| This content applies solely to Connected Claims, which must be purchased separately from the Appian base platform. This content was written for Appian 24.2 and may not reflect the interfaces or functionality of other Appian versions. |
Getting startedCopy link to clipboard
The Connected Claims Field Inspection module allows you to schedule on-site inspections and provide full visibility to your settlement team on inspection progress. You can quickly schedule and edit field inspection work orders, allowing your settlement team to manage their work.
This guide demonstrates the basic pages and actions required to complete work within the Field Inspection module. Note that your specific implementation of the Connected Claims application may have more or less functionality.
Use case: processing work ordersCopy link to clipboard
Peter is a manager for the field inspection team of a large insurance company. He oversees the scheduling of his inspectors and verifies the findings from their work orders are logged accurately.
Peter's daily tasks require him to be capable of the following actions:
- View and create work orders
- Manage documentation and add notes
- View inspectors and their schedules
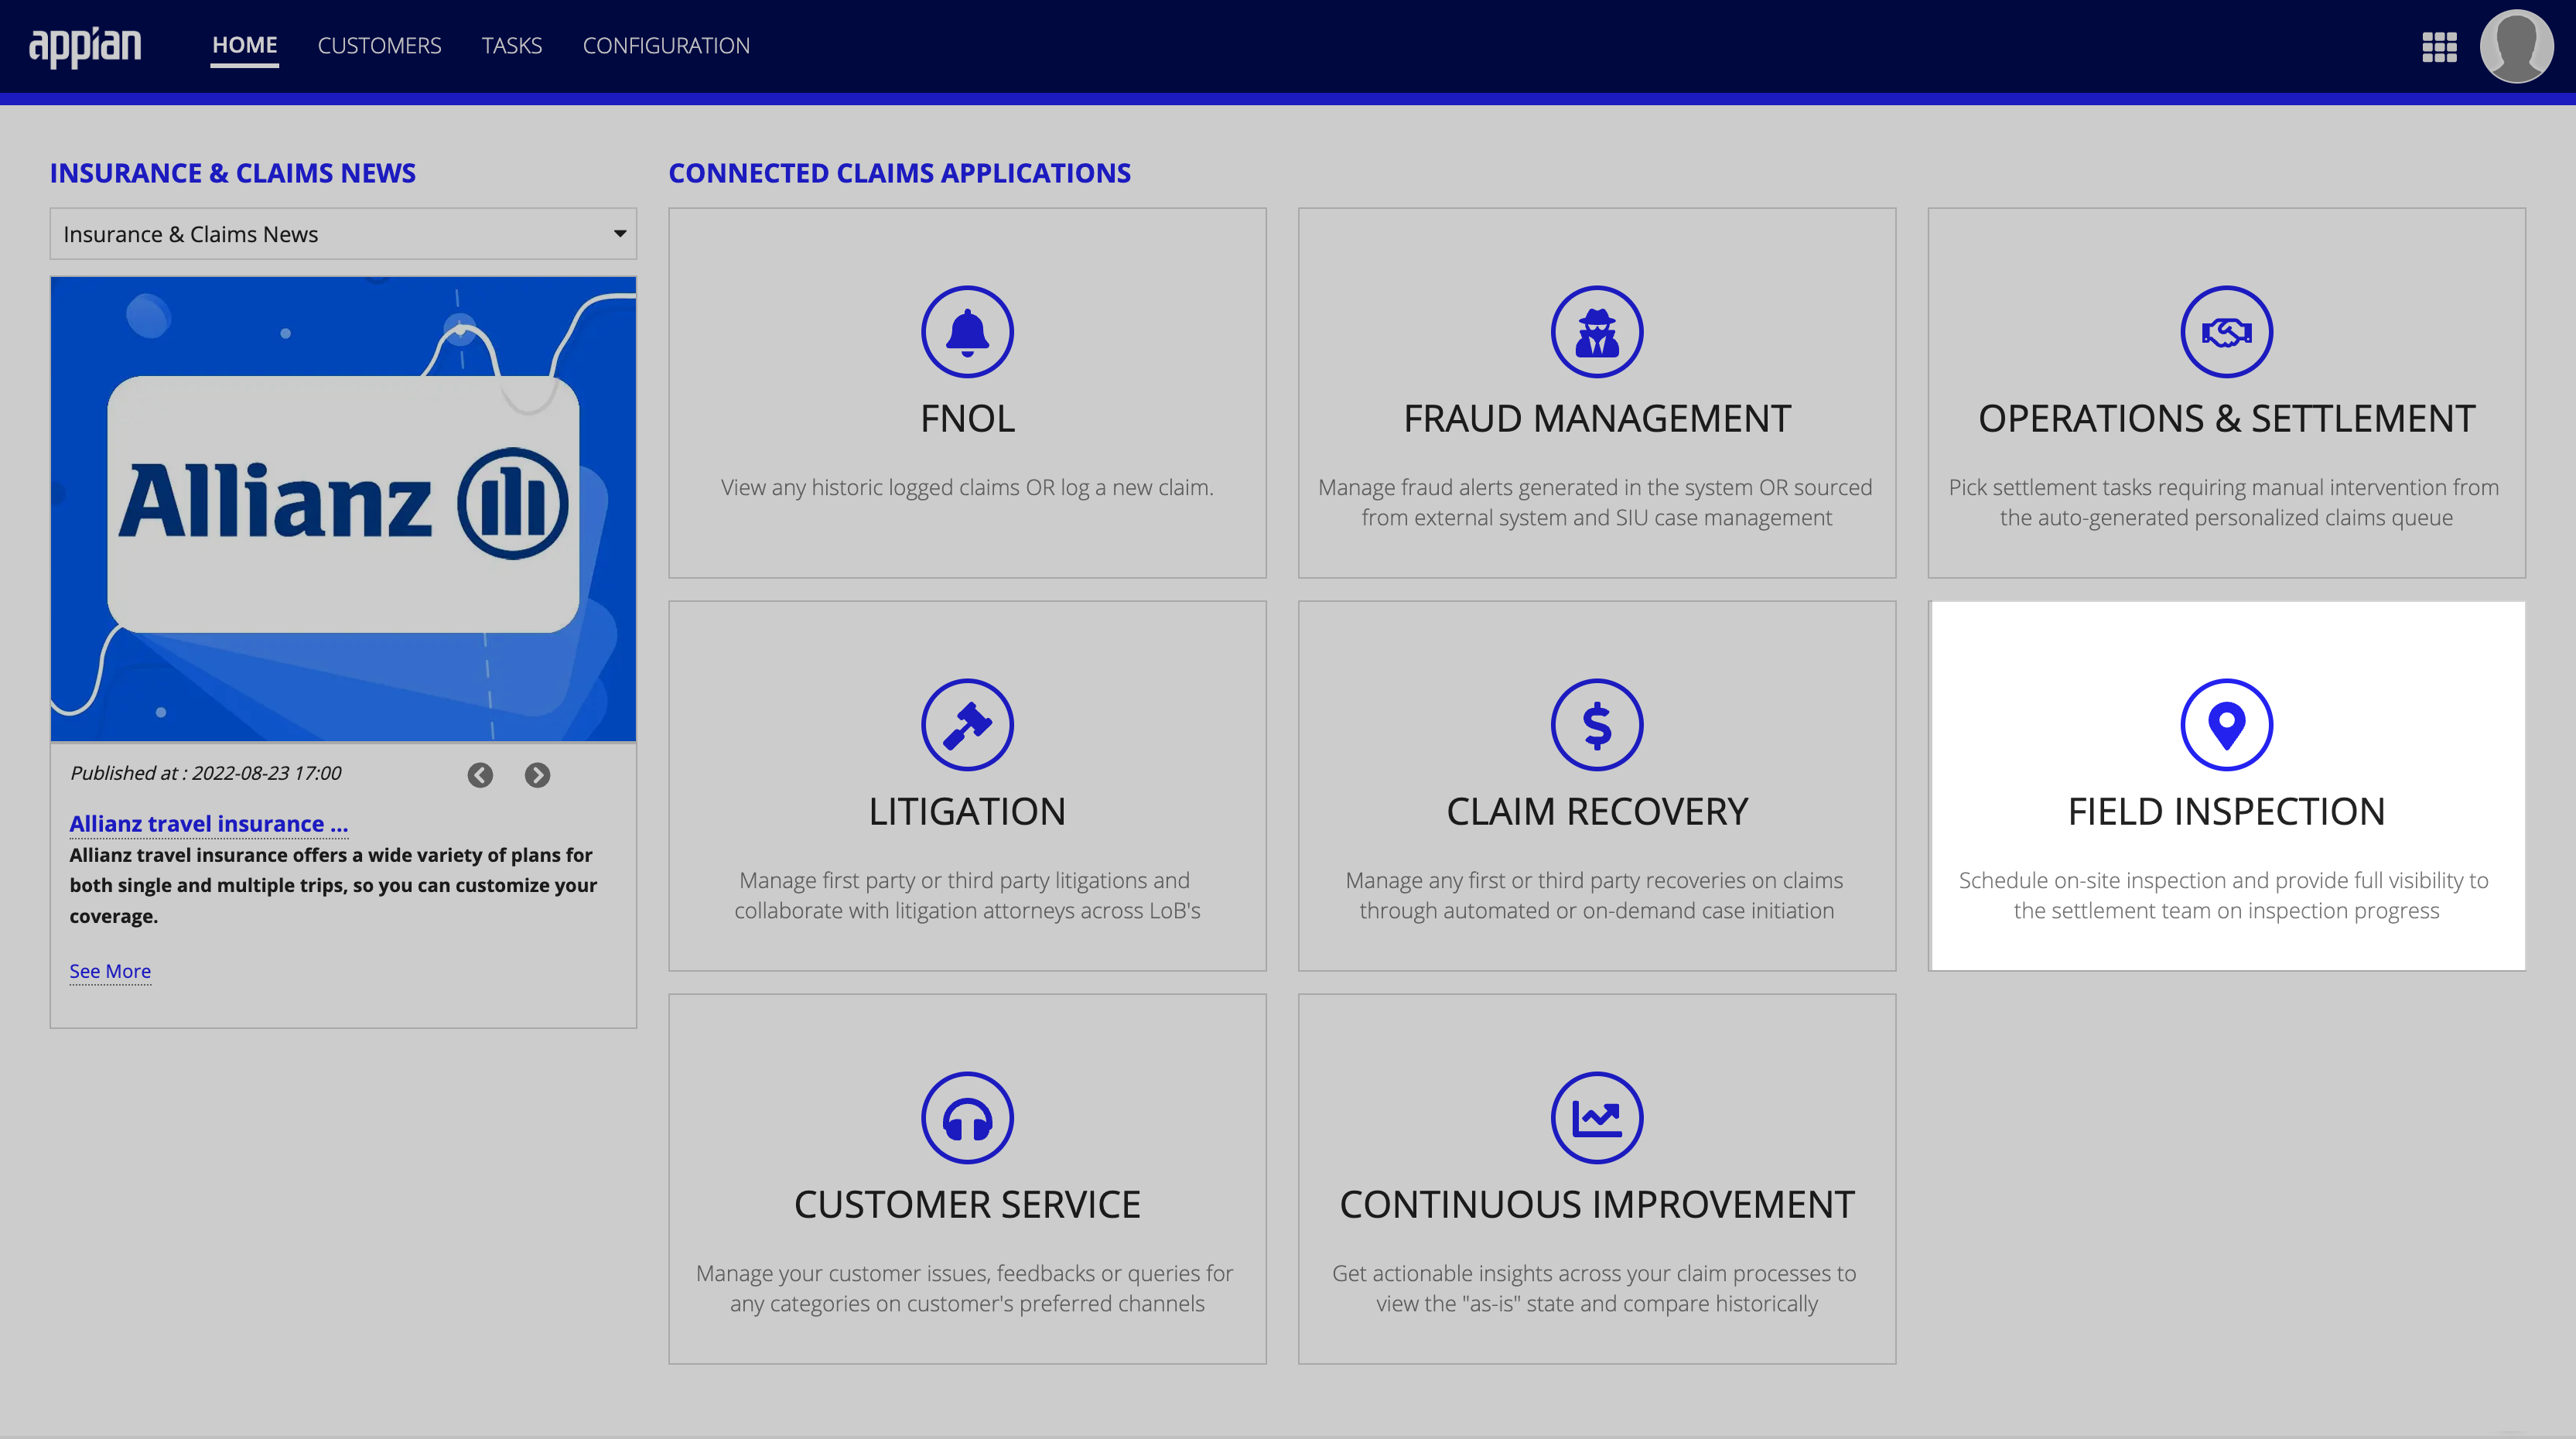
At the beginning of the week, Peter needs to check his team's schedule and make any modifications. From the Connected Claims home page, Peter clicks the Field Inspection card.
Field inspection homeCopy link to clipboard
Once within the Field Inspection module, the Inspection Team dashboard displays by default. This screen provides Peter a view of inspections in progress, notes, and his team's plan for the week.
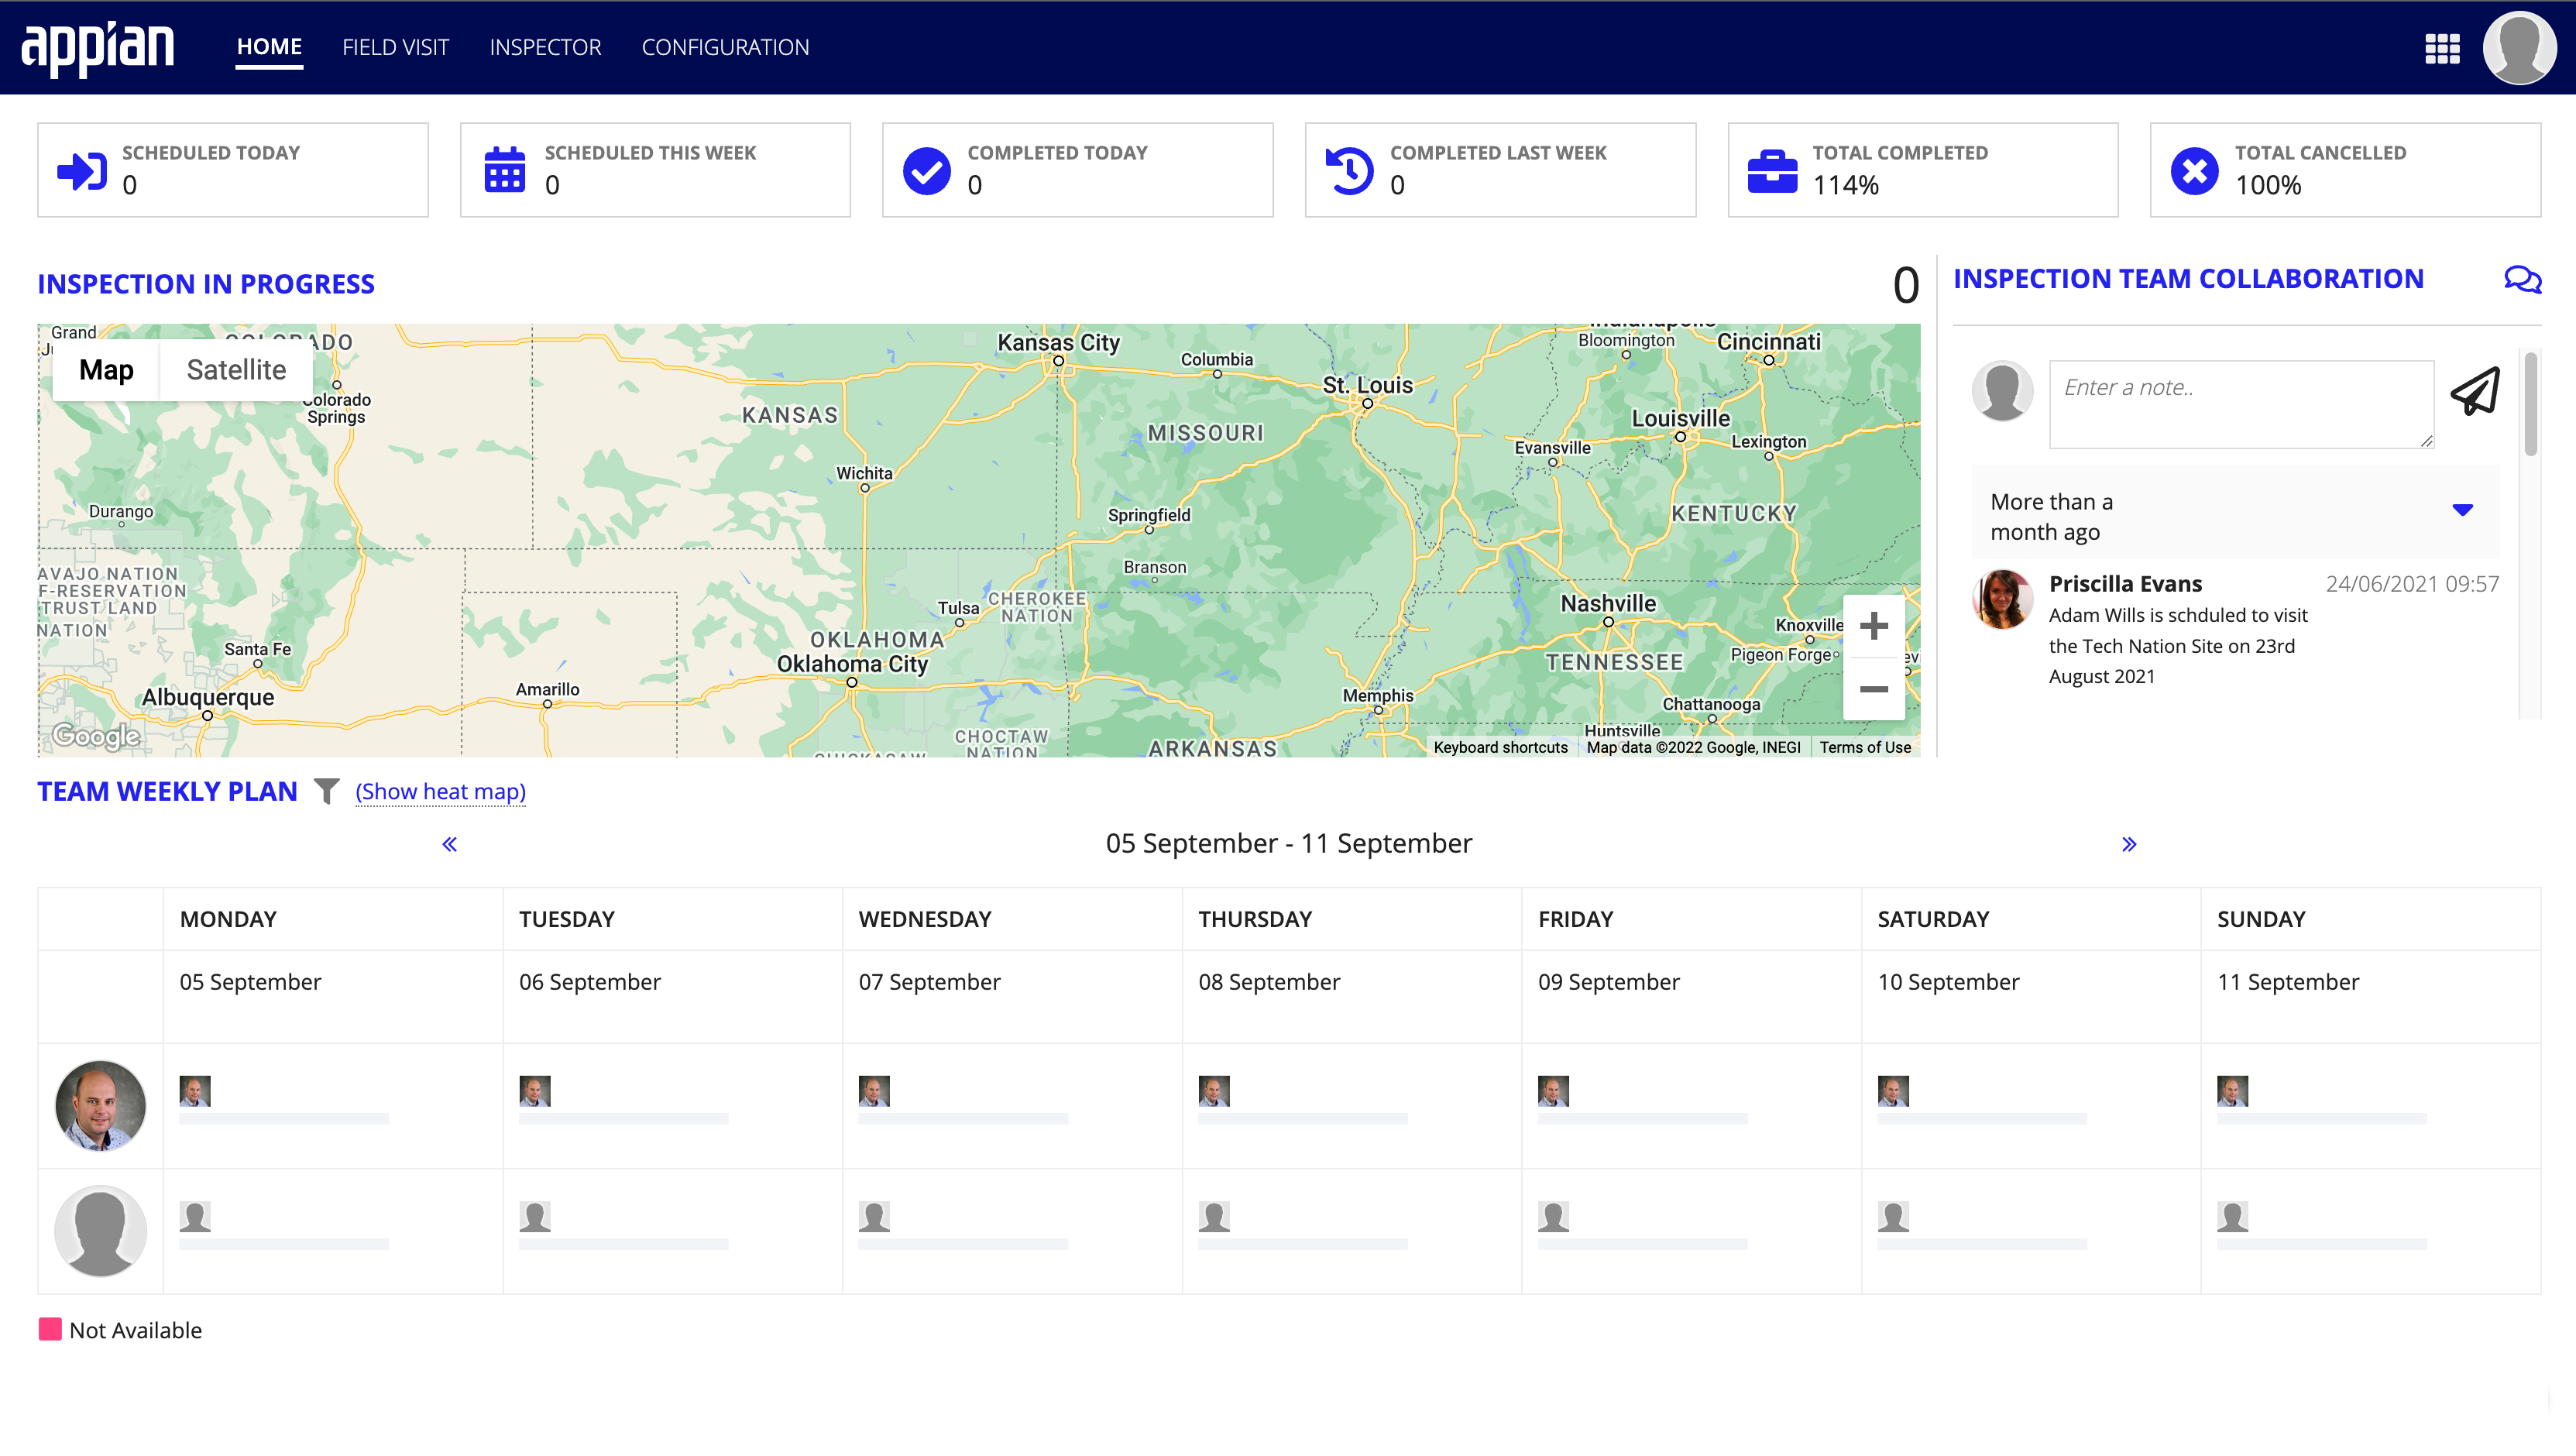
Peter can display his team's weekly plan in the form of a heat map by clicking Show heat map next to TEAM WEEKLY PLAN.

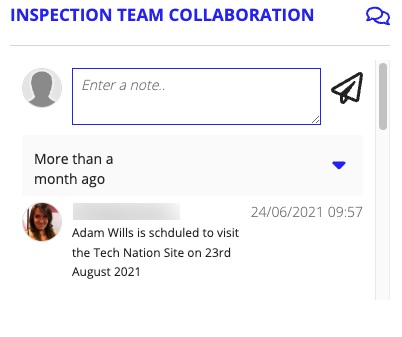
The inspection team can enter notes on the Inspection Team dashboard using the text field in the INSPECTION TEAM COLLABORATION section.
To enter a note:
- From the Inspection Team dashboard, go to the INSPECTION TEAM COLLABORATION section.
- Enter your note.
- Click .
Once a note has been saved, it can be managed with the Reply, Edit, and Delete buttons.
Viewing work ordersCopy link to clipboard
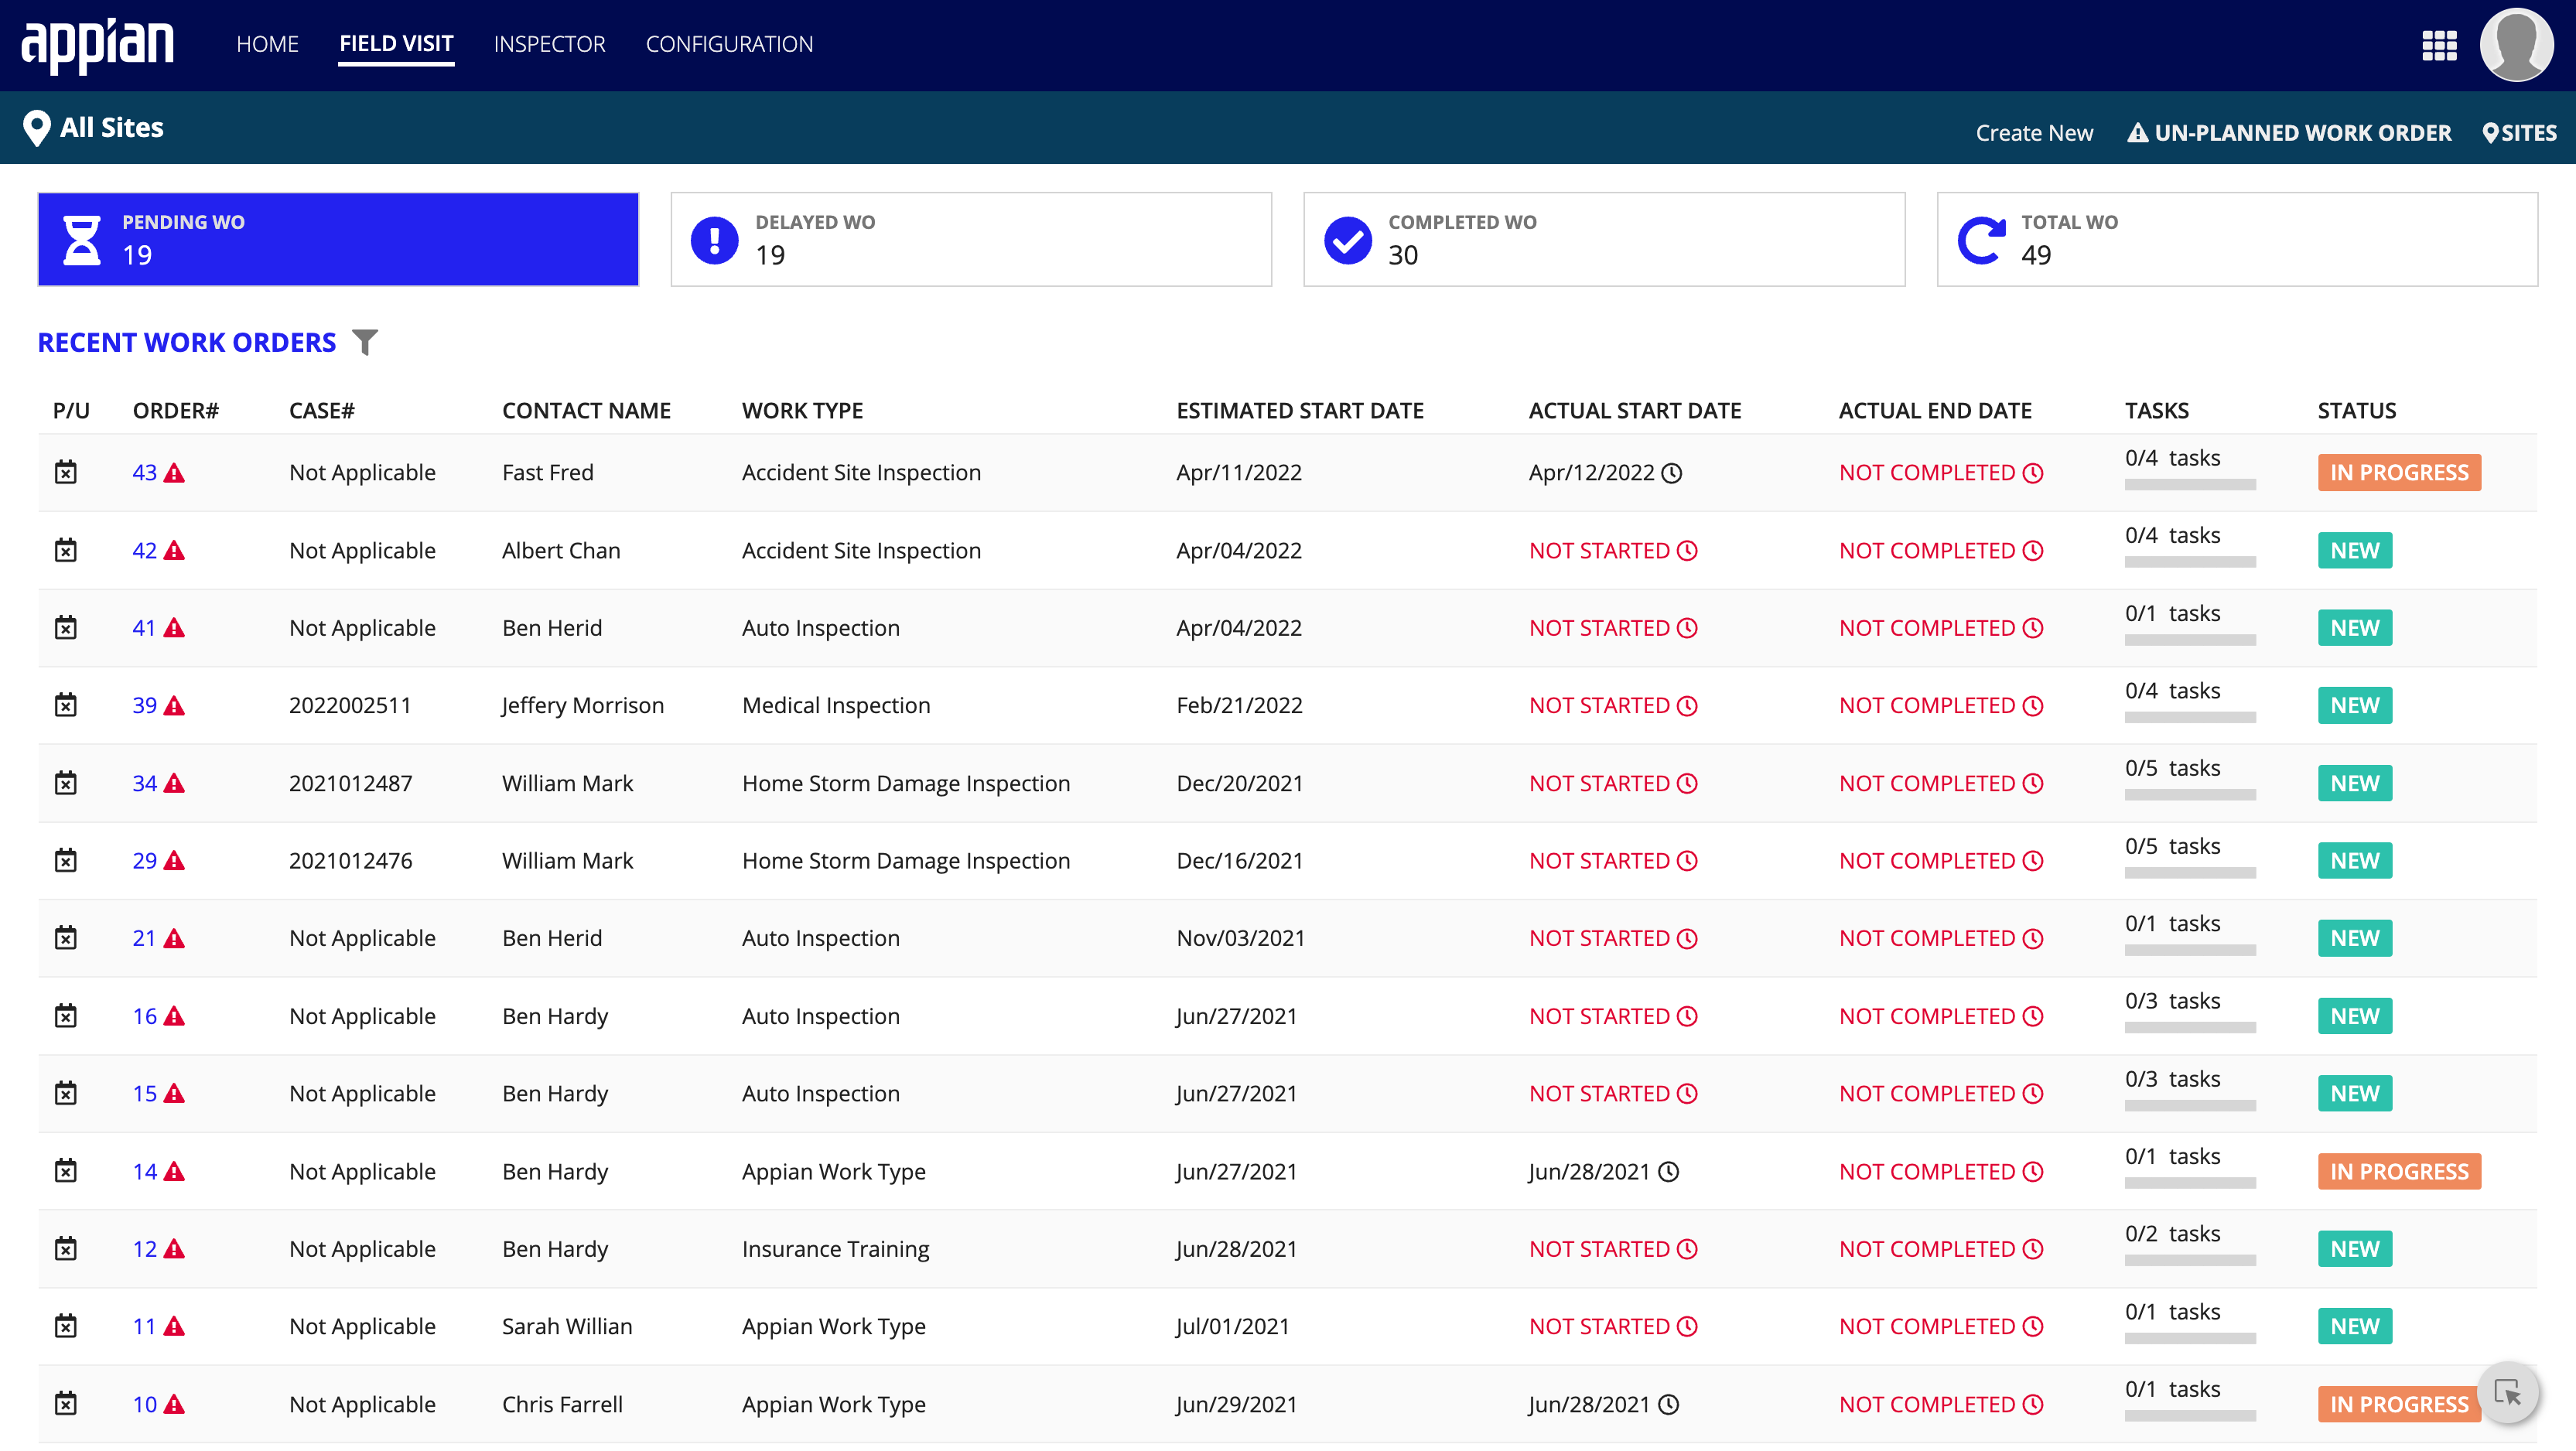
Every field inspection Peter creates is tracked via a Work Order. To view the current Work Orders, Peter clicks on FIELD VISIT in the navigation bar. This displays the Field Visit dashboard, which features a record table of Work Orders.
To filter the record table:
- Click the next to RECENT WORK ORDERS to display available filter fields:

- Press ENTER or click out of the filter field to apply the filter.
To filter the record table by site location:
- Click All Sites.
- Select a site from the field.
Clicking the X removes the filter.
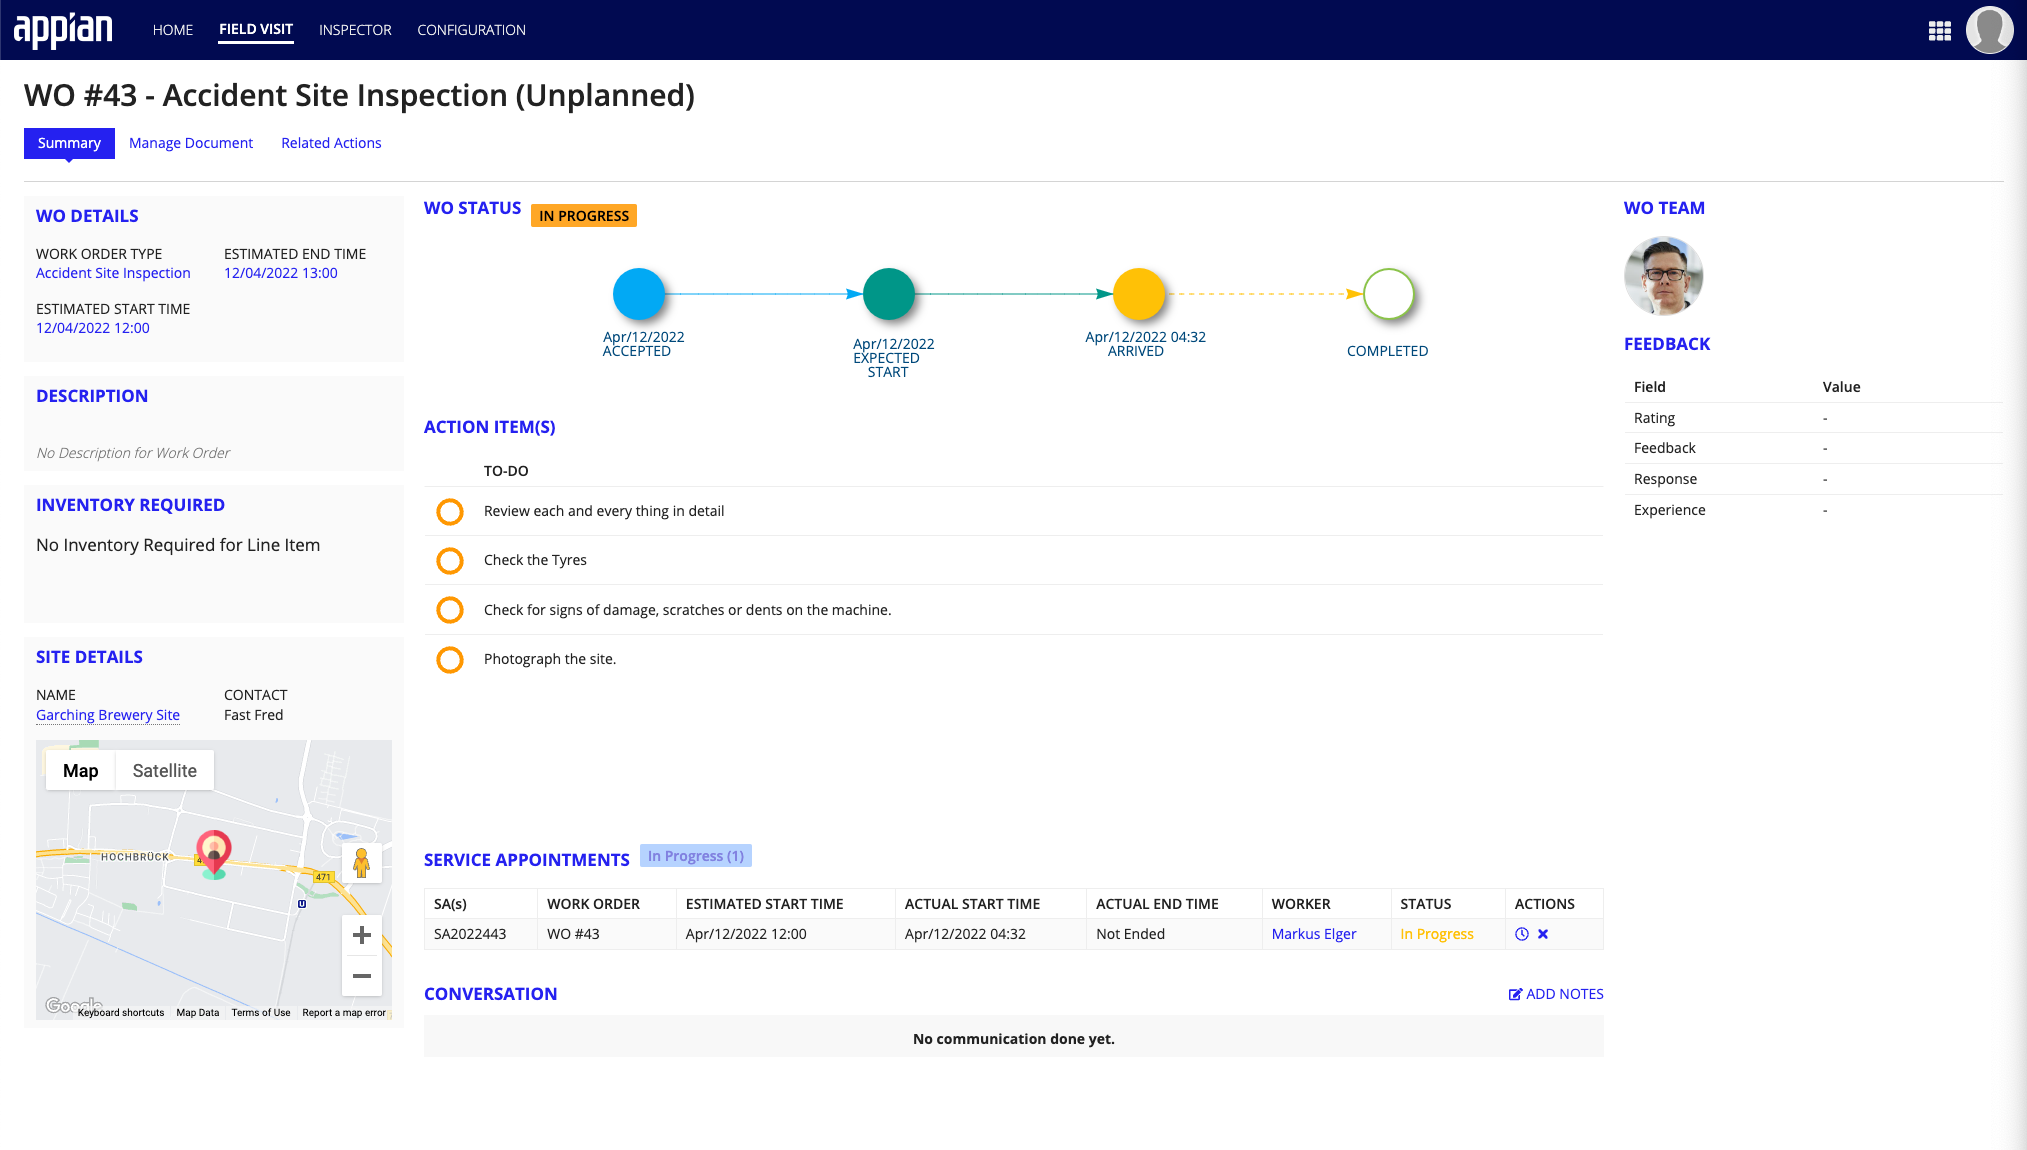
Peter clicks on the hyperlink in the ORDER# column, bringing him to the Work Order Summary page.
Create new work orders and inspection sitesCopy link to clipboard
Two of the more frequent tasks Peter must complete are creating new work orders and inspection sites. Both tasks are completed from the Field Visit dashboard.

To create a new work order:
- Click UN-PLANNED WORK ORDER.
- Complete the CAPTURE UNPLANNED WORK ORDER DETAIL form. The correct inspection line items will populate based on the value entered in the Work Type field.
- Complete the SCHEDULE UN-PLANNED WORK ORDER form. Click REVIEW.
- From the SUGGESTED WORKER section, select an inspector.
- From the SCHEDULE DATE section, select a day and time slot.
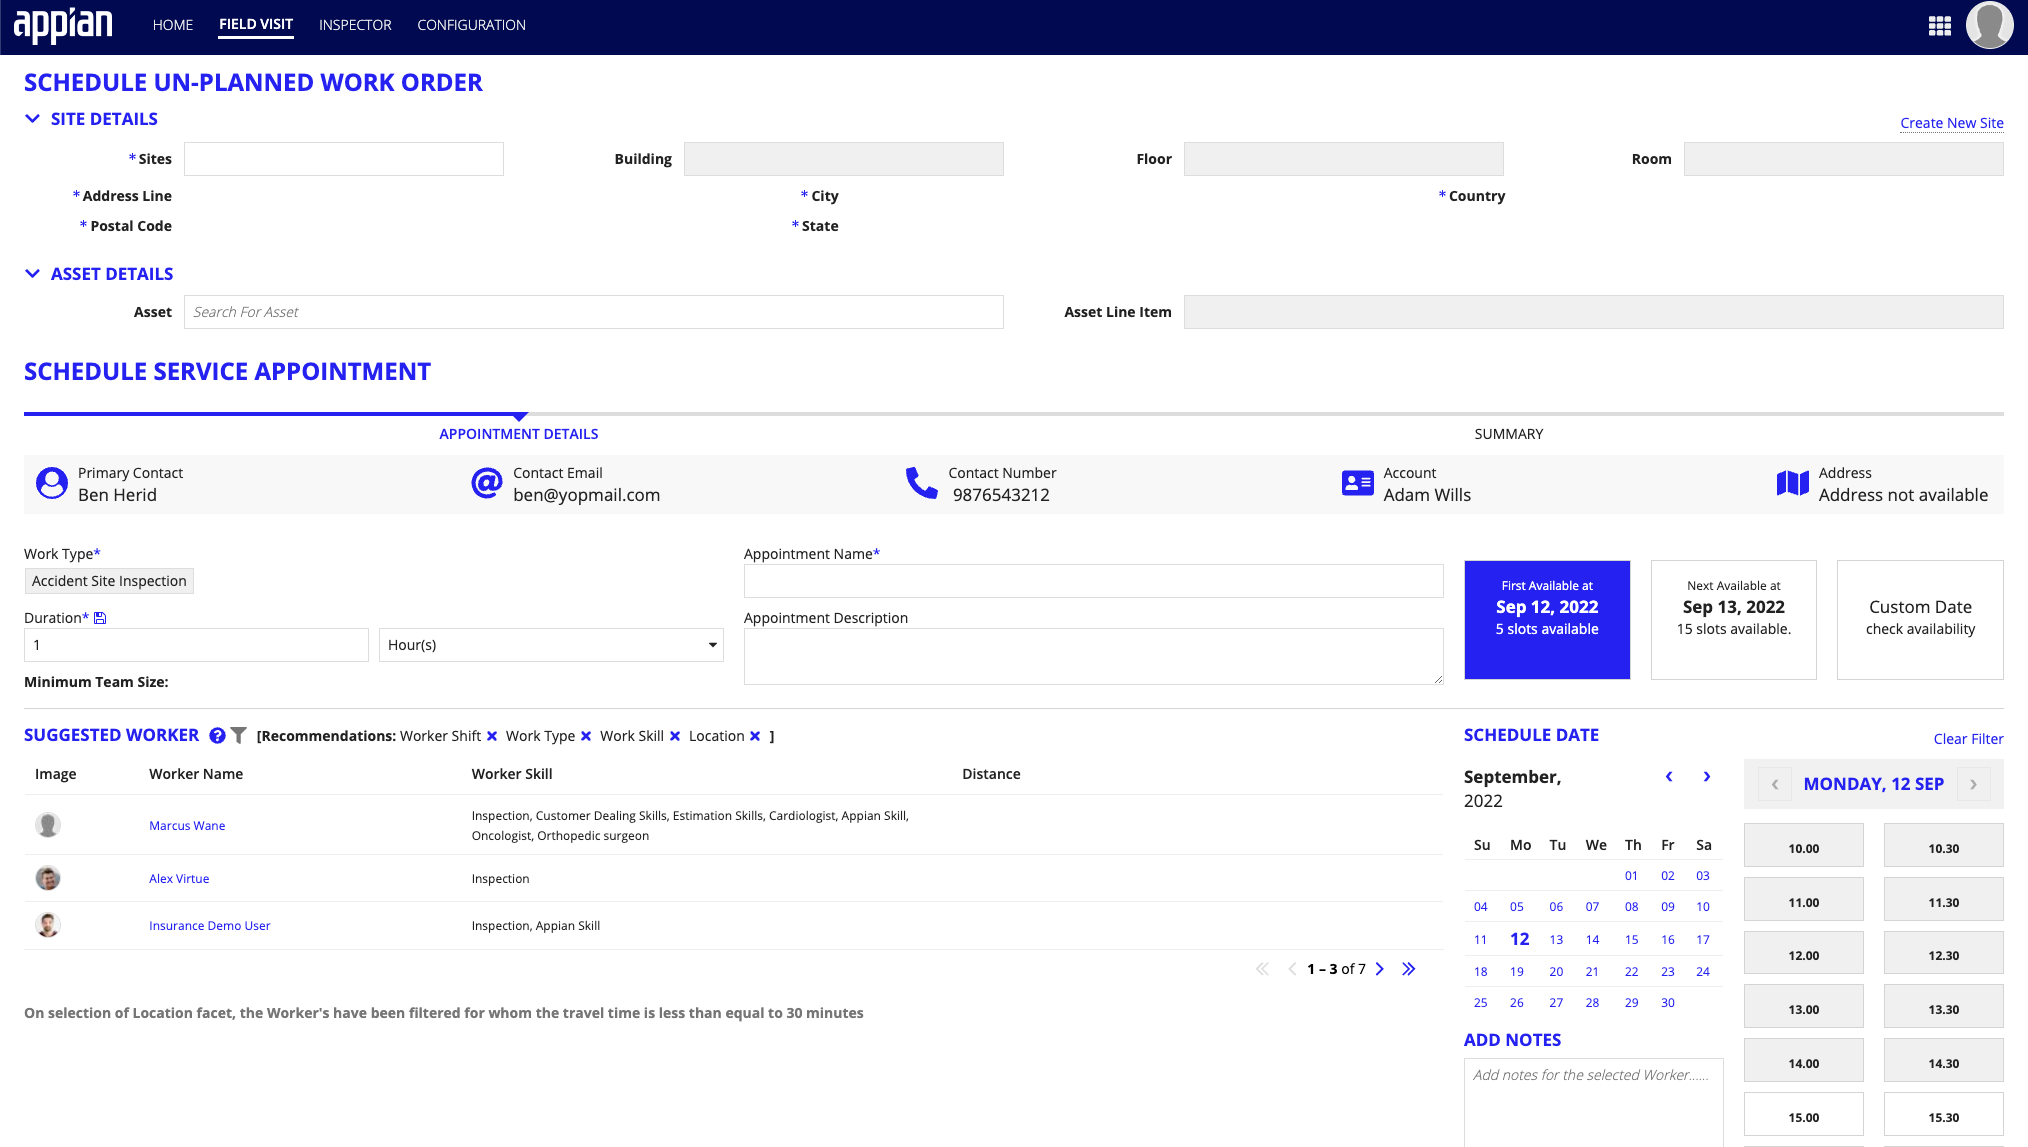
- Confirm the details on the REVIEW UN-PLANNED WORK ORDER form.
- Click SUBMIT.
The correct inspection line items populate based on the value entered in the Work Type field.
To create a new inspection site:
- Click SITES.
- Complete all of the required site detail forms:
- Site
- Buildings
- Floors/Area
- Rooms
- Confirm the details on the Review form.
- Click SUBMIT.
Edit or cancel appointmentsCopy link to clipboard
Appointments may be edited or canceled from a work order via the SERVICE APPOINTMENTS section on the Work Order Summary page.

To edit an appointment:
- Click the in the ACTIONS column.
- Complete the fields in the RESCHEDULE APPOINTMENT form. Click NEXT.
- Review the details on the SUMMARY page.
- Click SUBMIT.
To cancel an appointment:
- Click the X in the ACTIONS column.
- Provide an explanation in the CANCELLATION REASON text box.
- Click DECLINE APPOINTMENT.
Add notesCopy link to clipboard
When new information becomes available, Peter records it as a note on a work order.
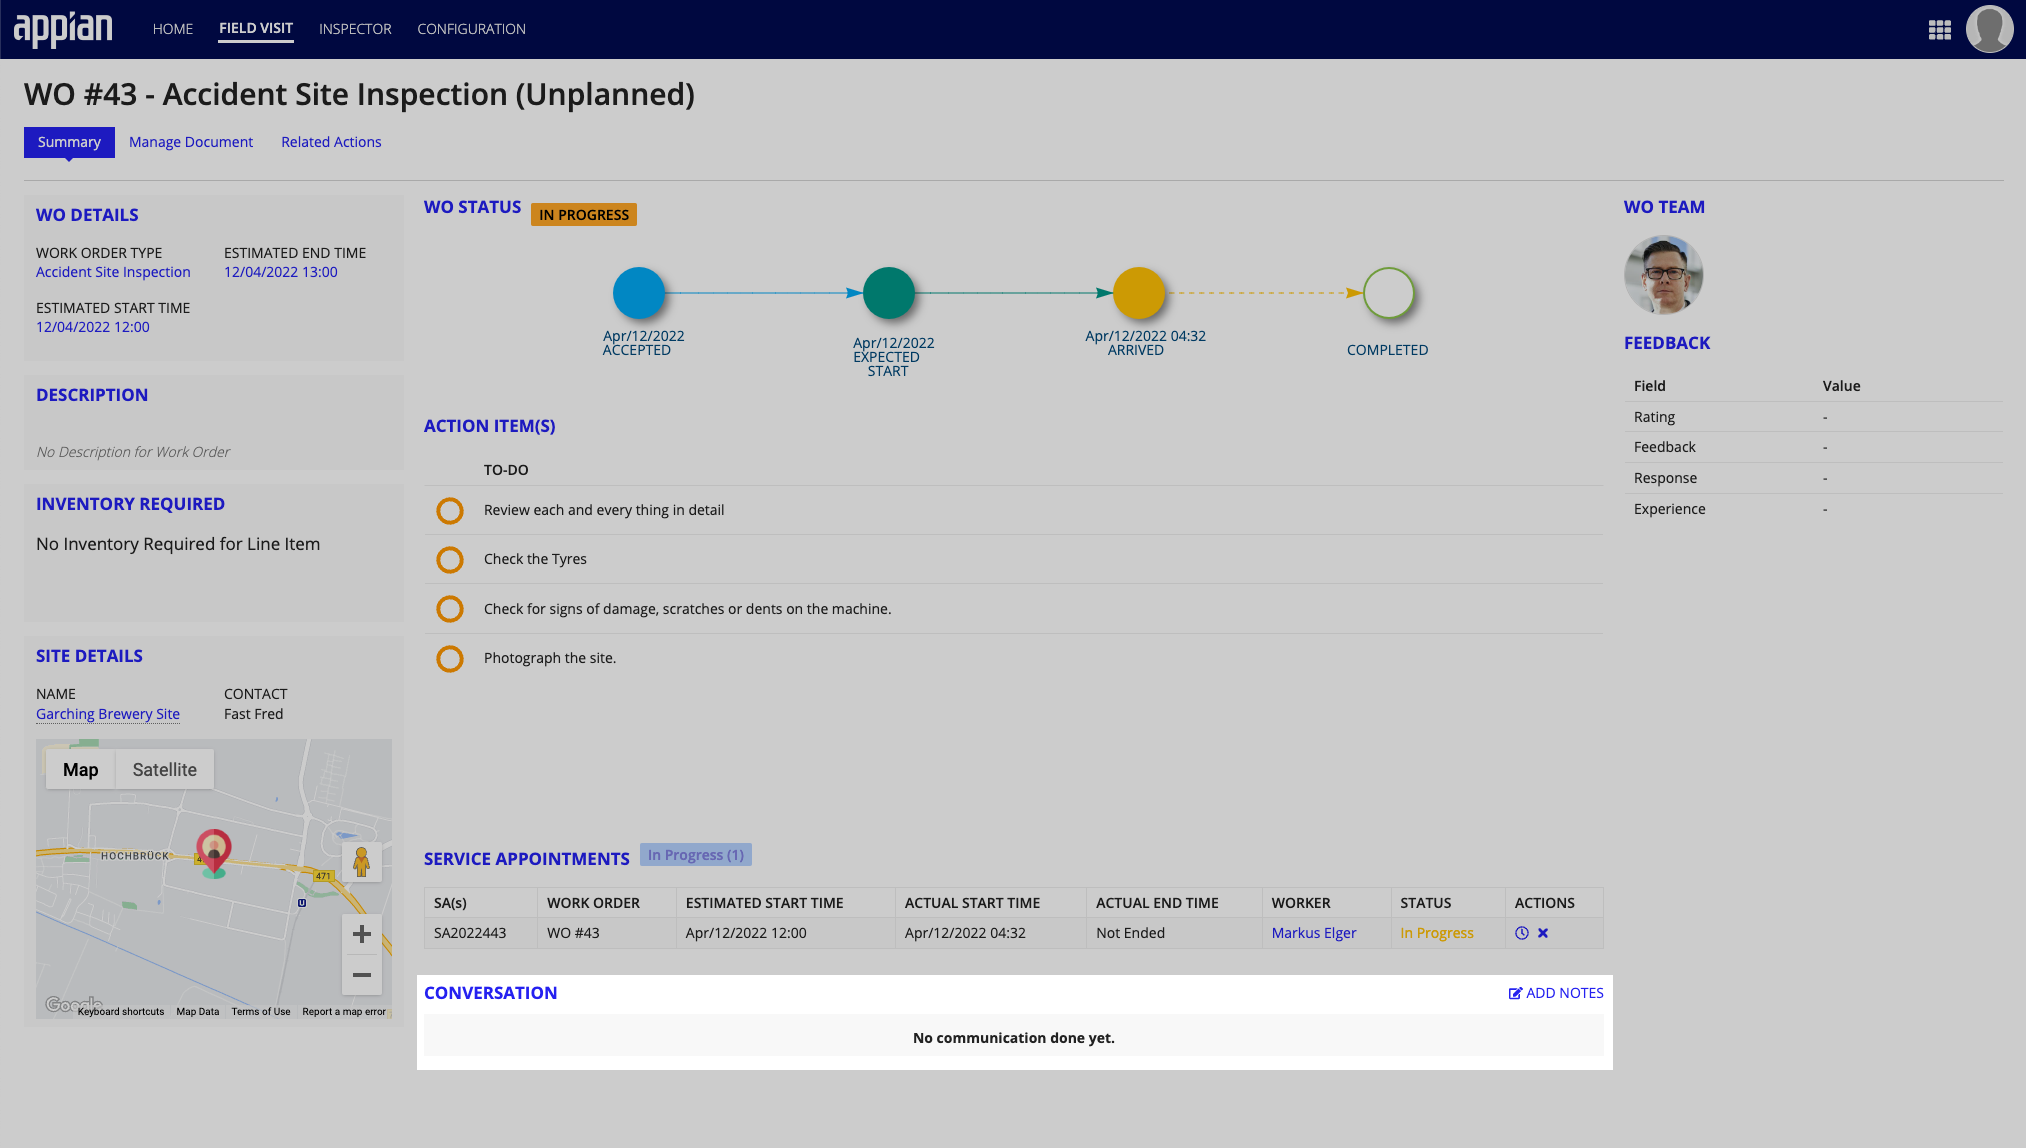
To add notes to a customer service case:
- From the Work Order Summary page, click ADD NOTES.
- Set the visibility to either public or private:
- Public: Case notes are visible to everyone.
- Private: Case notes are visible to only users with permission to view them.
- In the Title and Description fields, document the details of the conversation had with the customer.
- Click SAVE NOTE.
Viewing inspectorsCopy link to clipboard
One of Peter's most important tasks is ensuring his inspectors' schedules are accurate, and that work orders are assigned to the appropriate inspector based upon their skill set.
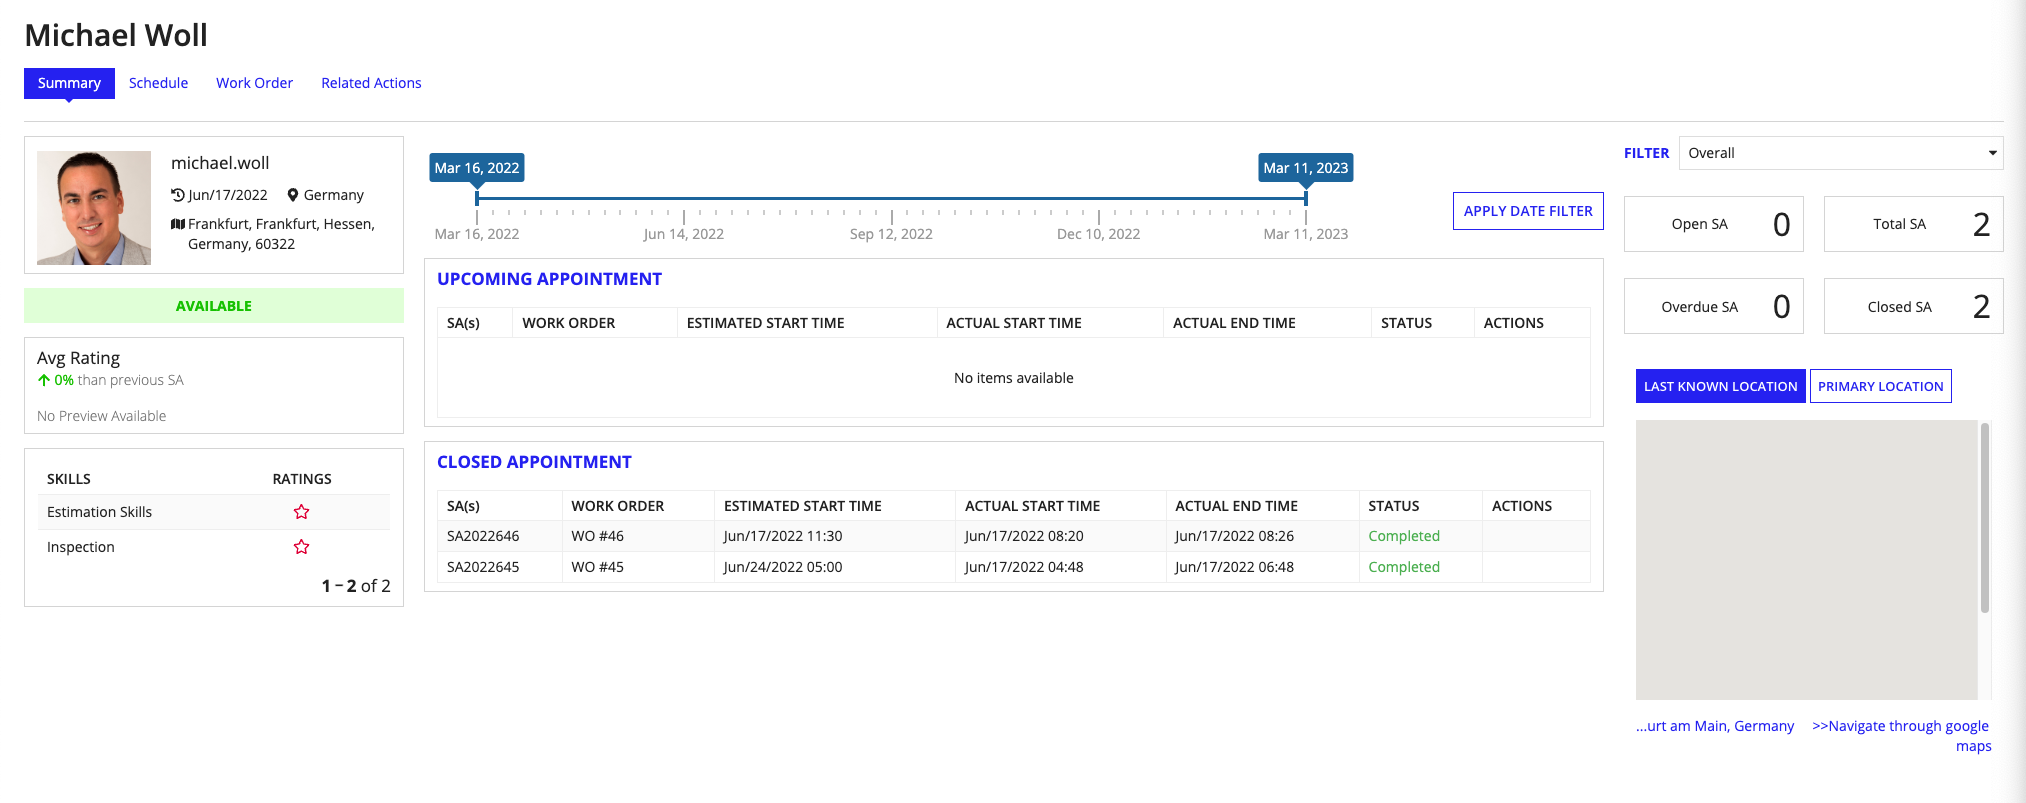
From the navigation bar, Peter clicks on INSPECTOR, presenting the Field Agent dashboard, which features a record table of field agent information. Clicking on the hyperlink in the AGENT column opens the Inspector Summary page.
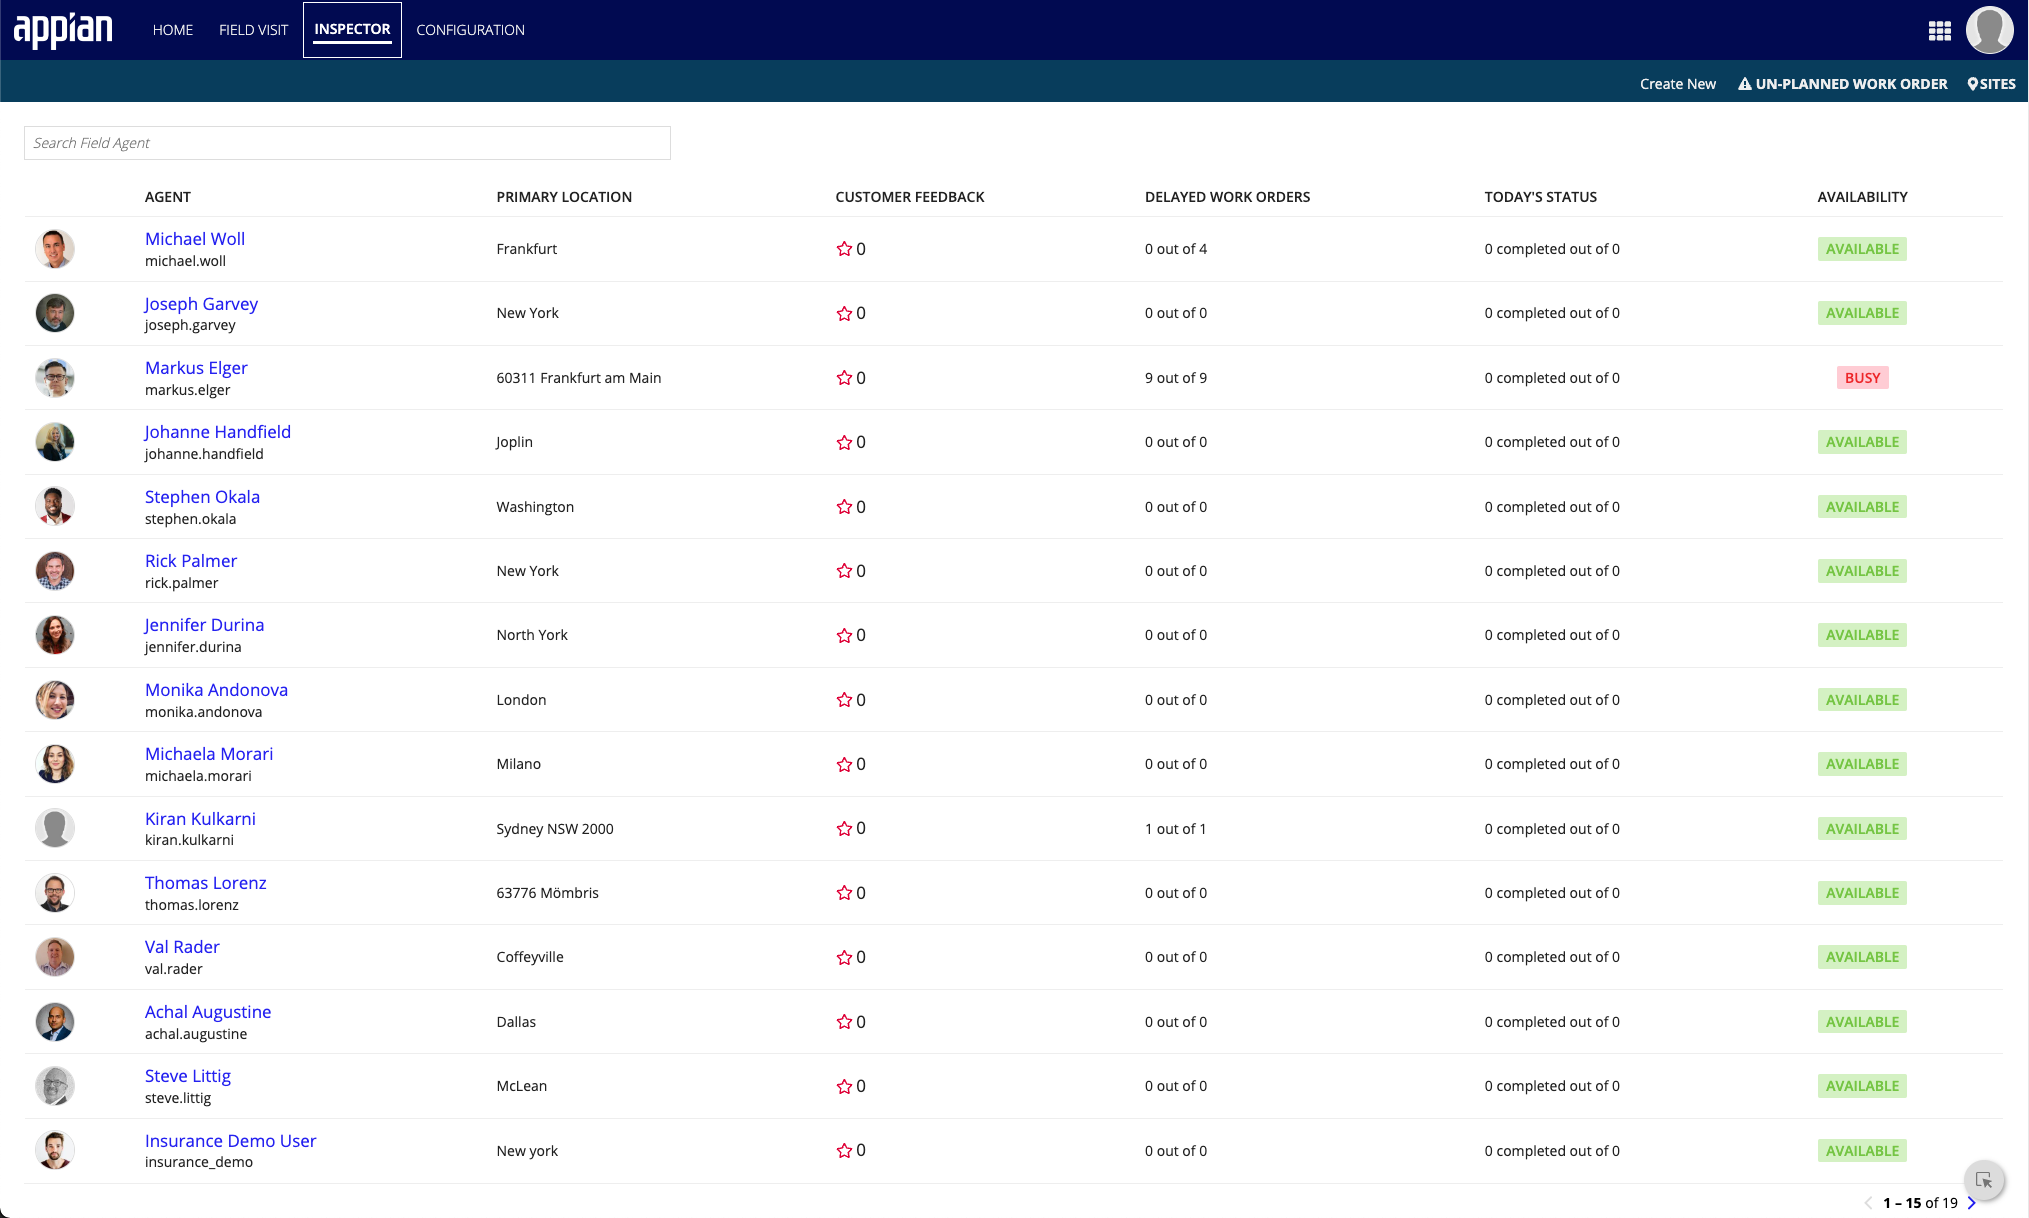
The Inspector Summary page provides a view of an inspector's upcoming appointments, recently closed appointments, contact information, and more.
Inspector actionsCopy link to clipboard
The following actions are available through the tabs located along the top of the Inspector Summary page:
- Viewing an inspector's schedule
- Viewing an inspector's work orders
- Updating an inspector's skills

View inspector's scheduleCopy link to clipboard
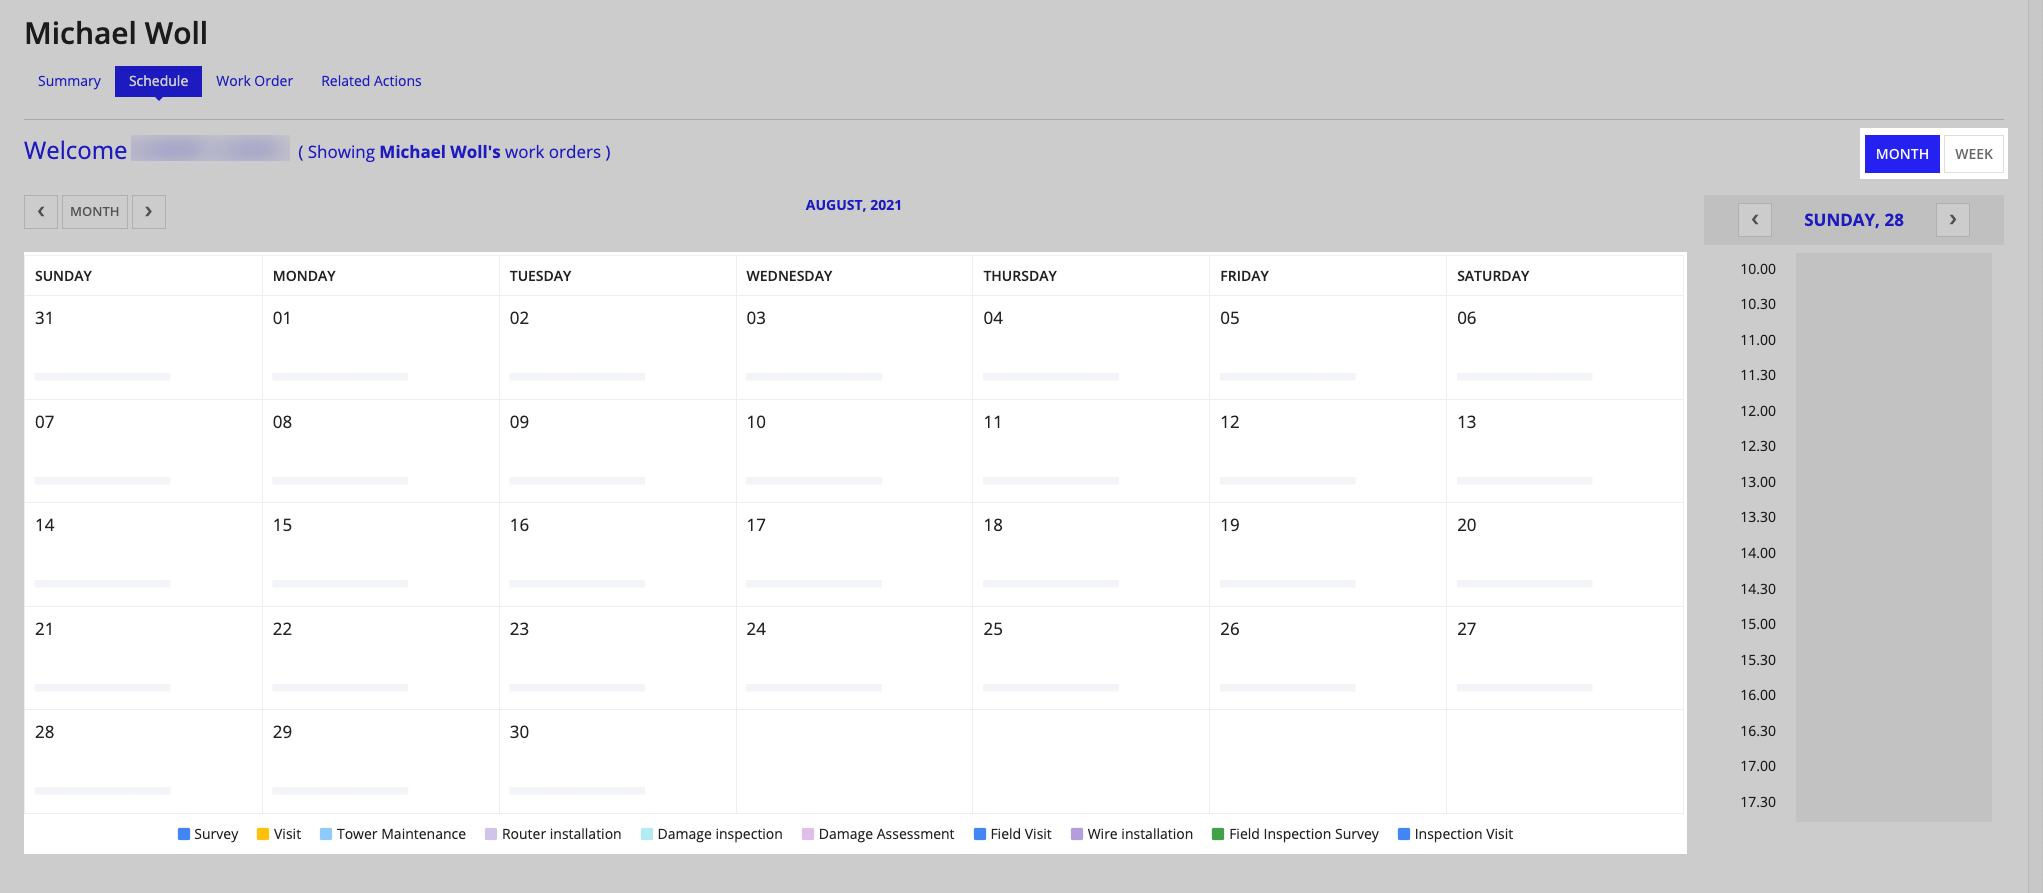
Peter can view a summarized version of an inspector's schedule by clicking the Schedule tab. The view can toggle between monthly and weekly views via a toggle.
View inspector's work ordersCopy link to clipboard
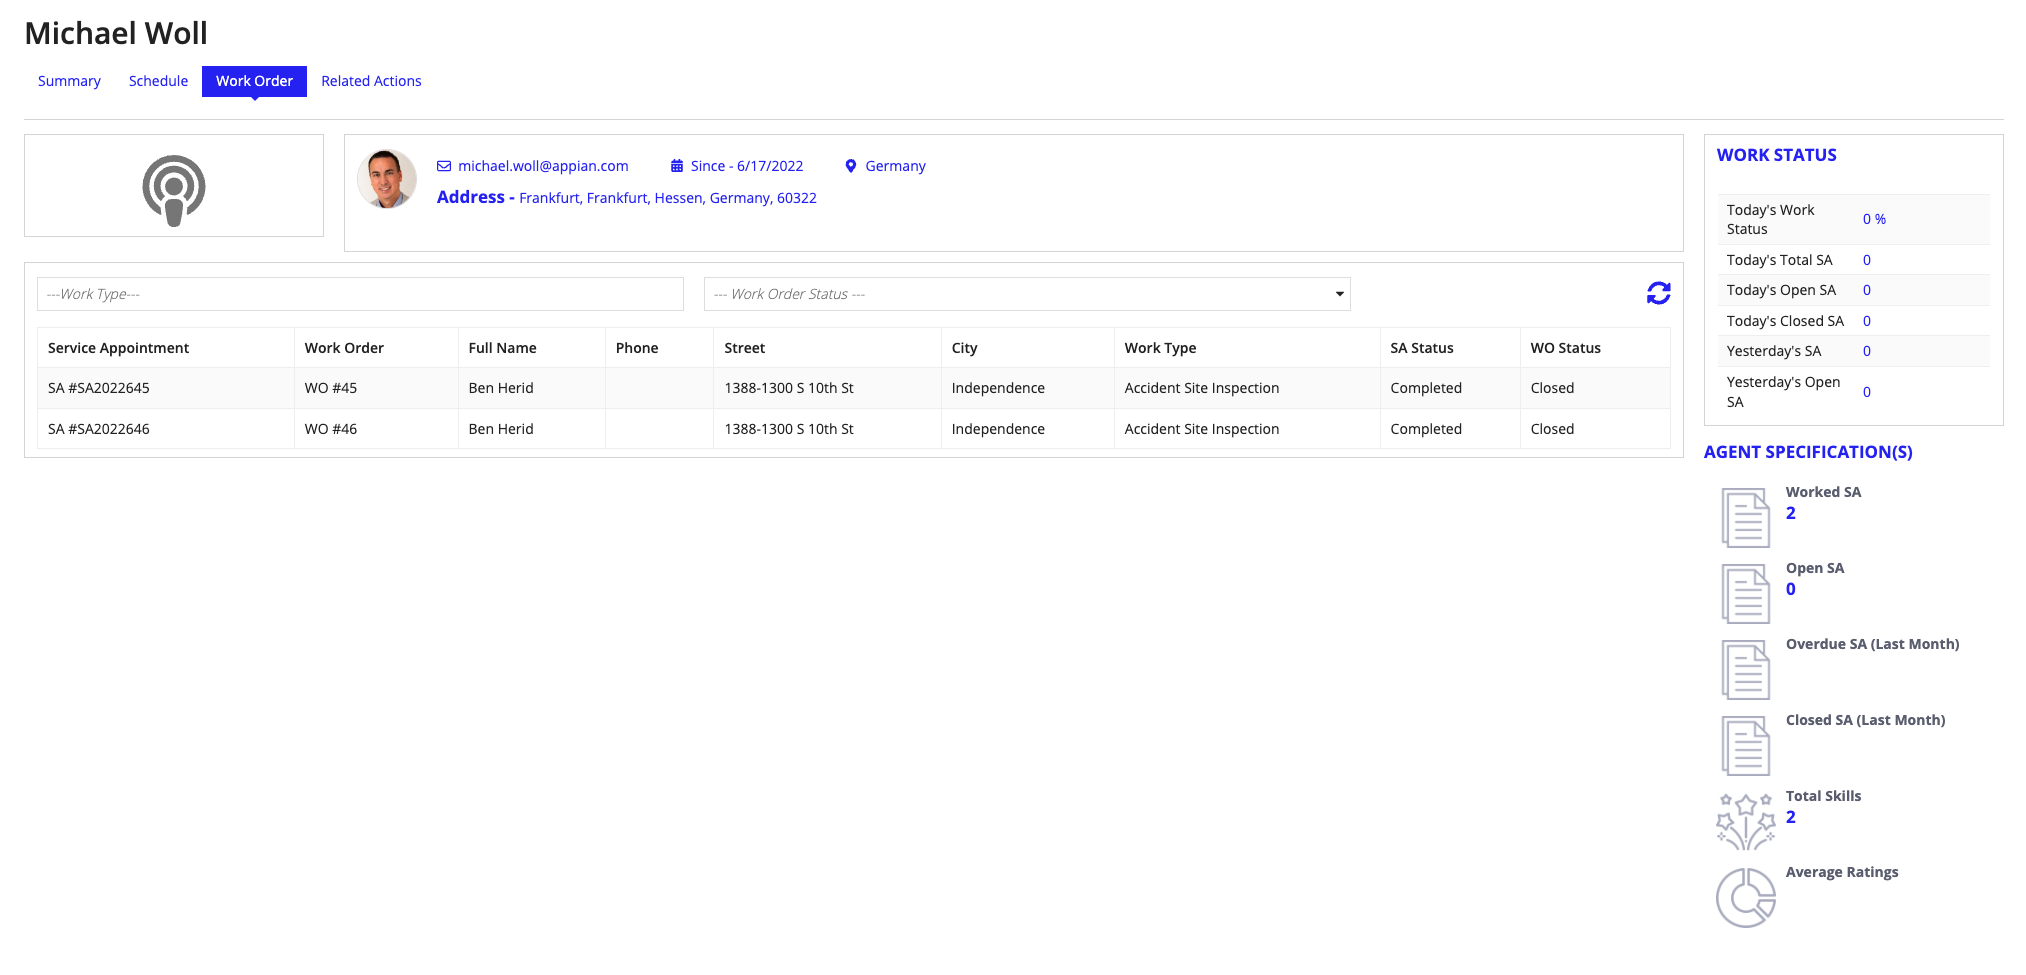
Peter can view a summarized version of an inspector's work orders by clicking the Work Order tab. Work orders can be filtered using the Work Type and Work Order Status fields.
Update inspector's skillsCopy link to clipboard
Peter assigns his inspectors to different work orders in a way that plays to the inspector's strengths.
To update an inspector's skills:
- From the Inspector Summary page, click the Related Actions tab.
- Click Update Worker's Skills.
- Click either the Estimation Skills or Inspection dropdown menu to display the options.
- Select the appropriate efficiency: Beginner, Intermediate, or Expert.
- Click SUBMIT.

Ready to startCopy link to clipboard
Now that you have walked through the various steps demonstrating the ways in which you can create work orders and schedule inspections, you can start using the Field Inspection module to effectively manage your inspection team.
