
This page applies to data stewards. It describes how to add, configure, and secure a process in process insights.
OverviewCopy link to clipboard
In process insights, we organize and curate information about a business process into a unit of data that can be analyzed to uncover actionable insights. We call this unit of data a process.
As a data steward, you are responsible for adding, configuring, and securing processes, so business users can safely explore and uncover new insights to optimize the process.
What is a process?Copy link to clipboard
A process consists of a case record type, an event history record type, and any relevant related record types that contain data relevant to the case or its events.
For example, in a Financial Customer Onboarding app, the case record type would be Onboarding Case, and the event history record type would be Onboarding Event History. Related record types could include Customer, Region, and Onboarding Event Type.


As you configure your process, you must select record fields from these record types to include in your process.
Once these record fields are included in a process, they are known as attributes. An attribute is a characteristic of a case or event that provides additional context for the process, such as the cost of an event, the user who performed the event, or the location of a related customer. For example, a Financial Customer Onboarding app, the customer's region might be a helpful attribute, so you can determine whether there are differences in how long a process takes for each region.
To help us better categorize data, analyze the process, and provide you with insights from it, you will need to map record fields to the attribute names and attribute types they'll use in the process.
Before you beginCopy link to clipboard
Before you begin adding processes, make sure that:
- You have access to all record types needed for your process.
- Your record data is prepped for process insights.
Add a processCopy link to clipboard
To add a process for analysis:
-
Go to the Process Insights page in your production environment.
-
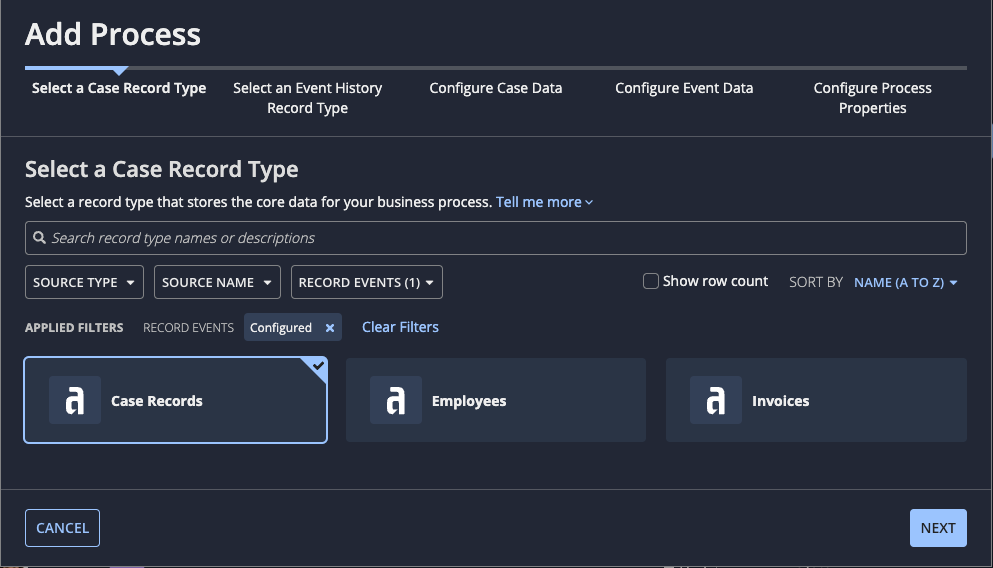
In the header pane, click ADD PROCESS. The Add Process dialog displays.
The first step, Select a Case Record Type, is active by default. The list displayed in this step includes all synced record types to which you have permissions in process insights.
-
Select the record type that represents the core aspect of the business process you want to analyze.
For example, in a Financial Customer Onboarding app, you might want to track the process of evaluating an application for a customer account. To represent this process, you'd select the Accounts record type that stores information about the application.
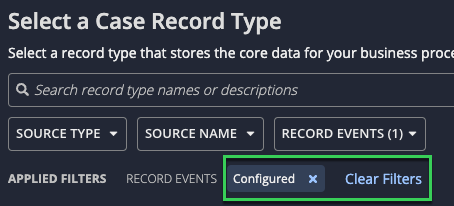
Record types with record events configured are shown by default, but you can deselect the Configured filter, search for, and choose any record type you have permission to.
-
Click NEXT. The next step, Select an Event History Record Type, displays.
The list displayed in this step includes all record types to which the case record type has a one-to-many relationship.

-
Select the record type that stores the event history for the case record type you selected.
- If record events are configured for your case record type, the event history record type related to your case record type will be suggested here for you to select.
- If record events are not configured for your case record type, select a record type to associate with your case record type.
- Click NEXT. The next step, Configure Case Data, displays.
- Configure your process data.
- Click NEXT. The final step, Configure Process Properties, displays.
- Configure process properties.
- Schedule process updates.
- Configure process security.
- Click ADD PROCESS.
You're all done! It may take a few minutes to complete the initial analysis of your process.
Configure process dataCopy link to clipboard
Configuring your process data consists of selecting record fields to use as attributes and mapping those fields to the appropriate attribute names and types.
You can configure process data while both adding and editing a process. Initially, you'll configure process data when you add a process. You can later edit a process as needed to reconfigure process data and improve the clarity of the analytical results based on business user feedback.
To configure process data:
-
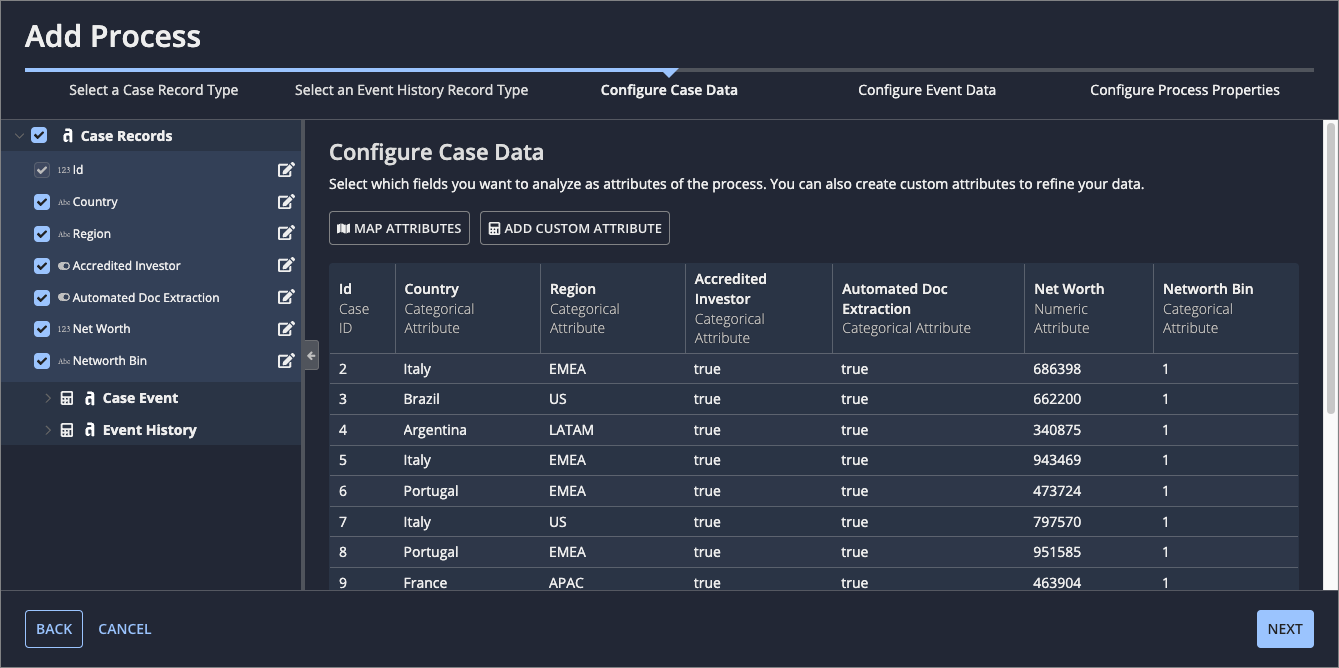
Start adding or editing a process. The Configure Case Data step displays.
This step lists fields from the case record type you selected and its related record types, and provides a sample of the data contained in those fields.
-
Select the fields to analyze as case attributes.
Note: The Case ID field is required and cannot be deselected.
- (Optional) Add custom attributes to enhance or secure data for use in analysis. For example, you can add custom attributes to:
-
Click MAP ATTRIBUTES to edit field names and review or change what each field is mapped to.
Tip: You can edit fields individually using the menu beside each field or in bulk using MAP ATTRIBUTES.
-
Click NEXT. The Configure Event Data step displays.
This step lists fields from the event history record type you selected and its related record types, and provides a sample of the data contained in those fields.
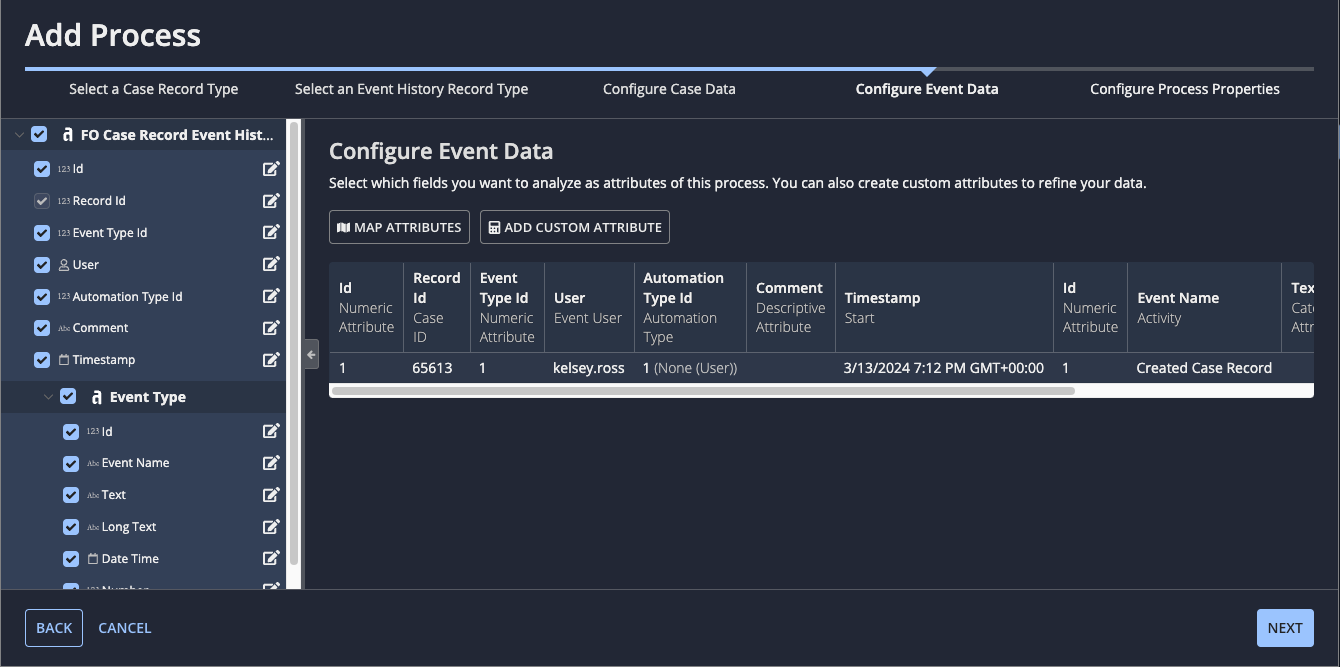
-
Select the fields to analyze as event attributes.
- (Optional) Add custom attributes to enhance or secure data for use in analysis. For example, you can add custom attributes to:
-
Click MAP ATTRIBUTES to edit field names and review or change what each field is mapped to.
The event data must be mapped to the following:
Mapping
Description
Case ID
The identifier for the specific occurrence of the business process, known as the case ID. This attribute corresponds to the
recordIdfield and is automatically mapped for you.Activity
The real-world action or task that occurs during the event, known as the activity. If you're mapping fields from a generated Event History record type,
namefield from the related Event Type Lookup record type.Start Timestamp
The timestamp when the event started.
End Timestamp
The timestamp when the event ended.
- Finish adding or editing the process.
Map attributesCopy link to clipboard
We automatically map fields for you based on the type for each field used in the record type, but you should always review our default mappings to make sure that each field is associated with the correct attribute type.
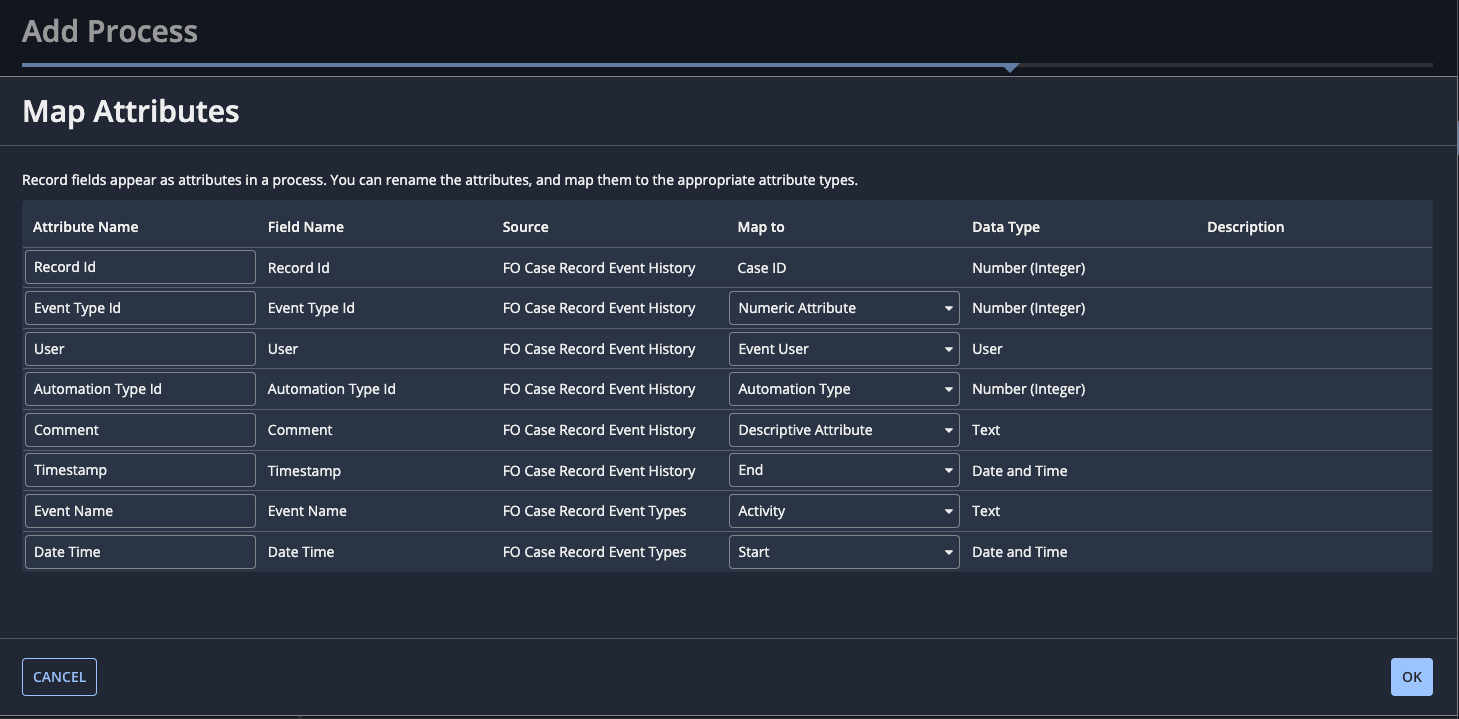
Fields can be mapped to and described as the following:
Mapping |
Location |
Required |
Description |
|---|---|---|---|
Required fields to map to attribute names |
|||
Case ID |
Event history data |
Required |
The identifier for the specific occurrence of the business process, known as the case ID. This attribute corresponds to the |
Activity |
Event history data |
Required |
The real-world action or task that occurs during the event, known as the activity. If you're mapping fields from a generated Event History record type, |
Start Timestamp |
Event history data |
Optional |
The timestamp when the event started. |
End Timestamp |
Event history data |
Required |
The timestamp when the event ended. |
Optional fields to map to attribute names |
|||
Event User |
Event history data |
Optional |
Provides additional context about the users relevant to the event. You can map only one field to this attribute name per process. |
Automation Type |
Event history data |
Optional |
Provides additional context about the type of automation that executed the event. You can map only one field to this attribute name per process. |
Optional fields to map to attribute types |
|||
Categorical attribute |
Both case and event history data |
Optional |
Attributes that can be used as categories for analyzing process data, such as "responsible department" or "office location". Categorical attributes can be used as factors when identifying insights during an investigation. |
Descriptive attribute |
Both case and event history data |
Optional |
Attributes that represent qualitative rather than quantitative data, such as fields for "description" or "notes". These attributes aren't analyzed. |
Numeric attribute |
Both case and event history data |
Optional |
Attributes that represent quantitative numeric data, like "total payment amount" or "total order items". |
Configure process propertiesCopy link to clipboard
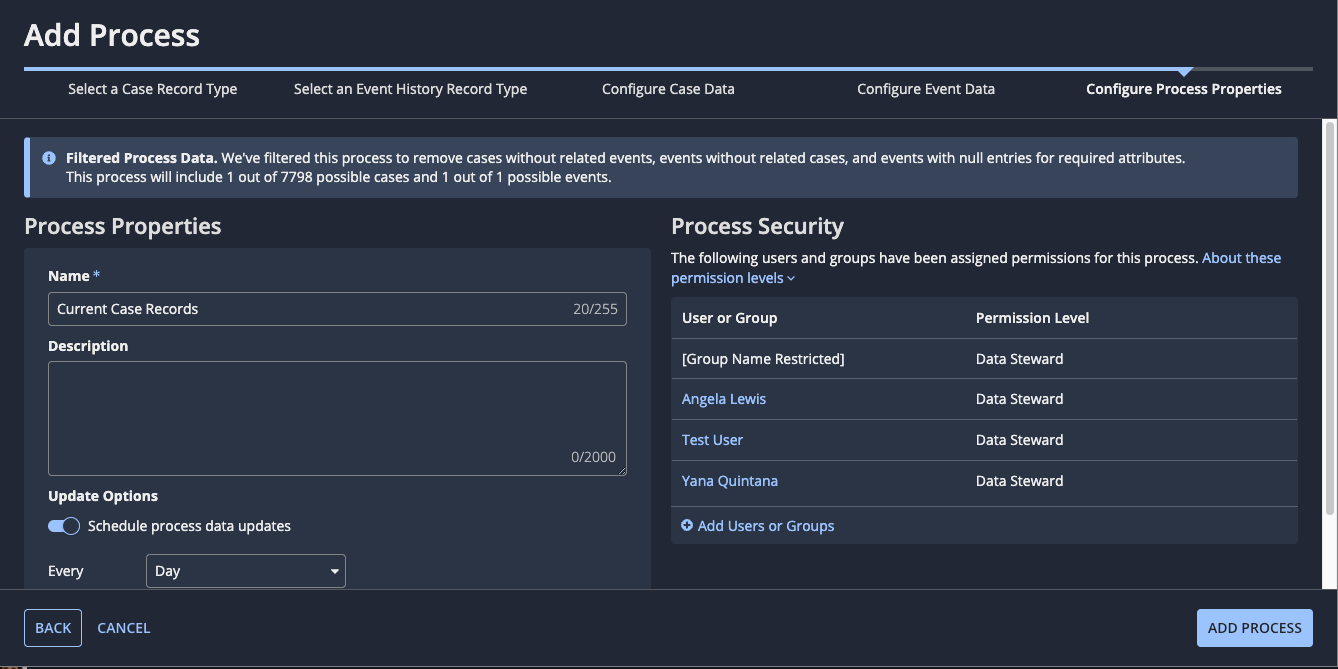
When adding or editing a process, data stewards can configure the following process properties:
| Property | Action |
|---|---|
| Name | Enter a name for the process. This name must be unique in the environment. |
| Description | Enter a brief description of the process. |
| Update Options | Schedule process updates. |

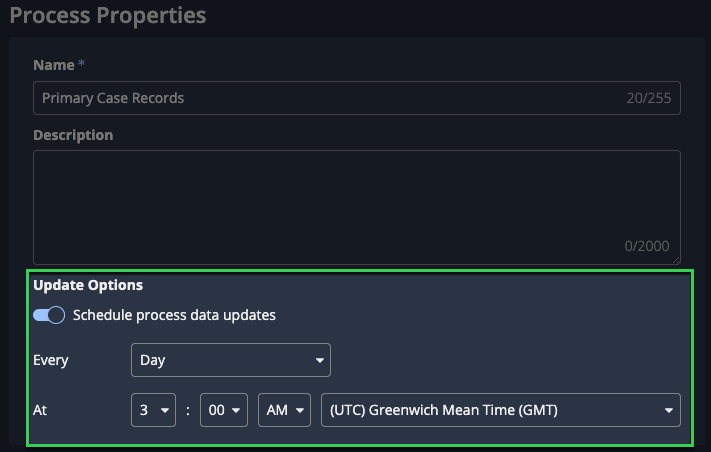
Schedule process updatesCopy link to clipboard
To automatically keep your process data up-to-date, schedule daily updates from the case and event history record types for a time that best fits your organization's needs. You can also turn off the process update if you want to preserve a historical snapshot of data for a specific analysis of the process.
Data stewards can schedule process updates when adding or editing a process.
To schedule process updates:
- Ensure the Schedule process data updates toggle is toggled on.
- In the Every field, select a frequency for the updates.
-
In the At fields, select a time and timezone for the updates. By default, process data updates daily at 3 AM GMT.
Note: Process updates may take some time, depending on the amount of process data involved. While the process is updating, you will not be able to edit the process, and your business users may not be able to access process views. To ensure that business users can access a process when they need it, we recommend scheduling updates during non-peak working hours.
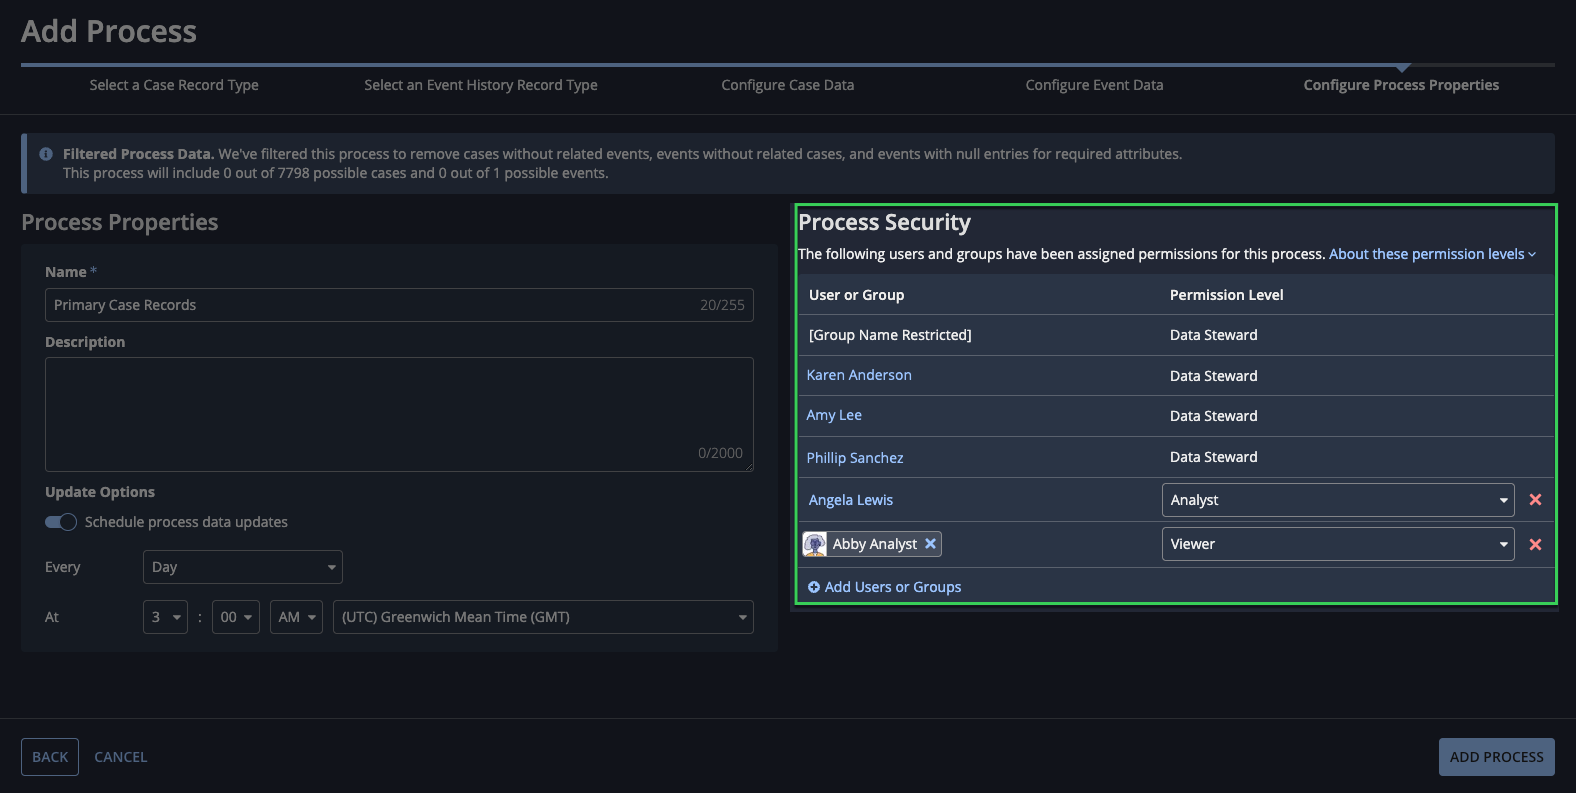
Configure process securityCopy link to clipboard
When adding or editing a process, data stewards can give users permission to access the process.
At least one user or group must be assigned Analyst permissions for each process. By default, Analyst permissions are assigned to the data steward who added the process.
To assign permissions for a process:
- Click Add User or Group. A new row displays, with Viewer permissions selected by default.
- In the new row, enter the name of a user or group, then select the user or group from the dropdown list.
- Select a permission level from the dropdown list next to the user or group.
To modify permissions for an existing user or group, select a new permission level from the dropdown list next to the user or group.
To remove permissions from an existing user or group, click the next to the row.
Process analysis and cleanupCopy link to clipboard
Once you add a new process (and any time the process updates), Process HQ analyzes your data, excludes records that contain null values in required fields, and identifies unique field values that may impact performance. It may take a few minutes to complete the initial analysis of your process.
If a field has too many unique values, Process HQ automatically re-maps it to a descriptive attribute, which will not be analyzed. Process HQ automatically re-maps the following:
- Event user attributes with more than 10,000 unique values.
- Event attributes with more than 5,000 unique values.
- Any categorical attributes with more than 5,000 unique values.
If the Activity field has more than 50 unique values, process creation fails. You will need to reduce the number of unique values in this field and try again.
Edit a processCopy link to clipboard
Once you've added and configured your process, you can edit the attributes included in the process, process properties, process update schedule, and process security. You cannot edit which record types are included in the process.
Note: Only data stewards can perform the steps below. However, analysts can rename the attributes of a process to provide clear and meaningful names for business users.
To edit a process:
- Open the edit menu in either of the following ways:
- In the PROCESSES list, click the more menu for the process.
- In a process, click PROCESS in the header pane.
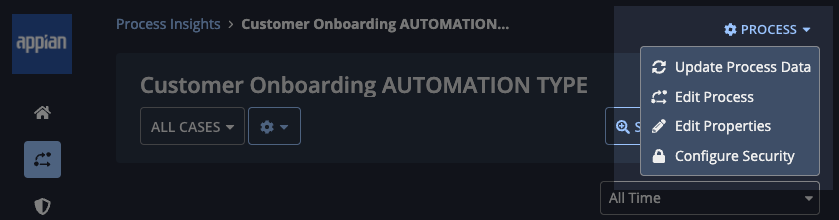
-
Edit the case or event data:
- In the menu, click Edit Process.
- Configure your process data.
- Click SAVE.
- Edit process properties:
- In the menu, click Edit Properties.
- Configure process properties.
- Schedule process updates.
- Click SAVE.
- Edit the process security:
- In the menu, click Configure Security.
- Configure process security.
- Click SAVE.
Rename attributesCopy link to clipboard
Users with Analyst permissions can rename attributes to ensure the names are clear and meaningful for business users.
To rename an attribute:
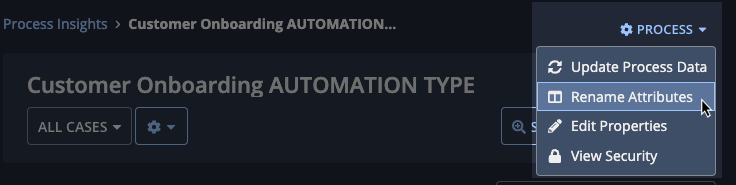
- In a process view, click PROCESS in the header pane.
- Click Rename Attributes. The Rename Attributes dialog displays.
- In the Attribute Names column, enter a new attribute name.
- Click SAVE.
Manually update a processCopy link to clipboard
In addition to scheduled process updates, you can also manually trigger process data updates from the PROCESSES list or in a process.
To update process data from the PROCESSES list:
- In the row for your process, click the more menu.
- Click Update Process Data.
To update process data in a process view:
- Click the PROCESS menu in the header pane.
- Click Update Process Data.
Note: Your users may not be able to edit or a view a process while the process data is updating.
Delete a processCopy link to clipboard
Deleting a process deletes the data used for analysis, as well as any custom attributes, custom views, and investigations associated with the process. It does not delete data in the source record types.
To delete a process:
- Open the edit menu in either of the following ways:
- In the PROCESSES list, click the menu for the process.
- In a process, click PROCESS in the header pane.
- Click Delete Process.
- Click DELETE to confirm.