This page applies to business users. It describes how to manage process views in process insights.
OverviewCopy link to clipboard
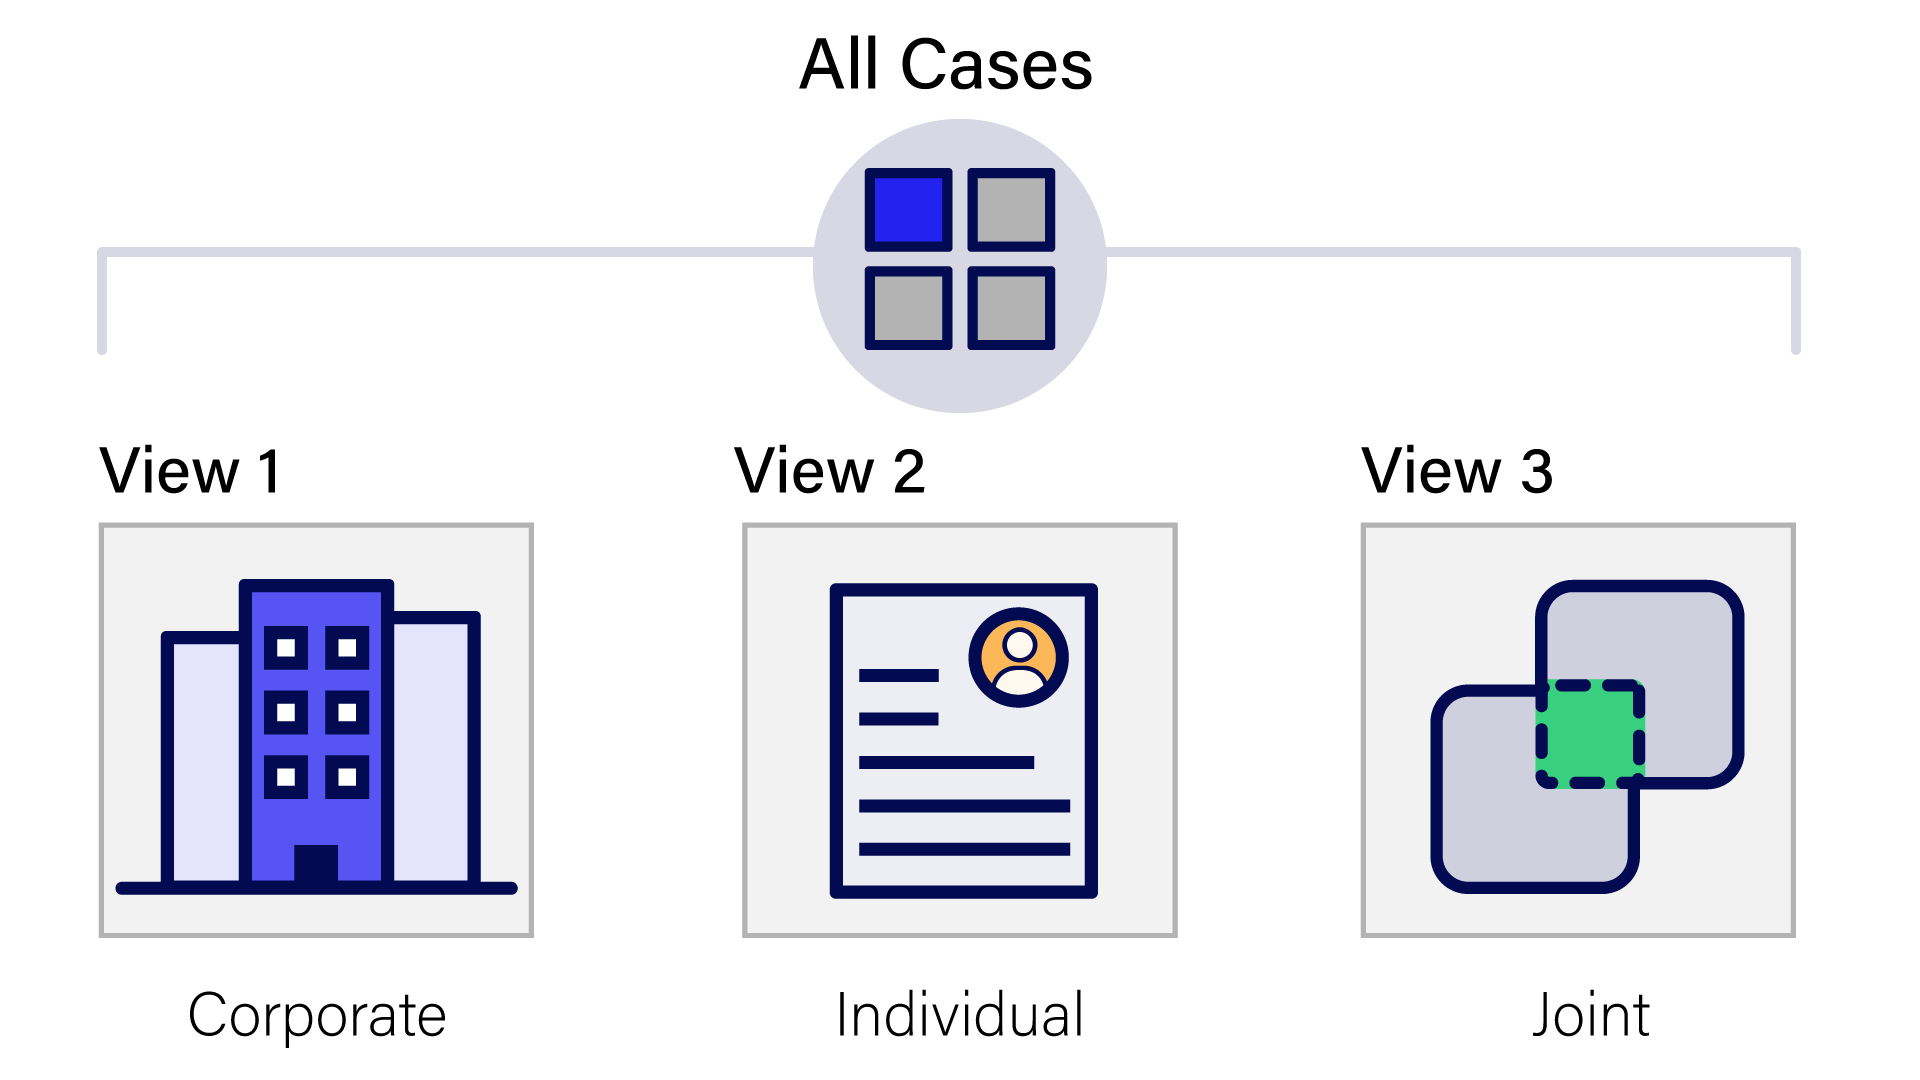
A process view is a subset of cases that is defined by a set of filters. By default, the All Cases view is available for all processes. You can create custom views to focus on specific types of cases.
Creating a view helps you explore how similar cases or parts of processes are performing. A view represents a meaningful segment of your cases that you want to focus your exploration on. For example, in a Financial Customer Onboarding process, you may want to create a view of cases involving corporate accounts only.
Each view includes key metrics and charts, in addition to the process diagram for the cases represented in the view. Learn more about the elements of a process view.
Once you've familiarized yourself with the data in a process view, you can start investigating the activities or attributes that might be slowing the process down.
When to create a viewCopy link to clipboard
When you decide to create a view, keep in mind that you can compare data for cases within a view, but not between views.
DO create a view based on... |
DON'T create a view based on... |
|---|---|
|
|
Create a viewCopy link to clipboard
To create a view:
-
In the header pane of the current view, click the down arrow next to the view name.
-
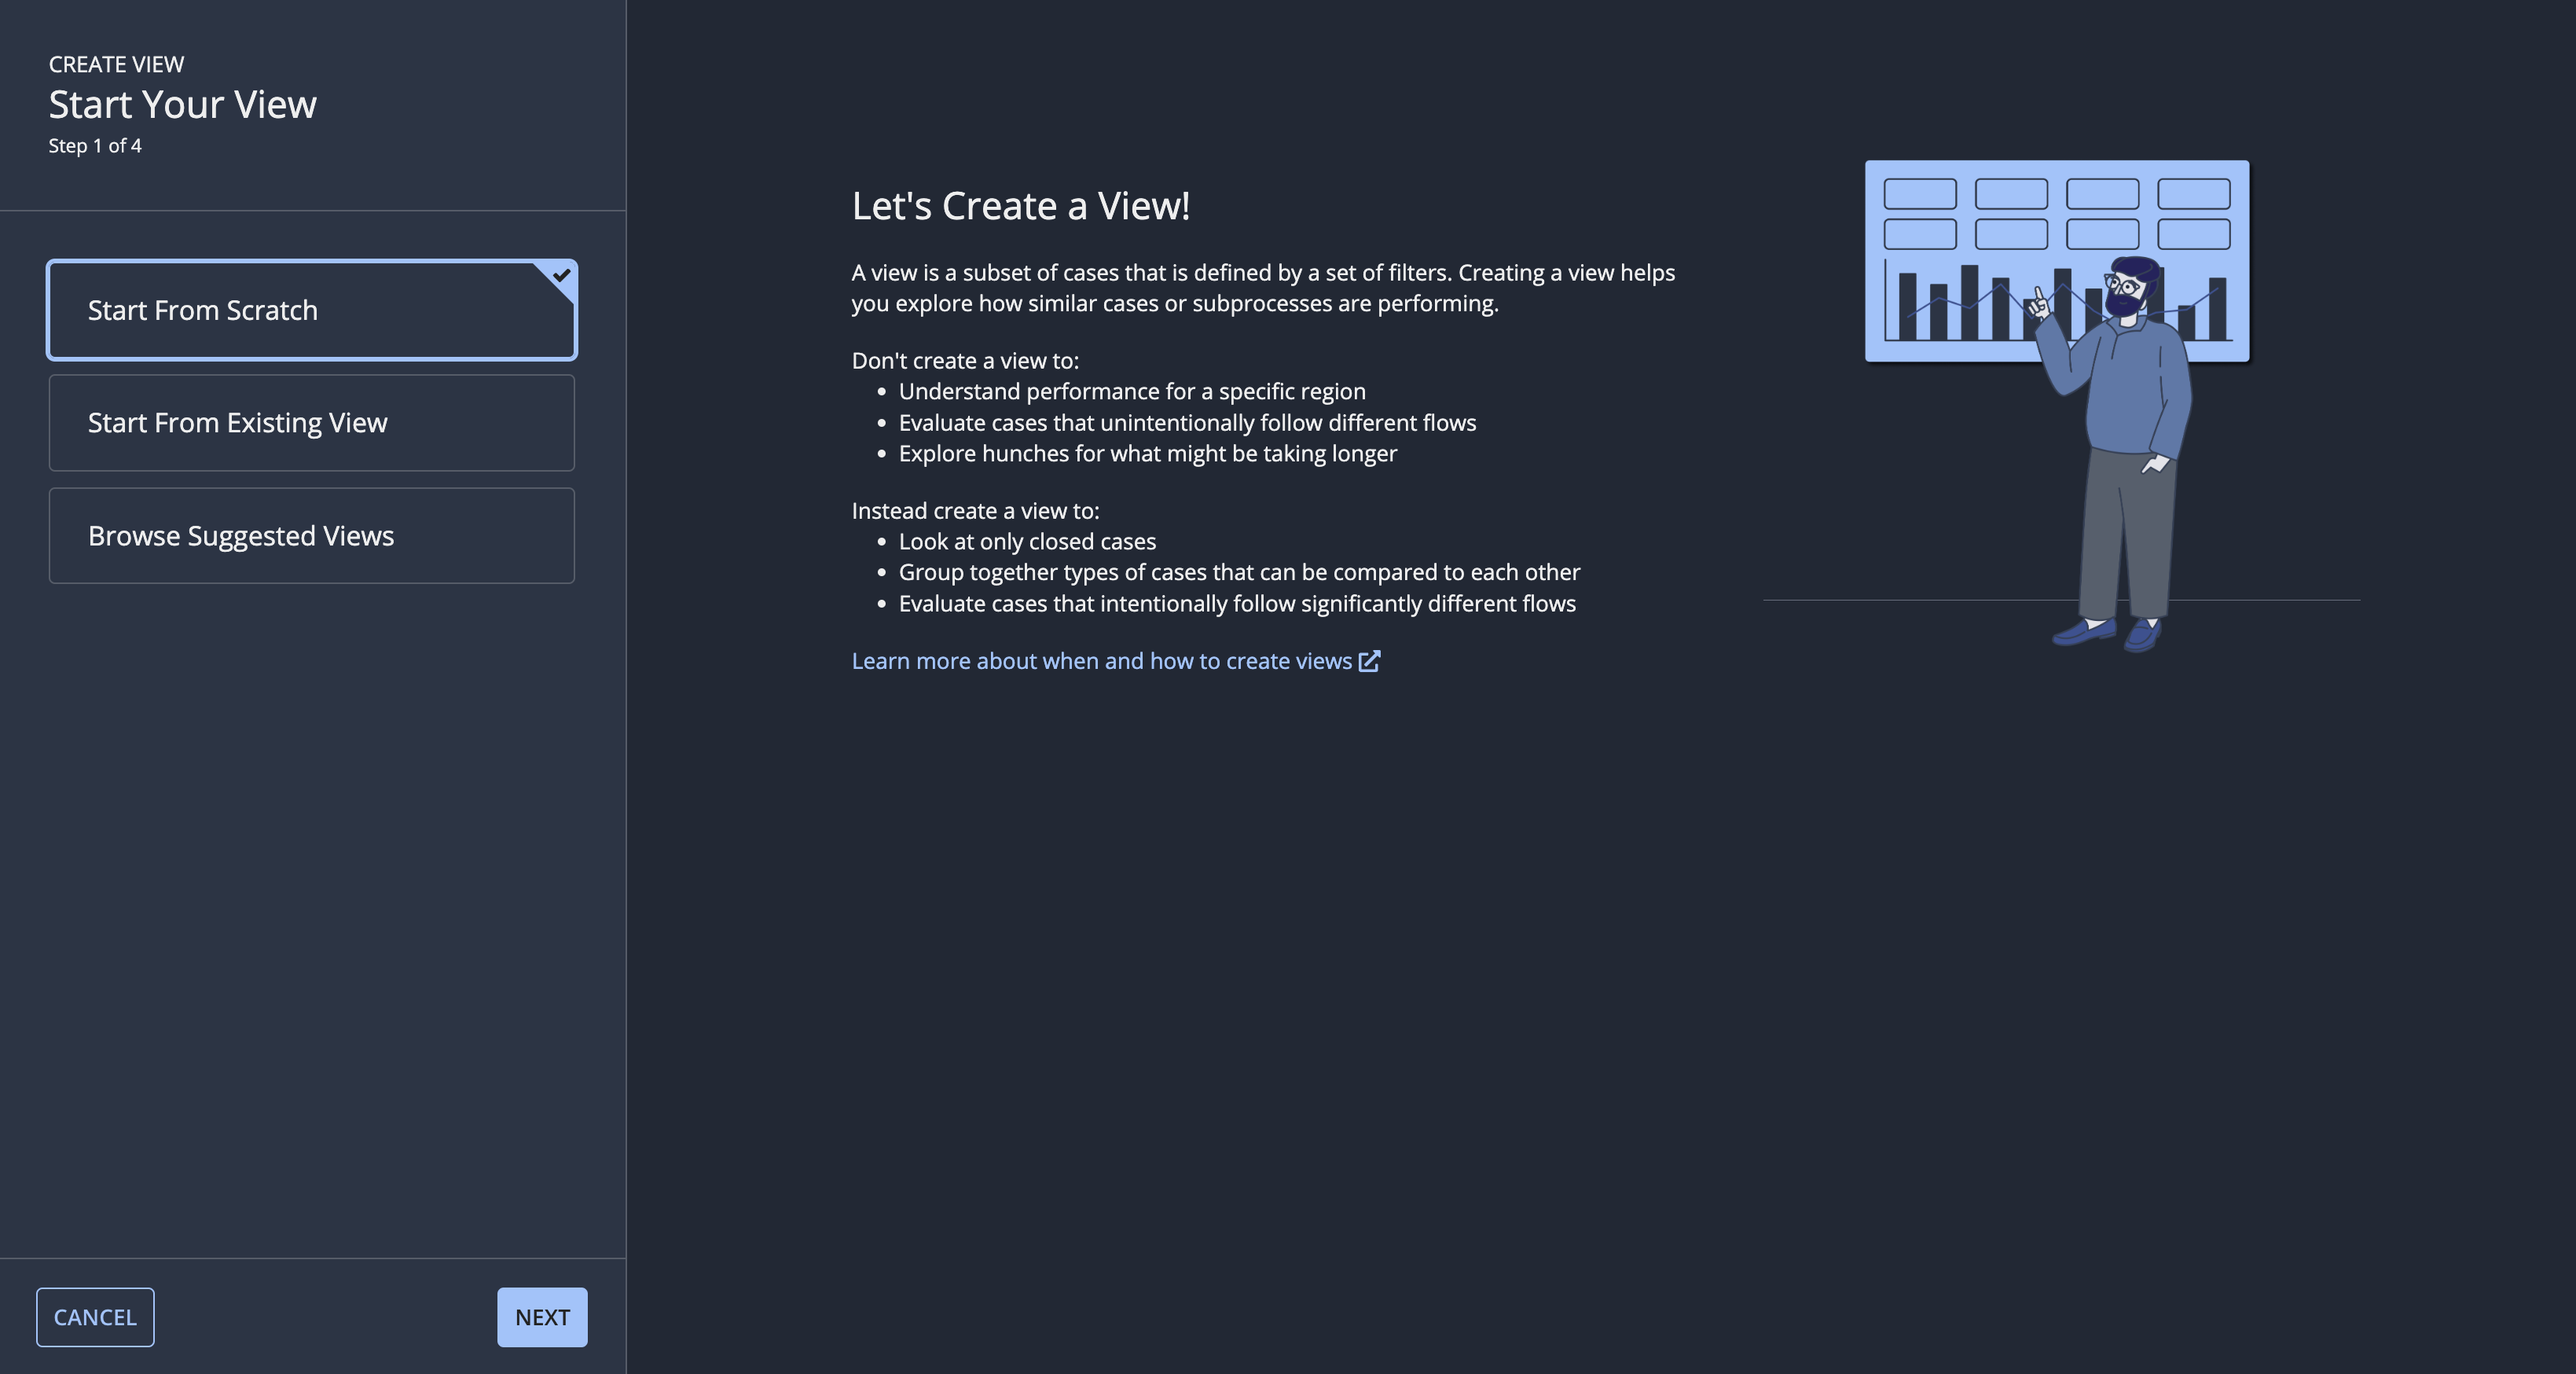
Click Create View. The CREATE VIEW dialog displays, with the Start Your View step active.
-
Continue as appropriate:
- To start from scratch, select Start From Scratch.
- To start from an existing view, select Start From Existing View, then select the view you want to use as the basis for the new view.
- To start with suggestions from AI Copilot, select Browse Suggested Views. Click GENERATE to see a list of suggested views. Select the view that looks most relevant to you, and proceed through the steps. You can edit all of the details in a suggested view.
Tip: Suggested views are available in select regions.
-
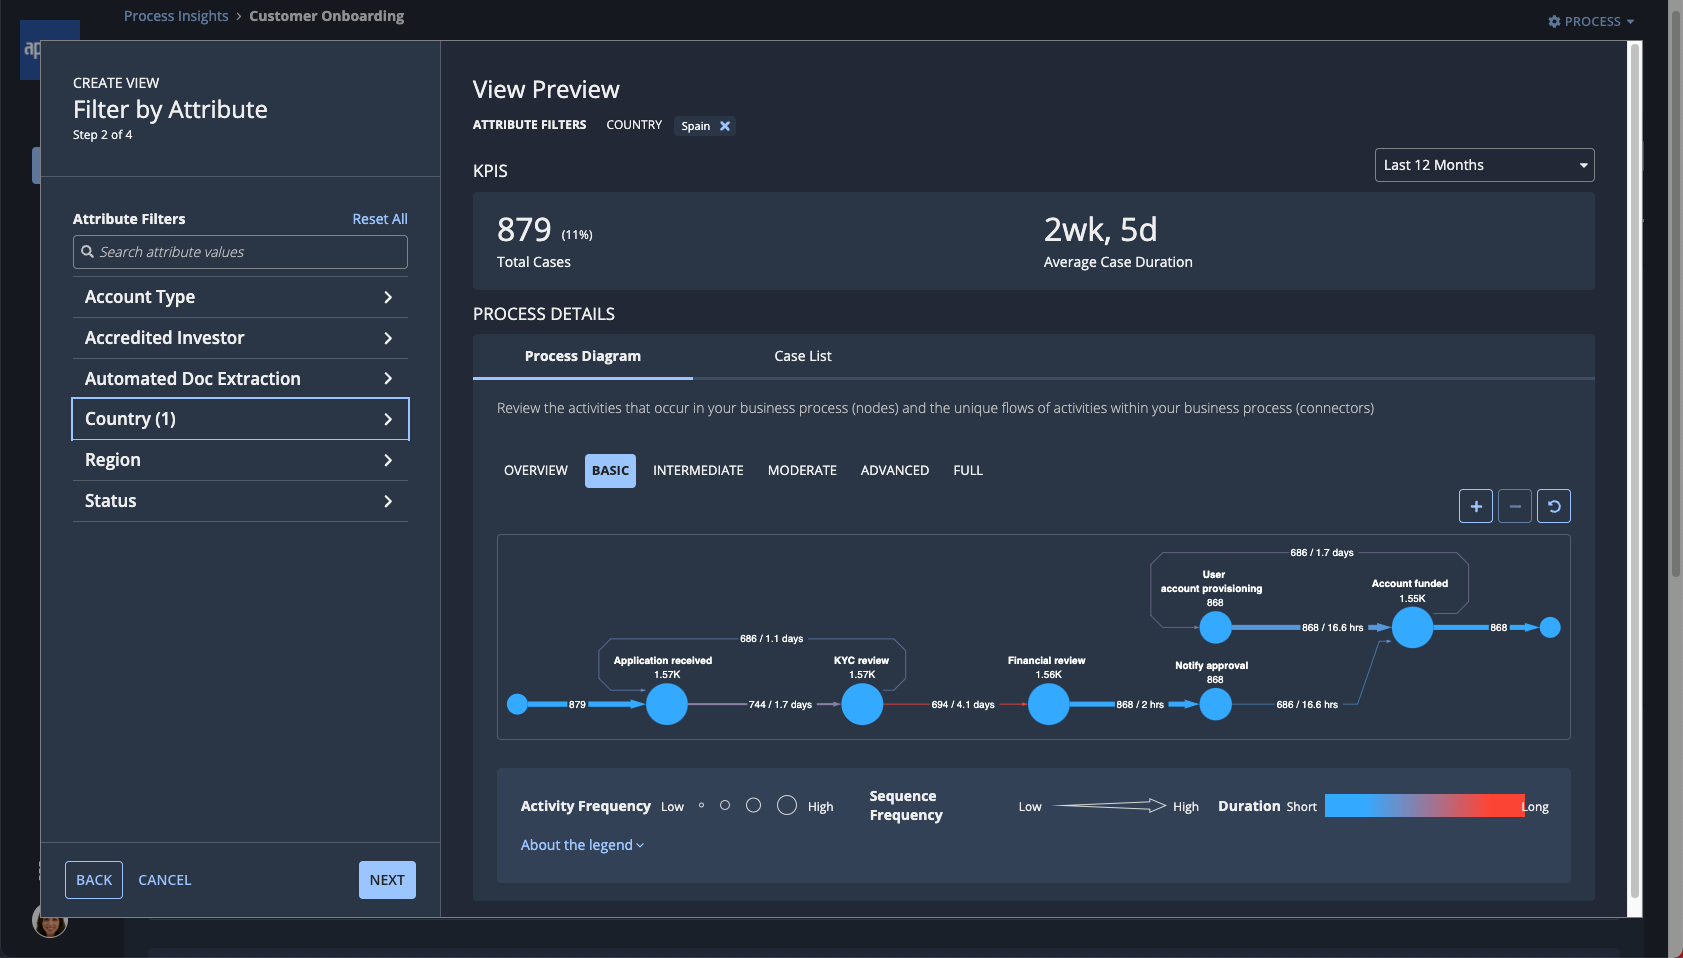
Click NEXT. The Filter by Attribute step displays.
The Attribute Filters list contains the names of all attributes that Process HQ has identified in the process.
-
Select attribute values that you want to filter the view on.
As you make your selections, review the resulting changes to the displayed metrics and process diagram in the preview pane. You can also view a sample of cases that will be included in the view by clicking Case List.
-
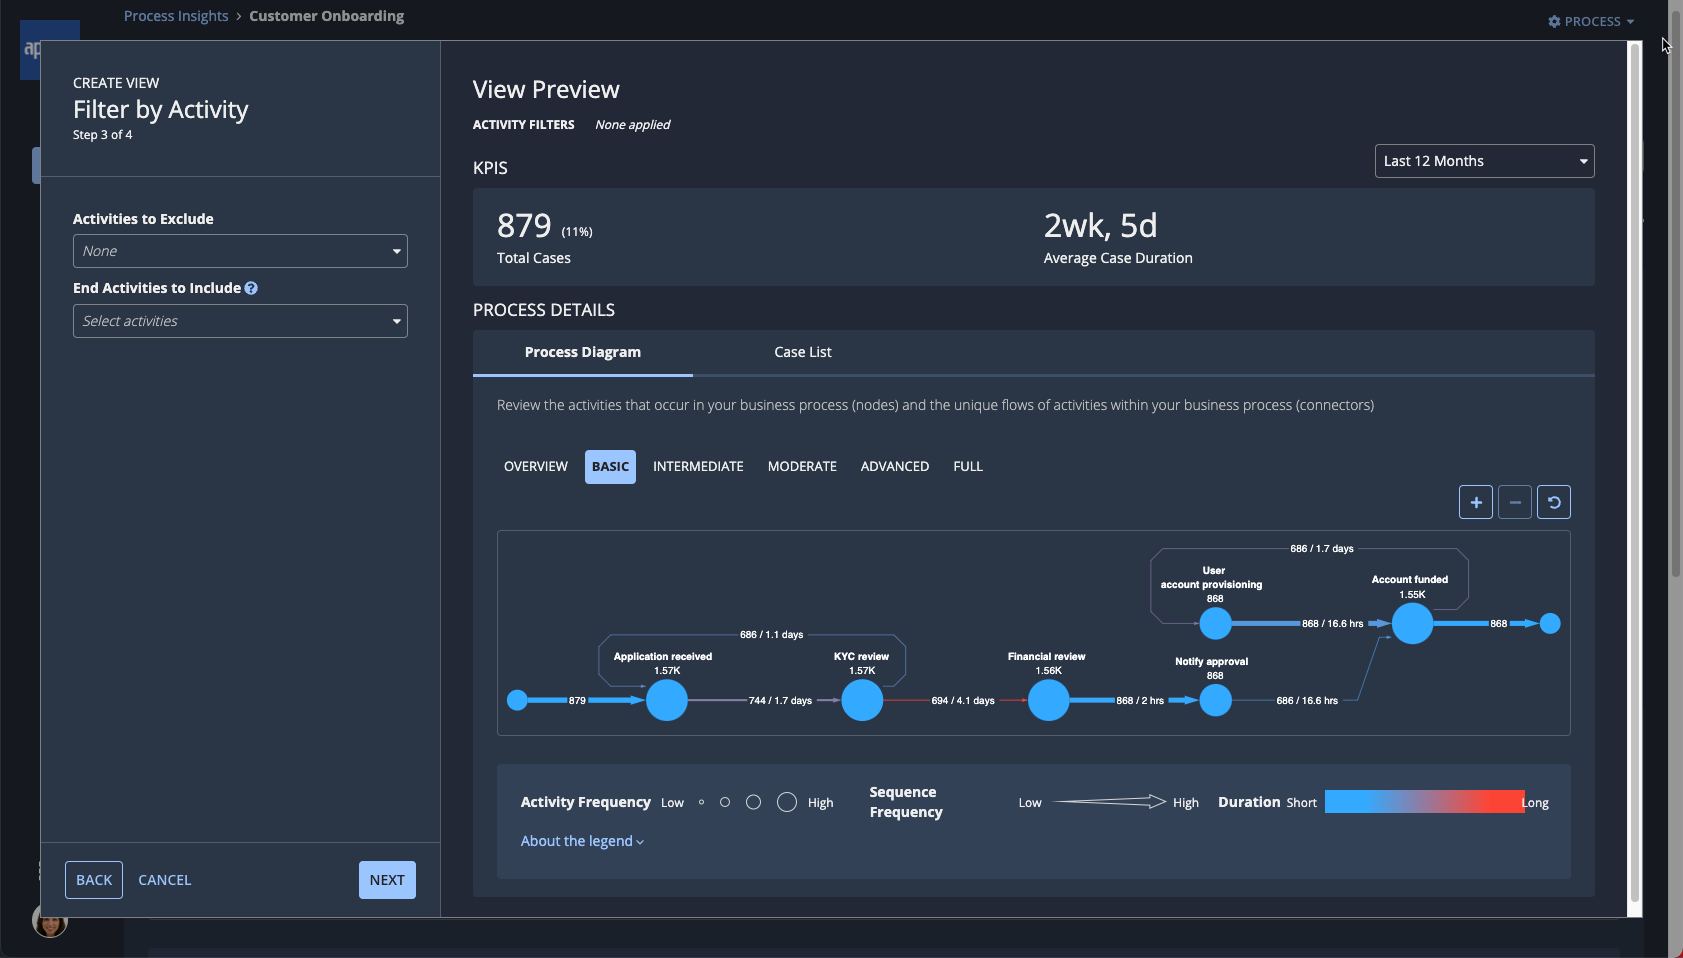
Click NEXT. The Filter by Activity step displays.
-
(Optional) For Activities to Exclude, select one or more activities. The view will exclude any cases that contain one of the specified activities.
-
(Optional) For End Activities, select one or more activities. The view will include only cases that end with one of the specified activities.
-
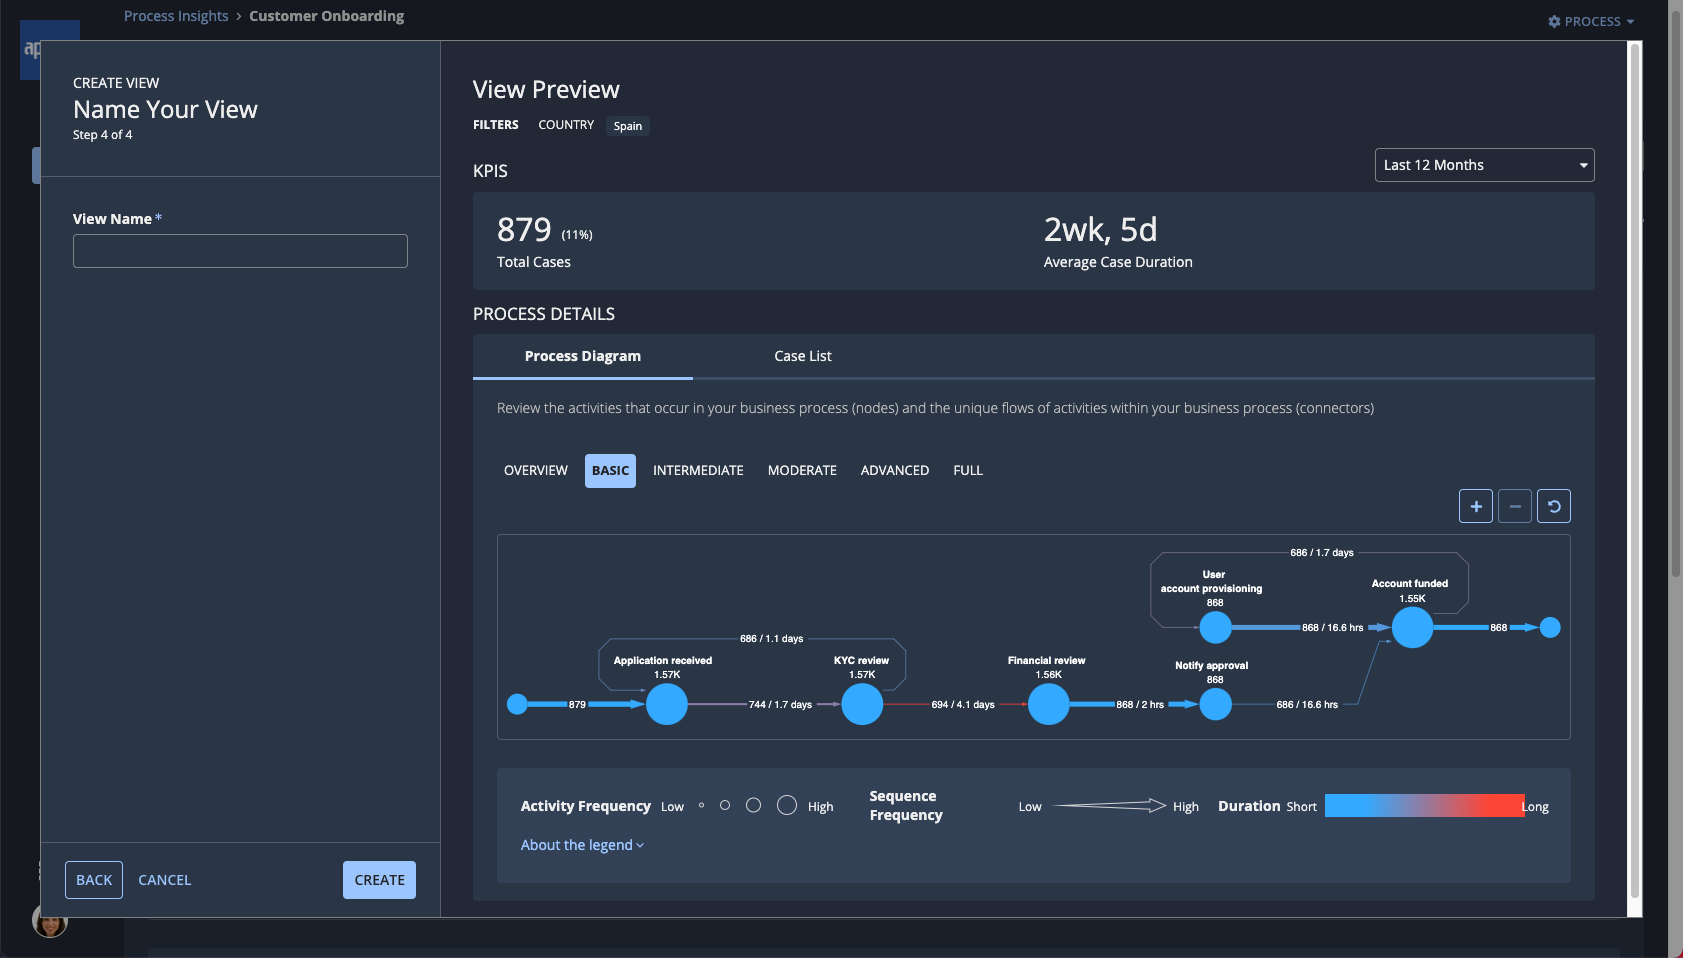
Click NEXT. The Name Your View step displays.
-
For View Name, enter a name. View names must be unique.
-
Click CREATE. Process HQ creates and displays the new view.
Access a viewCopy link to clipboard
To access a process view:
- In the header pane, click the down arrow next to the view name.
- Select a view from the dropdown list.
Rename a viewCopy link to clipboard
To rename a view:
-
Click the settings icon in the header pane of a process view.
-
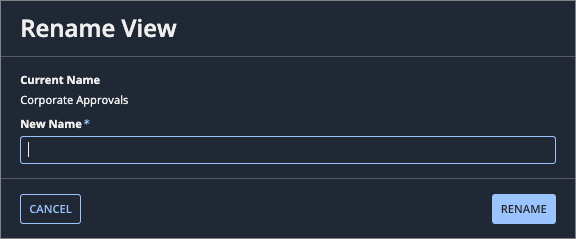
Select Rename View from the dropdown list. The Rename View dialog displays.
-
For New Name, enter the new name you'd like to use.
-
Click RENAME.
Edit view filtersCopy link to clipboard
Filters determine which cases are included in the view. You set these filters initially when creating the view and can then edit the filters as needed.
To edit the filters for a view:
- Click the settings icon in the header pane of a process view.
-
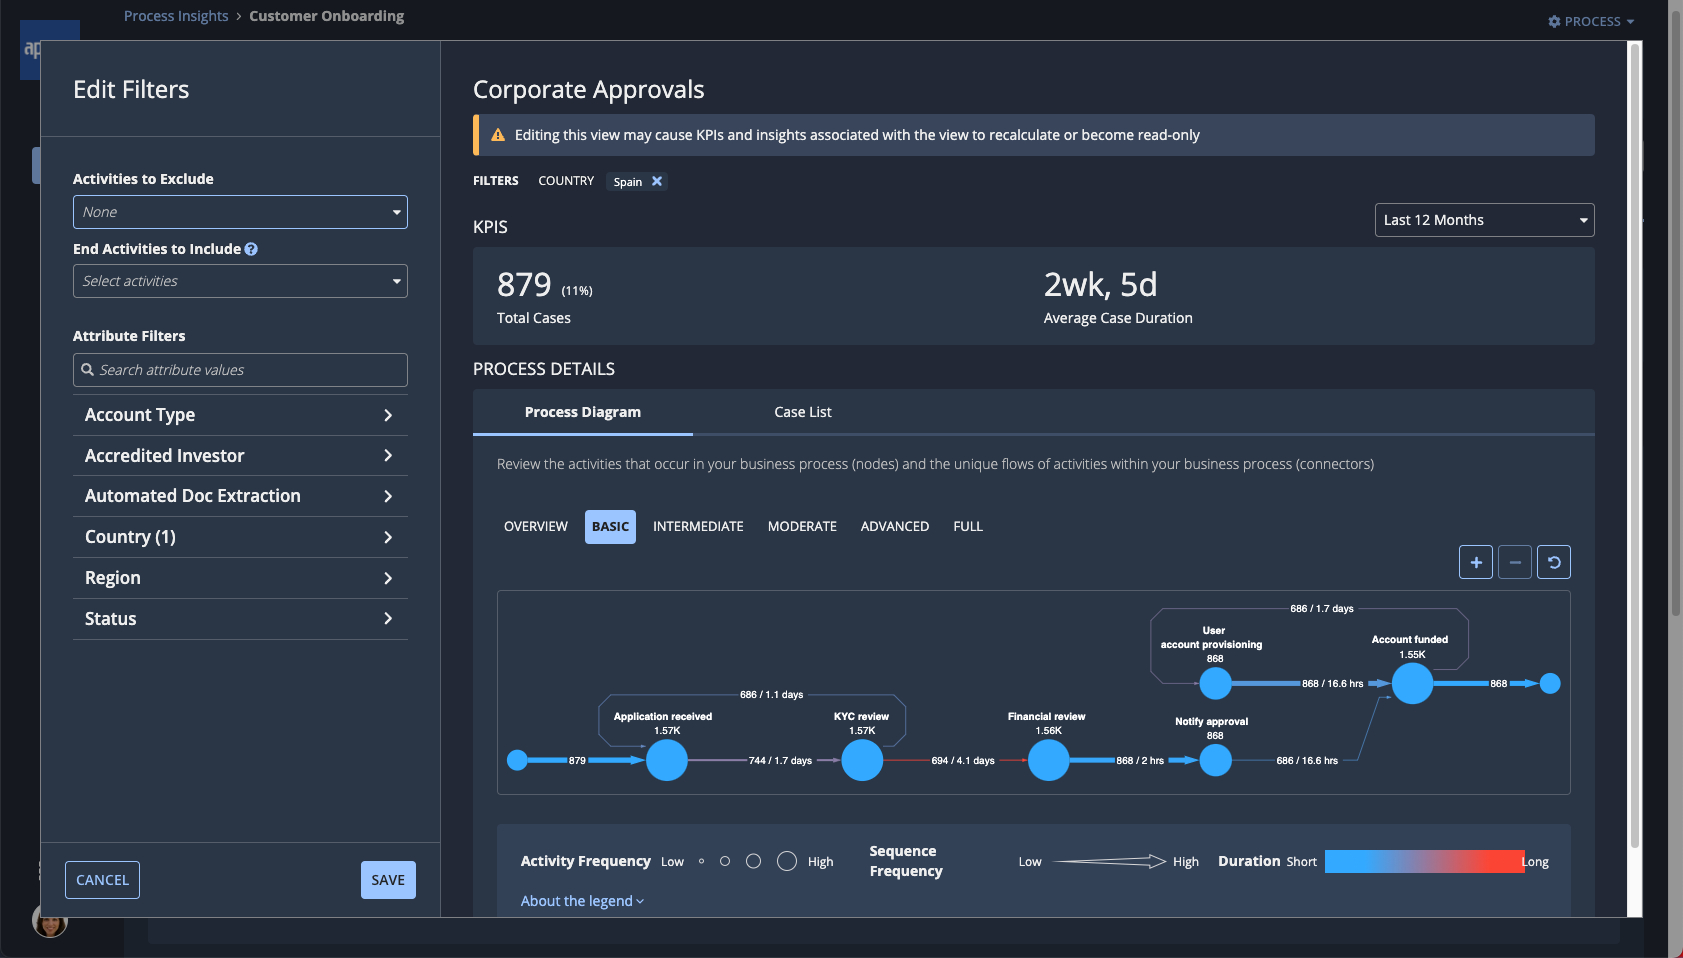
Select Edit Filters from the dropdown list. The Edit Filters dialog displays.
-
(Optional) For Activities to Exclude, select one or more activities. The view will exclude any cases that contain one of the specified activities.
-
(Optional) For End Activities, select one or more activities. The view will include only cases that end with one of the specified activities.
-
In the Attribute Filters list, select attribute values that you want to filter the view on.
As you make your selections, review the resulting changes to the displayed metrics and process diagram in the preview pane. You can also view a sample of cases that will be included in the view by clicking Case List.
- Click SAVE.
Set a date range for a viewCopy link to clipboard
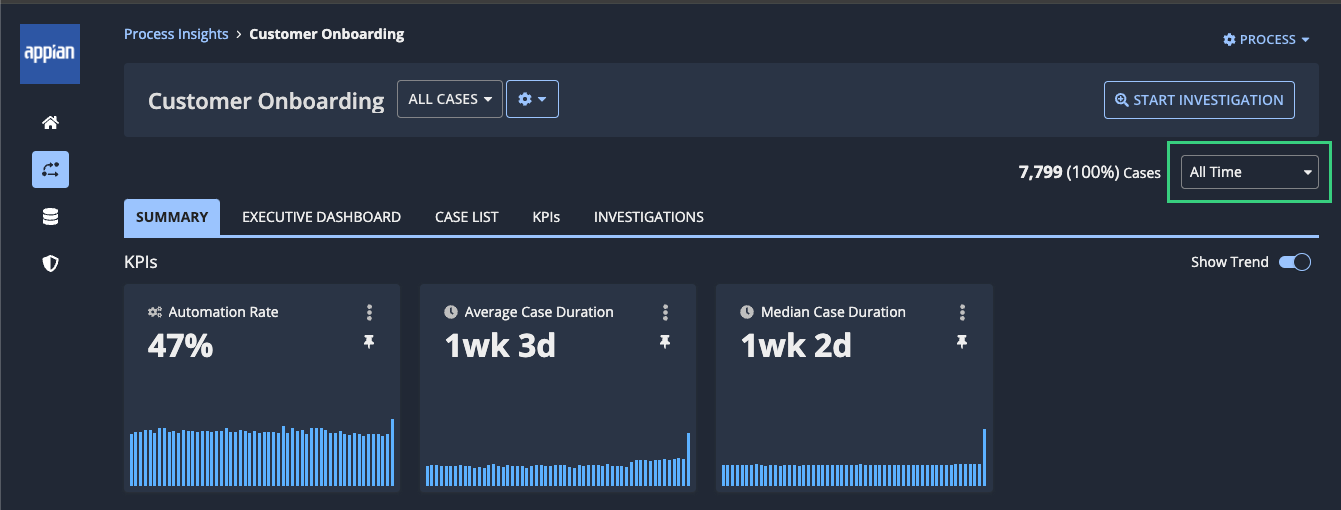
You can set a date range for a view. This date range lasts for the current user session. At the end of your session, the date range returns to the default range of Last 12 Months.
When you start an investigation, the date range you've currently helps define the investigation. Learn more about investigations.
To set a date range for the view:
-
In the header pane, click the date range to view the range options.
-
Select one of the predefined time ranges, or select Custom Date Range and specify From and To dates.
Delete a viewCopy link to clipboard
When you delete a custom view, you delete the filters that created the view and any investigations and insights associated with that view. However, any KPIs you created as part of the view will persist, so you can reuse them in other views.
You cannot delete the All Cases view.
To delete a view:
- In the header pane of the current view, settings icon in the header pane of a process view.
- Click Delete View.
- Click DELETE VIEW to confirm. Process HQ deletes the view and displays the All Cases view.
Regional availabilityCopy link to clipboard
Tip: Unless listed below, features are available in all regions.
The following features are available in select regions:
| Region Name | Region | Suggested Views |
|---|---|---|
| Africa (Cape Town) | af-south-1 | Not Supported |
| Asia Pacific (Mumbai) | ap-south-1 | Supported |
| Asia Pacific (Tokyo) | ap-northeast-1 | Not Supported |
| Asia Pacific (Seoul) | ap-northeast-2 | Not Supported |
| Asia Pacific (Singapore) | ap-southeast-1 | Not Supported |
| Asia Pacific (Sydney) | ap-southeast-2 | Supported |
| Asia Pacific (Jakarta) | ap-southeast-3 | Not Supported |
| Canada (Central) | ca-central-1 | Supported |
| Europe (Frankfurt) | eu-central-1 | Supported |
| Europe (Zurich) | eu-central-2 | Not Supported |
| Europe (Stockholm) | eu-north-1 | Not Supported |
| Europe (Milan) | eu-south-1 | Not Supported |
| Europe (Ireland) | eu-west-1 | Not Supported |
| Europe (London) | eu-west-2 | Supported |
| Europe (Paris) | eu-west-3 | Supported |
| Middle East (Bahrain) | me-south-1 | Not Supported |
| Middle East (UAE) | me-central-1 | Not Supported |
| South America (Sao Paulo) | sa-east-1 | Supported |
| US East (N. Virginia) | us-east-1 | Supported |
| US East (Ohio) | us-east-2 | Not Supported |
| US West (N. California) | us-west-1 | Not Supported |
| US West (Oregon) | us-west-2 | Supported |

