
This page applies to business users. It describes how to collaborate on an investigation of a process.
OverviewCopy link to clipboard
In a saved investigation, you can present the insights you've uncovered to your colleagues. They can then comment on your insights or create new insights based on yours to continue the investigation as needed.
Any user with Viewer or Analyst permissions for the process can collaborate on a saved investigation and its insights.
View a saved investigationCopy link to clipboard
To view a saved investigation:
-
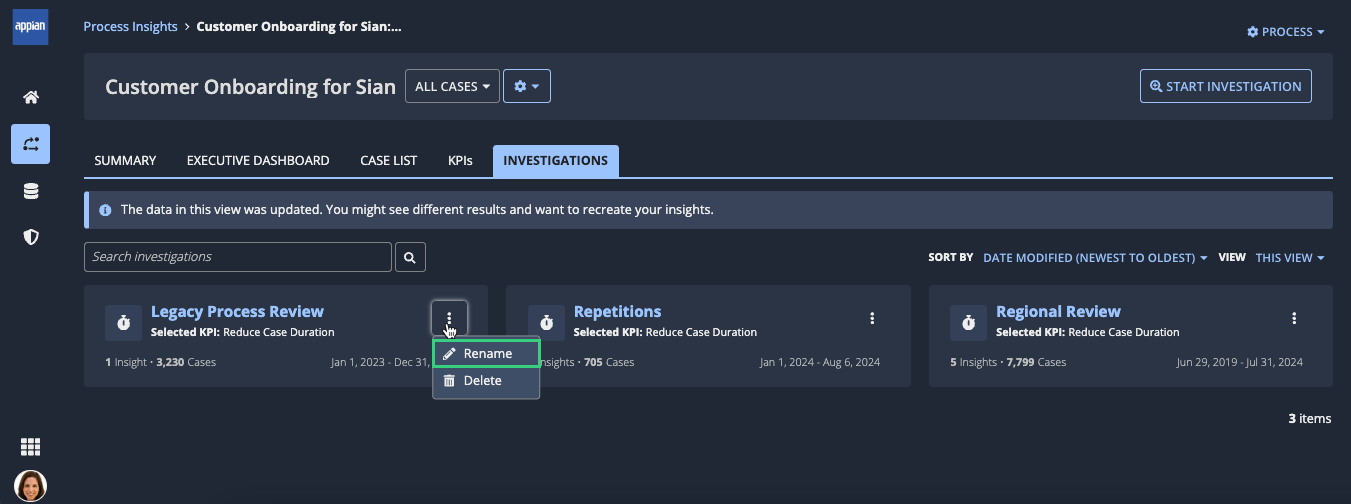
In a process view, go to the INVESTIGATIONS tab. A list of saved investigations displays.
For example:
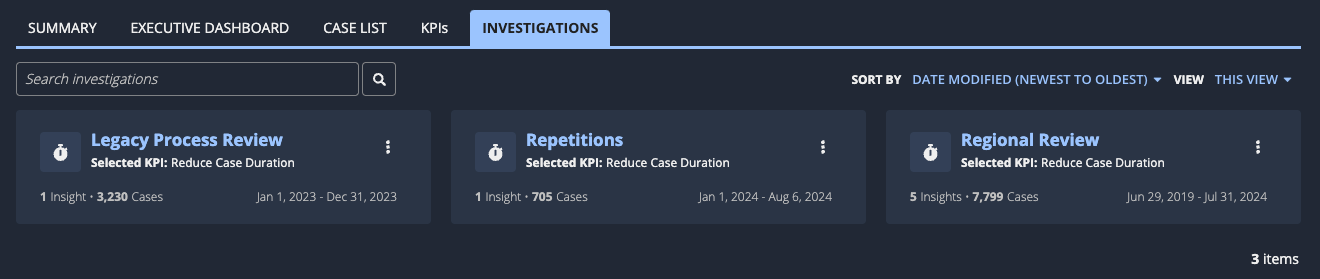

By default, this tab lists saved investigations in the current view only, and sorts them by date modified from newest to oldest. You can also sort by oldest to newest, or you can switch to a list of all investigations associated with the process.
-
(Optional) Search for a saved investigation by entering the name of an investigation in the search box. The results of your search replace the current investigations list.
-
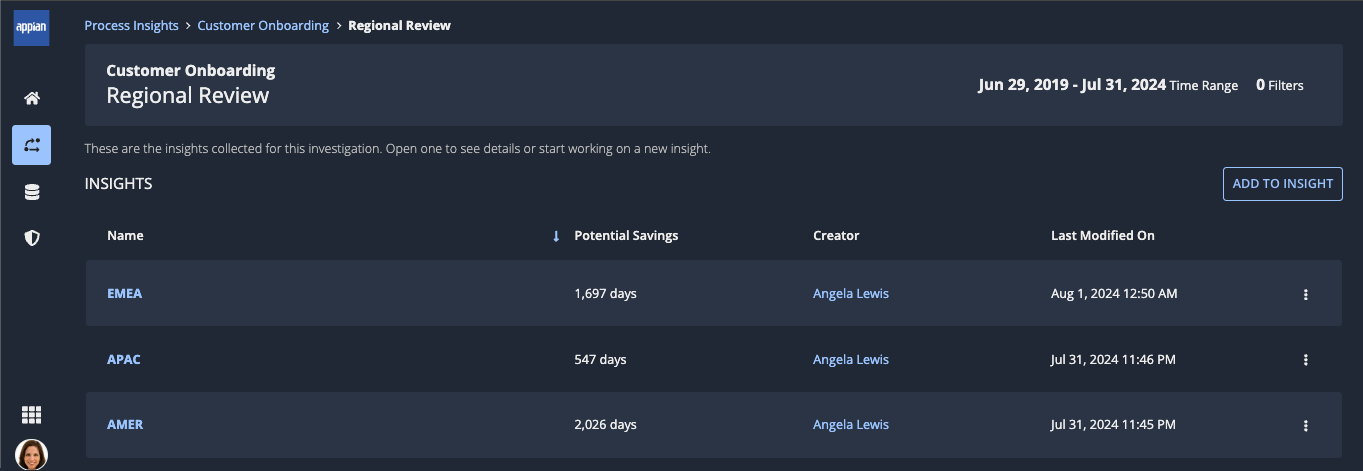
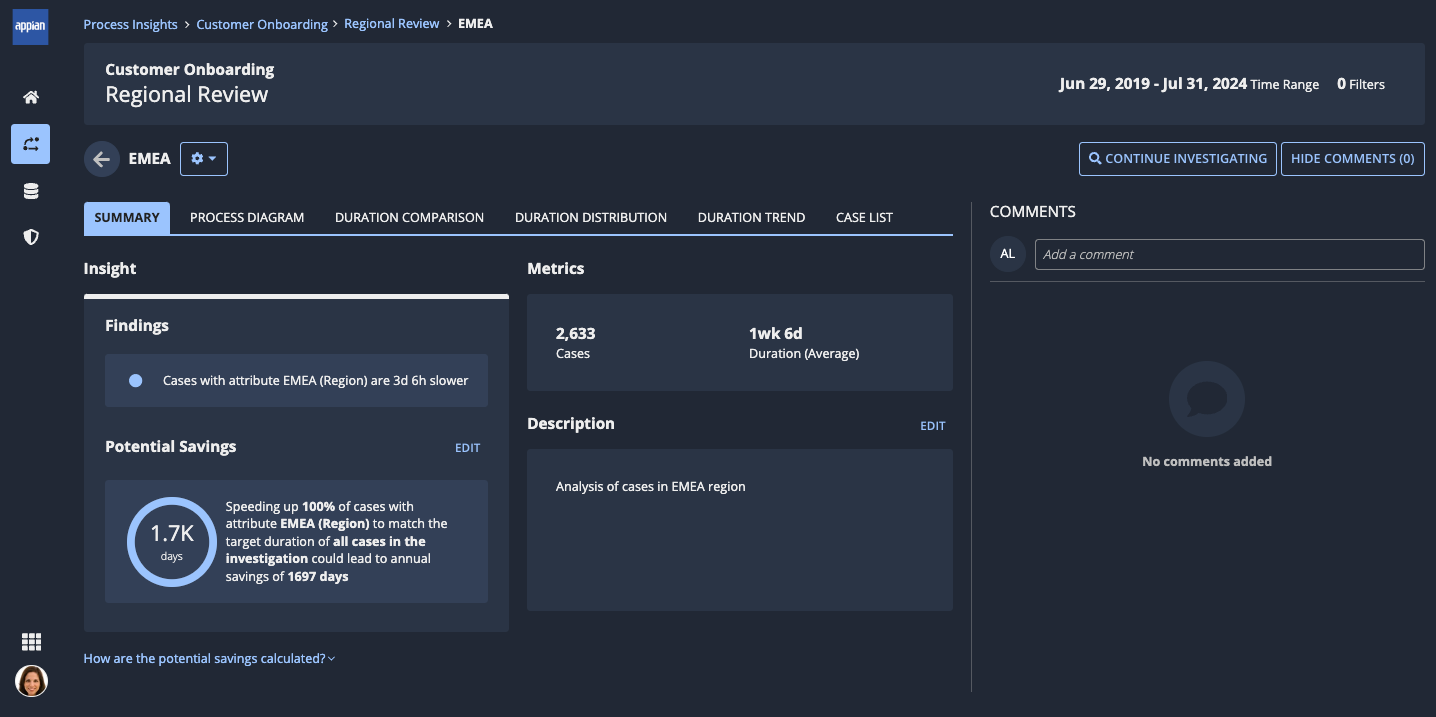
In the list, click the investigation you want to view. The saved investigation page displays.
For example:
Continue a saved investigationCopy link to clipboard
You and your collaborators can add new insights to an existing investigation by continuing the investigation.
You can continue a saved investigation in either of the following ways:
Tip: To return to the saved investigation page without saving the new insight, click the investigation name in the header.
Use investigation filtersCopy link to clipboard
You can use the filters from the existing investigation to create a new insight within that investigation.
To create an insight that uses the existing investigation filters:
-
View the saved investigation where you want to add the new insight.
-
In the header of the INSIGHTS list, click ADD TO INSIGHT.
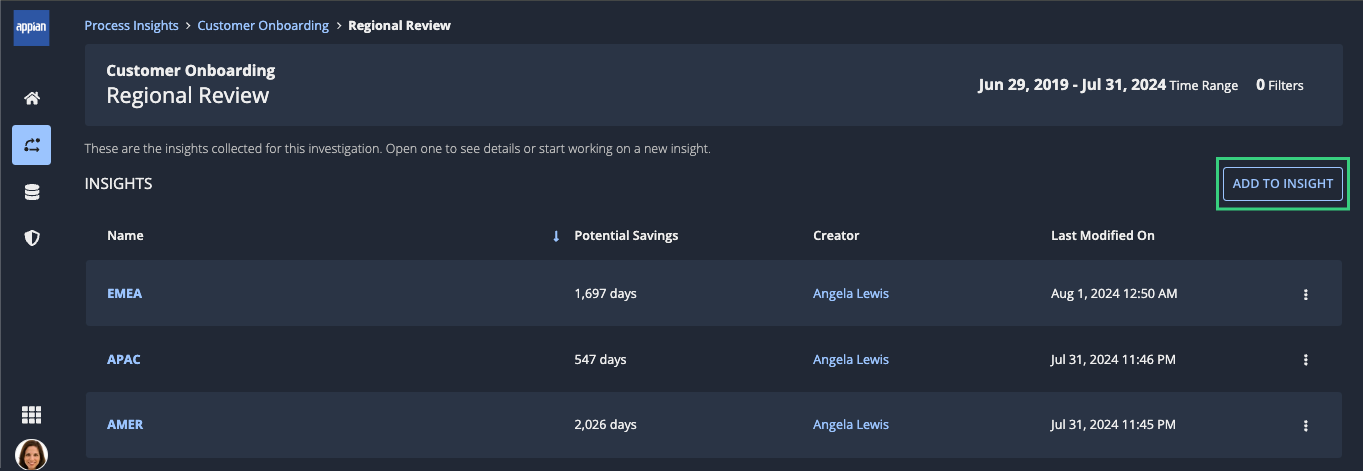
The active investigation page displays with the attribute values list active. The new insight automatically uses the date range from the investigation.
-
Start reviewing findings to build a new insight.
Use insight filtersCopy link to clipboard
You can use the filters from an existing insight to create a new insight within the same investigation.
To create an insight that uses the existing insight filters:
- View the saved investigation where you want to add the new insight.
- Click the three-dot menu in the insight you want to base the new insight on.
-
Select Continue Investigating.
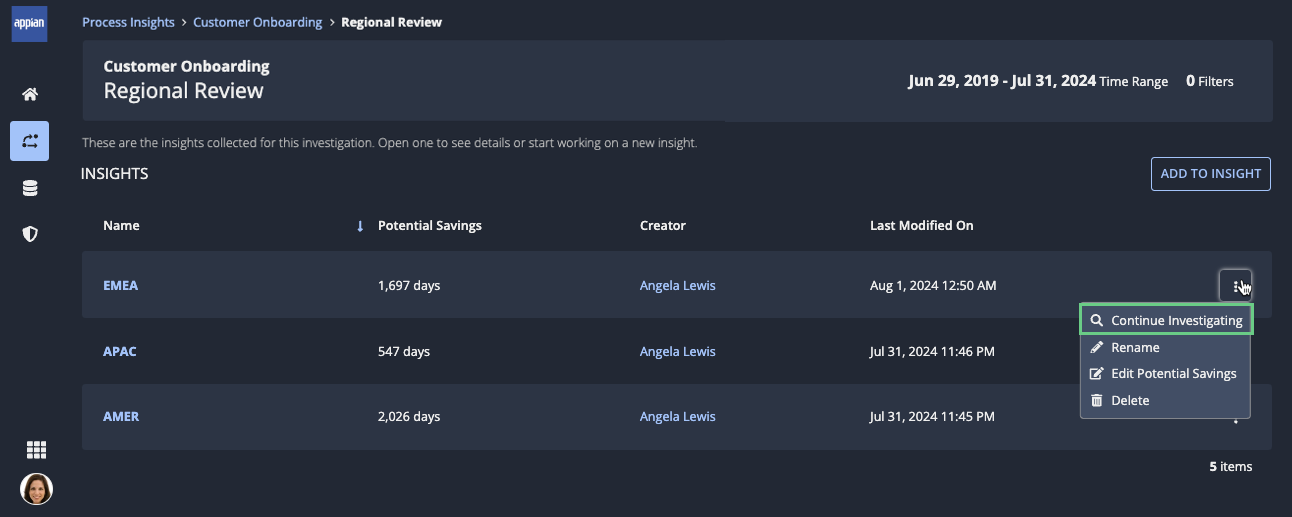
The active investigation page displays. The insight pane already includes the findings from the original insight, and the investigation pane displays possible next steps you can take to continue the investigation.
Rename a saved investigationCopy link to clipboard
To rename a saved investigation:
- In a process view, go to the INVESTIGATIONS tab.
- Click the three-dot menu for the investigation you want to rename.
-
Select Rename.
For example:
The Rename Investigation dialog displays.
For example:
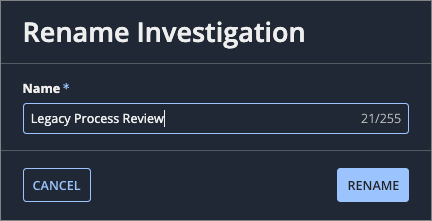
- For Name, enter a new name for the investigation.
- Click RENAME.
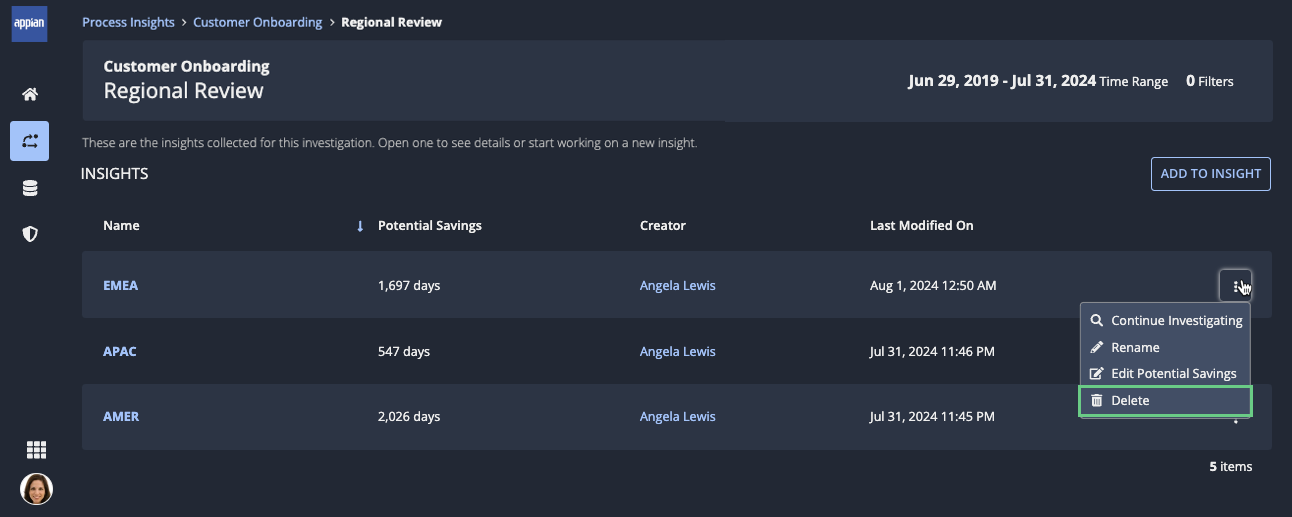
Delete a saved investigationCopy link to clipboard
To delete a saved investigation:
- In a process view, go to the INVESTIGATIONS tab.
- Click the three-dot menu for the investigation you want to delete.
-
Select Delete.
For example:

The Delete Investigation dialog displays.
For example:
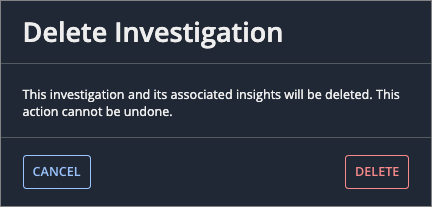
- Click DELETE to confirm the deletion.
View a saved insightCopy link to clipboard
To view a saved insight:
- View a saved investigation.
-
In the list of insights, click the insight you want to view. The insight details page appears.
For example:
Rename a saved insightCopy link to clipboard
To rename a saved insight:
- View a saved investigation.
- Click the three-dot menu for the insight.
-
Select Rename.
For example:

A Rename Insight dialog displays.
For example:
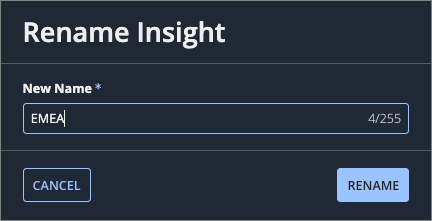
- For New Name, enter a new name.
- Click RENAME.
Edit the potential savings calculationCopy link to clipboard
By default, Process HQ calculates potential savings based on:
- The average duration of cases or parts of the process you're investigating (displayed in days).
-
A projected improvement rate over a year, as follows:
Investigation Target
Projected Rate
Why
Attribute value
100%
Typically, an attribute value represents a condition your business can change.
Repetition
100%
Typically, a repetition can be eliminated entirely from a process.
Sequence or activity
25%
The duration of a sequence or activity is more likely to reflect expected or unchangeable business conditions.
With your knowledge of the business context, you might want to recalibrate those calculations slightly—setting an expected duration that's more ambitious than the average duration, or setting an improvement percentage that is more realistic and reachable. Or perhaps your process involves events that make more sense in the context of minutes and hours, rather than days and years.
Process HQ allows you to make these adjustments directly in the insight, so you can run a lightweight simulation of the potential savings you could actually achieve.
To adjust the potential savings calculation:
- View a saved investigation.
- Click the three-dot menu for the insight.
-
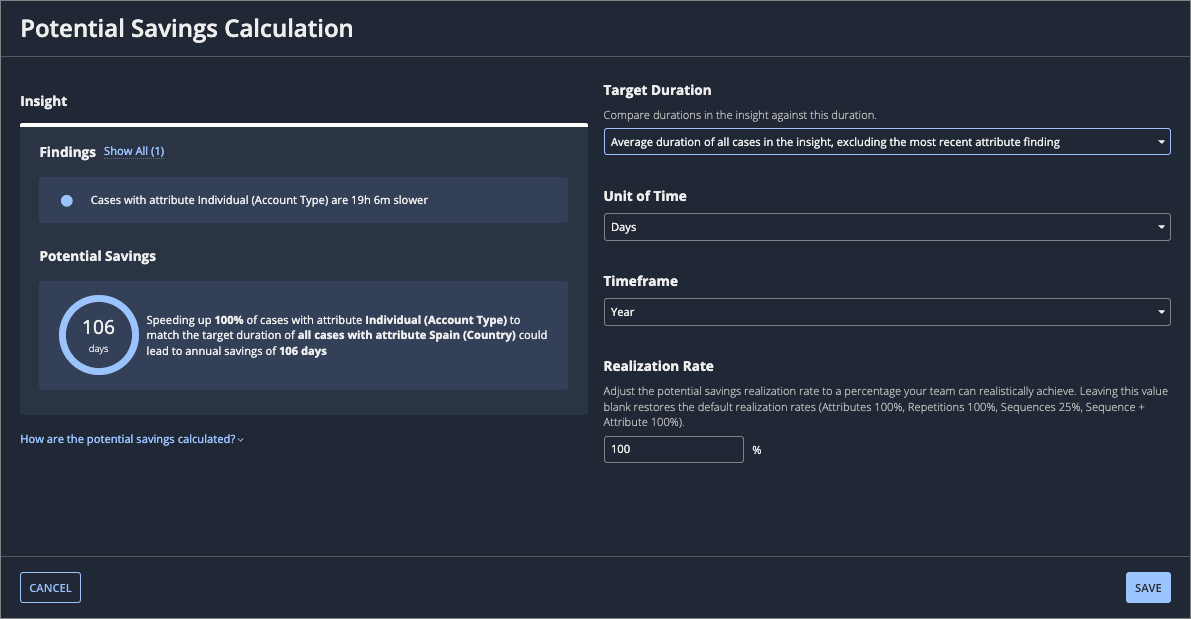
Select Edit Potential Savings. The Potential Savings Calculation dialog displays.
For example:
-
Configure the following properties:
Property
Action
Target Duration
- To use a contextualized target duration, select an option that excludes the most recent attribute finding.
- To use the average duration of cases or process parts in this investigation, select an option that includes the most recent attribute finding.
Unit of Time
Specify the unit of time to use when displaying potential savings. Possible values include:
- Minutes
- Hours
- Days (default)
- Weeks
Timeframe
Specify the timeframe to use when calculating potential savings.
- Week
- Month
- Quarter
- Year (default)
- Total (for the selected time period)
Realization Rate
Adjust the potential savings realization rate to a percentage your team can realistically achieve. If you set this value to `0`, the system uses the default projected improvement rates.
- Click SAVE.
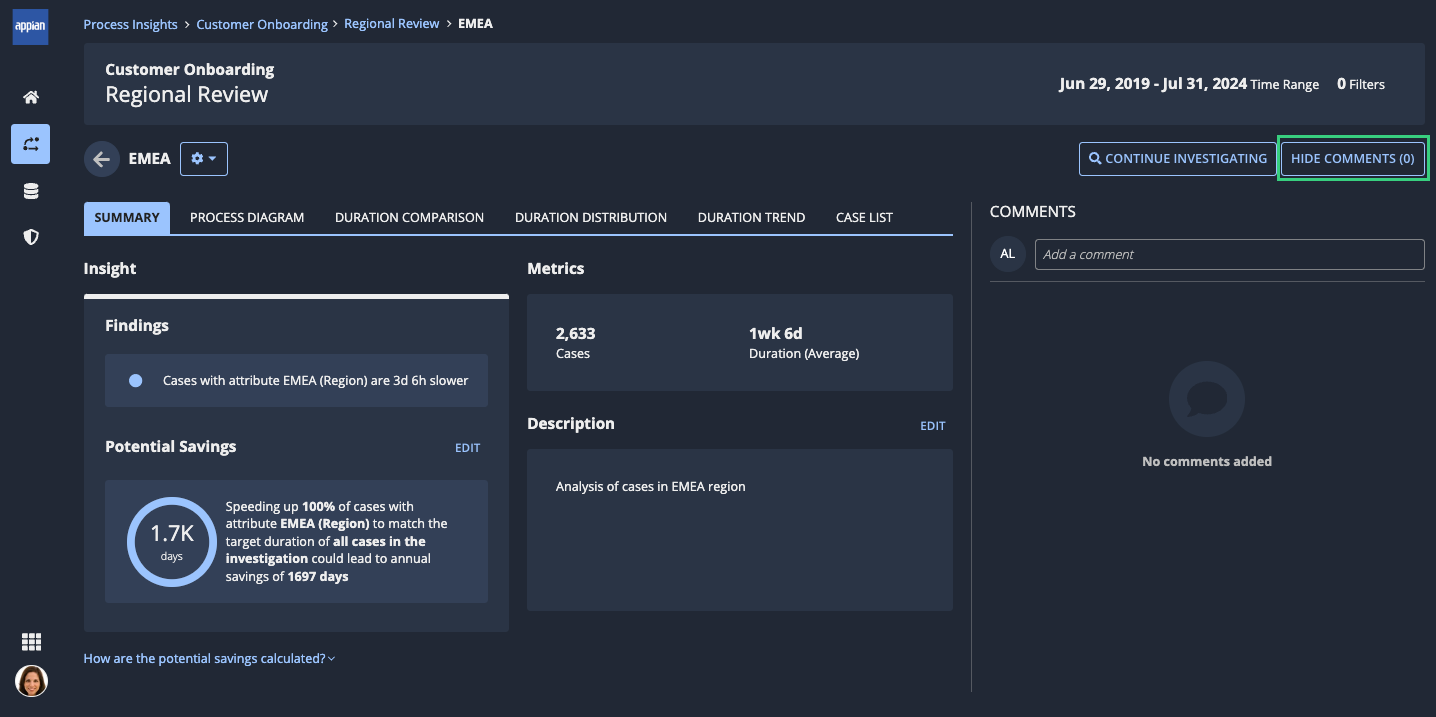
Add a comment to a saved insightCopy link to clipboard
As you and your colleagues are working together to validate and socialize insights into your processes, you'll often want to ask questions, add context, or document updates on the status of a finding. You and your collaborators can communicate about an insight using the commenting capability available in each insight.
To view existing comments, simply view the saved insight.
To post a comment to an insight:
- View a saved insight.
-
Place your cursor in the empty comment box that displays at the top of the COMMENTS pane.
Your initials display automatically next to the comment box. For example, this comment box displays initials for a user named Phillip Sanchez:

A rich-text toolbar and action buttons display with the comment box.
-
In the comment box, enter the text of your comment. You can enter up to 4,000 characters.
You can take advantage of the rich text formatting as you enter your text, and add links to external resources.
For example:
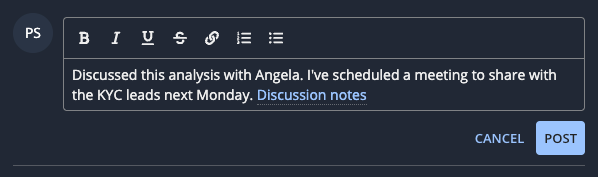
- Click POST.
Delete a comment from a saved insightCopy link to clipboard
You can only delete your own comments.
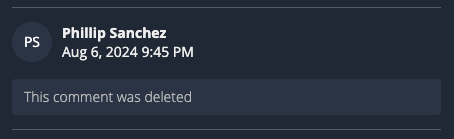
When you delete a comment, the system removes the content of the comment, but retains the comment structure as a placeholder to avoid confusion and ensure thread continuity.
To delete a comment from a saved insight:
- View a saved insight.
-
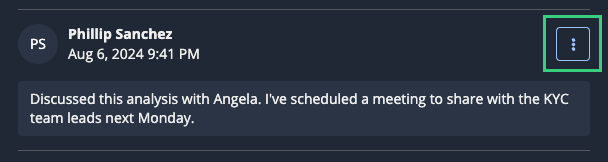
In the COMMENTS pane, click the three-dot menu for the comment you want to delete.
For example:
A confirmation dialog displays.
-
Click DELETE to confirm. The system removes the content of the comment.
Show or hide comments in a saved insightCopy link to clipboard
To show or hide comments in a saved insight:
- View the insight.
-
In the insight header, click SHOW COMMENTS or HIDE COMMENTS as appropriate.
For example:
Delete a saved insightCopy link to clipboard
To delete an insight:
- View the saved investigation.
- Click the three-dot menu for the insight.
-
Select Delete.
For example:
- Click DELETE to confirm the deletion.