
IntroductionCopy link to clipboard
After installing the Public Self-Registration module, you need to set it up before using it with the Case Management Studio Base application. This guide walks you through the setup steps, including:
- Setting up the Connected System.
- Adding the My Account page to the portal.
- Linking the Portal home page to the My Account page.
- Adding the Claim Case page to the My Cases site.
- Linking the My Cases home page to the Claim Case page.
- Adding the Claimed By details to the Case Summary view.
- Capturing the Audit for Claiming a Case.
Step 1: Set up the connected systemCopy link to clipboard
The first step in setting up the Public Self-Registration module with your Case Management Studio Base application involves setting up the connected system that backs claiming a case.
- Log in to the target environment.
- Navigate to the Admin Console and select Web API Authentication.
- From the API Key tab, click CREATE.
- In the Description field, add a unique description for the API key.
- Click the icon next to the Service Account field to create a new service account.
- In the Username field, enter
claimCase. - In the Groups field, enter
CMGT Service Accountsto add it to the appropriate group. - Click CREATE to apply the new service account to the API key.
- In the Username field, enter
- Click CREATE to create the new API key, copy it, and save it to use in step 11.
- Go to Appian Designer > Applications and select the CMGT Add-On - Self Registration application.
- Under Object Type, select Connected System.
- Search for and open
CMGT SELF Connected System. - Find the Value field and click the Clear link next to it.
- Paste the API key you saved in step 6 in the cleared Value field.
- In the Base URL field, update the URL to match the URL of the target environment you are in. Be sure to use the following URL format:
https://sample-url.com/suite/webapi/. - Click SAVE.
Step 2: Add the My Account pageCopy link to clipboard
Next, you must add the My Account page to the portal.
To update the portal:
- From Appian Designer > Applications, select the CMGT Portal Module application.
- Search for and open the
CMGT_Portalportal object. - Click Add Page and enter the following details:
- Title:
My Account - Web Address Identifier:
my-account - Icon:
file-o - Content:
CMGT_SELF_PortalPage_MyAccount
- Title:
- Click DONE > SAVE CHANGES.
Step 3: Link the Portal home page to the My Account pageCopy link to clipboard
This section provides instructions for linking the portal home page to the My Account page.
To add a link from the portal home page to the My Account page:
- From Appian Designer > Applications, select the CMGT Portal Module application.
- Search for and open the
CMGT_PortalPage_Homeinterface and click the Expression Editor view. -
Copy the following code block and paste it as the last item in the
local!portalPagesarray as shown.1 2 3 4 5 6 7
a!map( pageType: "MyAccount", label: 'translation!{2ed0b429-53f7-4b8b-923d-ec5b1ef98825}CMGT_SELF Translations.{0a0e3219-d2fd-4010-8b5b-a20eced229a6}', link: local!portalUrl & "/page/" & cons!CMGT_SELF_TXT_MY_ACCOUNT_PORTAL_URL_STUB, image: cons!CMGT_SELF_DOC_IMAGE_CMS_MY_ACCOUNT, description: 'translation!{2ed0b429-53f7-4b8b-923d-ec5b1ef98825}CMGT_SELF Translations.{0c575c22-89c1-4d0a-8c5d-0b86886a9663}' ),
Copy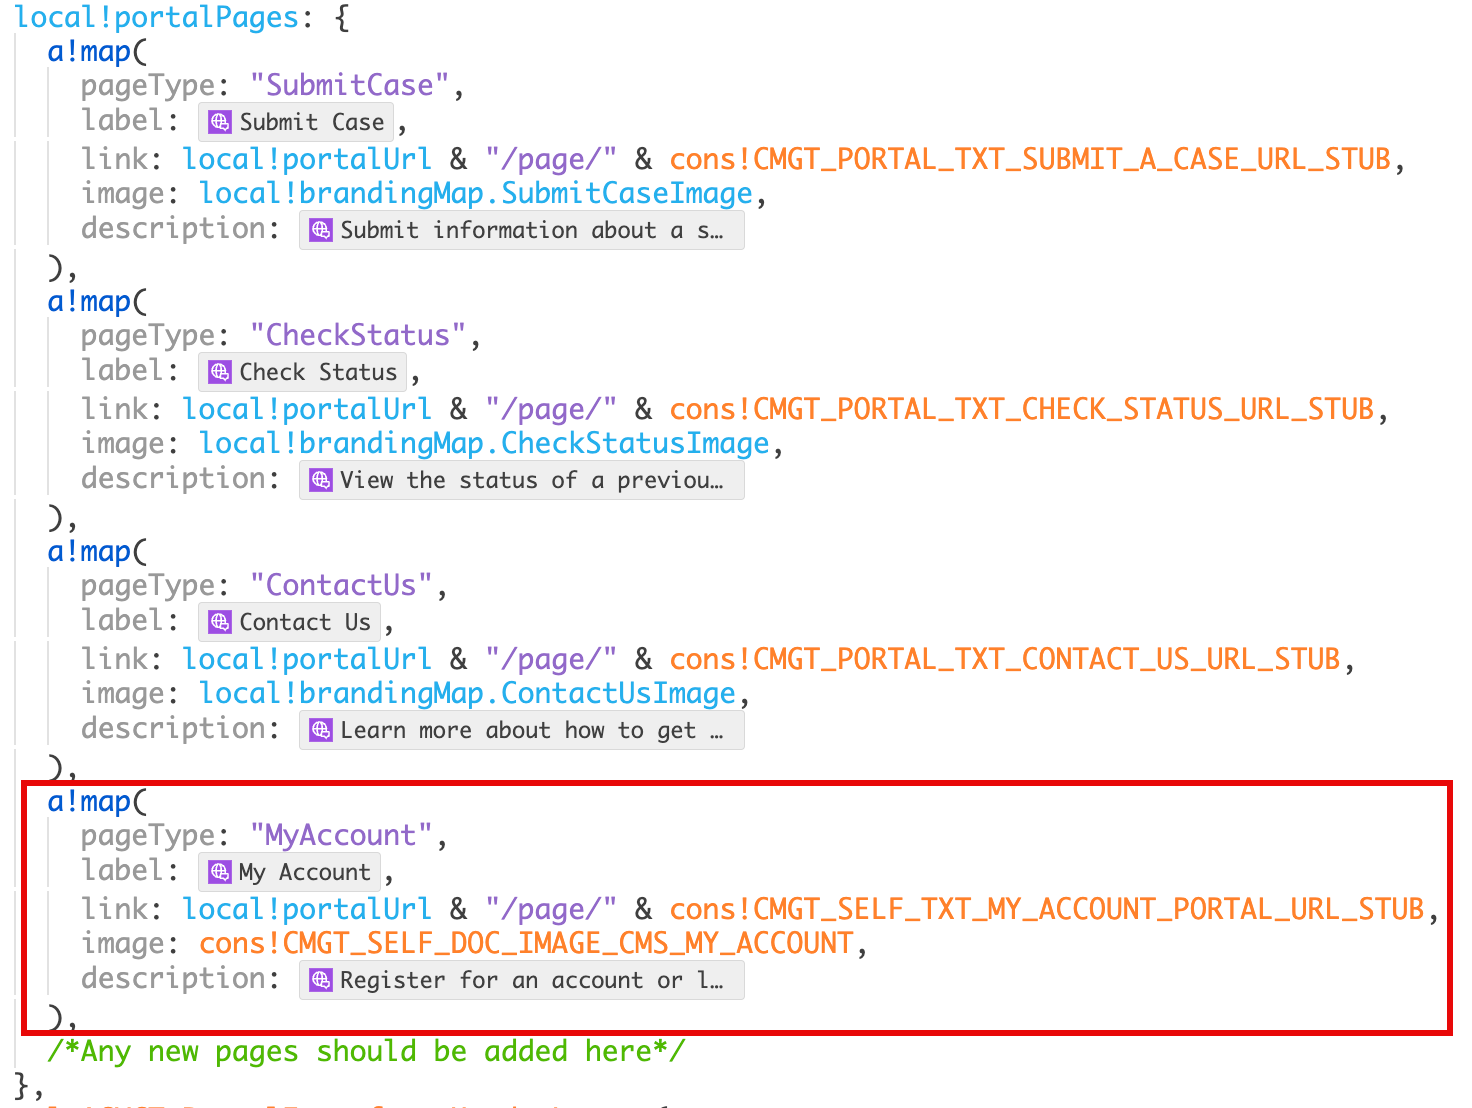
- Click SAVE CHANGES and close the interface.
Step 4: Add the Claim Case page to the My Cases siteCopy link to clipboard
Next, you must add the Claim Case site page the the My Cases site, so users can find their cases once logged in.
To add the Claim Case site page to the My Cases site:
- From Appian Designer > Applications, open the
CMGT Add On: My Cases Moduleapplication. - Search for and open the
CMGT_LA_CaseManagementSitesite object and click Add Page. - Enter the following details:
- Title:
Claim Case- Note: Use the translation string from
CMGT_SELF Translationstranslation set.
- Note: Use the translation string from
- Web Address Identifier: claim-case
- Icon:
file-o - Type:
Interface - Content:
CMGT_SELF_LA_SitePage_ClaimCase - Width:
Wide - Visibility:
Always show
- Title:
- Click DONE.
- Use the up arrow to move the new
Claim Casepage up so it is positioned after the Cases site page and before the Contact Us site page. - Click SAVE CHANGES and close.
Step 5: Link the My Cases home page to the Claim Case pageCopy link to clipboard
Follow the steps in this section to add a link from the My Cases home page to the Claim Case page, which provides another way for users to navigate from the My Cases home page to the Claim Case site page.
To add a link from the My Cases home page to the Claim Case page:
- From Appian Designer > Applications, open the
CMGT Add On: My Cases Moduleapplication. - Search for and open the
CMGT_LA_SitePages_HeaderLayoutinterface and click the Expression Editor view. -
Locate the
a!columnsLayoutthat contains the Create Case button, copy the following code block, and paste it as the second column as shown.1 2 3
rule!CMGT_SELF_LA_ClaimCaseDisplayLink( showActions: ri!showActions ),
Copy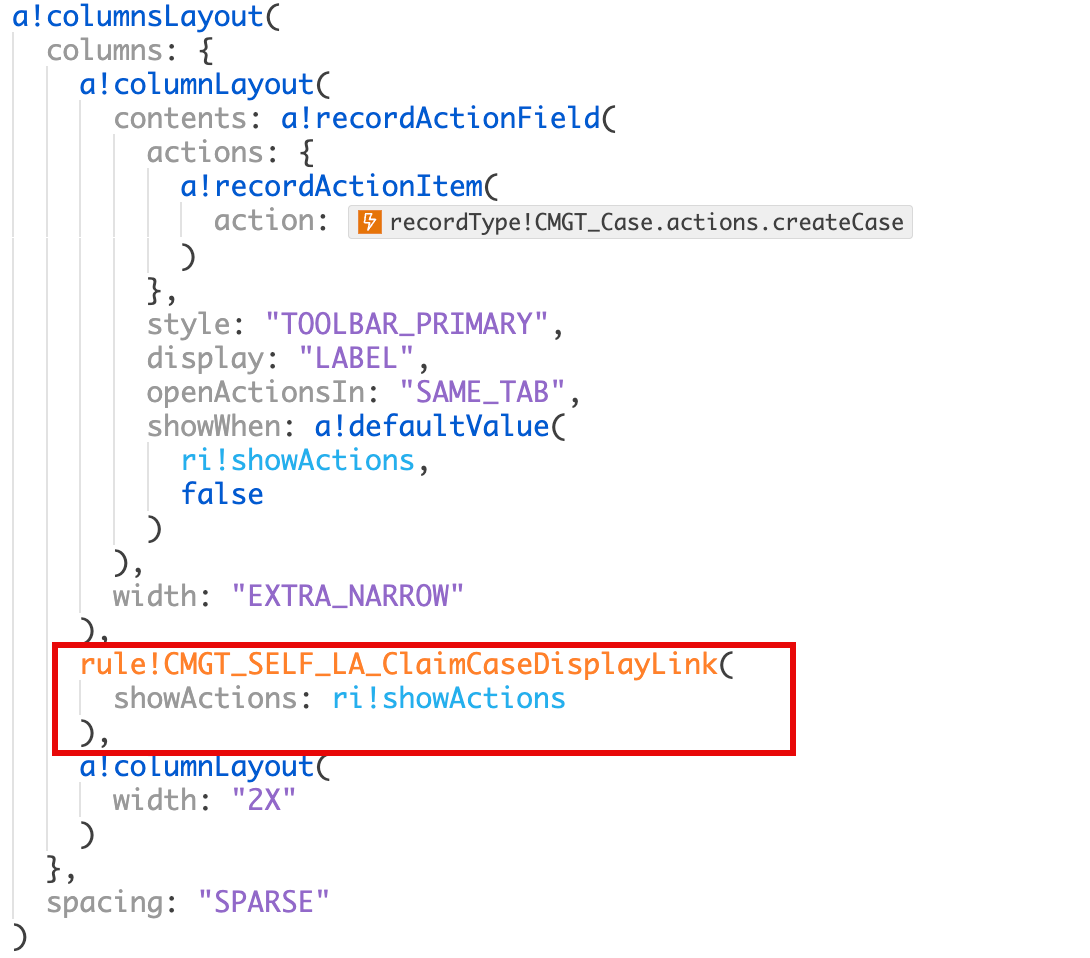
- Click SAVE CHANGES and close the interface.
Step 6: Add the Claimed By details in the case summaryCopy link to clipboard
Follow the steps in this section to add the Claimed By details to the Case Summary view.
To add the Claimed By details:
- From Appian Designer > Applications, open the
CMGT Case Management Studio Baseapplication. - Search for and open the
CMGT_Case_CaseSummaryinterface and click the Expression Editor view. -
Locate the
a!cardLayout, then copy and paste the following code block after the portal fields logic as shown.1 2 3 4
rule!CMGT_SELF_CaseSummary_ClaimedBy( brandingMap: ri!brandingMap, case: ri!case ),
Copy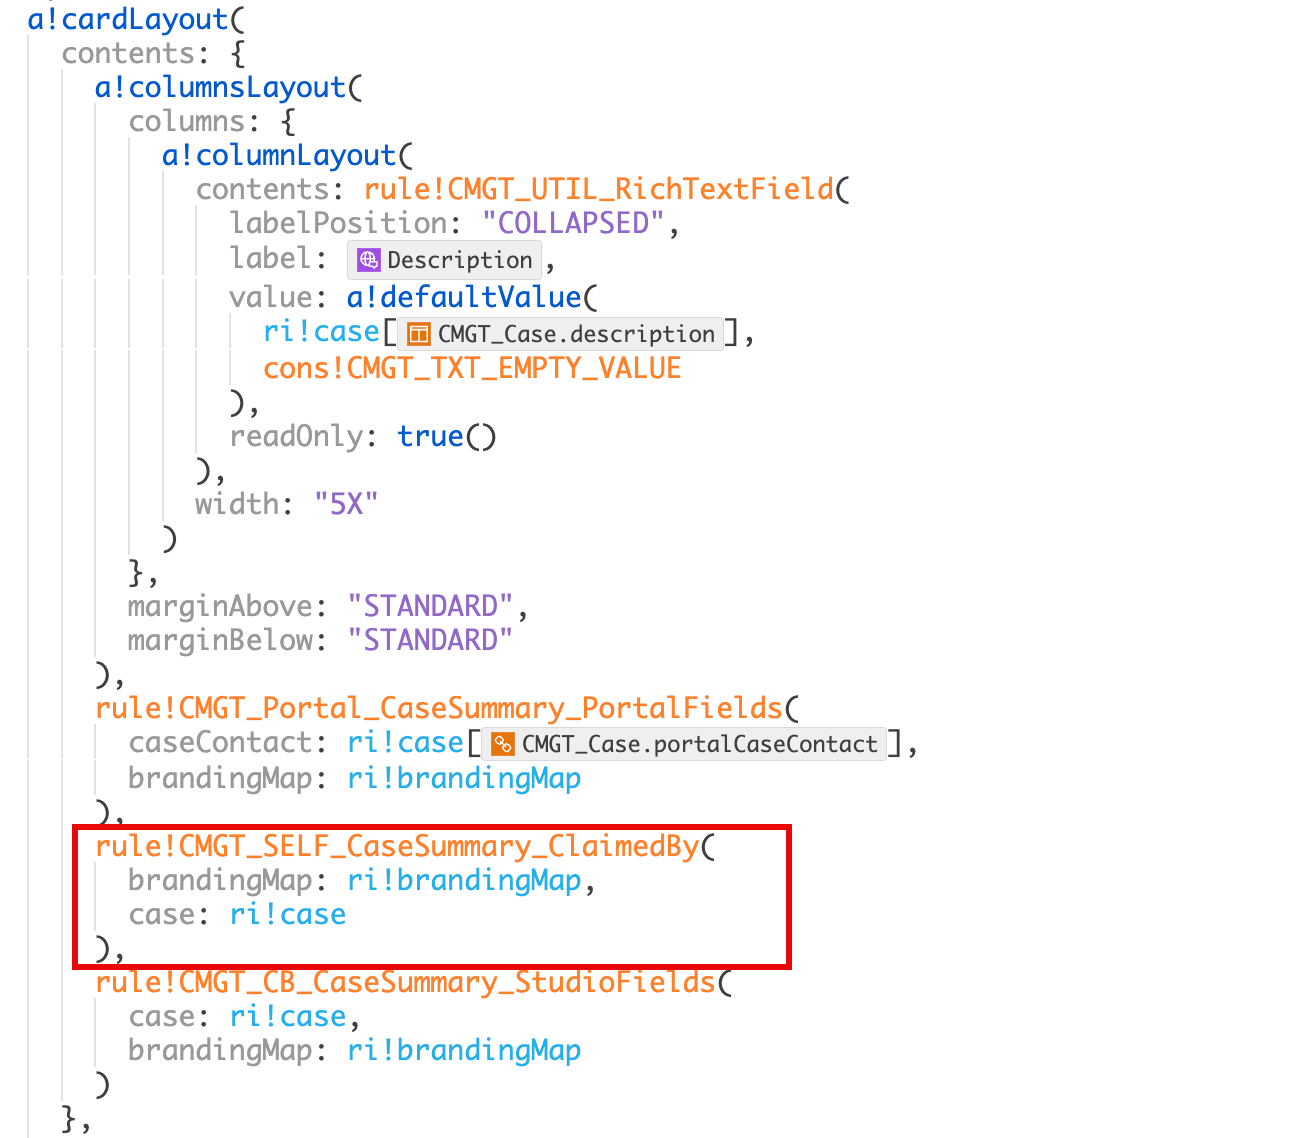
- Click SAVE CHANGES and close the interface.
Step 7: Capture the audit for claiming a caseCopy link to clipboard
Finally, you need to incorporate the logic that tracks an audit event when a case is claimed.
To add that logic:
- From Appian Designer > Applications, select the CMGT Case Management Studio Base application.
- Search for and open the
CMGT_Role_SetEventsexpression rule. - Add another condition to the
match()statement that returns a value based on theroleTypeId. See the image for where and how to add the condition.- Note: If the role being added is the claimant, this new logic returns the reference ID for the
Add Claimantevent type.
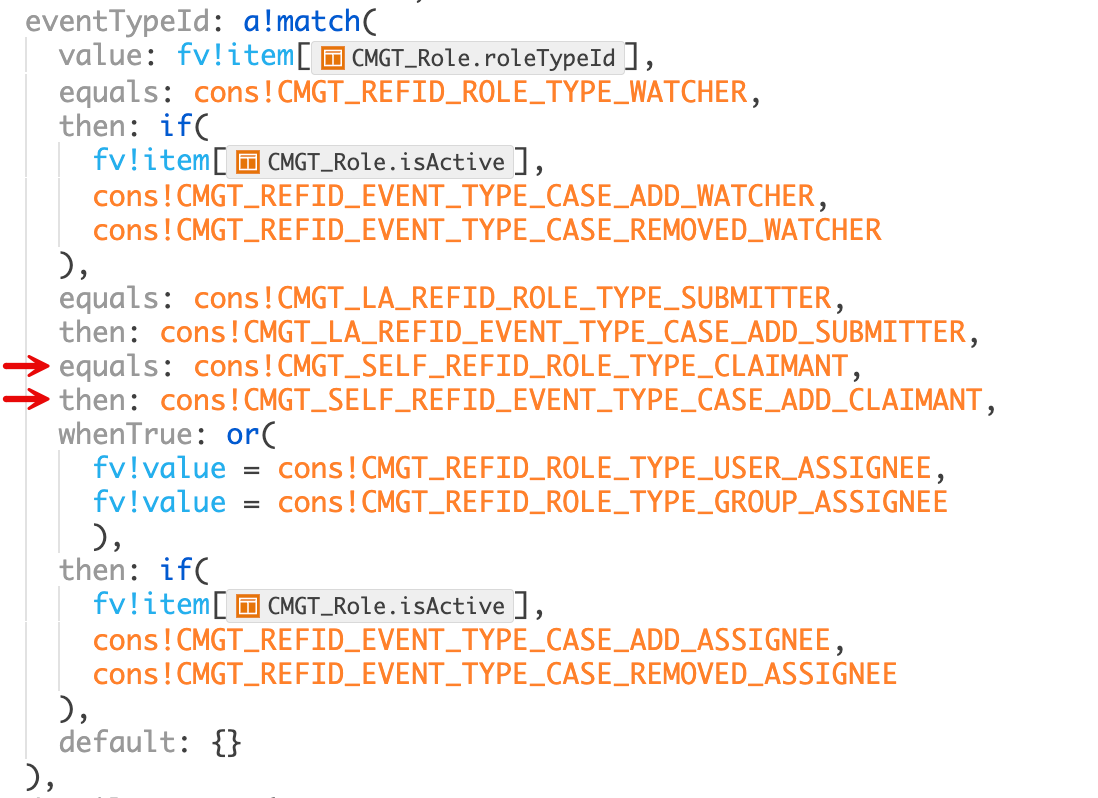
- Note: If the role being added is the claimant, this new logic returns the reference ID for the
- Click SAVE CHANGES.