
IntroductionCopy link to clipboard
After installing the Demo Data module, you need to set it up before using it with the Case Management Studio Base application. This guide walks you through the setup steps, including:
- Configuring the connected system.
- Enabling external deployments.
- Updating Case Management Studio group security.
- Updating Report Builder group security.
- Note: This step is only required if you are using Report Builder with your Case Management Studio Base application.
Step 1: Configure the connected systemCopy link to clipboard
First, you need to set up the connected system that backs the Demo Data module.
To set up the connected system:
- In the target environment, log in as an admin user.
- Navigate to the Admin Console > Web API Authentication.
- From the API Key tab, click CREATE.
-
In the Description field, enter
Demo Module Deployor another unique description for the API key.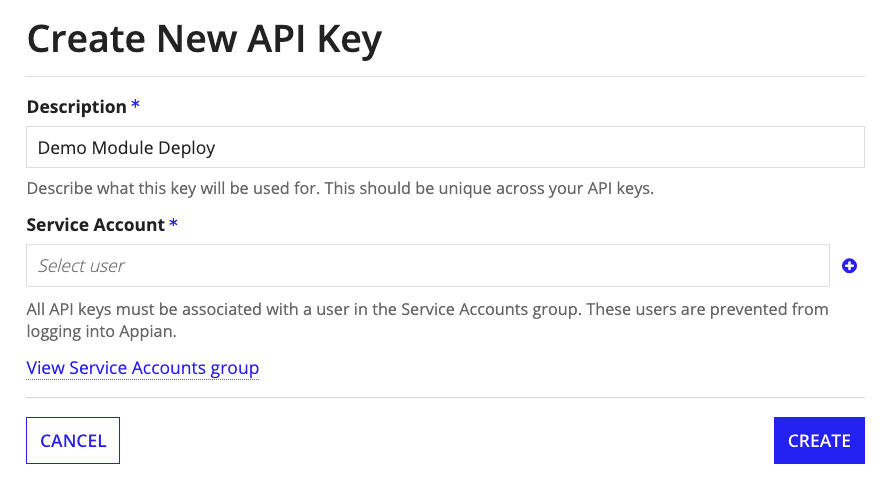
- Click the icon next to the Service Account field to create a new service account.
a. In the Username field, enter a unique username for the service account.
b. In the Groups field, enter the following groups to add them to the service account:
Service AccountsCMGT Service AccountsCMGT EXT Demo Data Administratorsc. Click CREATE to apply the new service account to the API key.
- Click CREATE to create the new API key, copy it, and save it to use in step xx.
- Go to Appian Designer > Applications and search for and open the CMGT Add-On - Demo Data Module application.
- In the Build view, search for and open the CMGT EXT Connected System object.
- Find and clear the Value field by clicking the Clear link.
- Paste the API key you saved in step 5 in the cleared Value field.
- In the Base URL field, update the URL to match the URL of the target environment you are in. Be sure to use the following URL format:
https://sample-url.com/suite/webapi/. - Click SAVE.
Step 2: Enable external deploymentsCopy link to clipboard
Next, you need to enable deployments in the target environment to deploy the demo data to the Case Management Studio Base application.
To enable external deployments:
- From the Admin Console, select Infrastructure under the DEVOPS section.
- In the External Deployments section, check Enable incoming and Enable Outgoing.
- In the Deployment Settings section, add the service account you created in Step 1 in the Deploy As field. a. If a service account does not exist, create one via the Deploy As field.
- Click SAVE CHANGES.
Step 3: Update the Case Management Studio group securityCopy link to clipboard
Follow the steps in this section to add the Demo Data users to the CMGT Internal Users group.
To update the group security:
- Navigate to Appian Designer and select the CMGT Case Management Studio Base application.
- Search for and open the CMGT Internal Users group.
- Click ADD MEMBERS.
- In the Groups to Add field, search for and select the following groups:
CMGT EXT Demo Data UsersCMGT EXT Demo Data Administrators
- Click ADD.
Step 4: Update the Report Builder group securityCopy link to clipboard
If you are using Report Builder with your Case Management Studio Base application, you will need to add the Demo Data users to the SEUR All Users group.
To update the group security:
- Navigate to Appian Designer and select the Report Builder application.
- Search for and open the SEUR All Users group. . Click ADD MEMBERS.
- In the Groups to Add field, search for and select the following groups:
CMGT EXT Demo Data UsersCMGT EXT Demo Data Administrators
- Click ADD.