| This content applies solely to Connected KYC, which must be purchased separately from the Appian base platform. This content was written for Appian 23.1 and may not reflect the interfaces or functionality of other Appian versions. |
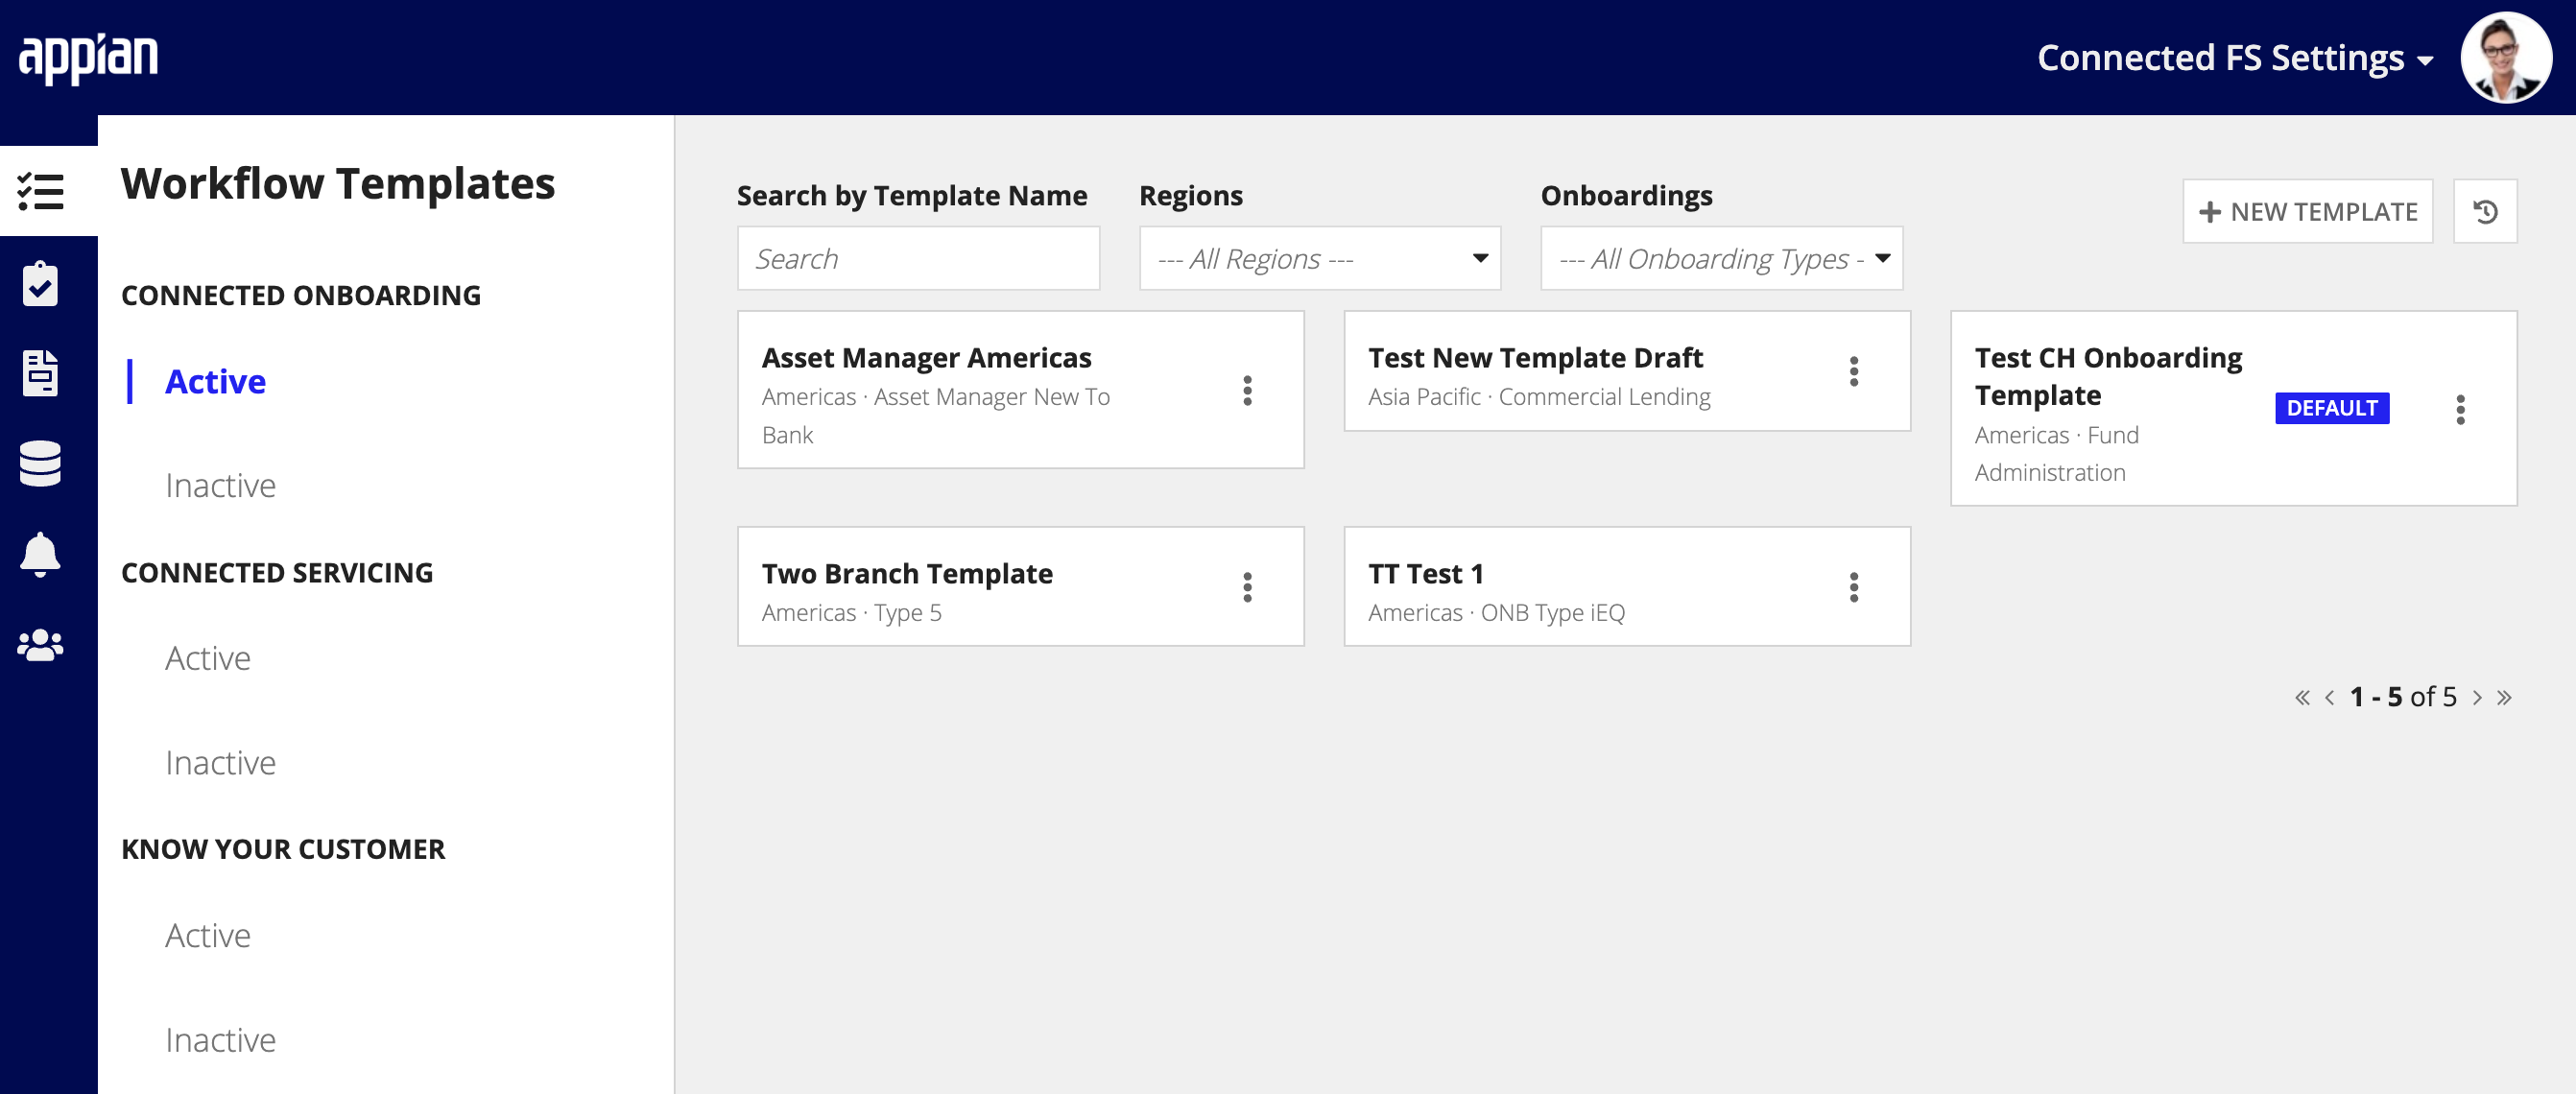
The Workflow section of the Connected FS Settings site allows business users to tailor the tasks required for each Investigation. This page describes how to manage workflow templates.
Business users can add and edit the workflow templates that assign default tasks for a type of Investigation.
For each Investigation process, users can set up individual workflow templates to tailor the process to each specific customer.
On the Connected FS Settings site, a grid lists all of the information that is pertinent to Investigation templates. Users can use this information to determine which templates already exist and when they were last updated.
To view the Investigation templates, navigate to the Connected FS Settings site and click WORKFLOW.
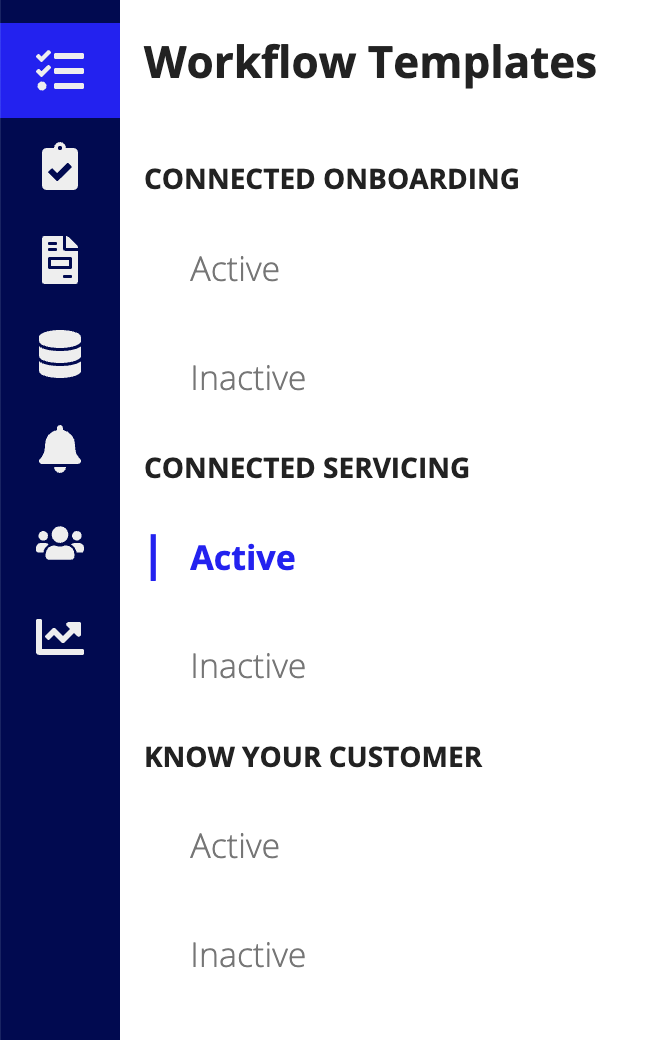
From here, you have the option to view either Active or Inactive templates. Active templates are ones that are able to be used during runtime processes. Inactive templates are ones that cannot be accessed during a runtime process, but can be edited or activated.
You can search or filter this list for a particular template. Clicking the history icon ![]() will take you to the Template History for that template with a list of all the changes that have been made to it.
To view a template as read only, click the menu icon and select View.
will take you to the Template History for that template with a list of all the changes that have been made to it.
To view a template as read only, click the menu icon and select View.
After installing the Connected KYC application, new Investigation templates that fit your organization's processes will need to be added.
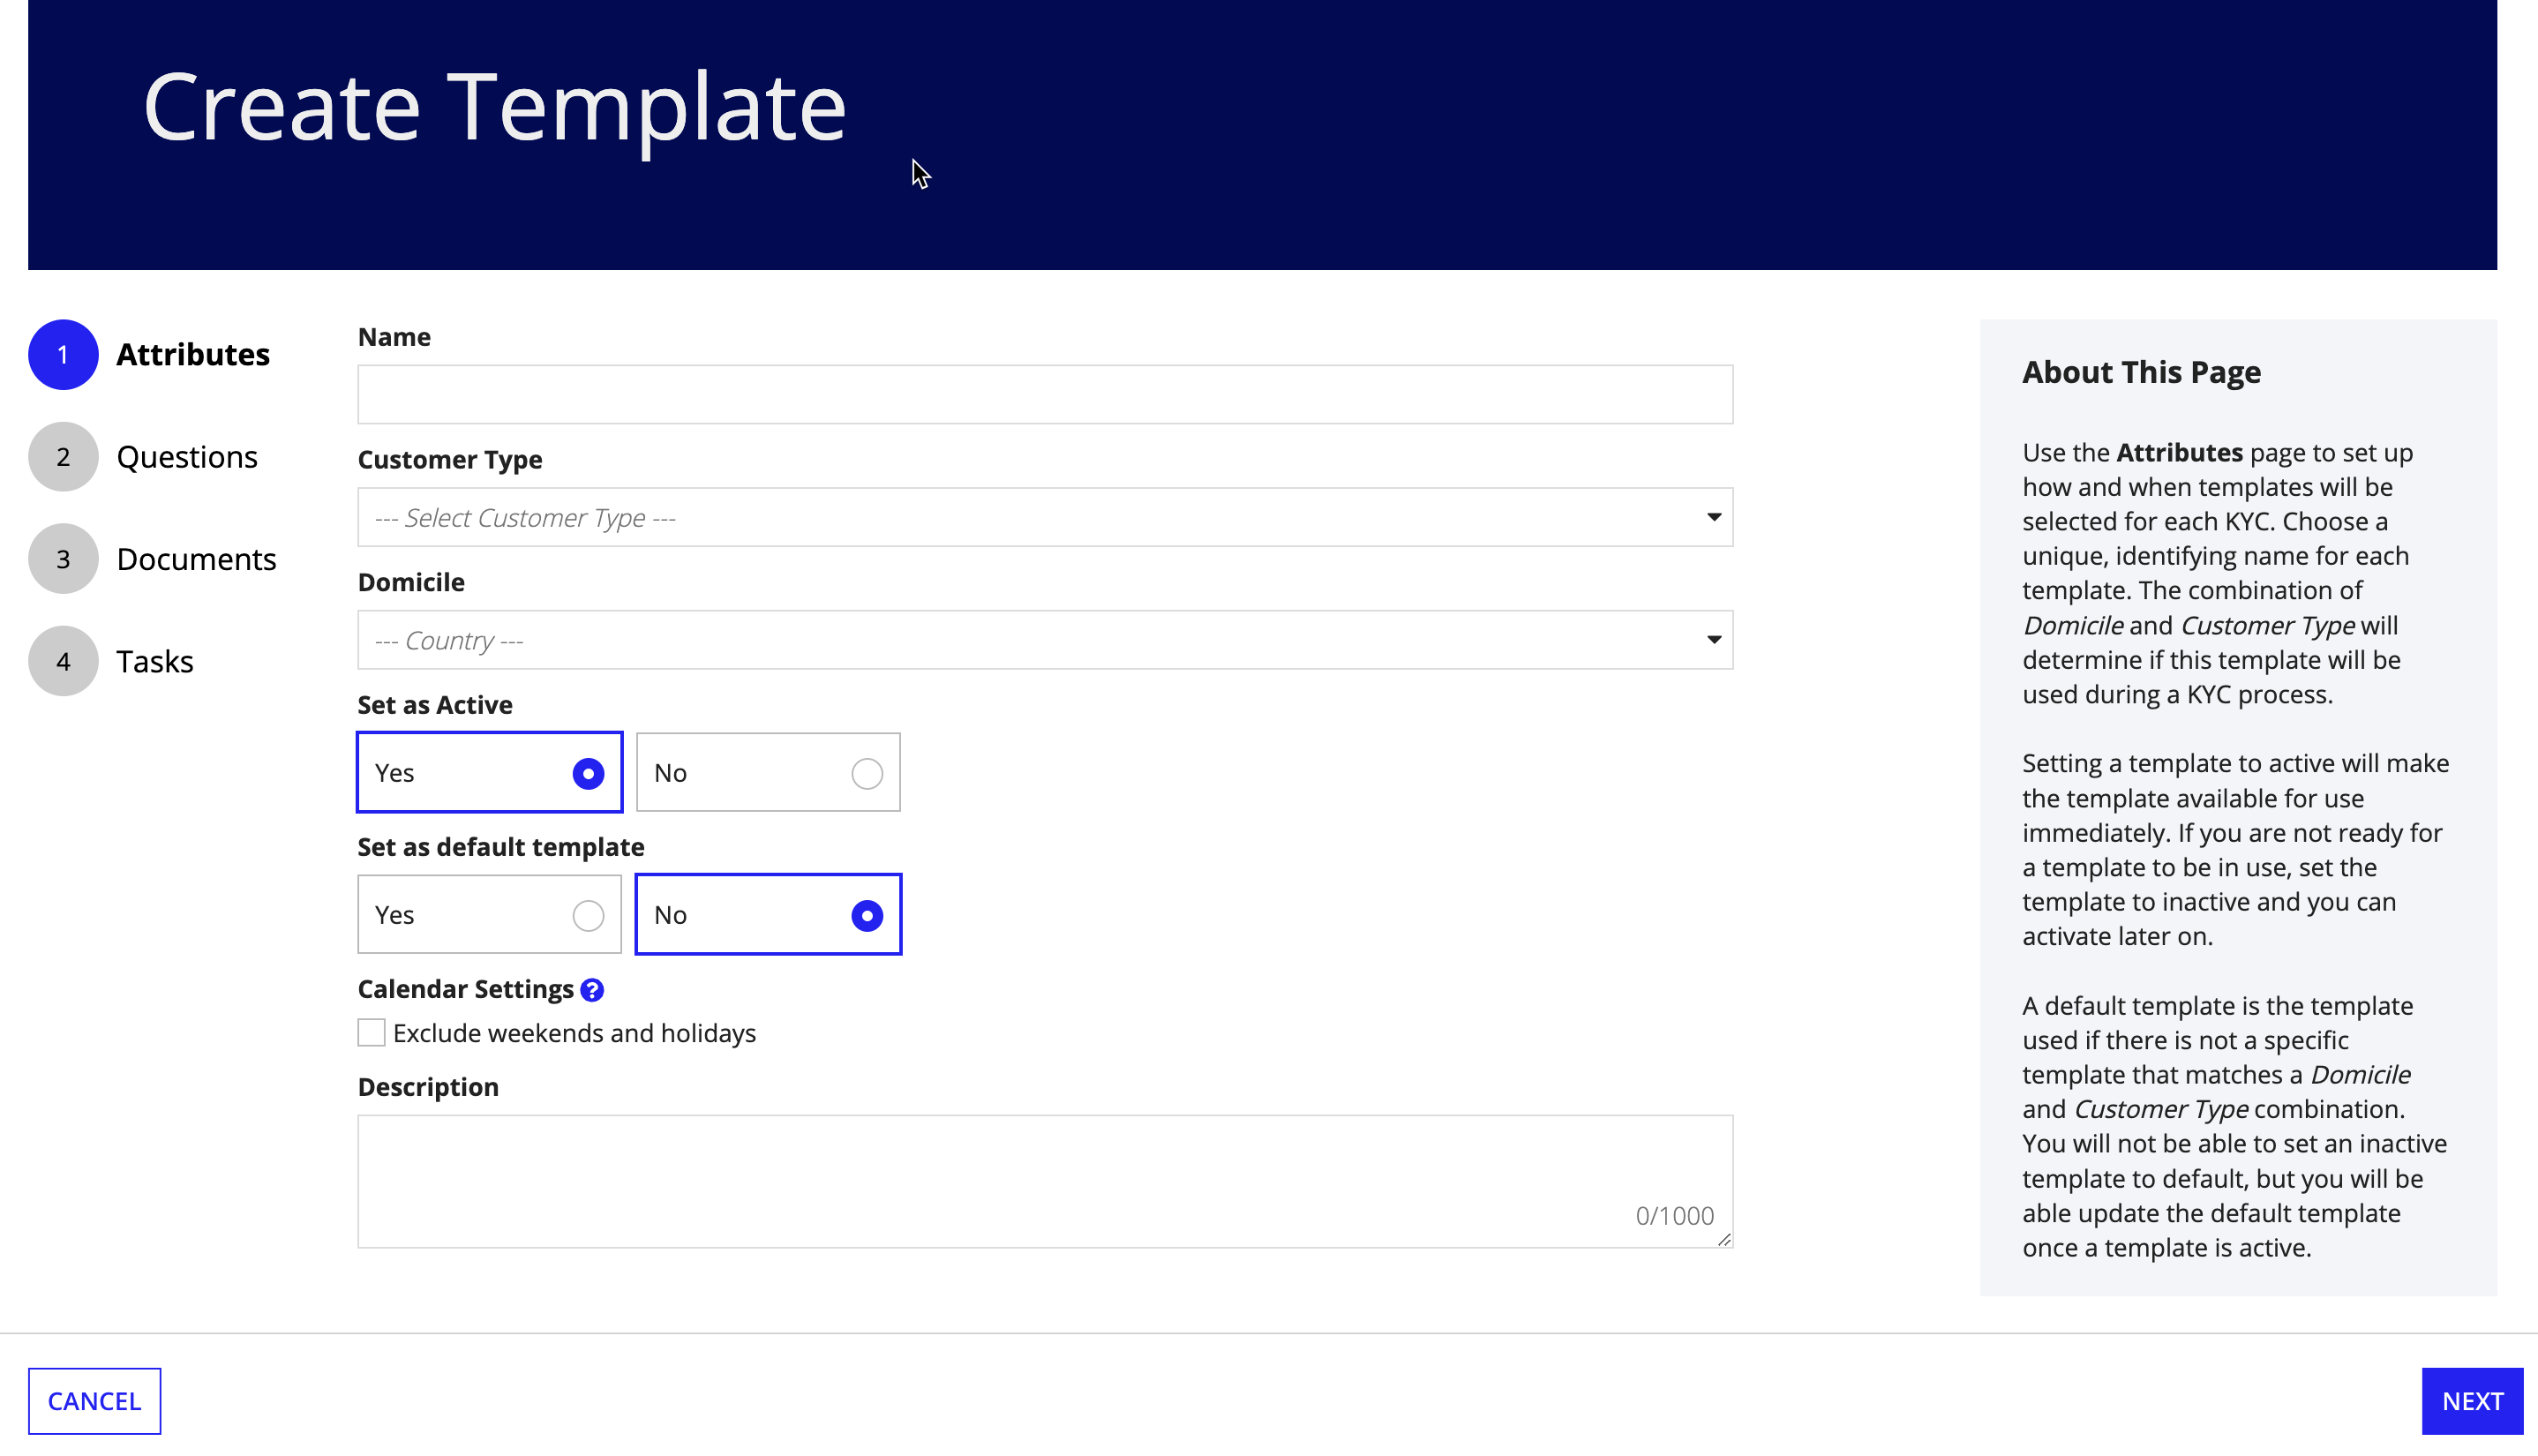
To create a new Investigation template:
From the Templates page, click NEW TEMPLATE.
Click SUBMIT.
On the questions step of the workflow process, business users set up the screening questionnaire that will be created when the KYC process is kicked off. Questions can be added either individually or by using a pre-built rule.
Rules and questions can be grouped into categories. Categories are the grouping name that the end user will see when filling out the questionnaire because the rule name will not be shown.
To add questions or rules to the questionnaire:

For dropdown and radio button questions, users are able to control Response Risk Scores for the individual template instead of using the default Response Risk Score set during question creation.
To update a question's response risk scores, click the icon.
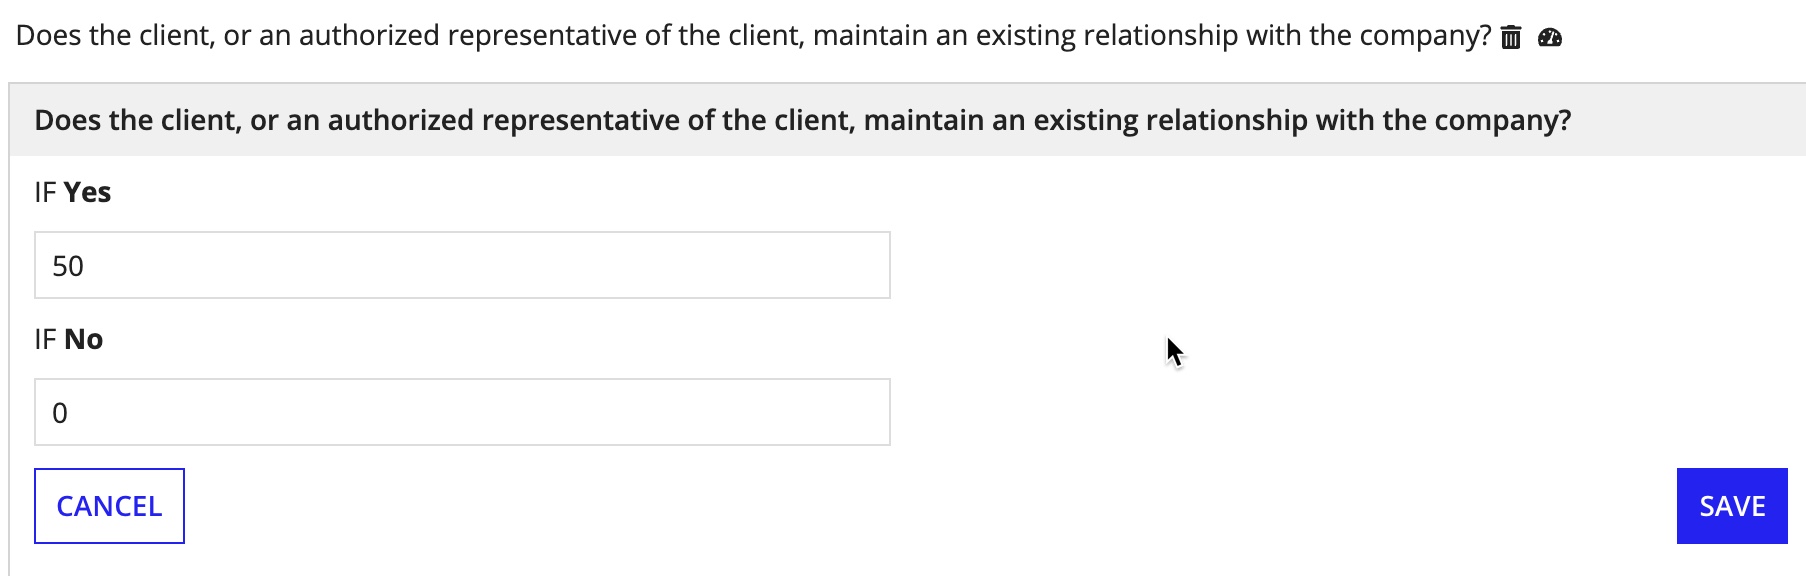
A customer’s overall risk score is calculated by summing all response risk scores for every selected response in a questionnaire.
On the document step of the workflow process, document requirements can be added. Each time the template is selected those specific documents will be required to be added during the Investigation process.
To add document requirements:
On the tasks step of the workflow configuration process, users can add and relate tasks that need to be completed. Some tasks will already be present on this page. If required documents were defined in the documents step, an attach and review document task will be added for each required document.
For the KYC process, a questionnaire, KYC decision, and KYC peer review task will also be added to the template and cannot be removed.
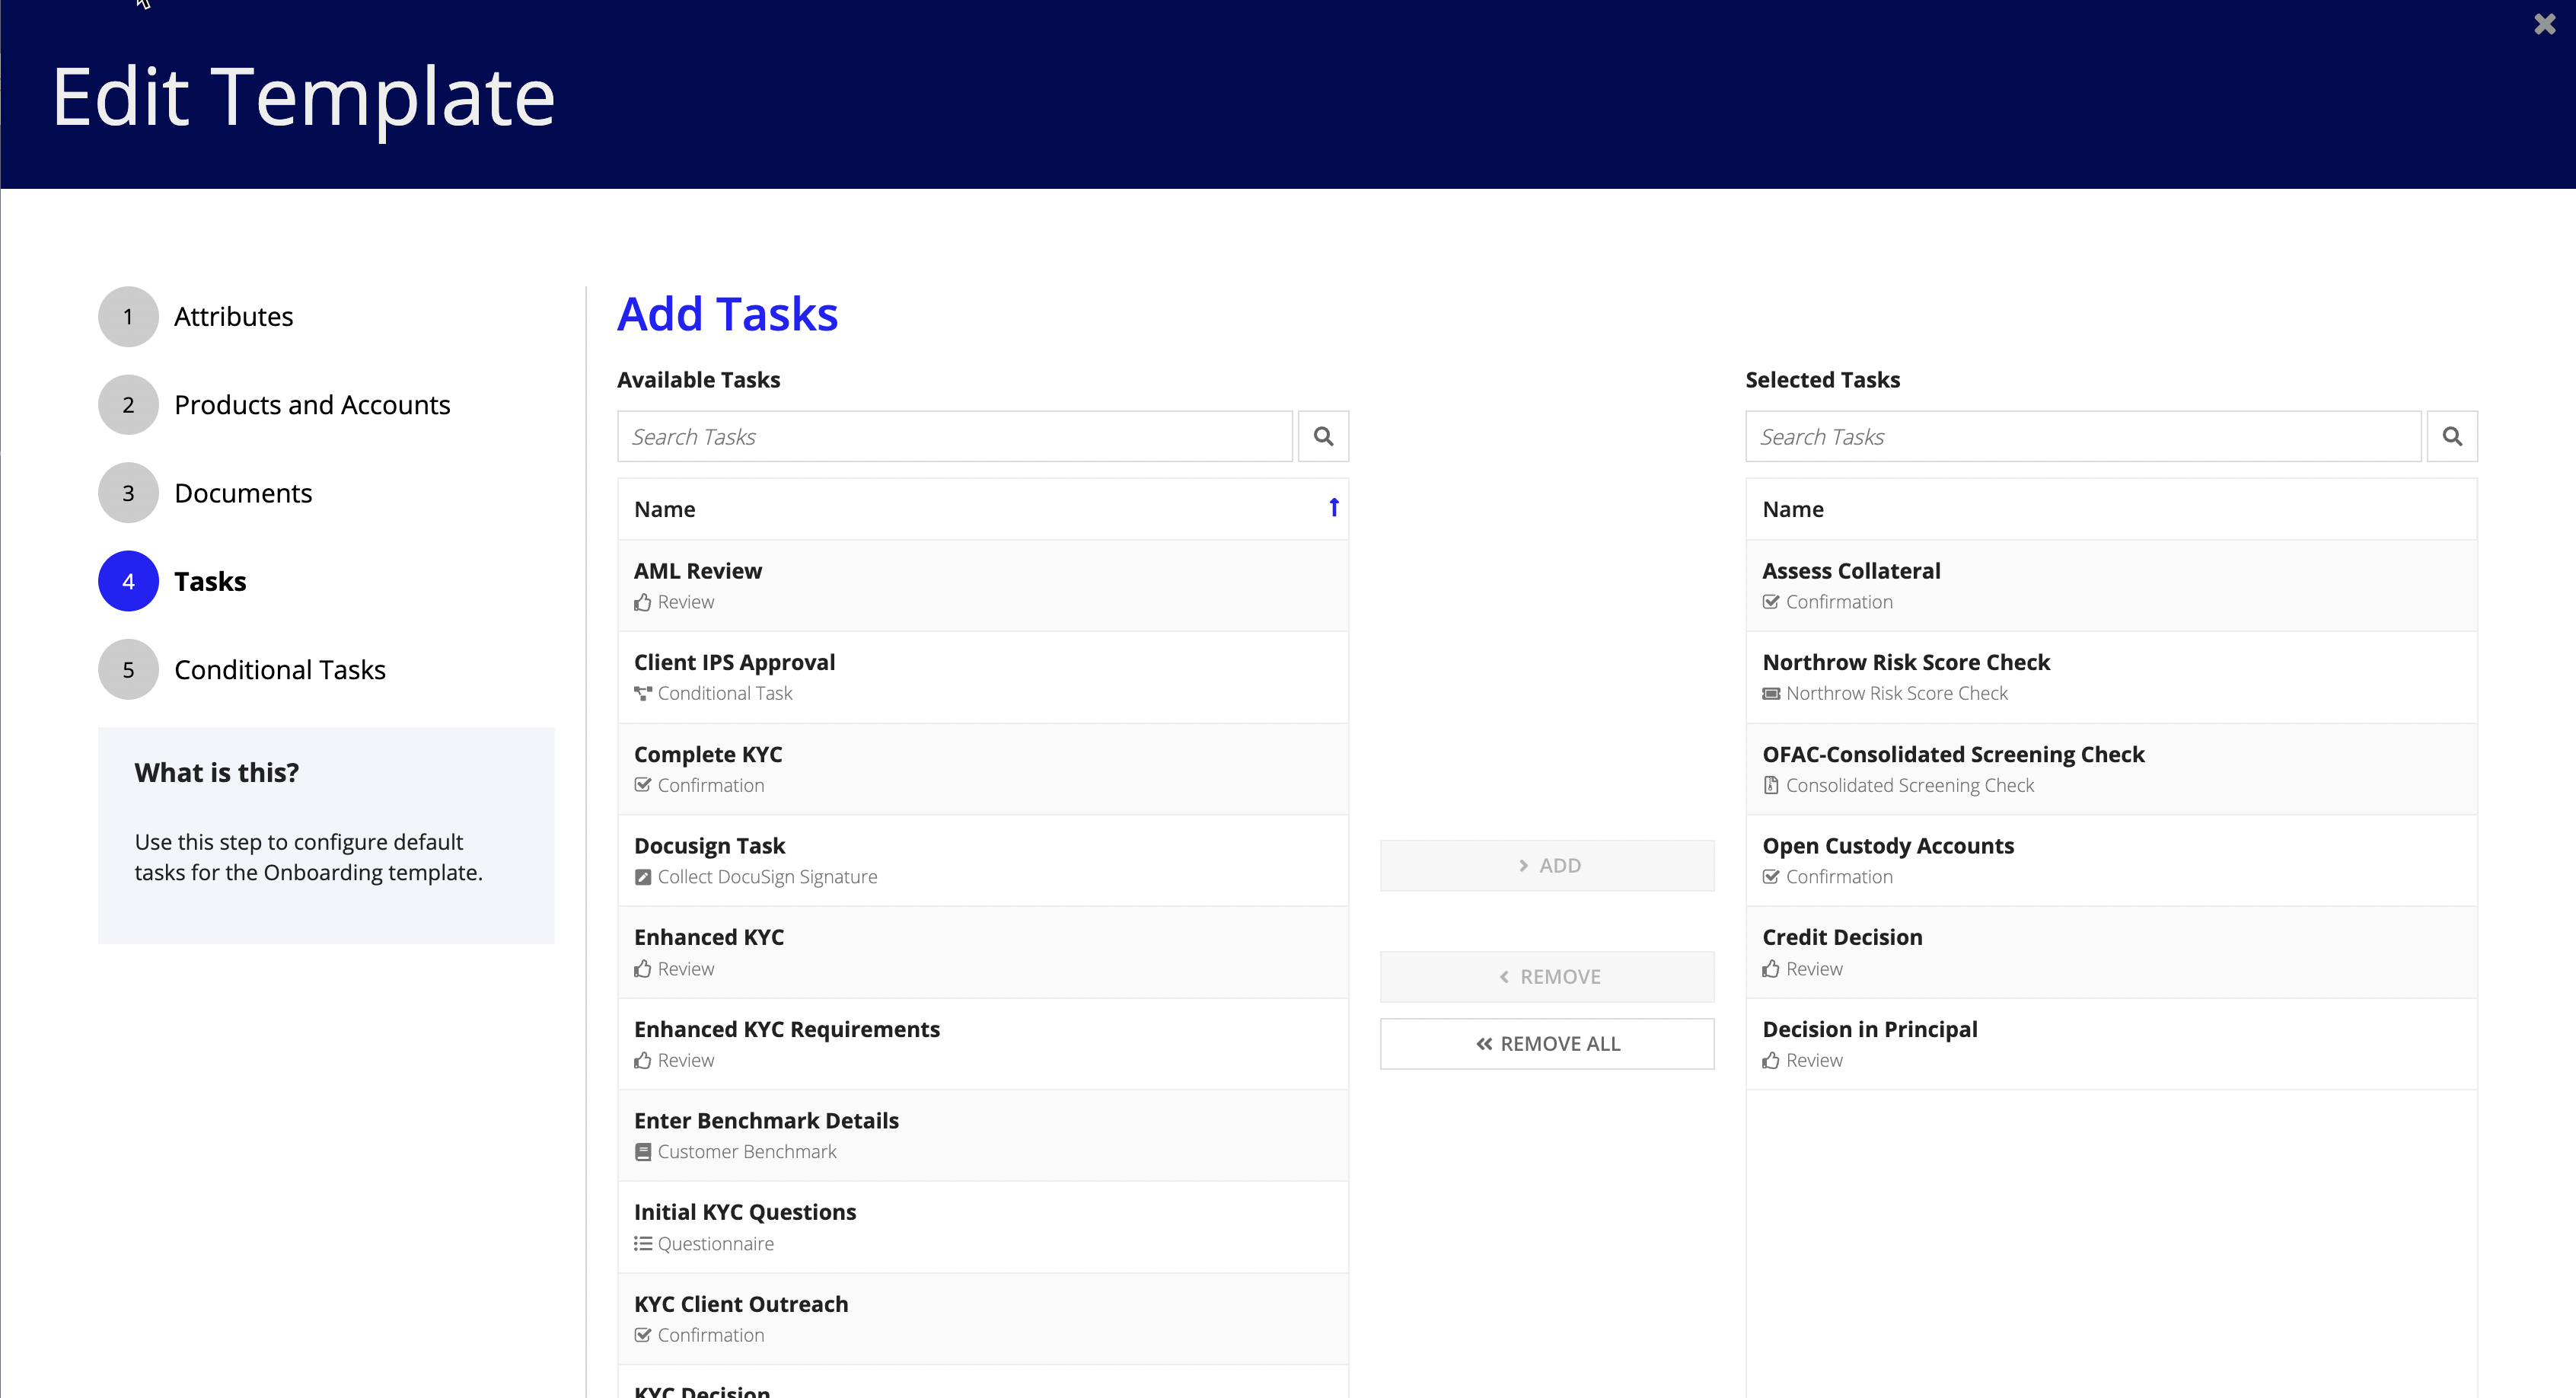
To add additional tasks:
After the tasks are all added, business users can then define the specific task configurations including:
Assigned group: The business unit responsible for completing the task.
Tasks added manually can also be removed from the templates. All tasks are able to be reordered using the up and down arrows before the task name in the grid.
When you finish creating the template, click SUBMIT to save it.
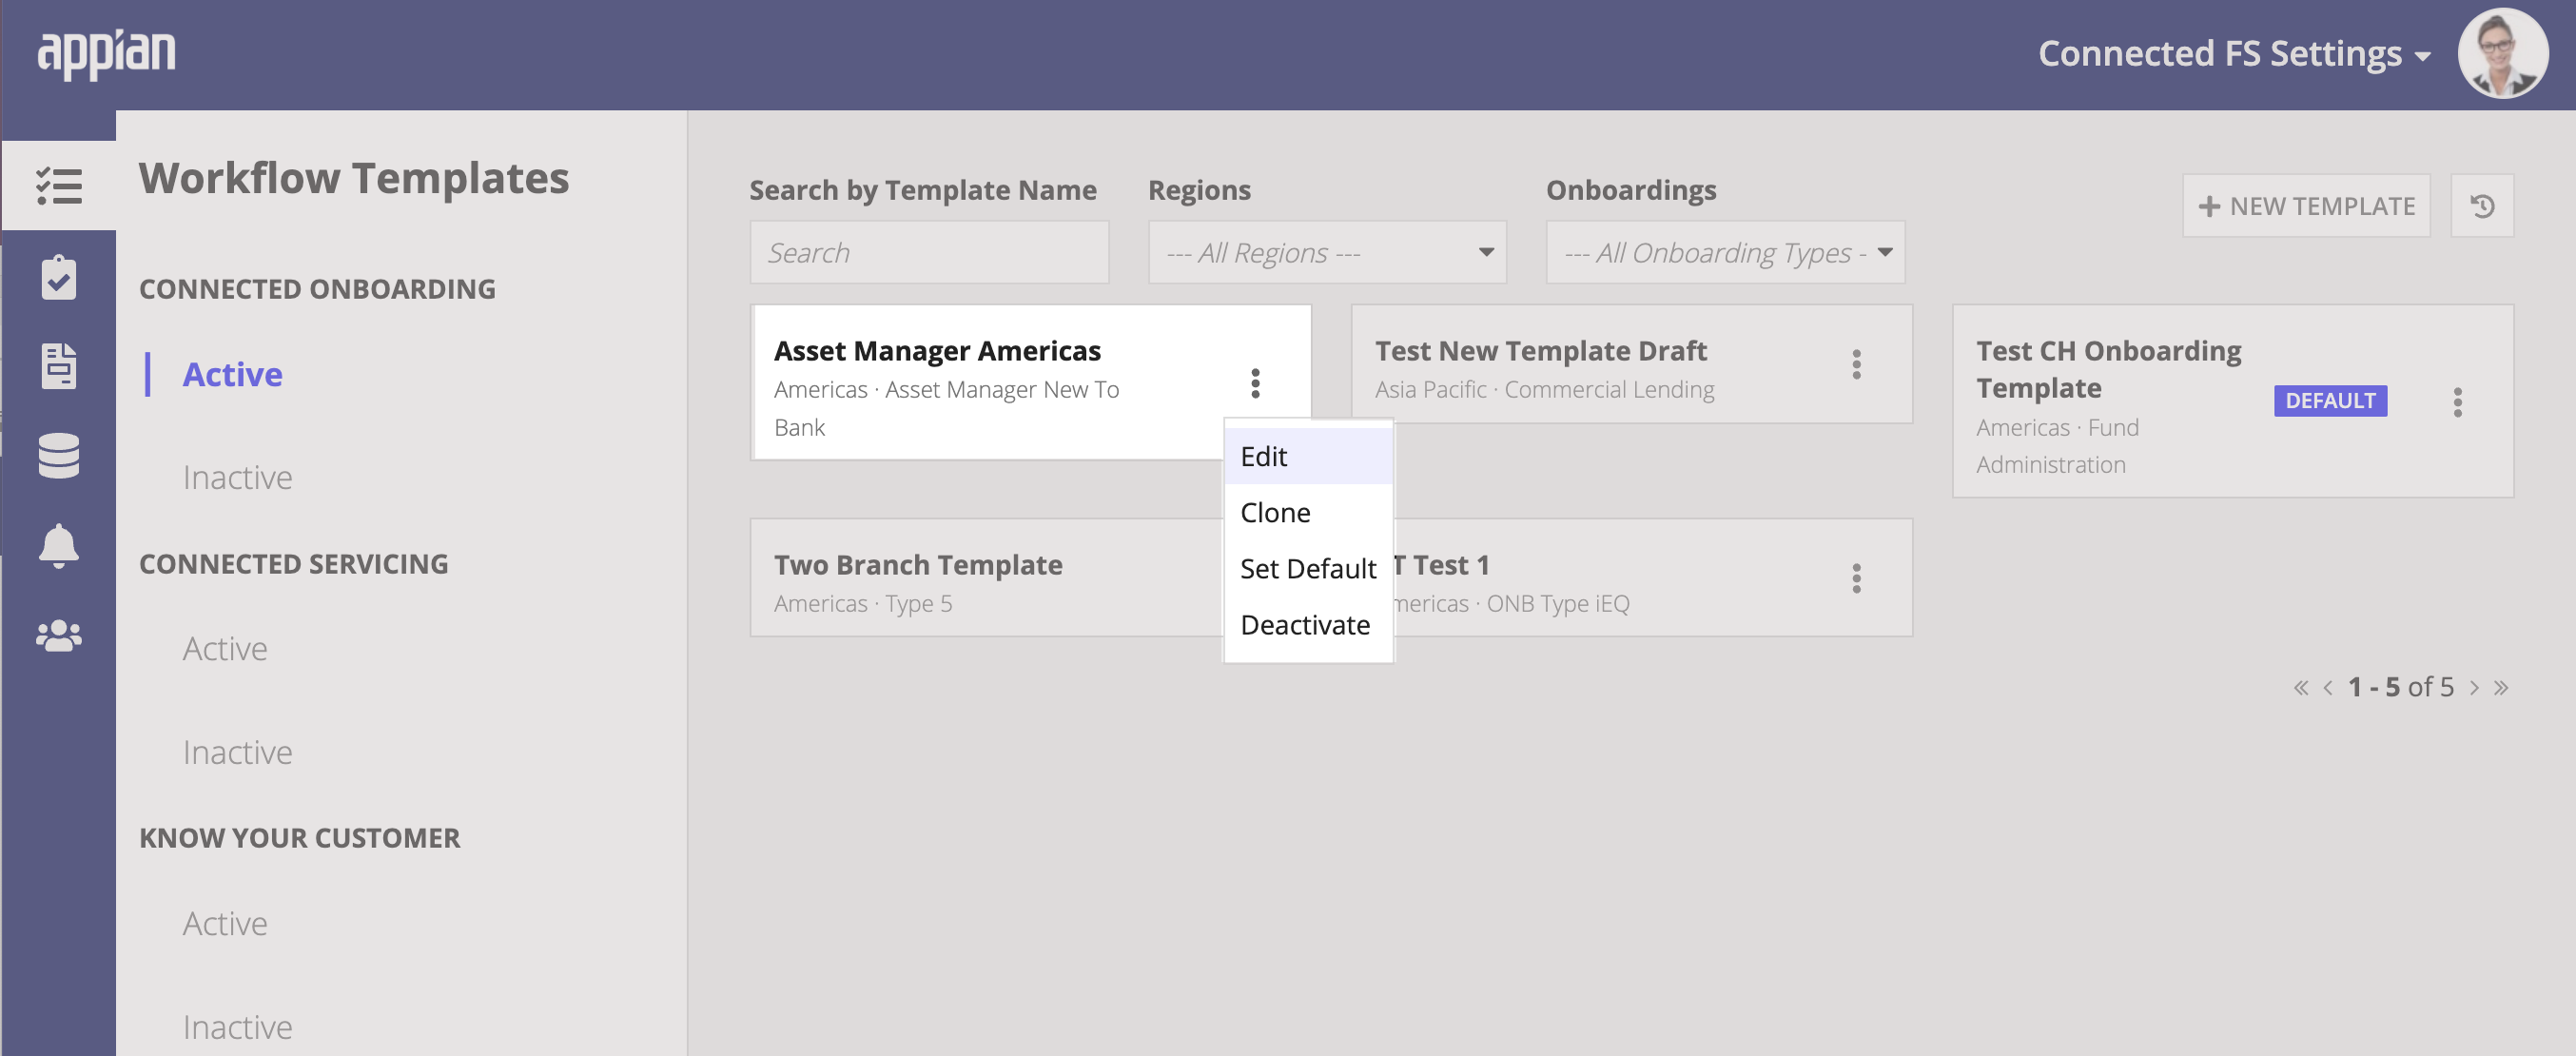
Business users can manage Investigation templates from the Connected FS Settings site, this includes updating, cloning, activating or deactivating, and deleting an existing Investigation template.
With the Connected FS Settings site, business users can easily and quickly update Investigation templates with any changes.
To update a workflow template:
Note: When updating an existing template, you are required to go through each step of the process in order to save your updates.
All future Investigations will use the modified template. Any Investigations that are already in process or completed will not be affected.
When a new template is needed and is very similar to an existing template it may be easier to simply clone the existing template and make the minor changes.
To clone a template:
The default template is the template that is used for the Investigation if there is not a distinct template for the selected customer's type and domicile. There can only be one default template, which cannot be deactivated.
You can select the default template by clicking the menu icon and selecting Set Default. The old default template will then be replaced by the current one.
If an active template is no longer needed or is needed in the future but is not ready to go live, business users can deactivate templates. A template can be set as inactive when creating, editing, or cloning an existing template by selecting No under Set as Active.
Templates can be deactivated from the Active template page by selecting the menu icon on a template and selecting Deactivate. Inactive templates are unavailable when creating new Investigation.
If an inactive template is ready to be used, business users can activate templates so that they are available for use when creating new Investigations. Templates can be activated when creating, editing, or cloning an existing template by selecting Yes under Set as Active.
Templates can be activated from the Inactive template page by selecting the menu icon on a template and selecting Activate. Active templates can be selected when creating new Investigations.
If an inactive template is no longer needed, it can be permanently deleted. From the menu icon, select Delete. Confirm that this template is the correct one to be deleted, as the action will not be able to be reversed.
Configure Workflows
