| This content applies solely to Connected KYC, which must be purchased separately from the Appian base platform. This content was written for Appian 23.1 and may not reflect the interfaces or functionality of other Appian versions. |
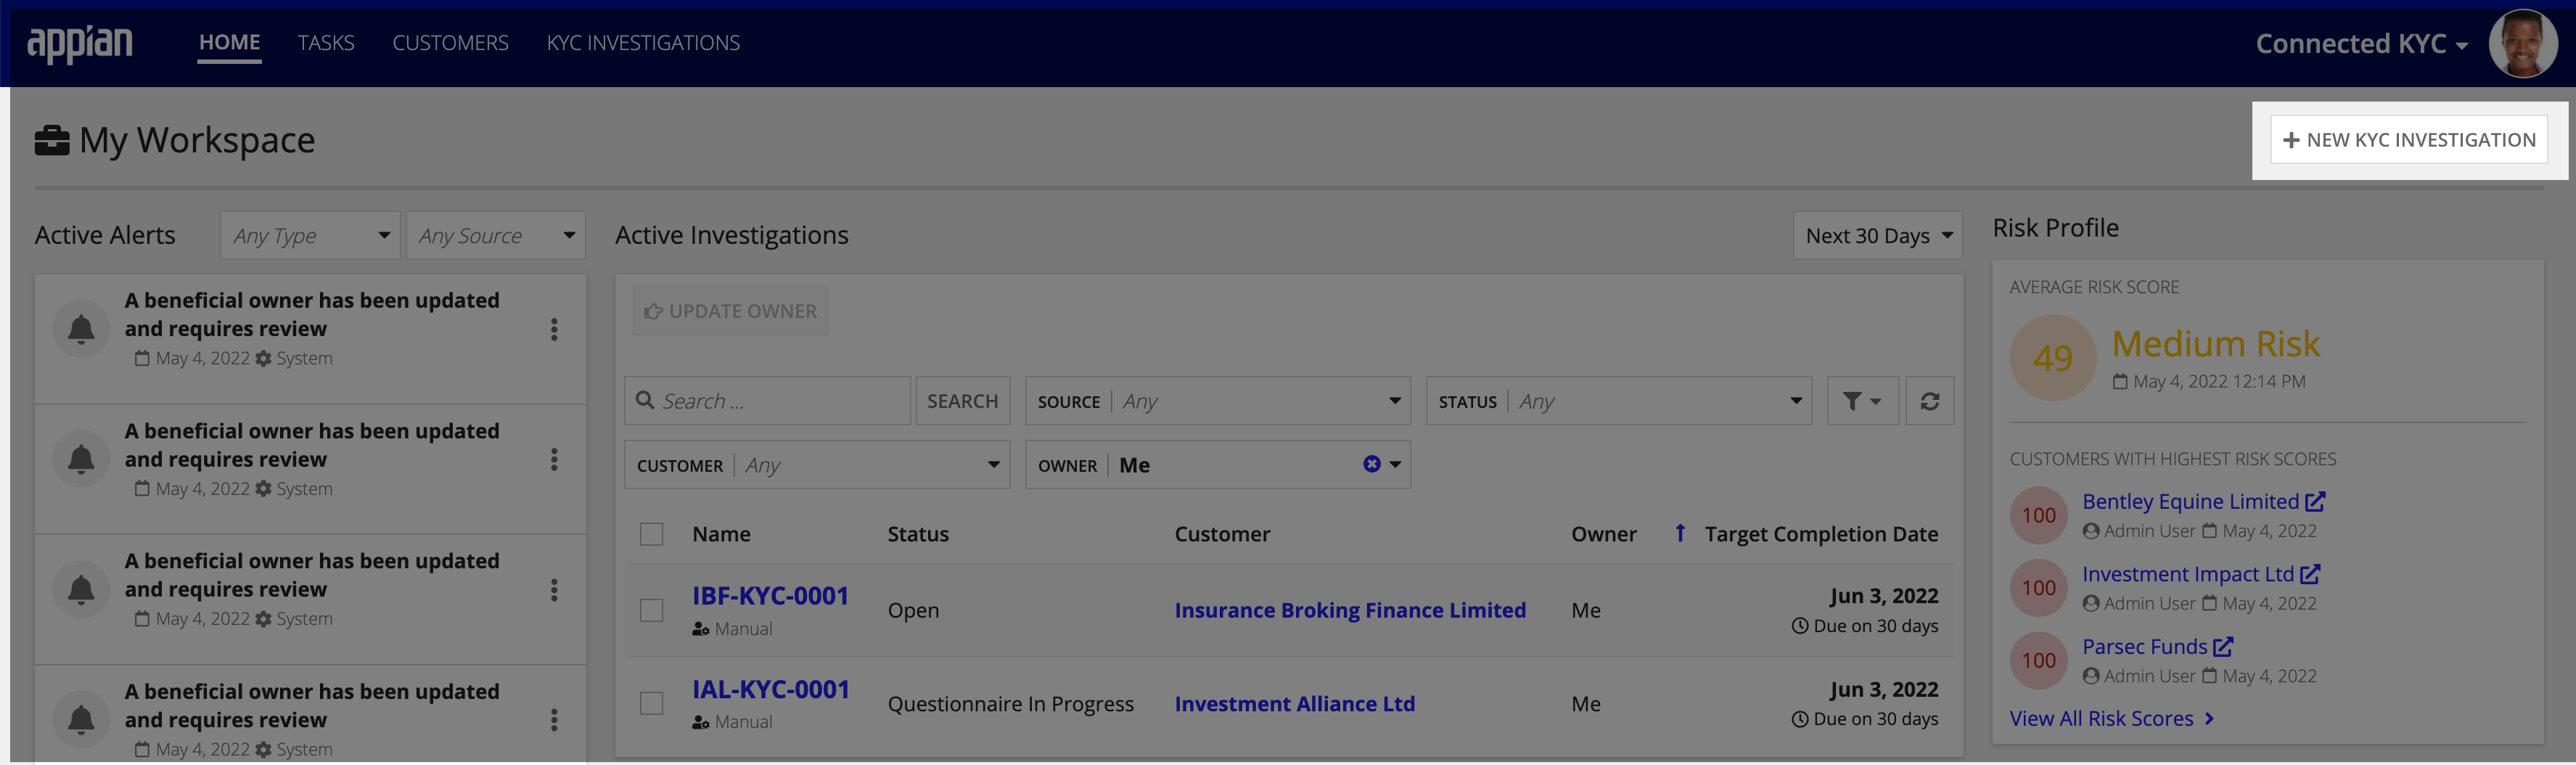
Know Your Customer (KYC) is a verification process completed at financial institutions in order to protect the bank and, in some cases, the customer from risk associated with the business relationships. This involves collecting and maintaining investigation information about the customer. The Connected KYC solution provides a guided experience for collecting this information. Enabled by Appian's powerful records, after a customer is created, end users can view and update this information from simple, informative record interfaces.
This page provides instructions for creating a new investigation.
In Connected KYC, the KYC investigation goes through many stages. Each step of the KYC process has a unique status and distinct actions that can be performed.
The different KYC investigation statuses are:
You can manually open a new KYC investigation or configure Connected KYC to automatically open a new investigation when an alert is triggered.
A KYC investigation can be created manually by clicking NEW KYC INVESTIGATION on the home page or the customer record. The Create KYC Investigation dialog opens and guides the KYC user through the process of entering the information needed to start the investigation process. The information entered here will populate the KYC Investigations records.
Creating a new investigation request manually consists of the following guided steps:
A KYC investigation that is opened automatically will create a task for the KYC group assigned to it to confirm the KYC investigation by entering the investigation details. Users in the assigned group have the ability to cancel or confirm the investigation. If a user decides the KYC investigation is unnecessary, the system requires the user to enter a cancellation reason. When an alert automatically creates a new KYC investigation, a user will also have the option to dismiss the alert and cancel the investigation.
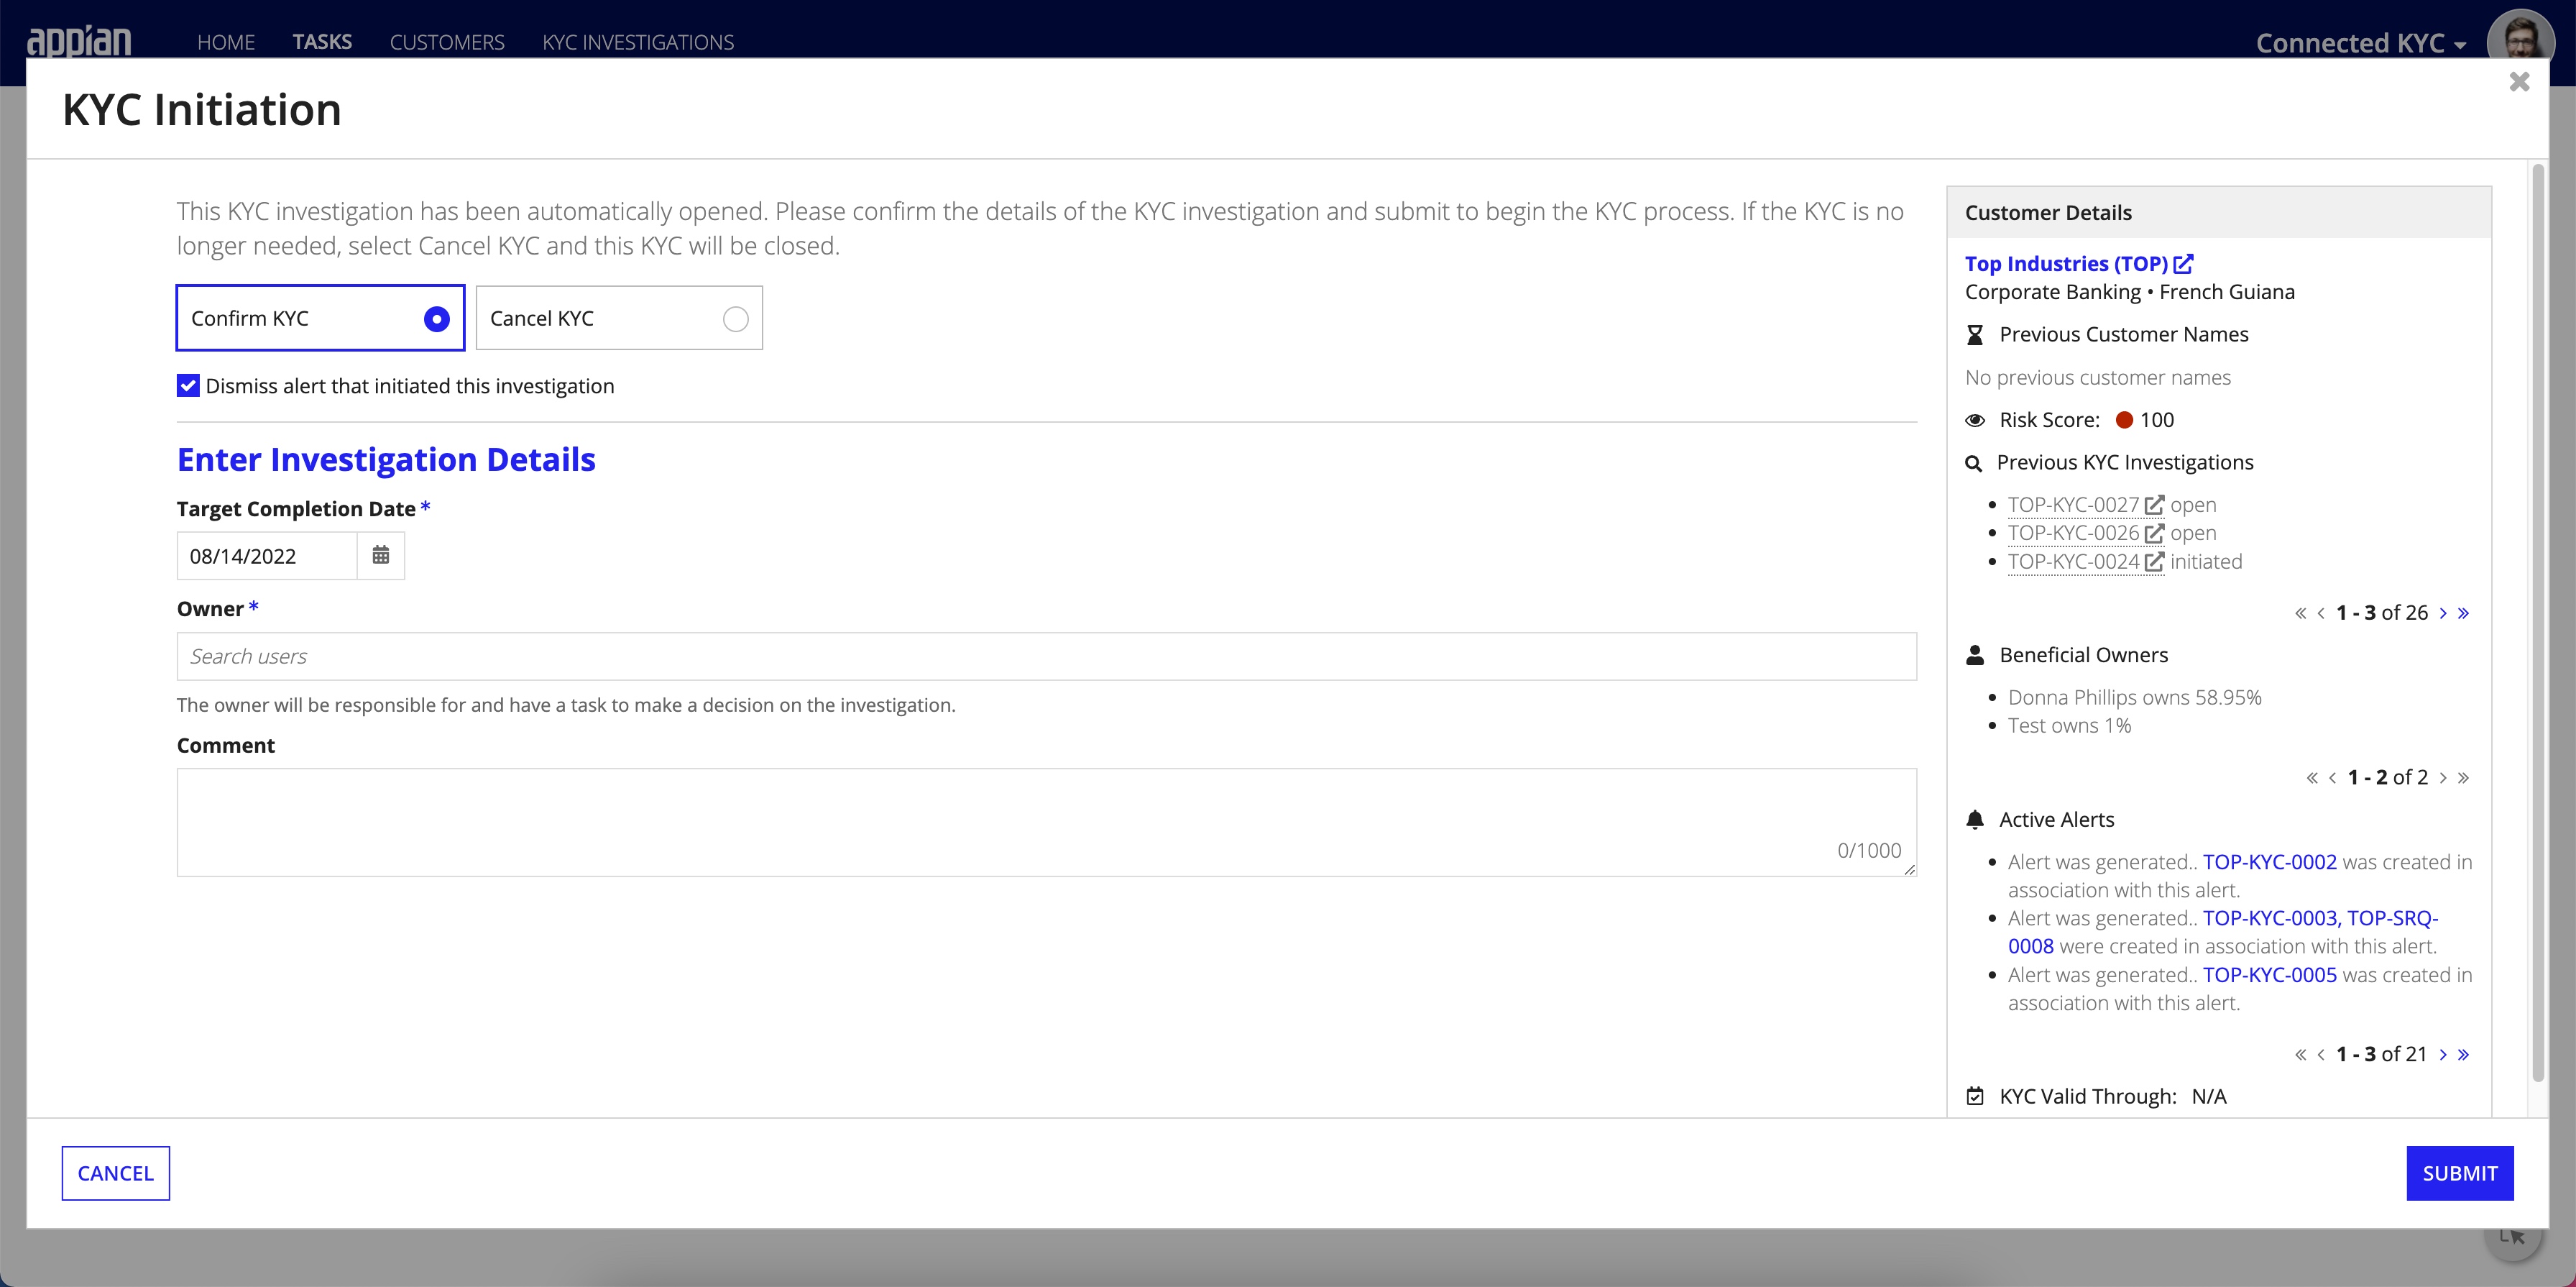
Beginning a new investigation request that was opened automatically consists of the following guided steps:
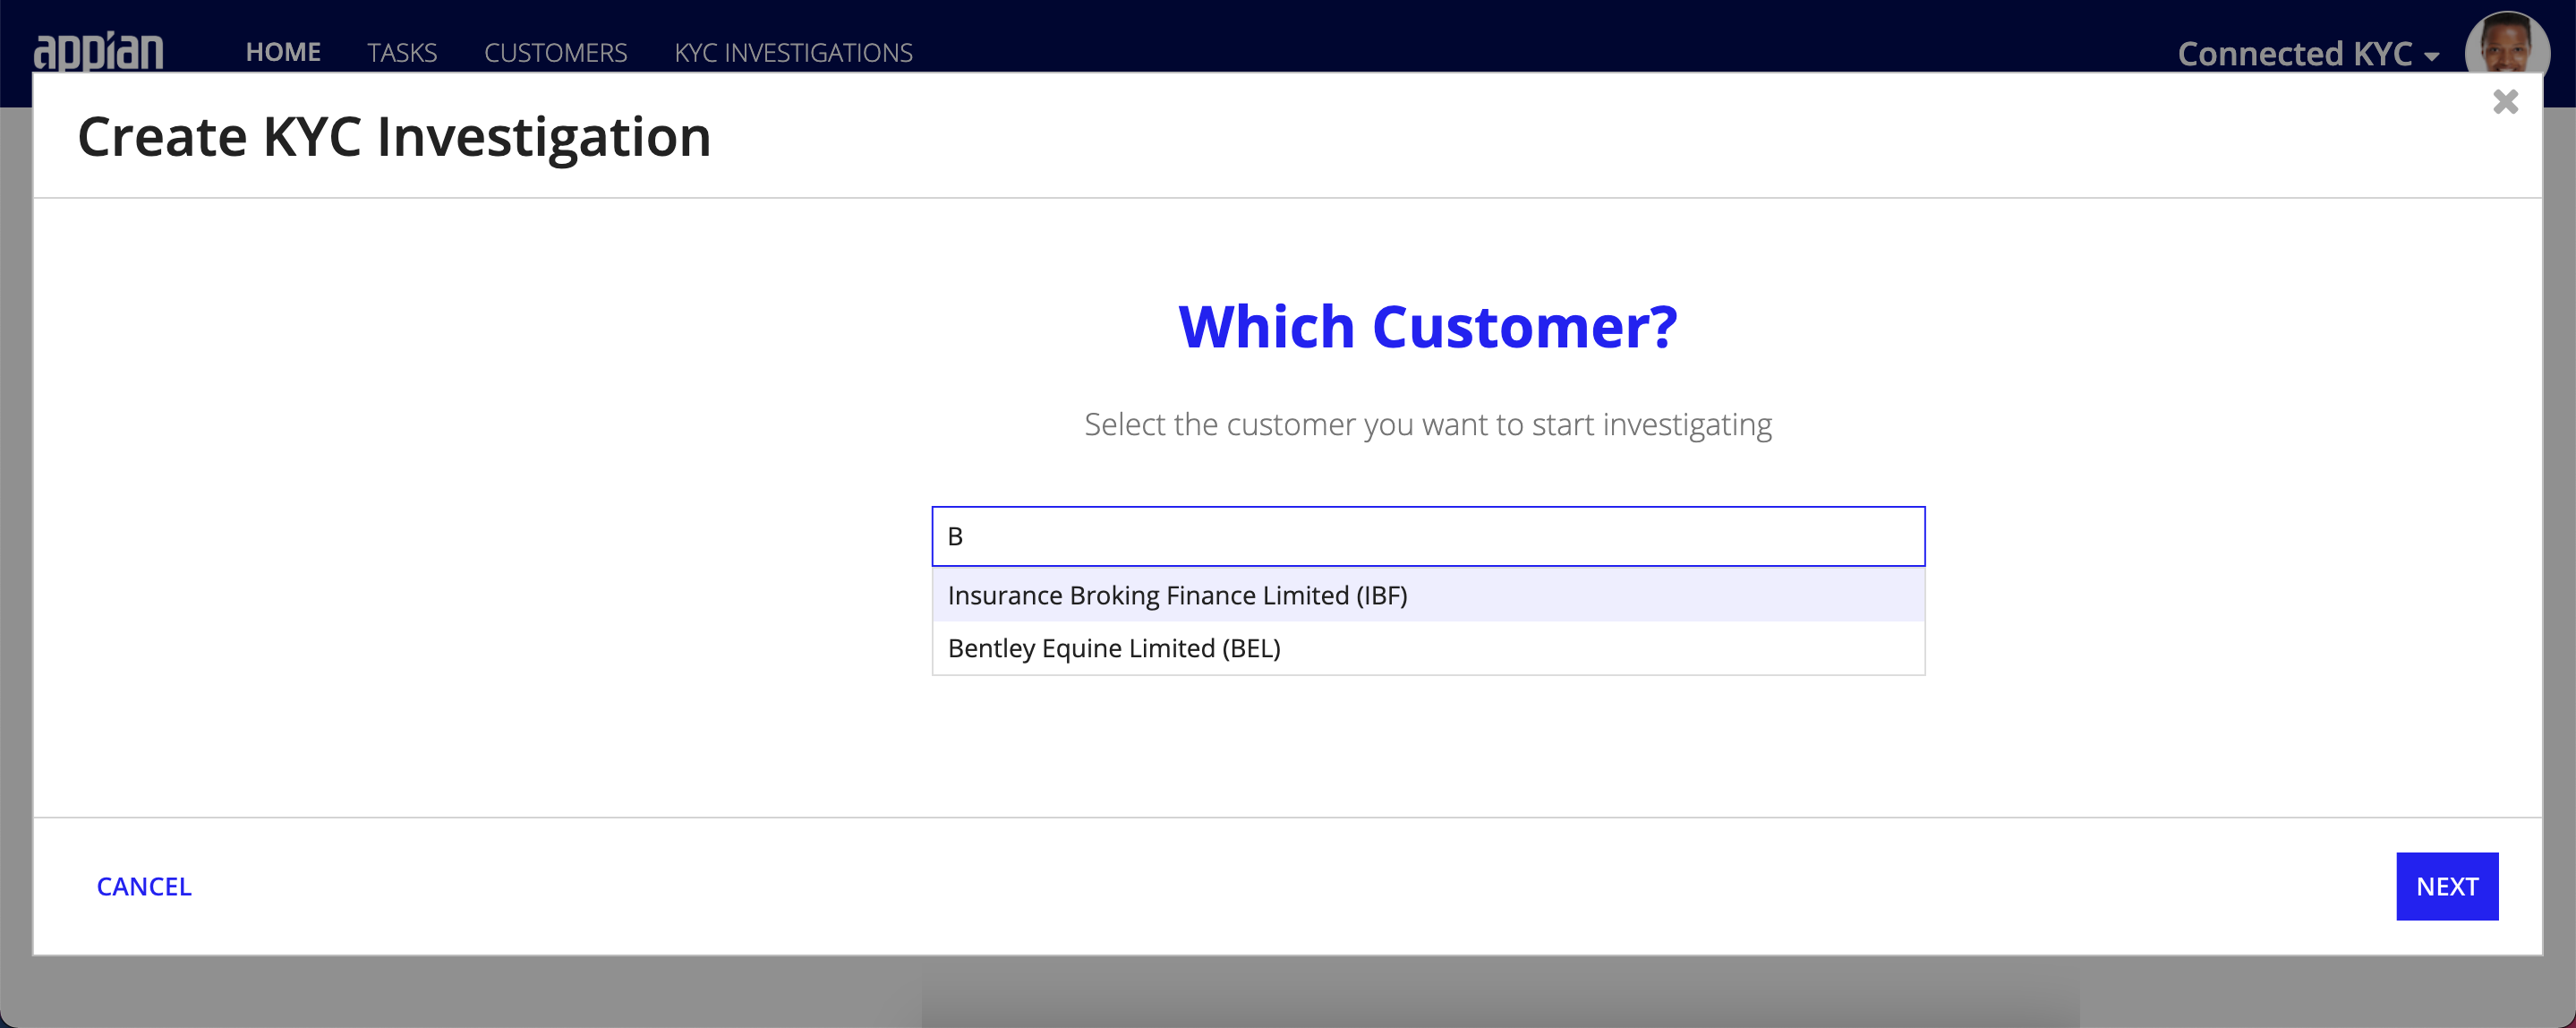
Creating a new investigation starts by asking you to specify which customer you want to start investigating. Note that the customer must already exist in the KYC solution. If the customer you want to investigate does exist in the KYC, go to the CUSTOMERS page to create a new customer.
To select a customer to investigate:
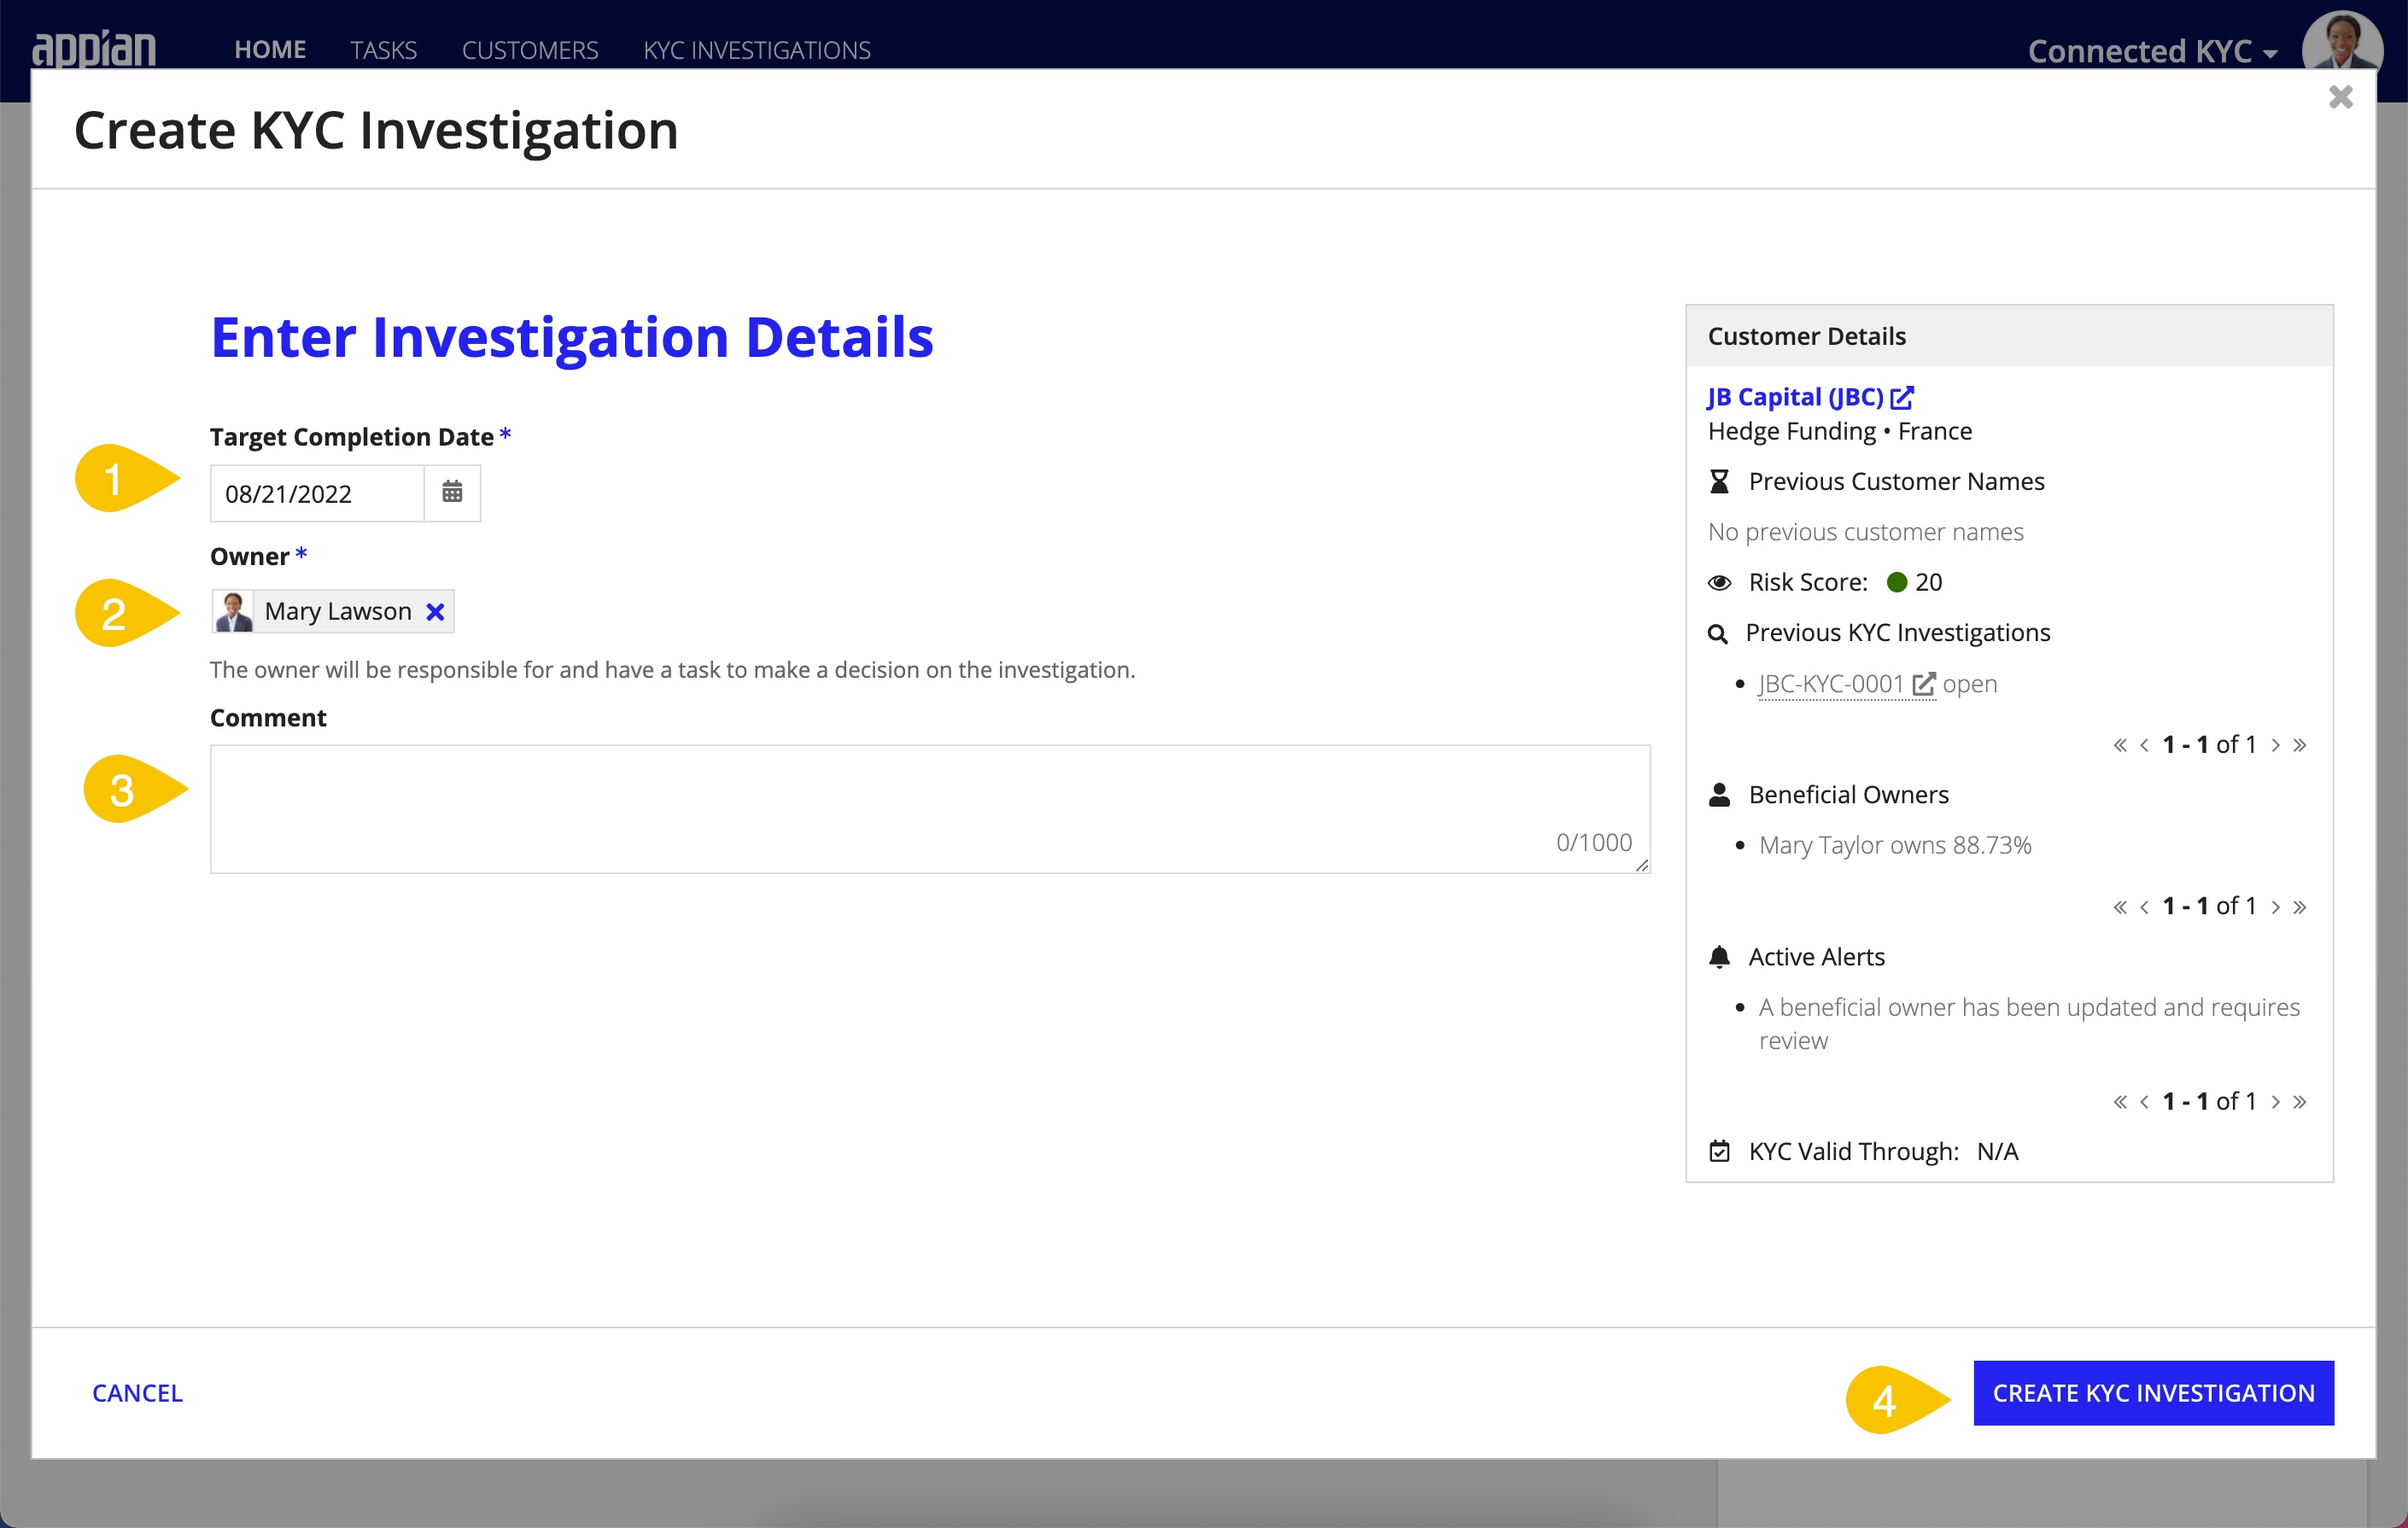
Once you've selected the customer you want to investigate, you will be able to enter investigation details.
To enter investigation details:
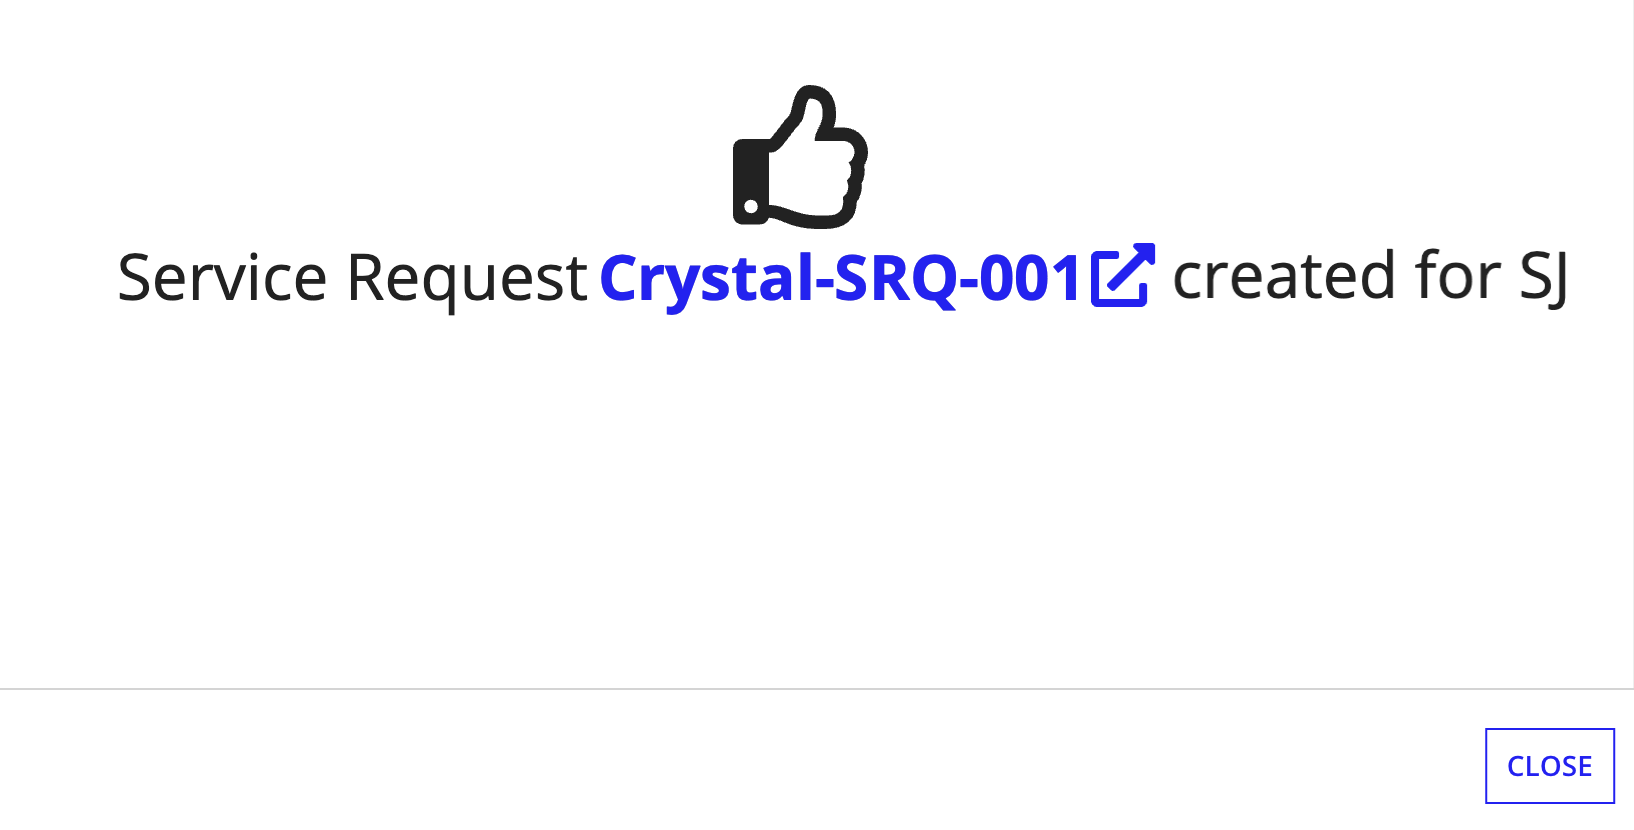
After the investigation has been created, you can immediately start the KYC questionnaire or click CLOSE to return to the previous page and continue other tasks.
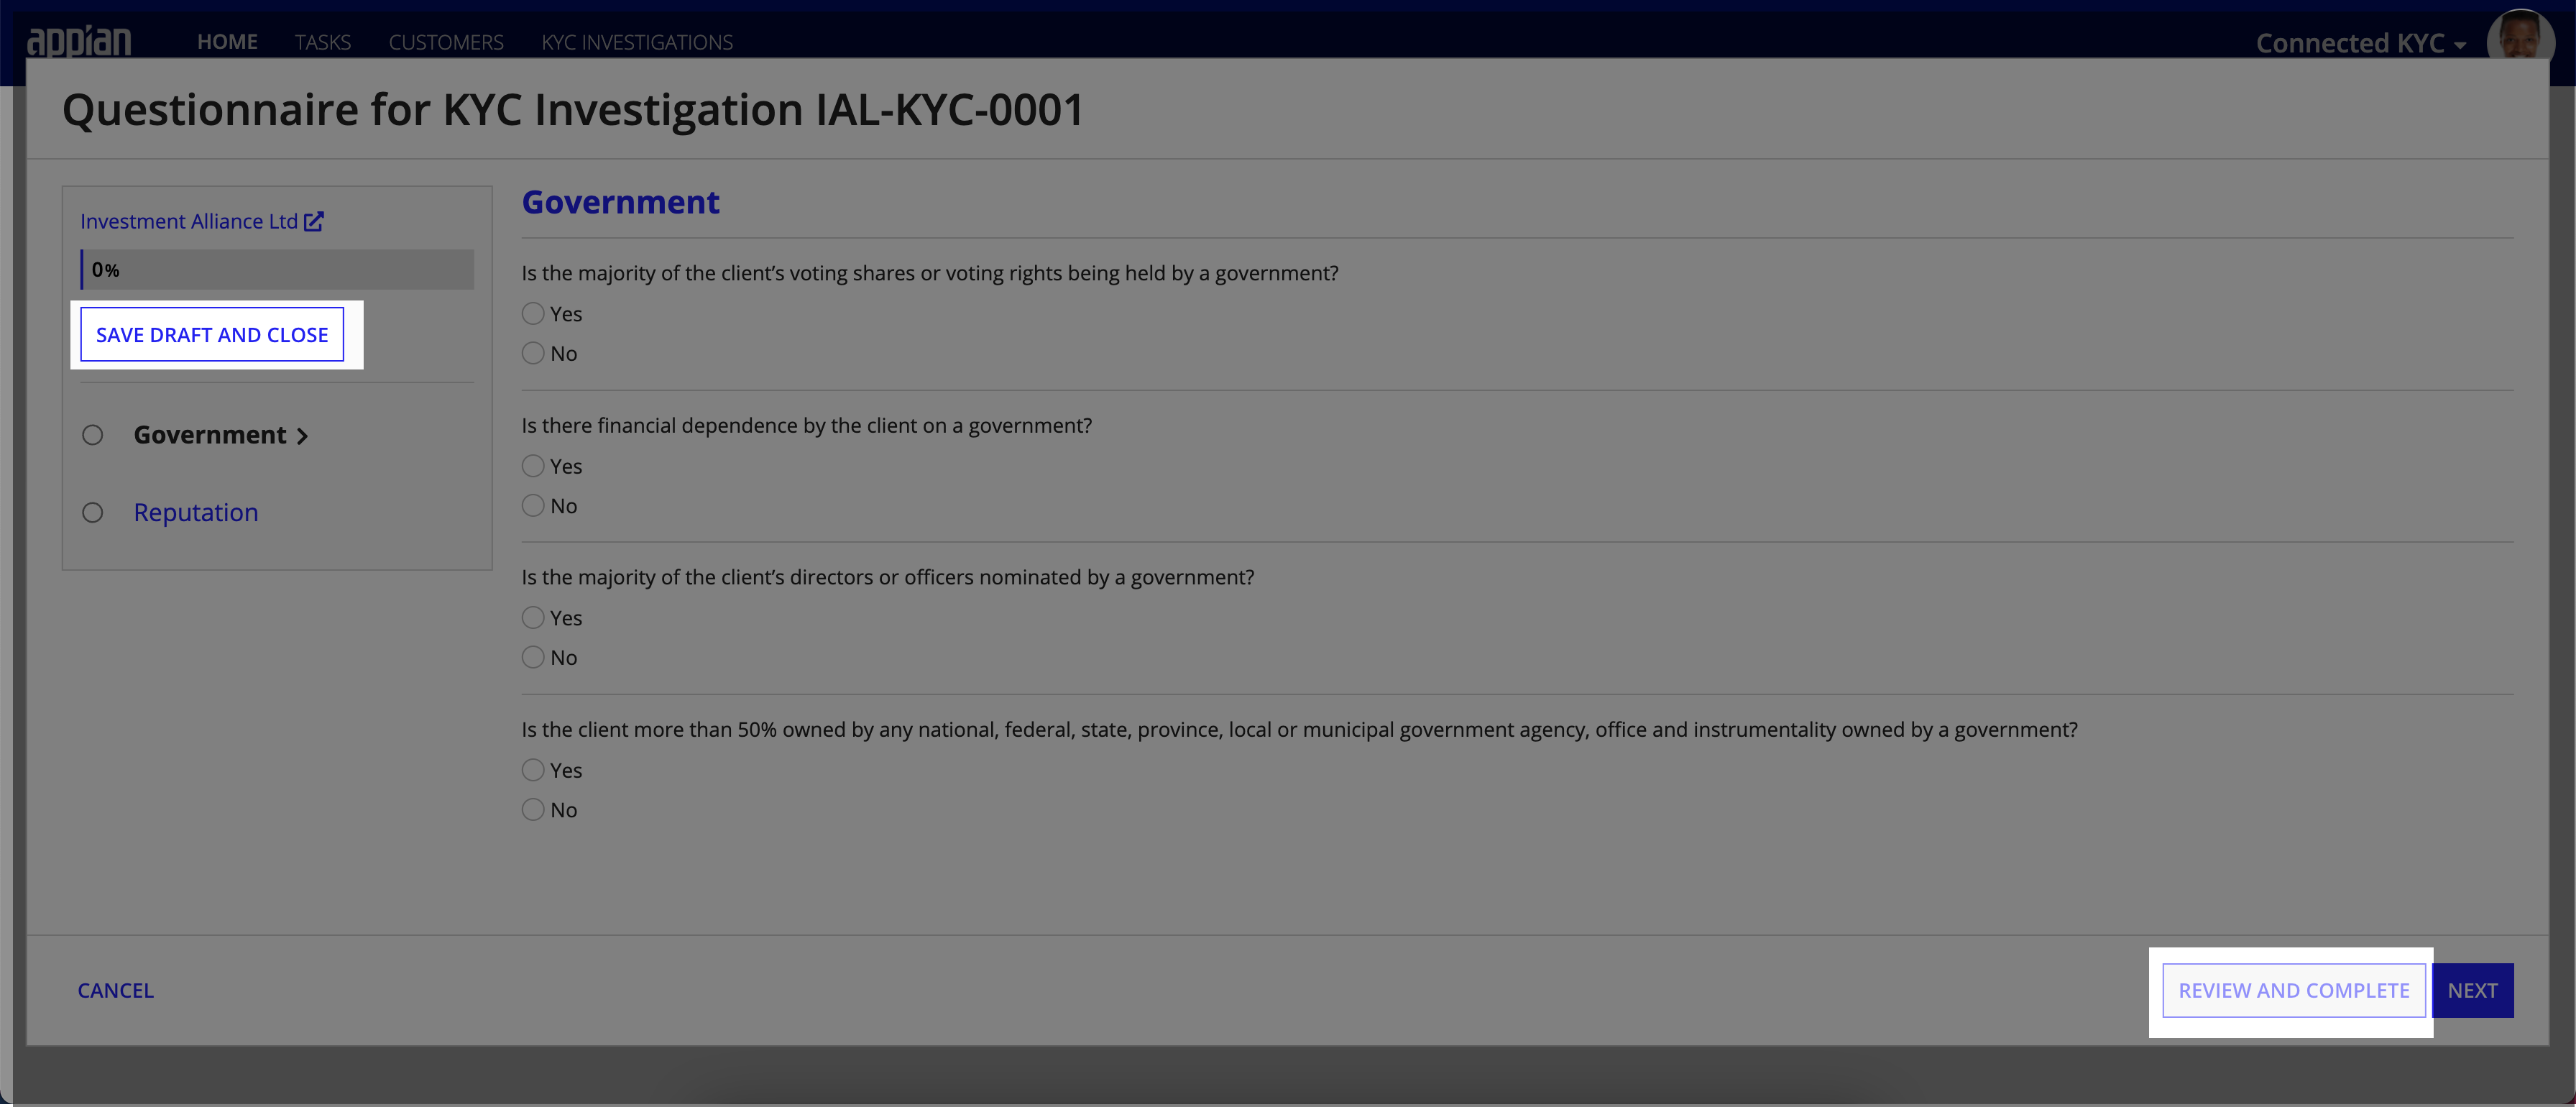
If you opt to CLOSE out of the screen, a task will be created and assigned to the owner to complete the questionnaire at a later date. You can view this task on the Summary page or the HOME page. You will also be able to access and complete the questionnaire on the Questionnaire page of the investigation record.
To complete the KYC questionnaire:
Once all questions are answered, click REVIEW AND COMPLETE.
The questionnaire will use the answers entered to determine the next steps for the investigation.
The first item the questionnaire will determine is the customer's new risk score. The risk score is calculated by adding the individual risk score assigned to each multiple choice answer in the questionnaire together.
You can configure the response risk scores for each answer in the Connected FS Settings site on a per question or per workflow template basis. After the questionnaire calculates the risk score, the system will update the customer risk score when the KYC investigation closes.
The second is whether or not manual review is required for this investigation. If manual review is required, tasks and required documents will be generated and the KYC will stay open and assigned to the owner. Necessary manual review is determined by either the risk score totaling above the HIGH risk score threshold or a designated manual review required answer has been entered.
If manual review is not required and the risk score is not high, the KYC will be closed as auto-approved.
Once the investigation has been determined to need manual review, after the questionnaire has been completed, any tasks set up in the workflow templates will be kicked off and needed to be complete.
Tasks can be completed from the home page or from the KYC investigation summary tab.
One of the tasks generated after as part of the KYC investigation is the KYC Decision task. This task determines whether or not the KYC is going to be approved or rejected. During the decision task, the user can review any relevant findings, complete outstanding tasks and then make a determination on the KYC investigation.
To make the decision:
Select a user to peer review the decision and a due date for the peer review.
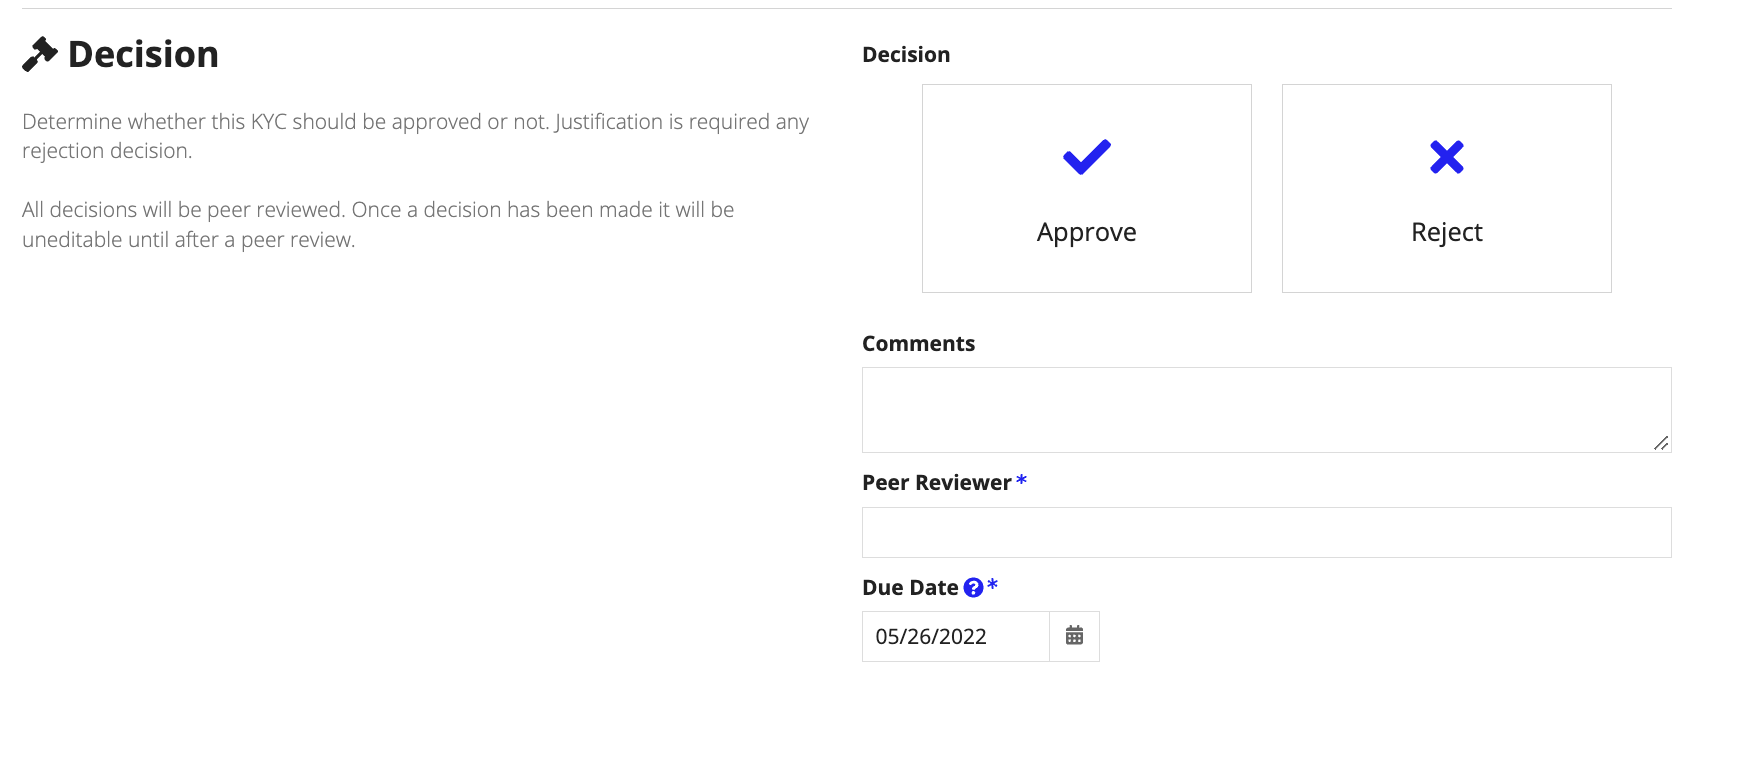
After submitting the decision, any outstanding tasks or documents will be marked as Not Needed for the investigation. The peer review task will be opened and assigned to the designated user and no additional actions will be available.
When the decision is submitted, the peer review task will go from queued to assigned. This task is to ensure that there is another user to confirm the KYC decision. The state of the KYC will be static until the peer reviewer either confirms or disputes the decision made by the original reviewer.
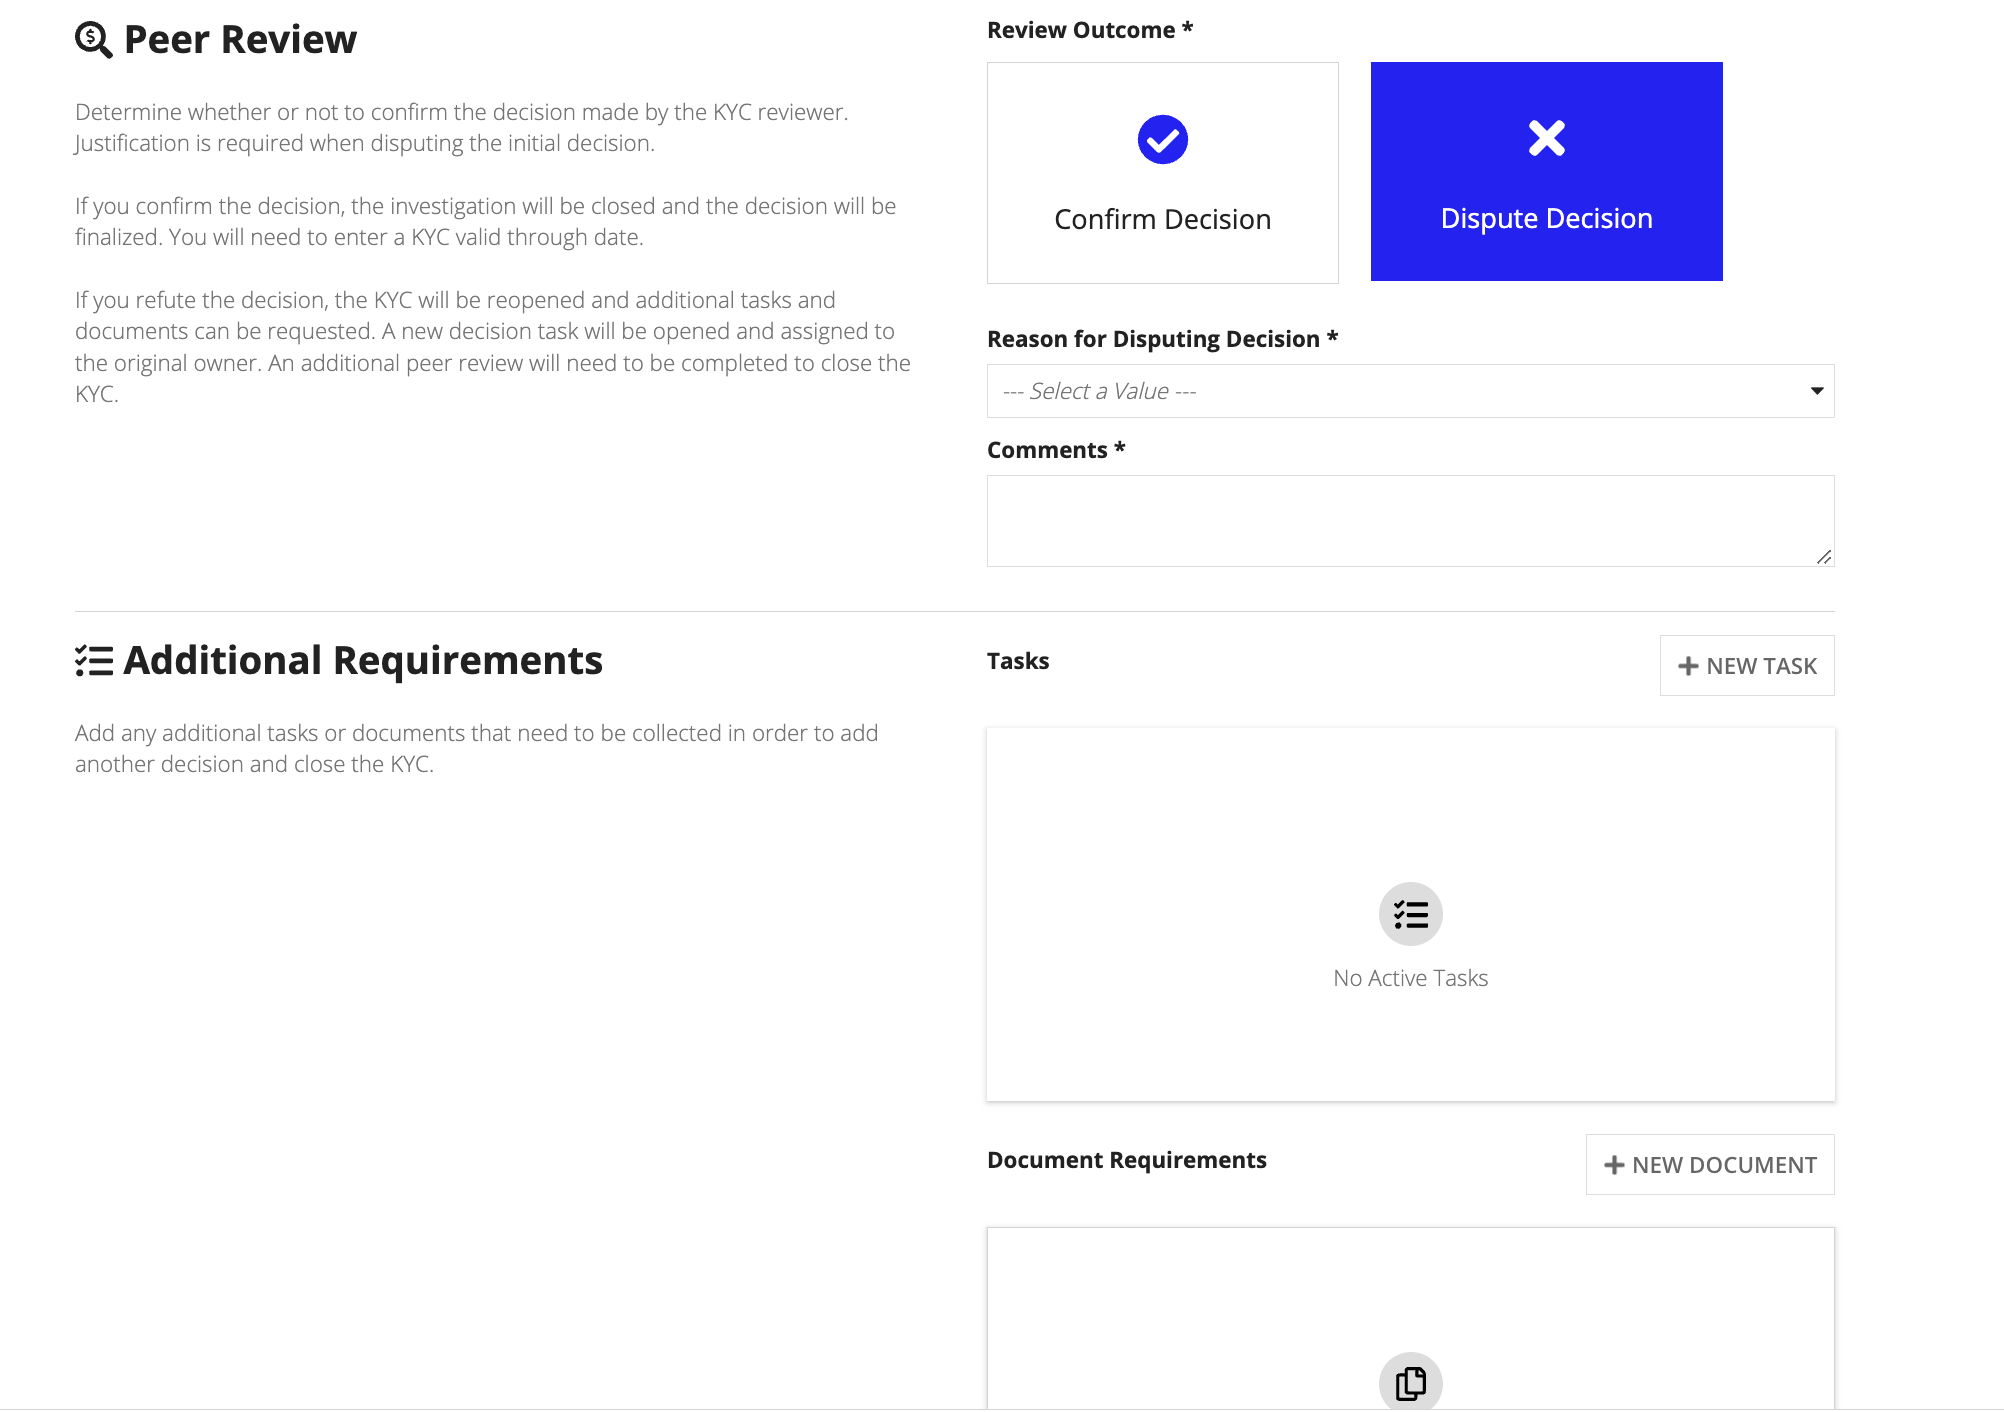
The peer reviewer can review the decision and relevant information before entering the outcome of the peer review.
If the peer reviewer chooses Confirm Decision, they can enter a comment and set a KYC Expiration date. The peer reviewer can opt to schedule a new KYC for the customer upon expiration of the current KYC investigation. If a new KYC is scheduled, the KYC investigation will automatically open when the kick off date is reached.
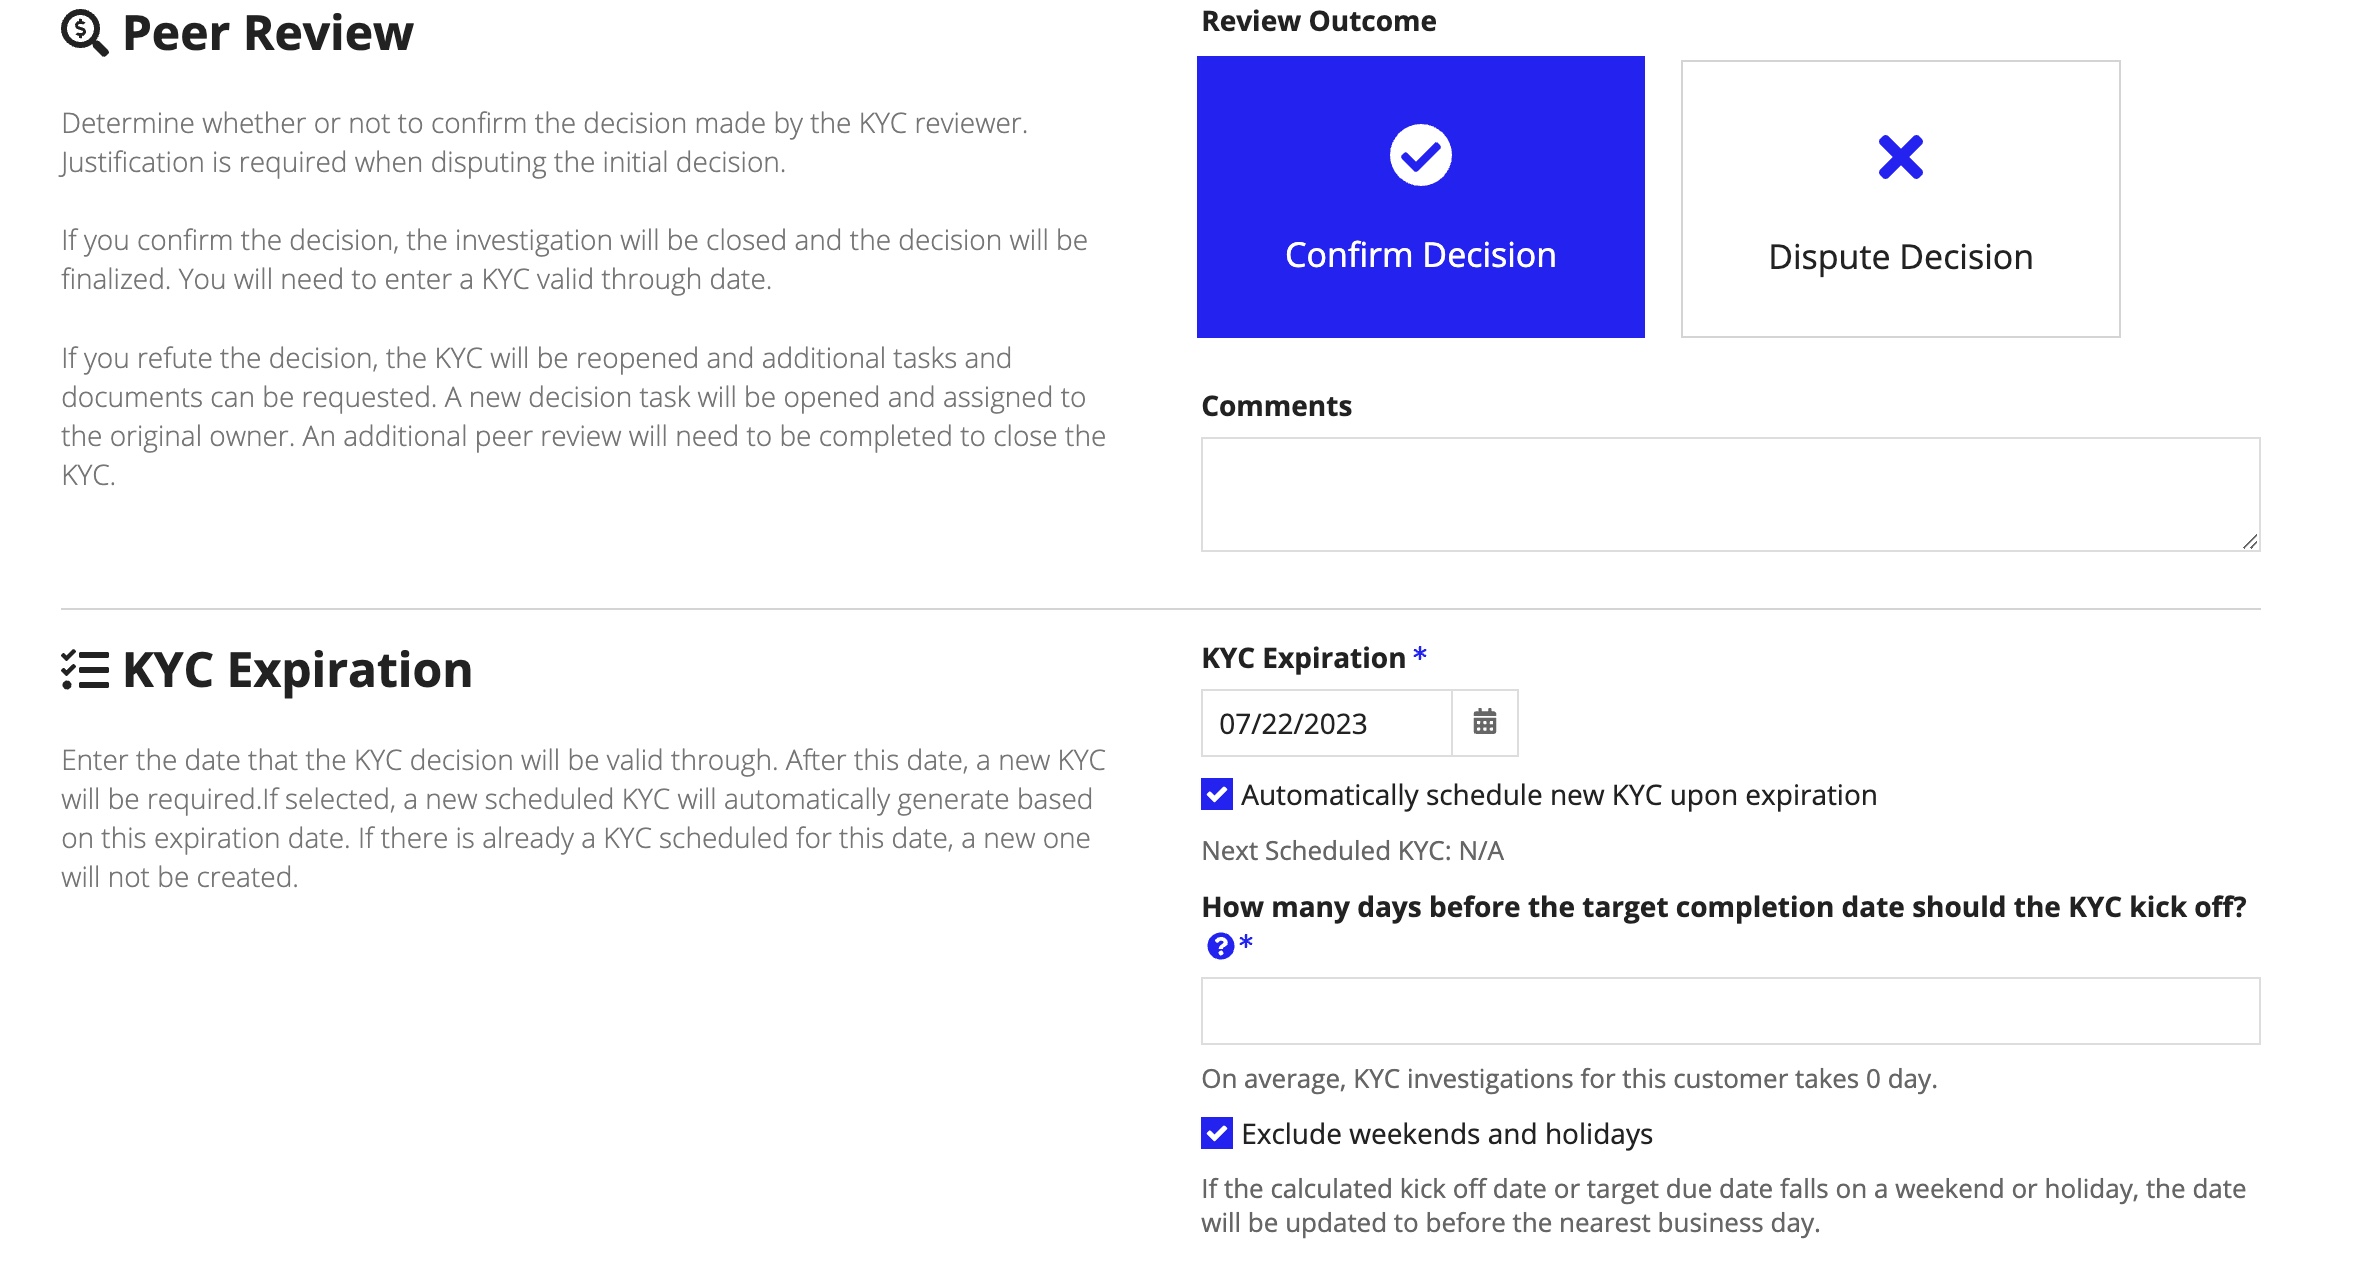
After the peer review is submitted, the KYC will be closed.
The KYC expiration date is the date that the KYC the assigned user is currently completing will be valid until. This date will update the customer's KYC valid through date indicating the next time a KYC will be required. The KYC expiration date defaults to one year from the KYC completion date.
For example, if a customer's KYC is valid through 03/21/2023 and another KYC investigation is completed and sets a new expiration date of 09/21/2023, this new date will be the one that a new KYC is required for the customer.
If the peer reviewer chooses Dispute Decision, they will be required to select a reason and can add any additional tasks or required documents to be opened after the peer review task is submitted. These tasks will be assigned and a new set of decision and peer review tasks will be opened as well. The KYC investigation will move back in to the Due diligence in progress status and tasks and actions will become available once again.
KYC investigations will be marked as closed after a peer review has been confirmed. When an investigation is closed, it is no longer available for editing.
If a KYC investigation is no longer required, the user can manually cancel the investigation. The user must select a cancellation reason and can enter an optional comment. The investigation's status will be set to Cancel and no further actions can be taken.
Create New Investigation
