| This content applies solely to Connected KYC, which must be purchased separately from the Appian base platform. This content was written for Appian 23.1 and may not reflect the interfaces or functionality of other Appian versions. |
A Investigation process is complicated and involves many individuals from different departments completing many different tasks. Tasks allow Connected KYC users to keep track of the work they need to accomplish for each Investigation.
Based on the process template configured for a Investigation, the solution automatically assigns the associated tasks to the correct user group. Appian Connected KYC simplifies this process by bringing together all of those tasks in one system to be tracked.
The life cycle of a task in Connected KYC is:
This page outlines each step in the life cycle of a task for Connected KYC and how to add new task types.
The Connected FS Settings site allows users to create reusable tasks that can be added to the Investigation templates or to the Investigation.
A Investigation template assigns default tasks for a specific type of Investigation. In order to complete Investigations, you will need to create templates that are mapped to certain attributes that are specified when the Investigation is created.
See Setting Up Processes for more information on adding and editing templates.
A new task can be added to the Investigation after it has been started. For KYC investigations with the status Due Diligence in Progress, additional tasks can be added after the template tasks are generated.
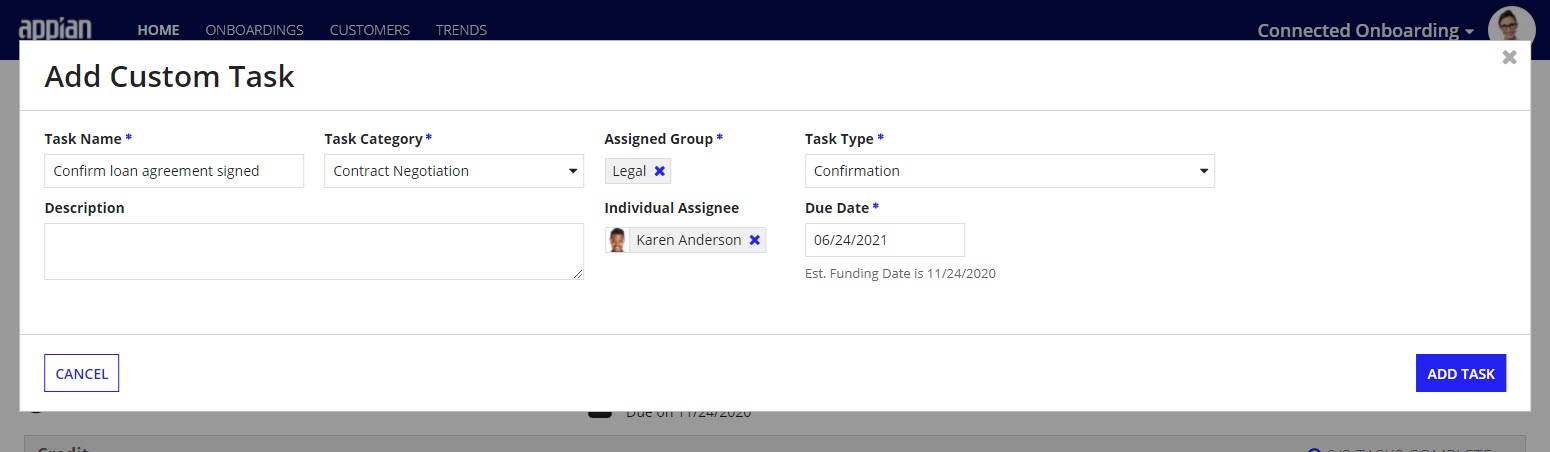
To create a new task:
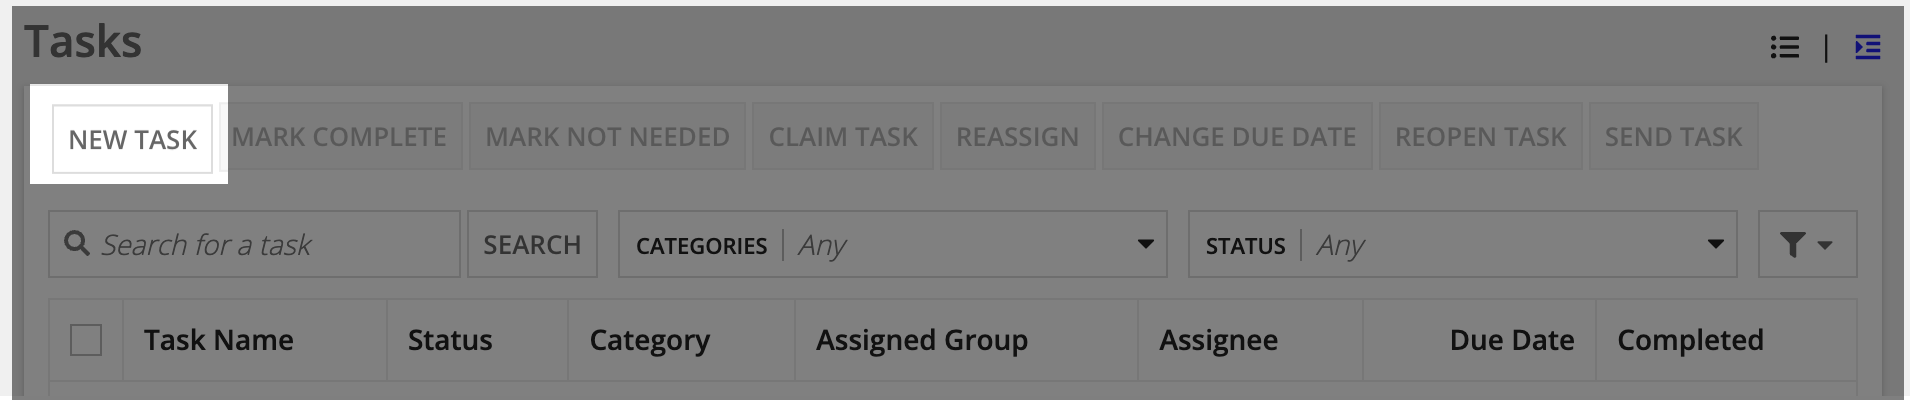
From the summary tab of the Investigation, Click New Task above the Tasks grid.
Select a business group to use as the Assigned Group. For example, Client Onboarding or Sales.
| Status | Icon |
|---|---|
| Assigned | |
| Queued | |
| Completed | |
| Not Needed |
The solution allows users to track completed work by marking off tasks as they complete them. Users can access their tasks from the Home site tab, the Tasks site tab, or from the Summary tab of the Investigation.
The Summary tab lists all tasks, whether or not they are assigned to the logged in user or their team. Tasks that belong to a group that the user is not a member of cannot be opened or modified by the logged in user. However, if the user is a member of a group that a task has been assigned to, they can claim, complete, or reassign the task.
The following actions are available in the task grids:
To complete any task, click into the Task Name.
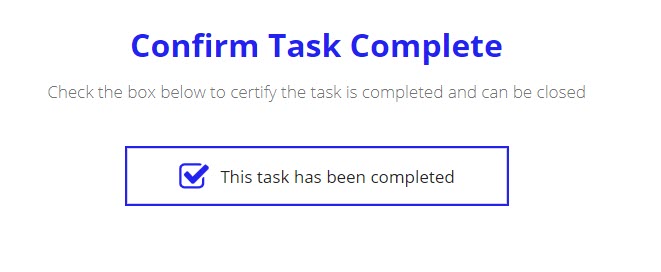
Confirmation tasks require users to select a checkbox that says the task has been completed.
To complete a confirmation task:
Select the checkbox to confirm the task has been completed and click SUBMIT.
Attach document tasks require users to attach a specific document to a Investigation. You can choose a document that has already been attached to that customer or attach a new document.
To complete a document task:
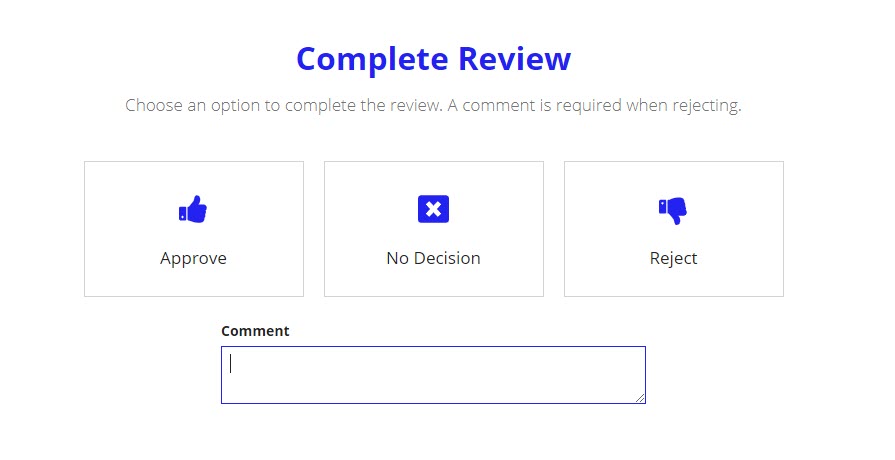
Review tasks require users to approve, reject, or make no decision on a task.
To complete a review task:
Click SUBMIT.
Document reconciliation tasks are auto-generated by the system when a document is uploaded and one of the following conditions apply:
These tasks will be assigned to the user that uploaded the document that needs to be classified. The document reconciliation tasks require the user to choose the DOCUMENT TYPE.
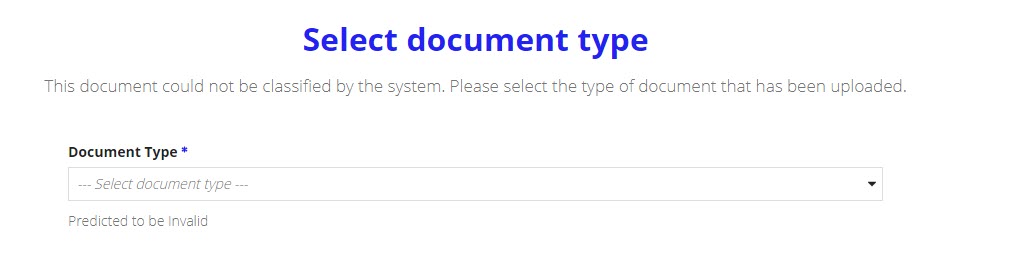
To complete a document reconciliation task:
Once submitted, the document will reflect the document type and will have an ACCEPTED status and fulfill any required documents.
If the Northrow integration is connected, Northrow's company check can be included as a task in the Investigation workflow process configuration. This task type is called the Northrow Risk Score Check. When the task is triggered, Connected KYC will make an integration call to Northrow and update the customer record automatically.
If there is an error connecting to or retrieving the results from Northrow, a follow up task will be opened. The Northrow error tasks are by default assigned to the Connected KYC group. To complete the Northrow Risk Score Error tasks, the user can choose to either retry the Northrow check or to skip the risk score check entirely.
The DocuSign integration sends documents to internal and external users to collect a signature. In order to have a document signed via DocuSign within Connected KYC, a user must receive a DocuSign task. When a user receives a DocuSign task, it will appear on their task list with a task type Collect DocuSign Signature. To complete a DocuSign task, a user must sign the document through DocuSign.
The OFAC integration will only open a task for a user to complete if user action is needed. A user will have to complete a task when OFAC has found matching customer name results on the consolidated screening list or there was an integration error. When a user receives an OFAC task, it will appear on their task list with a task type Consolidated Screening Results. To complete a Consolidated Screening Results task, a user must select which, if any, of the returned results are relevant or in the event of an error, choose whether or not to retry the integration.
Details of completed tasks are available on the CATEGORY VIEW on the Tasks tab of the Investigation. To view the specific details of the completed task, click on the task name. A read-only version of the task will show up in a modal and show the results of the task.
From the modal, you will be able to see:
Click on the icon above the Tasks grid to view tasks in the DEPENDENCY VIEW.
The tasks are displayed so that the KYC investigator can see a specific task and all of its dependent tasks in a cascading list.
Managing Tasks
