| This content applies solely to Connected KYC, which must be purchased separately from the Appian base platform. This content was written for Appian 23.1 and may not reflect the interfaces or functionality of other Appian versions. |
It is important to have easy access to all of your customer's data. The Customers tab contains all of this data, and allows users to take action on that data.
This page describes the customer record, including how to view, create, and update customer information.
See Using Records for more information on Appian Records.
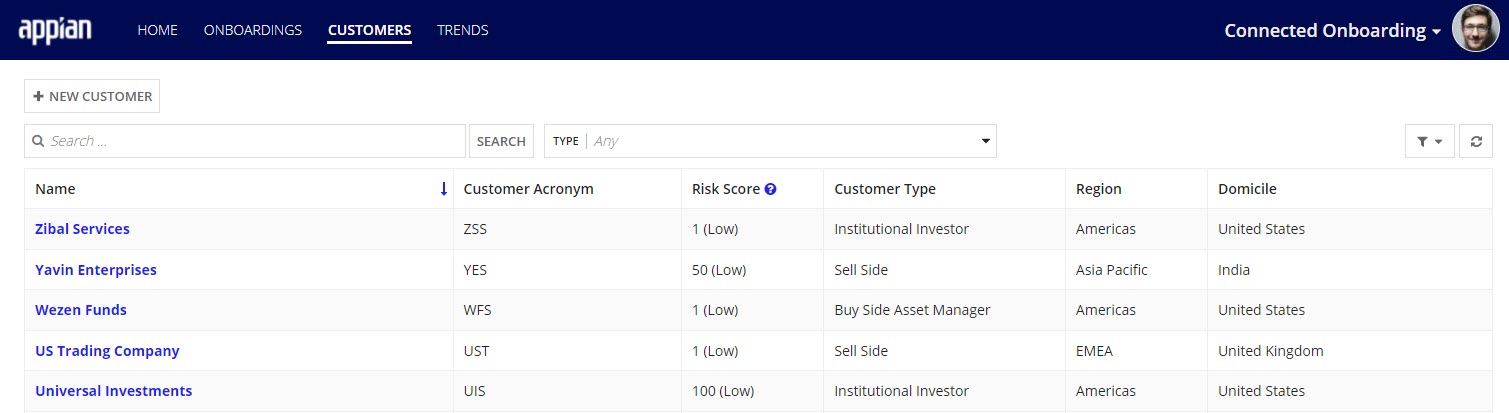
From the Connected Onboarding site, clicking CUSTOMERS displays a list of customer records. You can filter this list by searching for a customer or filtering by customer type.
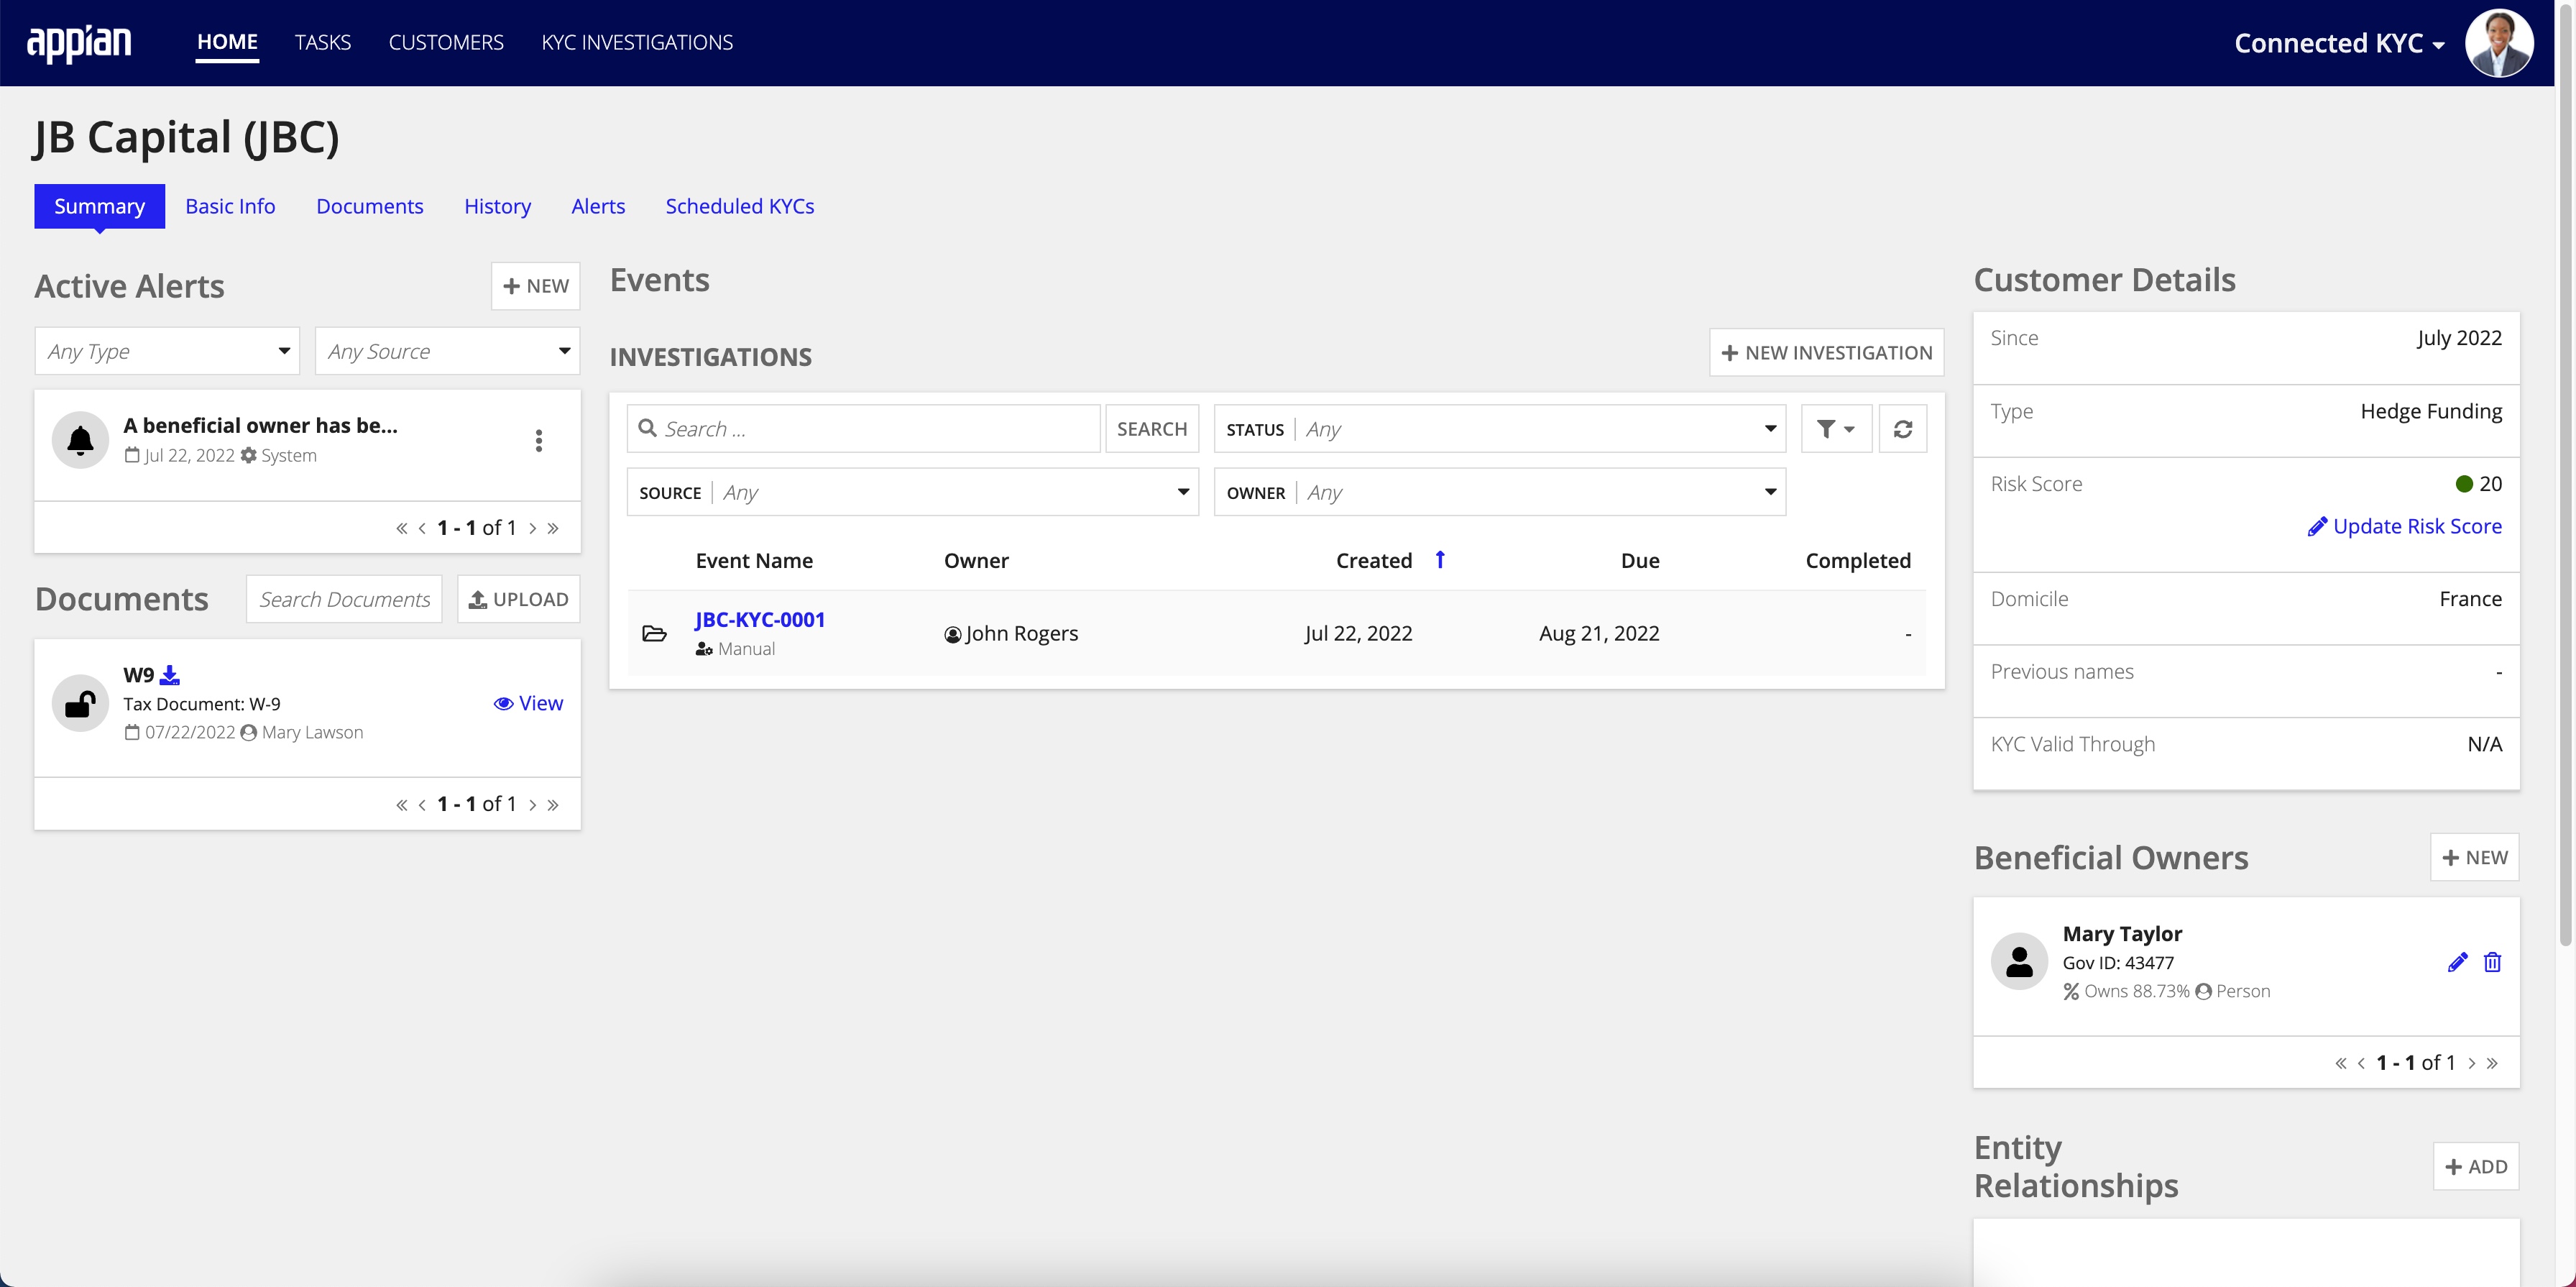
Clicking a customer name displays the record for that customer. The record displays all of the pertinent information for a particular customer. This information is split into several different pages, which are outlined in the following sections.
The Summary tab lists the important information about a customer.
The following customer information is listed on this page:
Customer Details: Additional customer details including the domicile and risk score.

The Basic Info tab shows all customer information. The customer information is split up into the following groups:
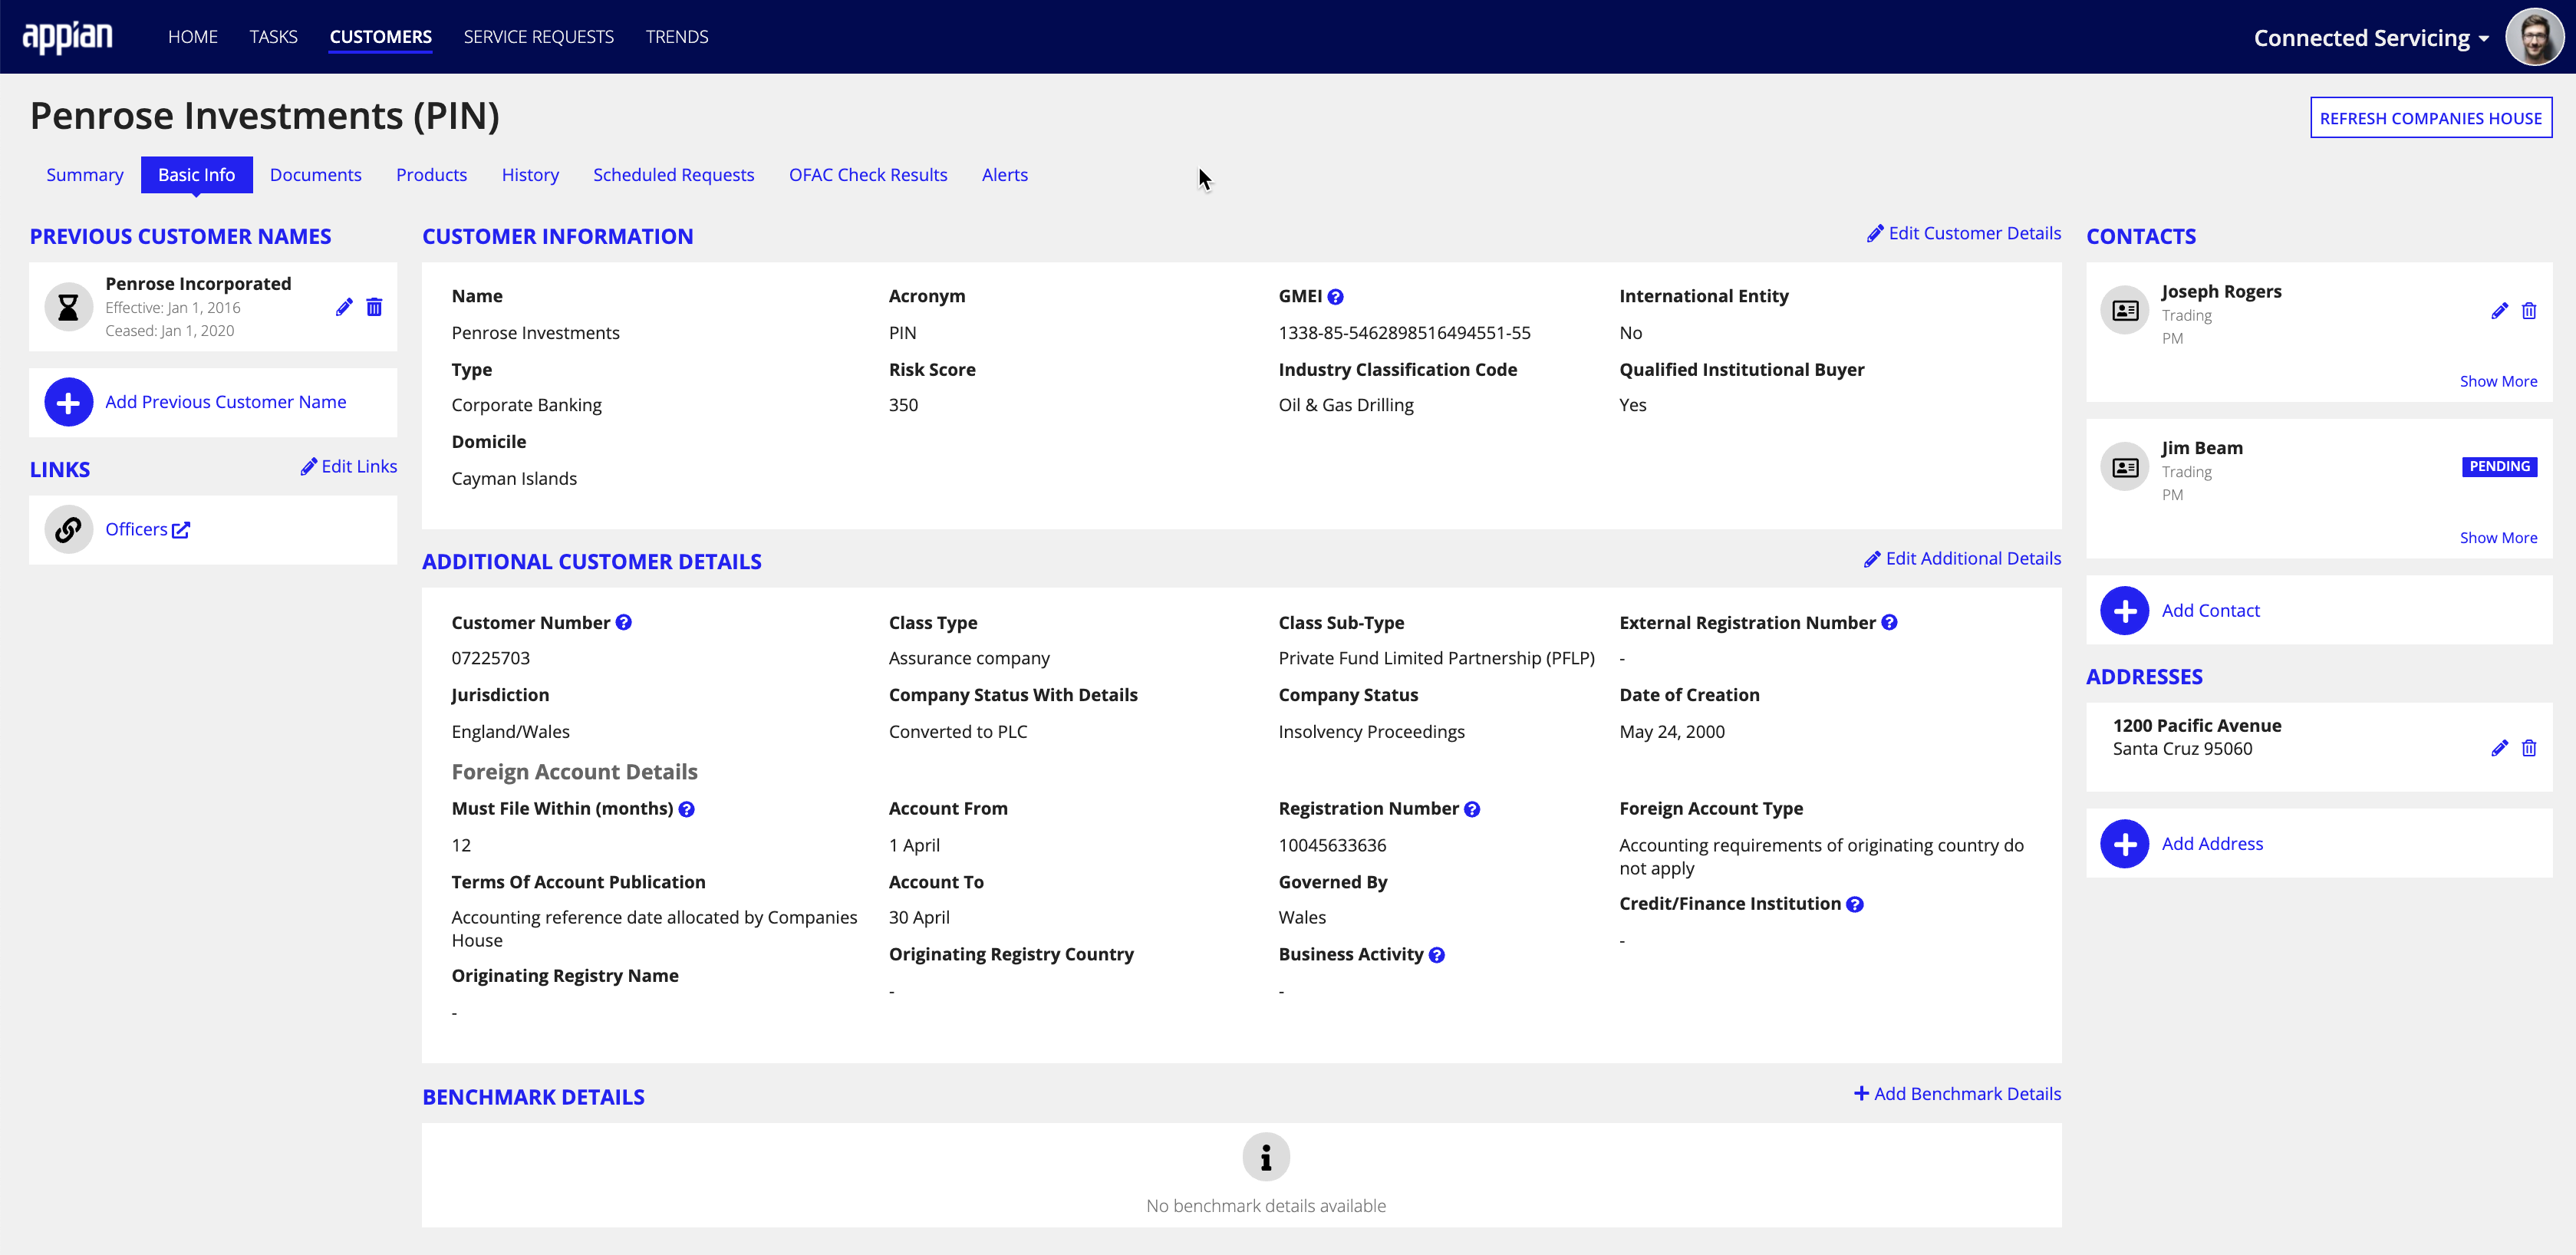
It is possible to update all the information on this page directly from here using the edit , add , and delete icons.
Some basic information can be populated using integrations if they are connected through the System Administration Center. See the Companies House, Dun and Bradstreet, and Northrow integrations for more information on pulling in customer data.
The Documents tab shows all of the documents associated with a customer.
On this page, you can:

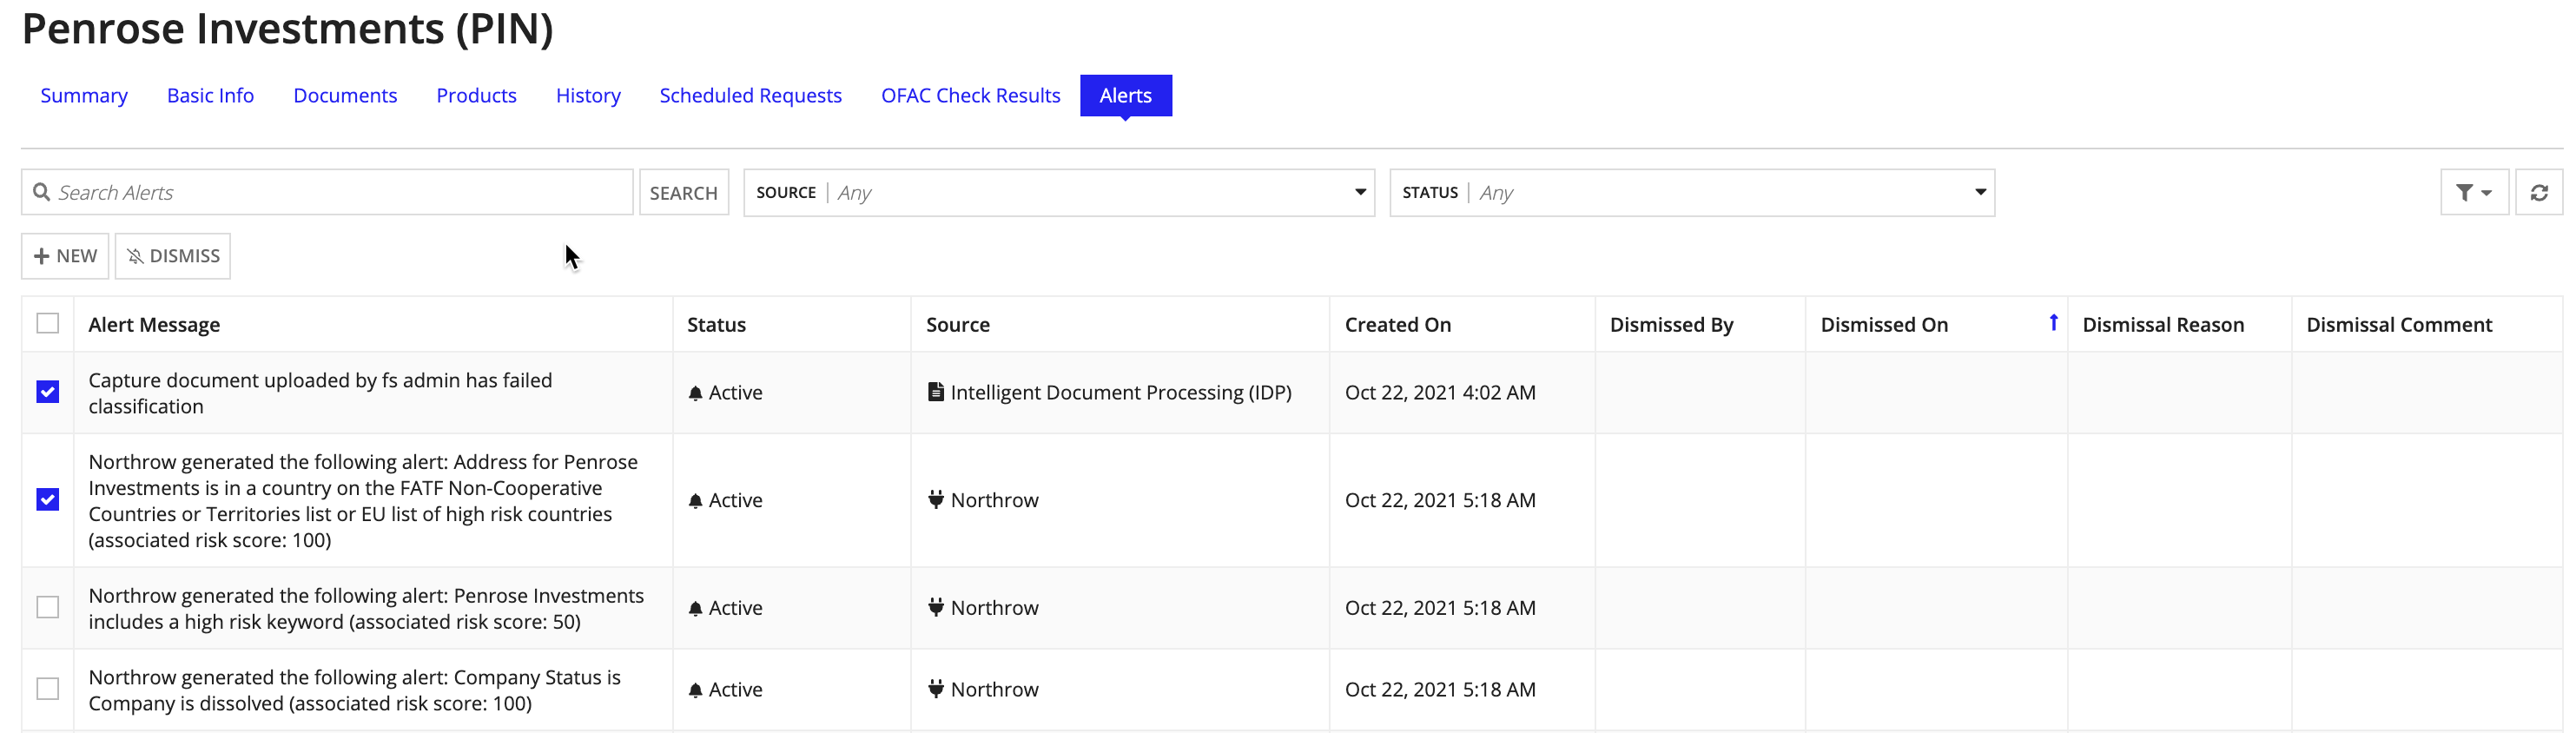
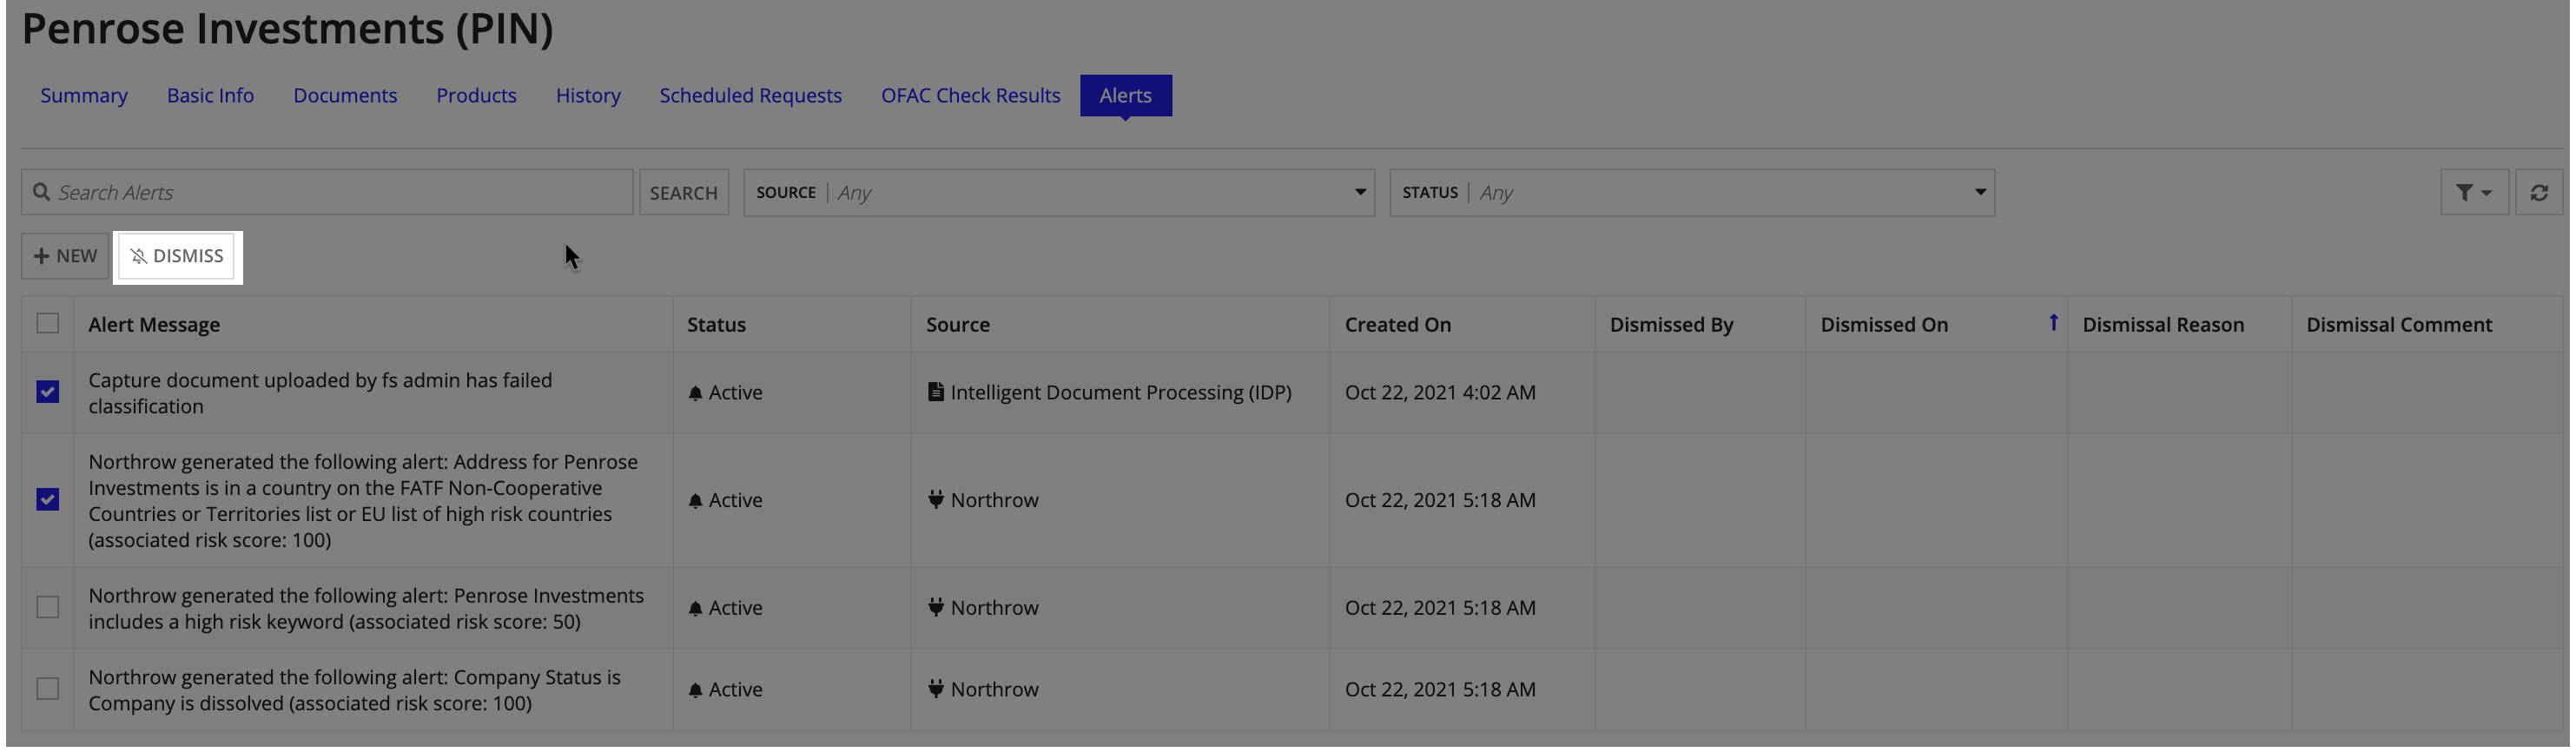
The Alerts tab shows all alerts that have been generated for the customer. All alerts regardless of dismissal status will show on the list. The alerts list can be filtered, refreshed, and exported.
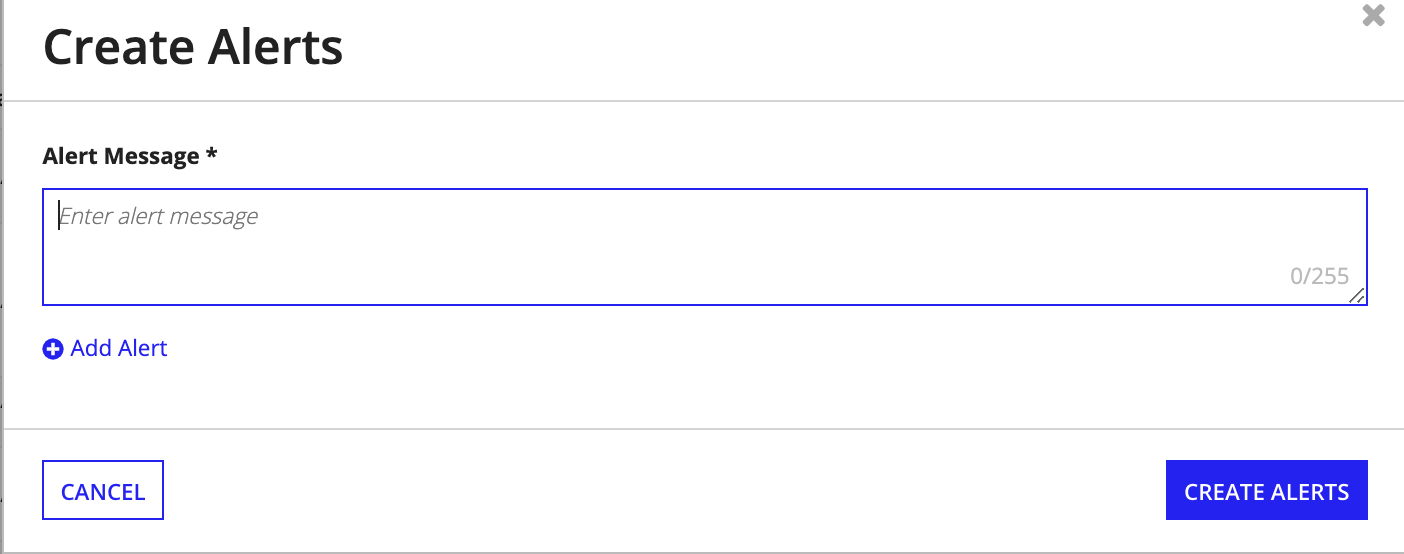
Users are also able to create new alerts and dismiss alerts from the alerts tab.
Active alerts can be viewed on the customer summary page and all alerts active or otherwise can be found on the alerts tab. Manual alerts can be created in both places
Customer alerts can be created by the system or manually by a user in order to bring attention to recent data changes on the customer record. Triggering customer alerts can be set up and managed by a business user in the FS Settings Site.
To create an alert:
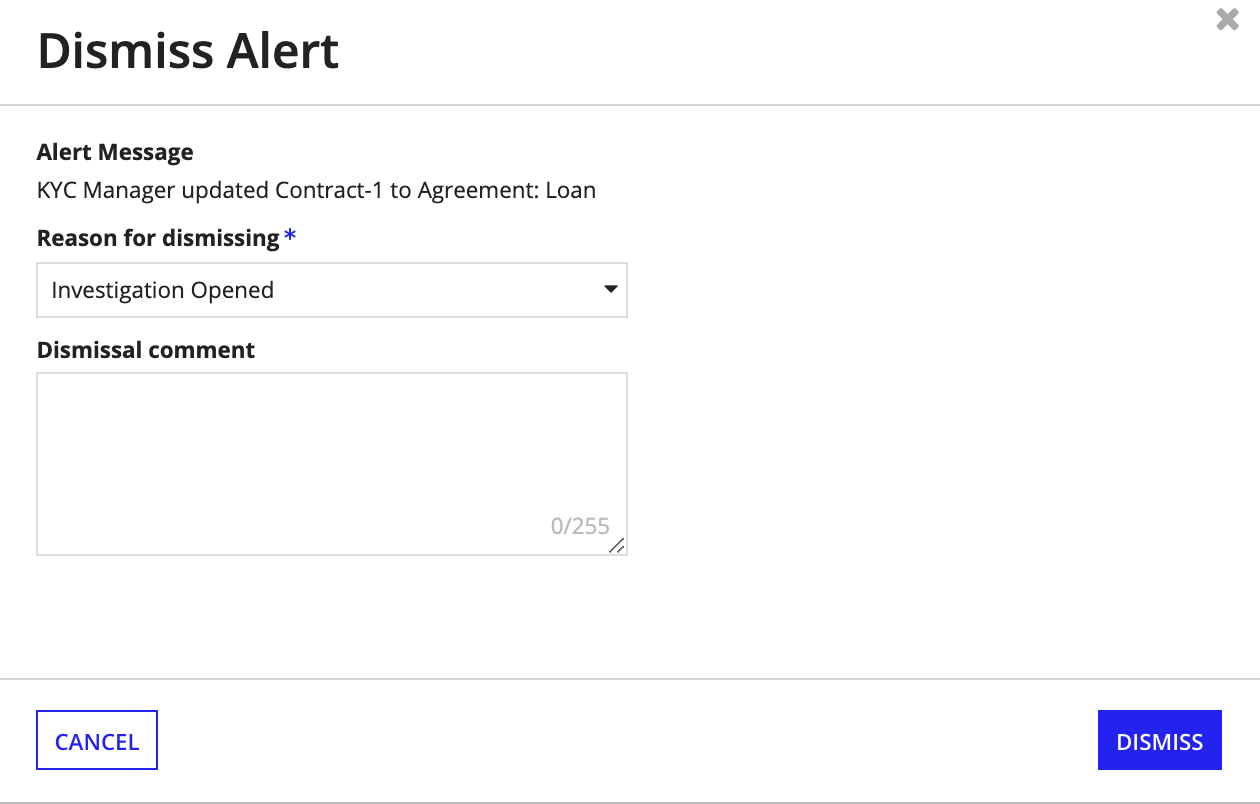
If a user deems that a customer alert has been addressed or is inconsequential, they may dismiss the alert, which will remove the alert from the active alerts on the customer summary page. If any user dismisses an alert, no other user will be able to see the alert on that customer record. By default, Client Onboarding Department Heads and KYC Department Heads are the two groups that have access to dismiss customer alerts.
All alerts both, active and dismissed, can be see on the ALERTS tab along with who, when, and reason why an alert was dismissed.
To dismiss a customer alert from the Summary tab:
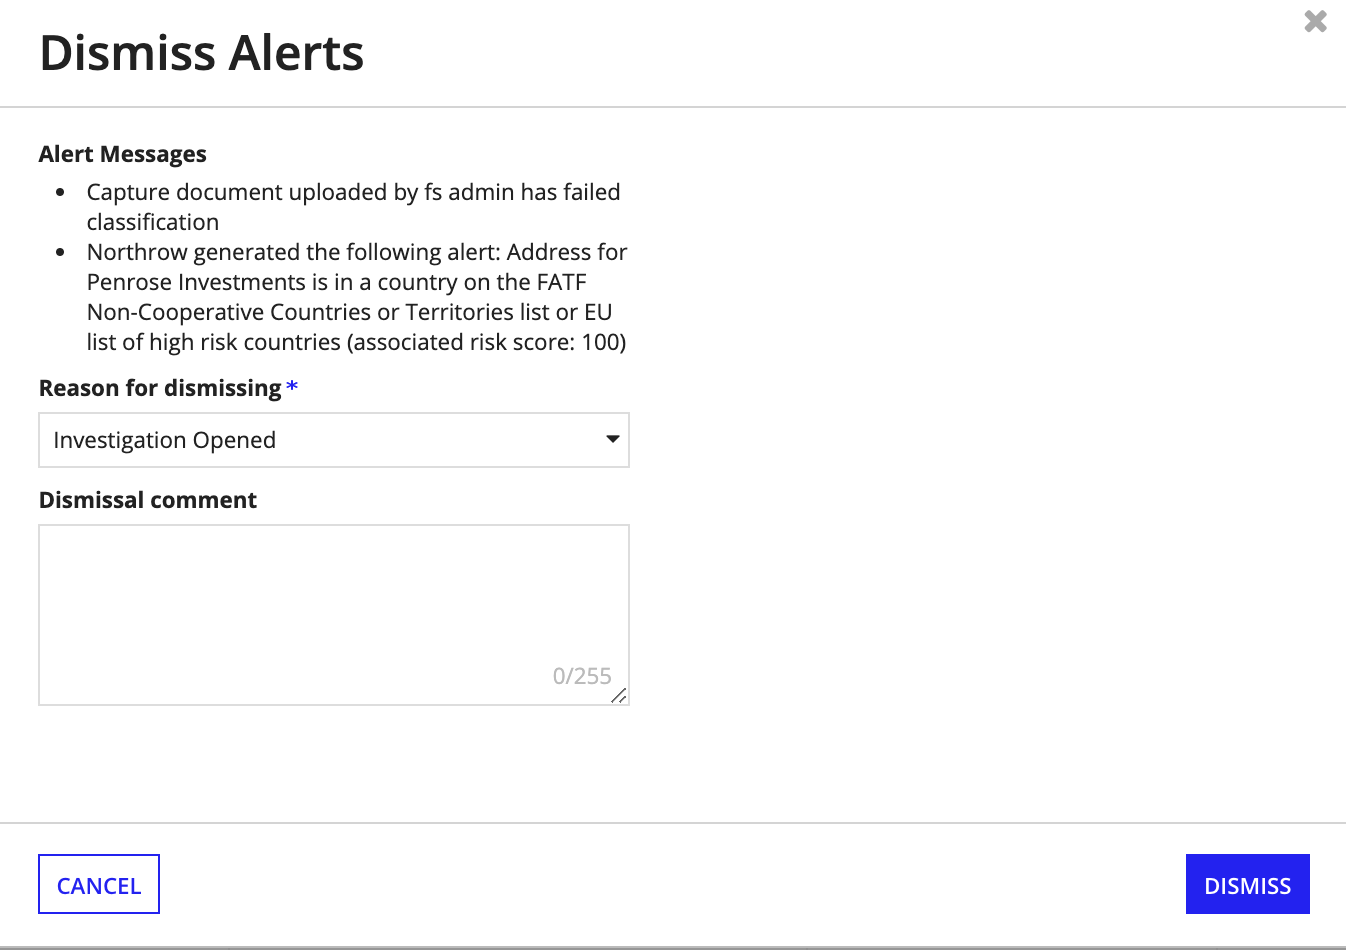
To dismiss a customer alert from the Alert tab:
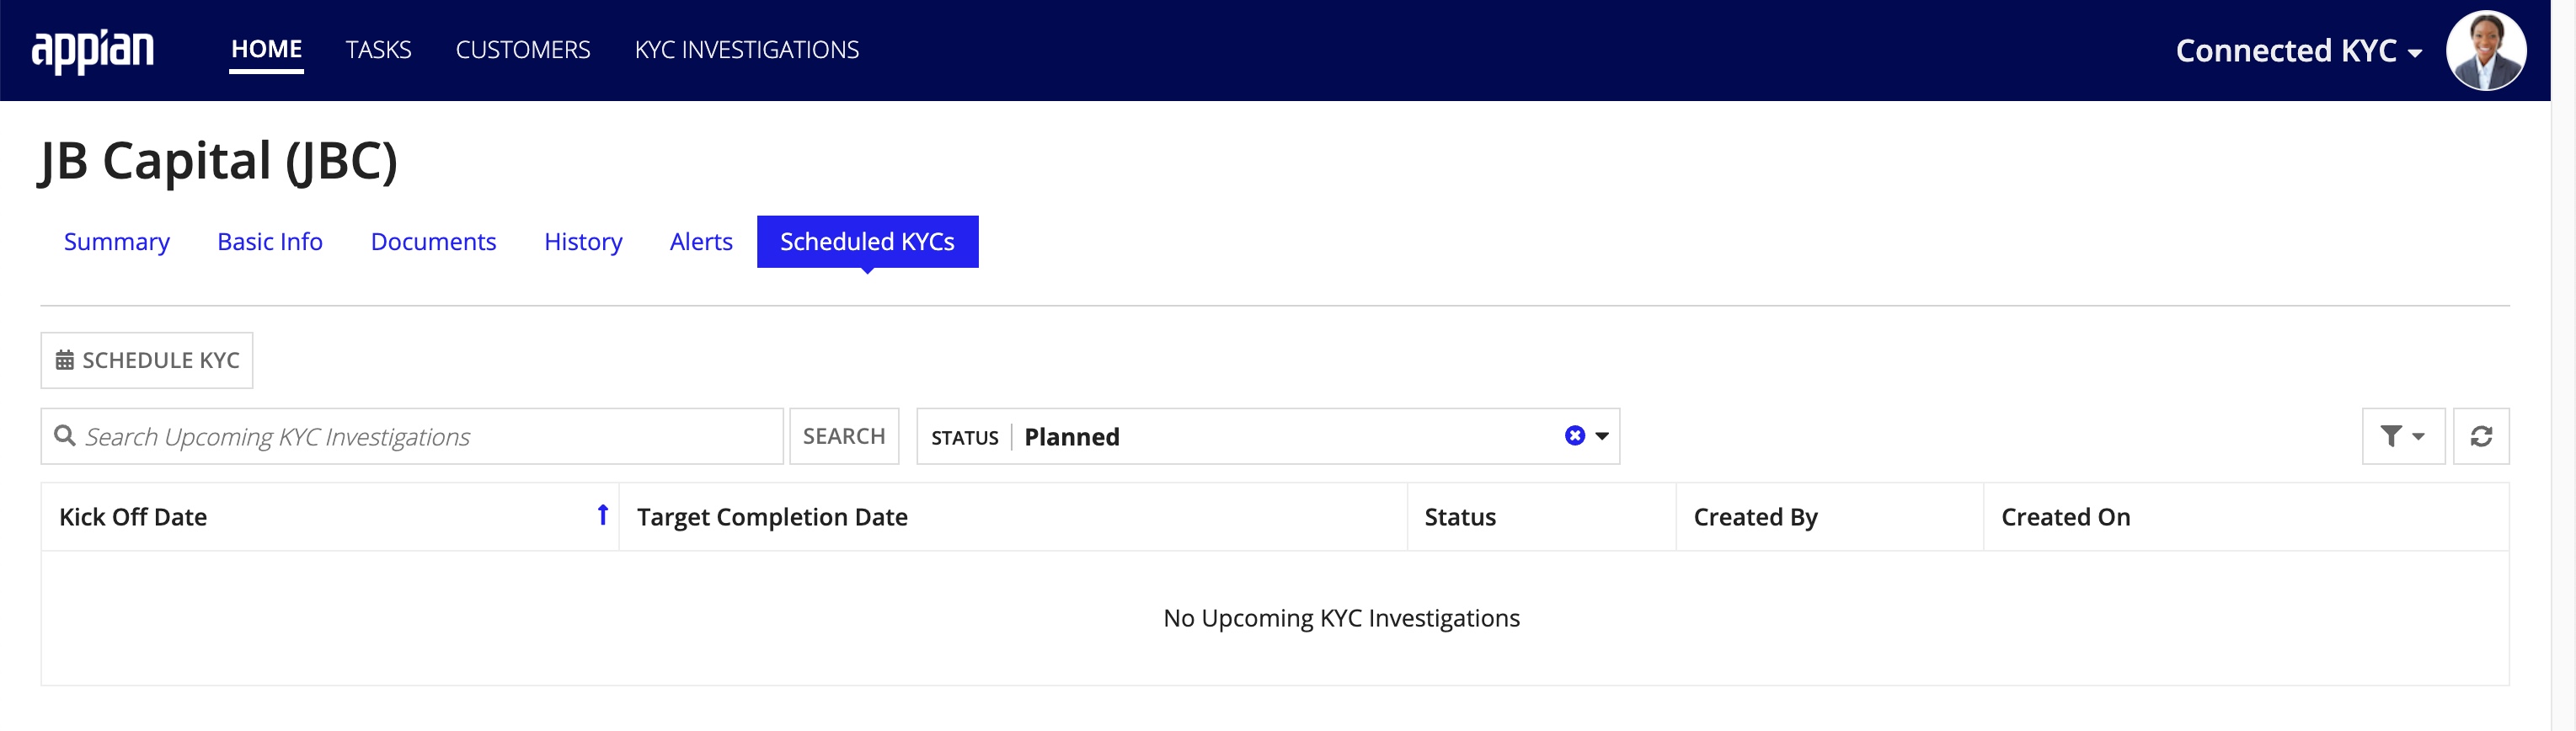
The Scheduled KYCs tab shows all KYC investigations that have been scheduled for the customer. Only upcoming investigations are shown by default. Note that users can update the filters to show deleted and past KYC investigations.
Connected KYC allow users to setup upcoming KYC investigations for either a single investigation or a regularly recurring investigation. A KYC investigation will automatically open for the KYC group, then start and complete by the determined date.
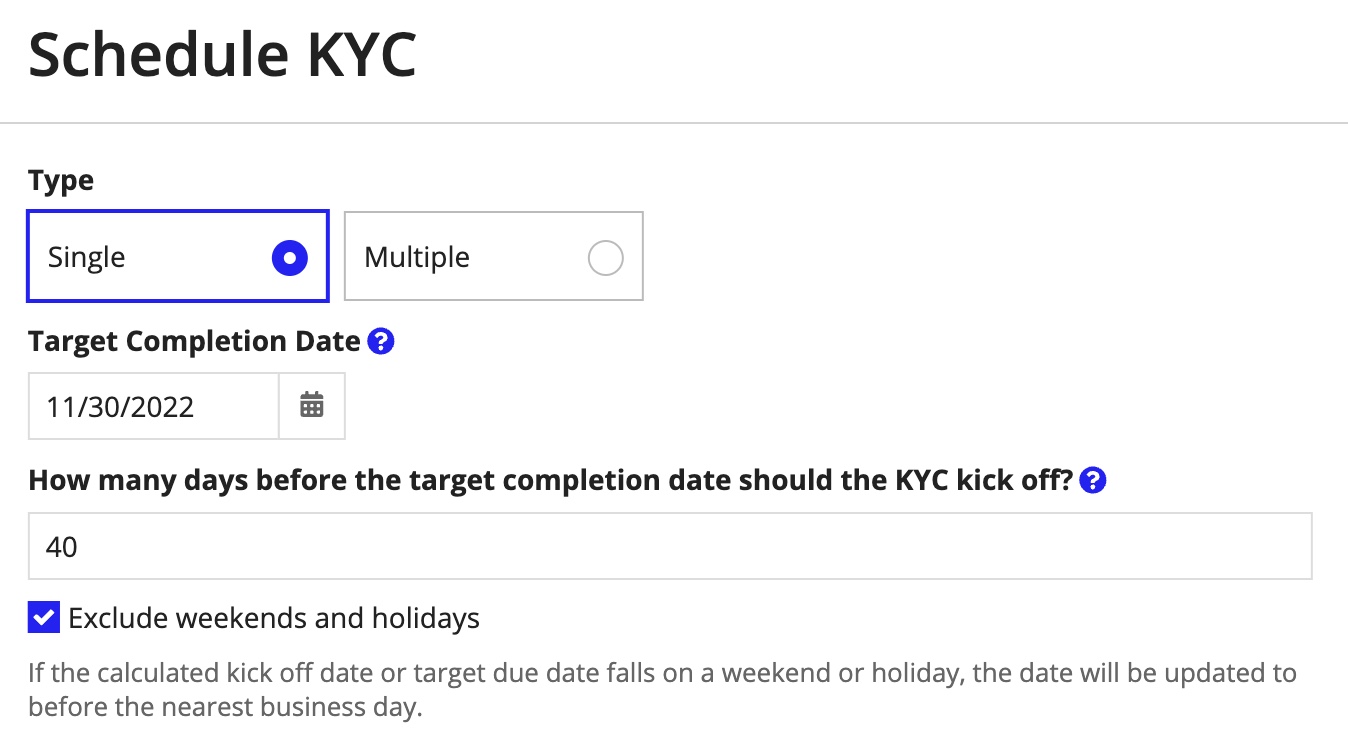
To schedule a single KYC investigation:
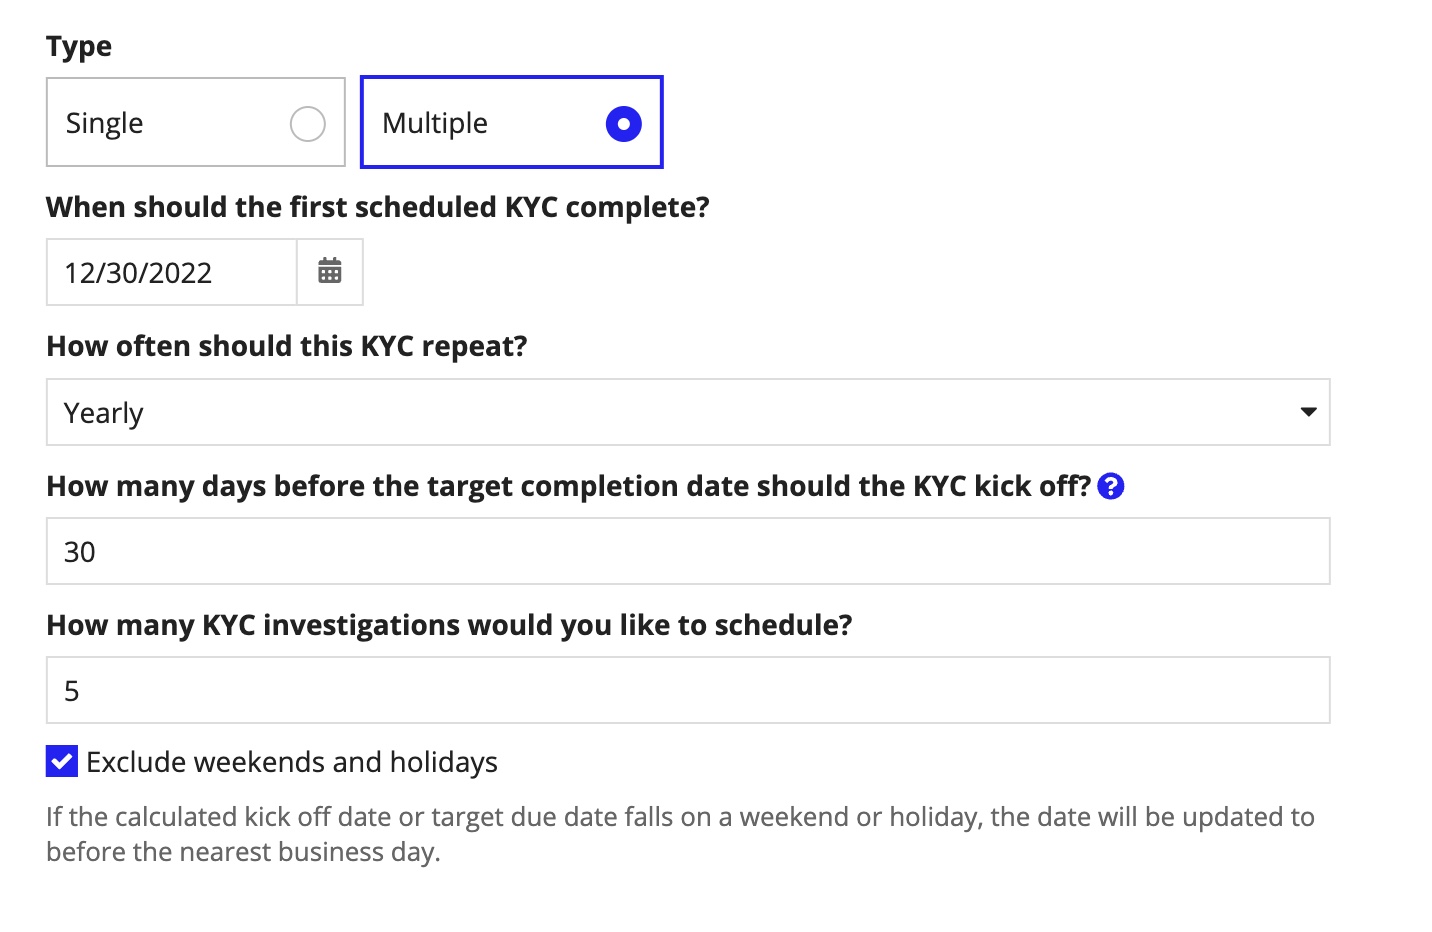
To schedule multiple KYC investigations:
To ensure that the schedule is correct, the user can click the button to see a preview of the calculated schedule.

After clicking SUBMIT, the investigations will be scheduled for the customer.
To add, remove, or edit scheduled investigations, click Edit. You can add a single investigation by clicking Add Scheduled KYC or remove it by clicking the icon. A kick off or target completion date can be individually updated from the grid.
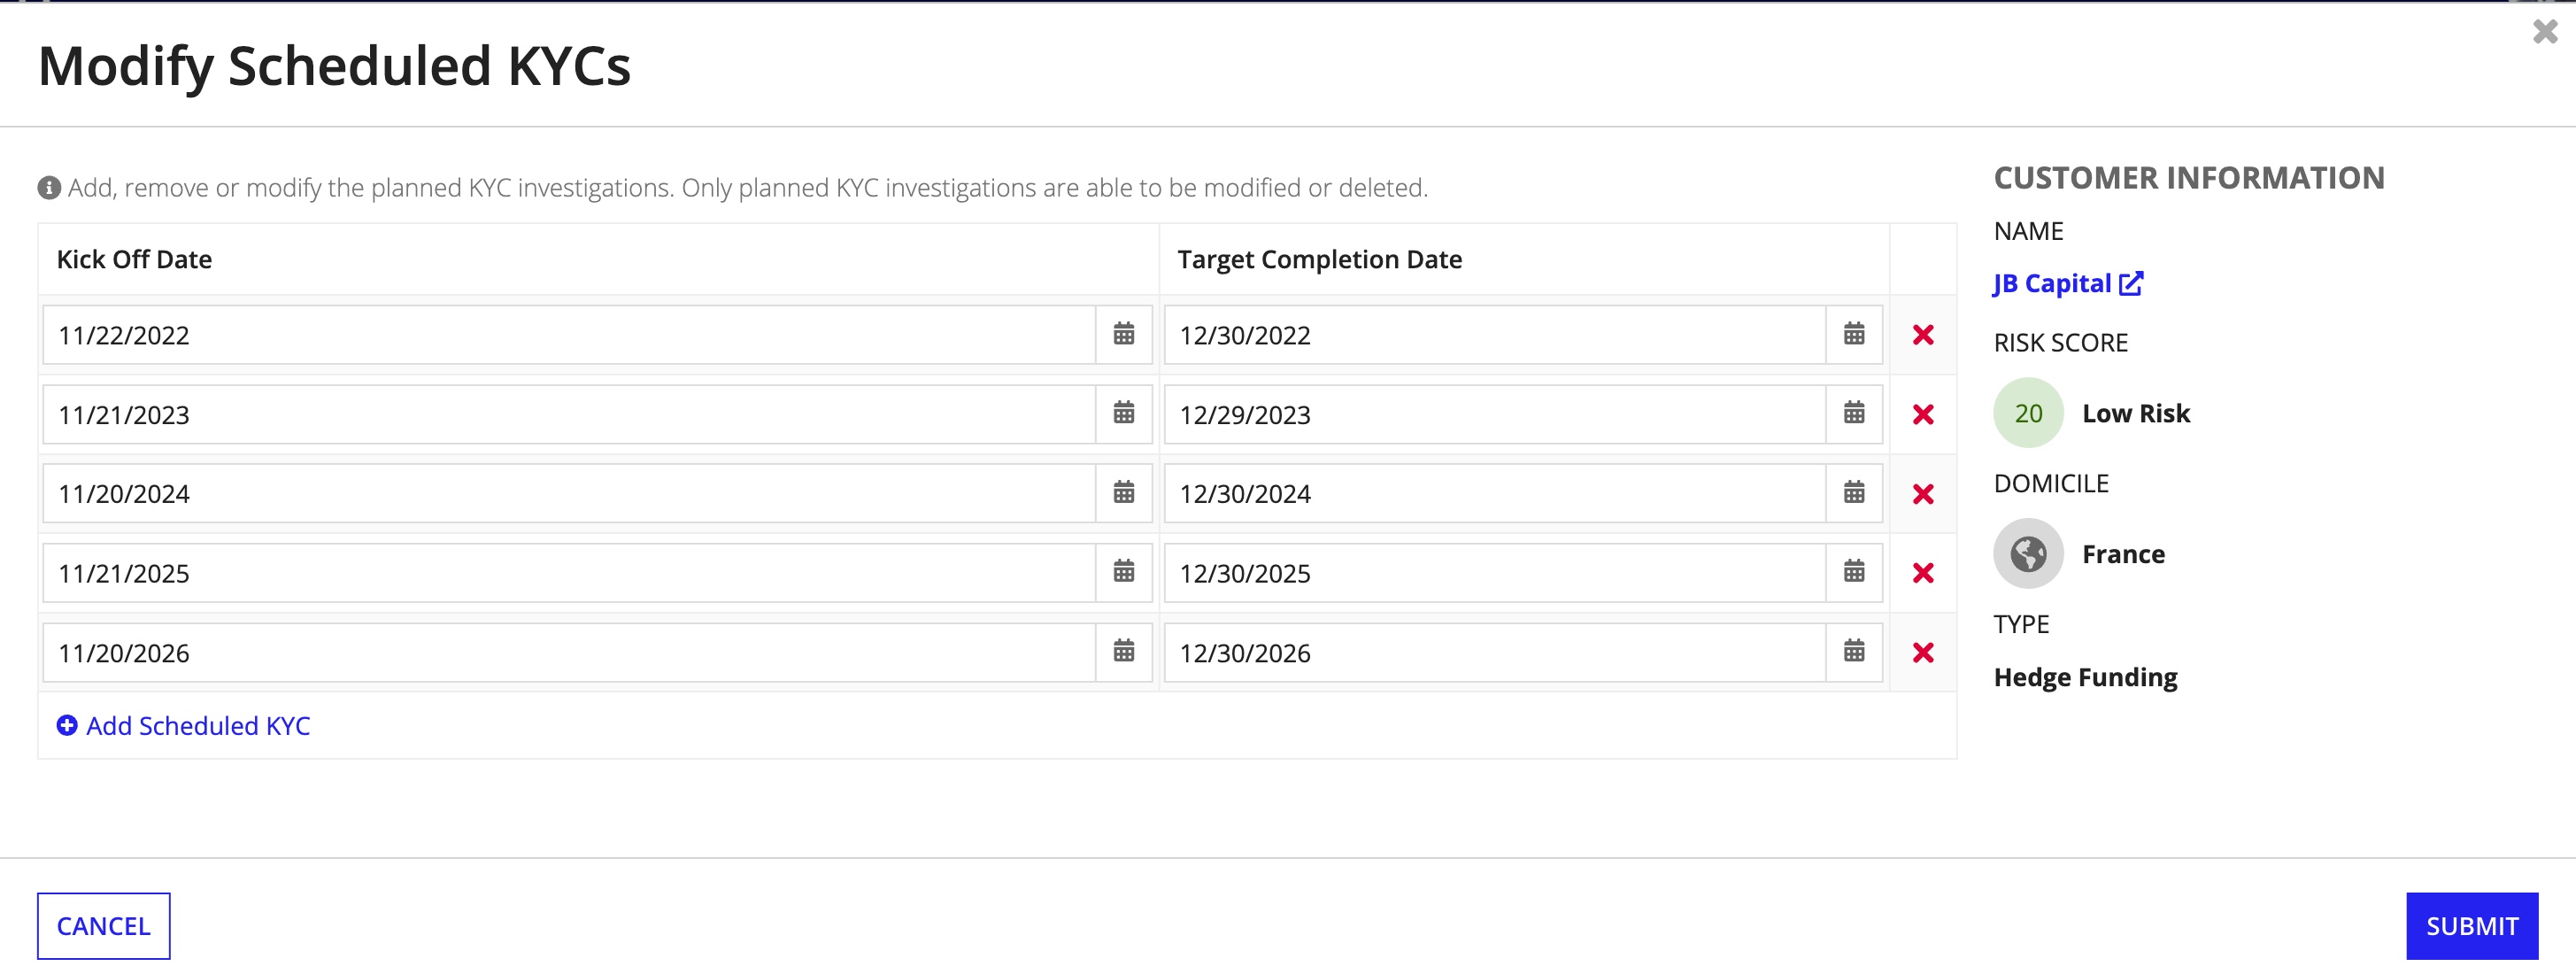
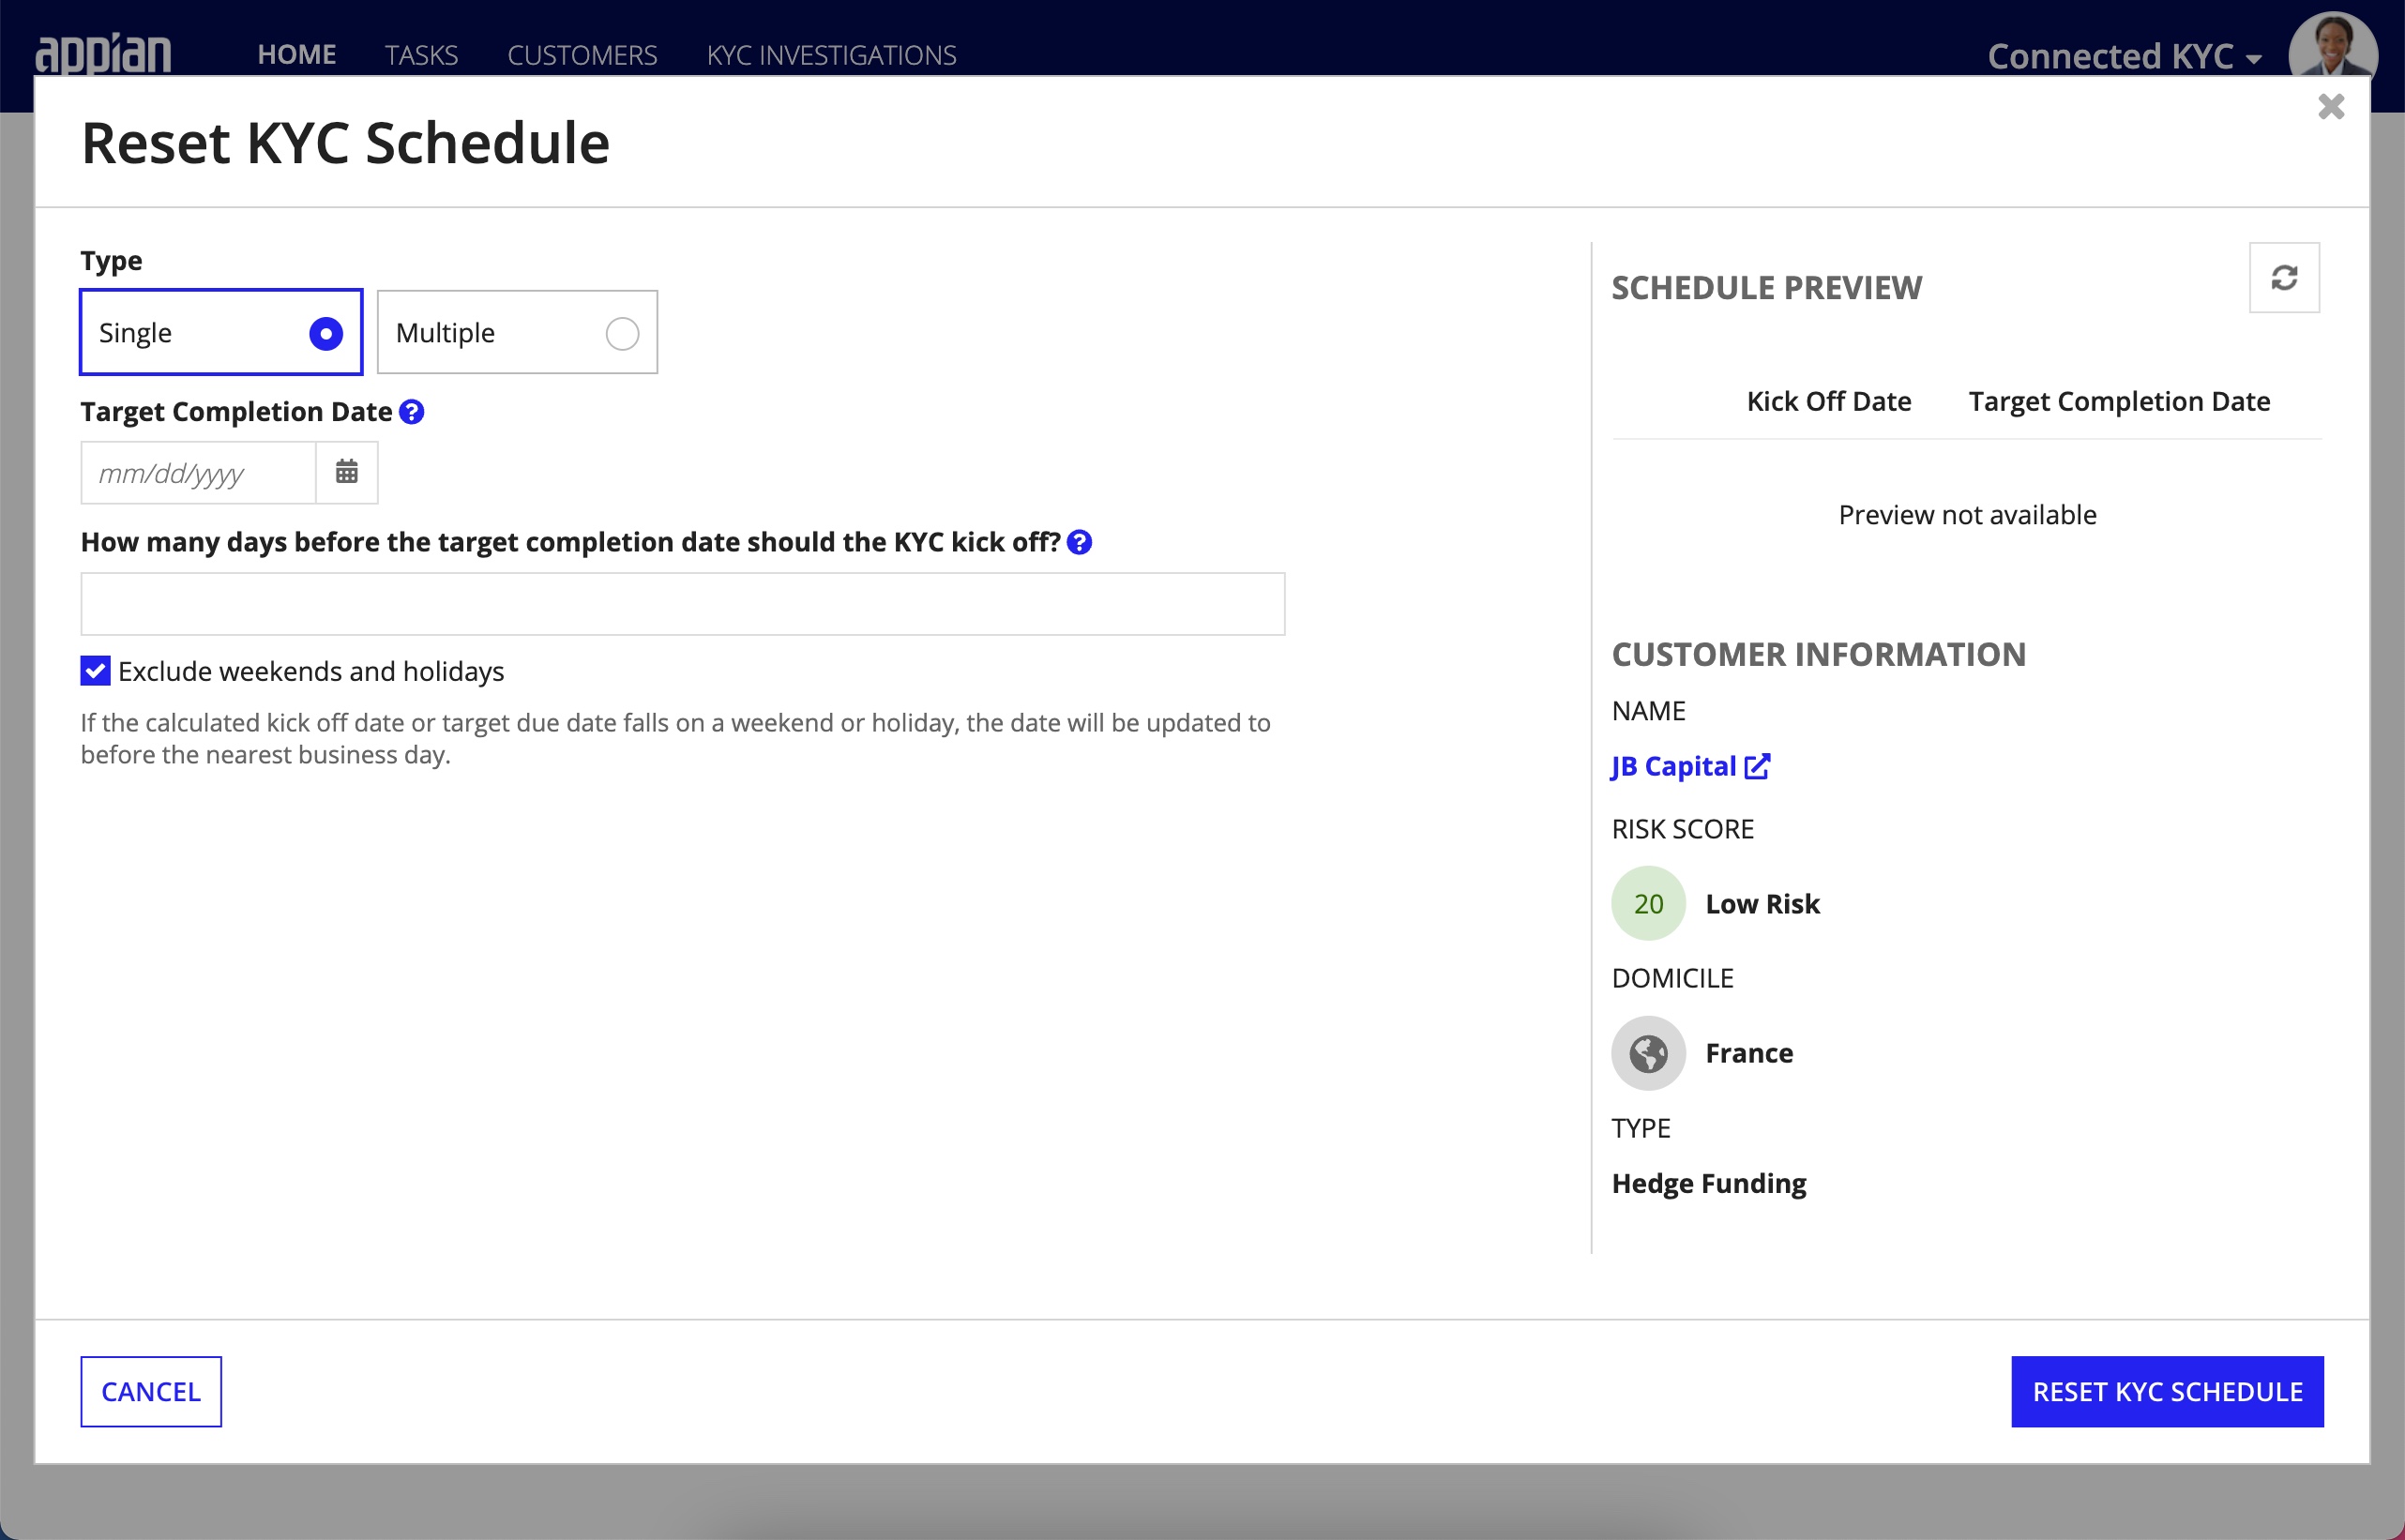
To change all of the scheduled KYC investigations at once, click Reset. New scheduled investigations can be created and the previously scheduled ones will be marked as canceled.
To remove all of the scheduled KYC investigations at once, click Delete All. Once confirmed, the previously scheduled ones will be marked as canceled.

Managing Customers
