|
| This content applies solely to Connected KYC, which must be purchased separately from the Appian base platform. This content was written for Appian 23.1 and may not reflect the interfaces or functionality of other Appian versions.
|
Introduction
The Appian Connected KYC solution is a customizable, expertly-developed application built on the Appian low-code platform. It allows financial services professionals to streamline the Investigations process for new and existing institutional customers into financial service products.
This guide provides guidance for installing Connected KYC or upgrading from one Connected KYC version to the most recent.
System requirements
- Appian platform running version 23.1 or greater.
- A supported version of MariaDB as a business data source.
- Note: Instructions below are for MariaDB databases. For use with other databases, the SQL script used in Step 3 for both installing and upgrading will need to be modified.
- A supported web browser.
Verifying Appian version and database type
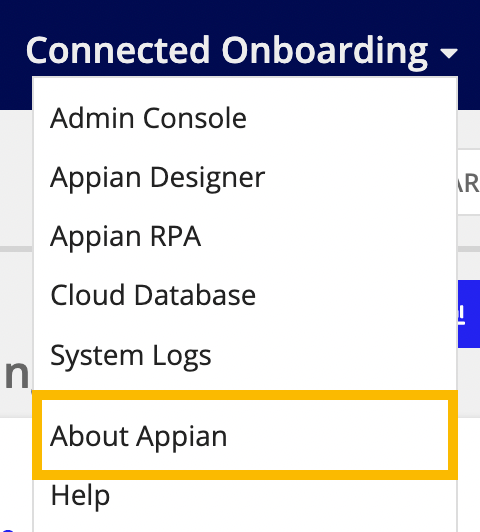
To check the Appian platform version and database: From the navigation bar, click on About Appian.
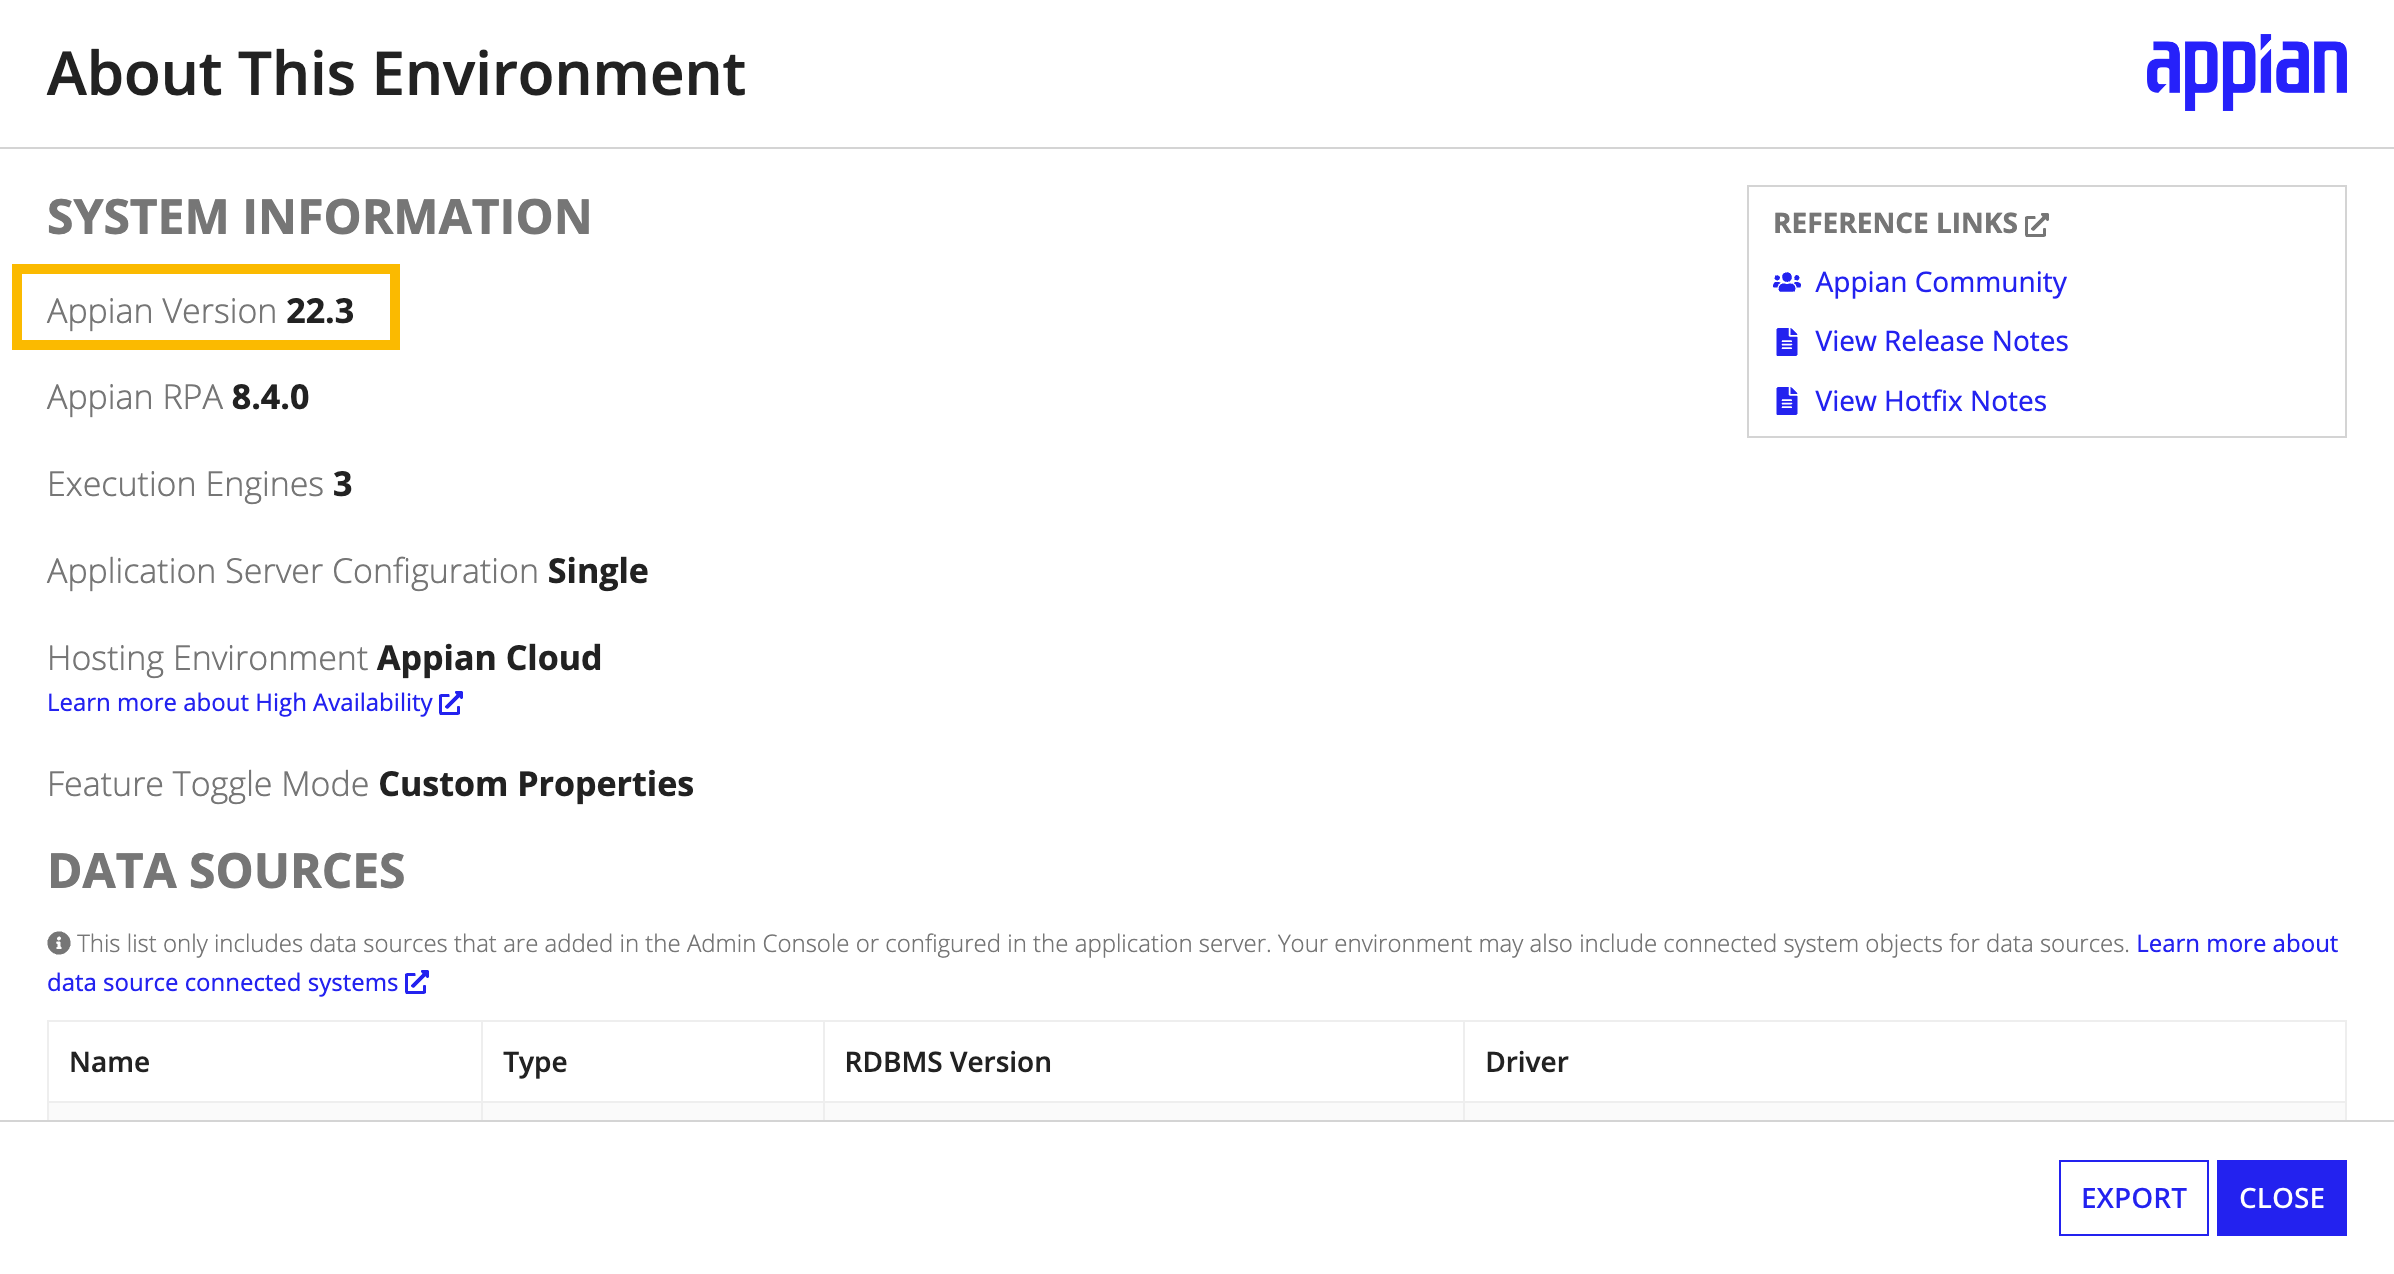
Refer to the Appian Version number under System Information.
To check the solution version: From the Connected KYC homepage, scroll to the bottom.
Technical support
In the instance of technical difficulty, current customers can log into Appian Community and open support cases. All users of Connected KYC can also email Appian Support at support@appian.com.
Installing Connected KYC
Installing Connected KYC consists of five main steps:
- Download the software package.
- Deploy Connected KYC plug-ins to the Appian environment.
- Create the database objects in the business data source.
- Import the Connected KYC application into the Appian environment.
- Configure user start pages
Before starting the installation process, review the System Requirements to make sure all minimum requirements are met.
Step 1: Download software package
The first step in installing Connected KYC is to download the software package that contains the following files. These files will be used in the remaining set up steps.
- 01.ConnectedKycv1.4.0.sql: SQL script for creating the database objects needed for the Connected KYC application.
- ConnectedKycv1.4.0.zip: Application package to import into Appian.
- ConnectedKycv1.4.0.properties: Import customization file for configuring the solution package.
To download the software package:
- In MyAppian, navigate to the Support tab.
- At the top of the page, select DOWNLOADS and then SOLUTIONS.
- In the grid, click Connected KYC v1.4.0.
- Under Downloads, click Connected KYC Installer and agree to the License Agreement.
- Click Connected KYC Installer v1.4.0 to download the ZIP file.
- Unzip
ConnectedKycv1.4.0 - Forum.zip to access the installation files.
Step 2: Deploy plug-ins
Connected KYC relies on the following plug-ins to be deployed and configured in the target system before the application files can be imported.
Appian Cloud environments
To deploy the plug-ins for an Appian Cloud environment:
- In the target environment, log in as the deployment user.
- Navigate to the Admin Console.
- On the left side of the console, click Plug-ins.
- Click ADD PLUG-INS.
- Search for and click
Appian Solutions.
- Click DEPLOY.
- Repeat the above steps, but search for and click the following:
Advanced UnzipFS Integration Plug-inGoogle Cloud AutoMLGoogle Cloud StoragePeople Functions
Self-managed environments
To deploy the plug-ins for a self-managed environment:
- Download the following plug-ins from the Appian AppMarket:
- Follow the Deploying Plug-ins instructions to deploy the plug-ins listed above.
Step 3: Create database objects
In order to create the structure for the database tables, views, and other objects that are a part of the Connected KYC application, you will need to run a DDL script in your database.
To create the database objects:
- In your MariaDB business database, import and run the
sql DDL file that was downloaded in Step 1.
Step 4: Import the application
The next step to install the Connected KYC application is to import the application files into the target environment.
To import the application:
- In the target environment, log in as the deployment user.
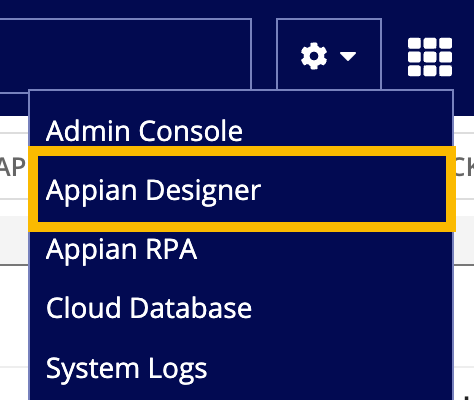
- Navigate to the Appian Designer.
- Click IMPORT.
- Click UPLOAD and choose the
zip file that was downloaded in Step 1.
- Select Include related import customization file and click UPLOAD. Select the
properties file that was downloaded in Step 1.
- Note: If you have credentials for any of the integrations, you may include them in the properties file.
- Click INSPECT in order to ensure that there will be no complications on import.
- Note: Inspection could take several minutes and may time out, but import will continue in the background.
- Click IMPORT.
- Note: The import may time out due to file size, but import will continue in the background.
- Review the import results.
- In Appian Designer, verify that the processes
AS KYC Set Group IDs and AS FS Set Doc IDs ran successfully.
Note: If the business database is not called Appian, a warning will occur when inspecting/importing the data stores. To fix this, after the import is complete, open each data store object and update the Data Source.
Step 5: Configure user start pages
After your import is completed, you should set up User Start Pages in the Appian Admin Console. This will ensure that when your users log in they will automatically be directed to the correct site.
The recommended start pages for the Connected KYC user groups are:
| Group |
Start Page URL |
| AS FS Internal Users |
https://< ENVIRONMENT-NAME >/suite/sites/connected-kyc |
| AS FS Appian Administrators |
https://< ENVIRONMENT-NAME >/suite/design |
Next steps
Now that the solution is installed and the database is set up, you're not quite done yet. There are a few more steps you need to take to get your solution up and running.
If you're using any integrations: Companies House, DocuSign, Dun and Bradstreet, Intelligent Document Processing, Northrow, or OFAC, there are some prerequisites to complete and minimal configuration needed from the System Administration Center.
After that, you're going to want to configure the solution for your organization's needs. How to Configure Connected KYC outlines the steps you will need to take to modify the solution to work with your organization's requirements.
Additional specifications such as branding and timezone can be set in the Appian Admin Console.
Caution: Do not delete objects that are not prefixed with AS_KYC. This can cause problems with future Financial Services solution setups and must be avoided. To learn more about how to safely edit these objects, go to the modifying objects section of our documentation.
Upgrading Connected KYC
When upgrading your Connected KYC solution, if you make any changes to your solution that are not outlined in this Upgrade Guide, your changes may not persist after completing the upgrade or hotfix. This includes any changes or customizations to the application objects or database.
This guide provides instructions for upgrading your Connected KYC solution from version 1.3 to 1.4 to get the latest feature updates and product improvements.
Step 1: Download software package
The first step in installing Connected KYC is to download the software package that contains the following files. These files will be used in the remaining set up steps.
- 01.ConnectedKycv1.4.0.sql: SQL script for creating the database objects needed for the Connected KYC application.
- ConnectedKycv1.4.0.zip: Application package to import into Appian.
- ConnectedKycv1.4.0.properties: Import customization file for configuring the solution package.
To download the software package:
- In MyAppian, navigate to the Support tab.
- At the top of the page, select DOWNLOADS and then SOLUTIONS.
- In the grid, click Connected KYC v1.4.0.
- Under Downloads, click Connected KYC Installer and agree to the License Agreement.
- Click Connected KYC Installer v1.4.0 to download the ZIP file.
- Unzip
ConnectedKYCv1.4.0 - Forum.zip to access the installation files.
Step 2: Backup data and reconfiguration
Backup your database and application to the Appian-provisioned cloud. This will give you the ability to revert back to the previous application state in the event that you need to after deploying the upgrade solution environment.
To backup your database:
- Log in to the solution as a system administrator or database administrator.
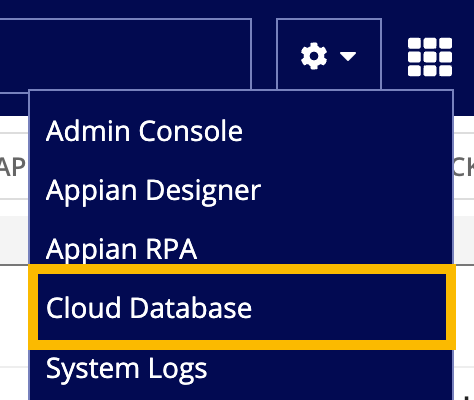
- Click the Applications menu icon and select Cloud Database.
- From your Appian-provisioned cloud database, click on Appian in the panel, and click the Export tab.

- Select Custom, scroll to the bottom, and select Go.
- When prompted, save the .sql generated file to a safe location in case you need to roll back this upgrade.
- This will create a database script with all objects and data in case of the need to revert the changes.
To backup your application:
- From the application navigation menu, navigate to Appian Designer.
- From Appian Designer, click the Connected KYC application checkbox.
- Click the Export dropdown and select Application.
- Append the current version number (v1.4) to the file name and click Export.
- Click Download Package and the Download import customization file link to download the backup.
- Save the files to a safe location in case you need to roll back the upgrade.
- Confirm all of the application objects were exported.
Step 3: Deploy plug-in
Connected KYC relies on the following plug-ins to be deployed and configured in the target system before the application files can be imported.
Appian Cloud environments
To deploy the plug-ins for an Appian Cloud environment:
- In the target environment, log in as the deployment user.
- Navigate to the Admin Console.
- On the left side of the console, click Plug-ins.
- Click ADD PLUG-INS.
- Search for and click Appian Solutions.
- Click DEPLOY.
- Repeat the above steps, but search for and click the following:
Advanced UnzipFS Integration Plug-inGoogle Cloud AutoMLGoogle Cloud StoragePeople Functions
Self-managed environments
The following plug-ins can be downloaded directly from the Appian AppMarket:
Once all plug-ins are downloaded, deploy the plug-ins to all environments. The steps for deploying plug-ins are different depending on if you have an Appian Cloud or self-managed environment.
To deploy the plug-ins for a self-managed environment:
- Follow the Deploying Plug-ins instructions to deploy the
Appian Solutions Plug-ins, Appian FS Integration Solutions Plug-in, Advanced Unzip, Google Cloud AutoML Connected System, Google Cloud Storage Connected System, and People Functions - Plug-in files that were downloaded earlier.
Step 4: Create database objects
In order to create the structure for the database tables, views, and other objects that are a part of the Connected KYC application, you will need to run a DDL script in your database.
To create the database objects:
- In your MariaDB business database, import and run the '01.ConnectedKycv1.4.0.sql' DDL file that was downloaded in Step 1.
Step 5: Import the application
The next step to install the Connected KYC application is to import the application files into the target environment.
To import the application:
- In the target environment, log in as the deployment user.
- Navigate to the Appian Designer.
- Click IMPORT.
- Click UPLOAD and choose the 'ConnectedKycv1.4.0.zip' file that was downloaded in Step 1.
- Select Include related import customization file and click UPLOAD. Select the 'ConnectedKycv1.4.0.properties' file that was downloaded in Step 1.
- Note: If you have credentials for any of the integrations, you may include them in the properties file.
- Click INSPECT in order to ensure that there will be no complications on import.
- Note: Inspection could take several minutes and may time out, but import will continue in the background.
- Click IMPORT.
- Note: The import may time out due to file size, but import will continue in the background.
- Review the import results.
- In Appian Designer, verify that the processes 'AS KYC Set Group IDs' and 'AS FS Set Doc IDs' ran successfully.
If the business database is not called "Appian", a warning will occur when inspecting/importing the data stores. To fix this, after the import is complete, open each data store object and update the Data Source.
Step 6: Update the data stores
Note: If new sites in Appian Cloud for Connected KYC were provisioned for you when your organization purchased the solution, skip this step and continue to the next step.
During the application import, you may see a warning about the Datastore objects. This warning displays if you do not name the database in your environment “Appian”.
To check the database name, click About Appian from the navigation bar
If it does not indicate jdbc/Appian, complete the following steps:
Updating the data stores
After successfully importing the application container, you will need to update your application’s data stores to ensure that any new data tables present in the new release are included within the application.
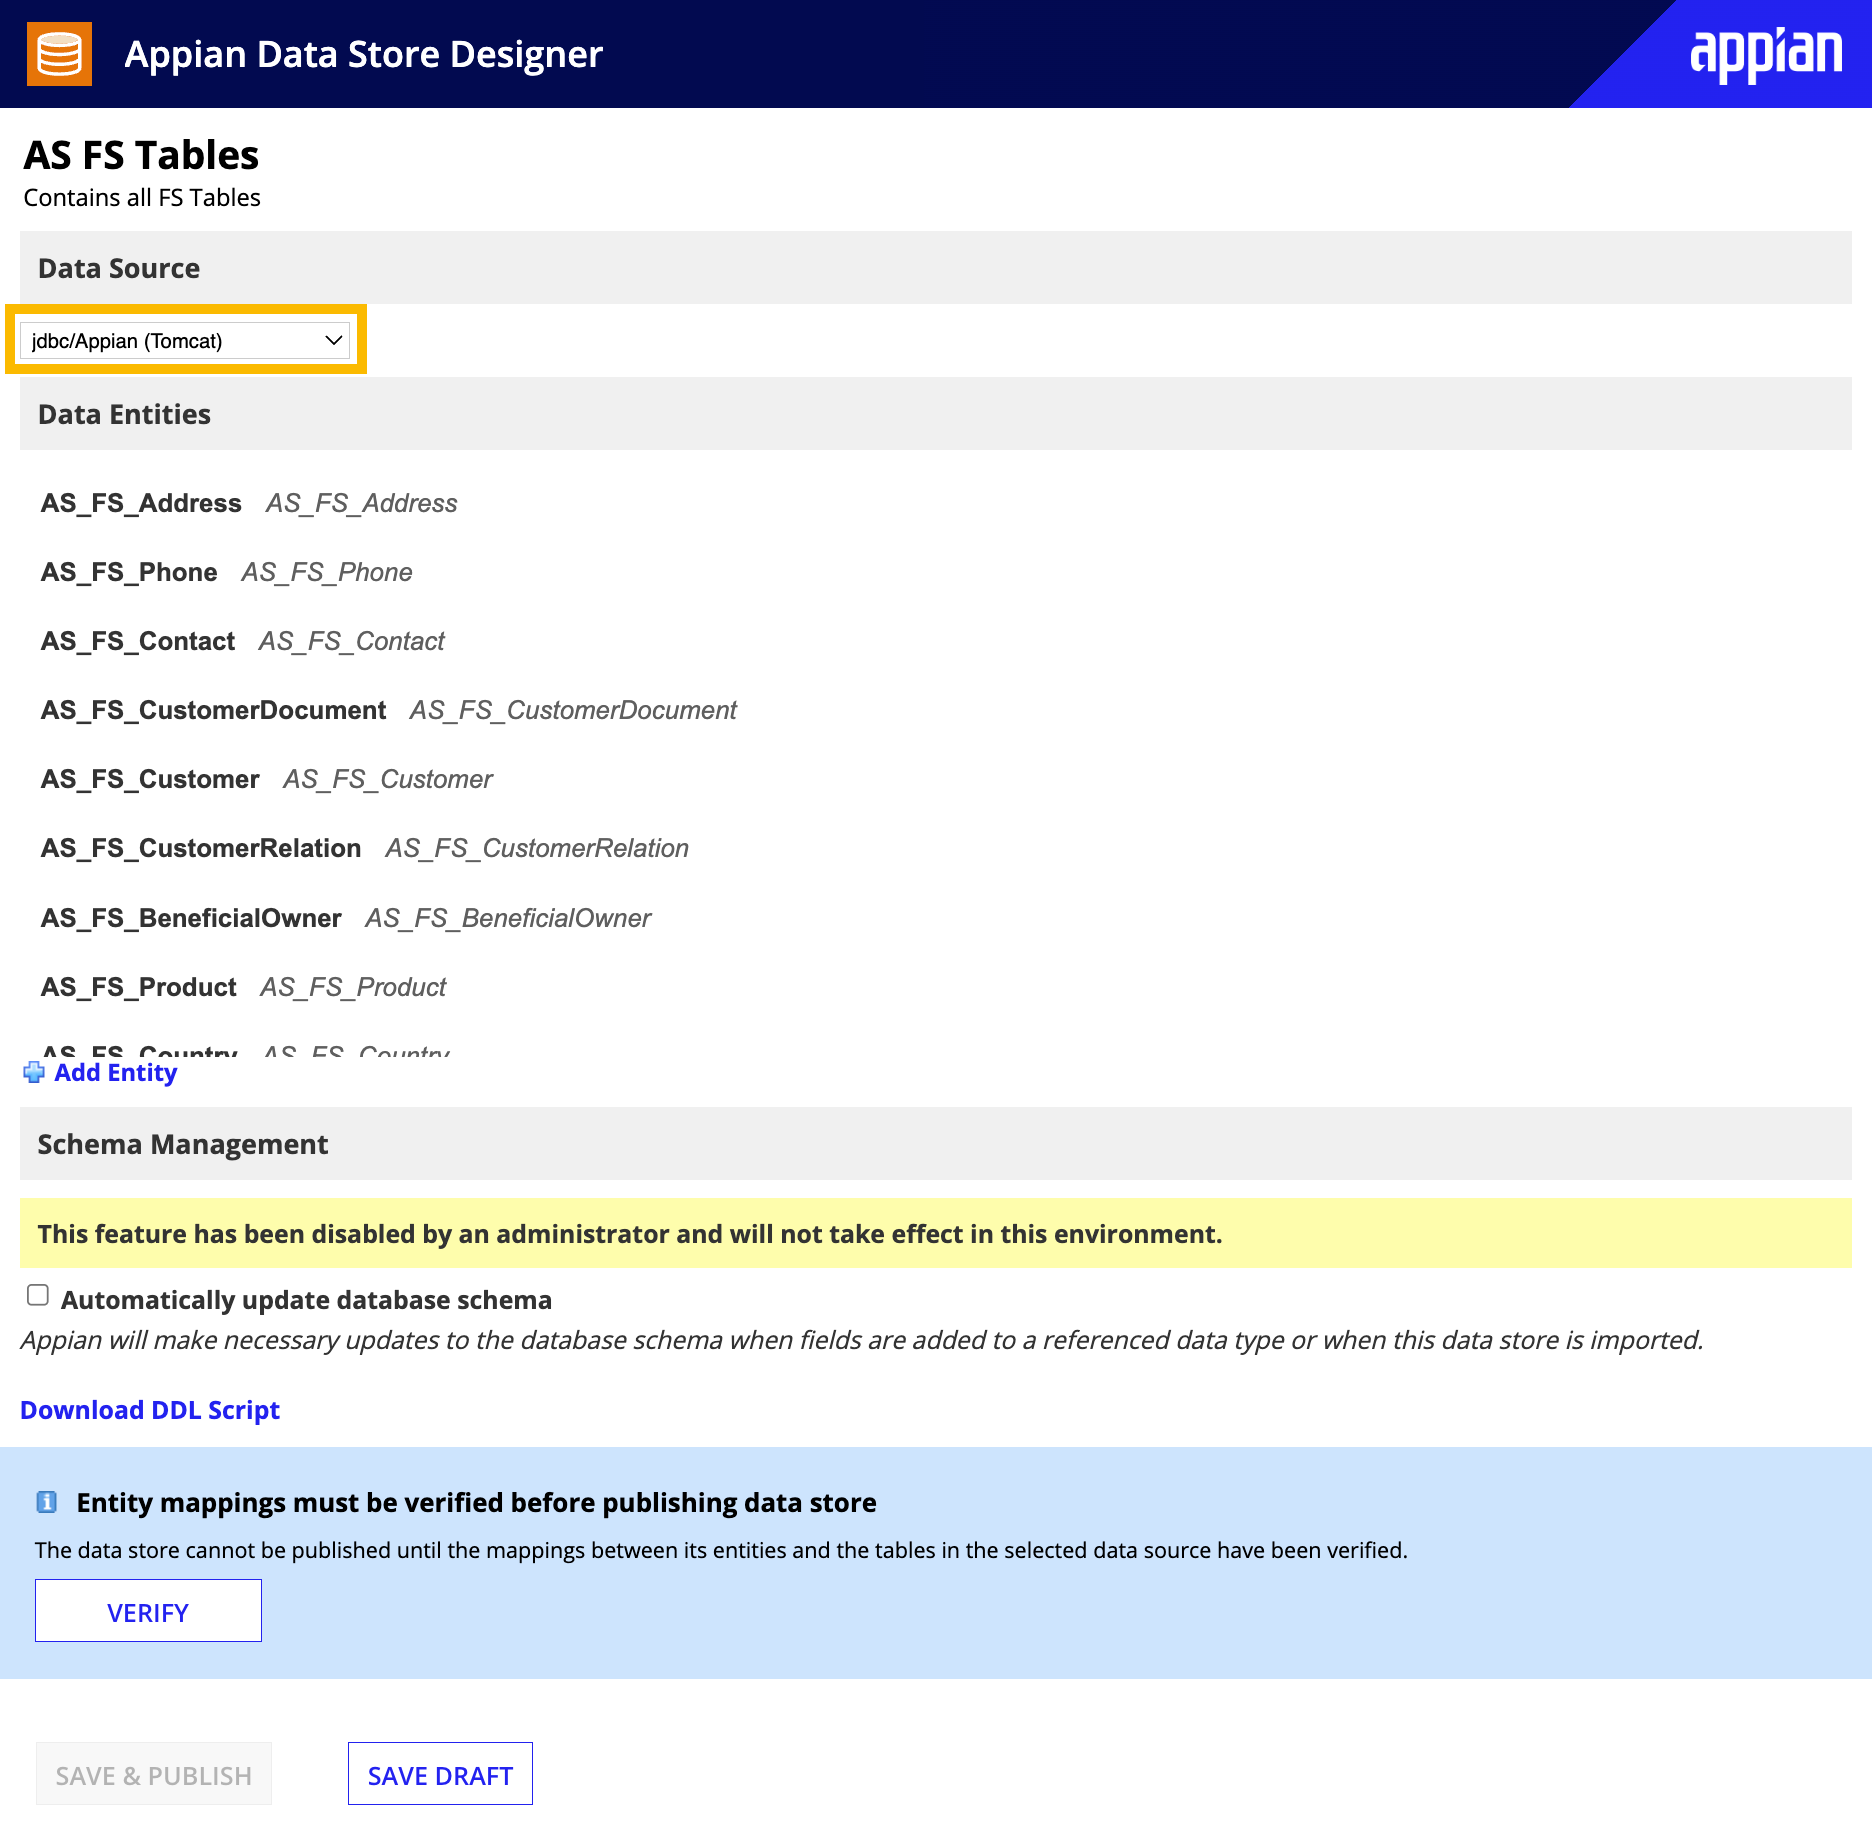
To update these data stores:
- From Appian Designer, open the 'AS FS Tables' data store object.
- When importing the application files, if a warning displays under Data Source that indicates your business database is not called "Appian", select the correct database.

- Modify the draft version of the data store.
- Select the data source from the drop-down.
- Click Save Draft.
- Click VERIFY.
- Click SAVE & PUBLISH.
- Repeat these steps for the rest of the data store objects.
-
Execute the following process models:
AS KYC Set Group IDs
- AS FS Set Doc IDs
Step 7: Update Docusign Connected System Credentials (Optional)
- From Appian Designer, open the
AS EI Docusign Connected System connected system object.
- Follow these instructions to generate the proper credentials for JWT authentication for docusign.
- Update the Private RSA Key field of the docusign connected system and verify the other fields are populated with your existing credentials.
Step 8: Deploy upgrade to other environments (Optional)
After validating that the upgrade was completed successfully, you can deploy the upgrade to additional environments. We recommend using connected environments with the ability to directly deploy and completing the following steps.
When you are ready to upgrade your production environment, make sure you upgrade it during an off-peak time, at the end of the calendar day, for the majority of your users.
- From Admin Console, set a maintenance window in the target environment.
- Repeat steps 2, 3, and 4 for your target environment.
- In the Appian Designer of your source environment, prepare to deploy to a target environment.

- Select the target environment and click Next.
- Select Entire Application.
- Select Database Scripts tab.
- Select the Data Source from the dropdown.
- Upload 01.ConnectedKycv1.4.0.sql in Database Scripts.
- Click Next to Inspect the package:
- Make sure there are no missing precedents.
- During inspection, you may see conflicts show up as warnings. You can safely ignore conflicts that are related to branding configurations or hotfixes that have been directly applied to your solution. Contact technical support if you cannot discern the cause of the conflict.
- Warnings may show up for database changes. The database script
01.ConnectedKycv1.4.0.sql will add any missing columns.
- Due to the size of the package, the inspection process may time out and throw a HTTP 504 error. If this happens, you may continue to follow the deployment steps below.
- Click Next to review the deployment.
- Click Deploy to deploy the changes to your target environment.
- Once your deployment is in progress, the deployment details will be available on the Deployments View in the source and target environment. Deployment details are only visible by system administrators and application administrators.
- If your deployments require review, application administrators and users in the reviewer group will receive emails about the pending deployment. They can approve or reject packages in the deployments view. After a package has successfully deployed to the target environment, the same package can be deployed to additional environments.
- Once the deployment is complete, remove the maintenance window.
