| This content applies solely to Connected KYC, which must be purchased separately from the Appian base platform. This content was written for Appian 23.1 and may not reflect the interfaces or functionality of other Appian versions. |
New Investigations can involve a lot of documentation. From agreements to financial documentation such as tax forms, Appian Connected KYC allows you to manage all of your documents in one place and provides a guided workflow to walk you through the process of attaching a new or existing document to your Investigation or task. When enabled, Connected KYC uses the power of intelligent document processing (IDP) to properly classify the document type for an uploaded document. This ensures data integrity and saves onboarders time.
This page describes how to use Connected KYC to view, attach, update and manage all of your Investigations documents.
Connected KYC includes a full document review and approval process, which correspond to distinct document statuses to help users know where in the lifecycle the document sits.
The document statuses are:
Each required document will go through the following steps to fulfill the requirement:
If a document is Rejected in step #4, Connected KYC will create a new attach document task for the requirement and the process will begin again and continue until the document is Approved.
A document can be attached to a Investigation via:
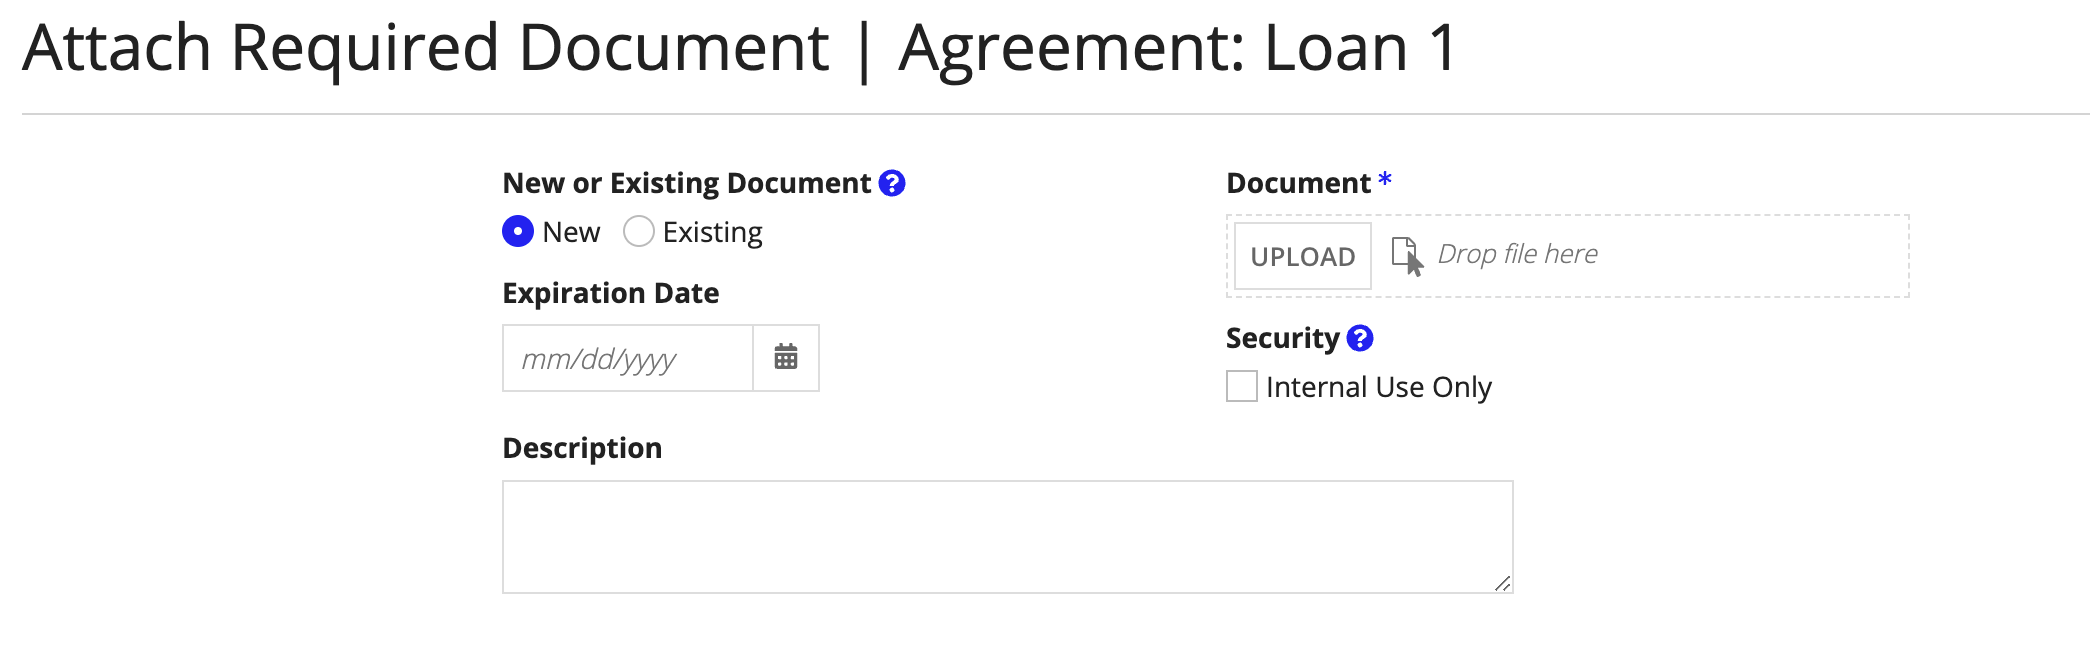
To attach a document:
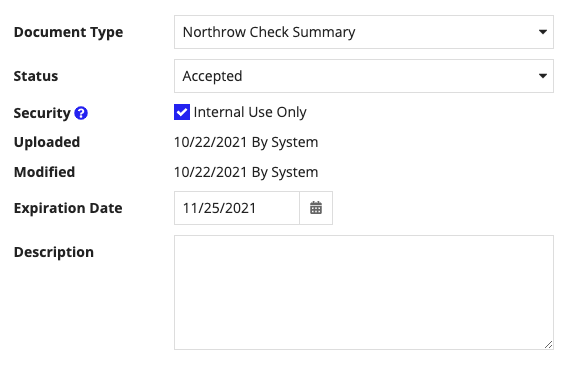
(Optional) Change Security to be an internal document.
It is crucial to ensure the documents uploaded to the system are the correct and expected type. Connected KYC uses Intelligent Document Processing (IDP) to verify the document types automatically to ensure the accuracy of the uploaded document before a user takes time to review it.
When a user attached a document, they must select a document type. IDP will compare the document type selected to the document template expected and if these match, the review task will be assigned.
If the system cannot match the uploaded document's DOCUMENT TYPE or the system's confidence level is below the threshold set by the administrator, a DOCUMENT RECONCILIATION task will be generated and assigned to the user that uploaded the document.
If the customer uploaded the document, the primary owner will receive the task. The user will be able to manually select the DOCUMENT TYPE at that time and the type confidence level will be set at 100%.
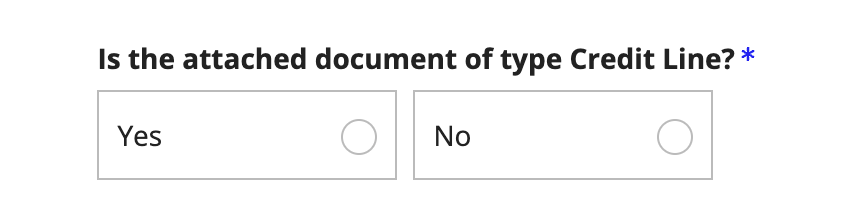
A document reconciliation task is opened when an uploaded document's type cannot be verified by IDP. The user who uploaded the unverified document will be asked to confirm the documents type.
If the document's type was indeed correct, the user selects Yes when asked Is the attached document of type < entered type >?. If the user selects No, they will be asked to upload a new document and it will be run through IDP again.
If IDP is not on in the environment, this task will be skipped.
After a document's type is verified, a review task will be opened. The reviewer can choose whether or not to Approve or Reject the document. If the document is approved, the document requirement will be fulfilled and checked off in the Required Documents section. If the document is rejected, a new attach document task is opened and the process begins again.
There may be certain documents that are required as part of the Investigation. In order to keep track of these documents, Connected KYC will show the user a checklist of which documents are outstanding.
Document requirements are set up by configuring Investigation workflows. Business users can automatically default the document requirements for each workflow, but a user is able to modify to the list of documents requirements if any additional documents are needed. After the Investigation is kicked off, the document requirements will automatically be added to the Investigation and the attach and review tasks will be created.
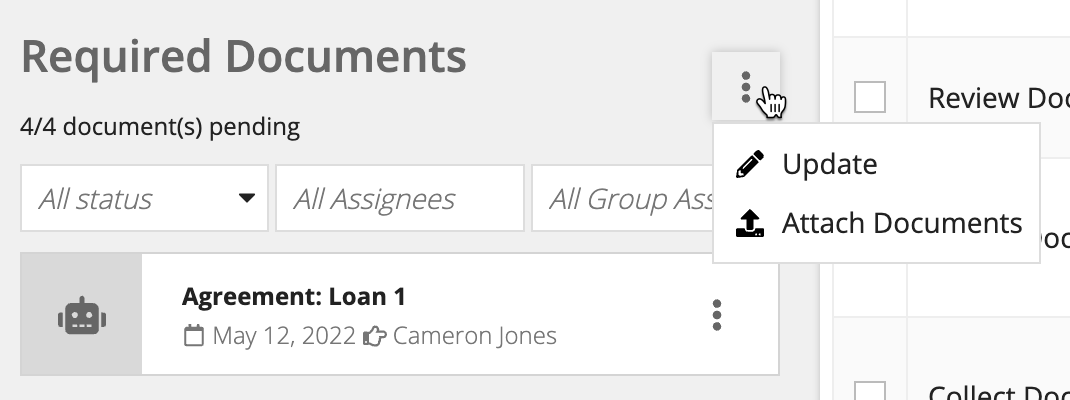
To modify the required document list from the Investigation record, open the menu in the Required Documents section of the Summary tab and Click Update.
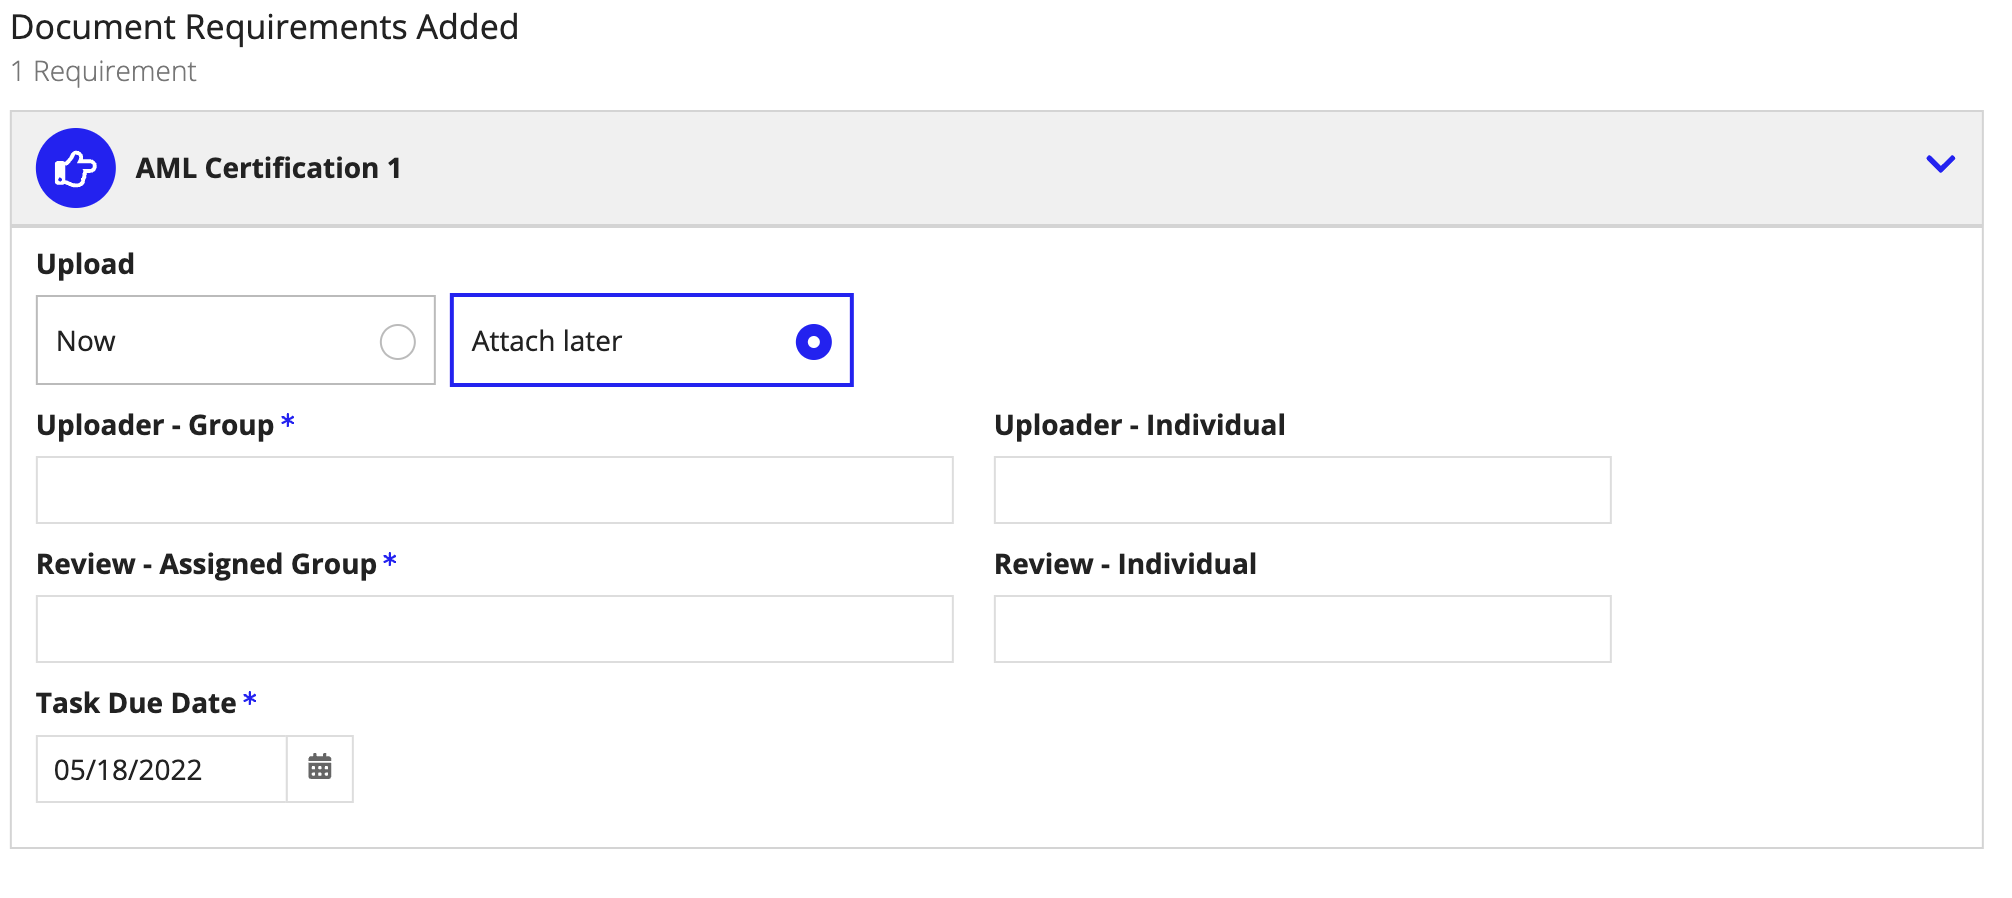
To add a document requirement:
To remove a document requirement:
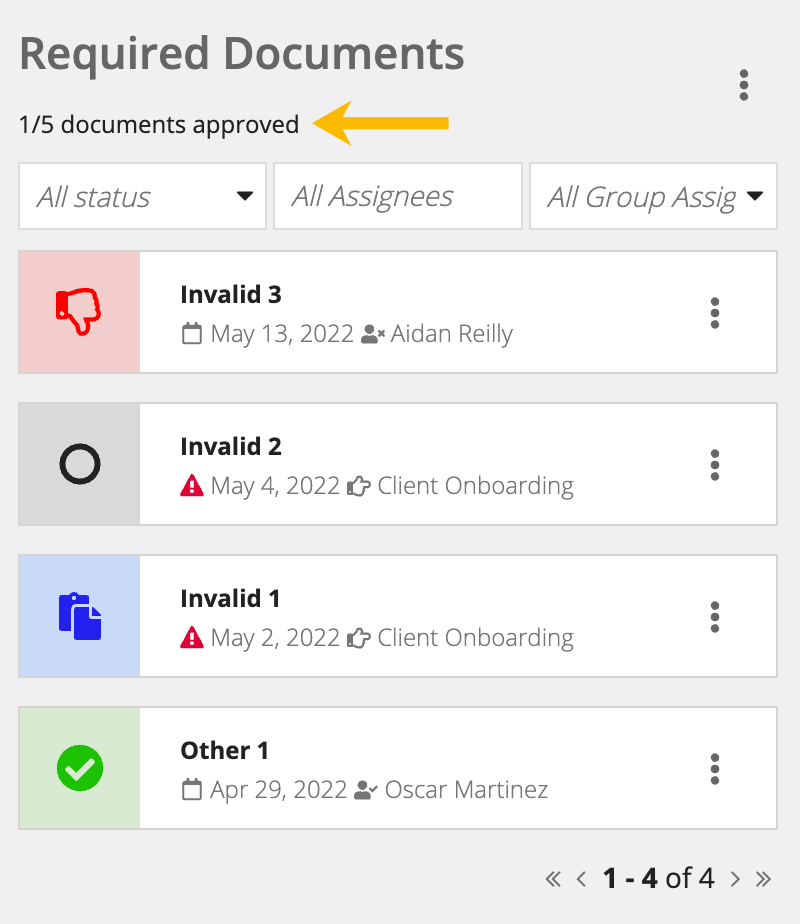
Connected KYC makes it easy for you to view a list of all required documents for a individual Investigation and their details from the the Summary or Document tabs in the Investigation record. Know exactly where your required documents are in the process, when they are due, and the user or user group they are assigned to.
From the page, you can drill down into a specific Investigation record by locating and clicking the link from the Investigation list. By default, the Summary tab displays and provides a Required Documents section where you can view a list of all of the document requirements associated with the Investigation.
At a quick glance, the Required Documents list shows you how many required documents are outstanding and the status of each document. You can also quickly find a specific document by filtering the list by status, assignee, or group. Users can update the required document list or attach additional documents to the Investigation by clicking the icon.
From the Documents tab of a Investigations record, you can perform the following actions:
After a document has been uploaded, a user is able to update the document details to ensure accuracy of the documents on the Investigation.
The user can update the following details:
To update the details of a document from the DOCUMENTS tab:
If a document is no longer required for an Investigation or a customer, it can be removed by the user that originally uploaded the document.
For Investigations, when a document is deleted, it is still available on the customer's document tab.
For customers, if a document is deleted, the document will no longer be available on the customer's document tab. Additionally, the document can no longer be used as an existing document for other Investigation. A customer document cannot be removed if there are existing Investigation links.
To delete a document:
Managing Documents
