| This content applies solely to Workforce Safety, which must be purchased separately from the Appian base platform. This content was written for Appian 21.4 and may not reflect the interfaces or functionality of other Appian versions. |
We created Workforce Safety to help organizations with a unique problem—how can they keep their employees safe during the COVID-19 pandemic?
Reacting quickly to possible exposures while maintaining employee anonymity is of paramount importance.
This page outlines how response managers, screeners, and coordinators use the Response Hub to manage crises.
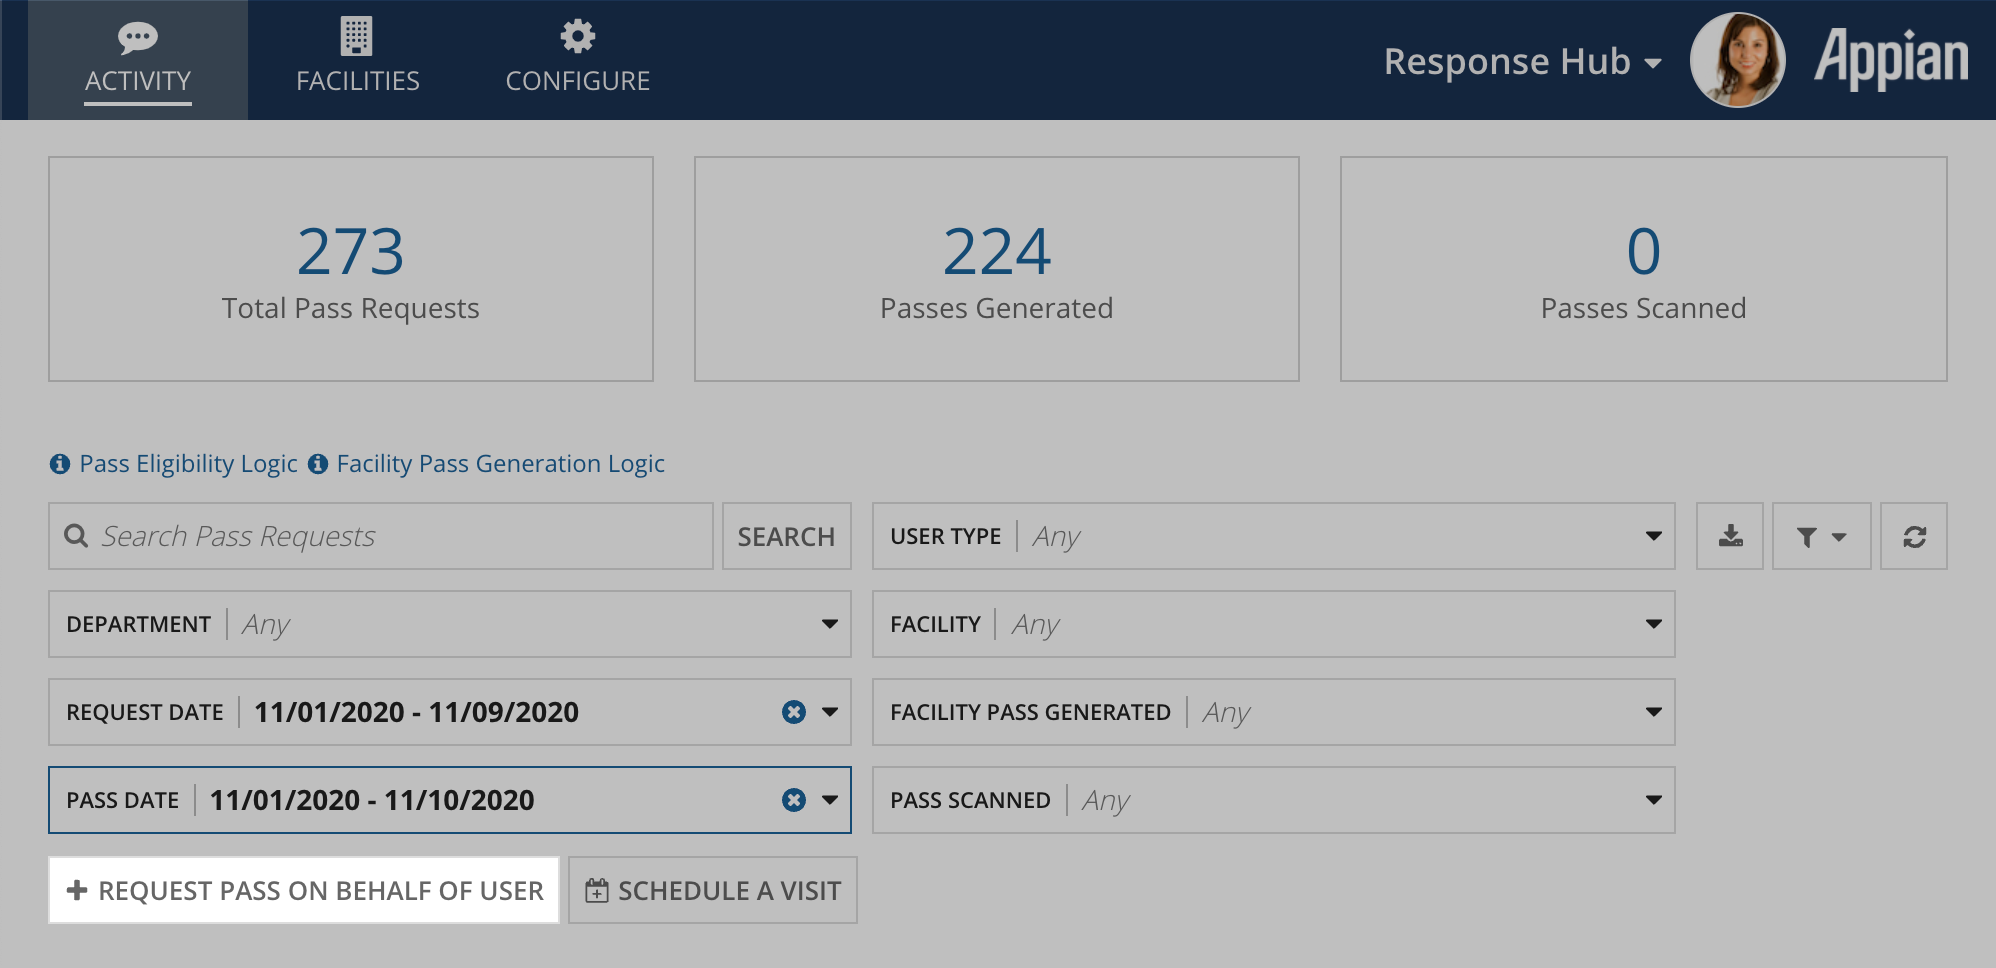
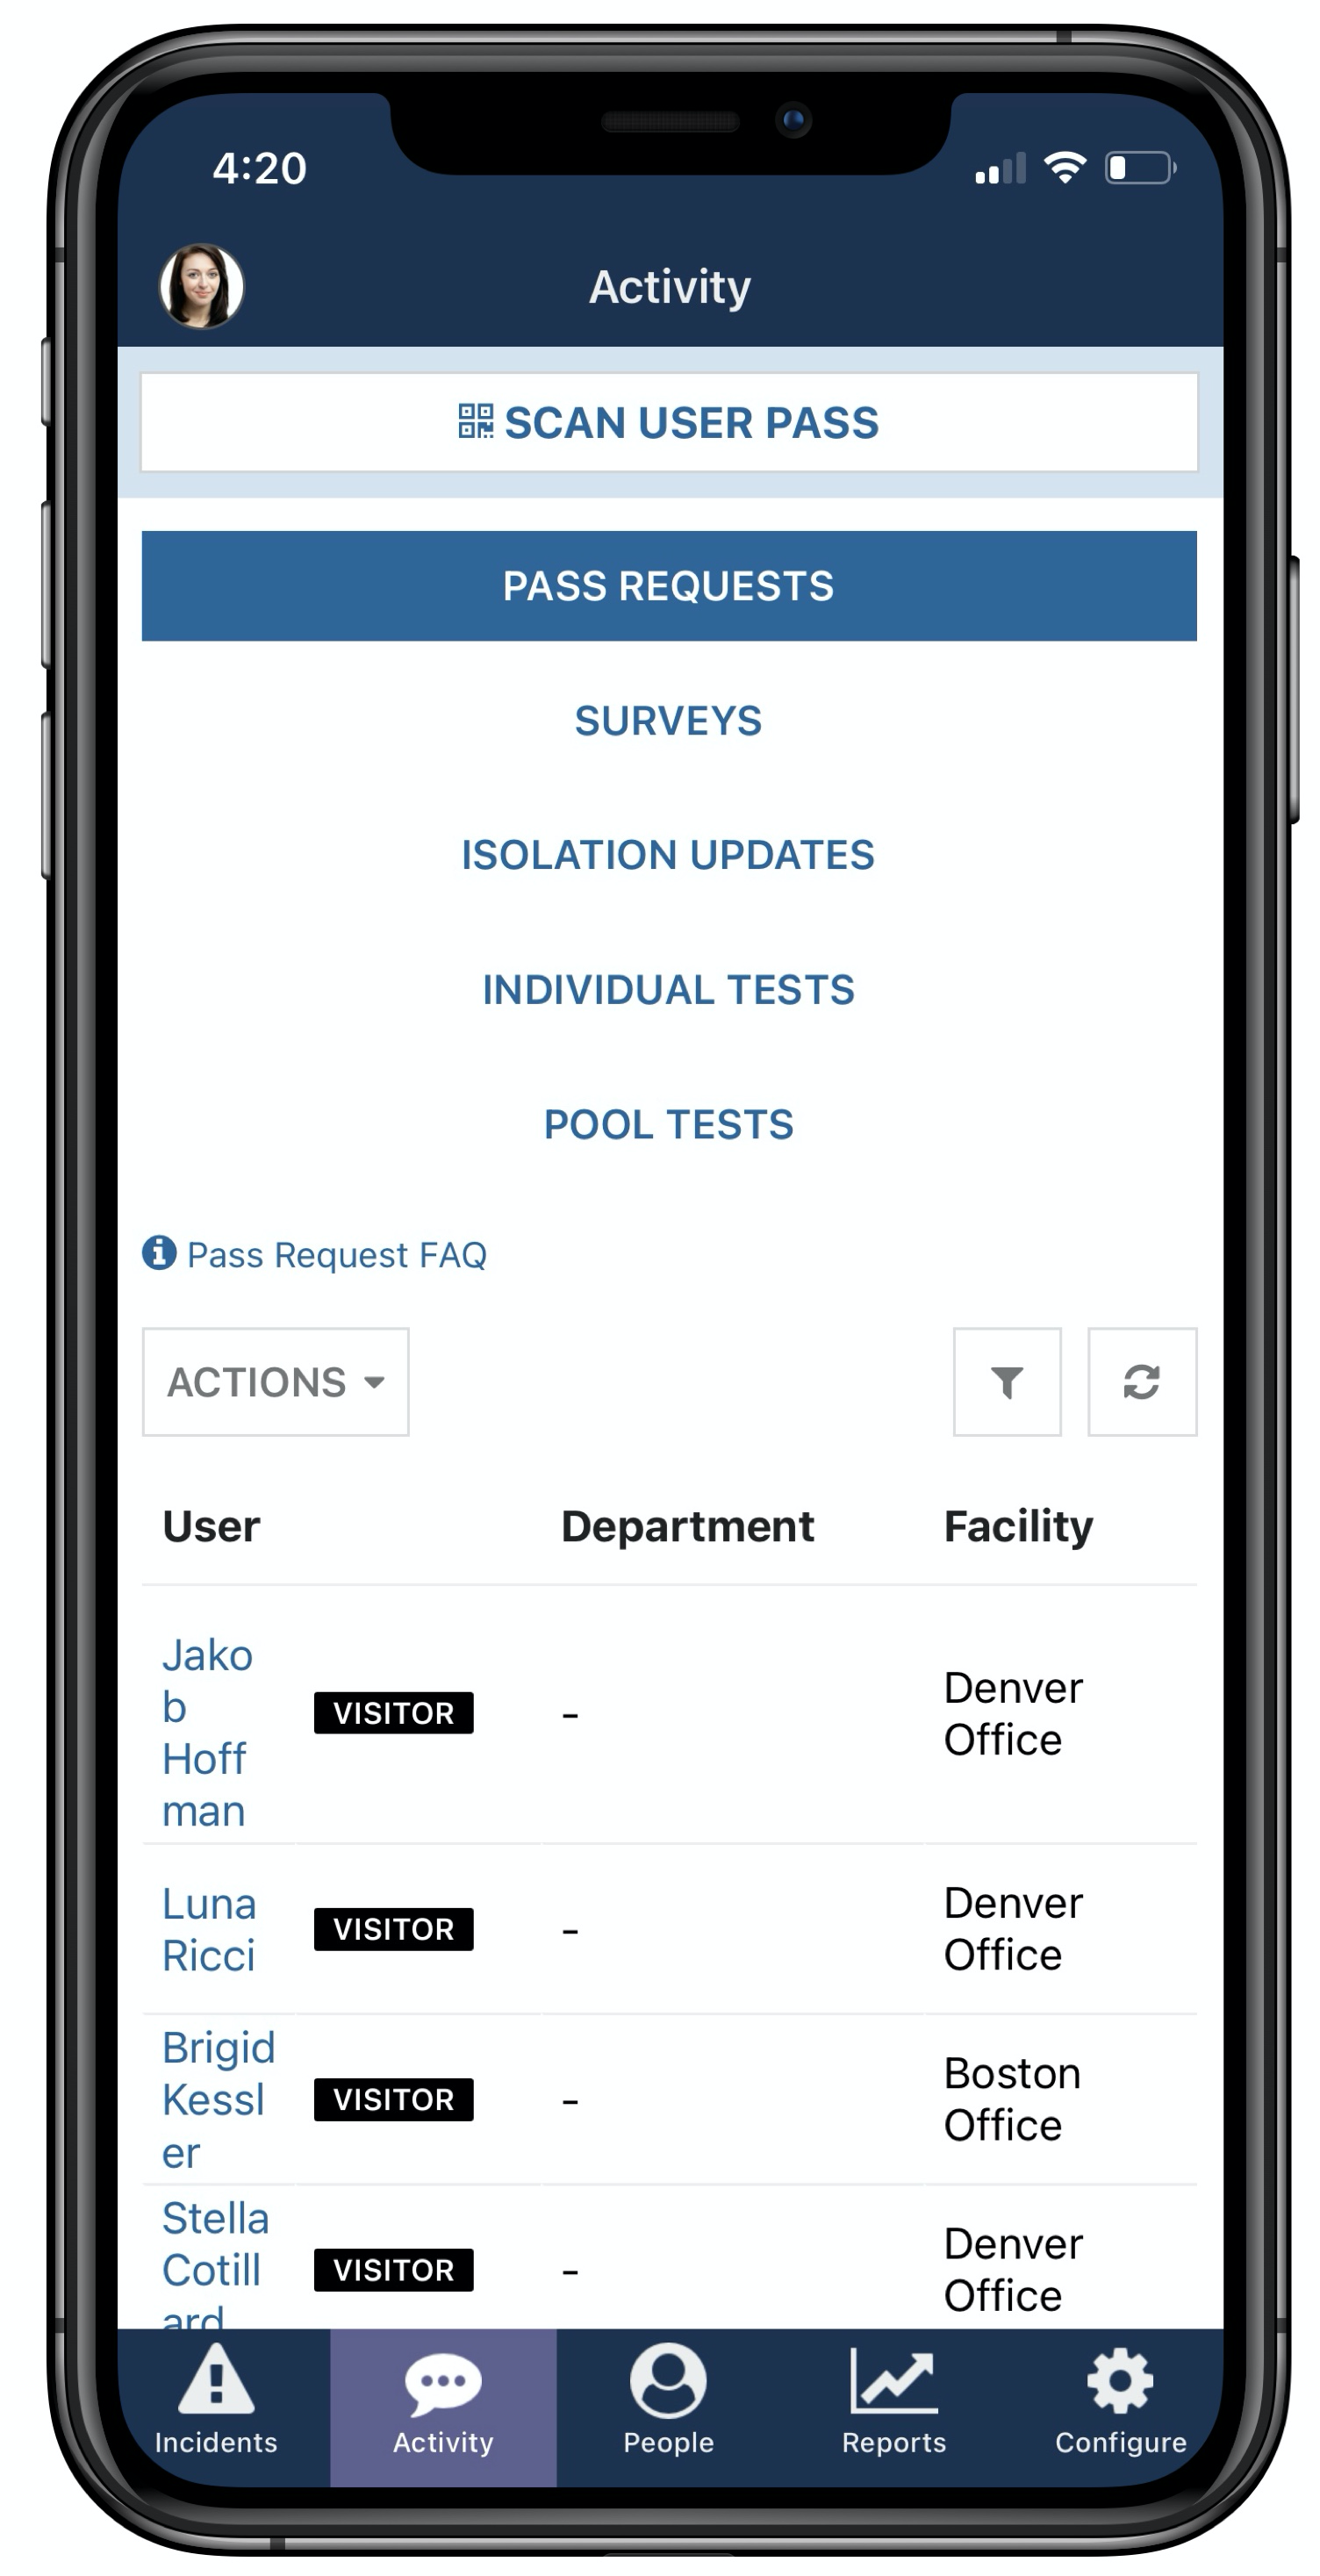
Screeners and response managers can request a pass for a user in the Activity tab in the Response Hub.
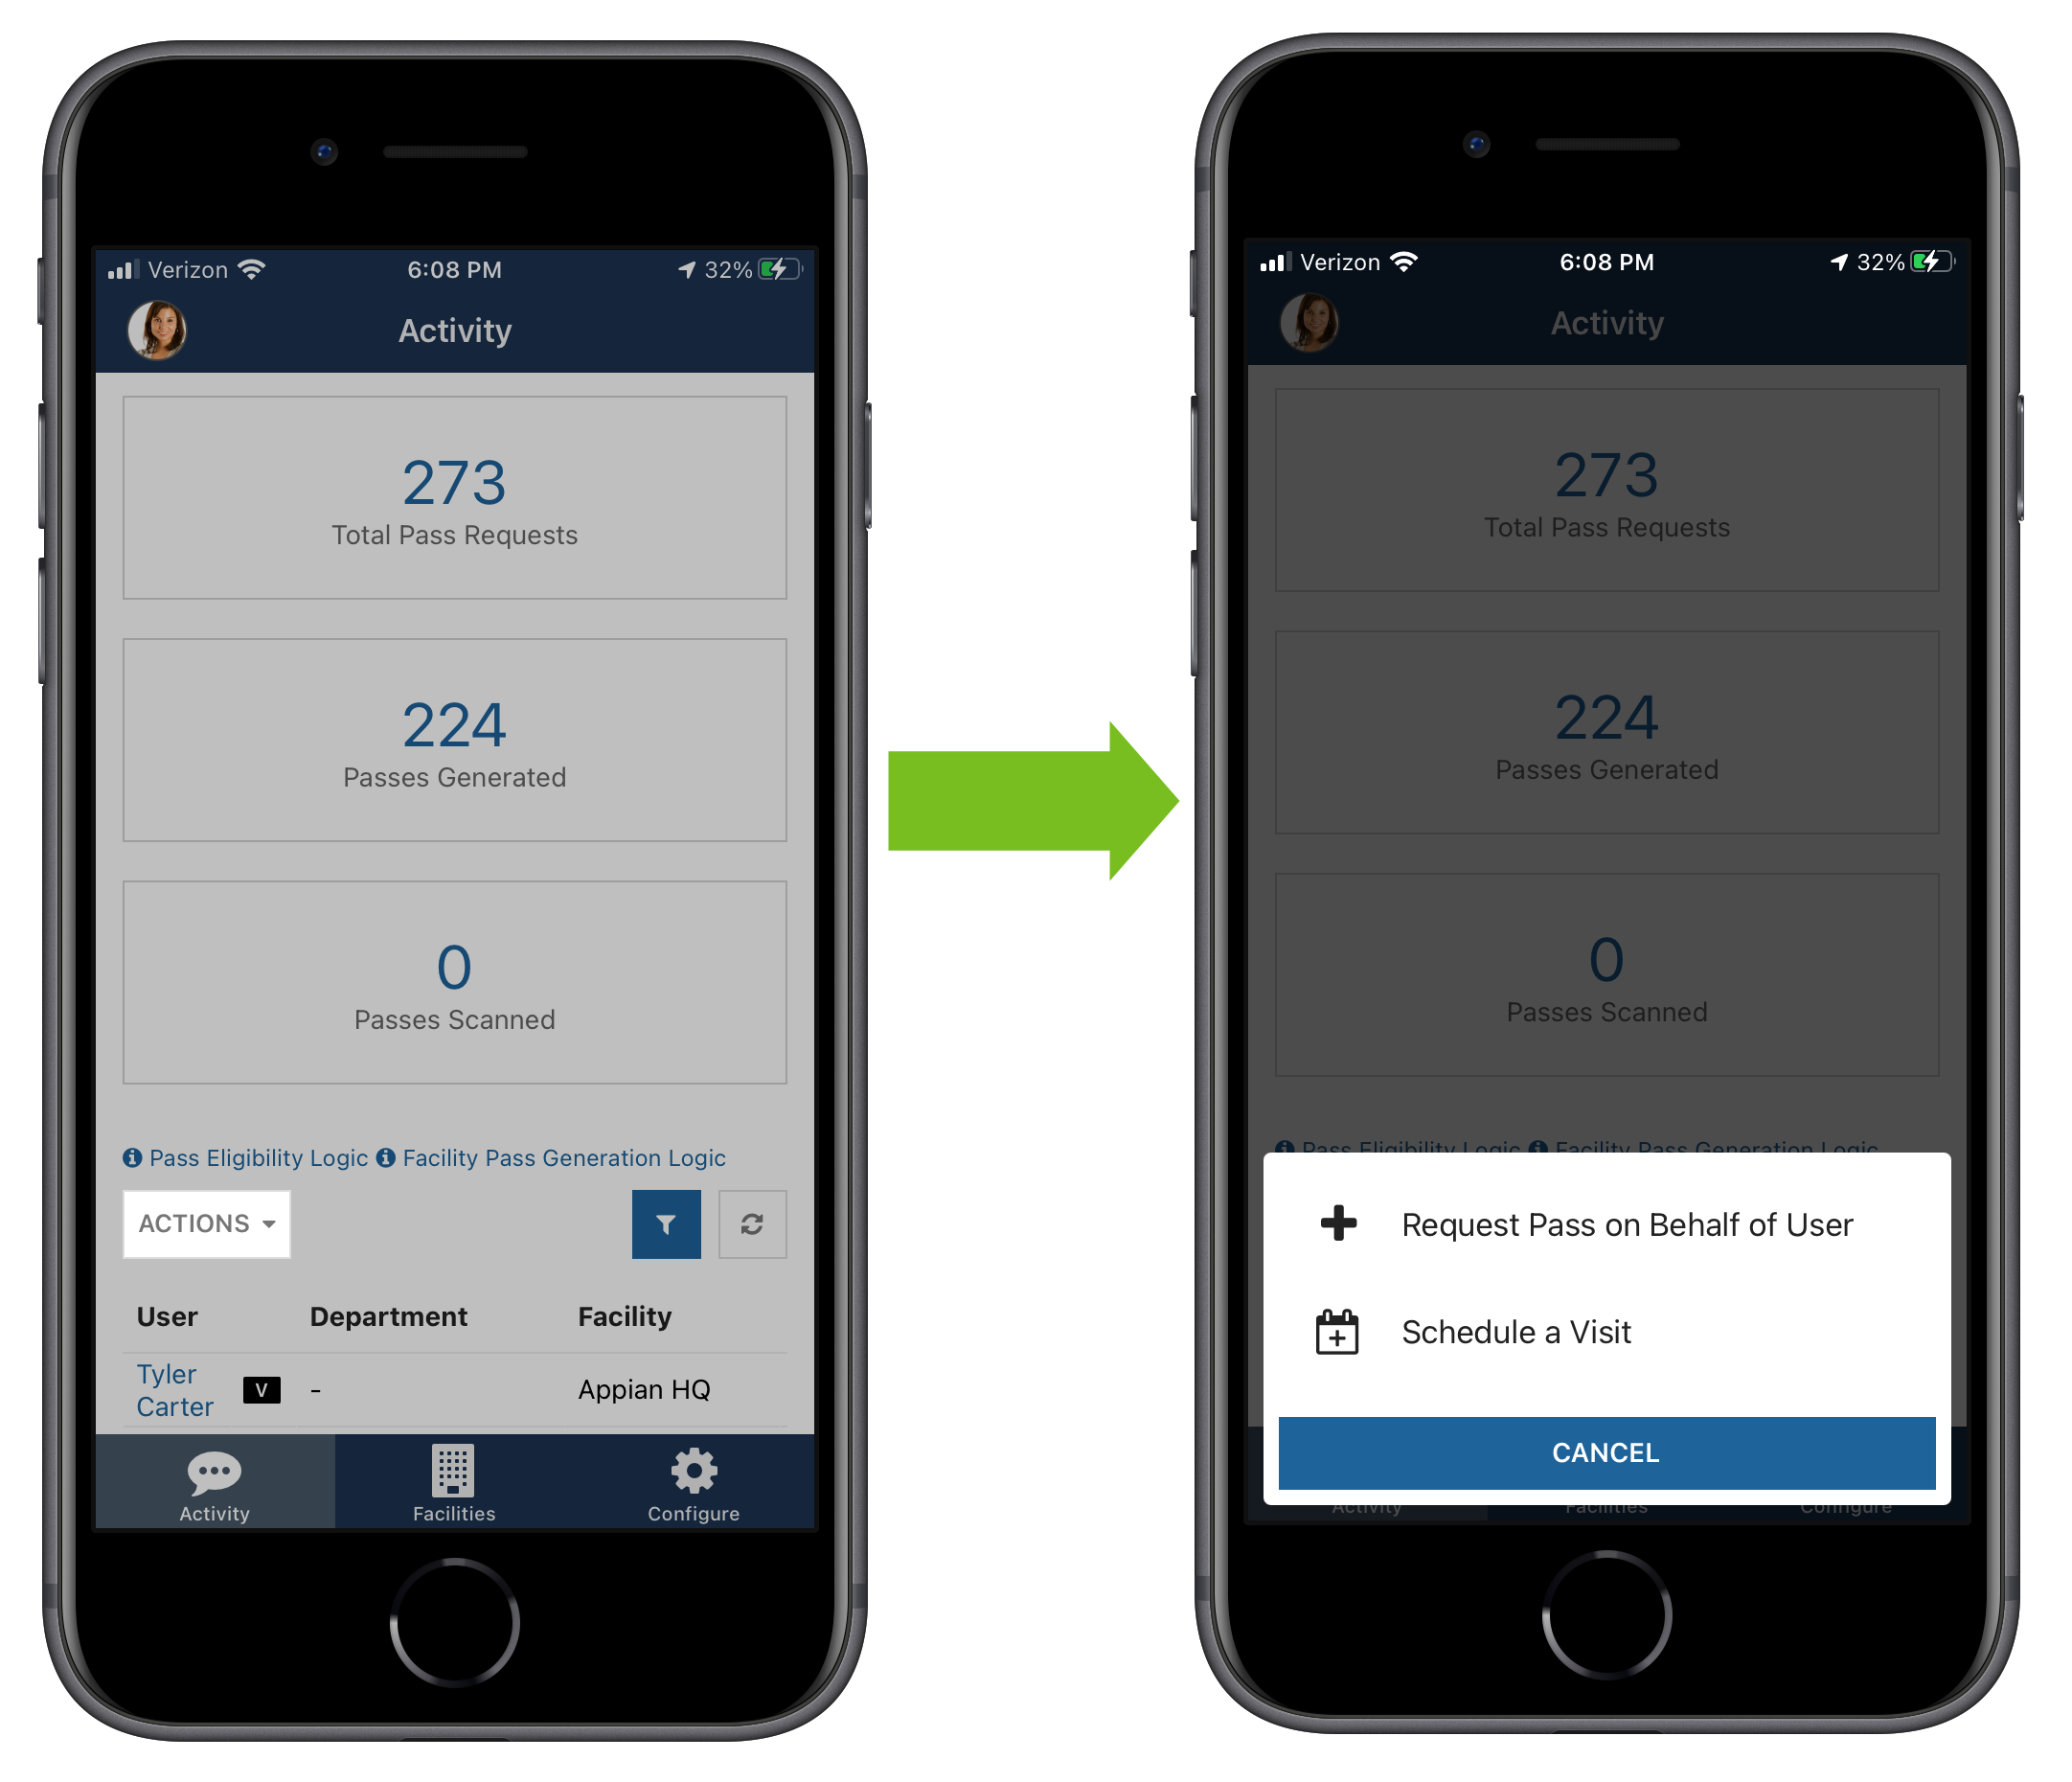
To request a pass on mobile, click ACTIONS, then Request a Pass on Behalf of User.
Screeners can also request passes for visitors, but the visitor must have a visit scheduled first. See On-site registration process for more details on this process.
Note that capacity restrictions and cohorts do not apply to visitors.
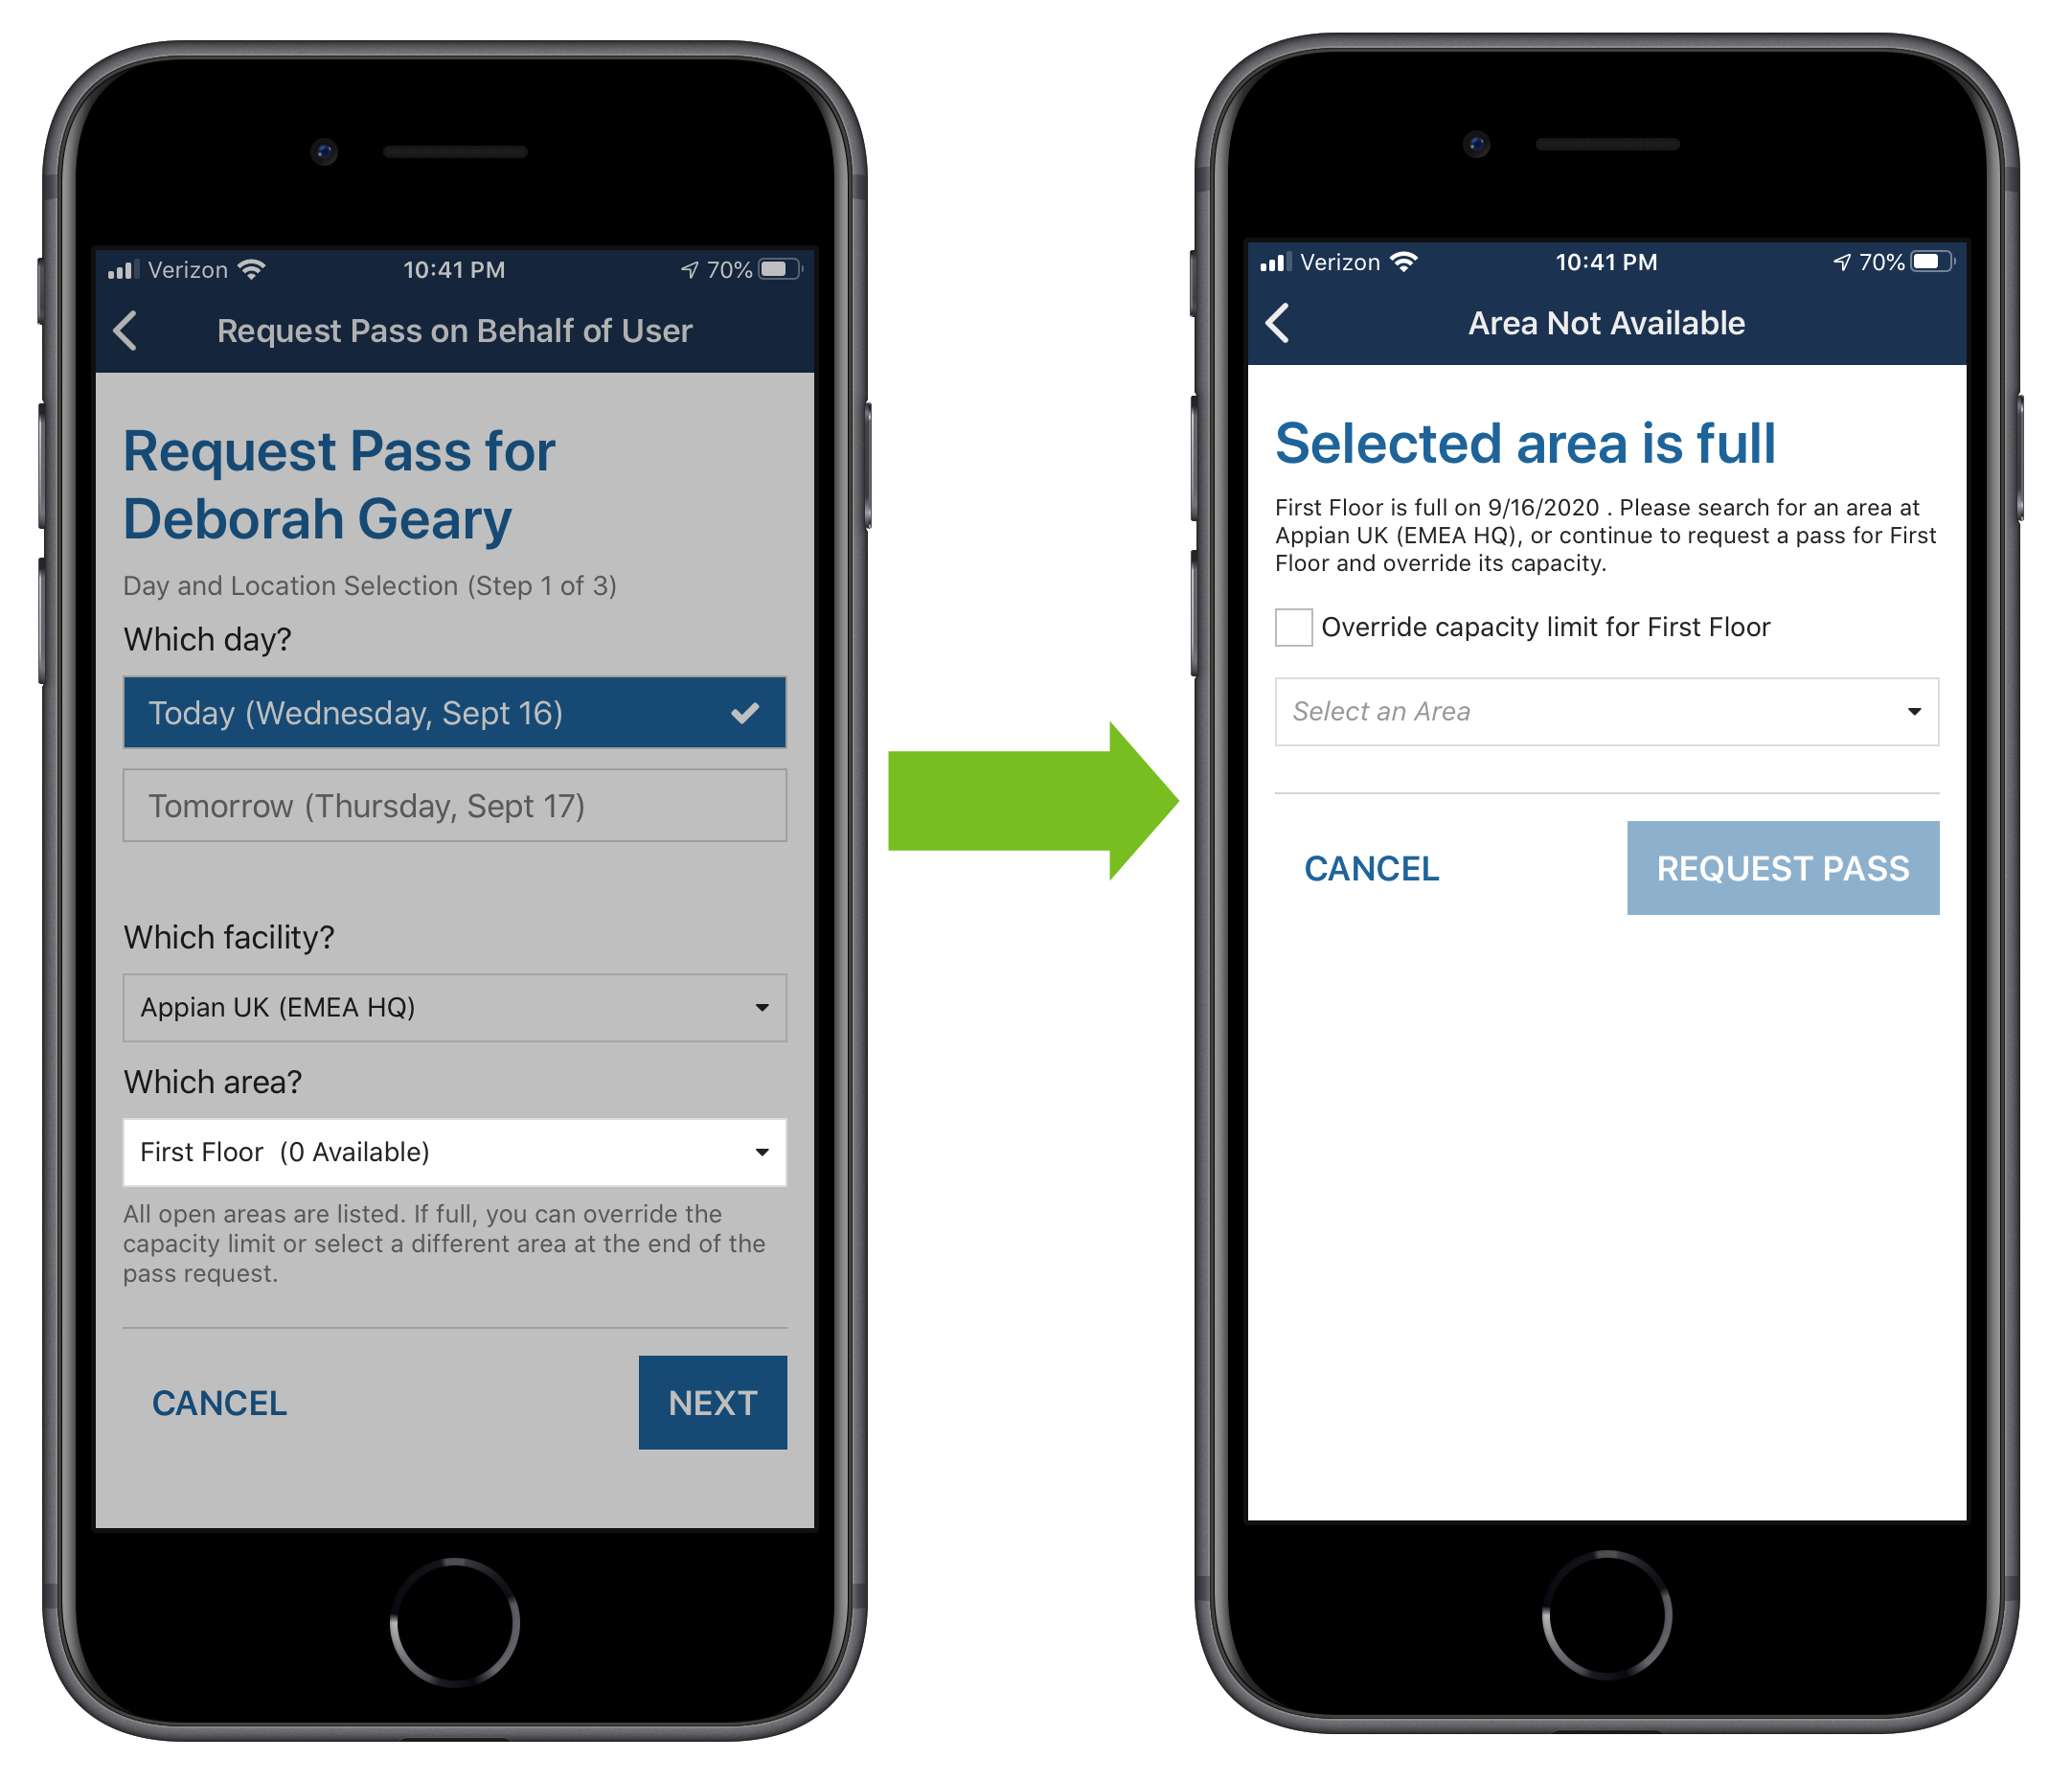
If Enforce Area Capacity Restrictions is toggled on, an area selection will display on the pass request.
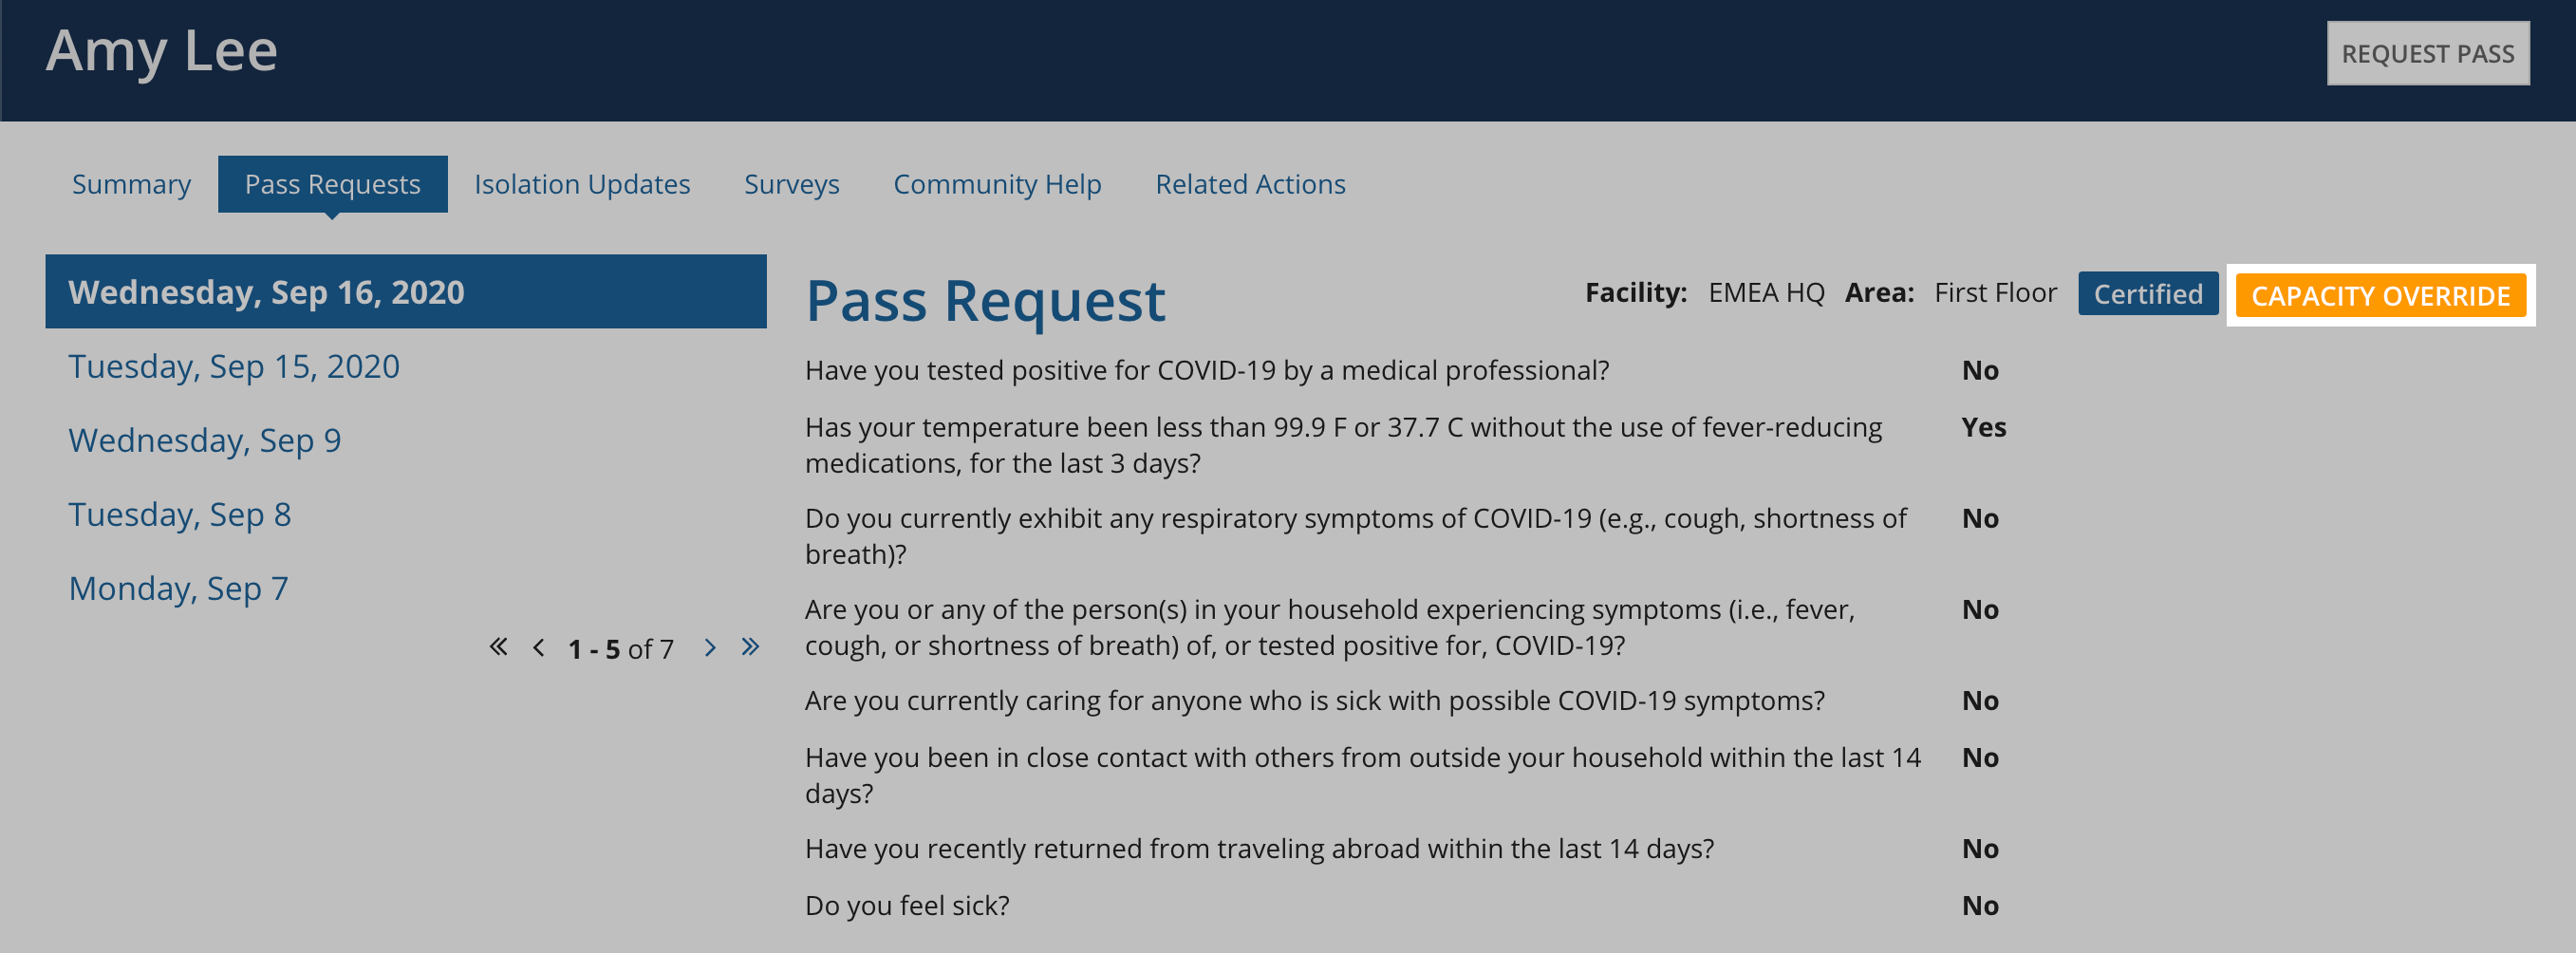
Response managers and screeners will see the remaining capacity for each area. If an area is full, they can still select the area. At the end of the pass request, they will be asked to override the capacity restriction, or select another area.
If capacity restriction is overridden, it will display on the user's Pass Request tab for that pass request.
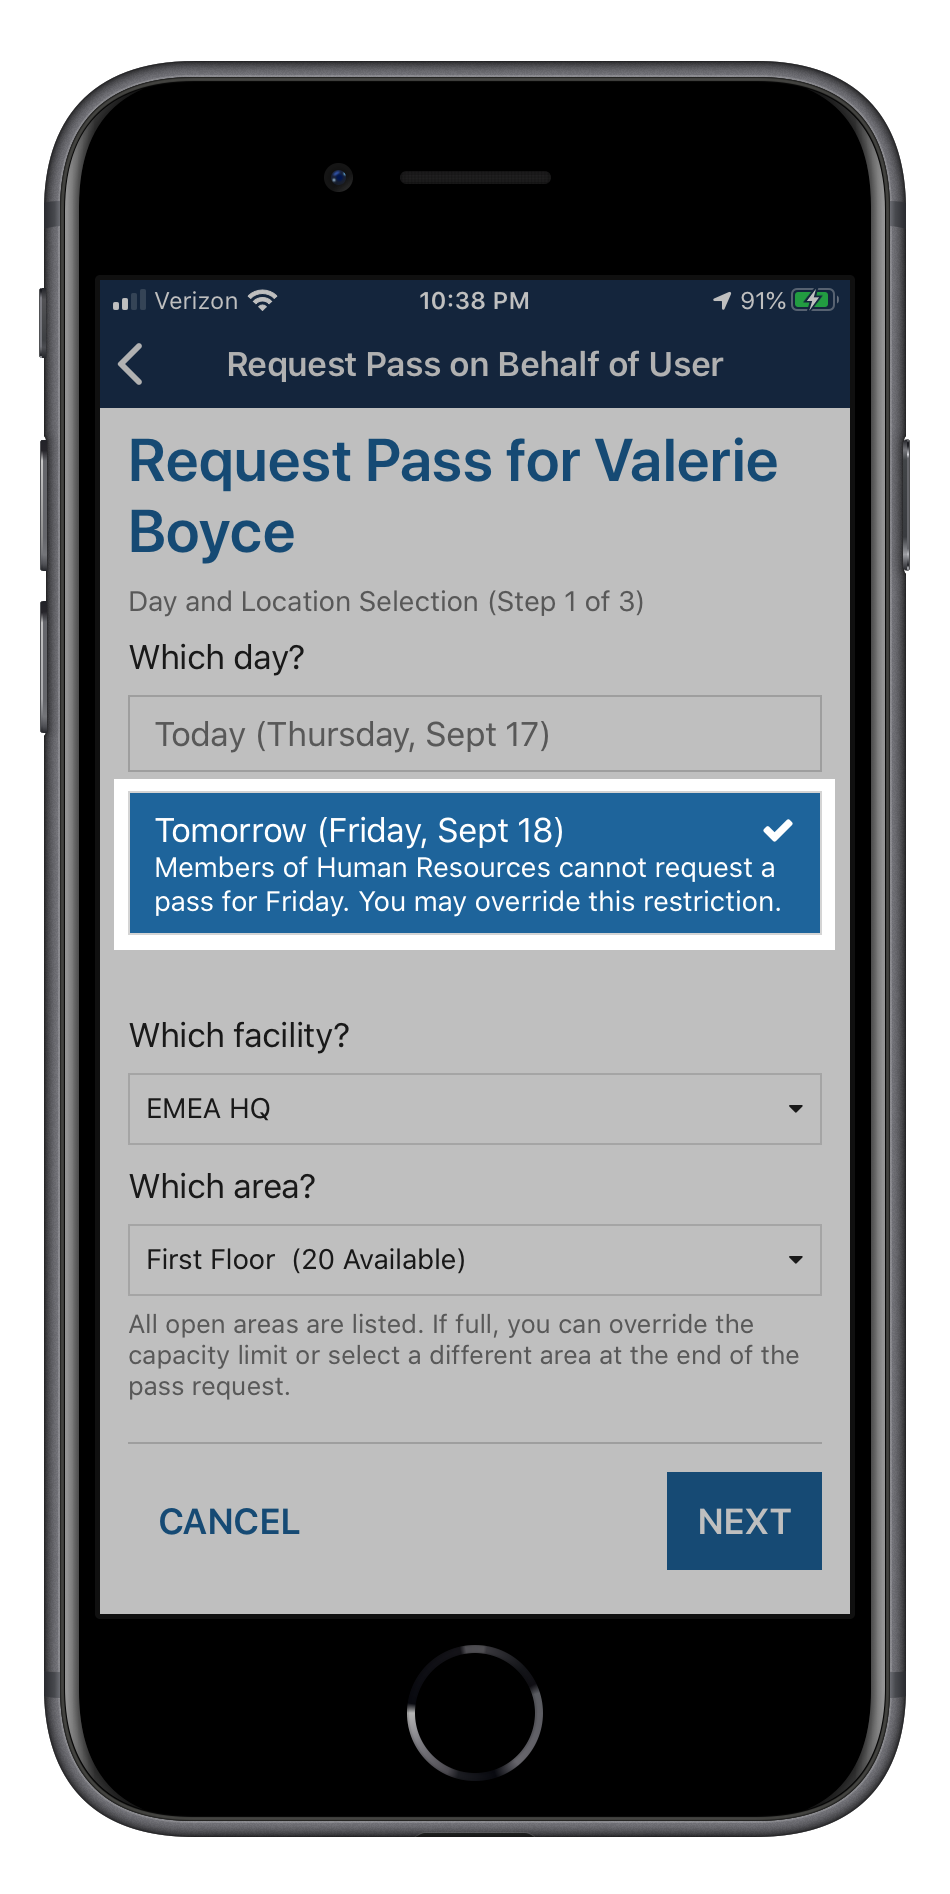
If Cohort Management is toggled on, a message will display for any days that aren't associated with the user's cohort. Screeners and response managers can still select the day and override this restriction.
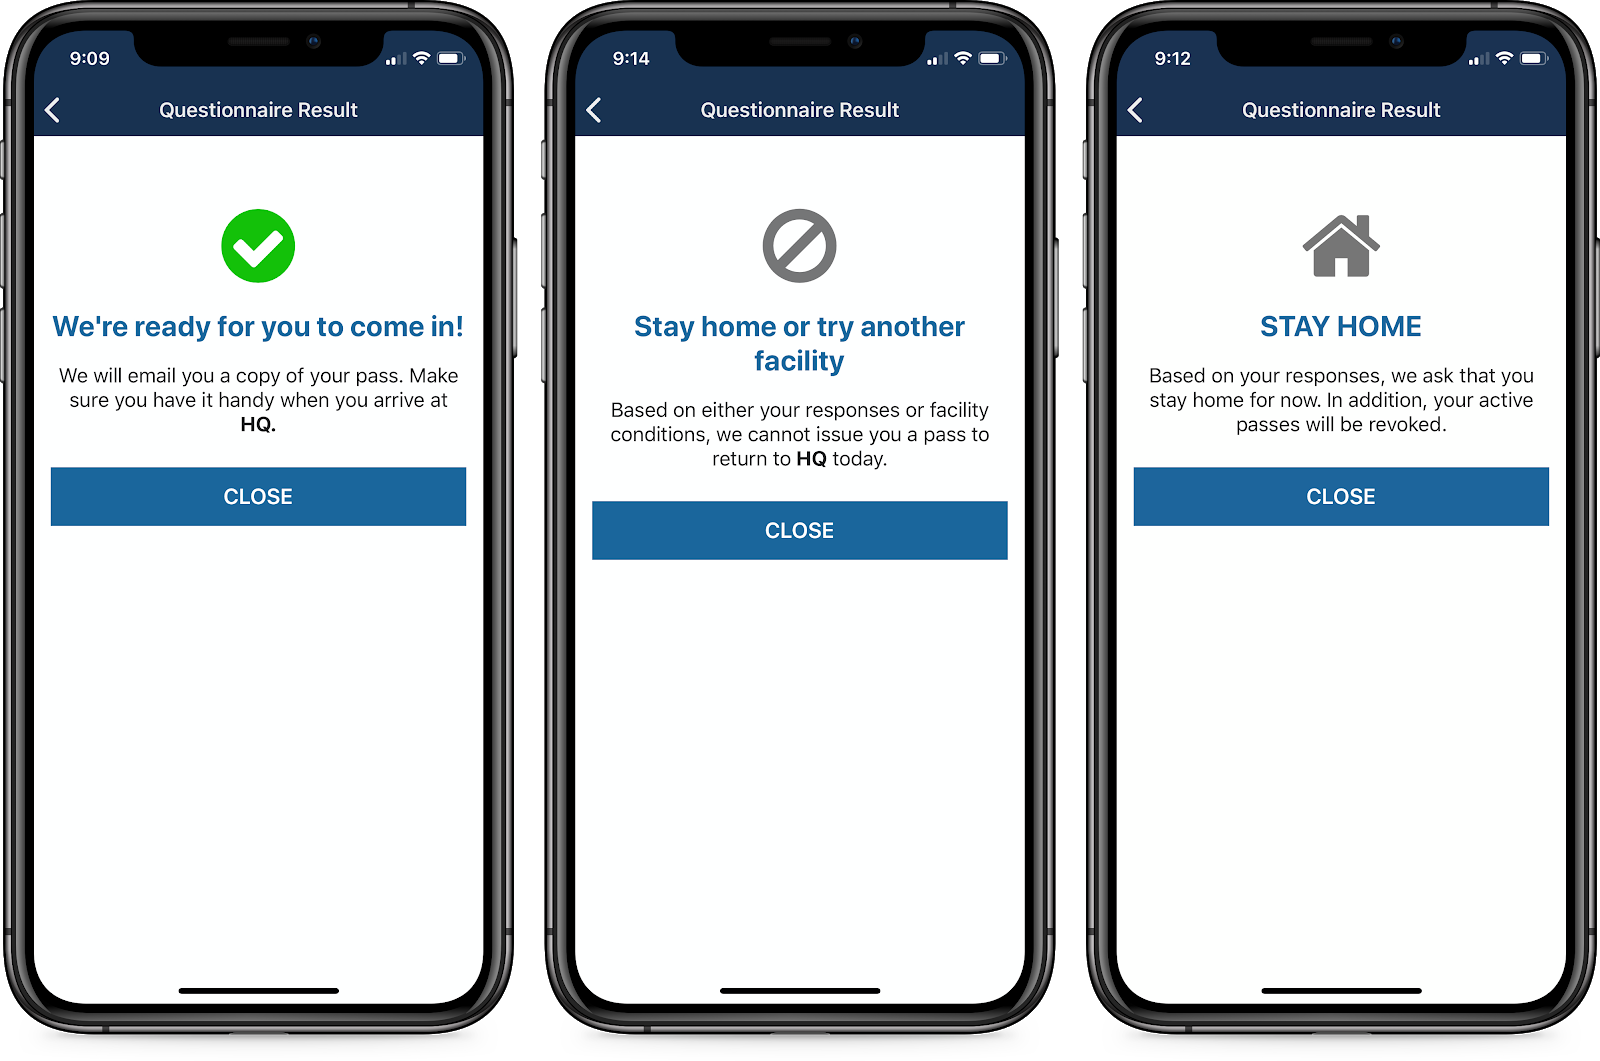
After they submit the request, the result of the request displays. See Pass eligibility for more information on how pass eligibility is determined.
Screeners and response managers can schedule a visit for visitors in the Response Hub. Visitors must have a visit scheduled before a screener can request a pass for them. See Managing Visitors for more information on visitors.
To schedule a visit from the Response Hub:
(Desktop) Click SCHEDULE A VISIT.
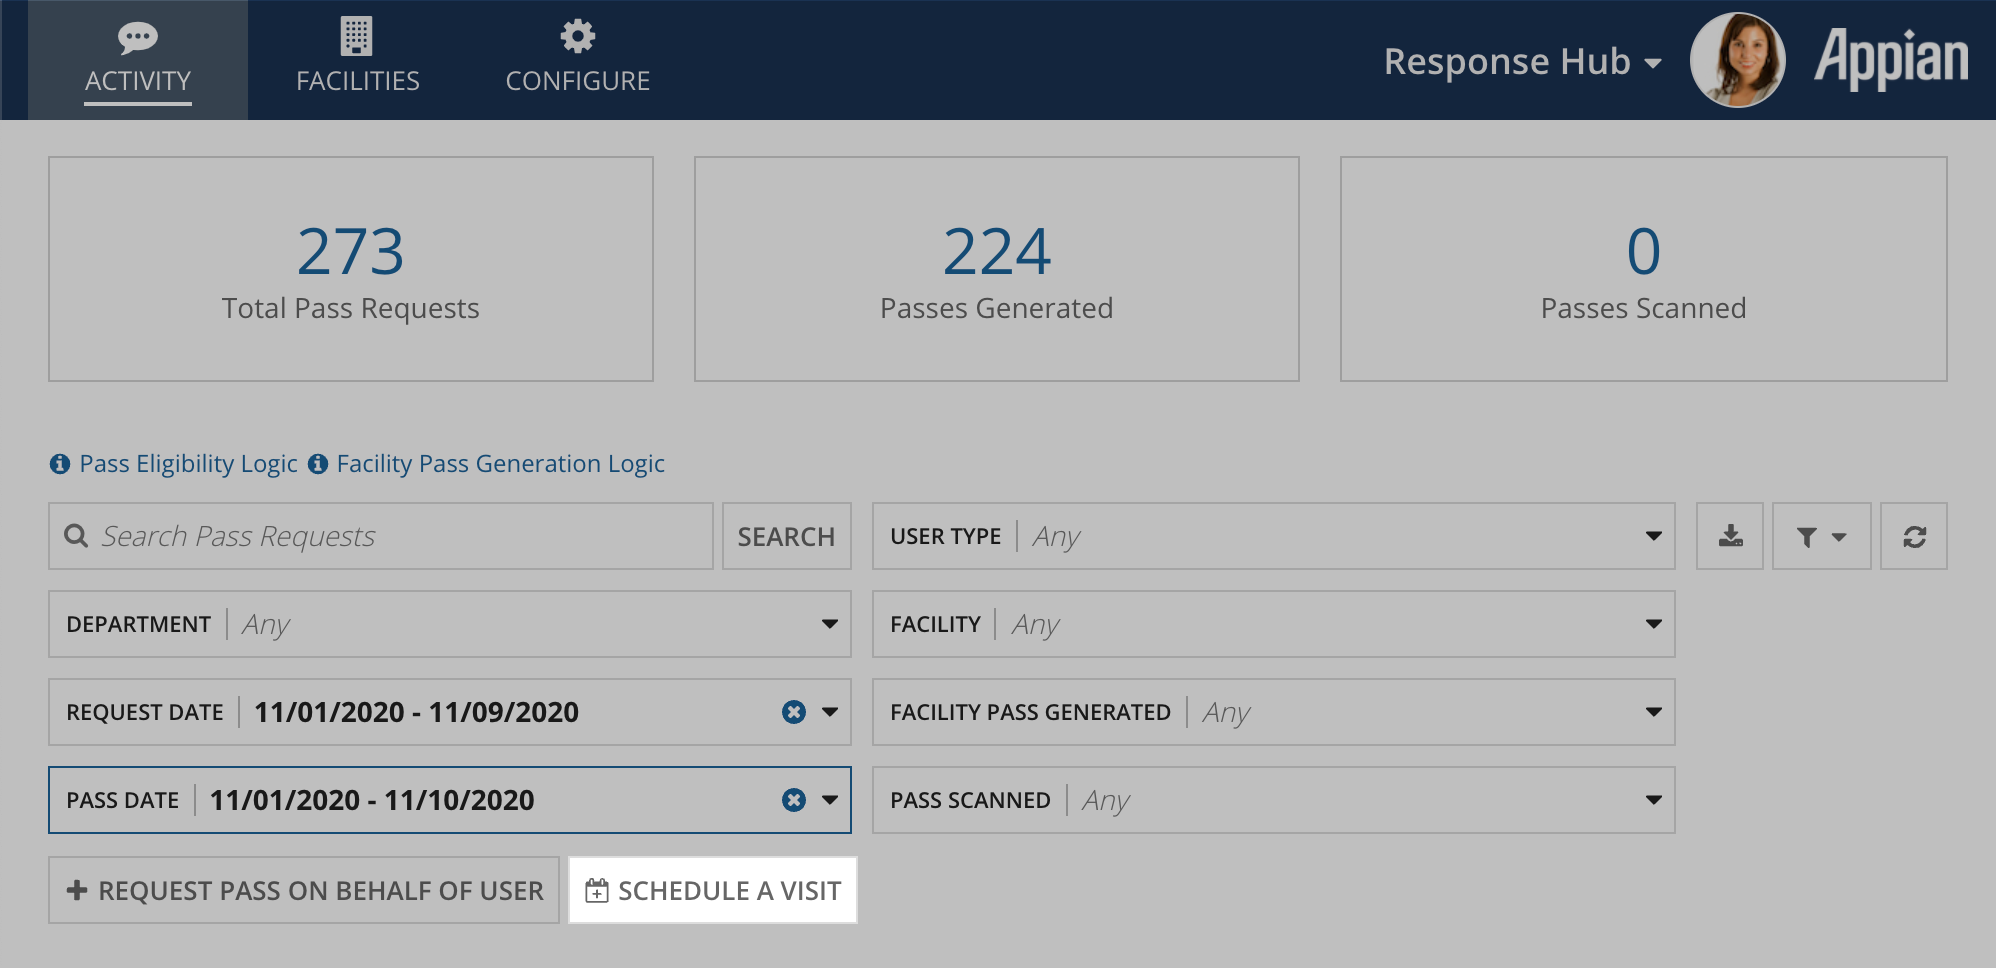
(Mobile) Click ACTIONS > Schedule a Visit.
After the visit is scheduled, the visitor can request a pass. If they are requesting a pass themselves, they will need to reset their temporary password using the instructions in the account creation email that is sent to them. Screeners and response managers can also request a pass on behalf of the visitor.
Screeners and response managers can scan mobile passes using the Appian mobile application.
If the user is eligible to return for that calendar day for the selected location, VALID PASS displays. Otherwise, INVALID PASS displays. If the pass is invalid either because it is for a different day or location, the reason displays.
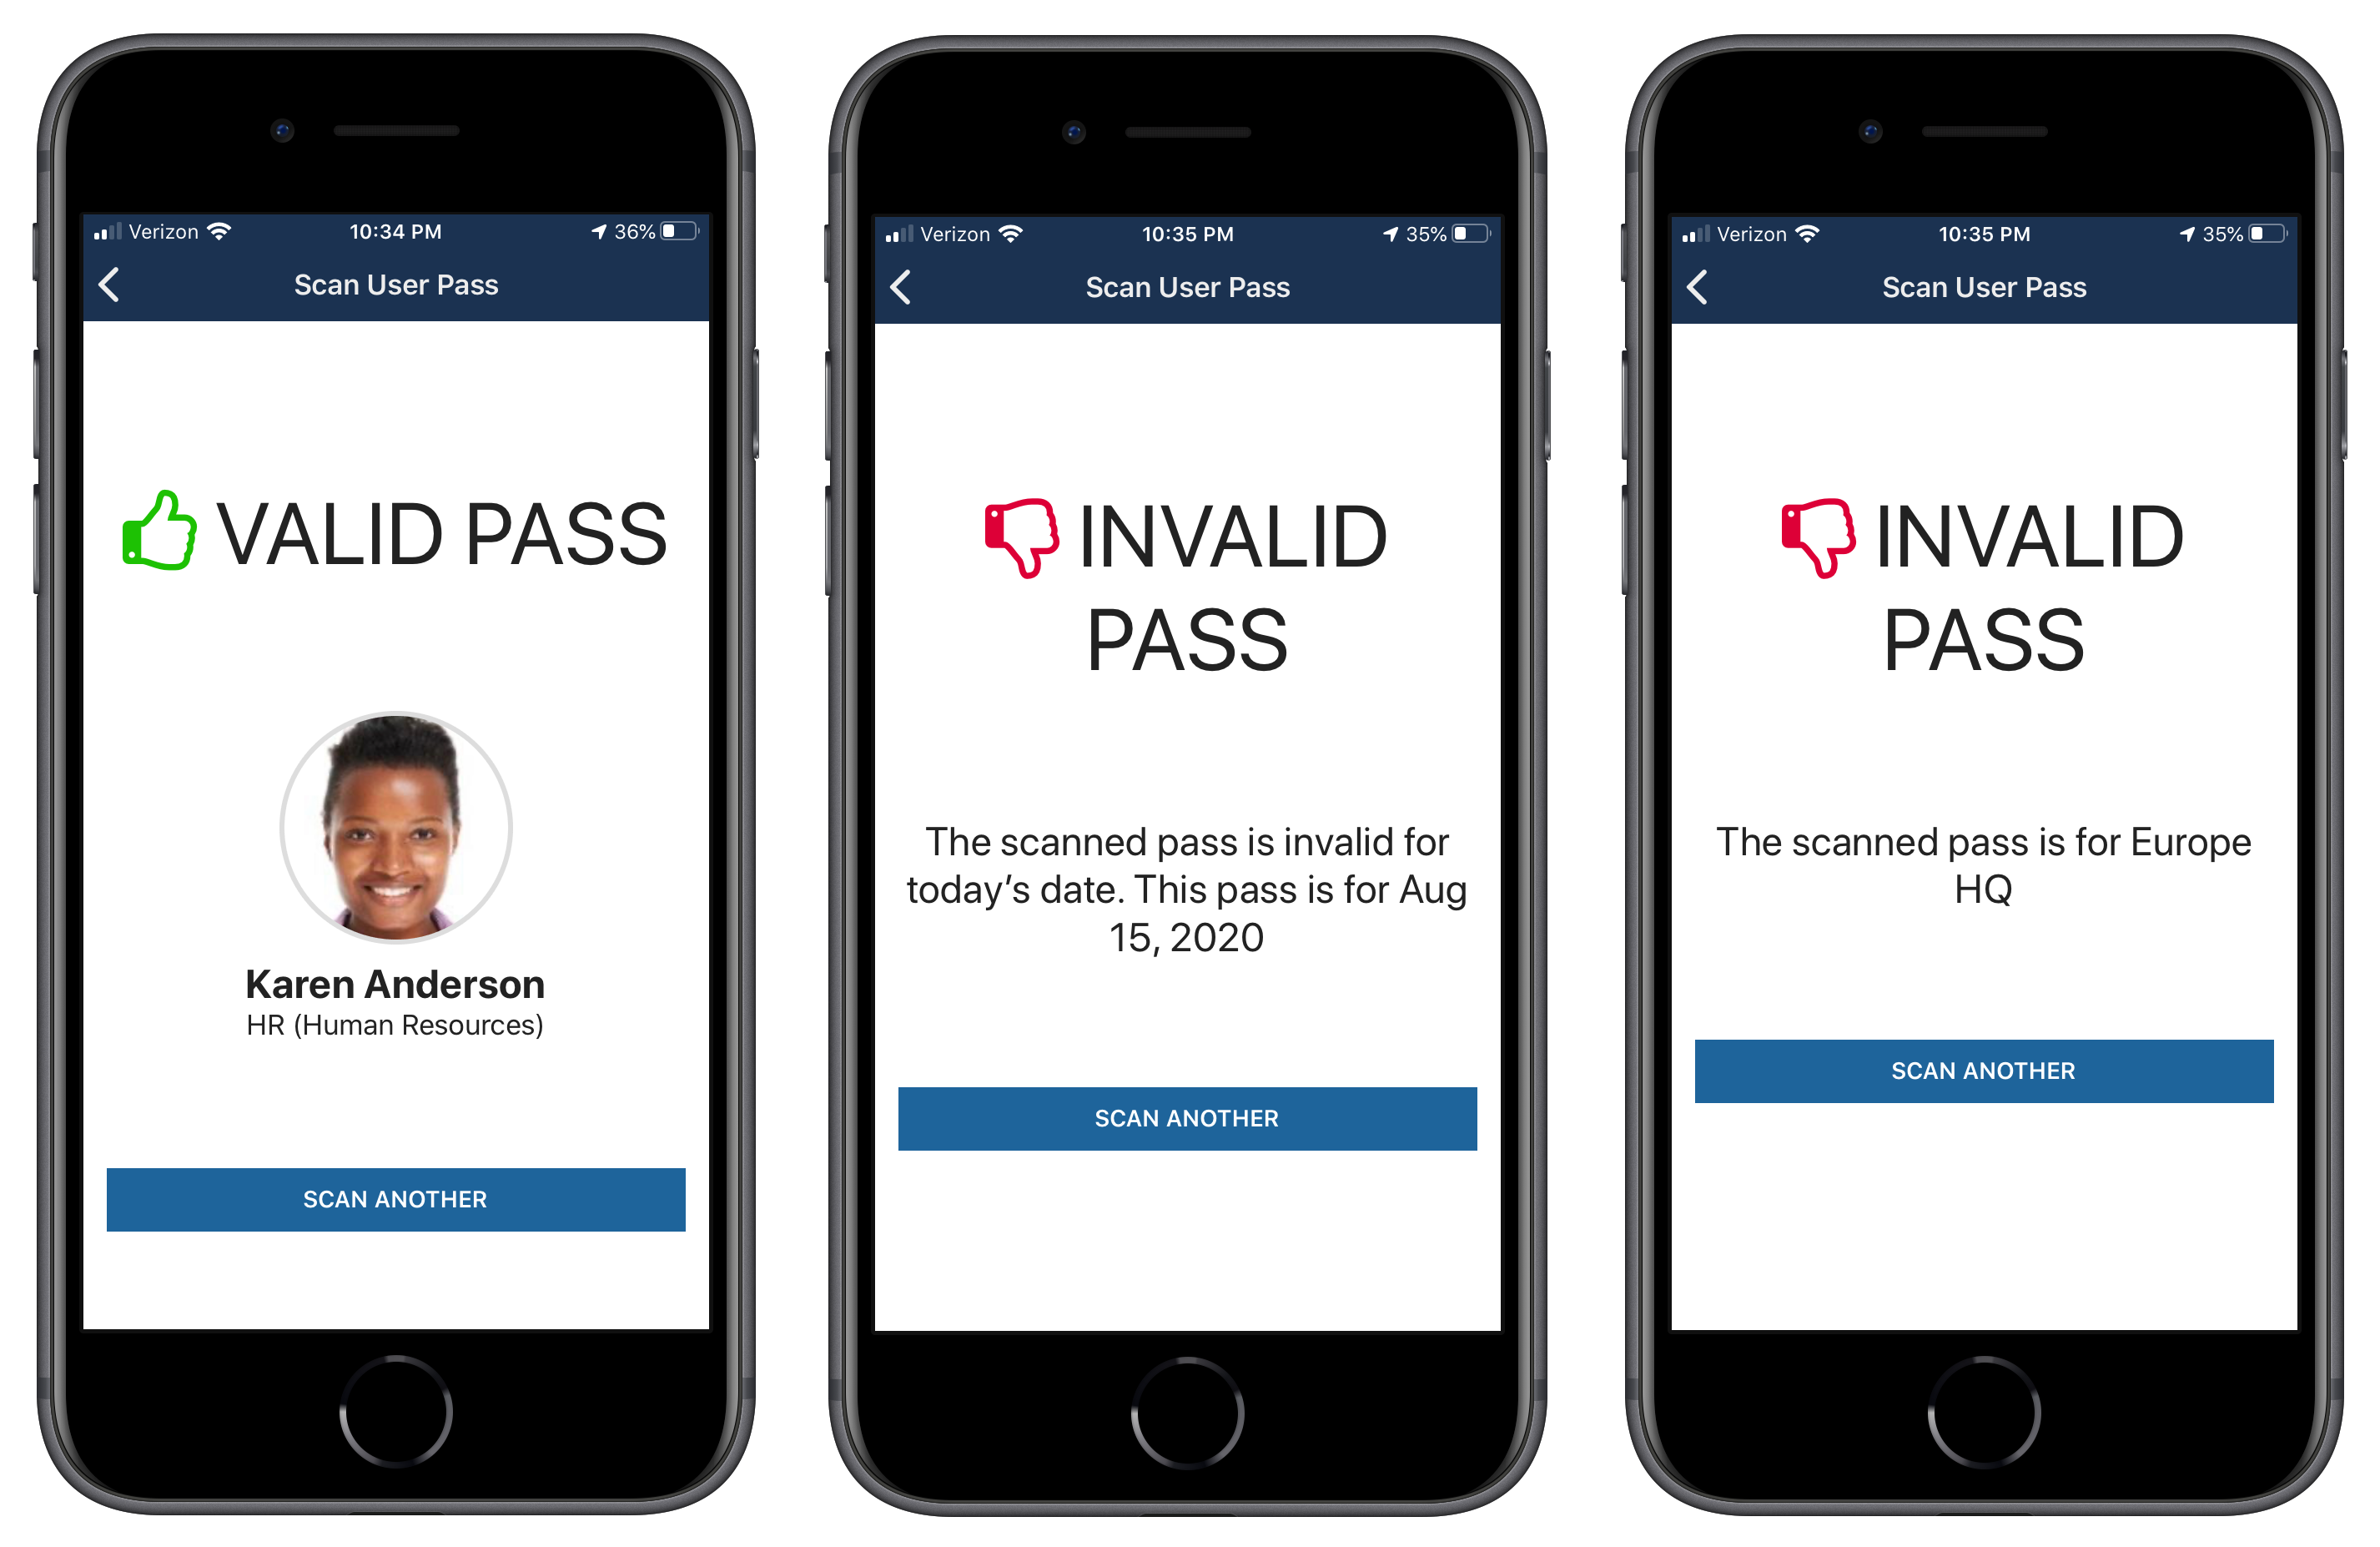
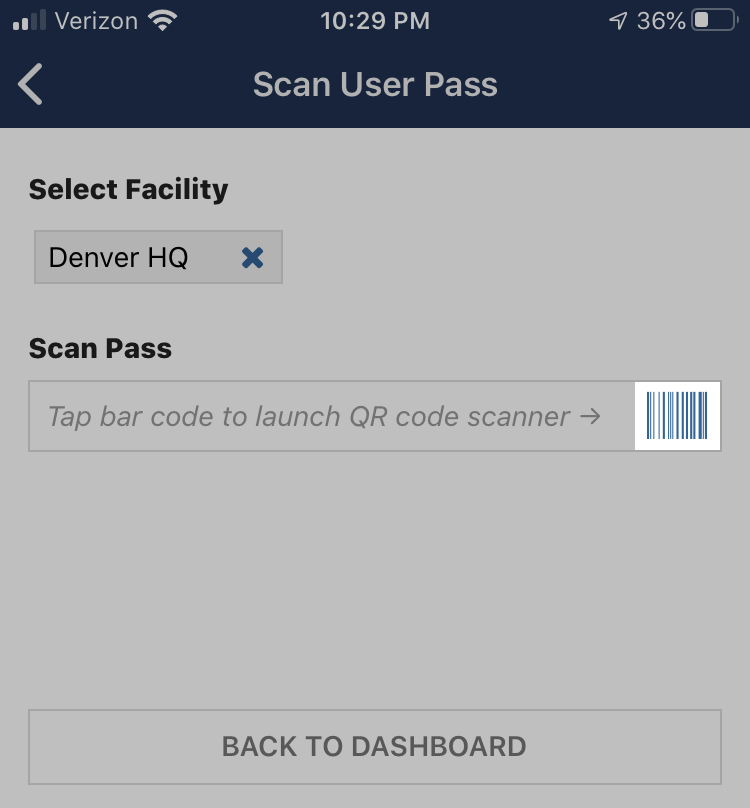
To scan a pass:
Go to the Activity tab and click SCAN USER PASS.
Note: You may need to grant access to the mobile device's camera.
When a valid pass is scanned, the timestamp is saved to record that the user visited the facility that day.
Valid passes can be scanned multiple times and will be valid until they have expired or been revoked due to a disqualifying response on a questionnaire.
If the Community Volunteering and Help Requests feature option is toggled on, response managers and coordinators can match help requests with volunteers.
To match a help request with a volunteer:
In the Help Request Details list, click an Unassigned help request.
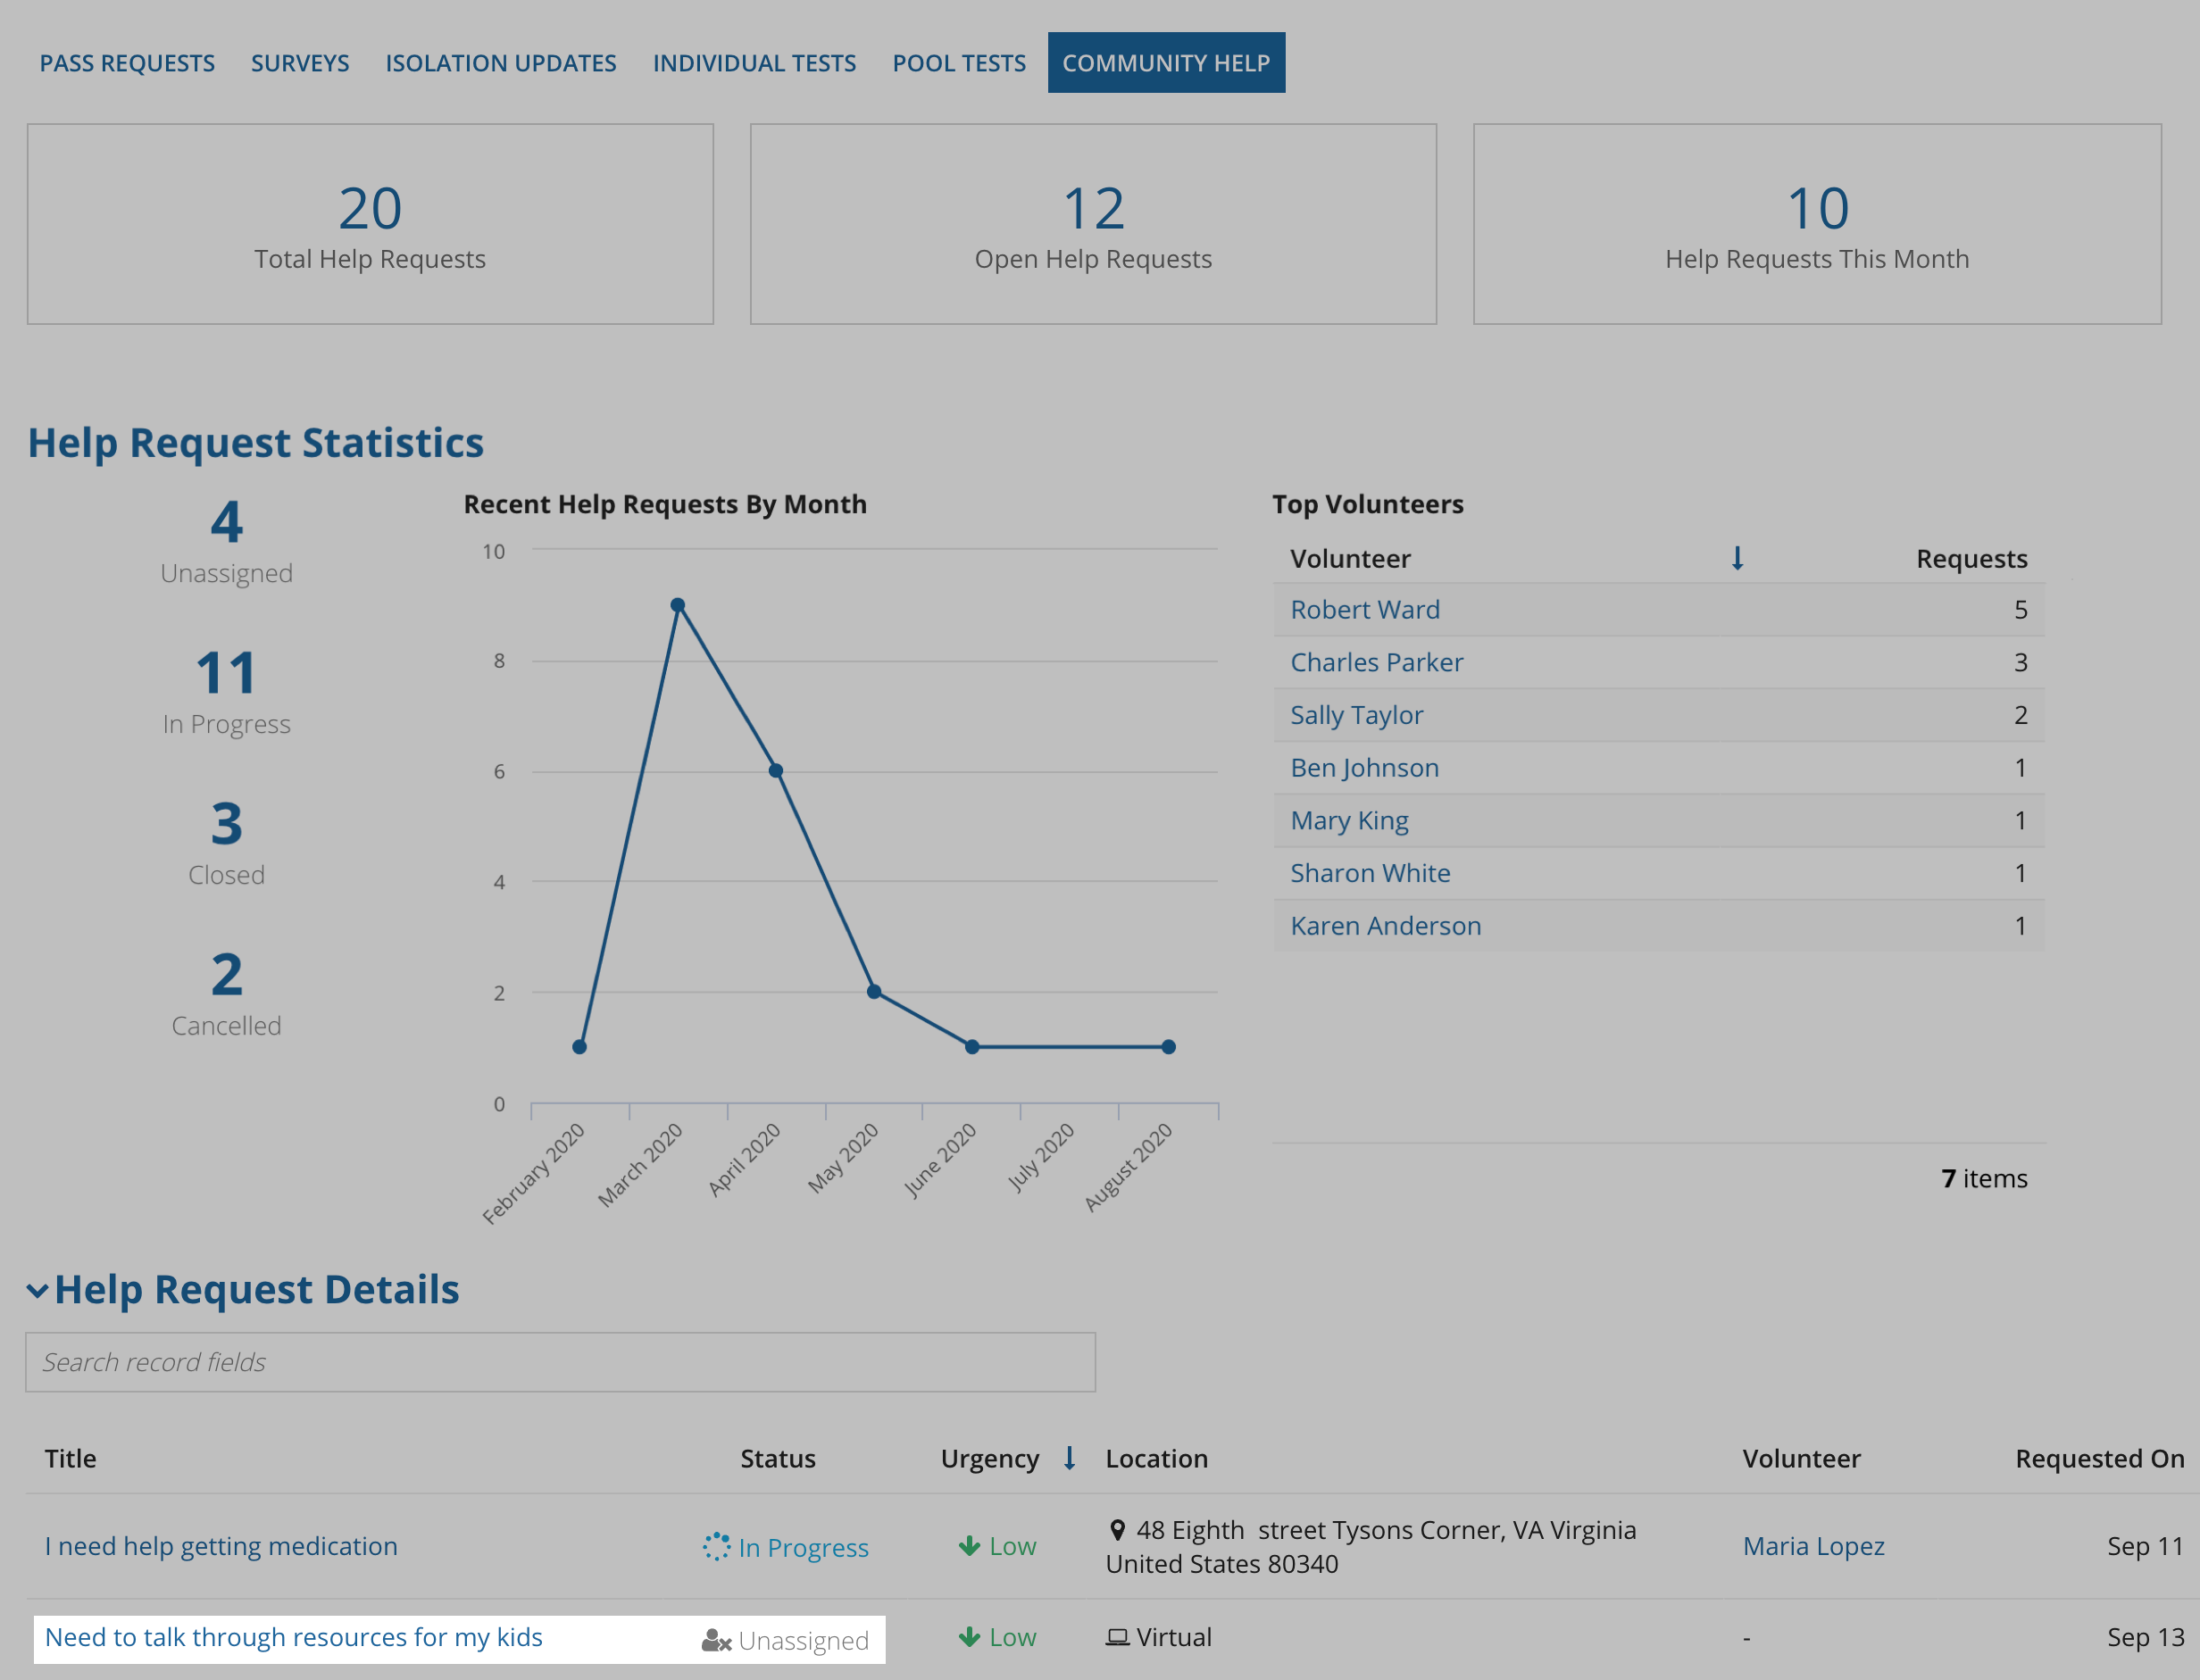
Select a volunteer from the list and click ASSIGN CASE.
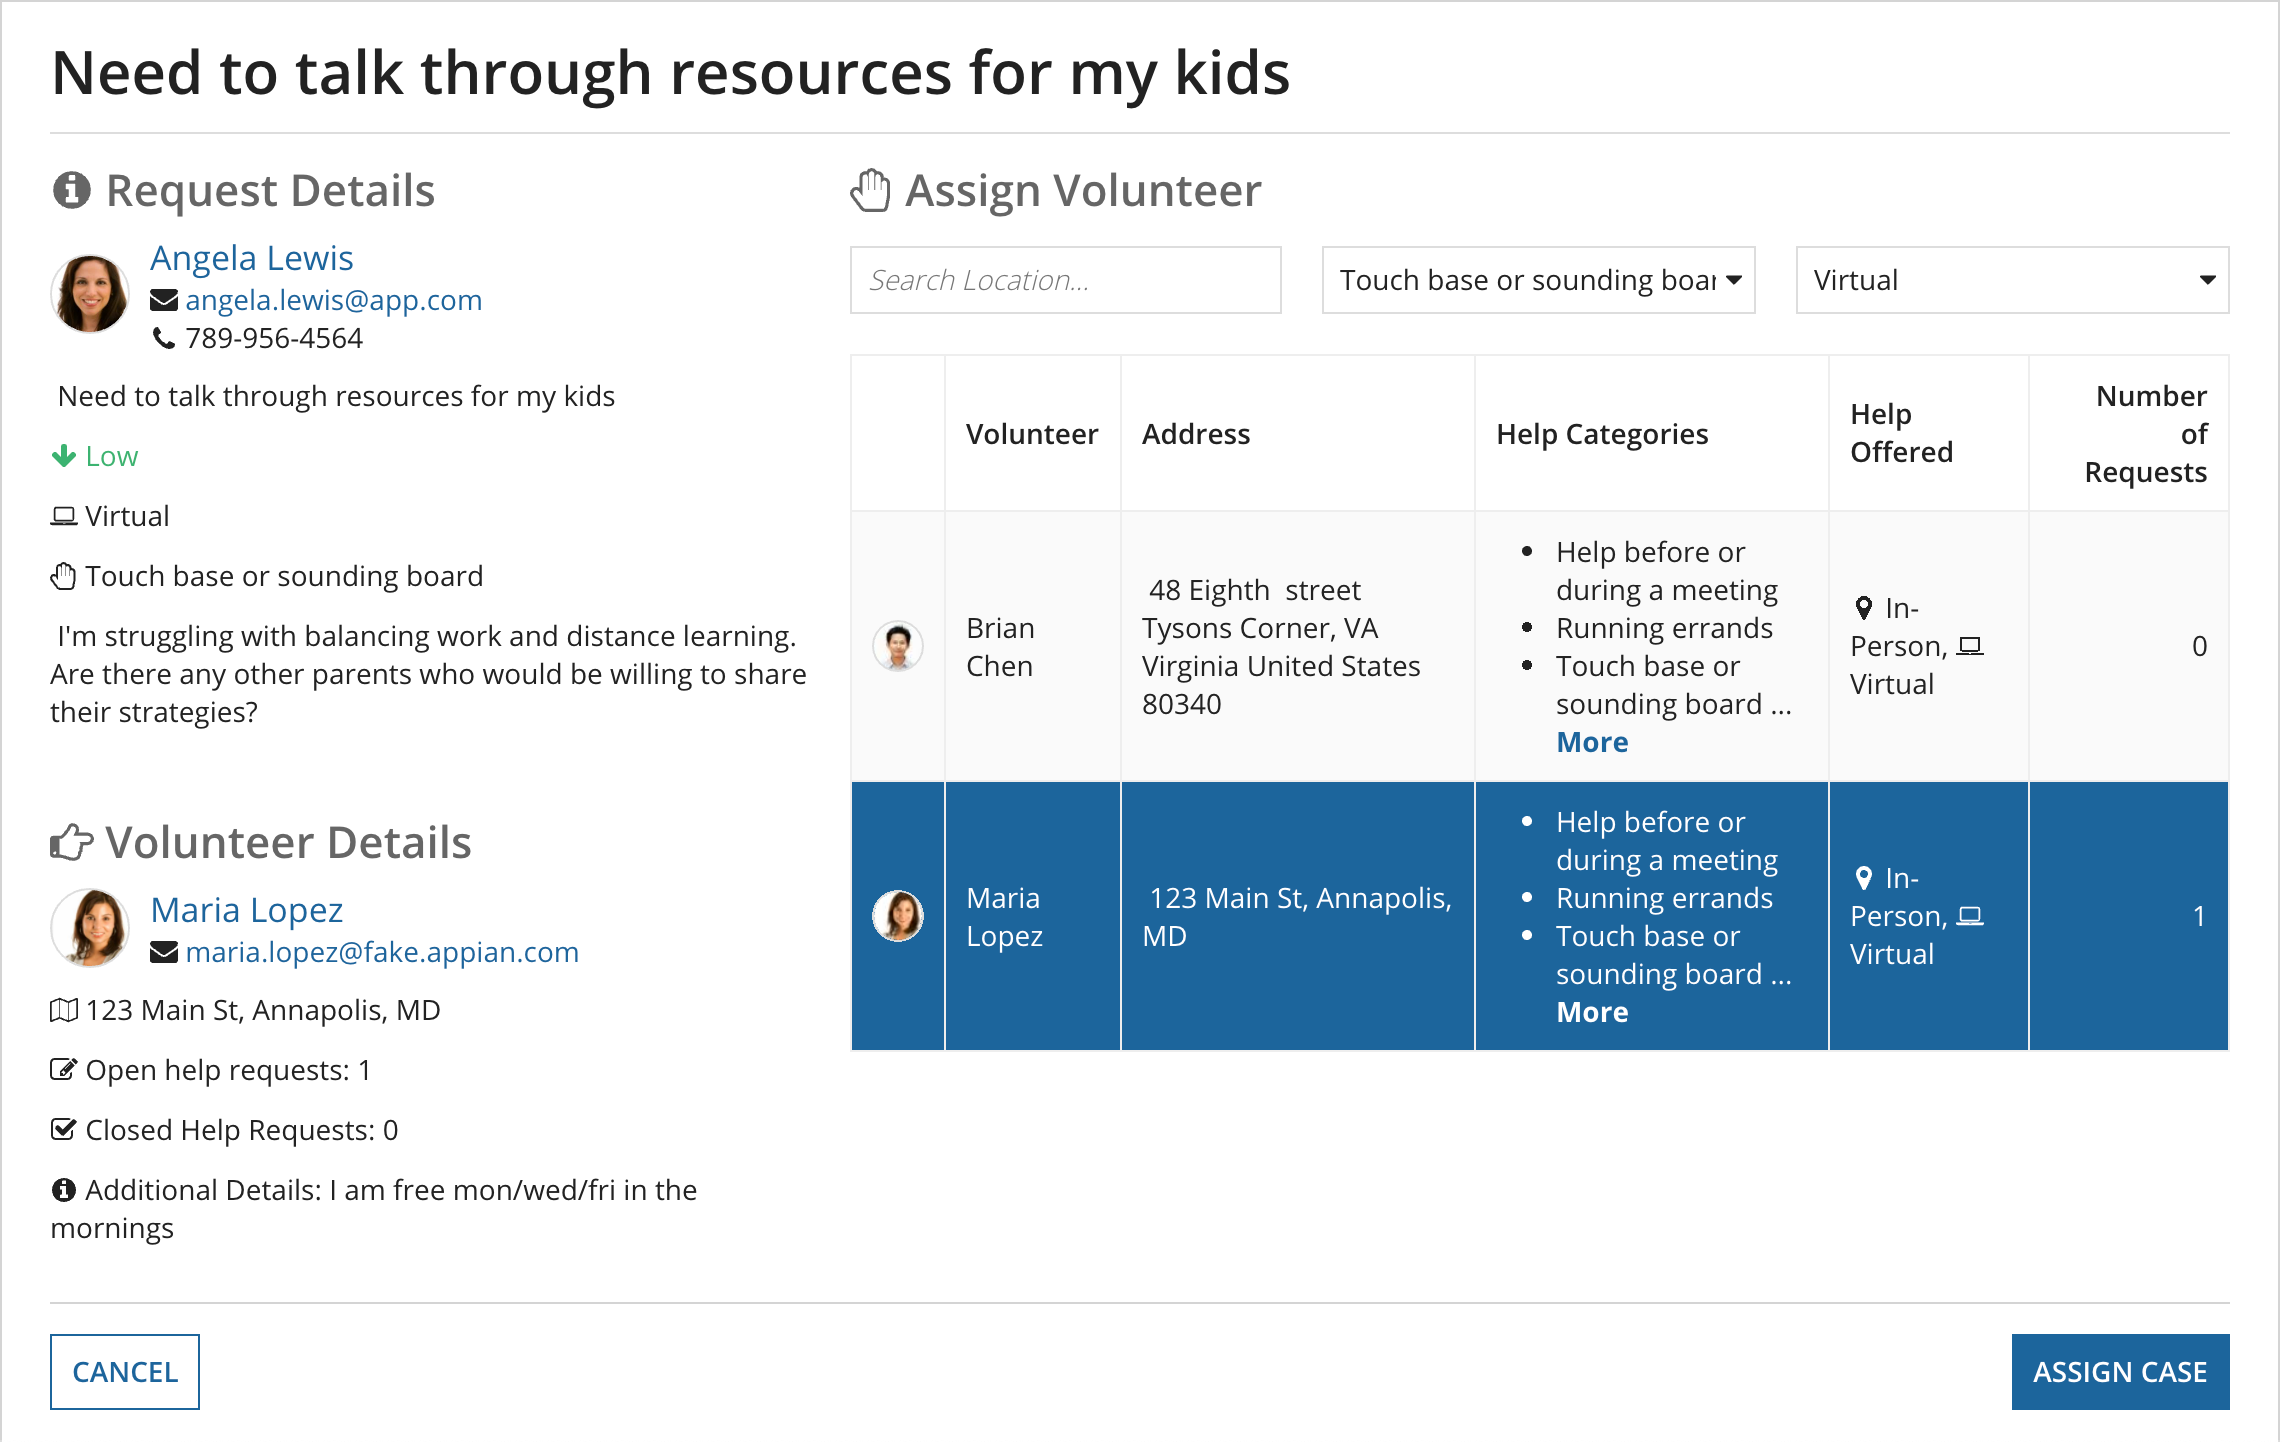
Tip: The filters are automatically set to only show volunteers that said they are willing to help with that type of request based on the category of request and whether it is in-person or virtual.
You can also match an assigned help request to a different volunteer by opening the help request and clicking REASSIGN.
When the help request is complete, the response manager, coordinator, volunteer, or requestor can CLOSE the help request.

To keep your users up to date with the latest news, response and configuration managers can post announcements on their Workforce Safety homepage. You can also choose to send an email or push notification to mobile devices when you post the announcement.
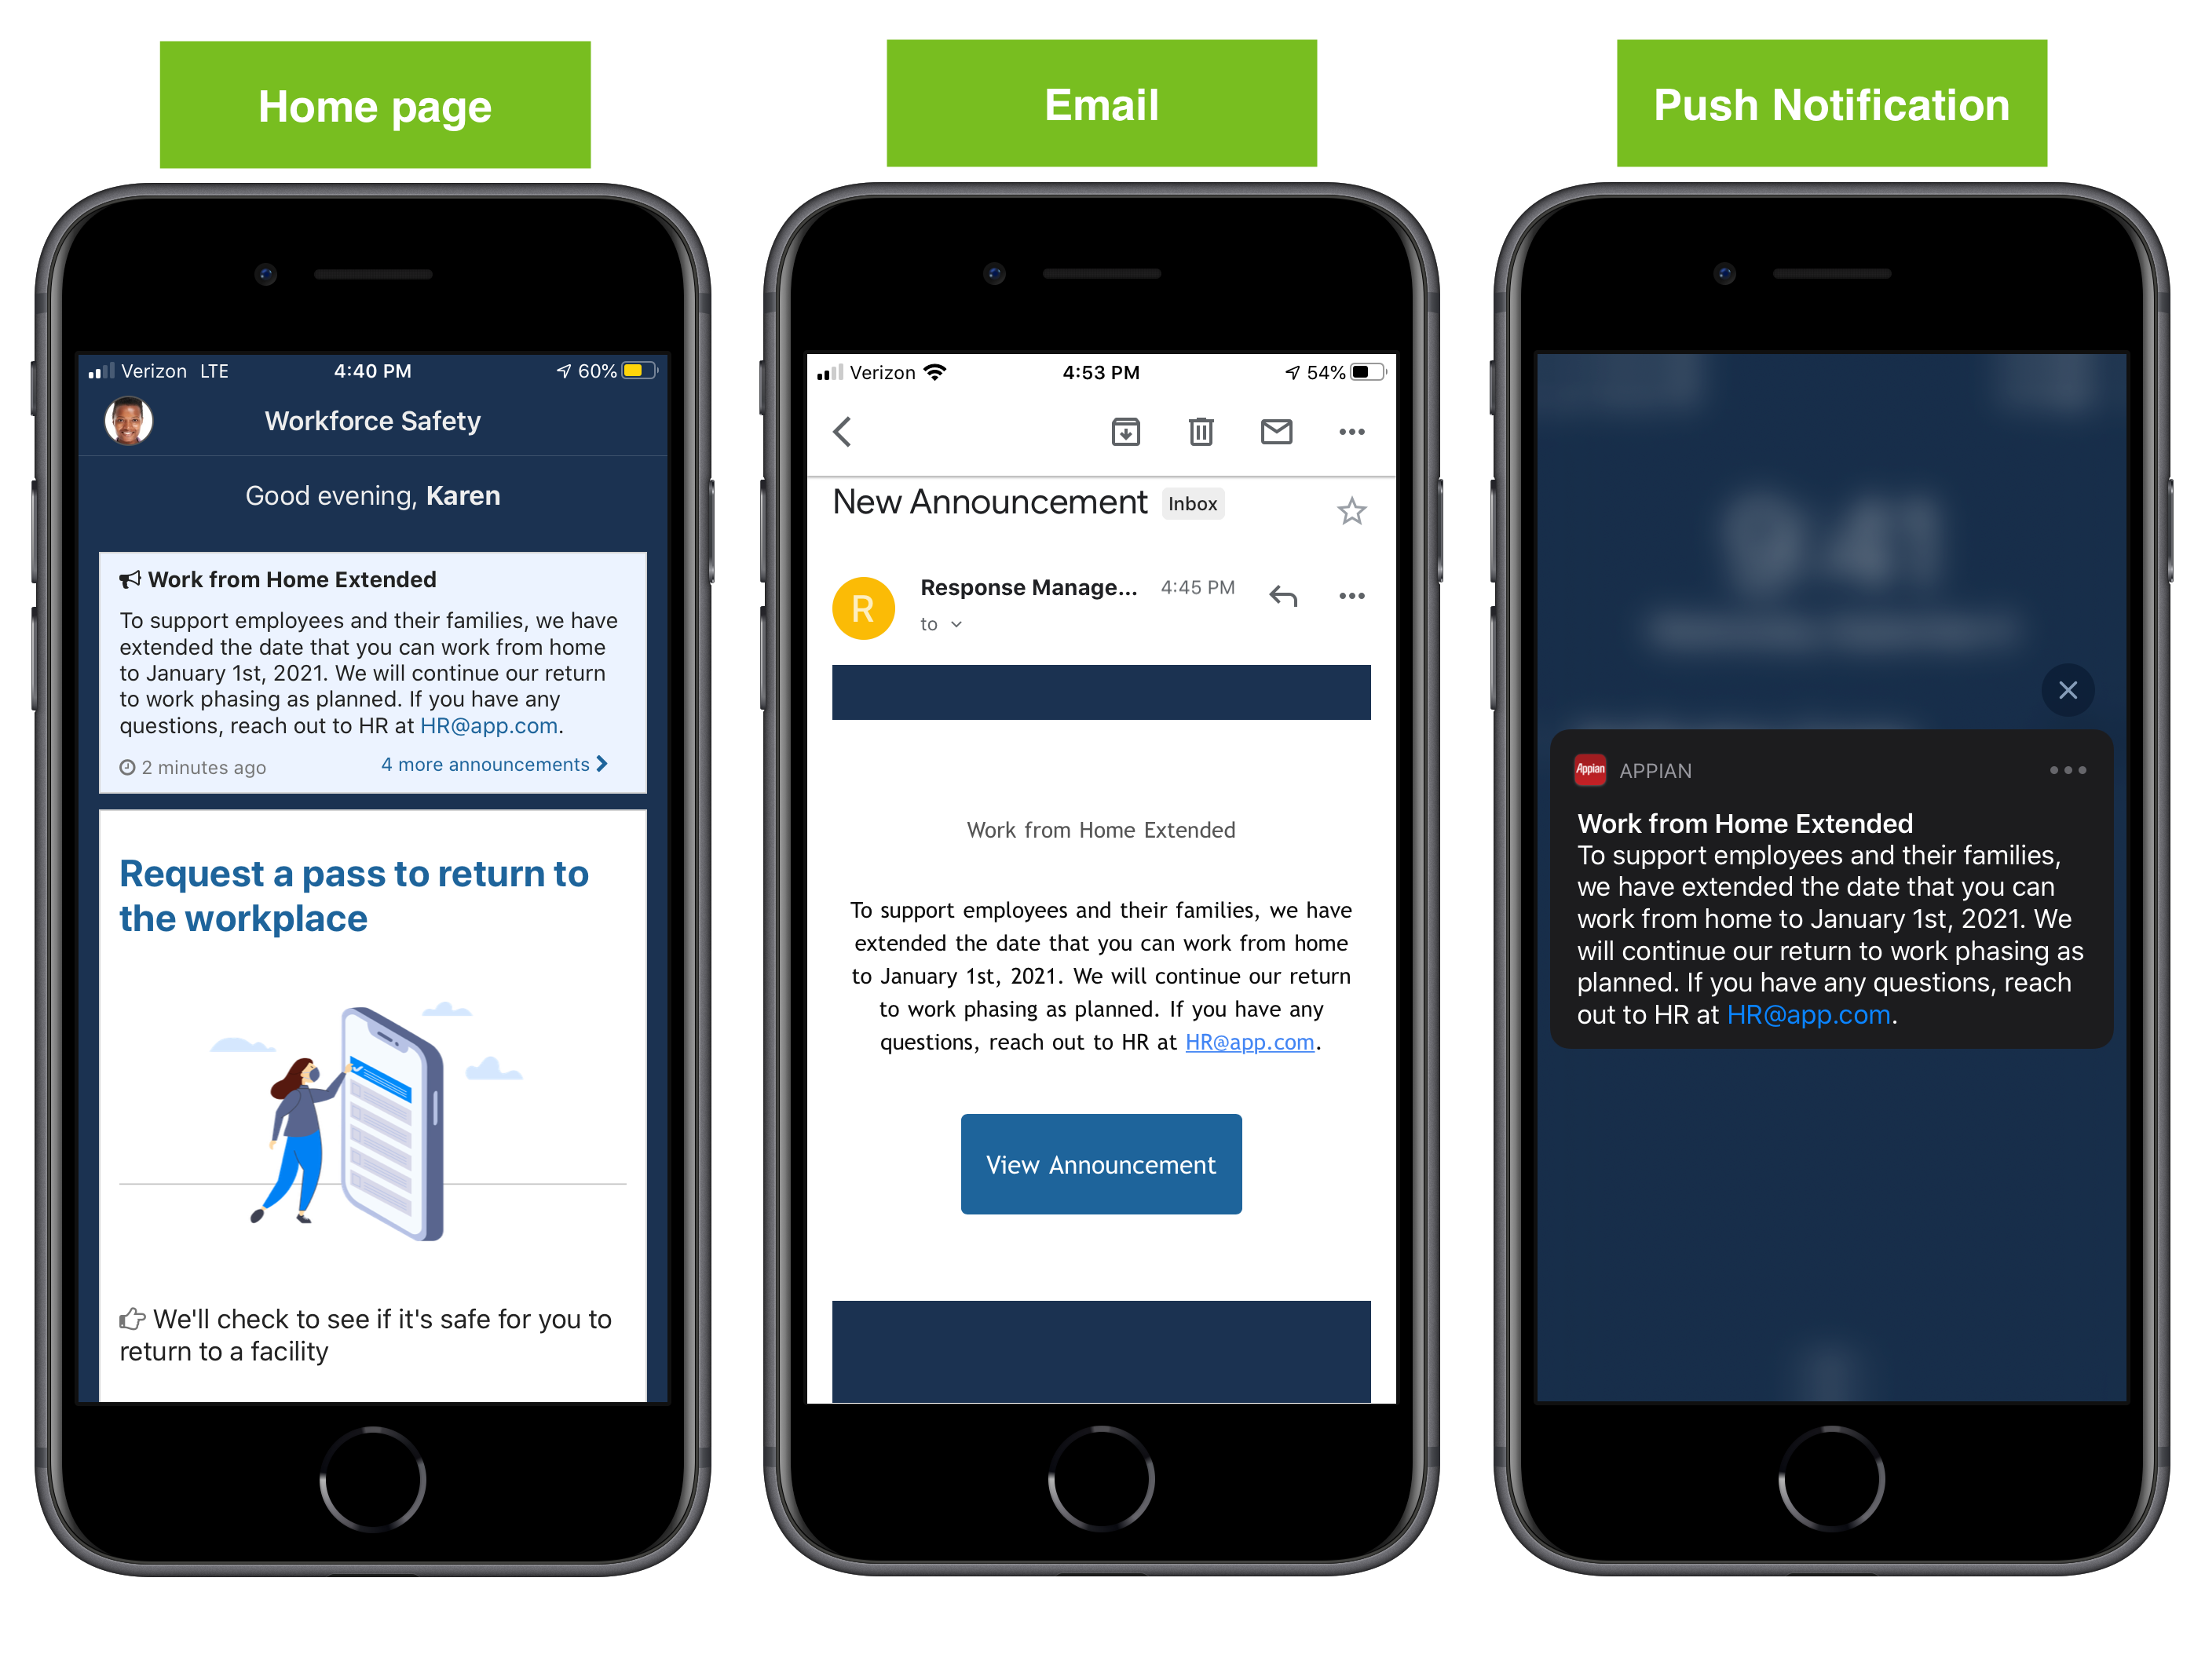
In order to receive push notifications, users must have downloaded and logged in to the Appian application on their mobile device. They also must have notifications turned on for the Appian application in their device settings.
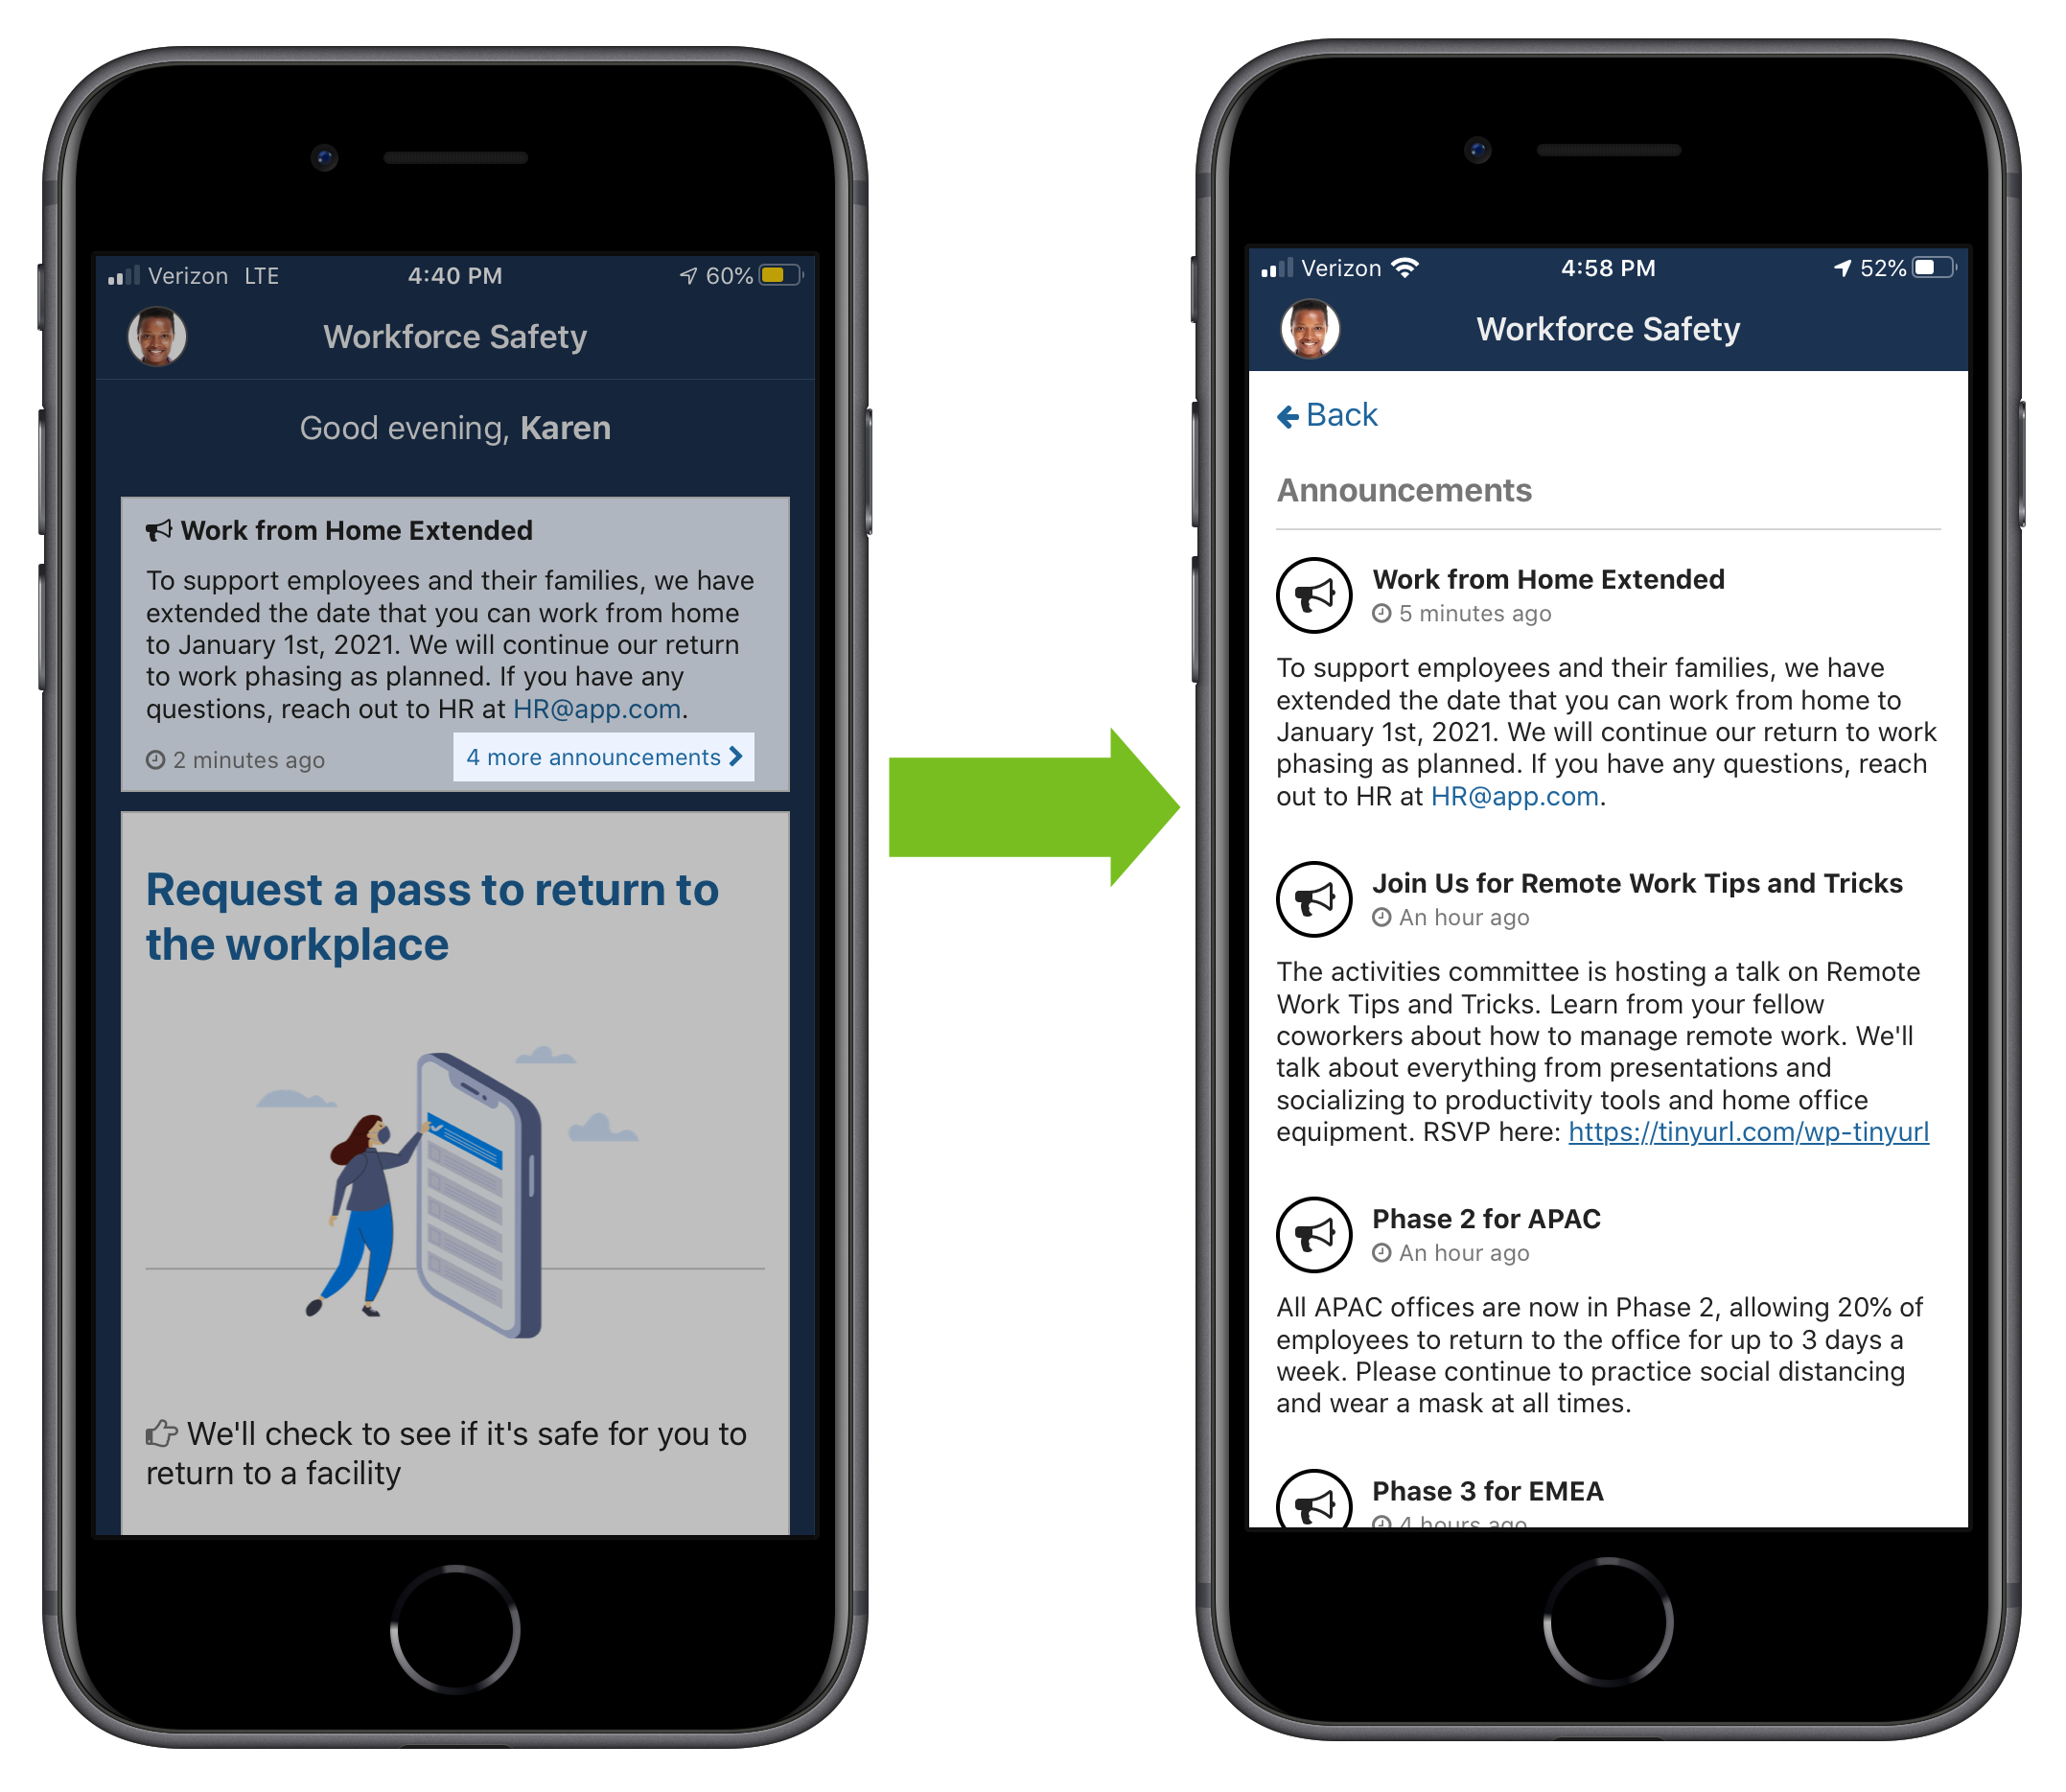
Up to five announcements can be displayed at a time. If you have reached the limit, you must archive an announcement to post a new one.
The newest announcement will display on every user's homepage until it is archived or a new announcement is posted. Users can click the link to view all posted announcements, which display in the order that they were created.
To display an announcement on the Workforce Safety homepage for all users, post it. Optionally, you can send an email or push notification when you post the announcement.
To post an announcement:
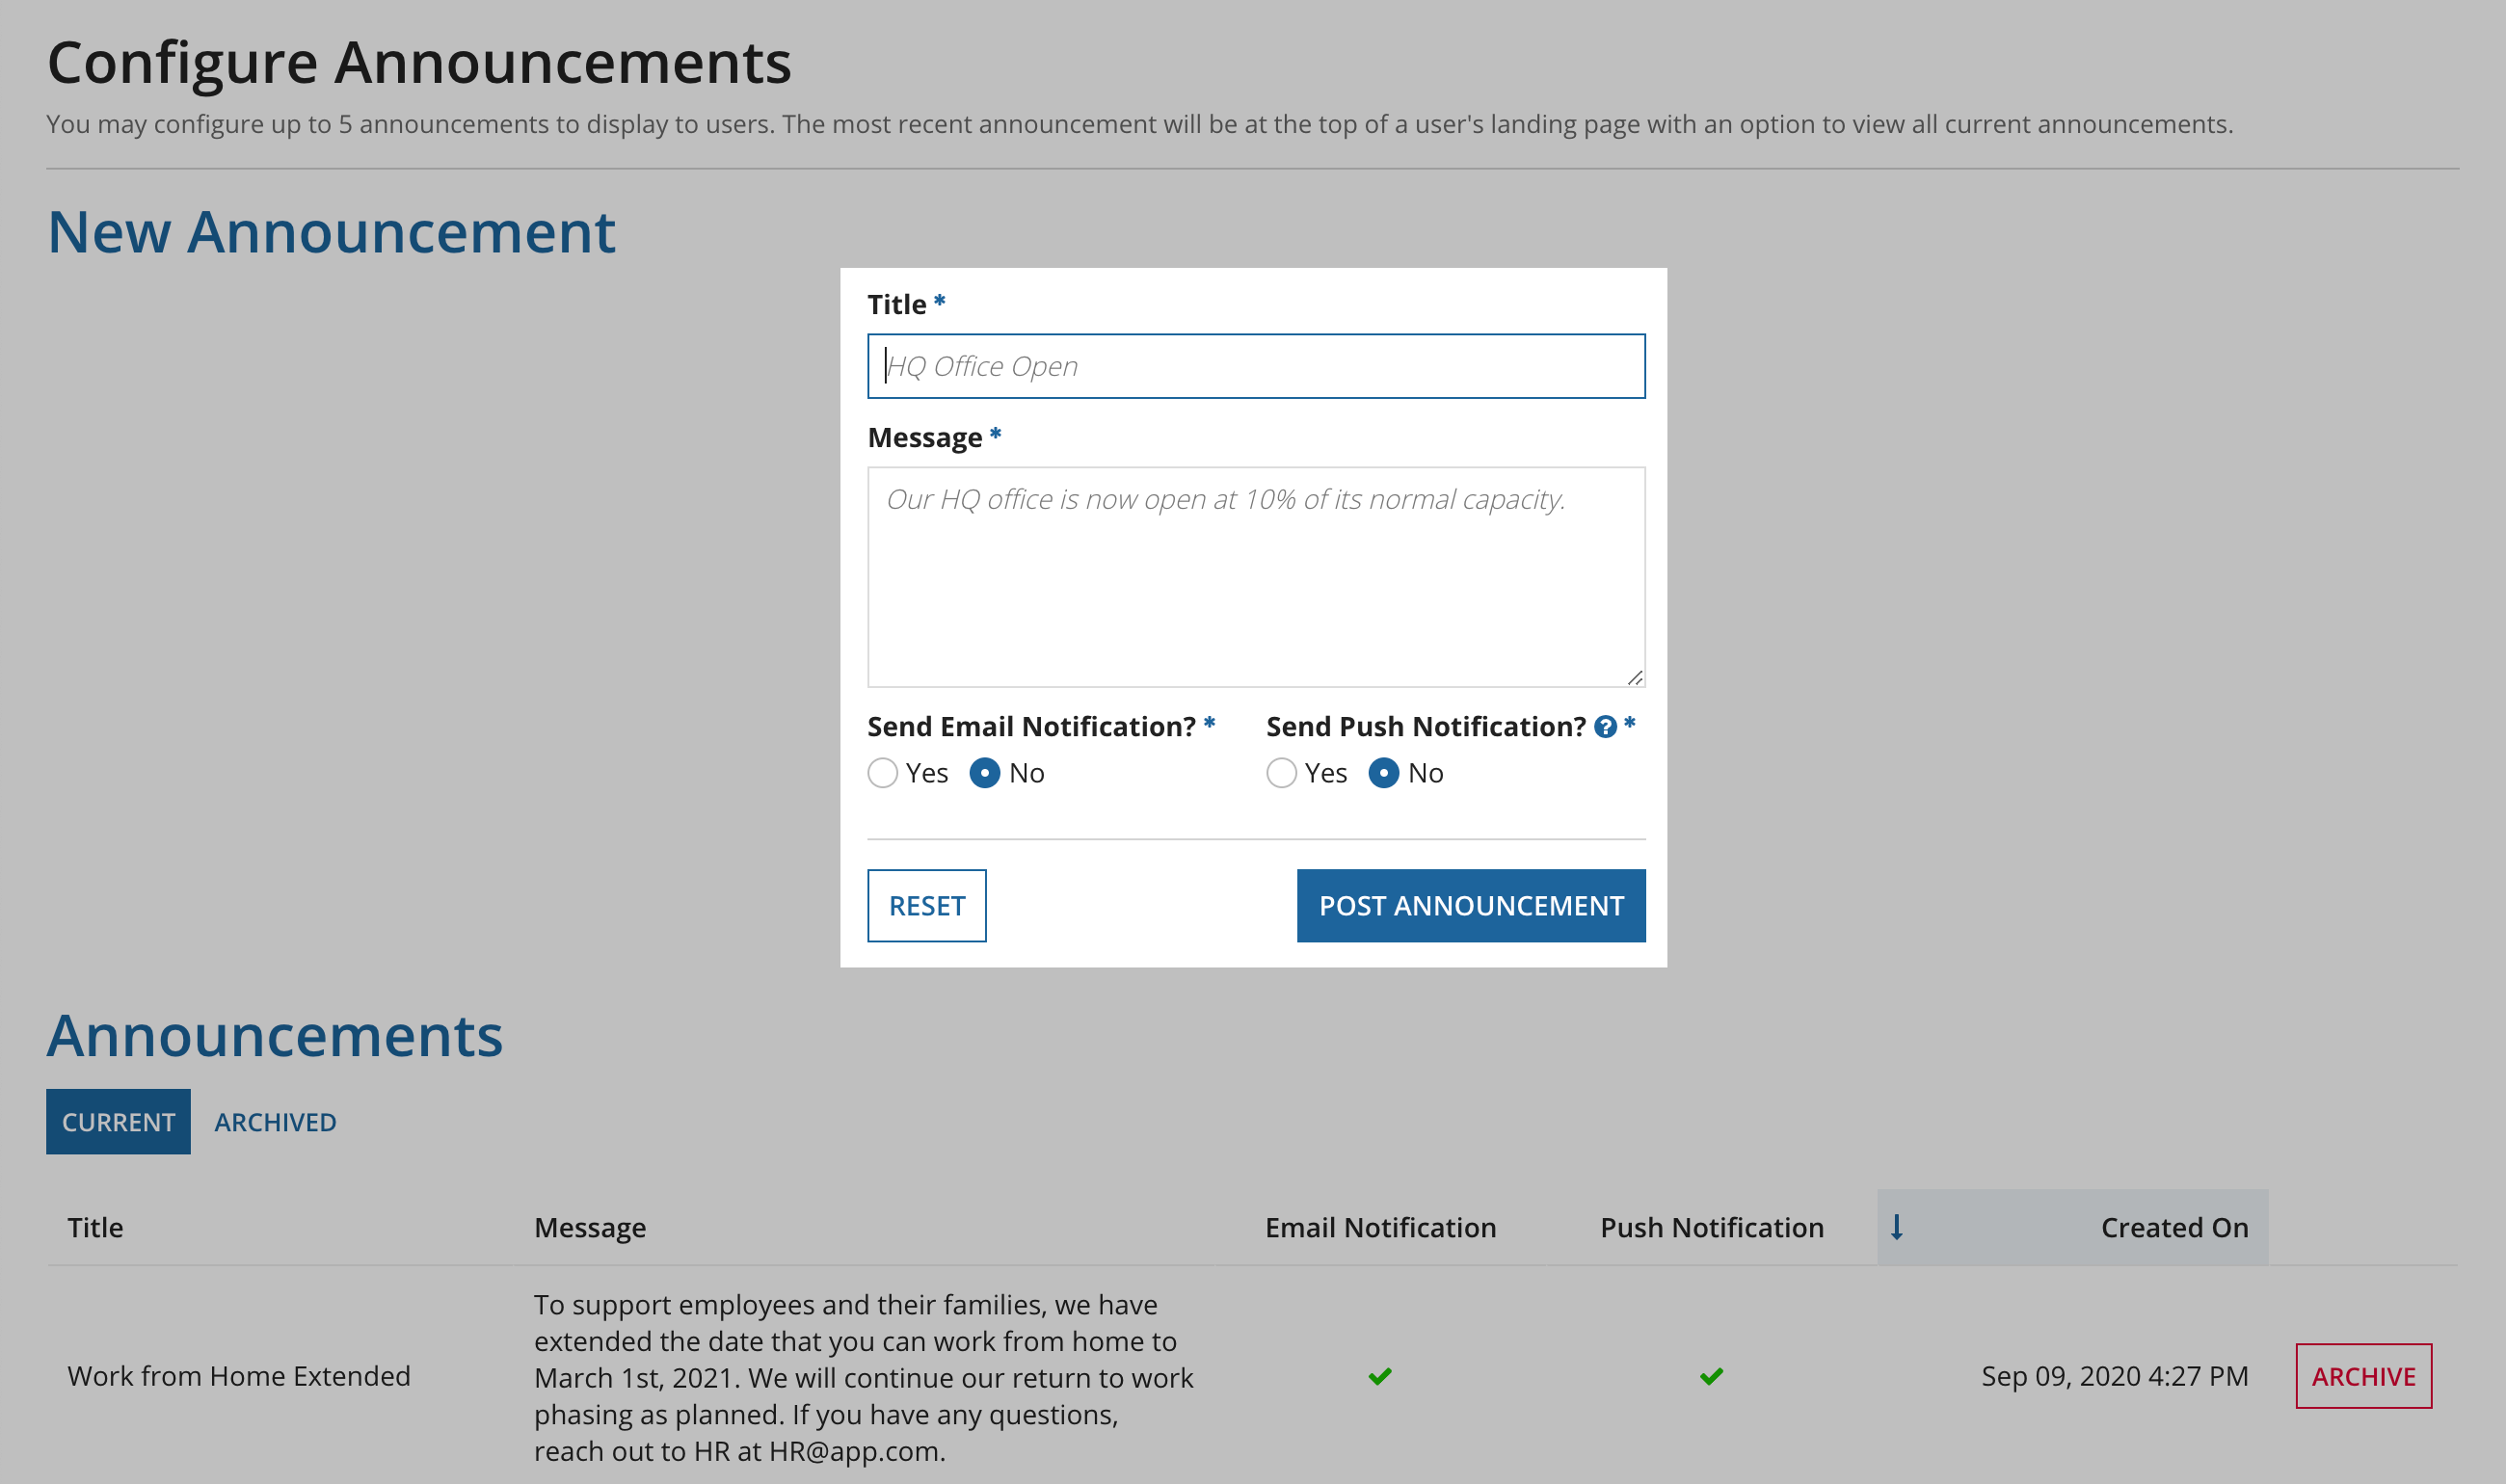
To remove an announcement from the Workforce Safety homepage of all users, archive it.
To archive an announcement:
You can view archived announcements by clicking the ARCHIVED tab.

Tip: The capabilities in the following sections are only available to response managers.
COVID-19 isolation incidents are essential to managing your COVID-19 response. Response managers must be made aware of all employees who tested positive for COVID-19 or were exposed to someone who tested positive for COVID-19. They must also be aware of employees that show symptoms of COVID-19 in order to protect the workplace community.
Workforce Safety helps response managers with the enormous task of keeping their communities safe by:
Users and response managers can manually create COVID-19 isolation incidents by selecting COVID-19 RELATED INCIDENT when they create an incident.
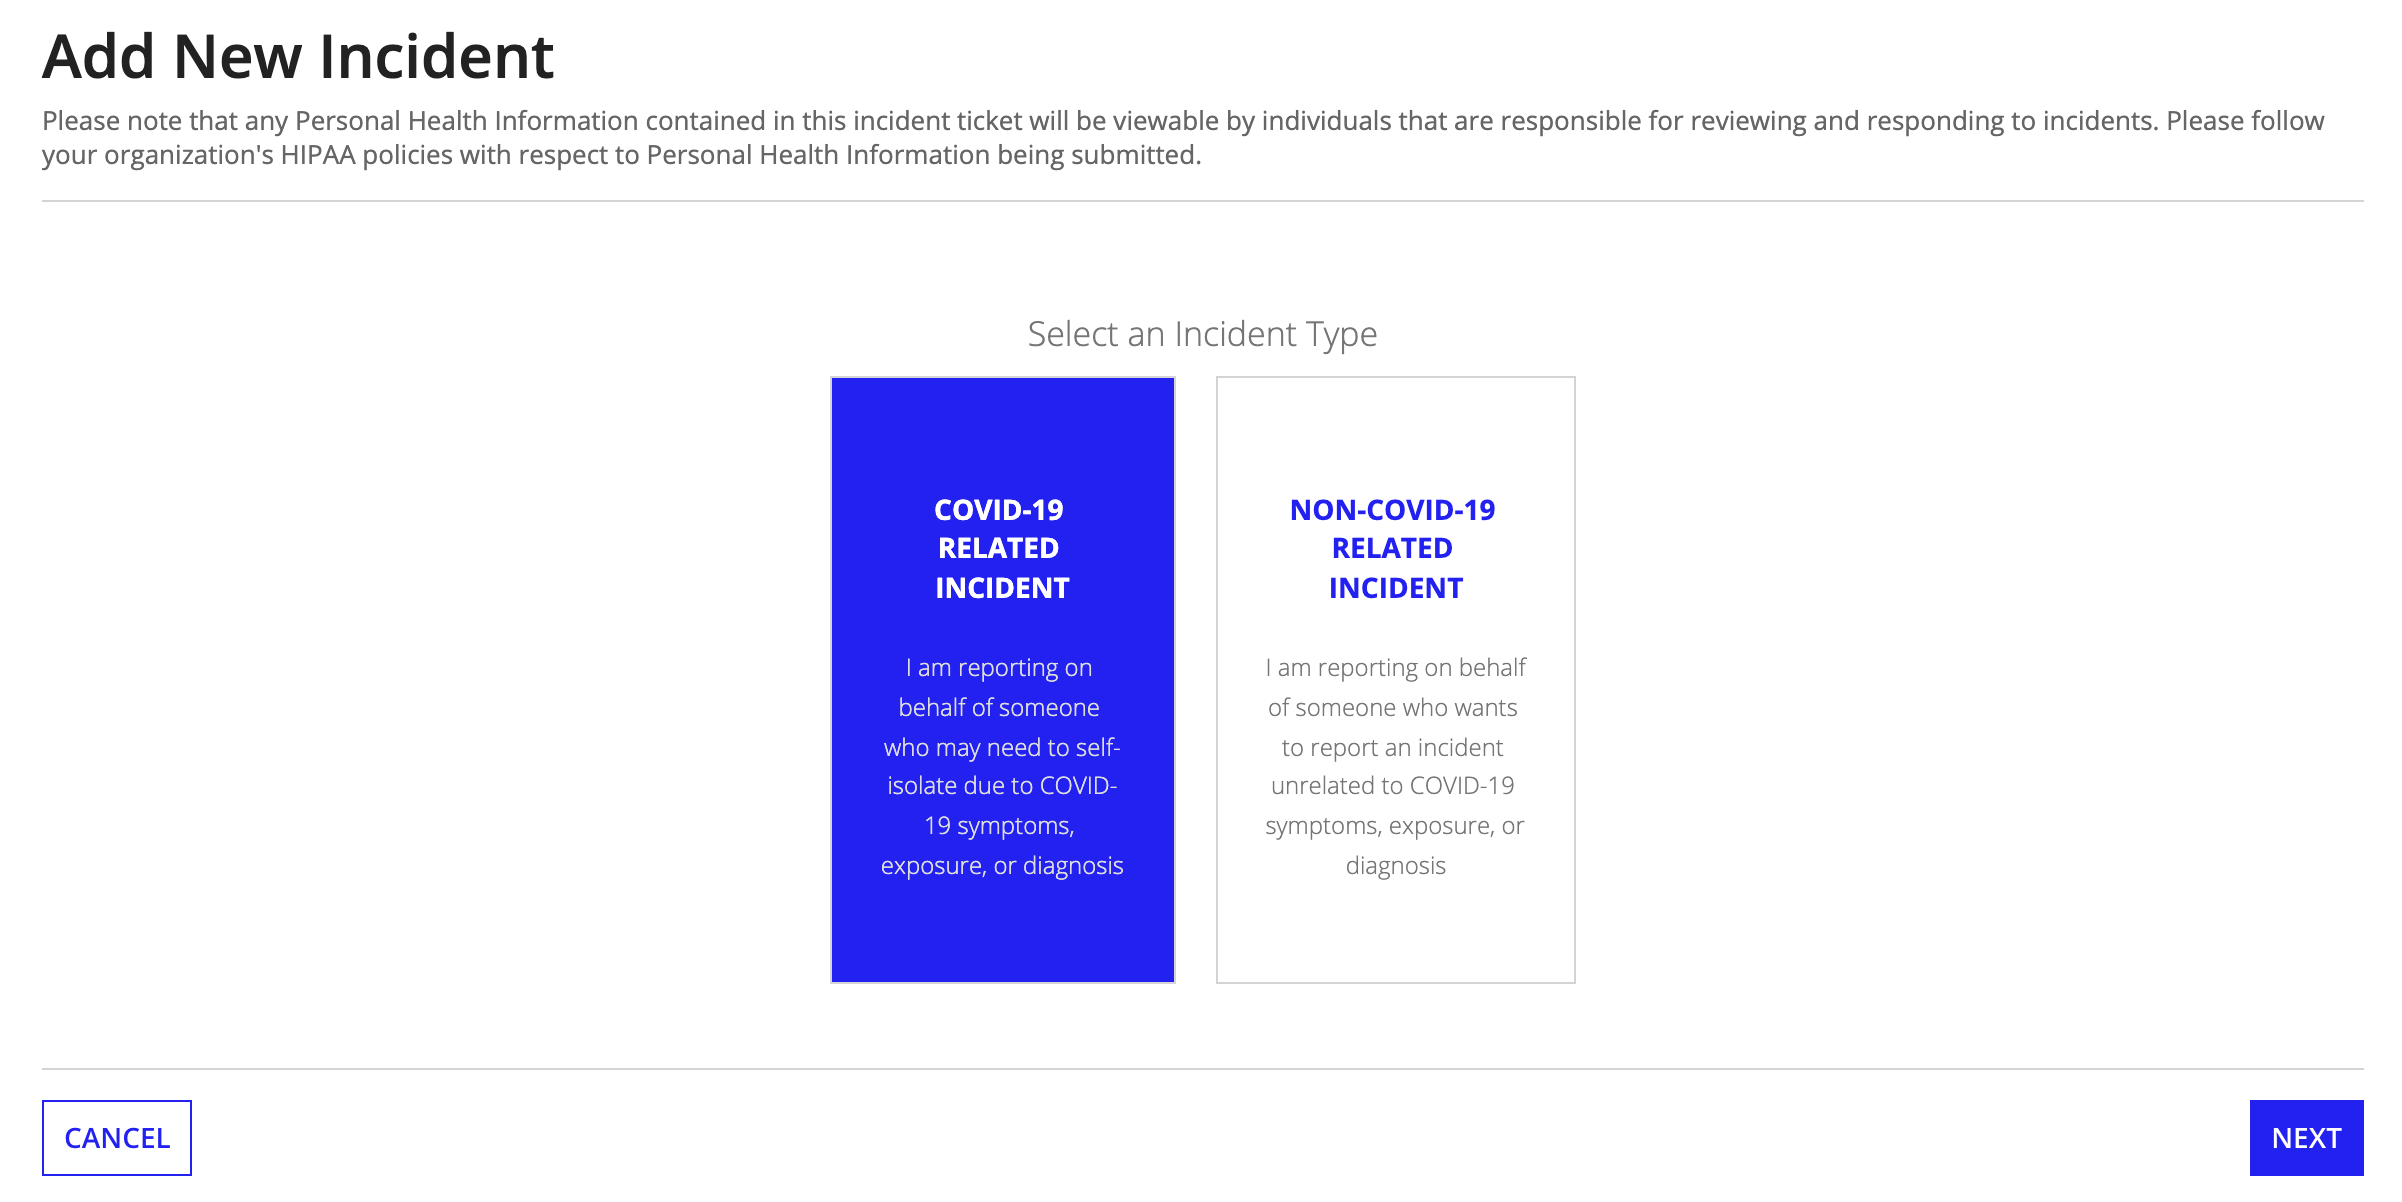
A COVID-19 related incident can also be created automatically in the following situations:
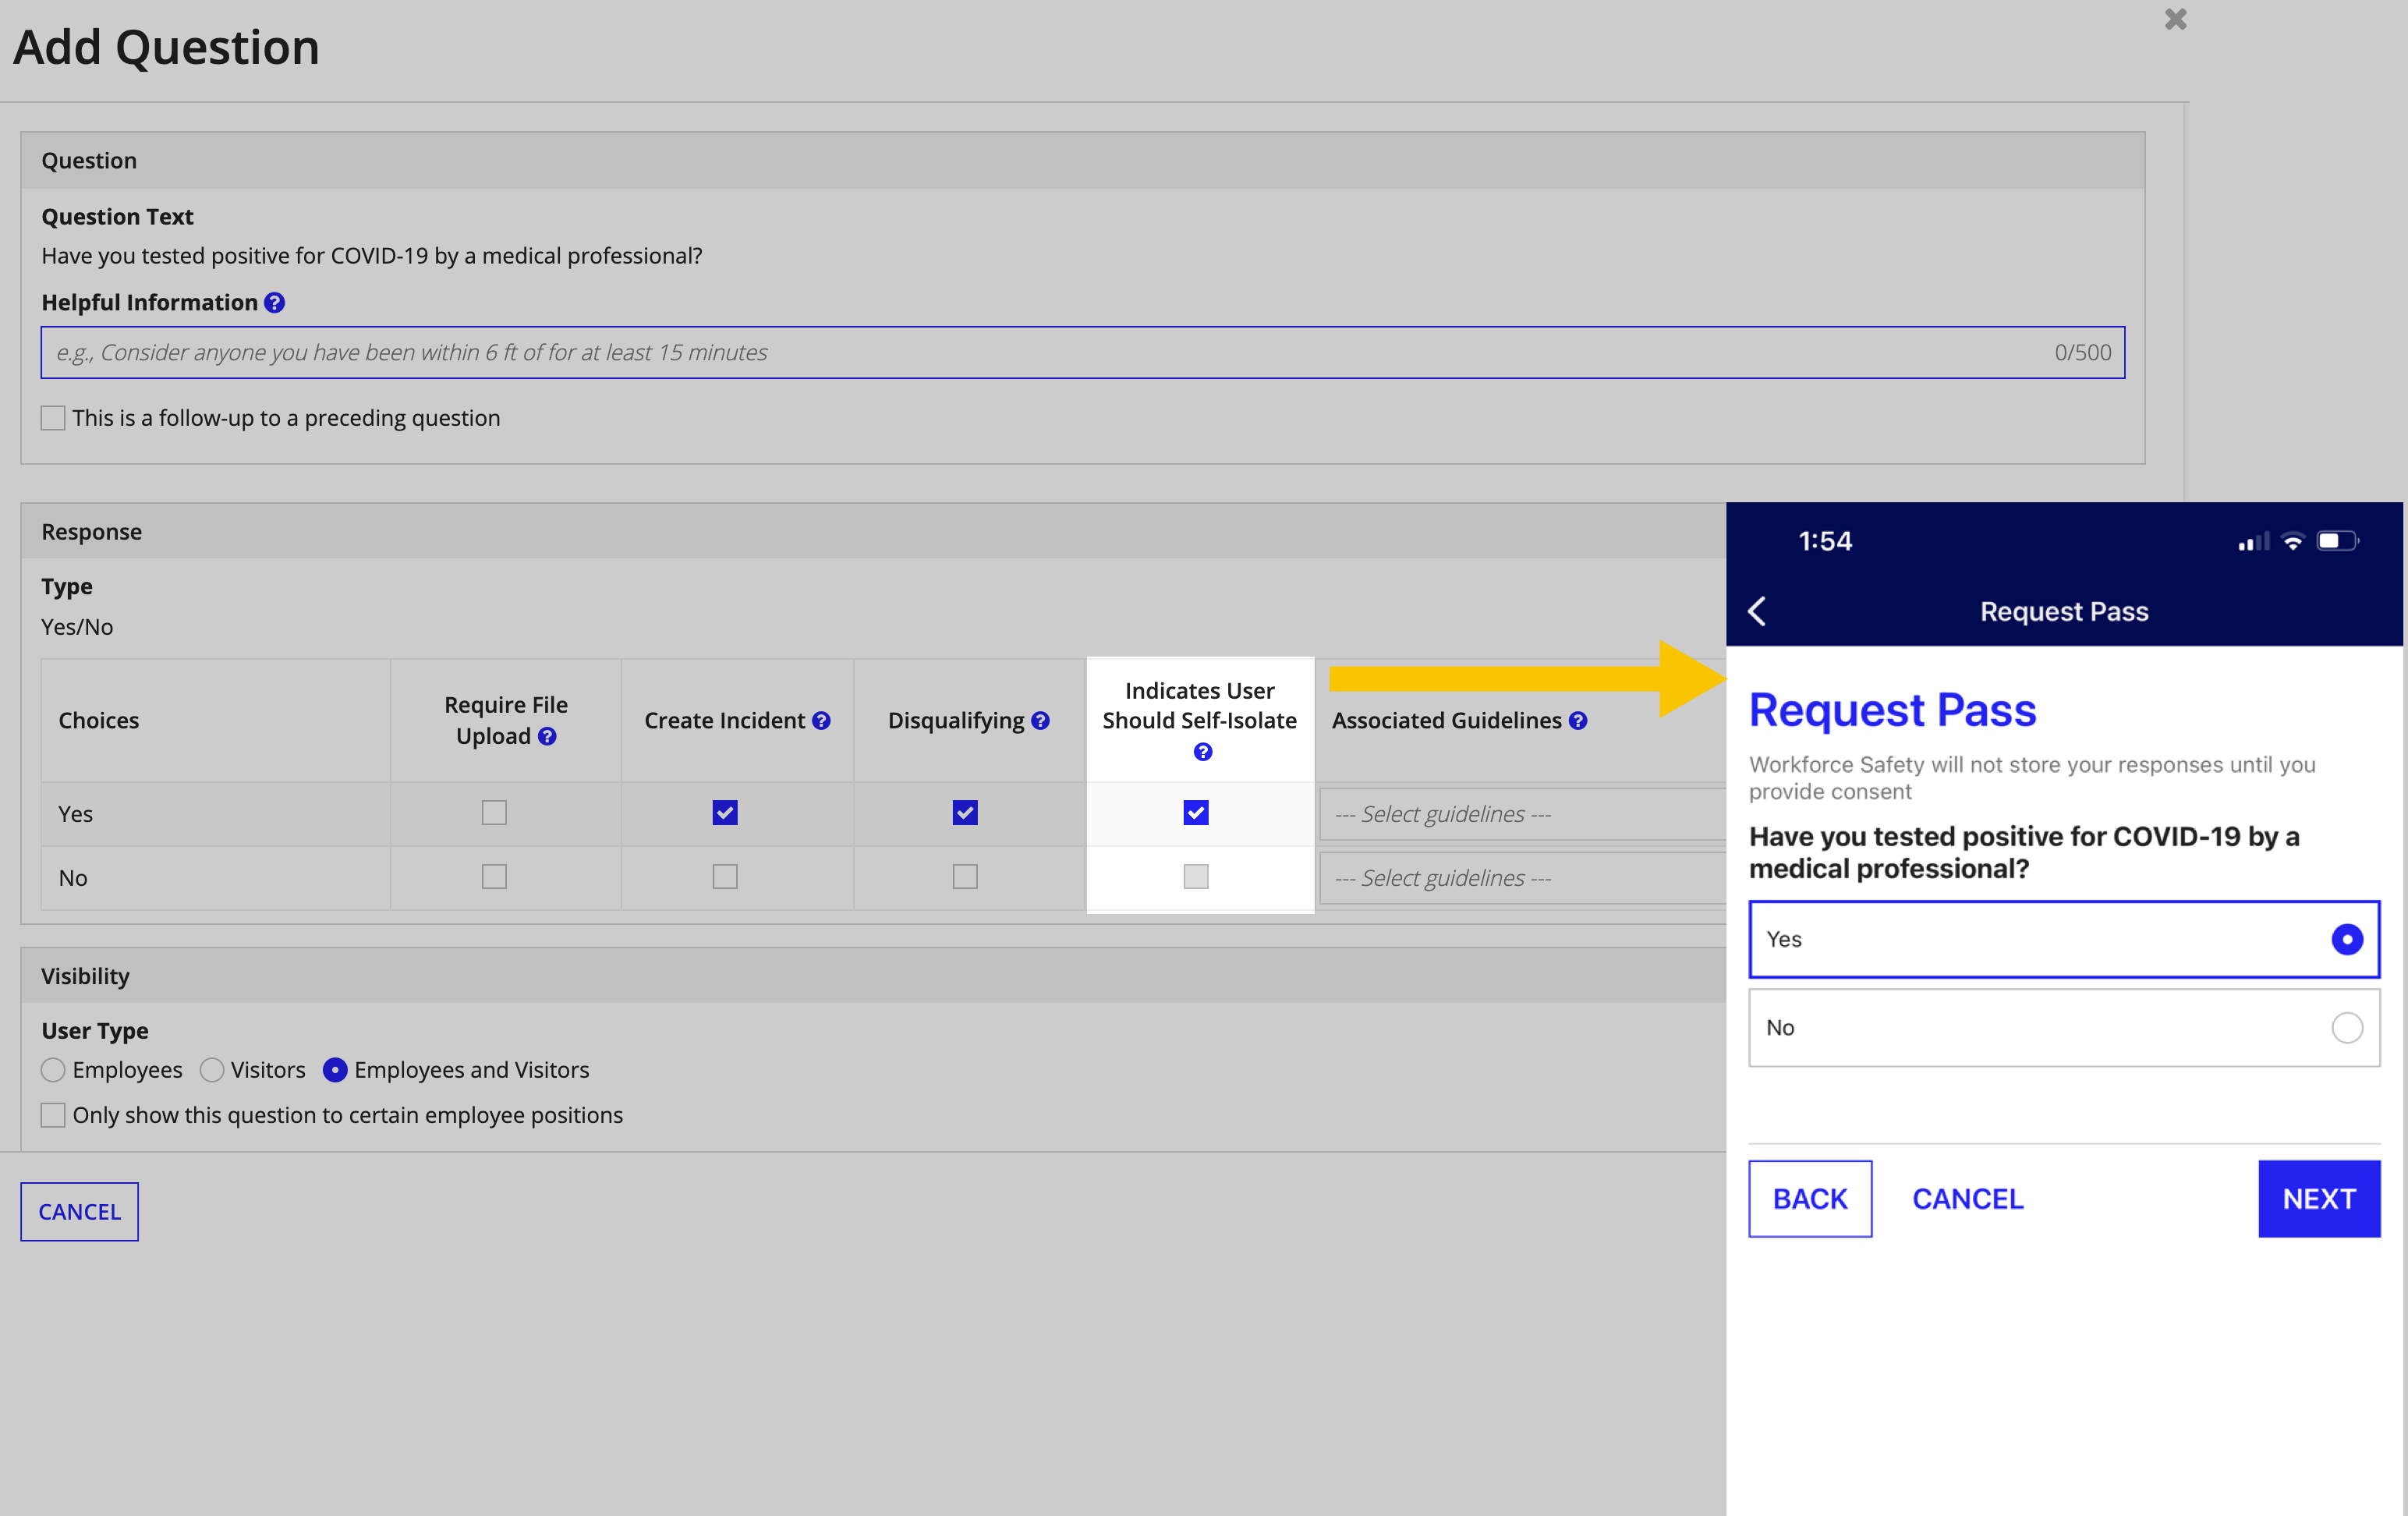
Through a pass request or isolation update—if the user chooses a response that is configured to create a COVID-19 isolation incident.
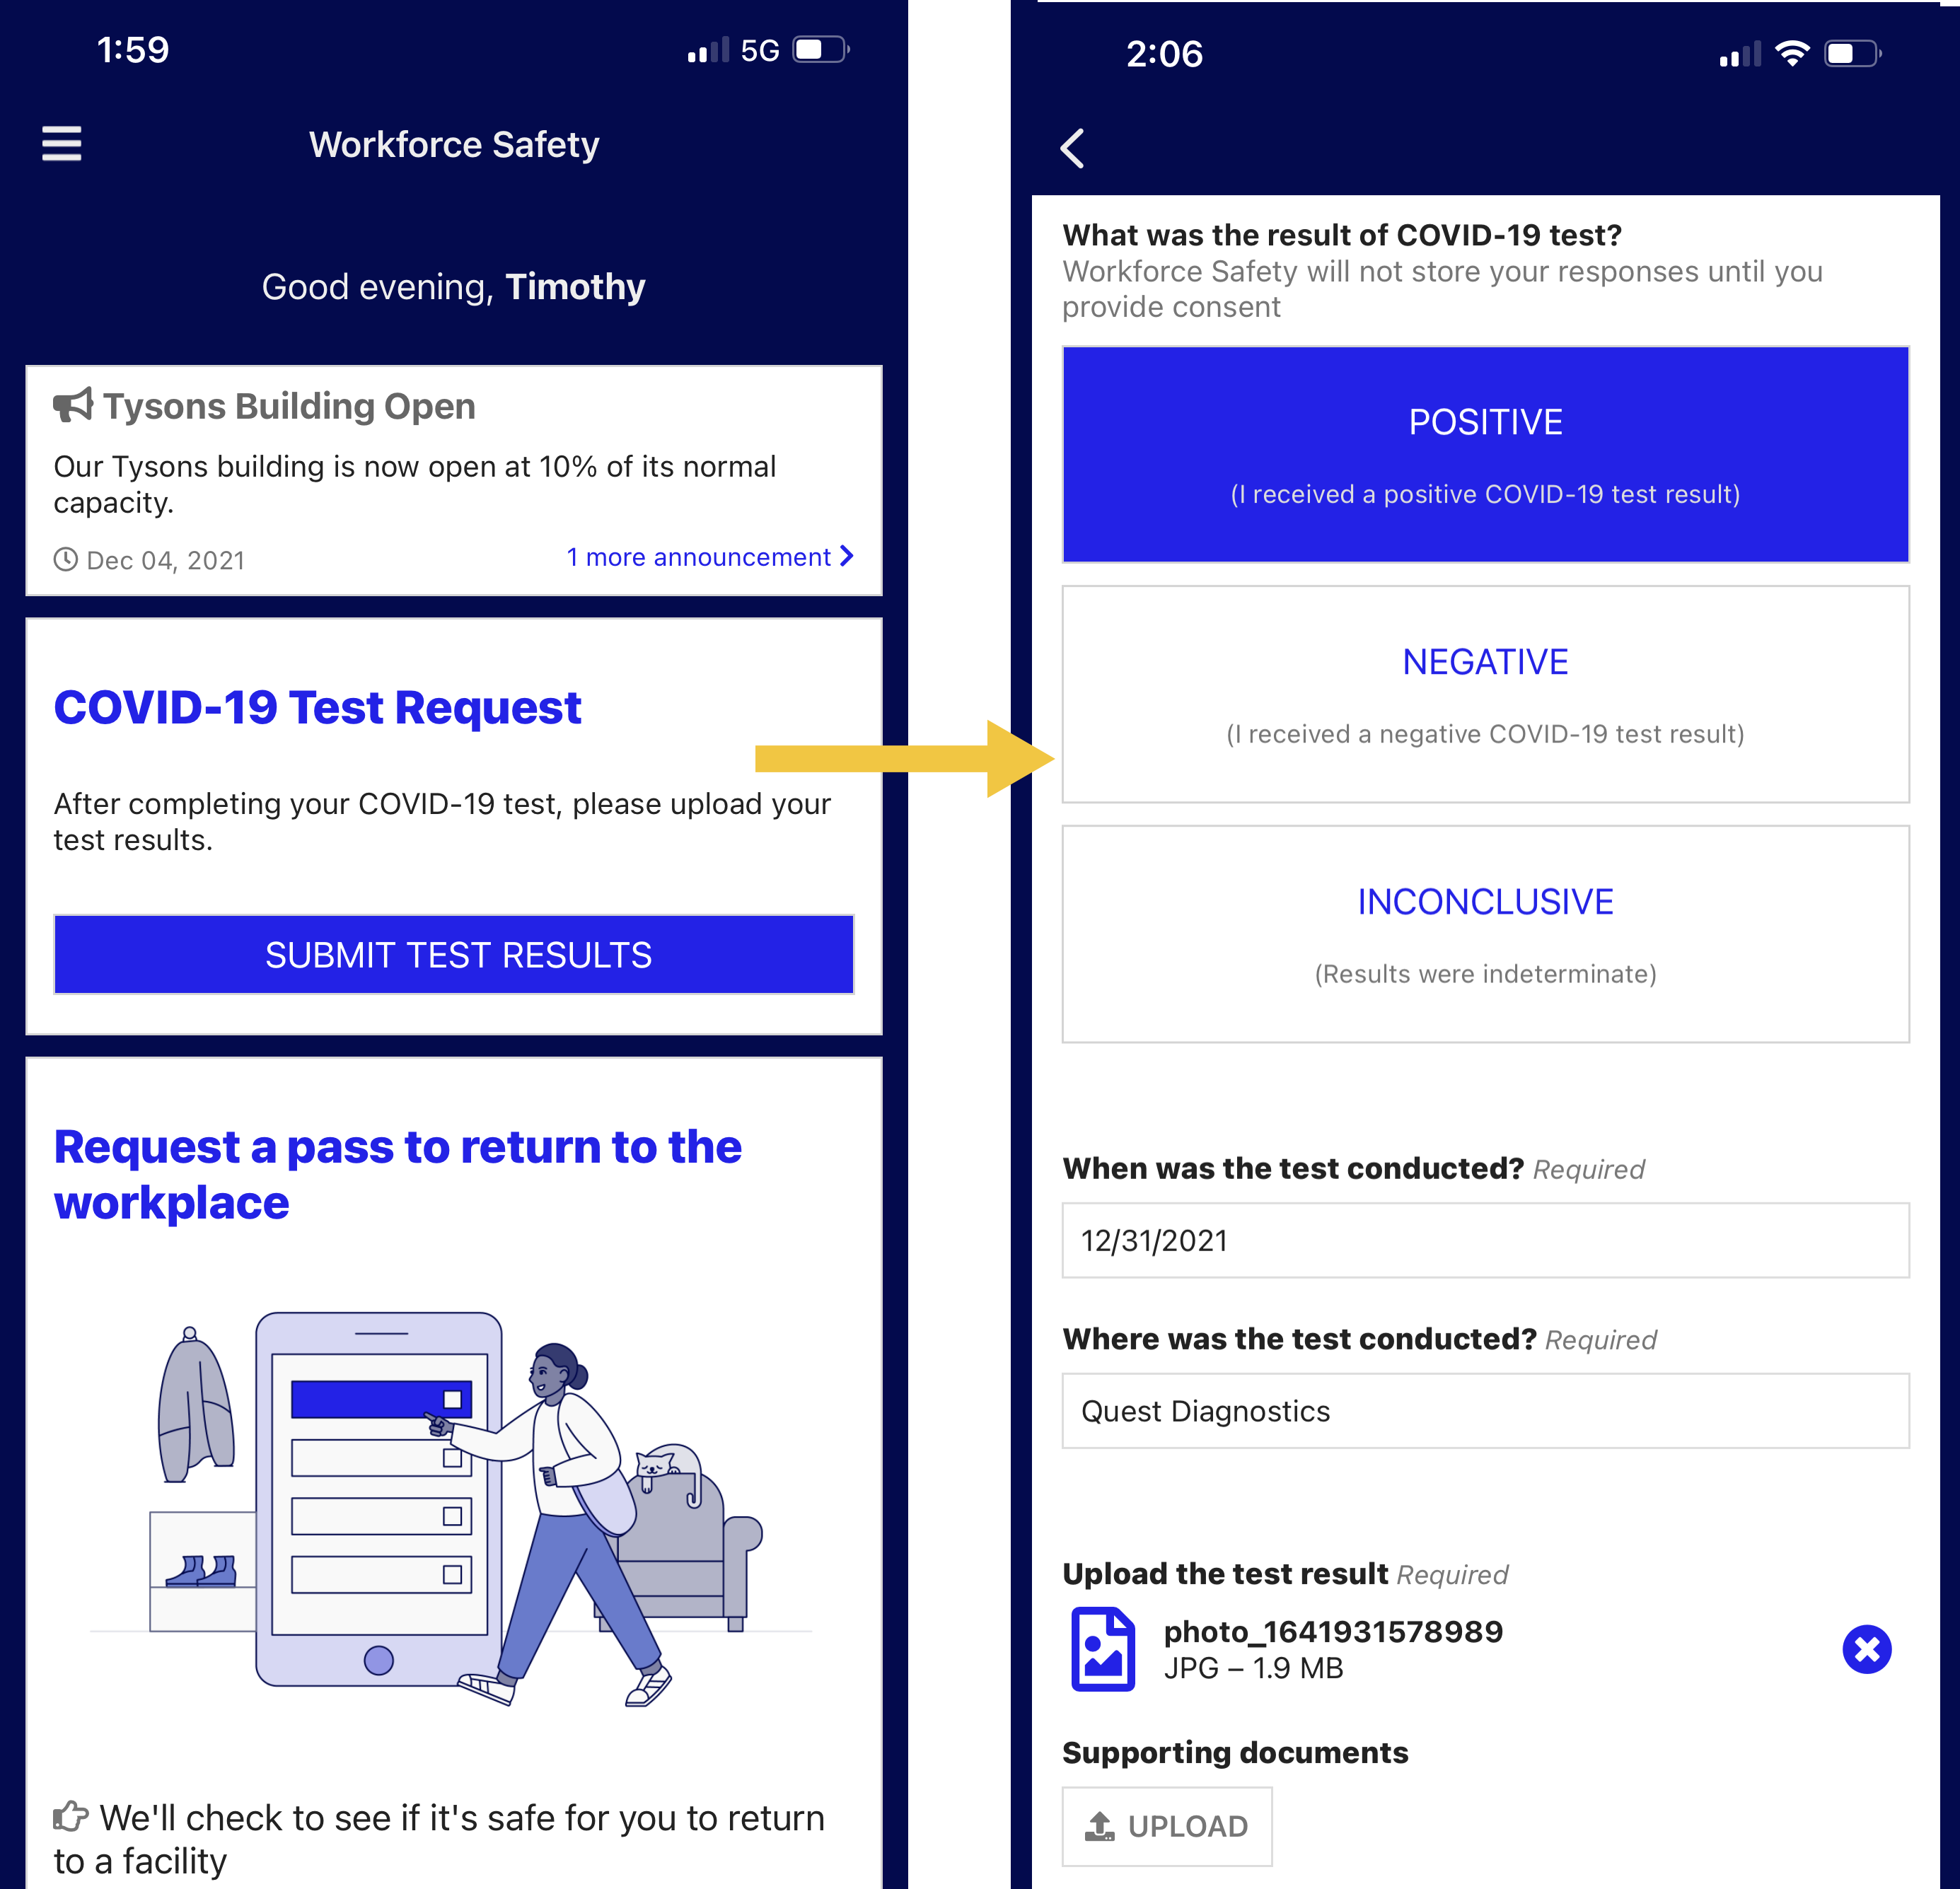
By submitting a positive COVID-19 test result.
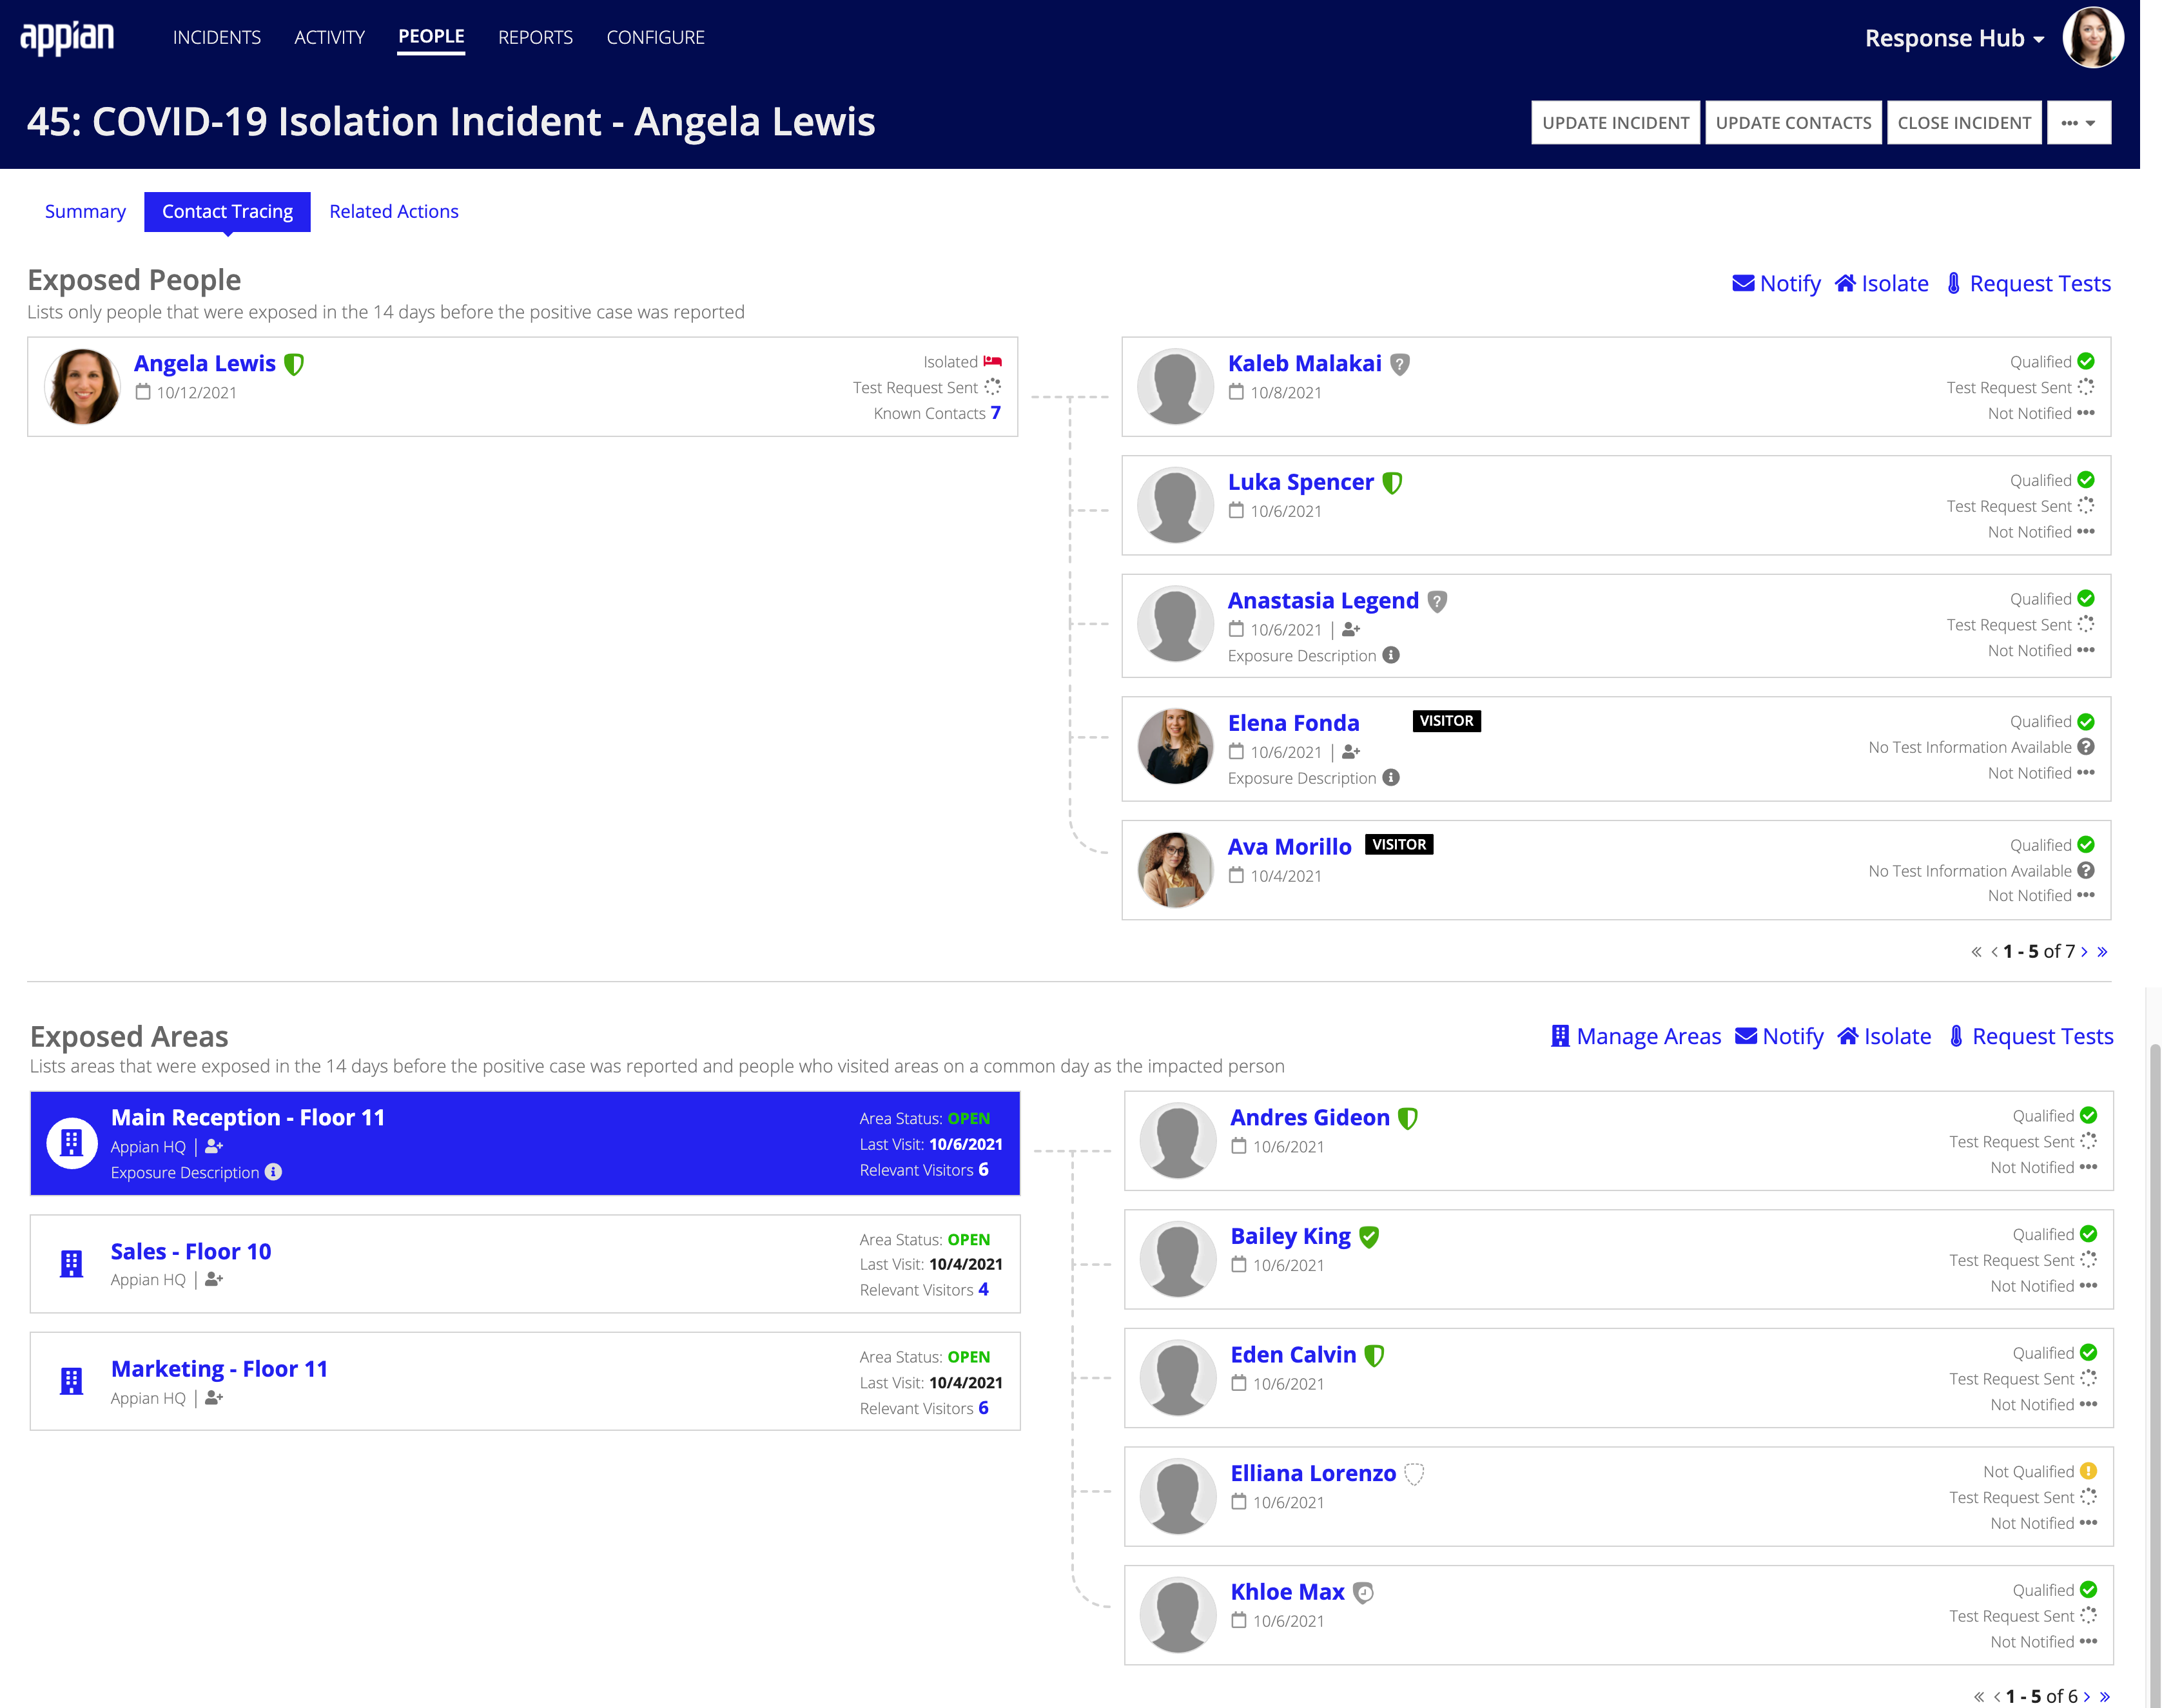
When a COVID-19 isolation incident is created by a user or response manager, all of the people that the user reported having contact with during the past 14 days is displayed in the Contact Tracing tab of the incident. Since visitors do not log contacts, visitor contact tracing information is gathered by users who have reported having contact with the visitor. After a COVID-19 isolation incident is logged, a response manager can also gather contact tracing information for a user.
The Contact Tracing tab of the incident displays any individuals the user was reported to have come in contact with during the past 14 days.
Additionally, the Exposed Areas section will display all users that reported contact with an area on the same day that the affected individual did.
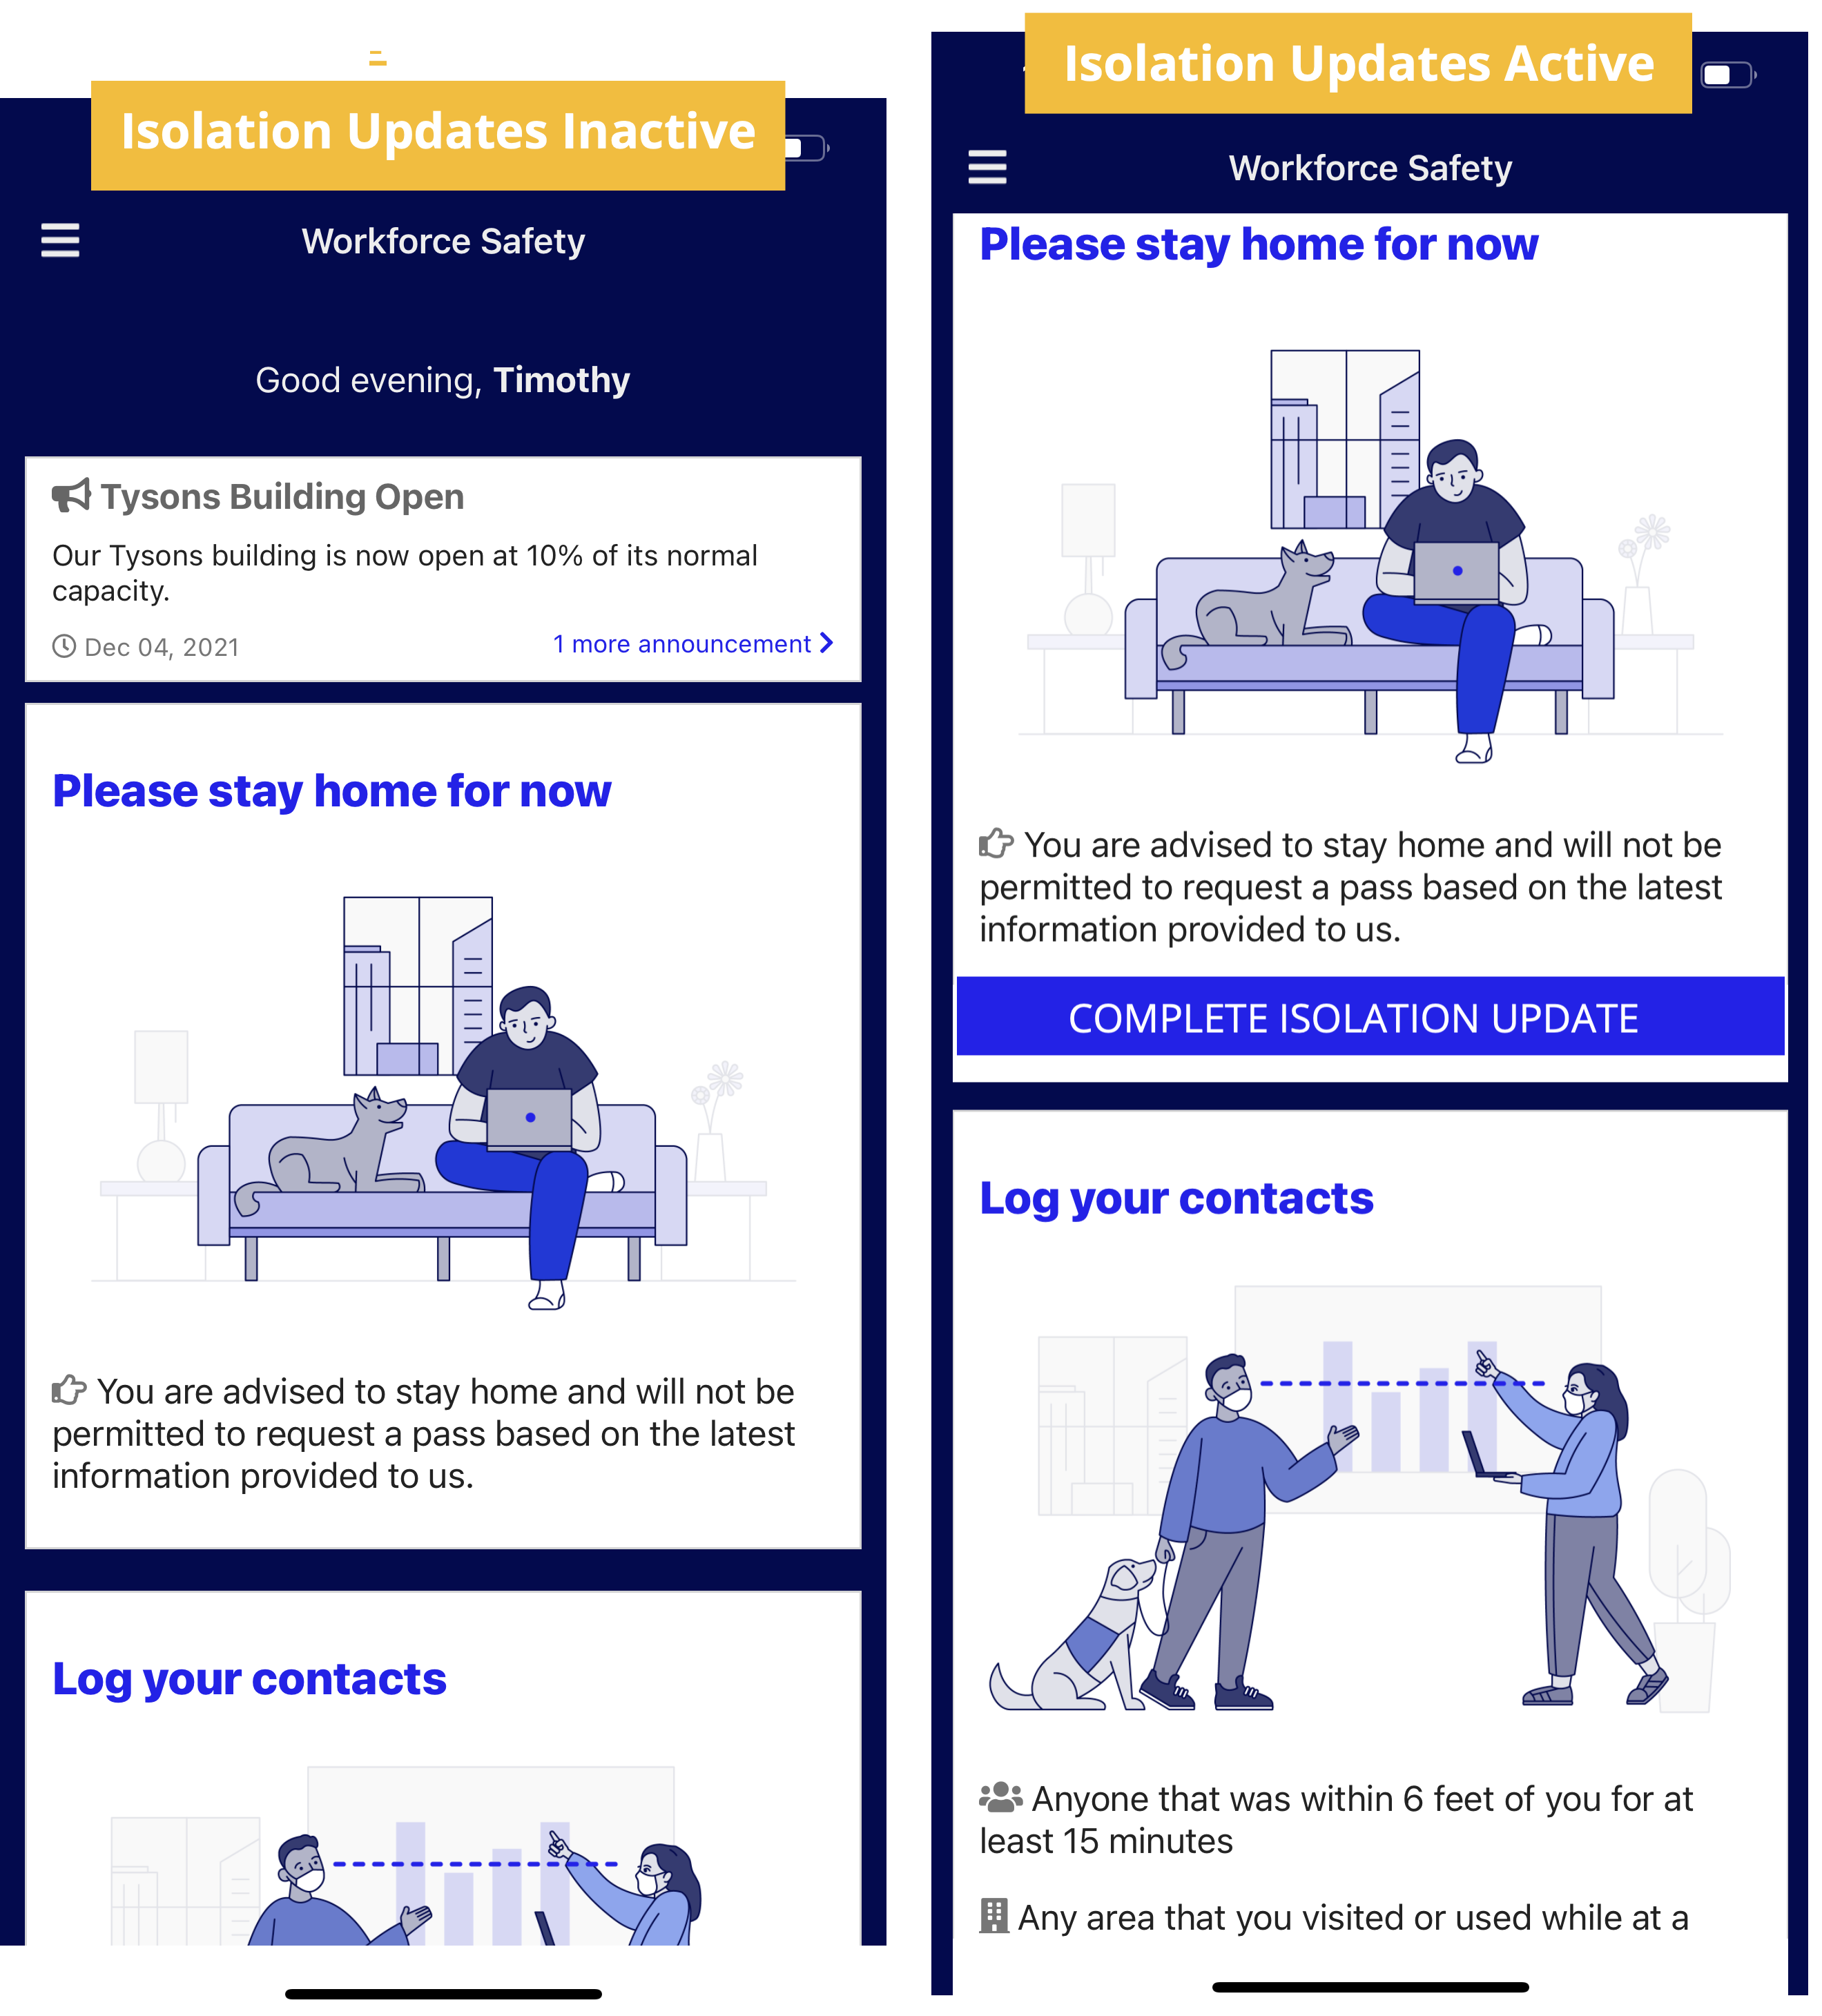
Whether the COVID-19 isolation incident is created manually or automatically, the affected person will be automatically placed into isolation and any active passes they have will be revoked. This means that they cannot take a survey or request a pass. Instead, they will see an isolation section on their home page. If Isolation Updates are active, and the visibility for at least one isolation question is applicable to a user, that user will be asked to complete an isolation update.
Users can only have one open COVID-19 isolation incident at a time. Both users and response managers cannot create a second COVID-19 isolation incident for the same user.
When a COVID-19 isolation incident would be created automatically by Workforce Safety, such as when a positive test result is submitted, but the user already has an open COVID-19 isolation case, a new incident will not be created. However, if Workforce Safety is configured to automatically remove users from isolation, the countdown for removing the user and/or sending a test request is reset.
Tip: If you have upgraded Workforce Safety from v5.0 or older, users will be able to have more than one COVID-19 isolation incident open at a time because their older incidents will remain open.
Generally, the flow that response managers will take when responding to COVID-19 isolation incidents consists of four steps:
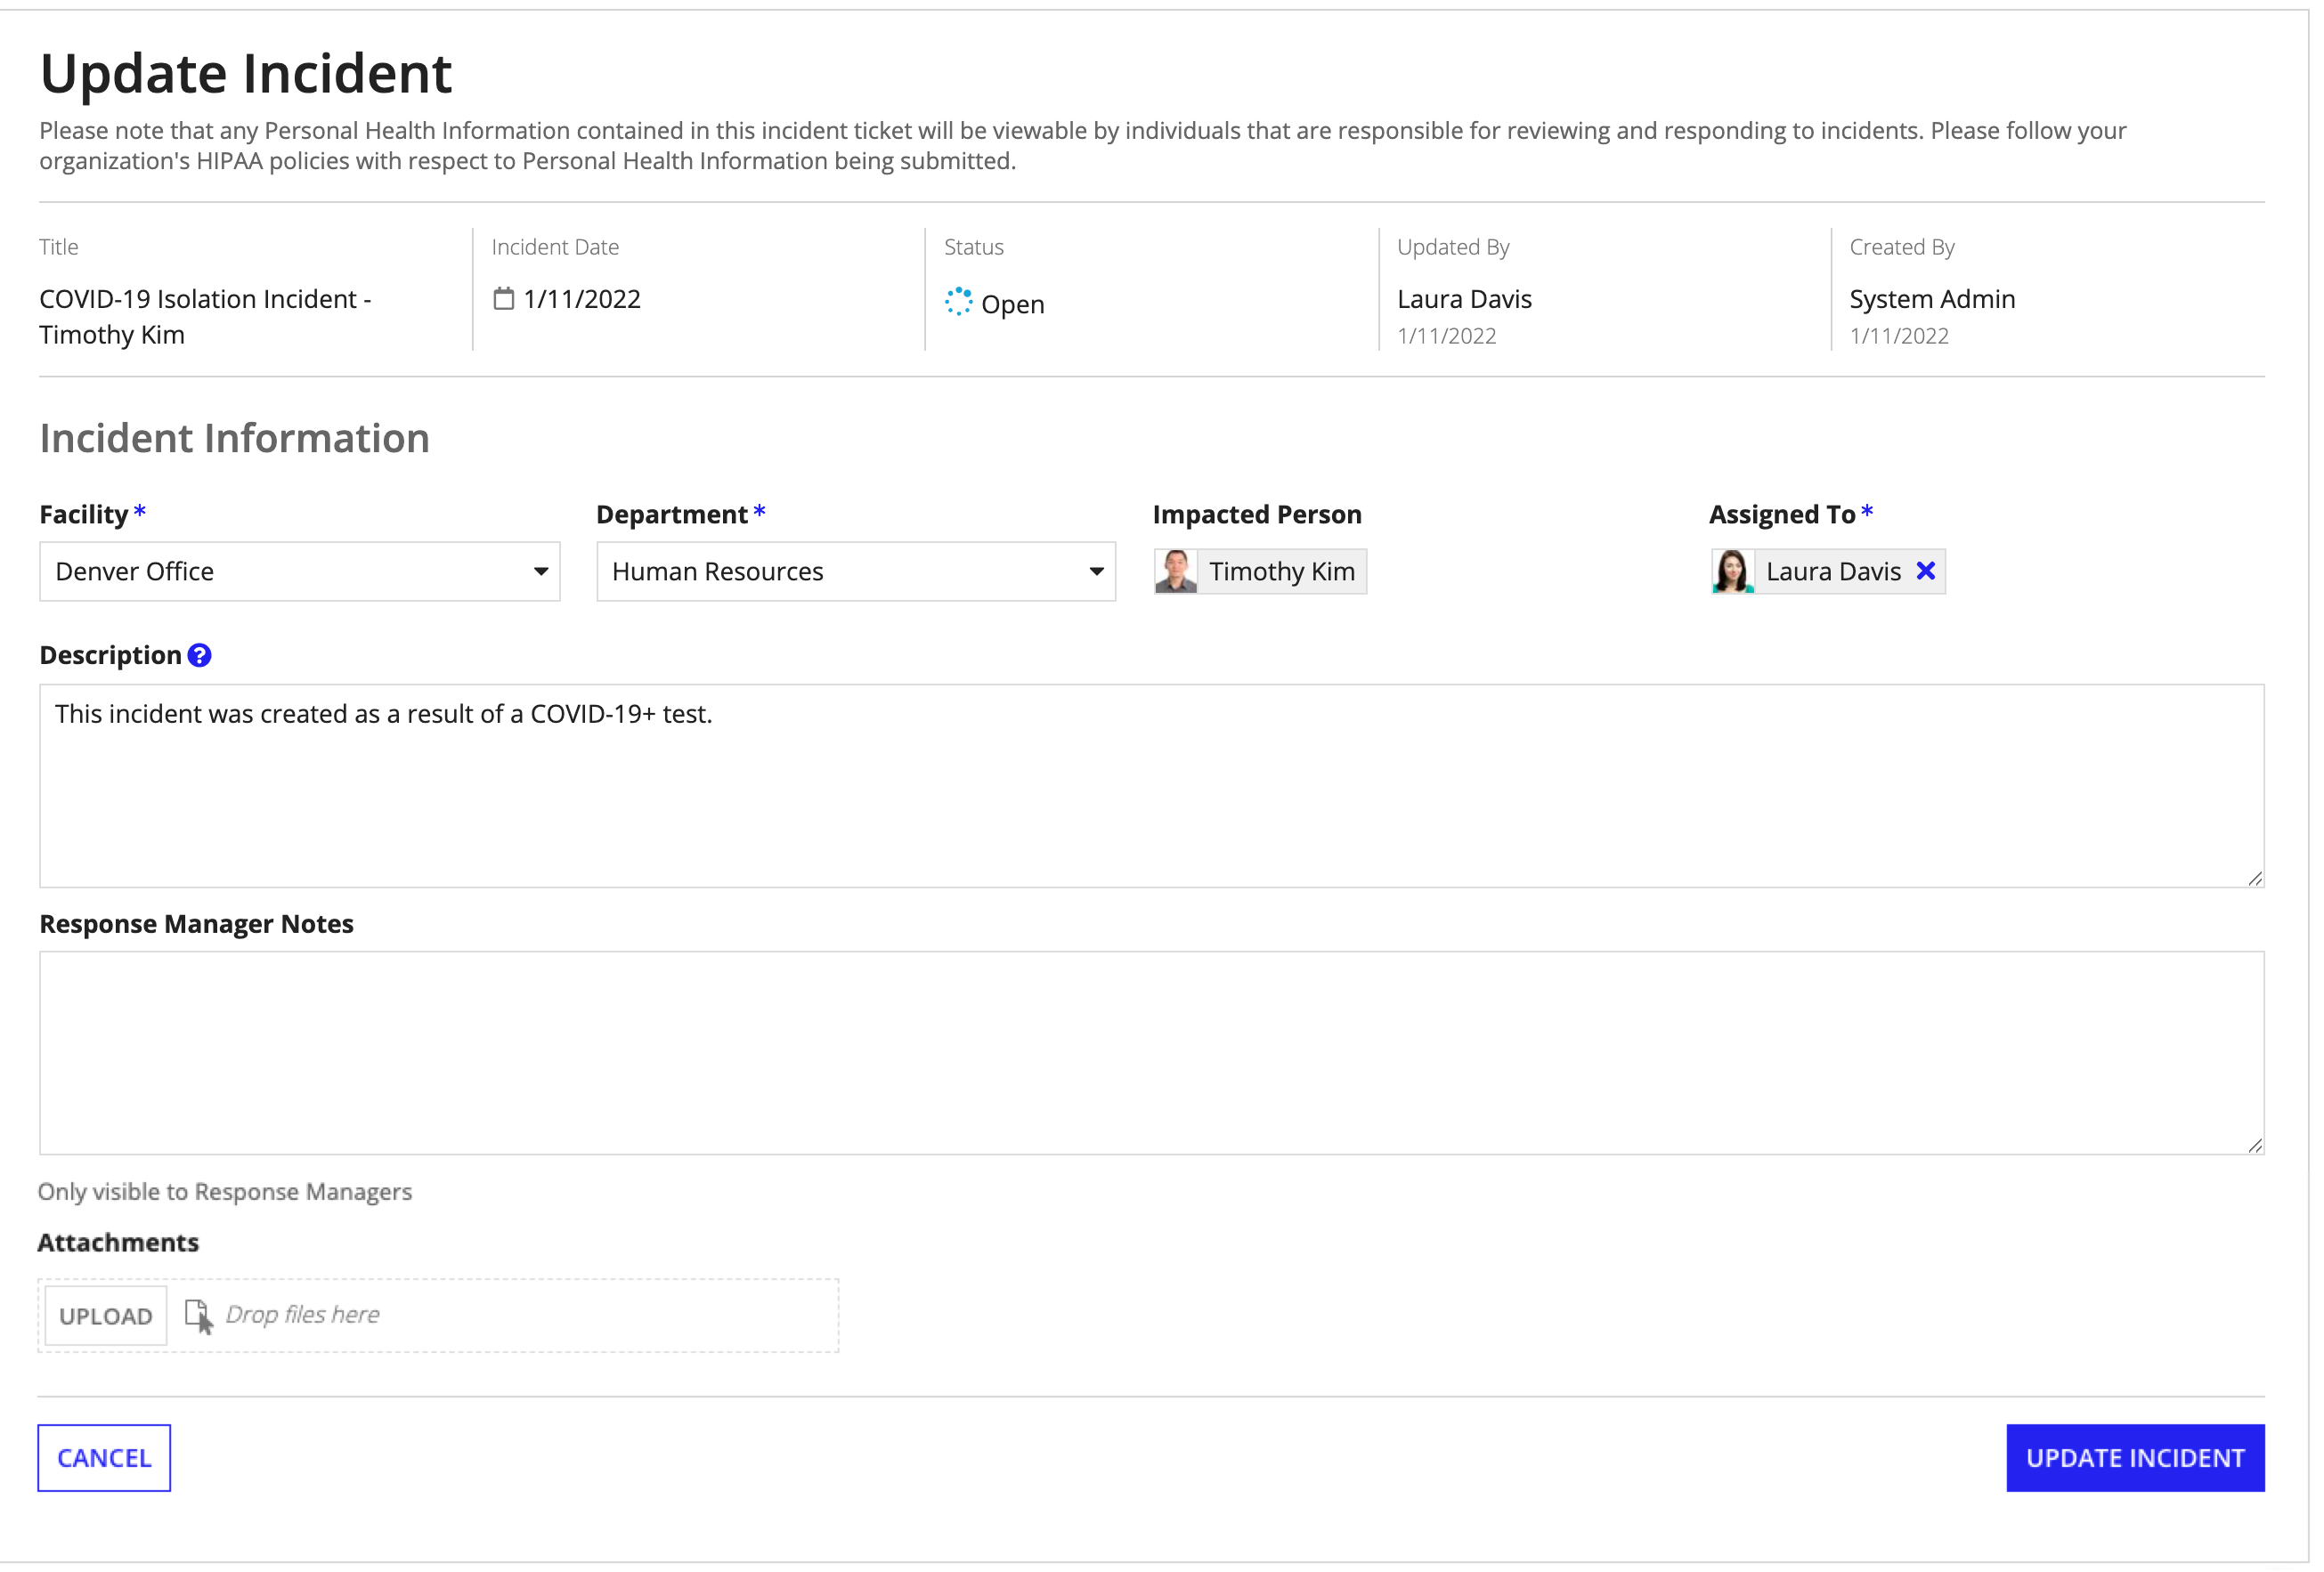
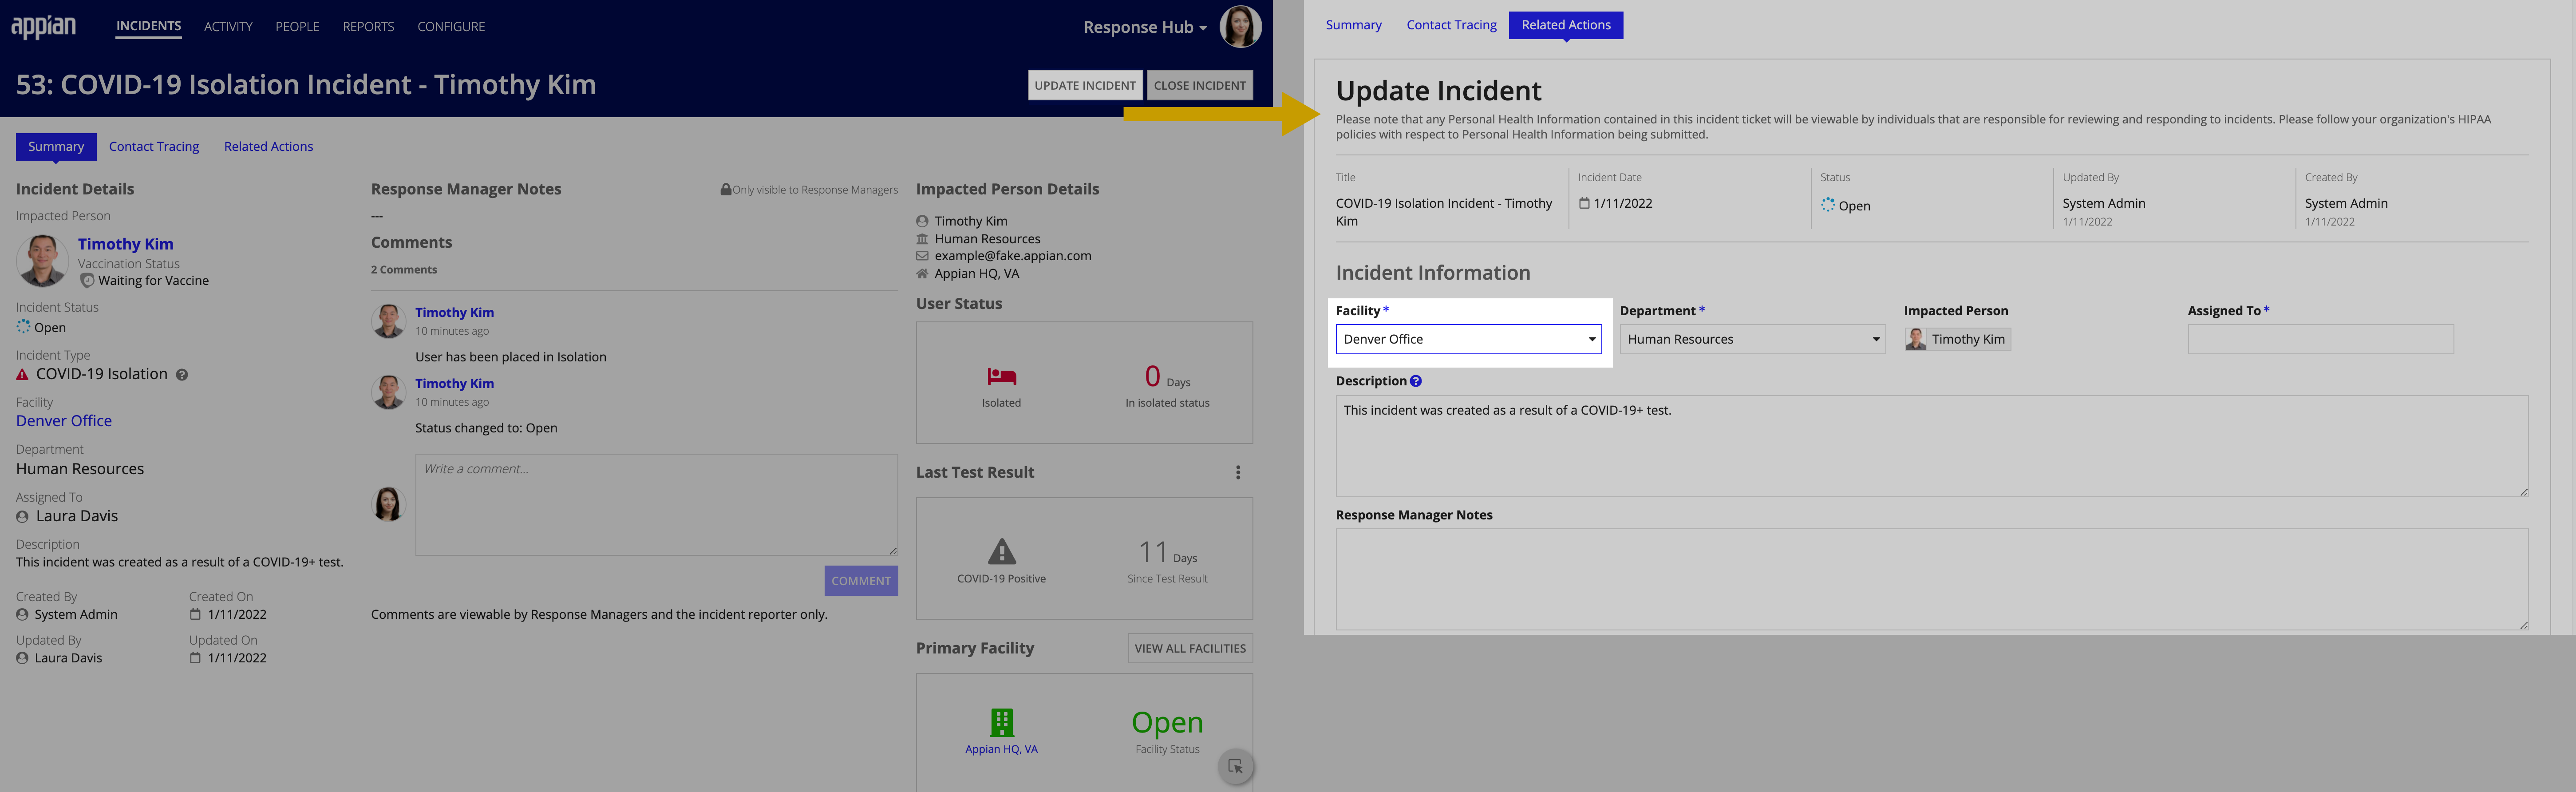
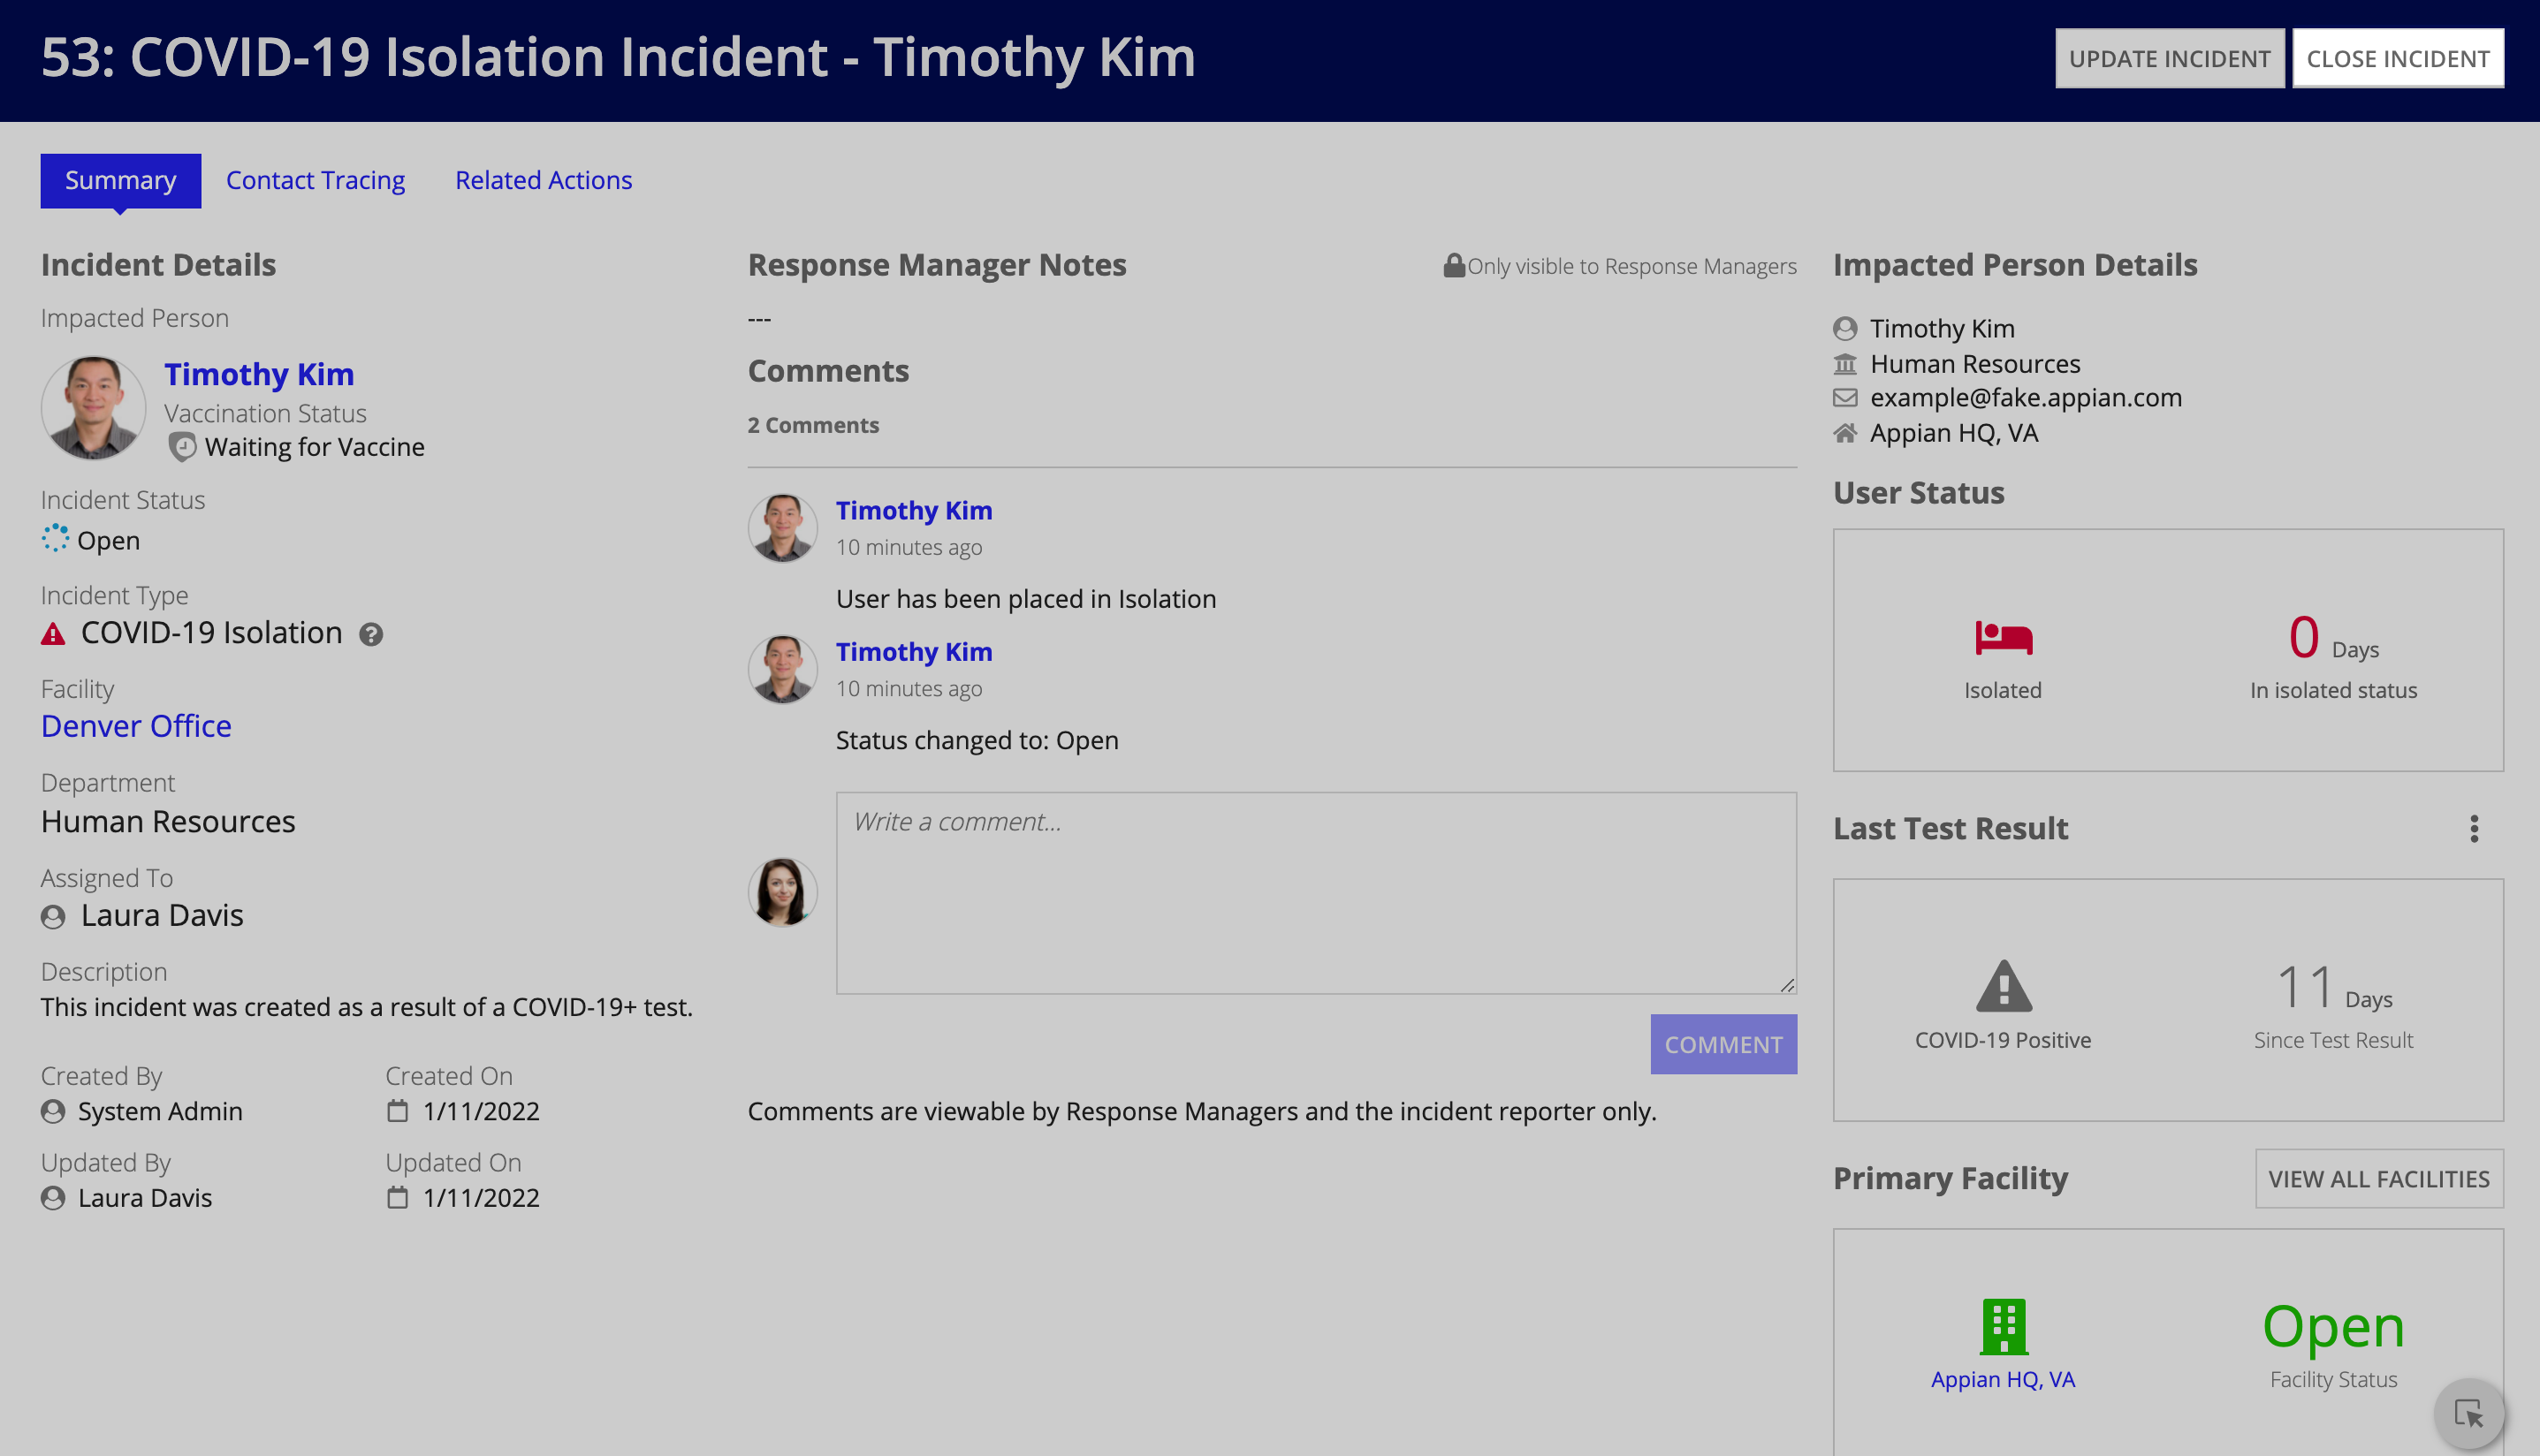
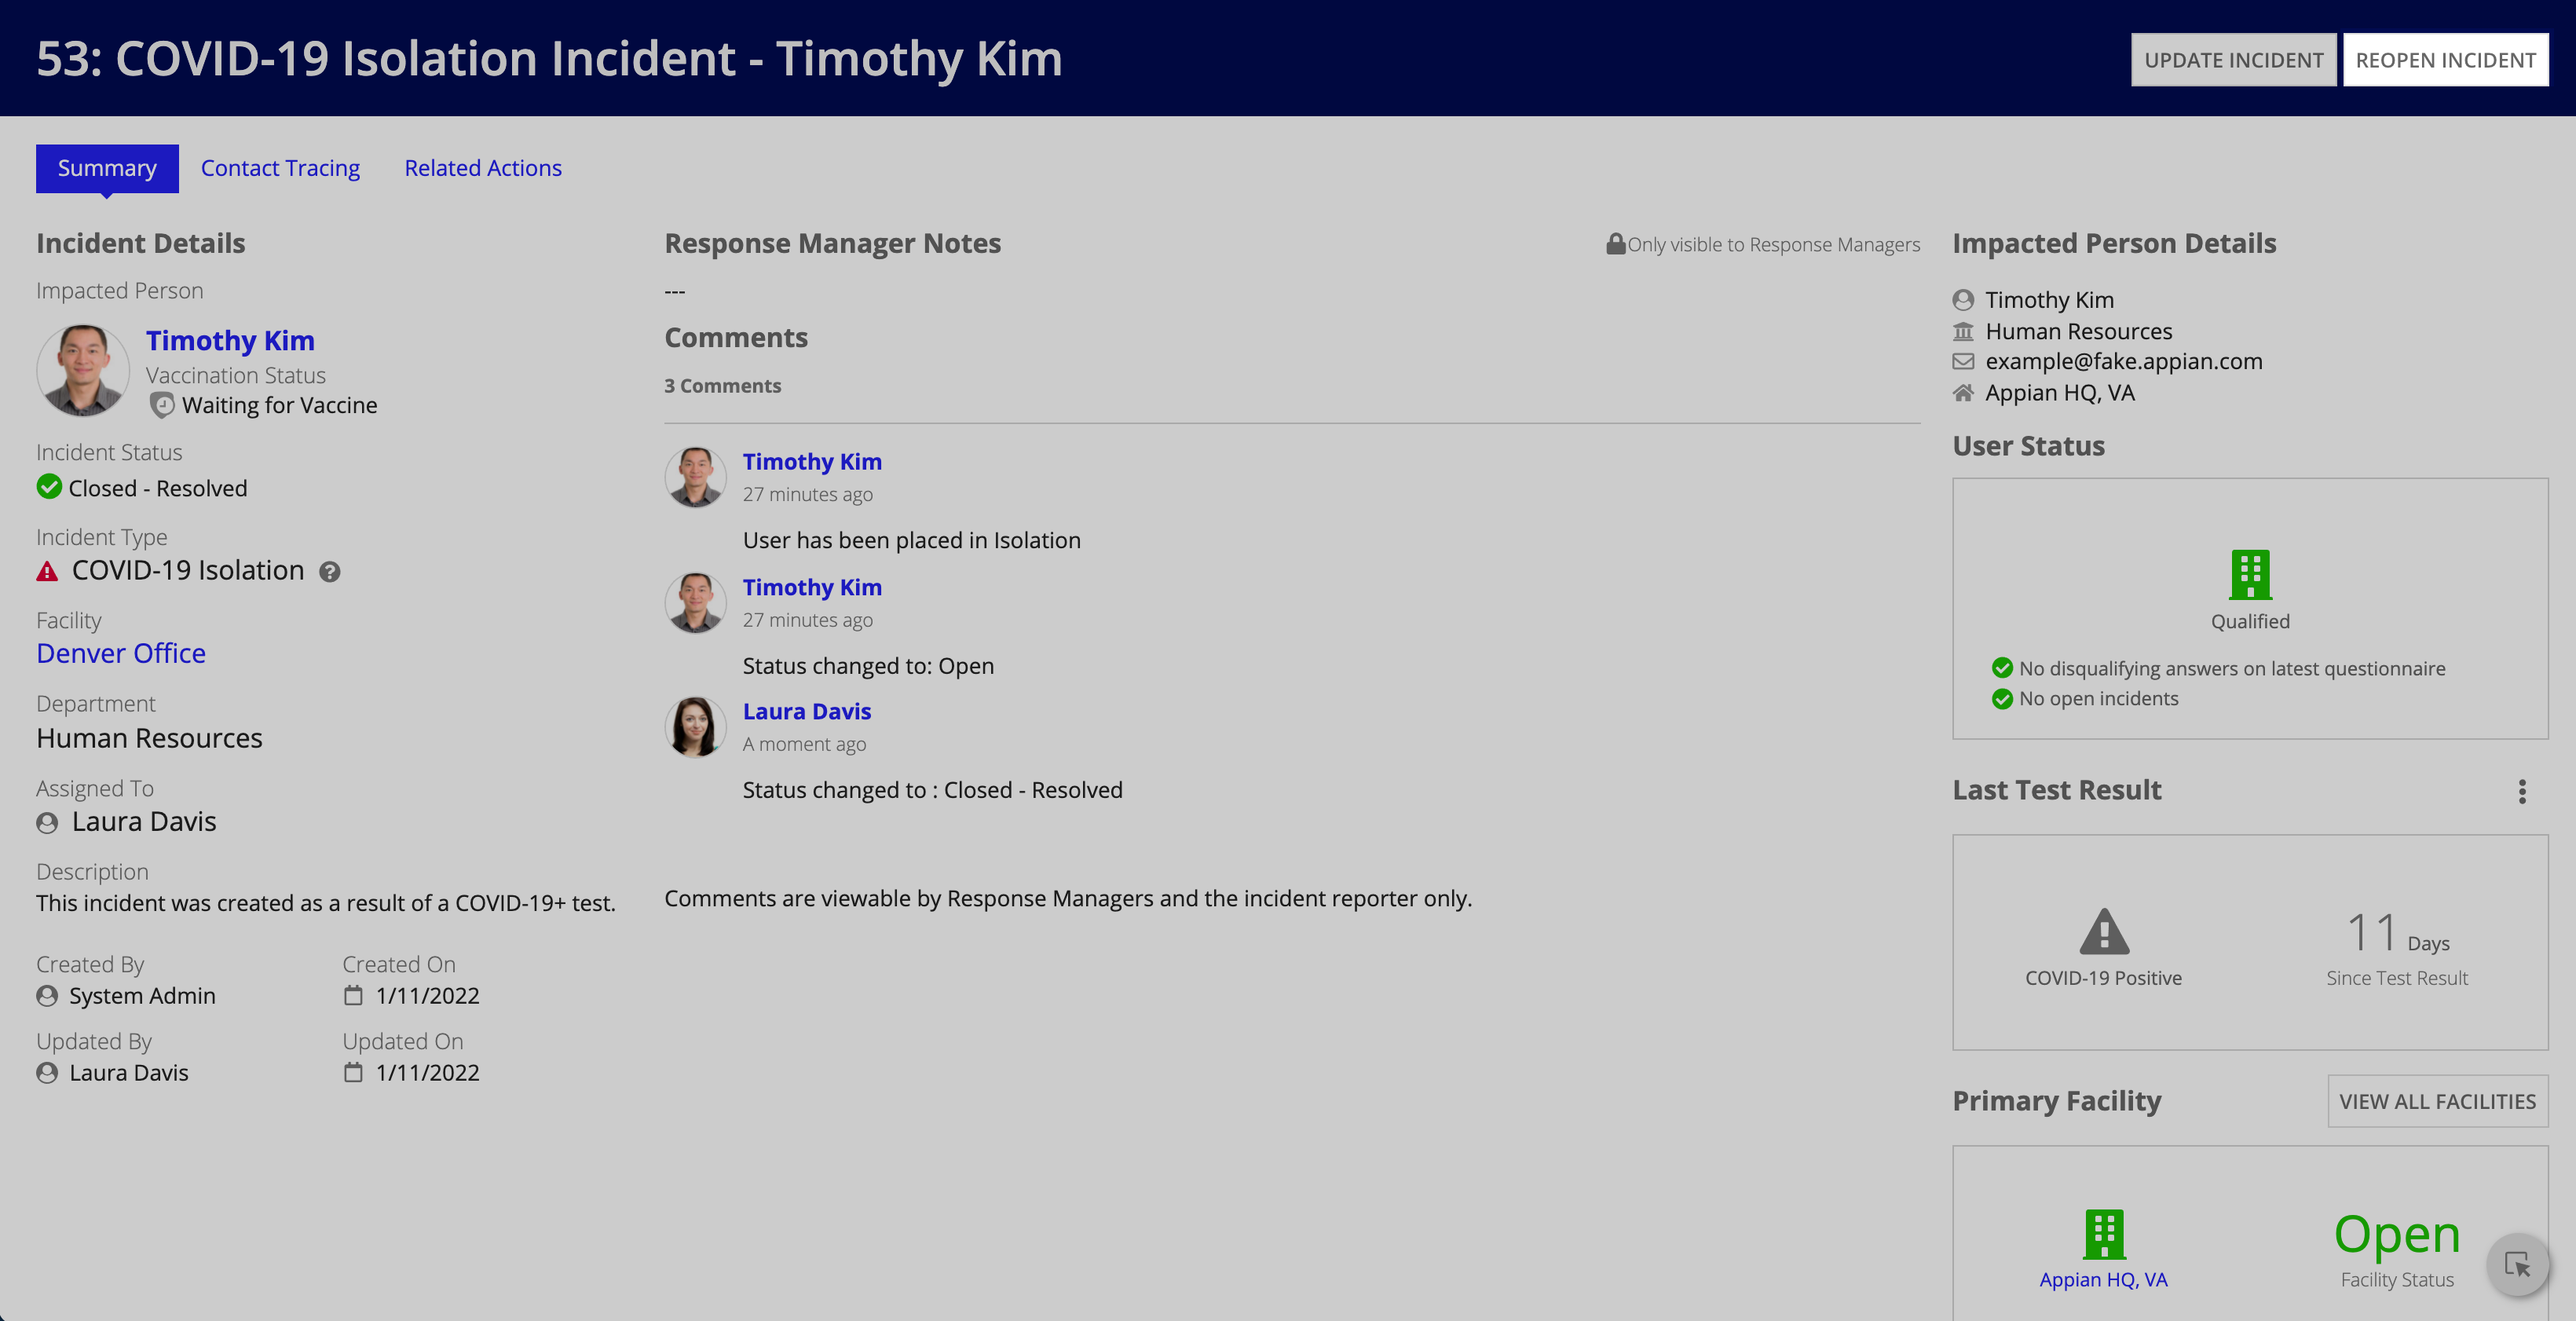
Managing an incident includes determining if the incident is valid and assigning it to a response manager for follow up. This is also how you can add response manager notes, which are only visible to other response managers.
To manage a COVID-19 isolation incident:
When you manage a COVID-19 isolation case, you may want to remove the user from isolation manually, manage test requests, or close the user's primary facility. COVID-19 isolation incidents include quick actions to perform these tasks.
Note that managing incidents for visitors is a bit different since you can't request tests for them and they don't have a primary facility.
To manage the impacted user, you can take the following actions, when necessary:
To manage test requests for the user, click Upload Test Result or Request a Test depending on the test request status of the user.
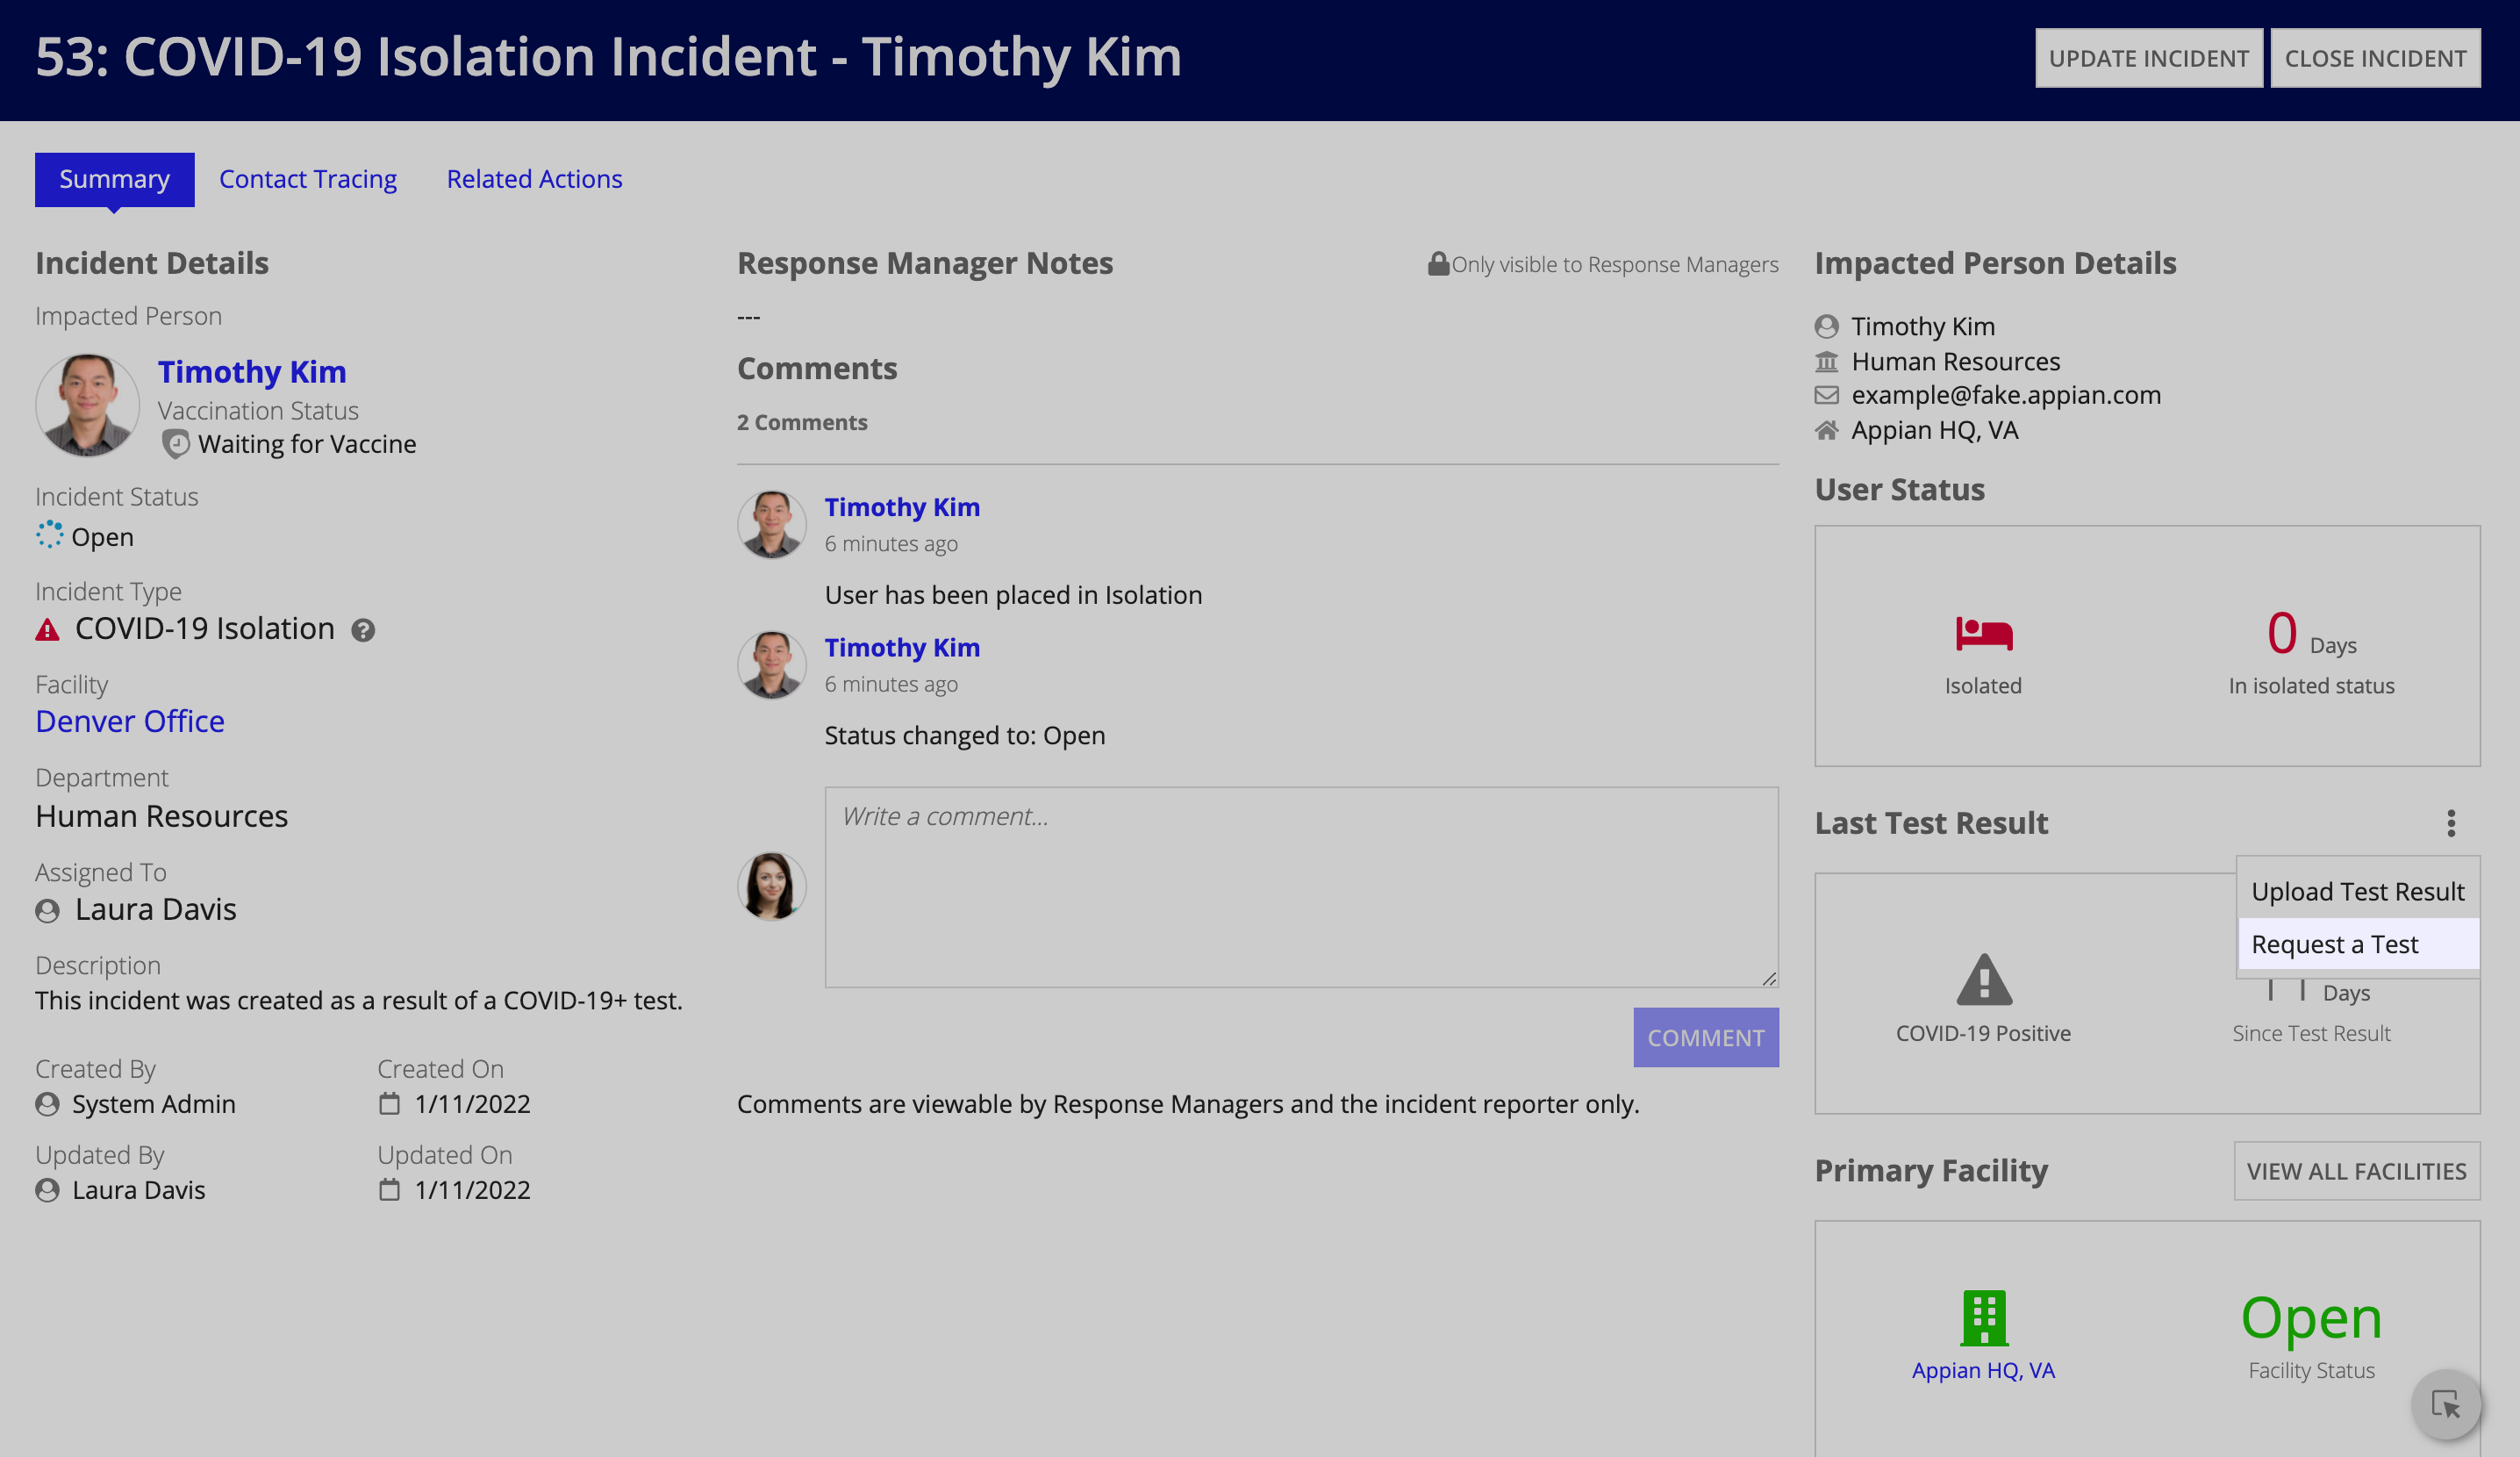
You can also click the Testing Status card to go directly to the user's test record, if it exists.
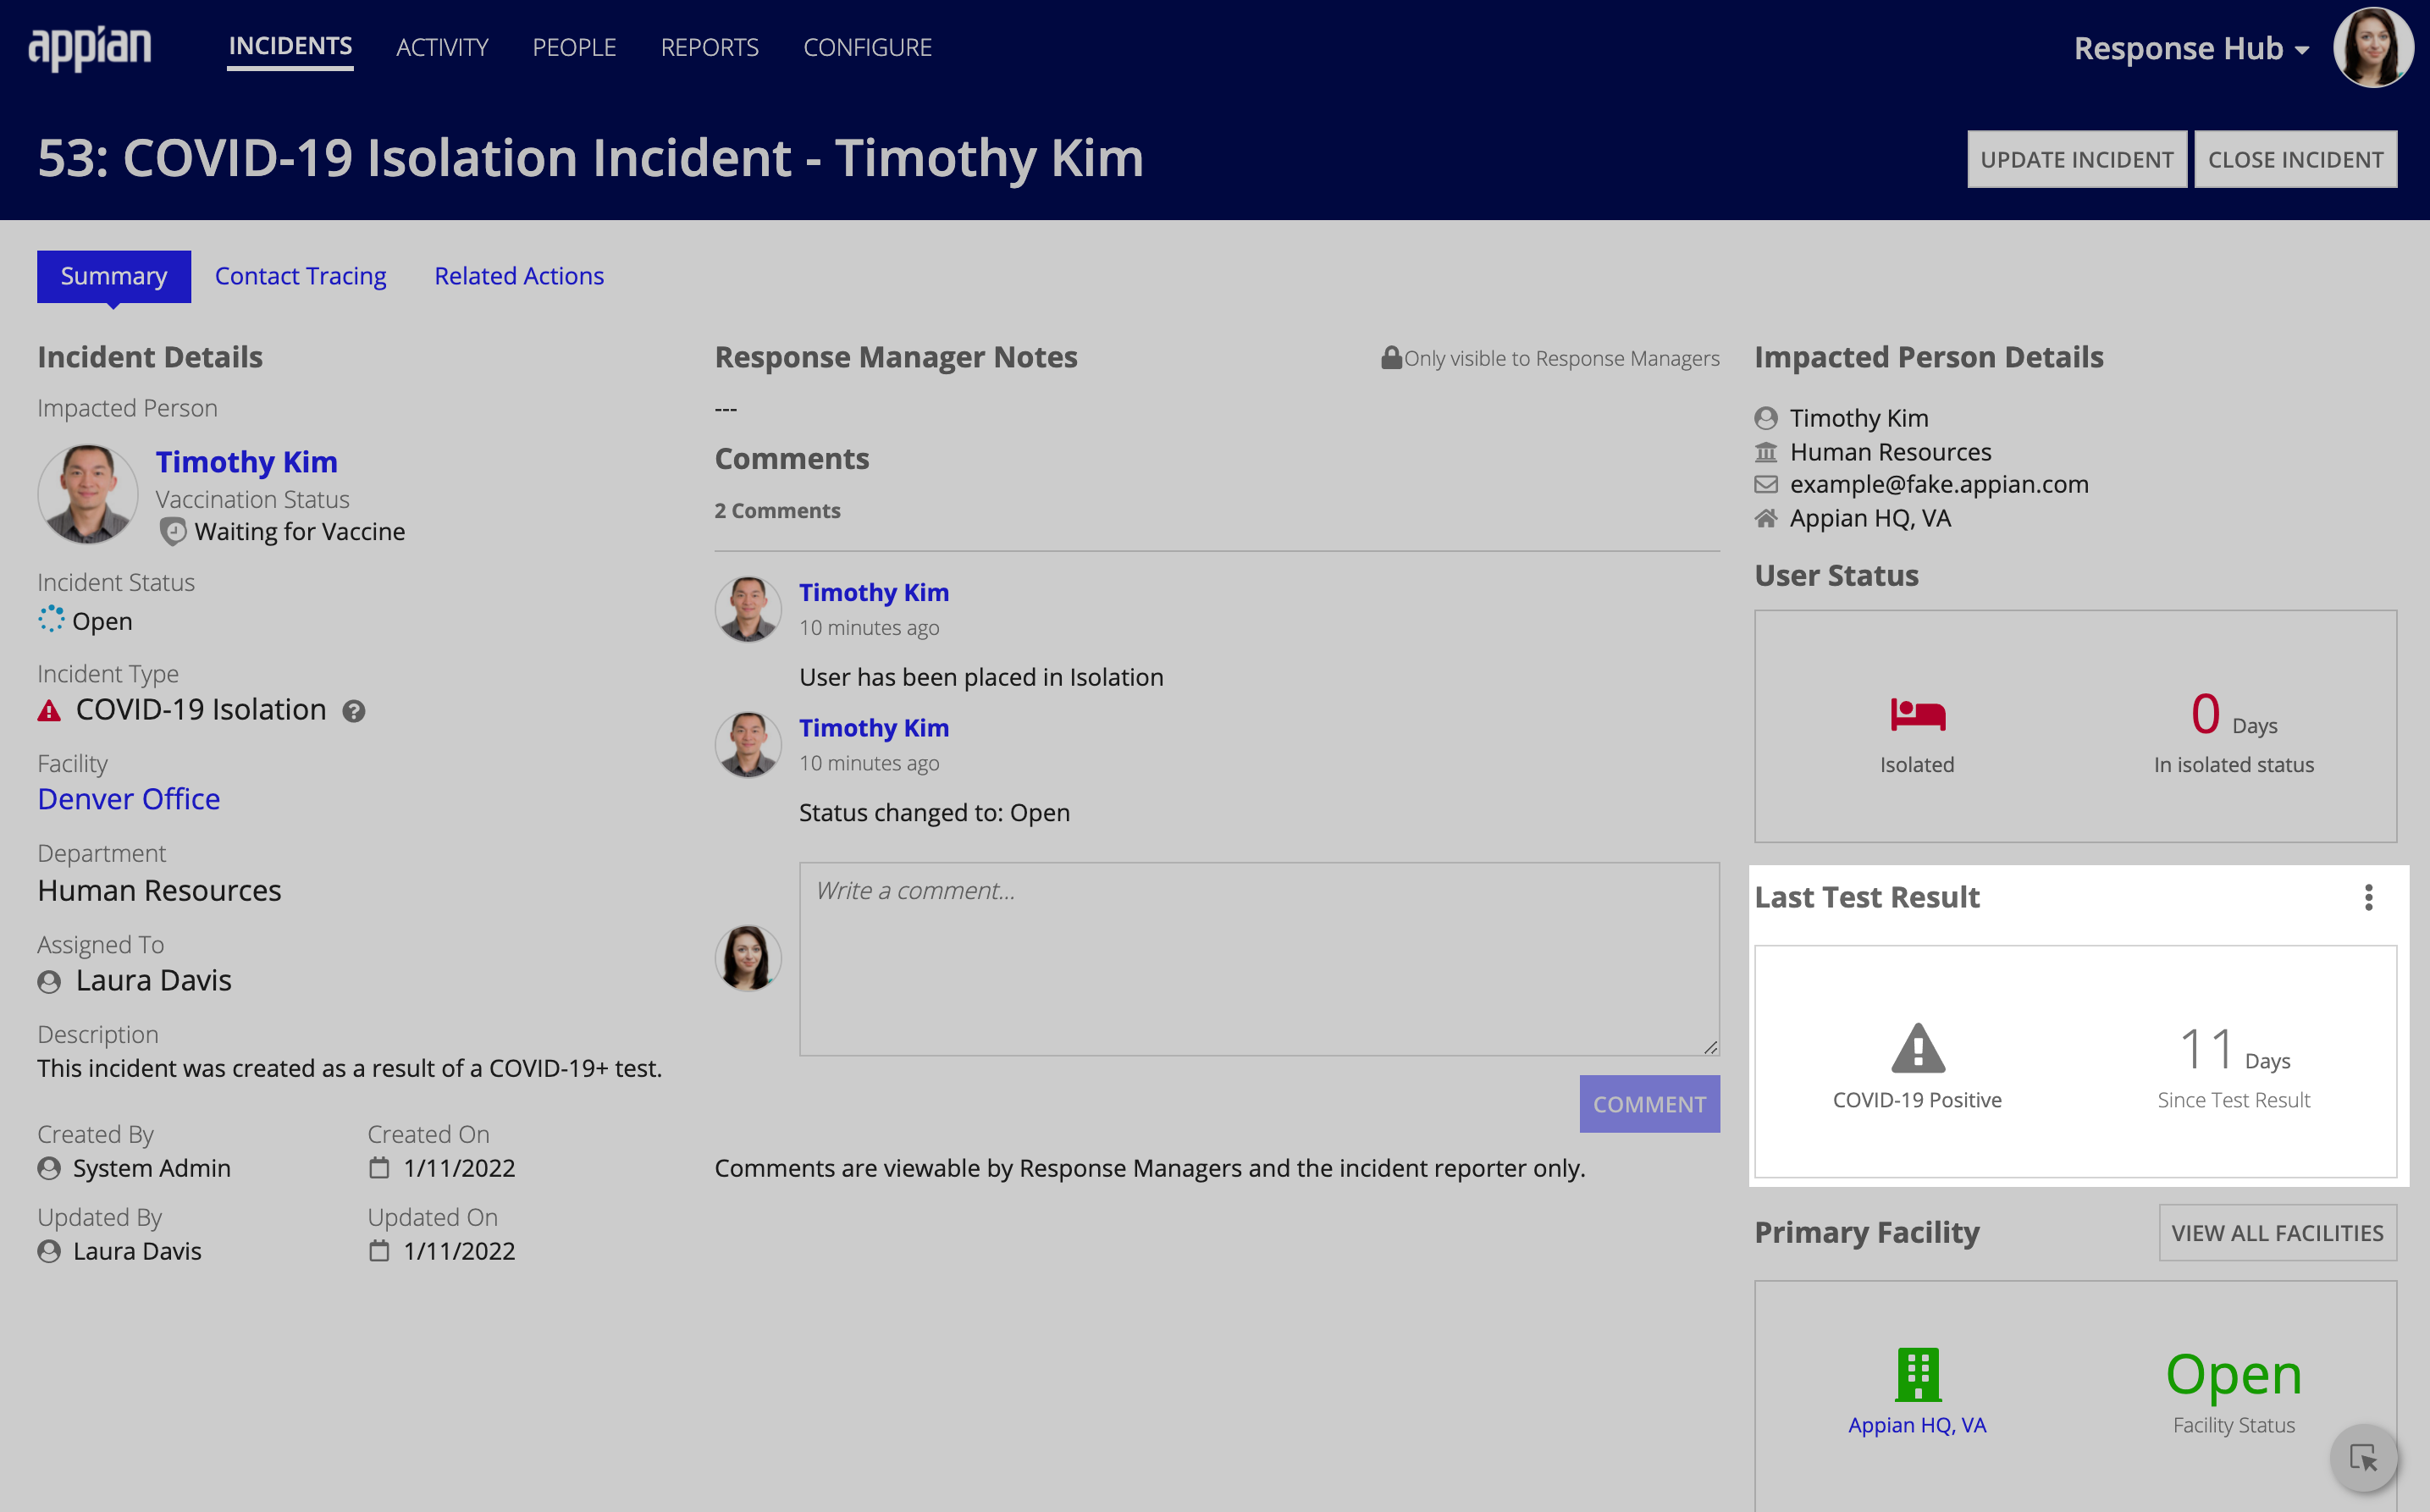
To update the status of the user's primary facility, click MANAGE FACILITIES.
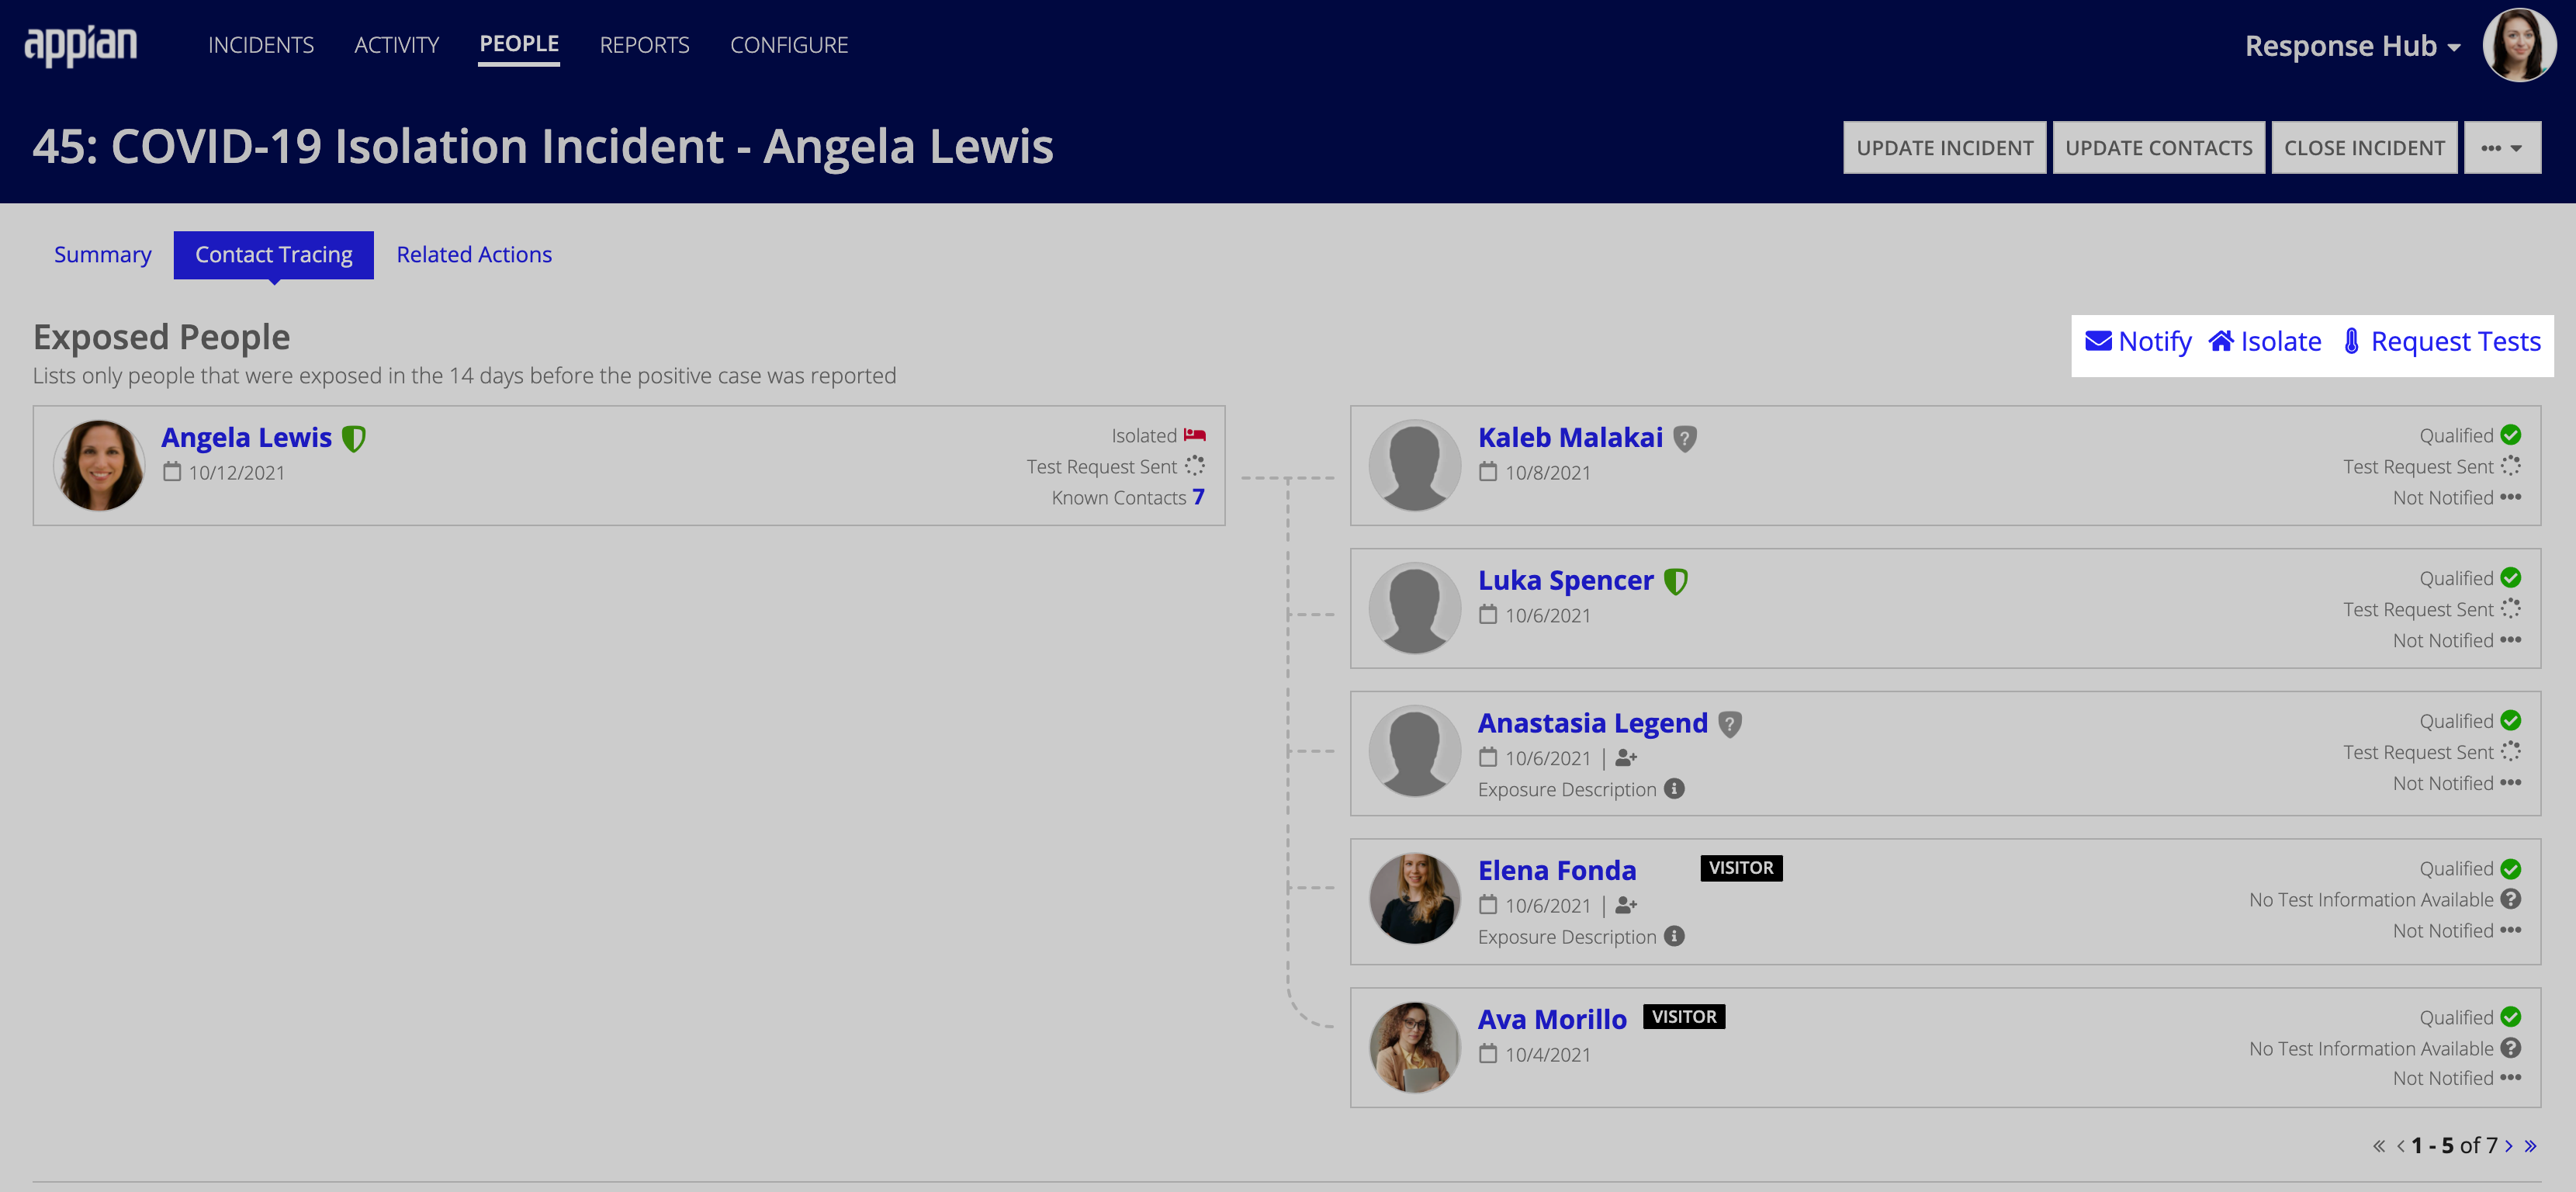
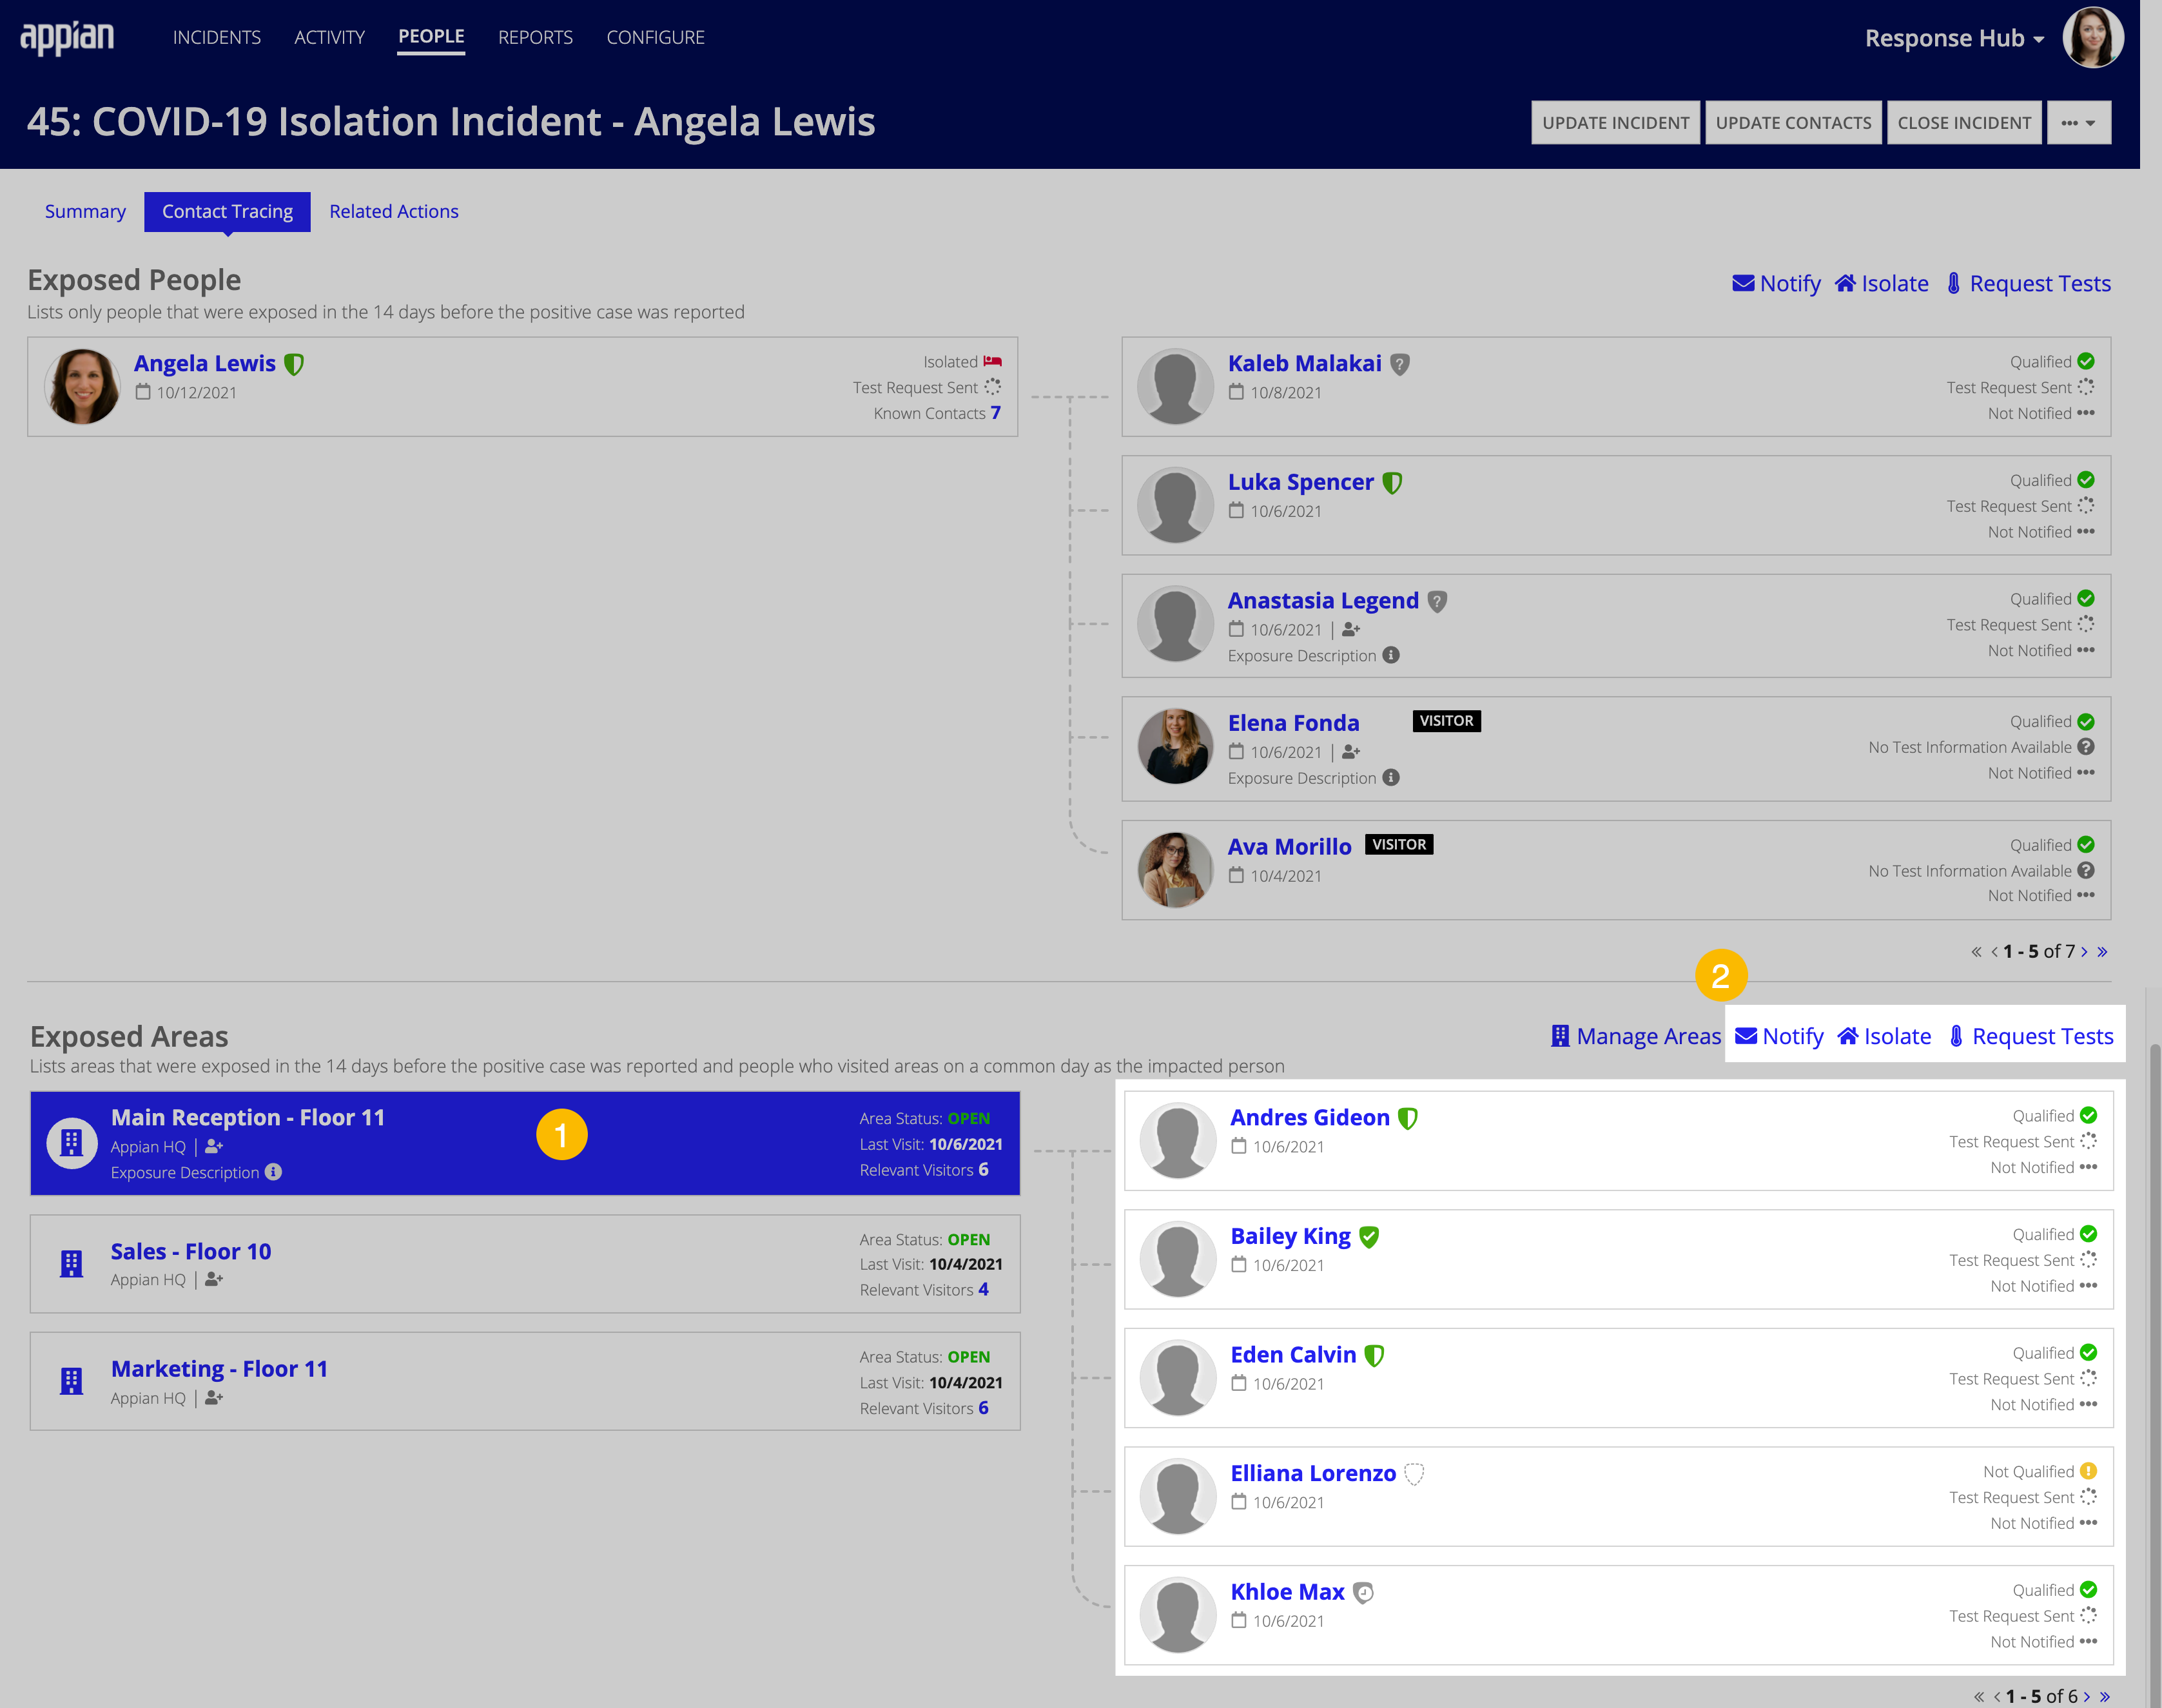
Determining who was exposed to a user before they were diagnosed as positive for COVID-19 is very important to limit the spread of COVID-19. COVID-19 isolation incidents list all of the people that the user reported having contact with, along with all of the people who reported having contact with the user. Additionally, it also shows all users who reported contact with an area on the same day that the user reported being in the area.
Workforce Safety uses smart suggestions to help you log contacts in the Log Contacts form. These suggestions are based on a multitude of data points including a user’s past logged contacts, the facilities and areas they received a pass for and visited on a given day, and department association data. This feature provides users with up to 20 contact suggestions, allowing them to quickly log a contact by simply tapping a suggestion card.
These users may have been exposed to the virus and may need to be isolated, notified, or tested. You may also need to alert all Workforce Safety users that there is a COVID-19 isolation incident via an announcement. You can perform all of these actions from the Contact Tracing tab in the COVID-19 incident.
Note: Never send any personally identifying information of any affected individuals when notifying exposed people.
To perform contact tracing for exposed people and areas:
Click Request Tests to request tests from the users listed in the Exposed People section.
Click an area, then click Notify, Isolate, or Request Tests to perform the action for the users that were exposed to that area.
After a COVID-19 isolation incident is logged, you may need to update the incident's contact tracing information. This could include additional contactsor areas that were exposed to the user during the 14 days before the incident was reported.
The UPDATE CONTACTS action on the incident's Contact Tracing tab allows response managers to add, remove, or edit close contacts or areas for a user. Note that you can add one or more people or areas to a user's contact tracing information.
To update the contacts for a user's COVID-19 isolation incident:
You may also need to close the incident, but this will happen automatically if you have Workforce Safety configured to remove users from isolation automatically.
To close an incident manually:
You can reopen closed COVID-19 isolation incidents. If you do, the user will automatically be placed into isolation again.
You can configure Workforce Safety to remove users from isolation automatically. However, you can also remove a user from isolation manually from their user summary.
Note: If you remove a user from isolation that has an open COVID-19 isolation incident, the incident will be automatically closed.
To manually remove a user from isolation:
Confirm the action by clicking REMOVE FROM ISOLATION.
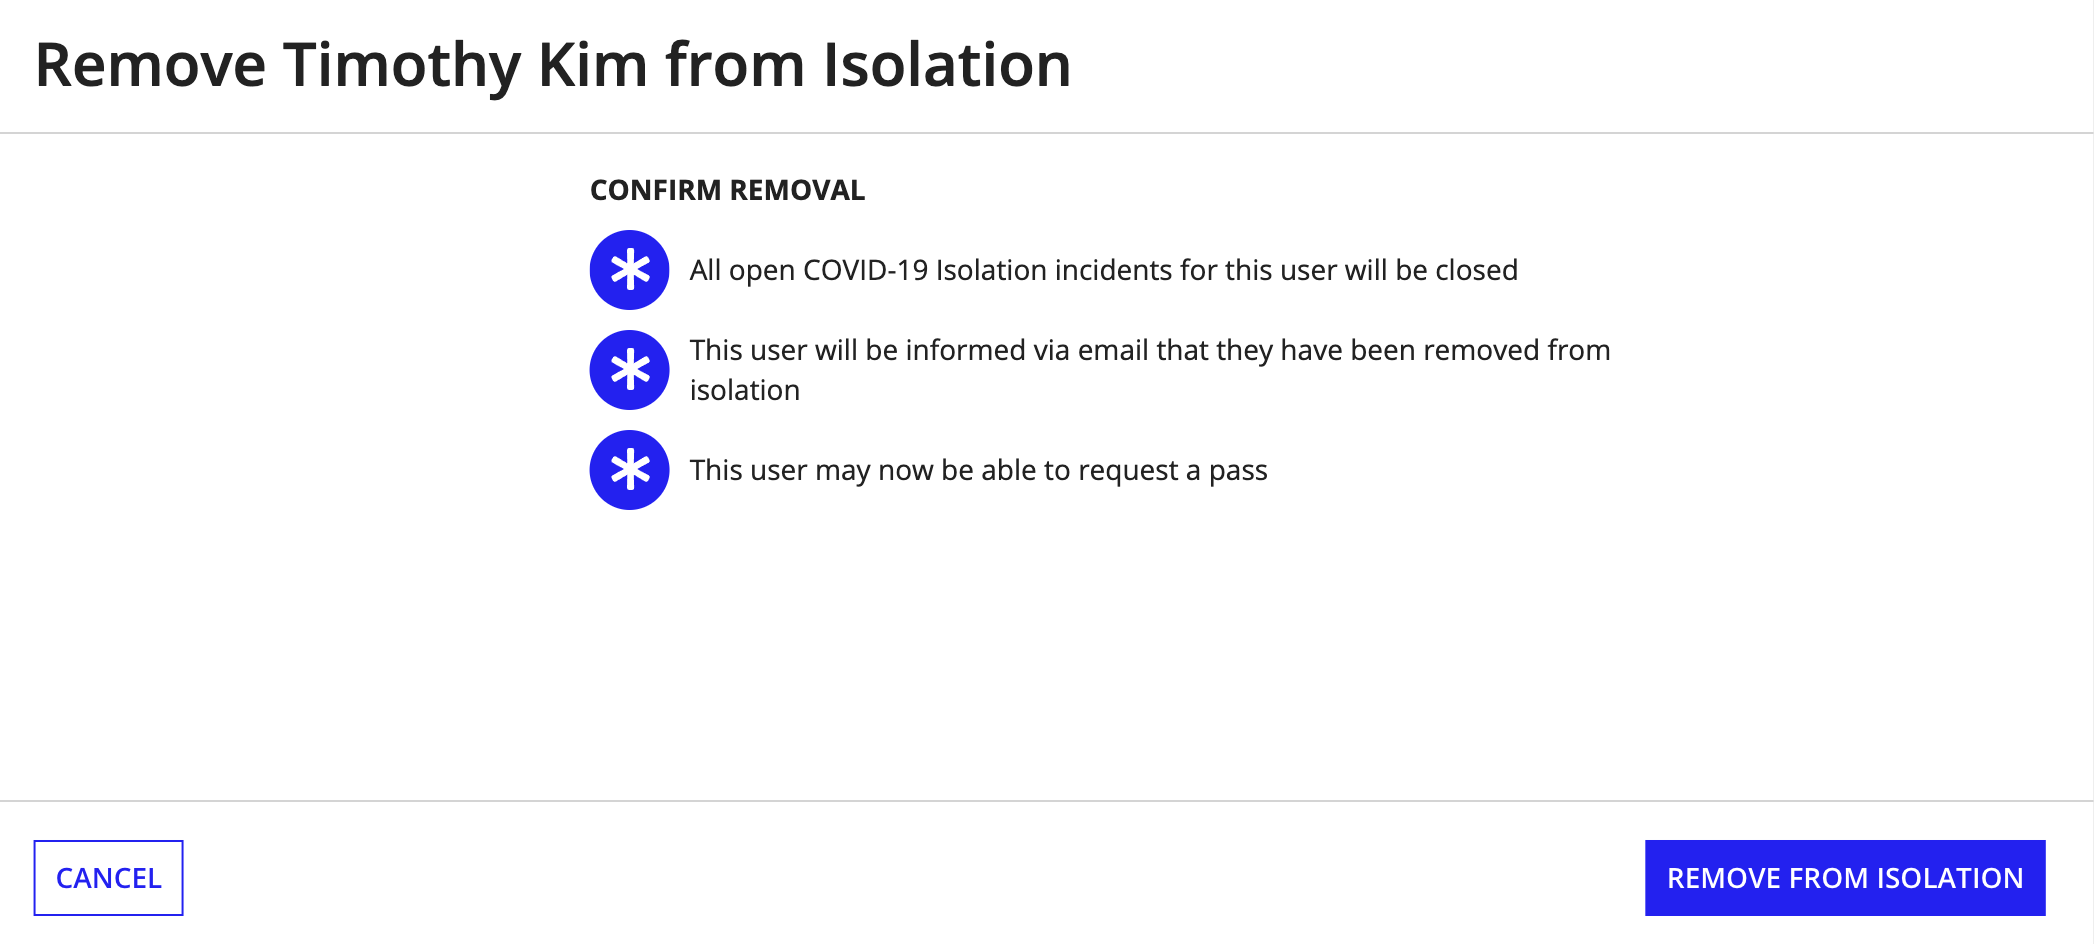
The user's status updates to the last status they were in before being placed into isolation, either Qualified, Not Qualified, or Status Pending.
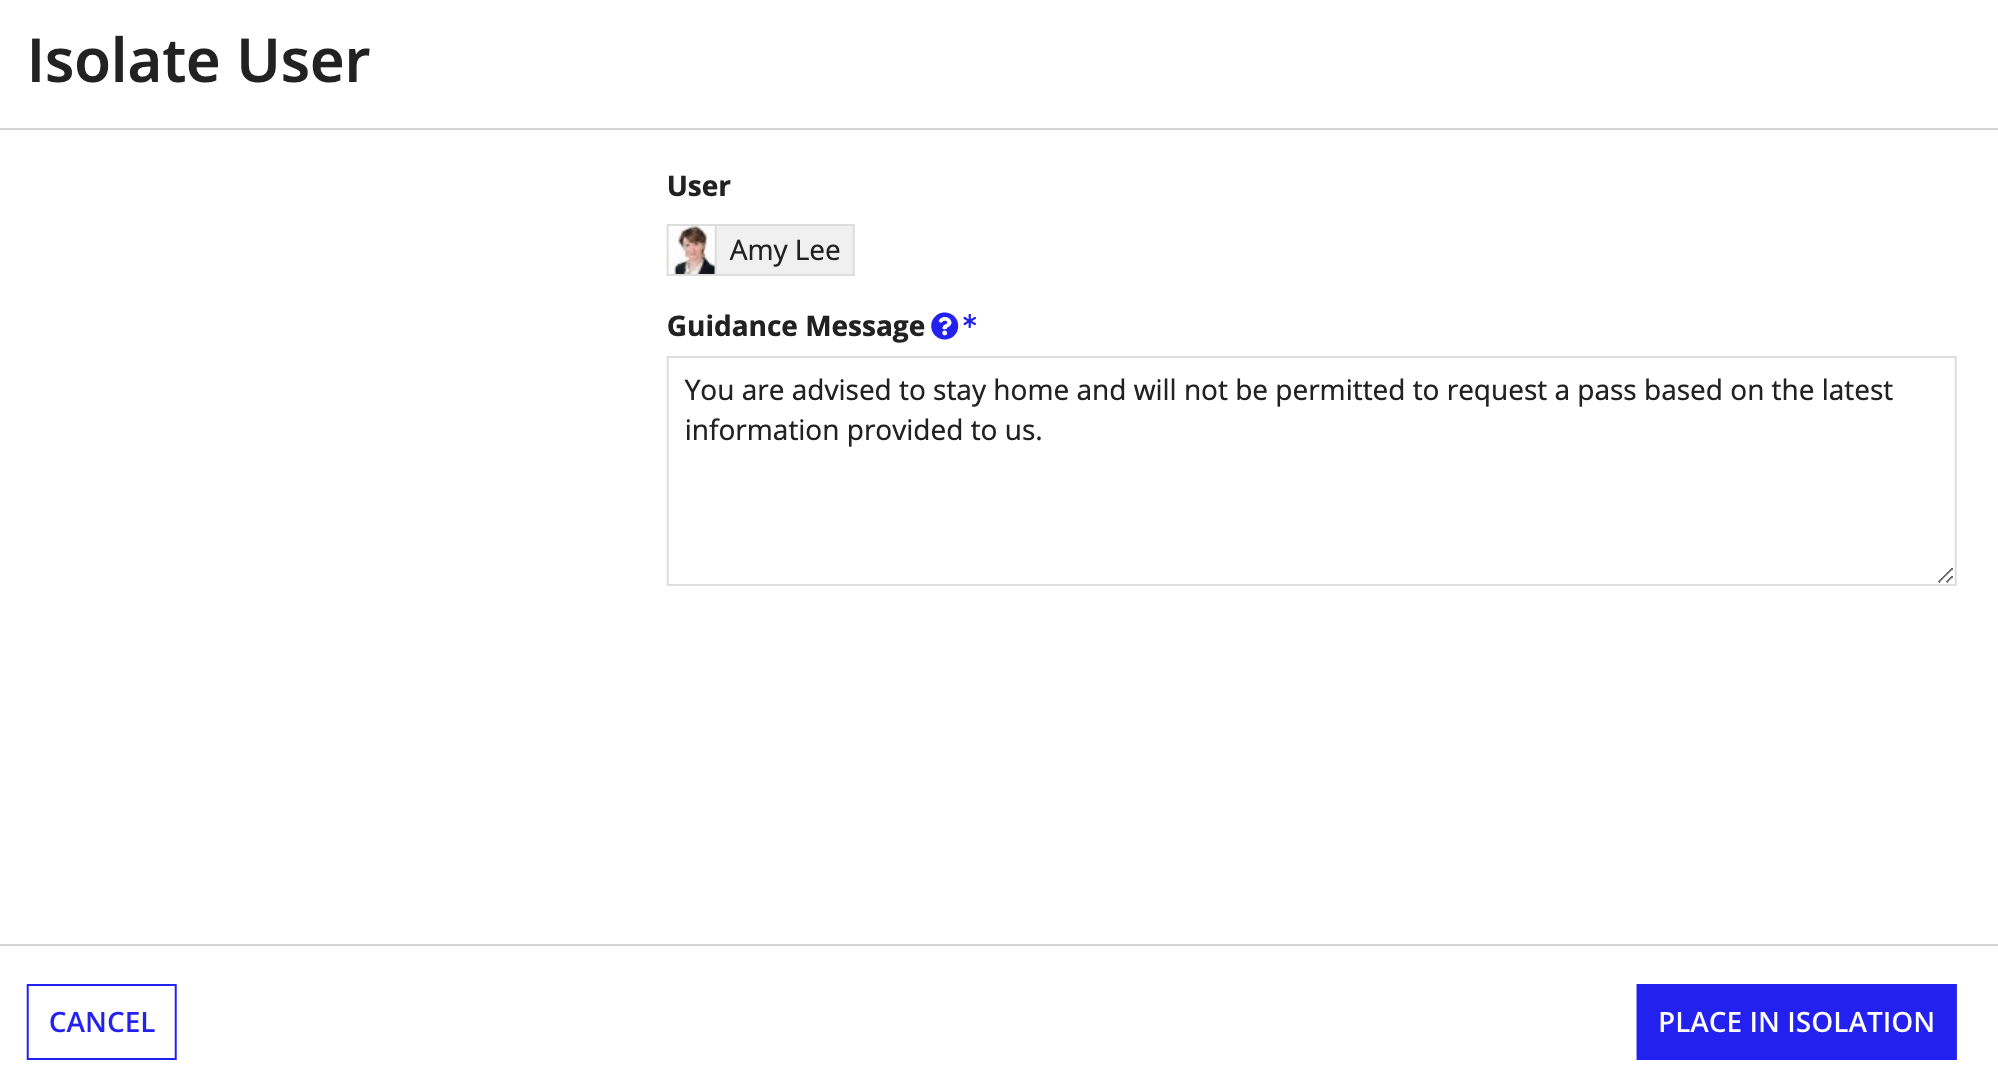
More than likely, users will be put into isolation through a COVID-19 isolation incident, or through contact tracing. However, you can also manually put a user into isolation from their user summary.
After you isolate a user, any active passes they have will be revoked.
To manually put a user into isolation:
Click PLACE IN ISOLATION.
If there is an active survey and a user receives a Not Eligible status after completing it, or they haven't taken it yet, response managers can choose to skip the survey for the user.
If you skip the survey for a user, they will no longer be able to complete the currently active survey.
To skip the survey for a user:
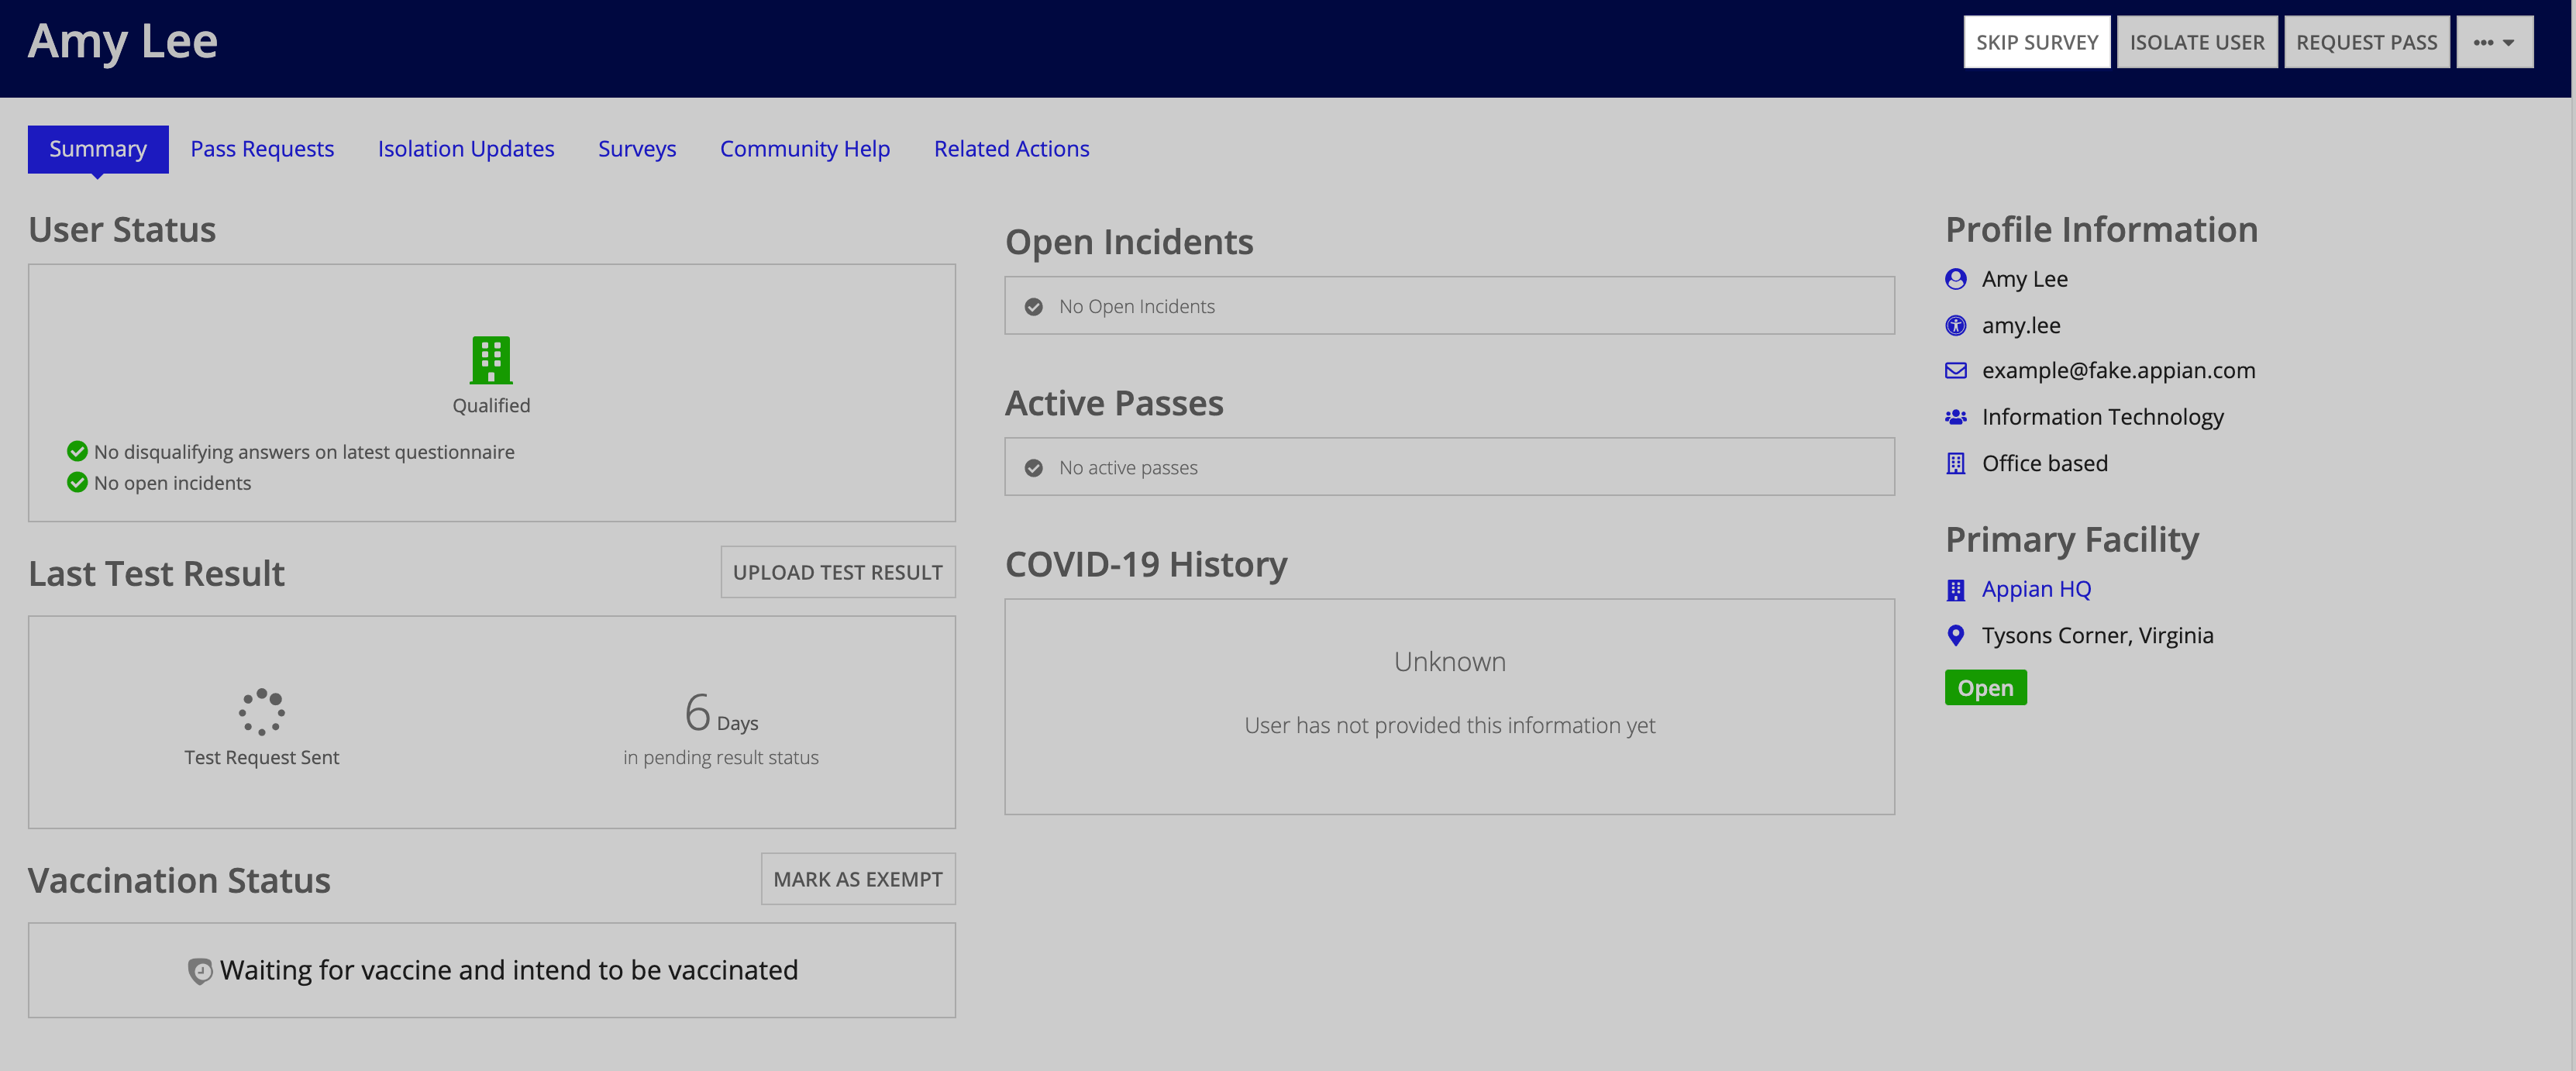
Confirm the action by clicking SKIP SURVEY.
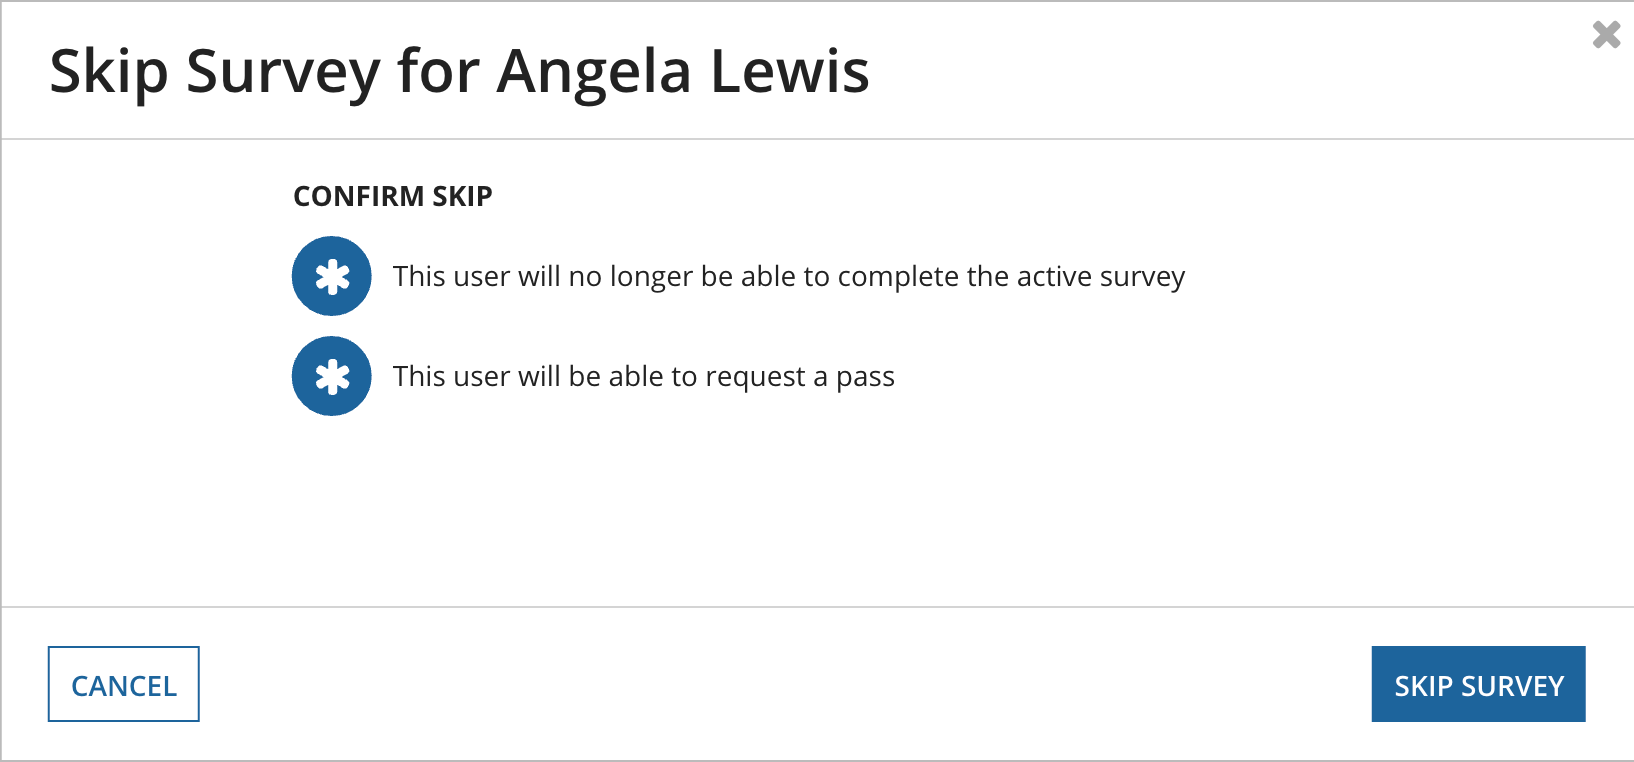
The user will be placed in a Qualified state and will be able to request a pass immediately.
Response managers can request that users take COVID-19 tests either from the user's profile, the People page, or the Contact Tracing tab of a COVID-19 isolation incident. They can determine their own process for testing and can notify individuals of that process when they request a test.
To request a test for the employee's profile:
Click NEXT.
After test request is sent, the employee can acknowledge and submit their test result.
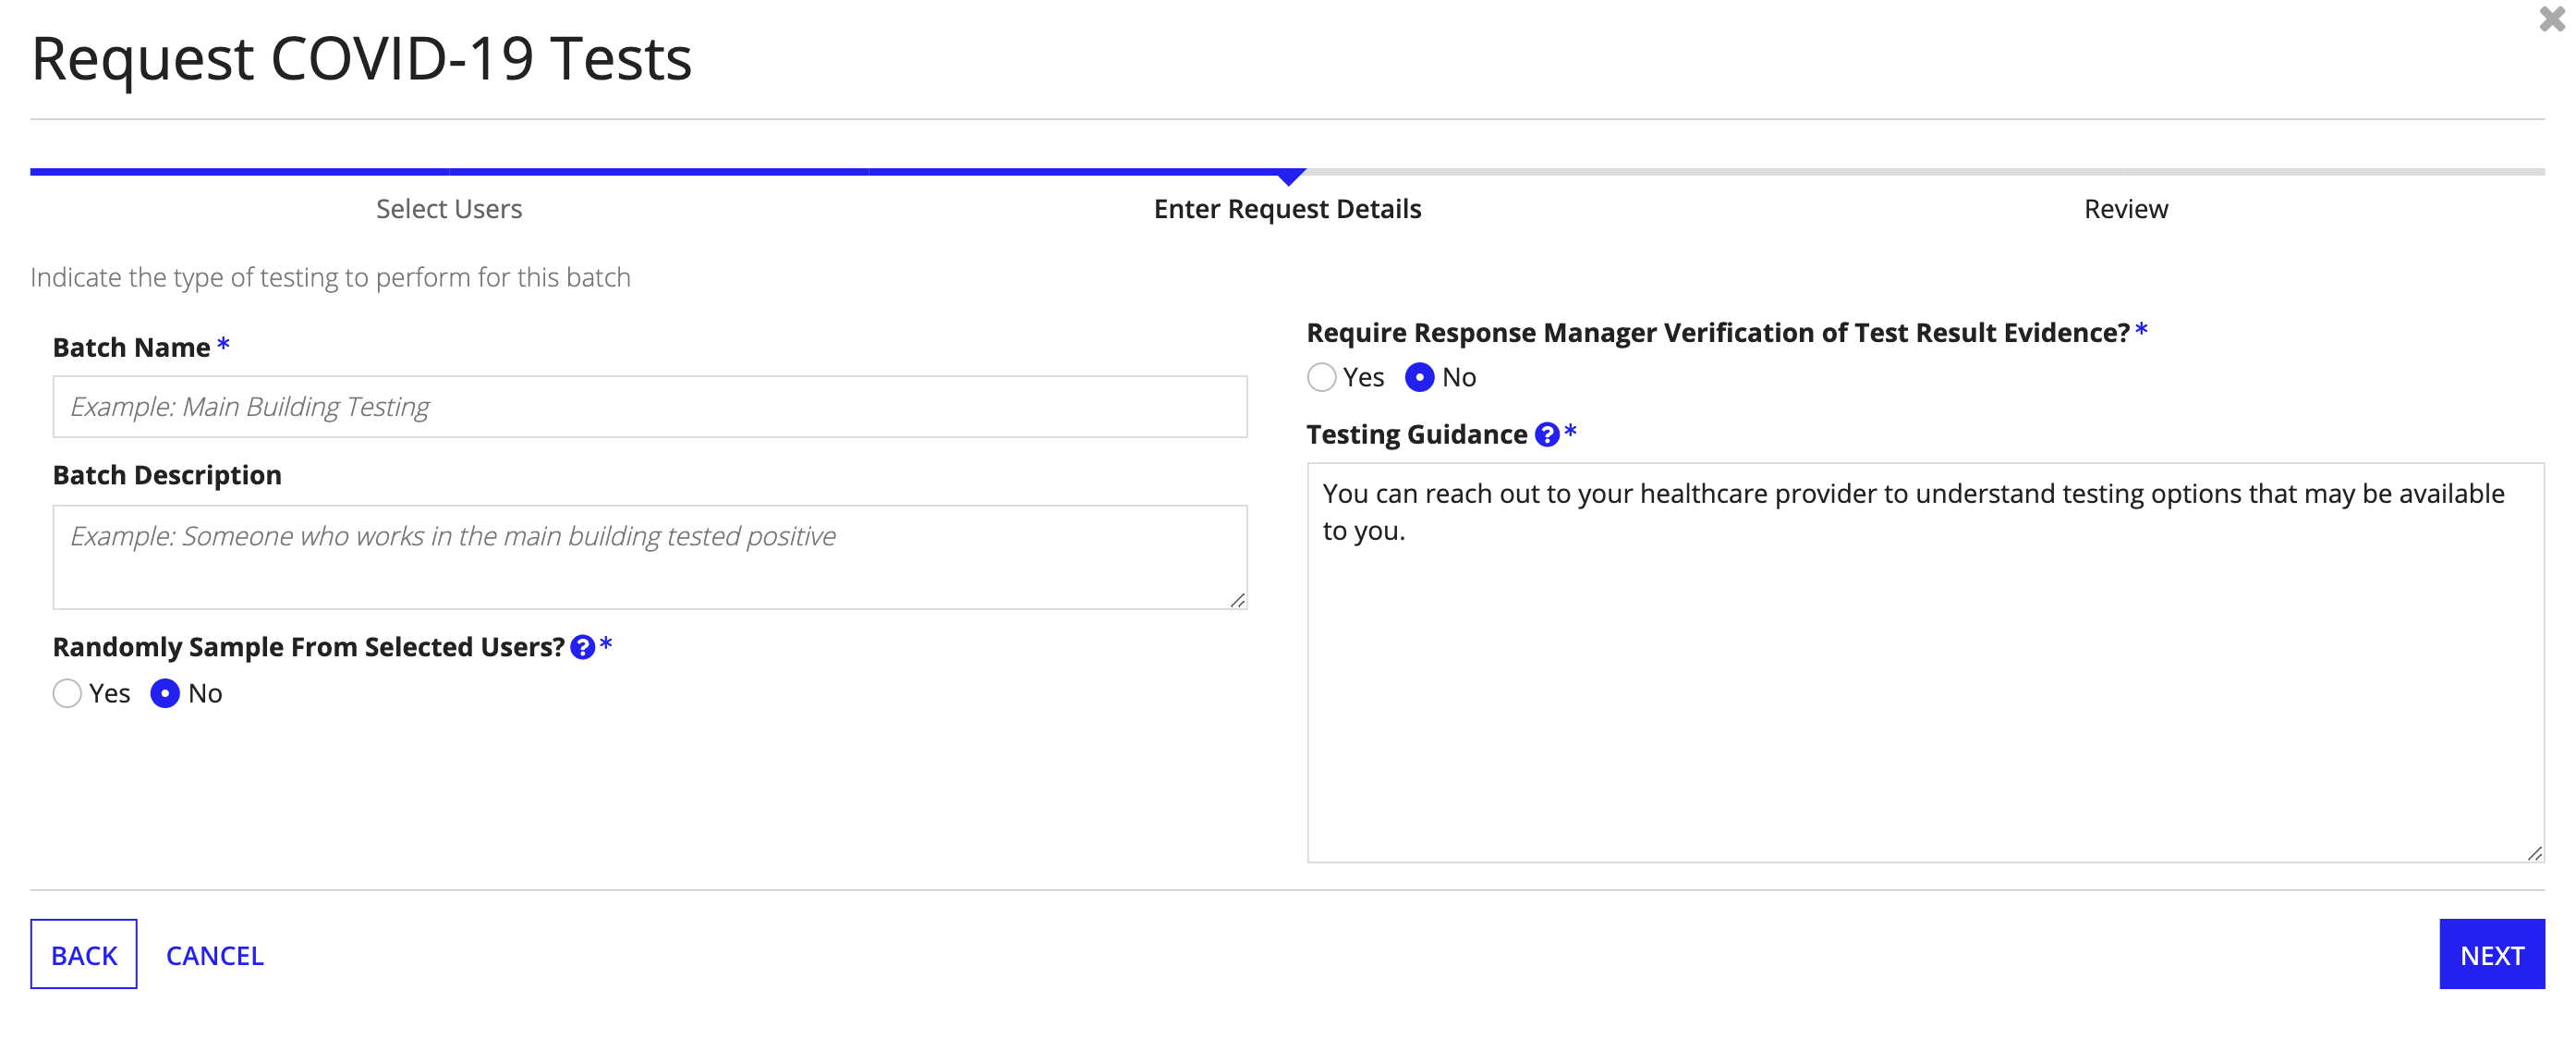
From the PEOPLE page, response managers can request test results from individuals or groups. This also includes the ability to select a random sample from a group. This can help response managers determine the spread of an outbreak, check the status of a population, and target individuals for testing.
To request COVID-19 tests from the PEOPLE page:
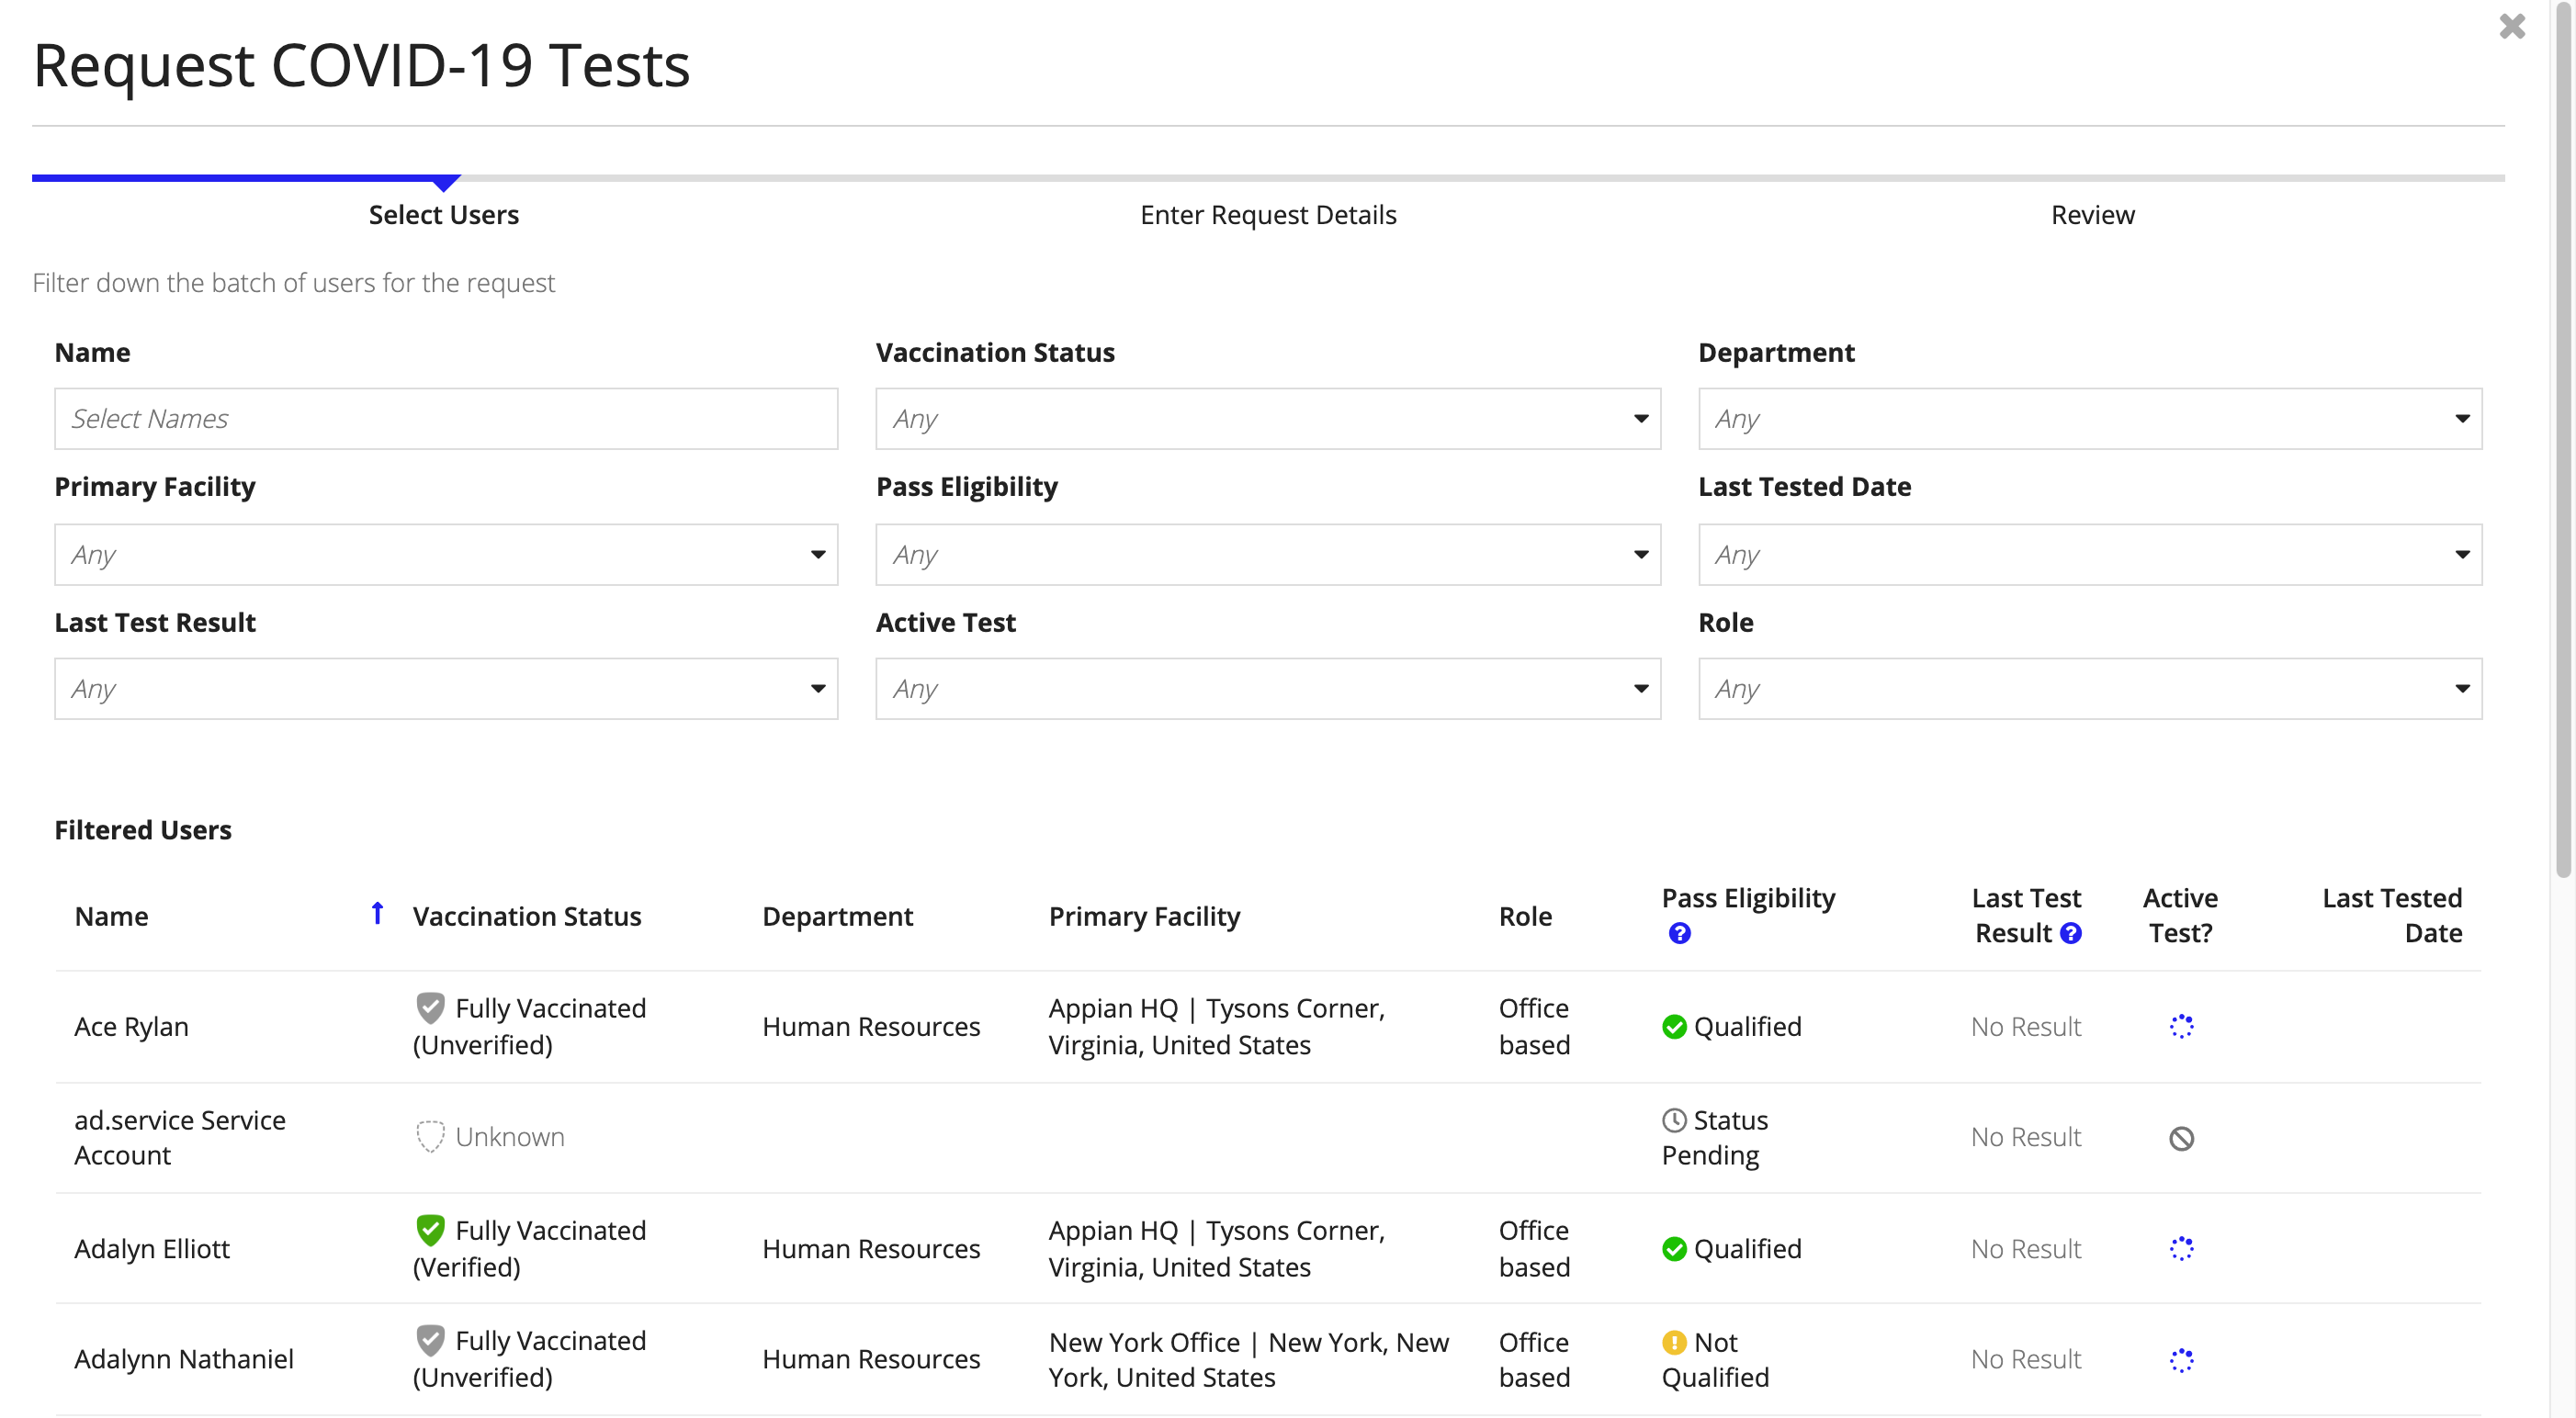
Click NEXT.
A list of the users who will be sent a test will display. Click SEND REQUESTS.
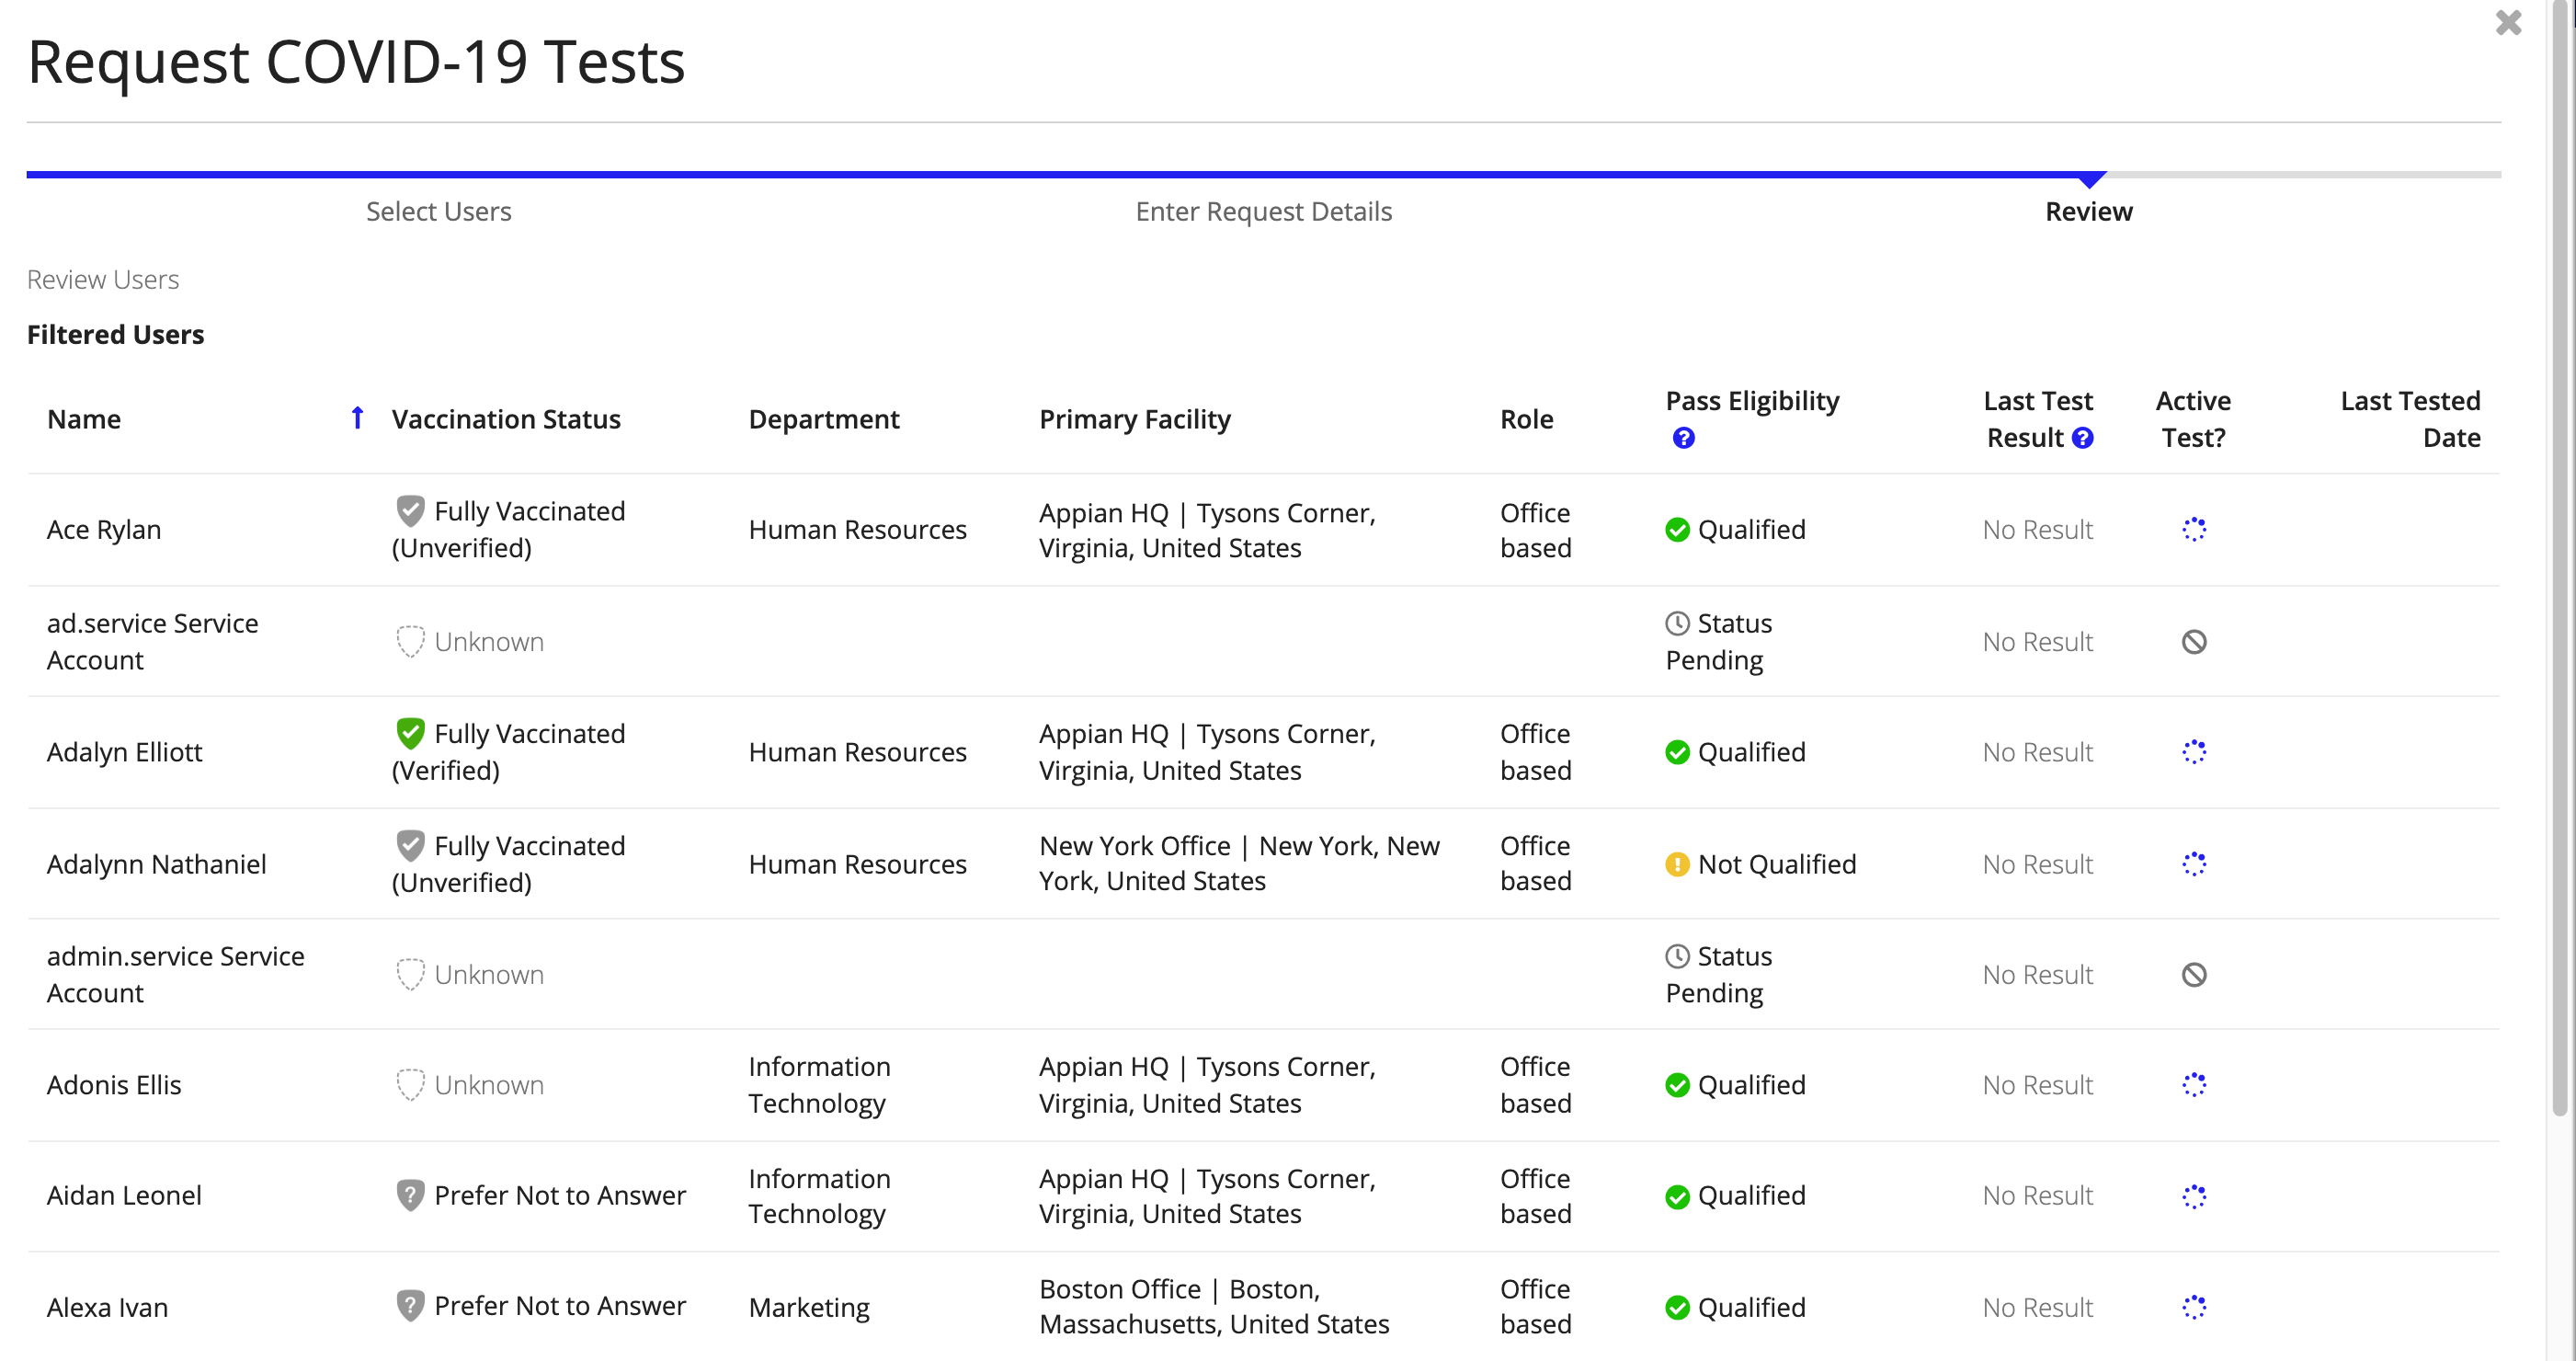
After test result requests are sent, users can acknowledge and submit their test results.
For any test request that has Yes selected for Require Response Manager Verification of Test Result Evidence?, response managers will have to approve or reject the test result.
Response managers can also provide test results on behalf of users. For pooled testing, response managers must always provide the test results.
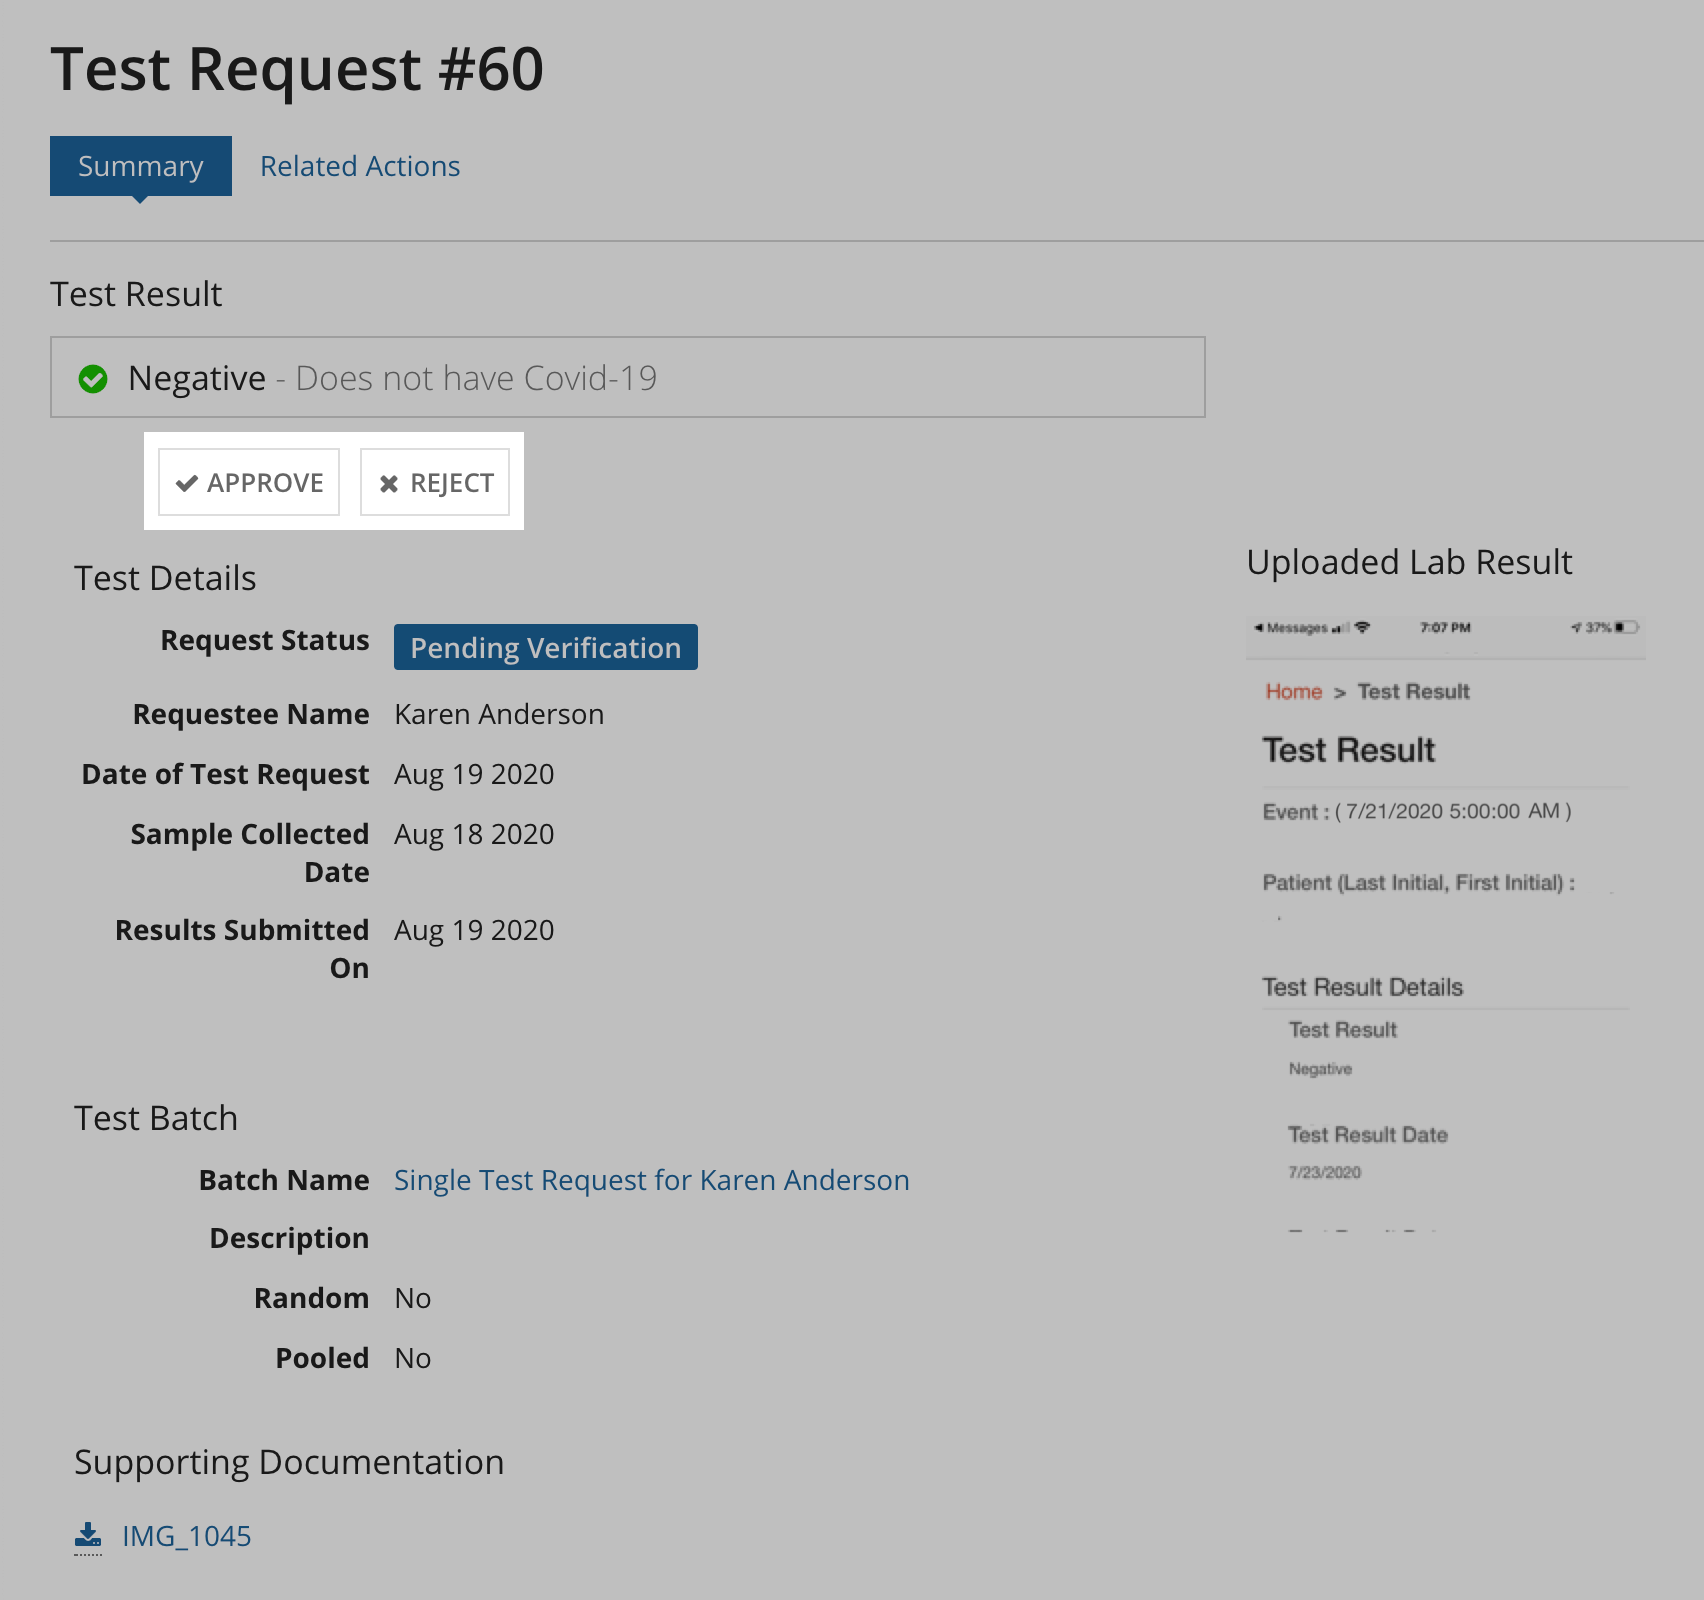
For any COVID-19 test request that has Yes selected for Require Response Manager Verification of Test Result Evidence?, response managers will have to approve the result in order for the test result request to be completed. If they reject the test result, the user will be sent an email with the reason and will be requested to submit their results again.
To verify a test result:
Click the Request number for the request that you would like to verify.
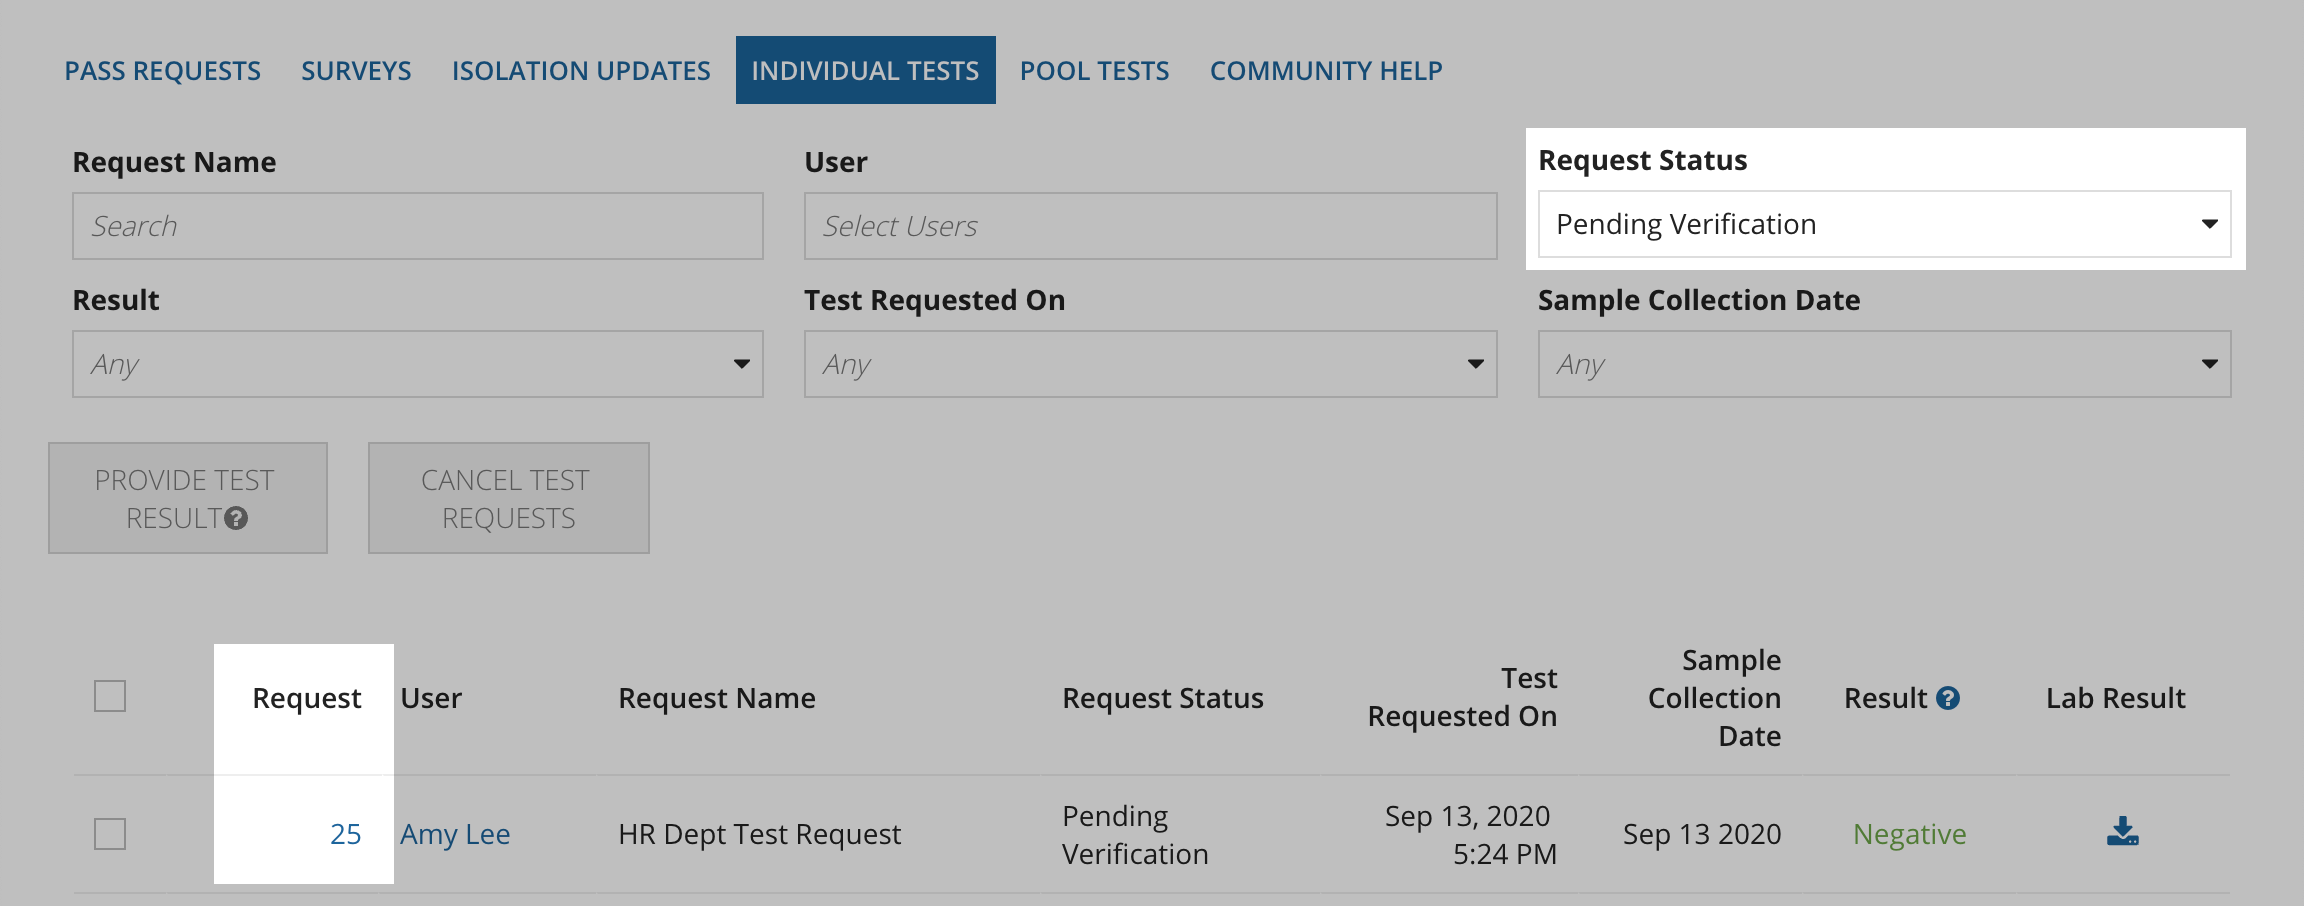
Click APPROVE or REJECT.
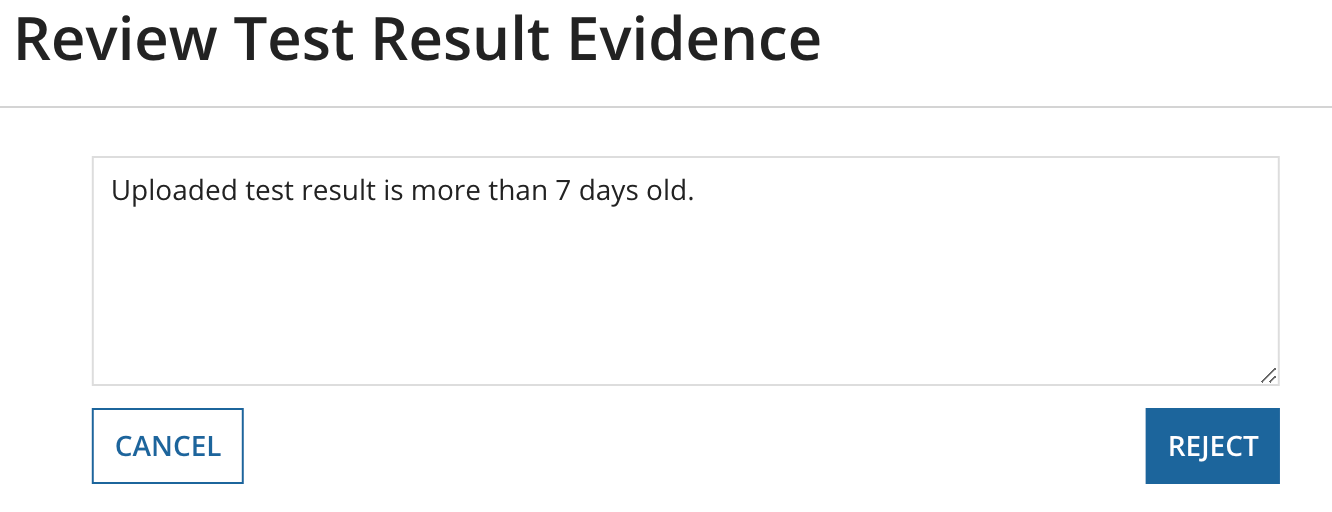
If the result was rejected, enter the reason, then click REJECT. An email will be sent to the user with the reason and they will be asked to submit their test results again.
If the result is approved, click APPROVE to complete the test result.
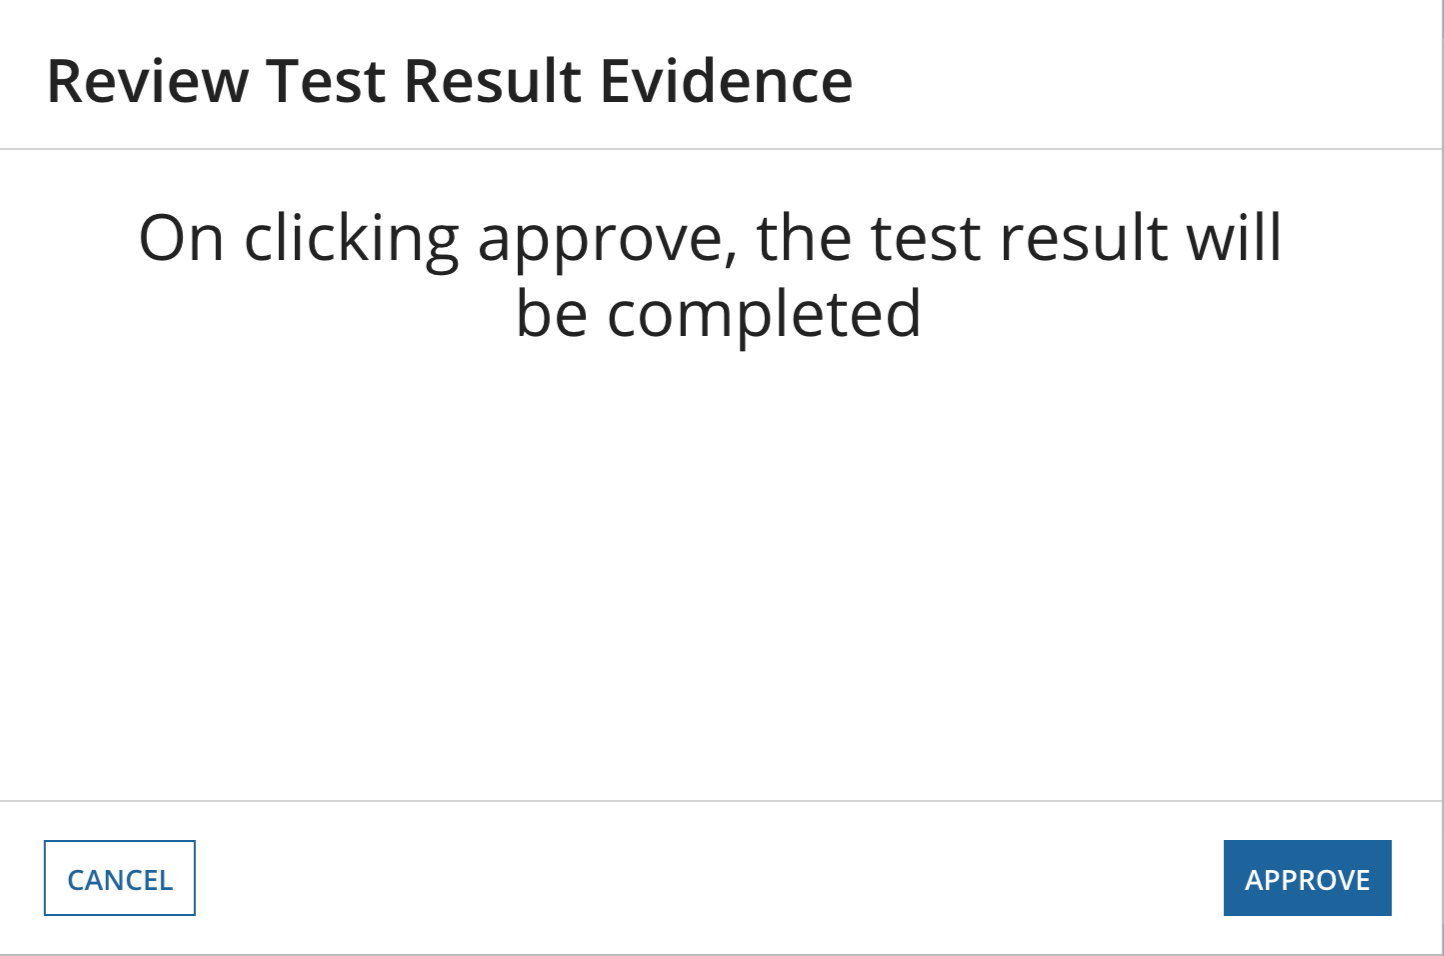
After the test result is approved, the Request Status updates to Completed and the Result displays for the user.

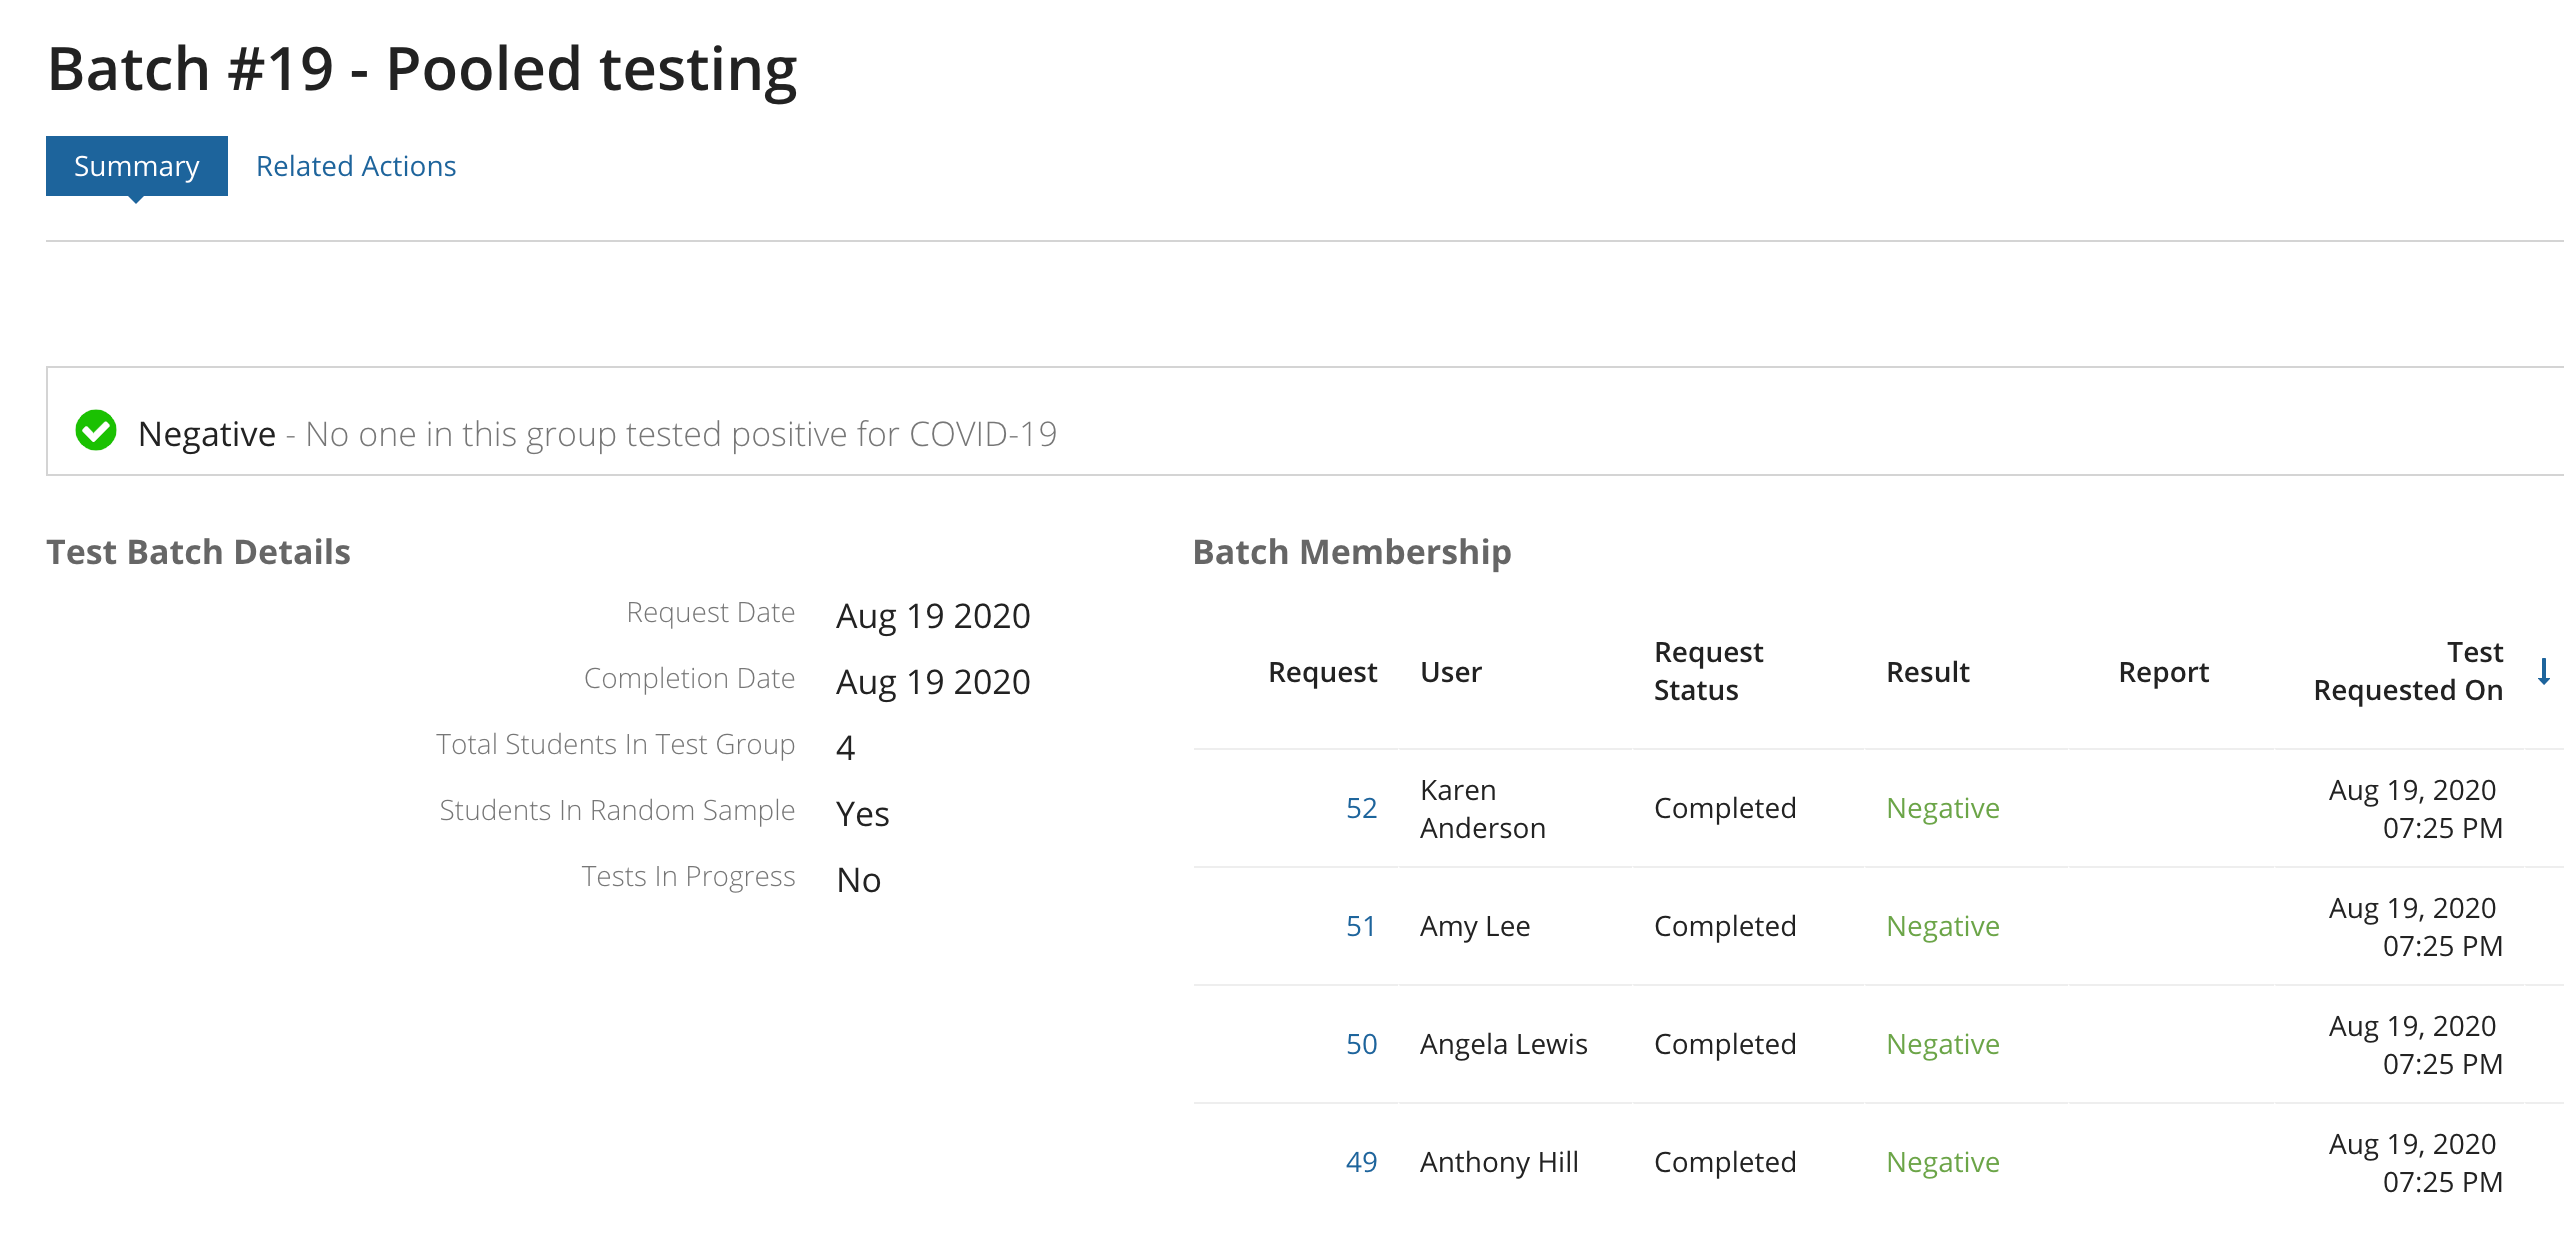
If the organization is coordinating their own COVID-19 testing, response managers may receive the test results and be able to submit them on behalf of users. Additionally, for pooled testing, response managers must be the ones to submit the test result since all of the samples for the individuals are combined into one sample. Because of this, response managers can submit test results from the Tests report.
To provide a test result for an individual test:
Click PROVIDE TEST RESULT.
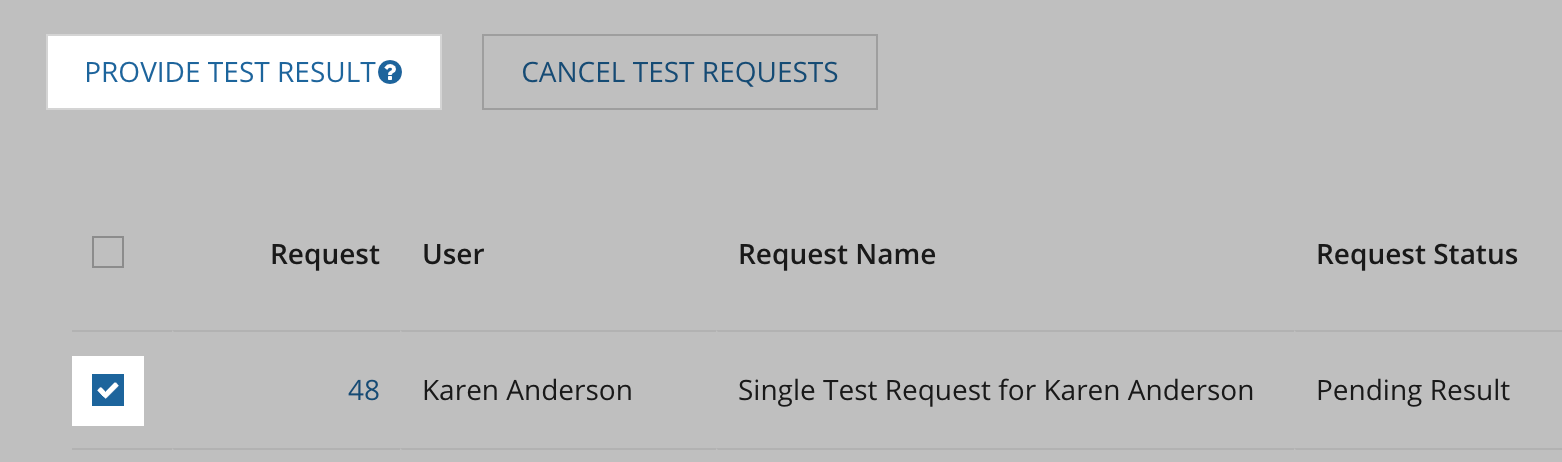
Enter the information for the test and click SUBMIT.
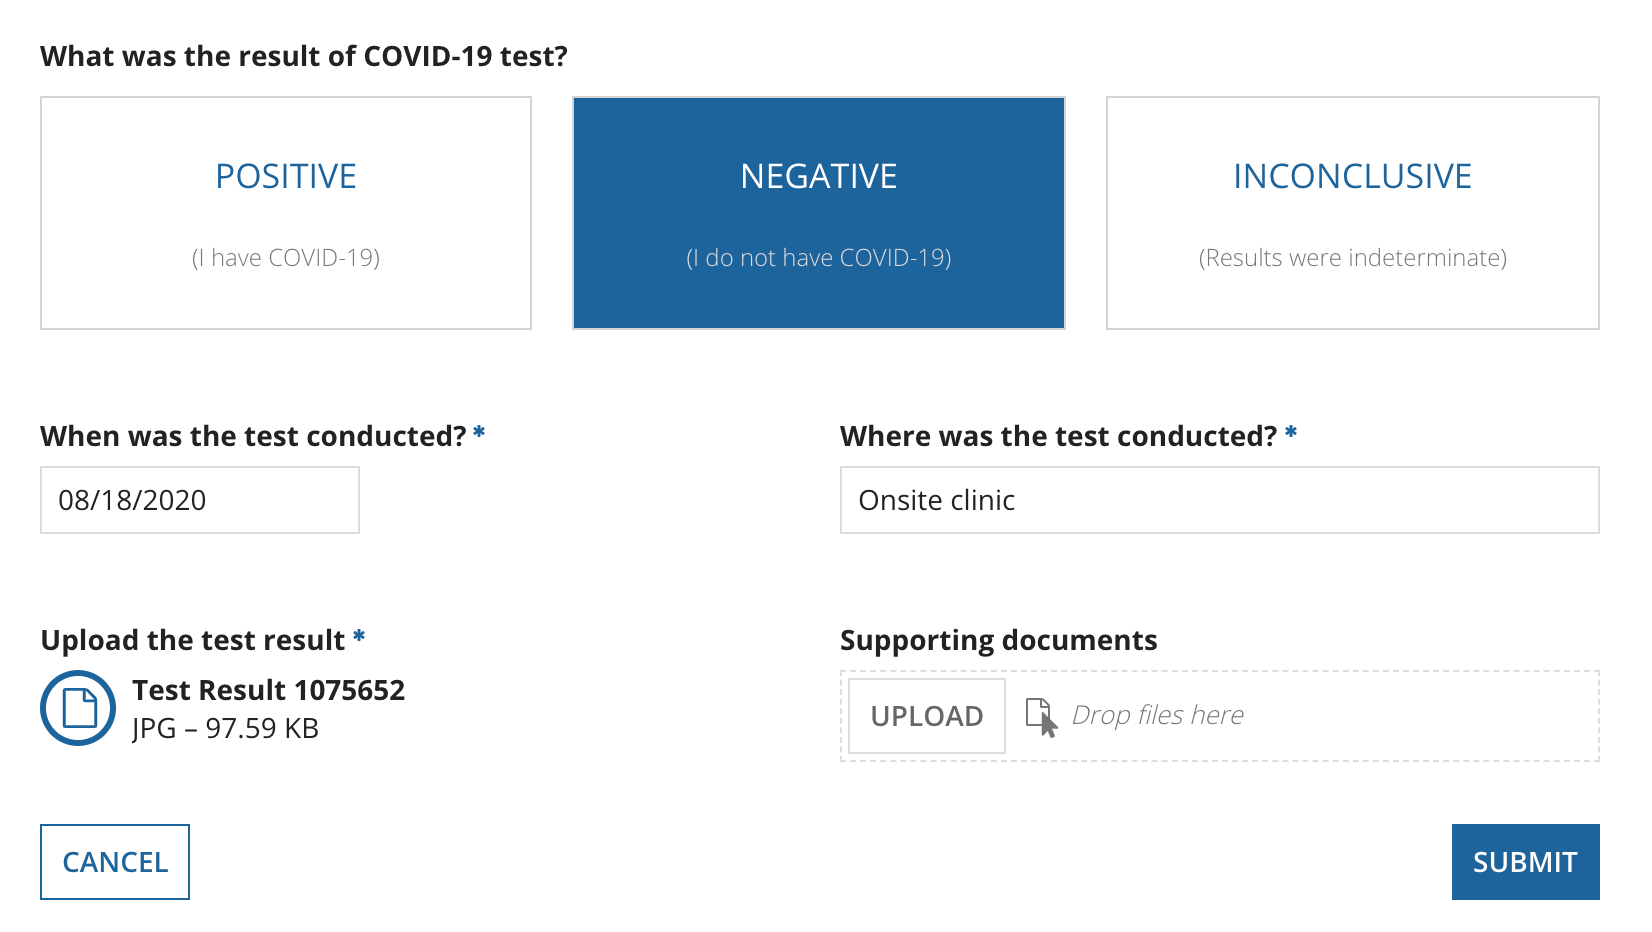
The Request Status for the user is updated to Completed and the Result displays for the user. A review is not required.

To provide a test result for a pooled test:
Click PROVIDE TEST RESULT.
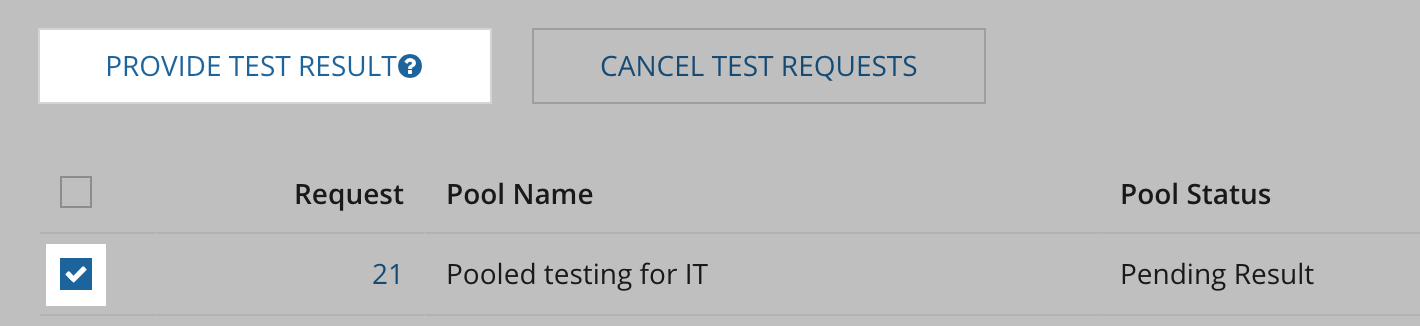
Enter the information for the test and click SUBMIT.
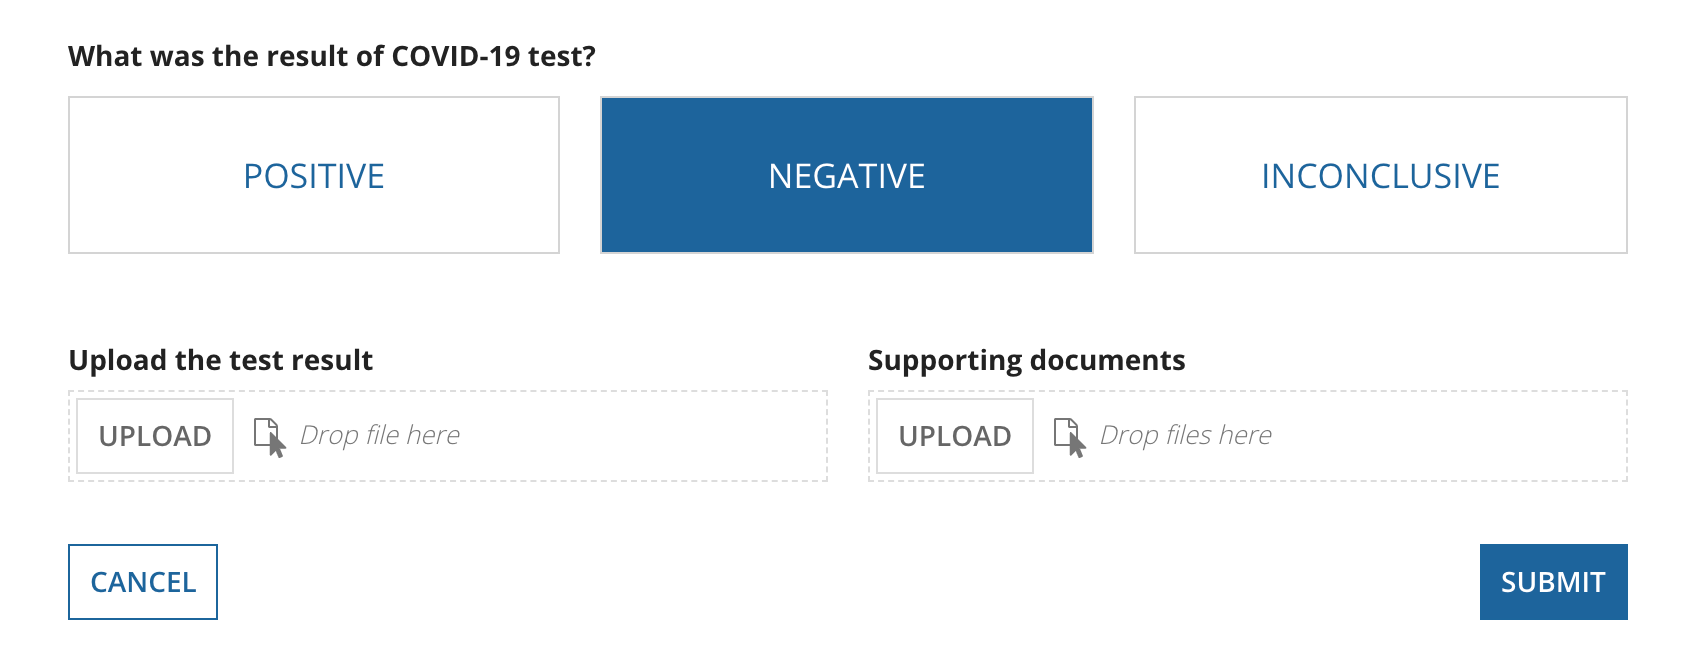
If the pool test result is negative, the Result for all individuals in the pool will be updated to Negative. If the pool test result is positive, the Result for all individuals in the pool will be updated to No Result and response managers should request individual test results from the group.
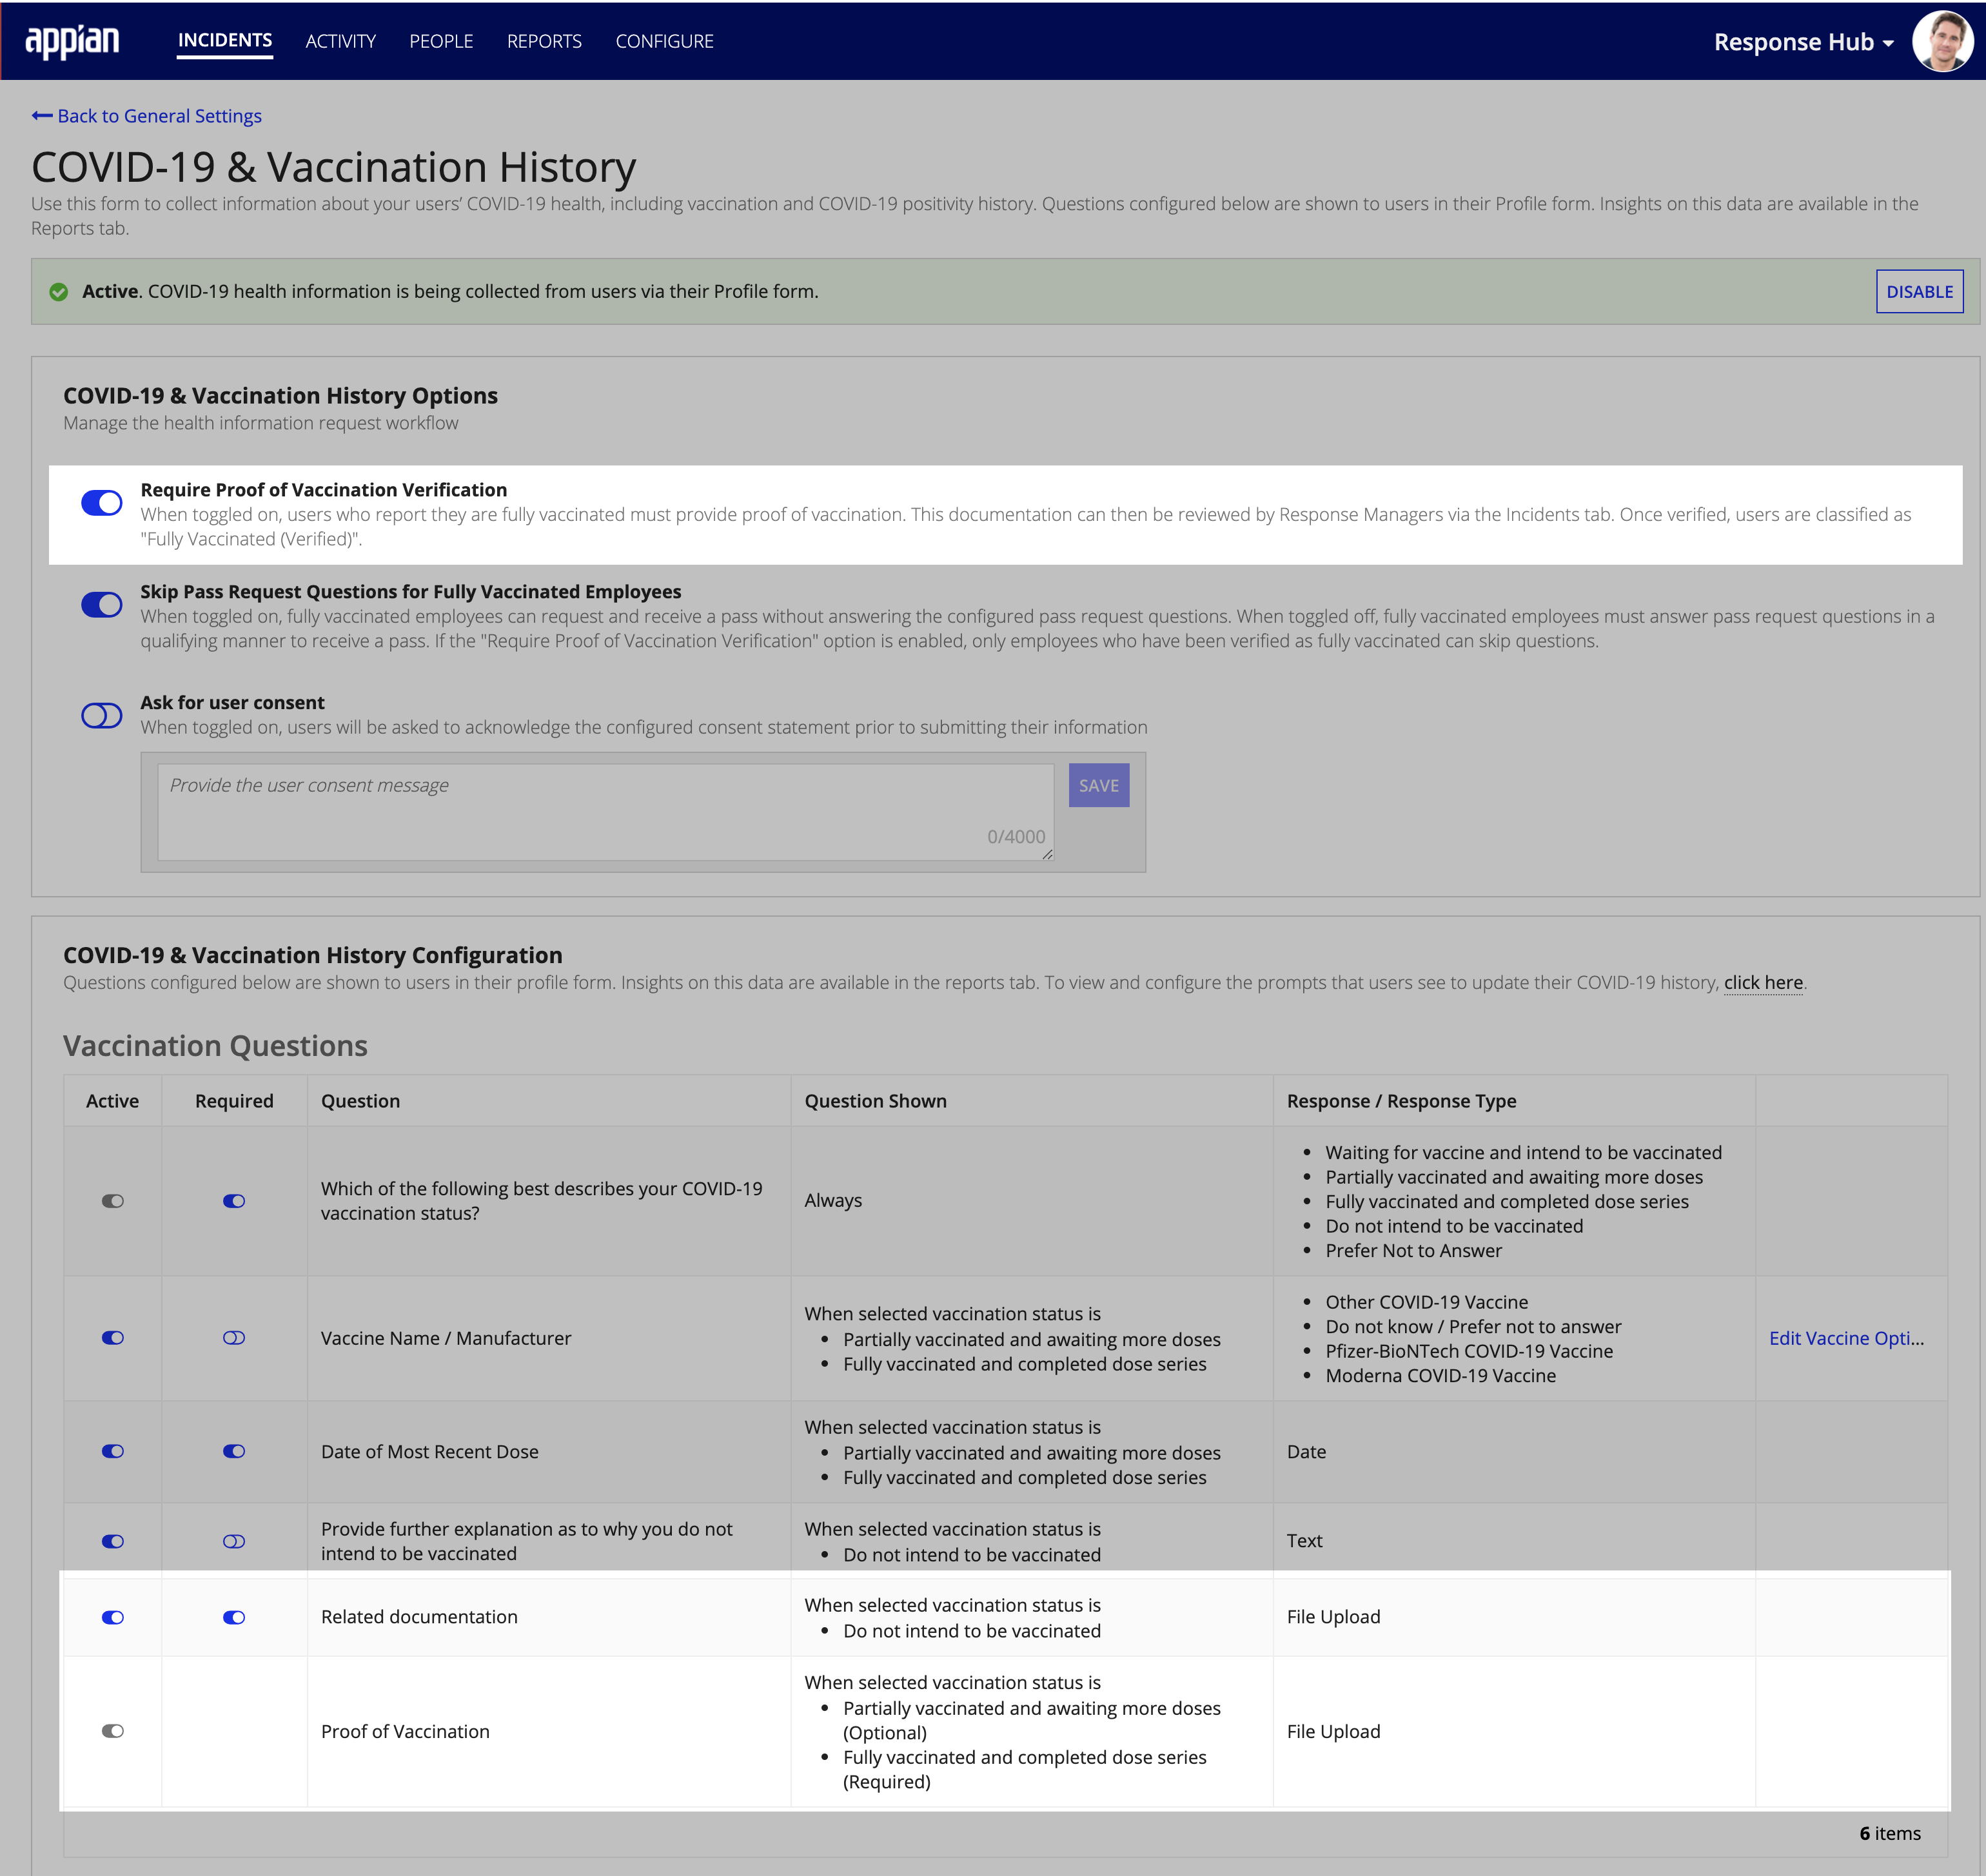
If the Require Proof of Vaccination Verification toggle is turned on, Response managers can quickly verify proof of vaccination for all employees who have uploaded vaccination documentation to their profile form.
After a user provides proof of vaccination, they'll show up in the Vaccination Verification review portal. To quickly determine if you have employees that require a verification review, navigate to the INCIDENTS page and look for the alert banner at the top of the page. This banner displays how many employees have submitted their proof of vaccination and are in the review queue.
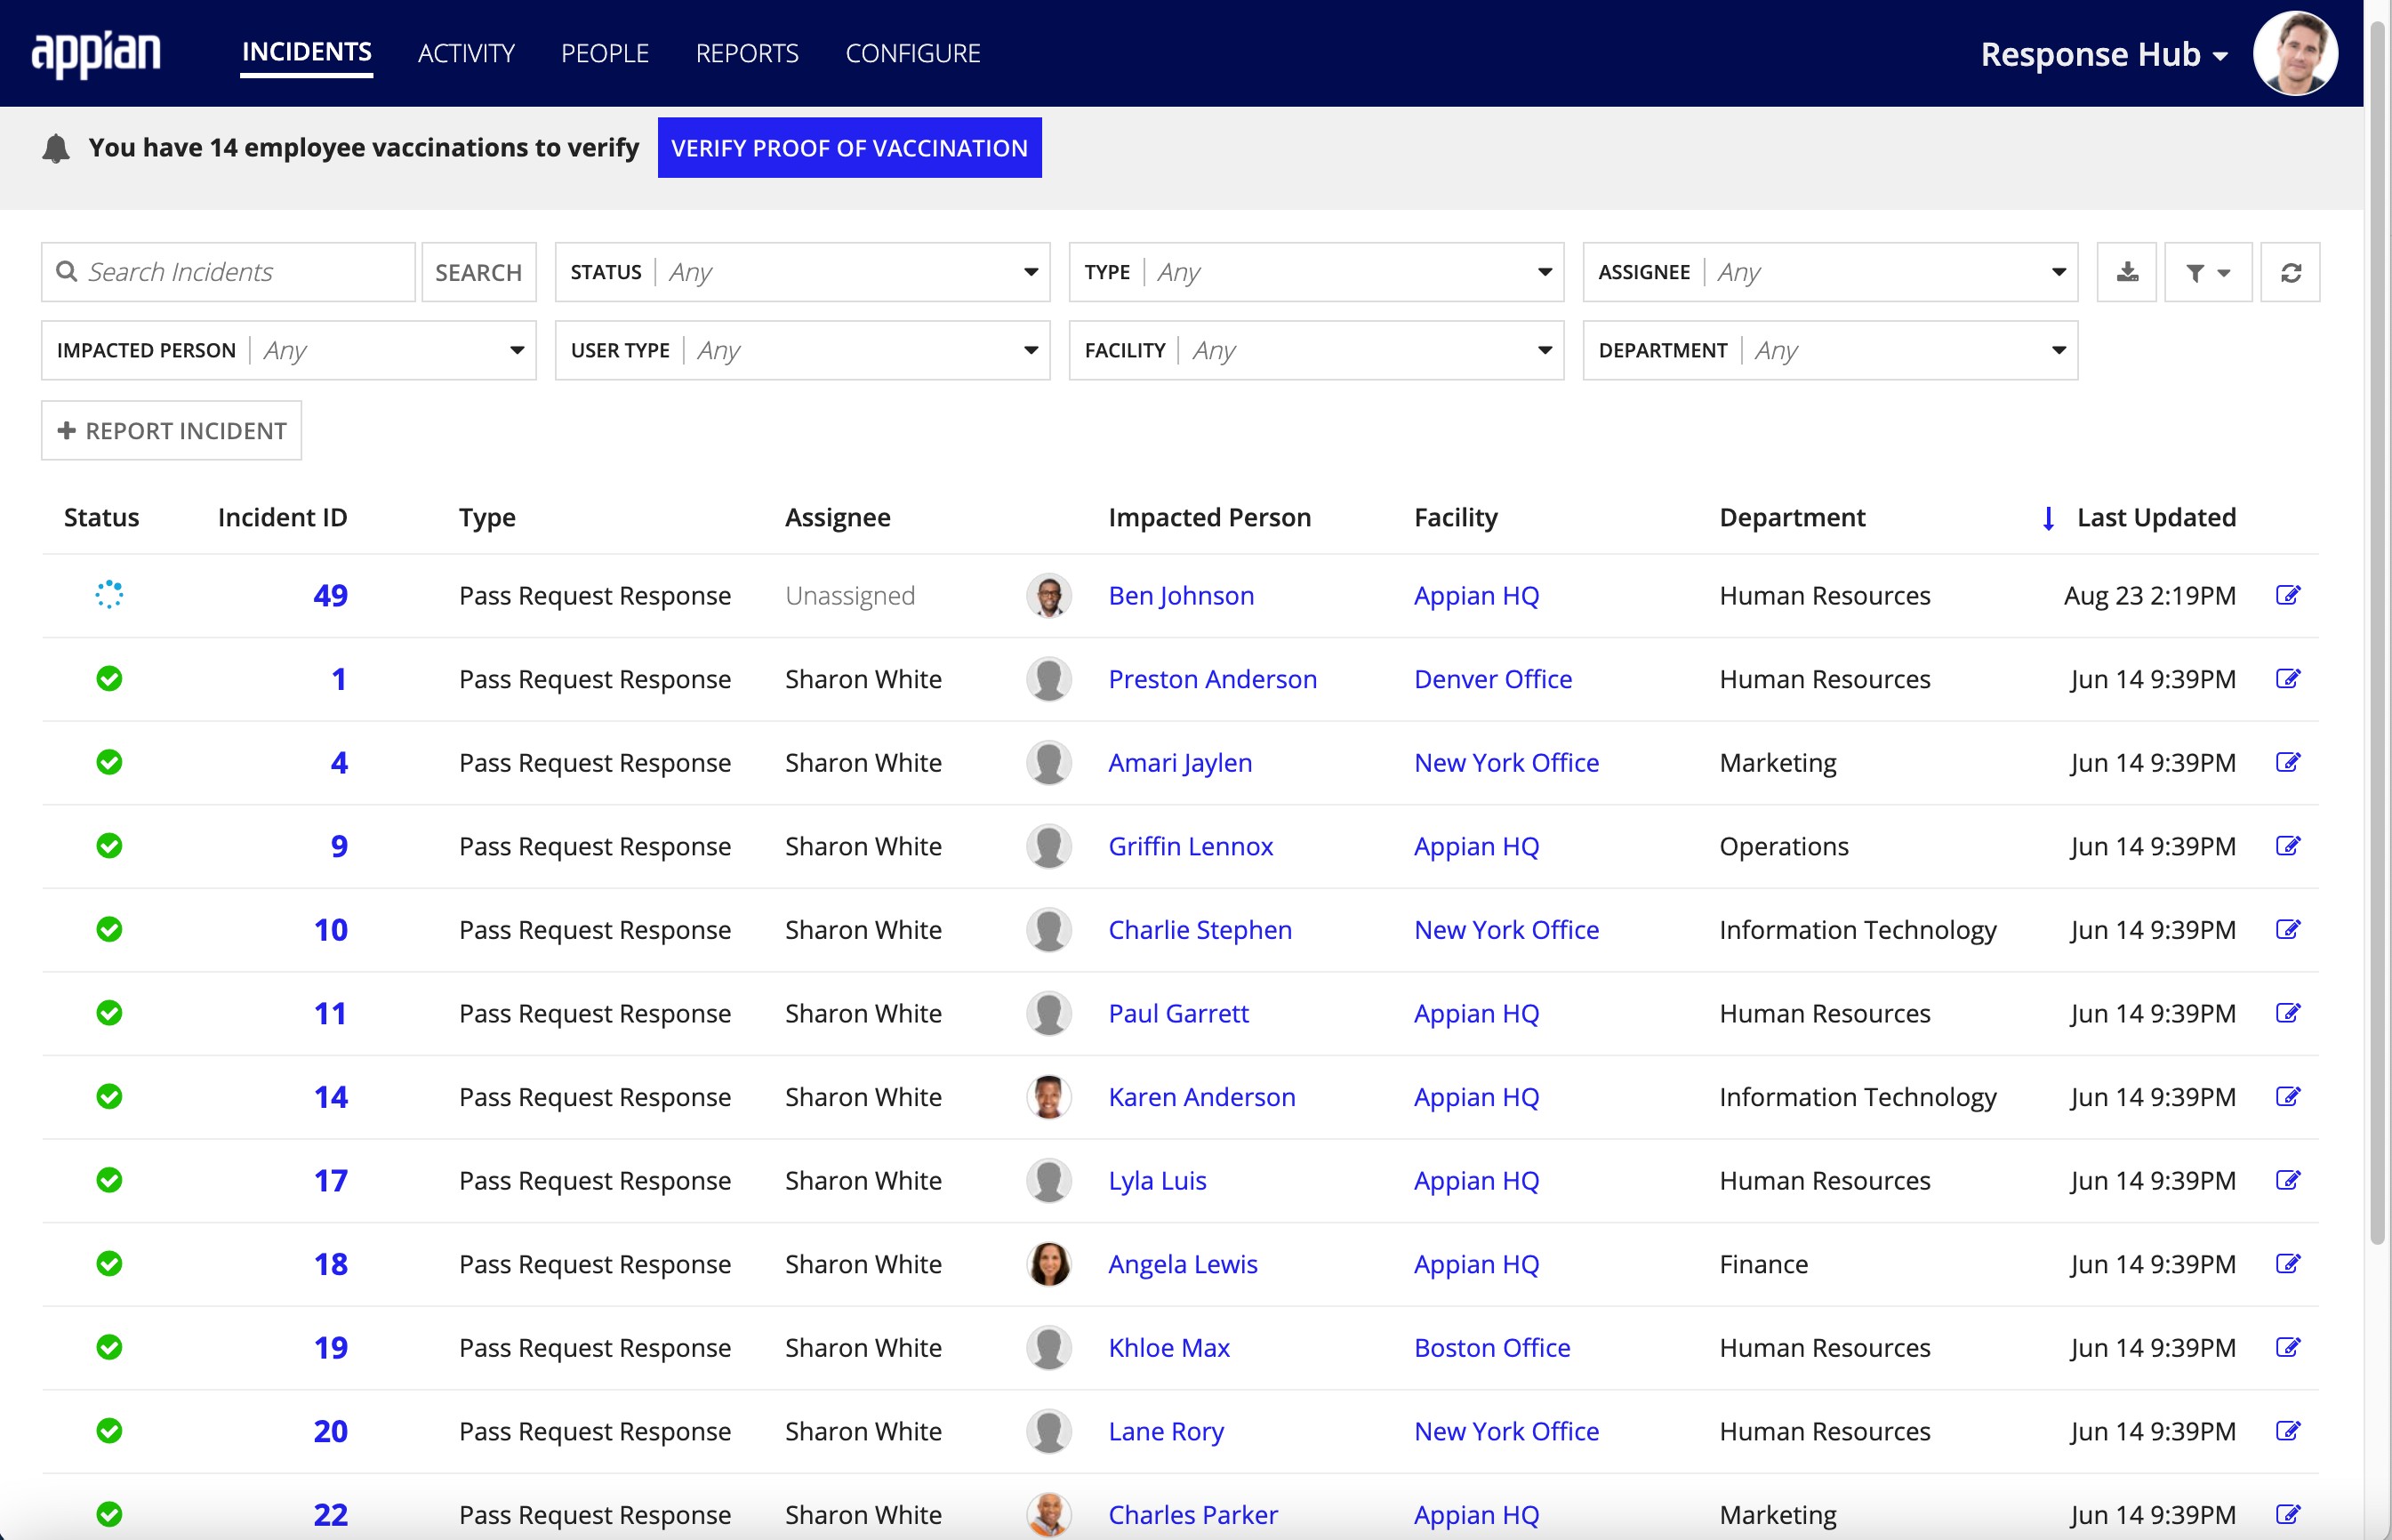
Click VERIFY PROOF OF VACCINATION to access the review portal. In the left panel, you'll see an ordered list of all employees who have submitted their proof of vaccination by submission date.
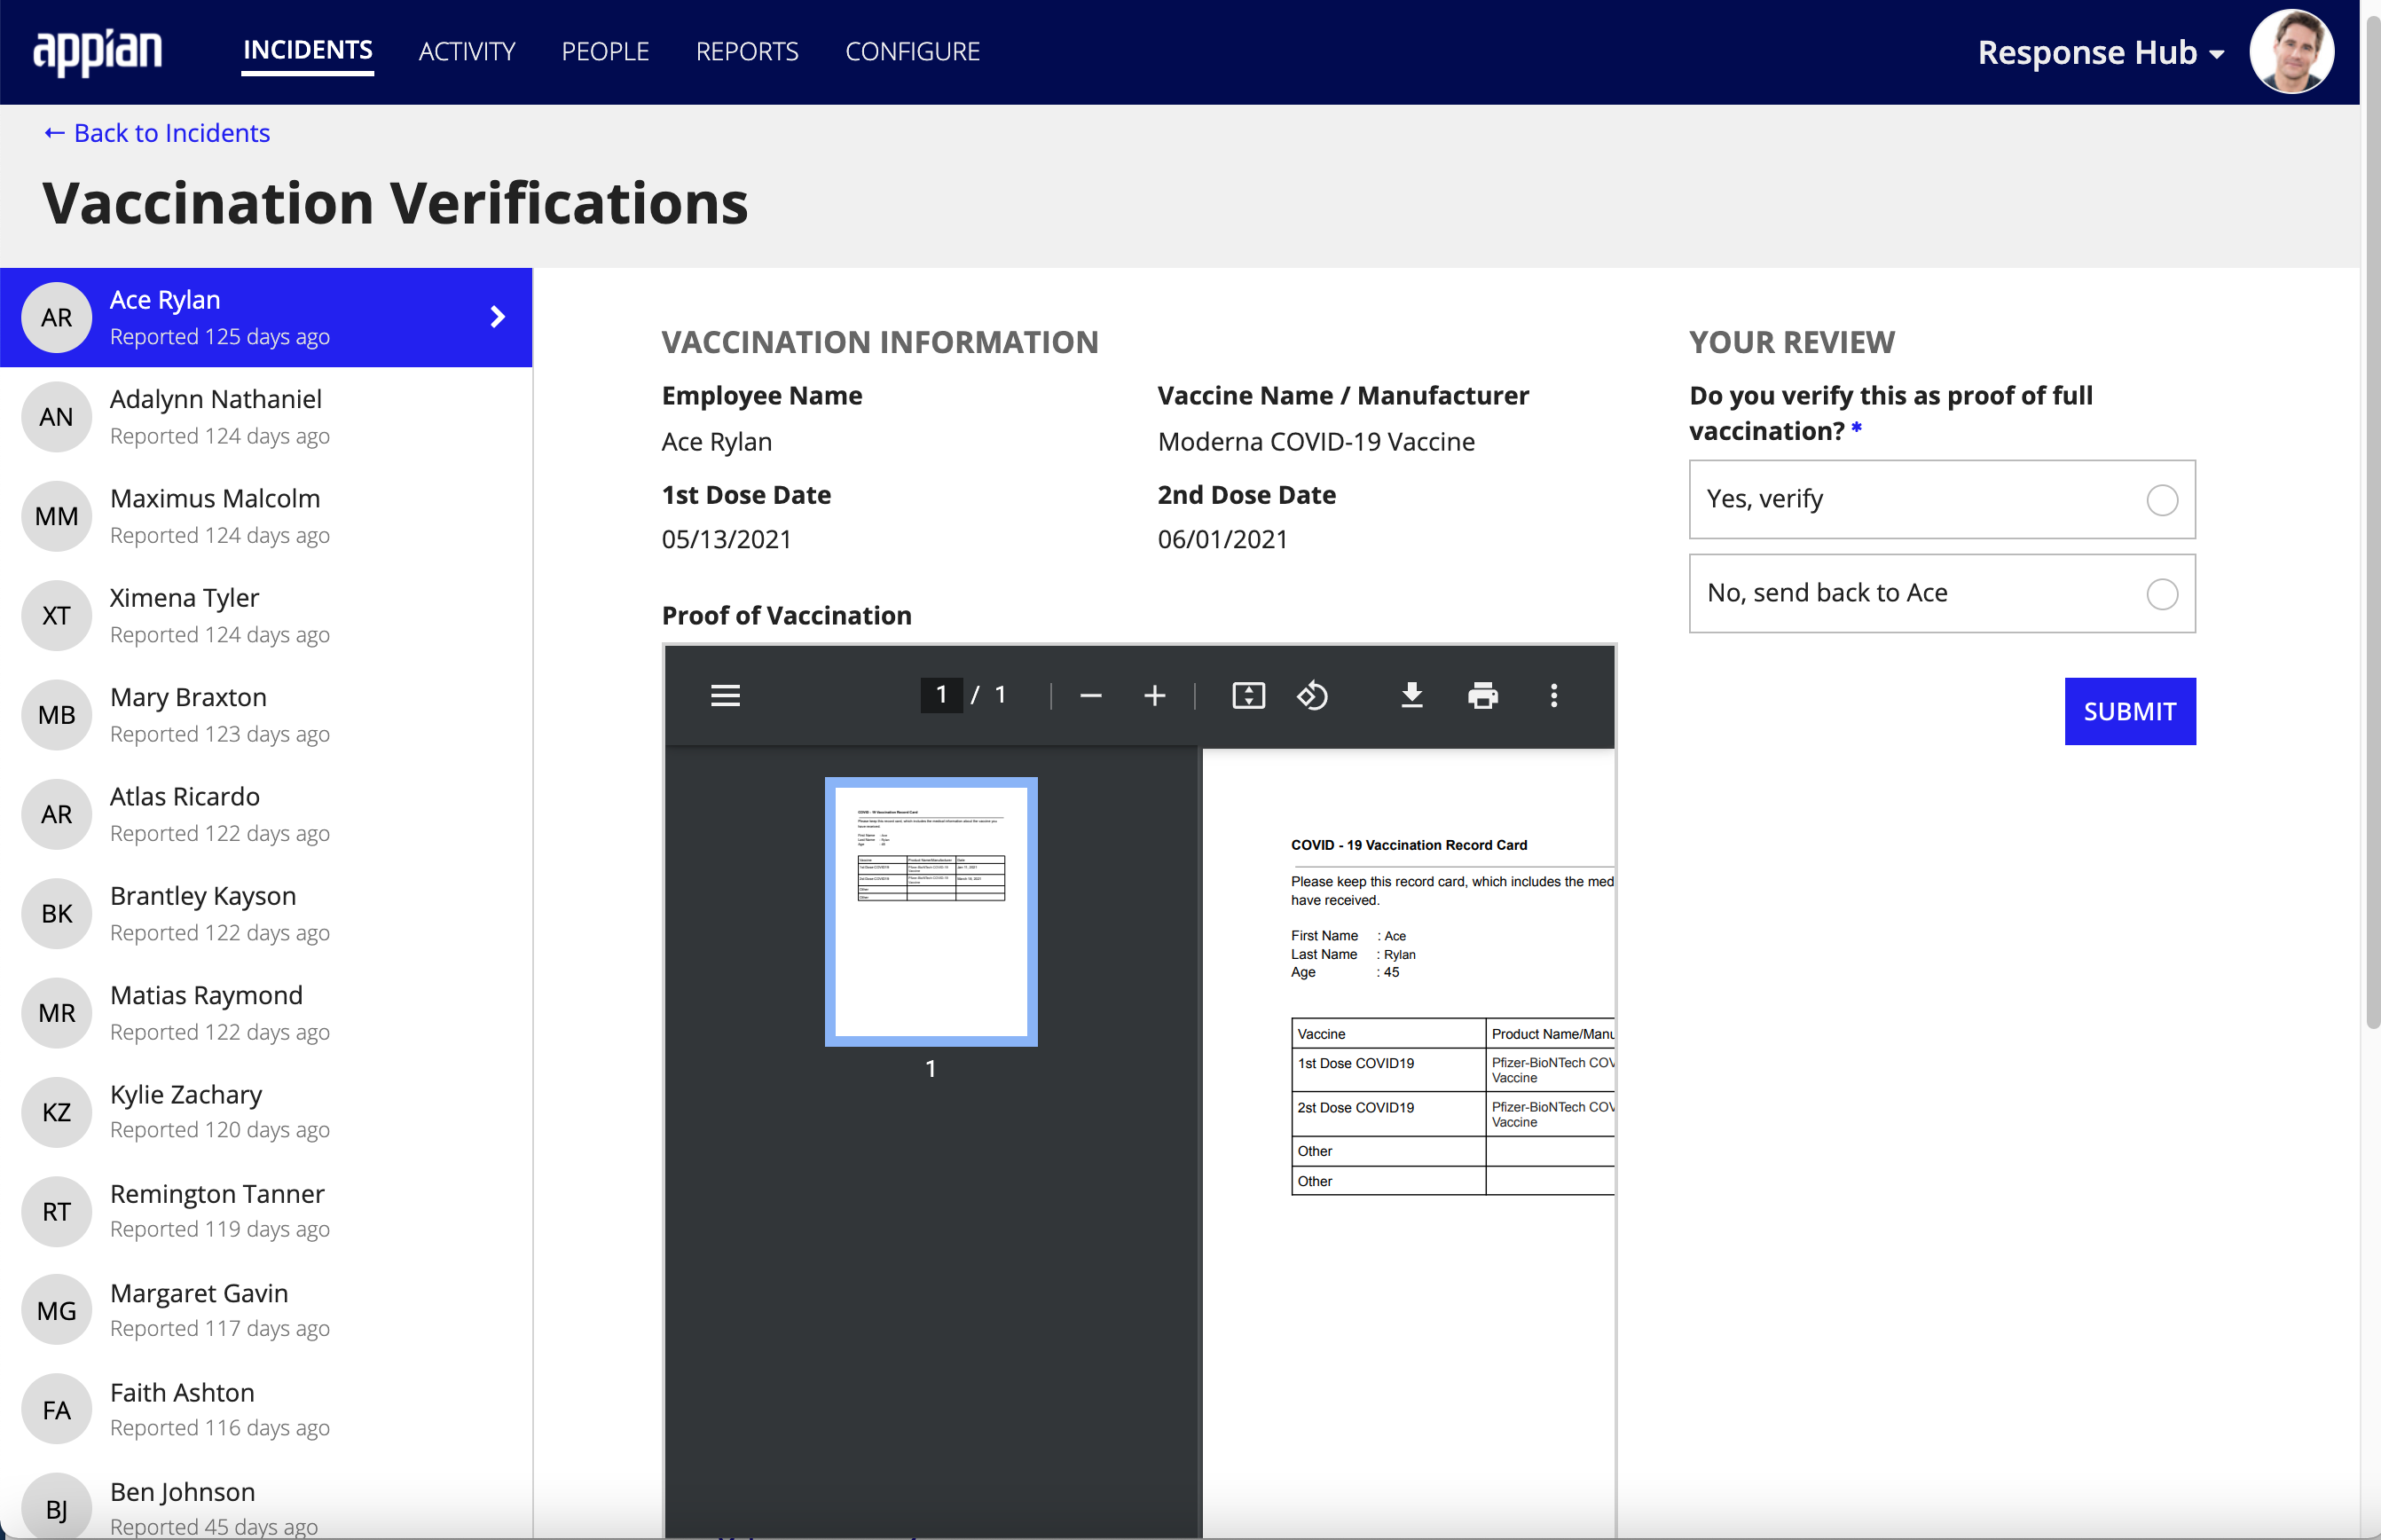
When you click on an employees in the queue, you'll also see relevant vaccination information they provided, including the vaccine name/manufacturer, the most recent date of their first and second vaccination dose, and their uploaded documentation.
To verify vaccination proof:
employees name to reject the employee's proof of vaccination.
employees name, you must provide a feedback comment in the provided field, which will be visible to the employees when they edit their vaccination information.If you enabled the Booster Doses setting, only new users with a Partially Vaccinated and Fully Vaccinated vaccination status who match all of the criteria for one of the user groups listed below will require vaccination verification. These users are added to the Vaccination Verification queue:
Additionally, existing users who have already submitted their Fully Vaccinated status and documentation for the initial 1 or 2-dose vaccine, and had it verified by a response manager are added to the verification queue again, only if:
Only users matching any of these booster groups along with users who submitted vaccination information for the 1 or 2-dose series will show up in the total count of users in the Vaccination Verification banner on the INCIDENTS page:

Your response managers can click VERIFY PROOF OF VACCINATION to quickly review the queue of employees. Highlighting a specific user in the queue will display their vaccination information in the preview screen. If the employee submitted information for one or more booster doses, the Booster Doses section will display the dose date, vaccine name and manufacturer, and an image of their vaccination documentation for the most recent booster dose they received.

If your response managers are required to review the validity of the employee's vaccination information for the initial 1 or 2-dose series again and their booster information and documentation, the YOUR REVIEW section allows them to select Yes, verify to approve or No send back to… to deny.

Your organization may require COVID-19 vaccination as a requirement to return to workplace. Alternatively, it may offer routine testing in lieu of mandatory immunization in order to keep the community safe from the risk of exposure while on site.
Your organization may require COVID-19 vaccination as a requirement to return to campus. Alternatively, it may offer routine testing in lieu of mandatory immunization in order to keep the community safe from the risk of exposure while on site.
Some employees may be approved for an exemption from immunization for one of the following reasons:
To track these users, you can record their exemption status directly in their People record.
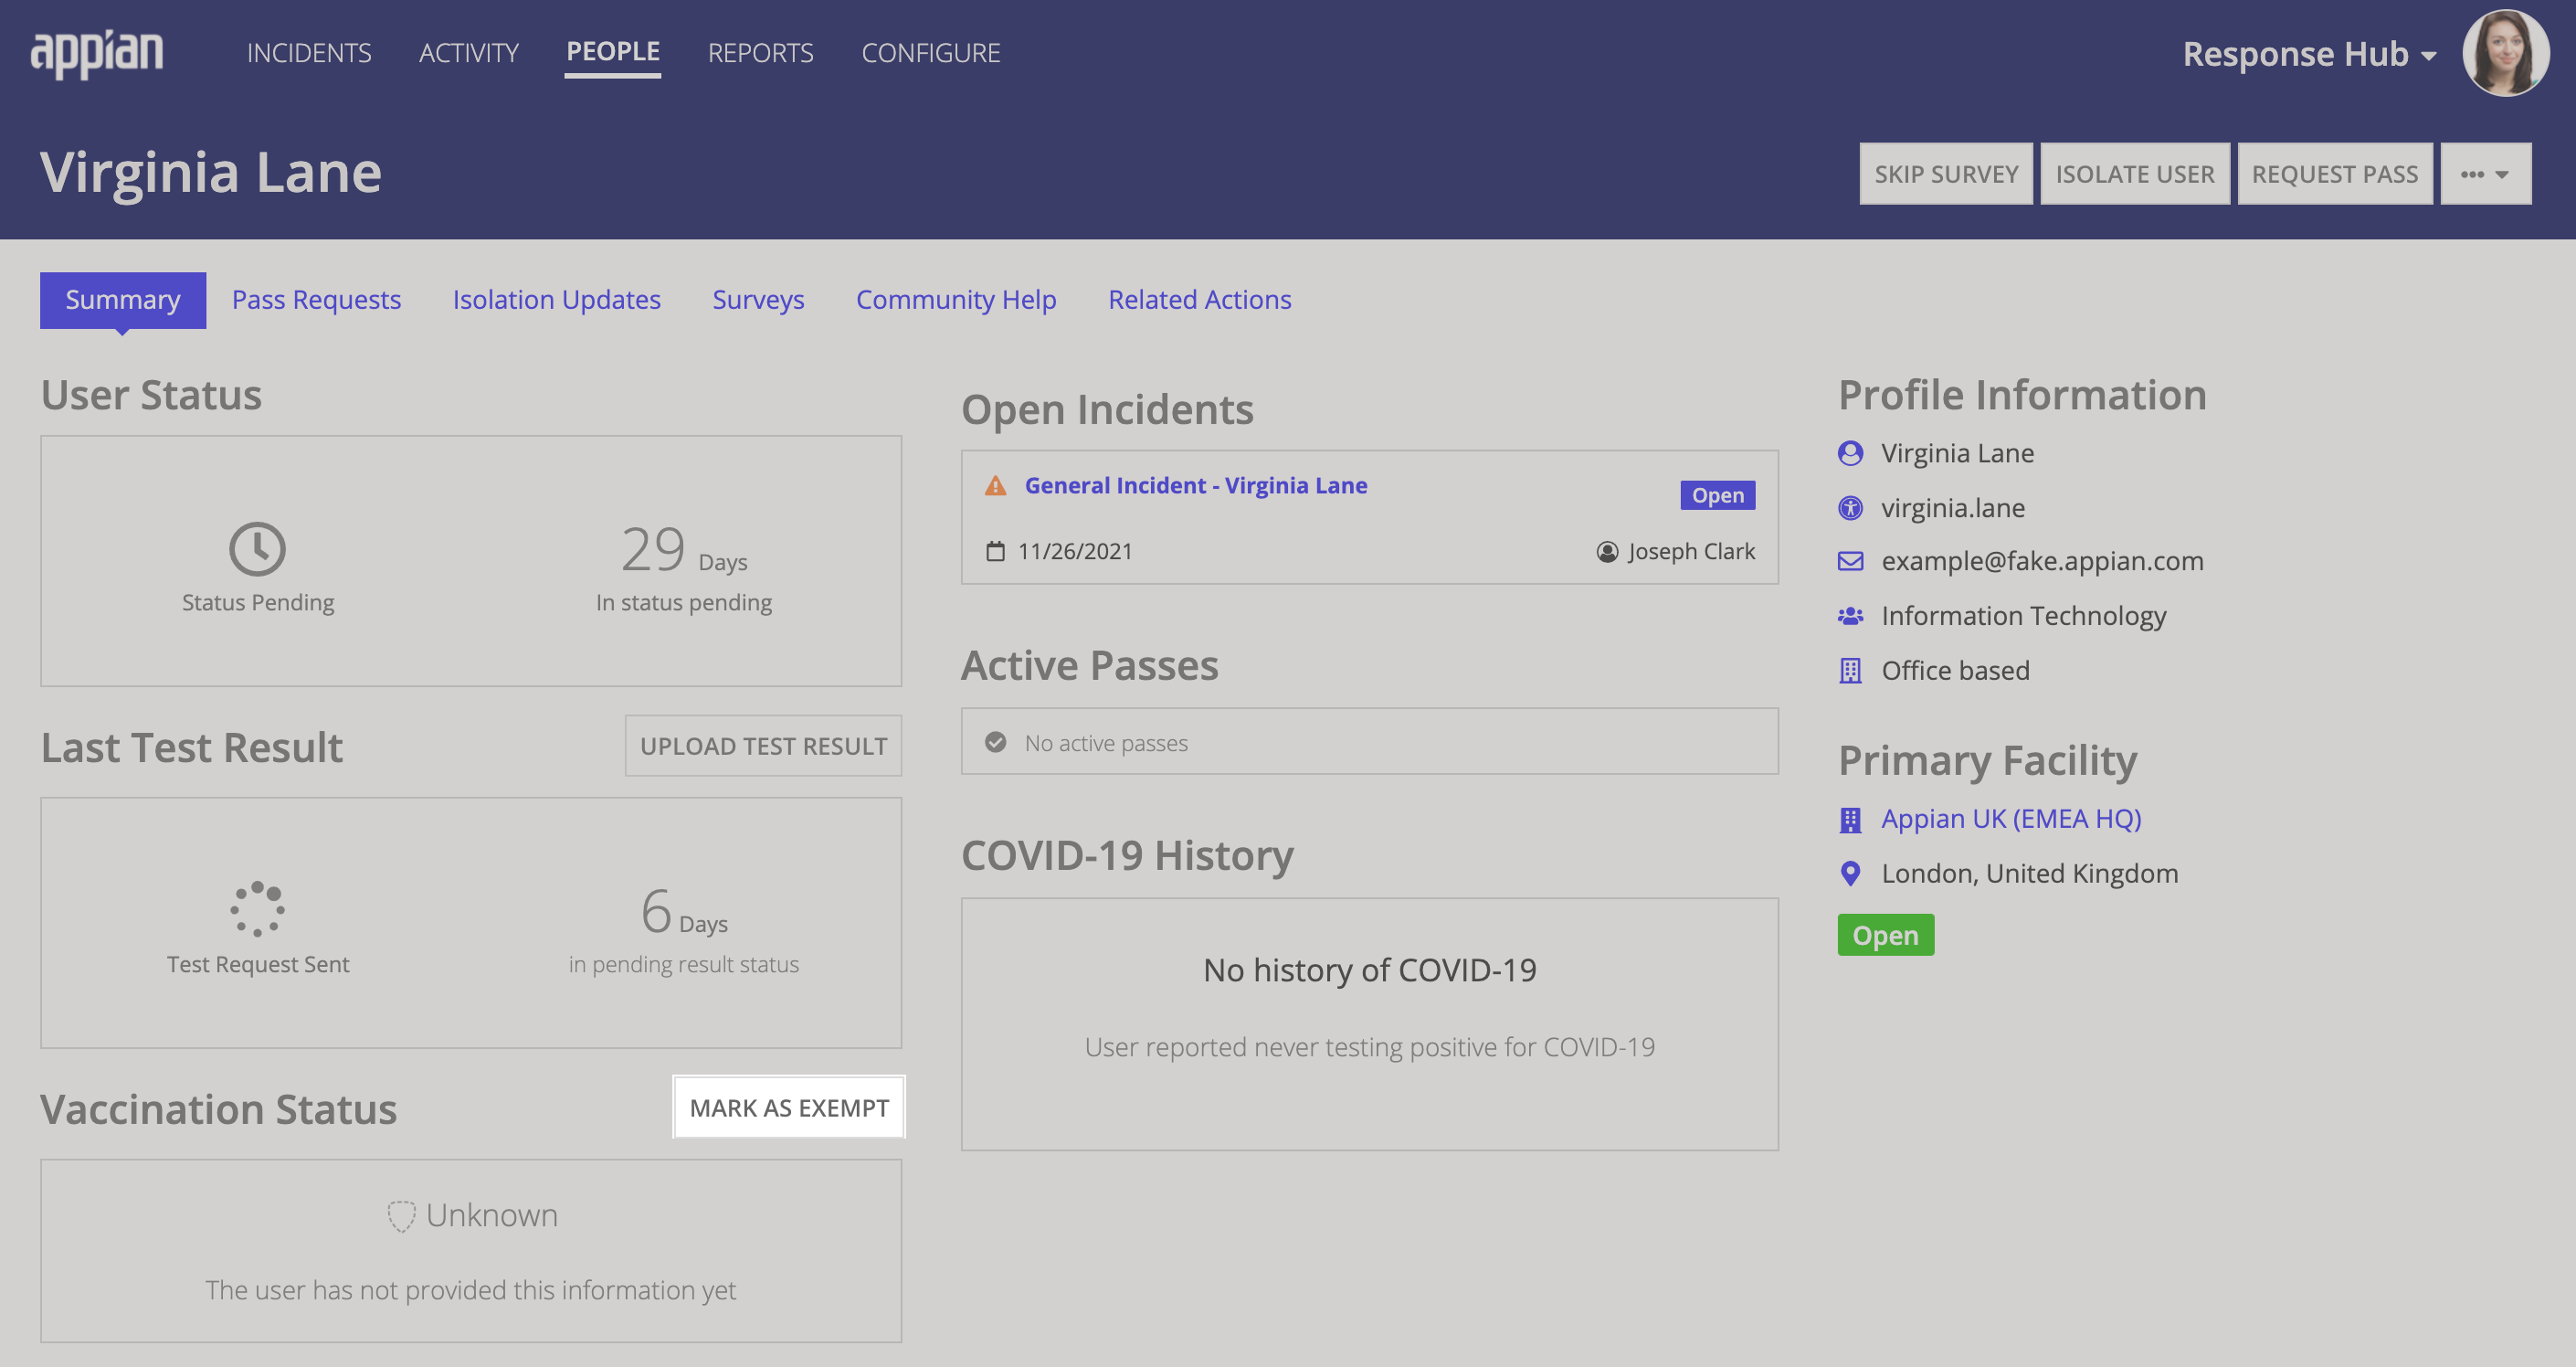
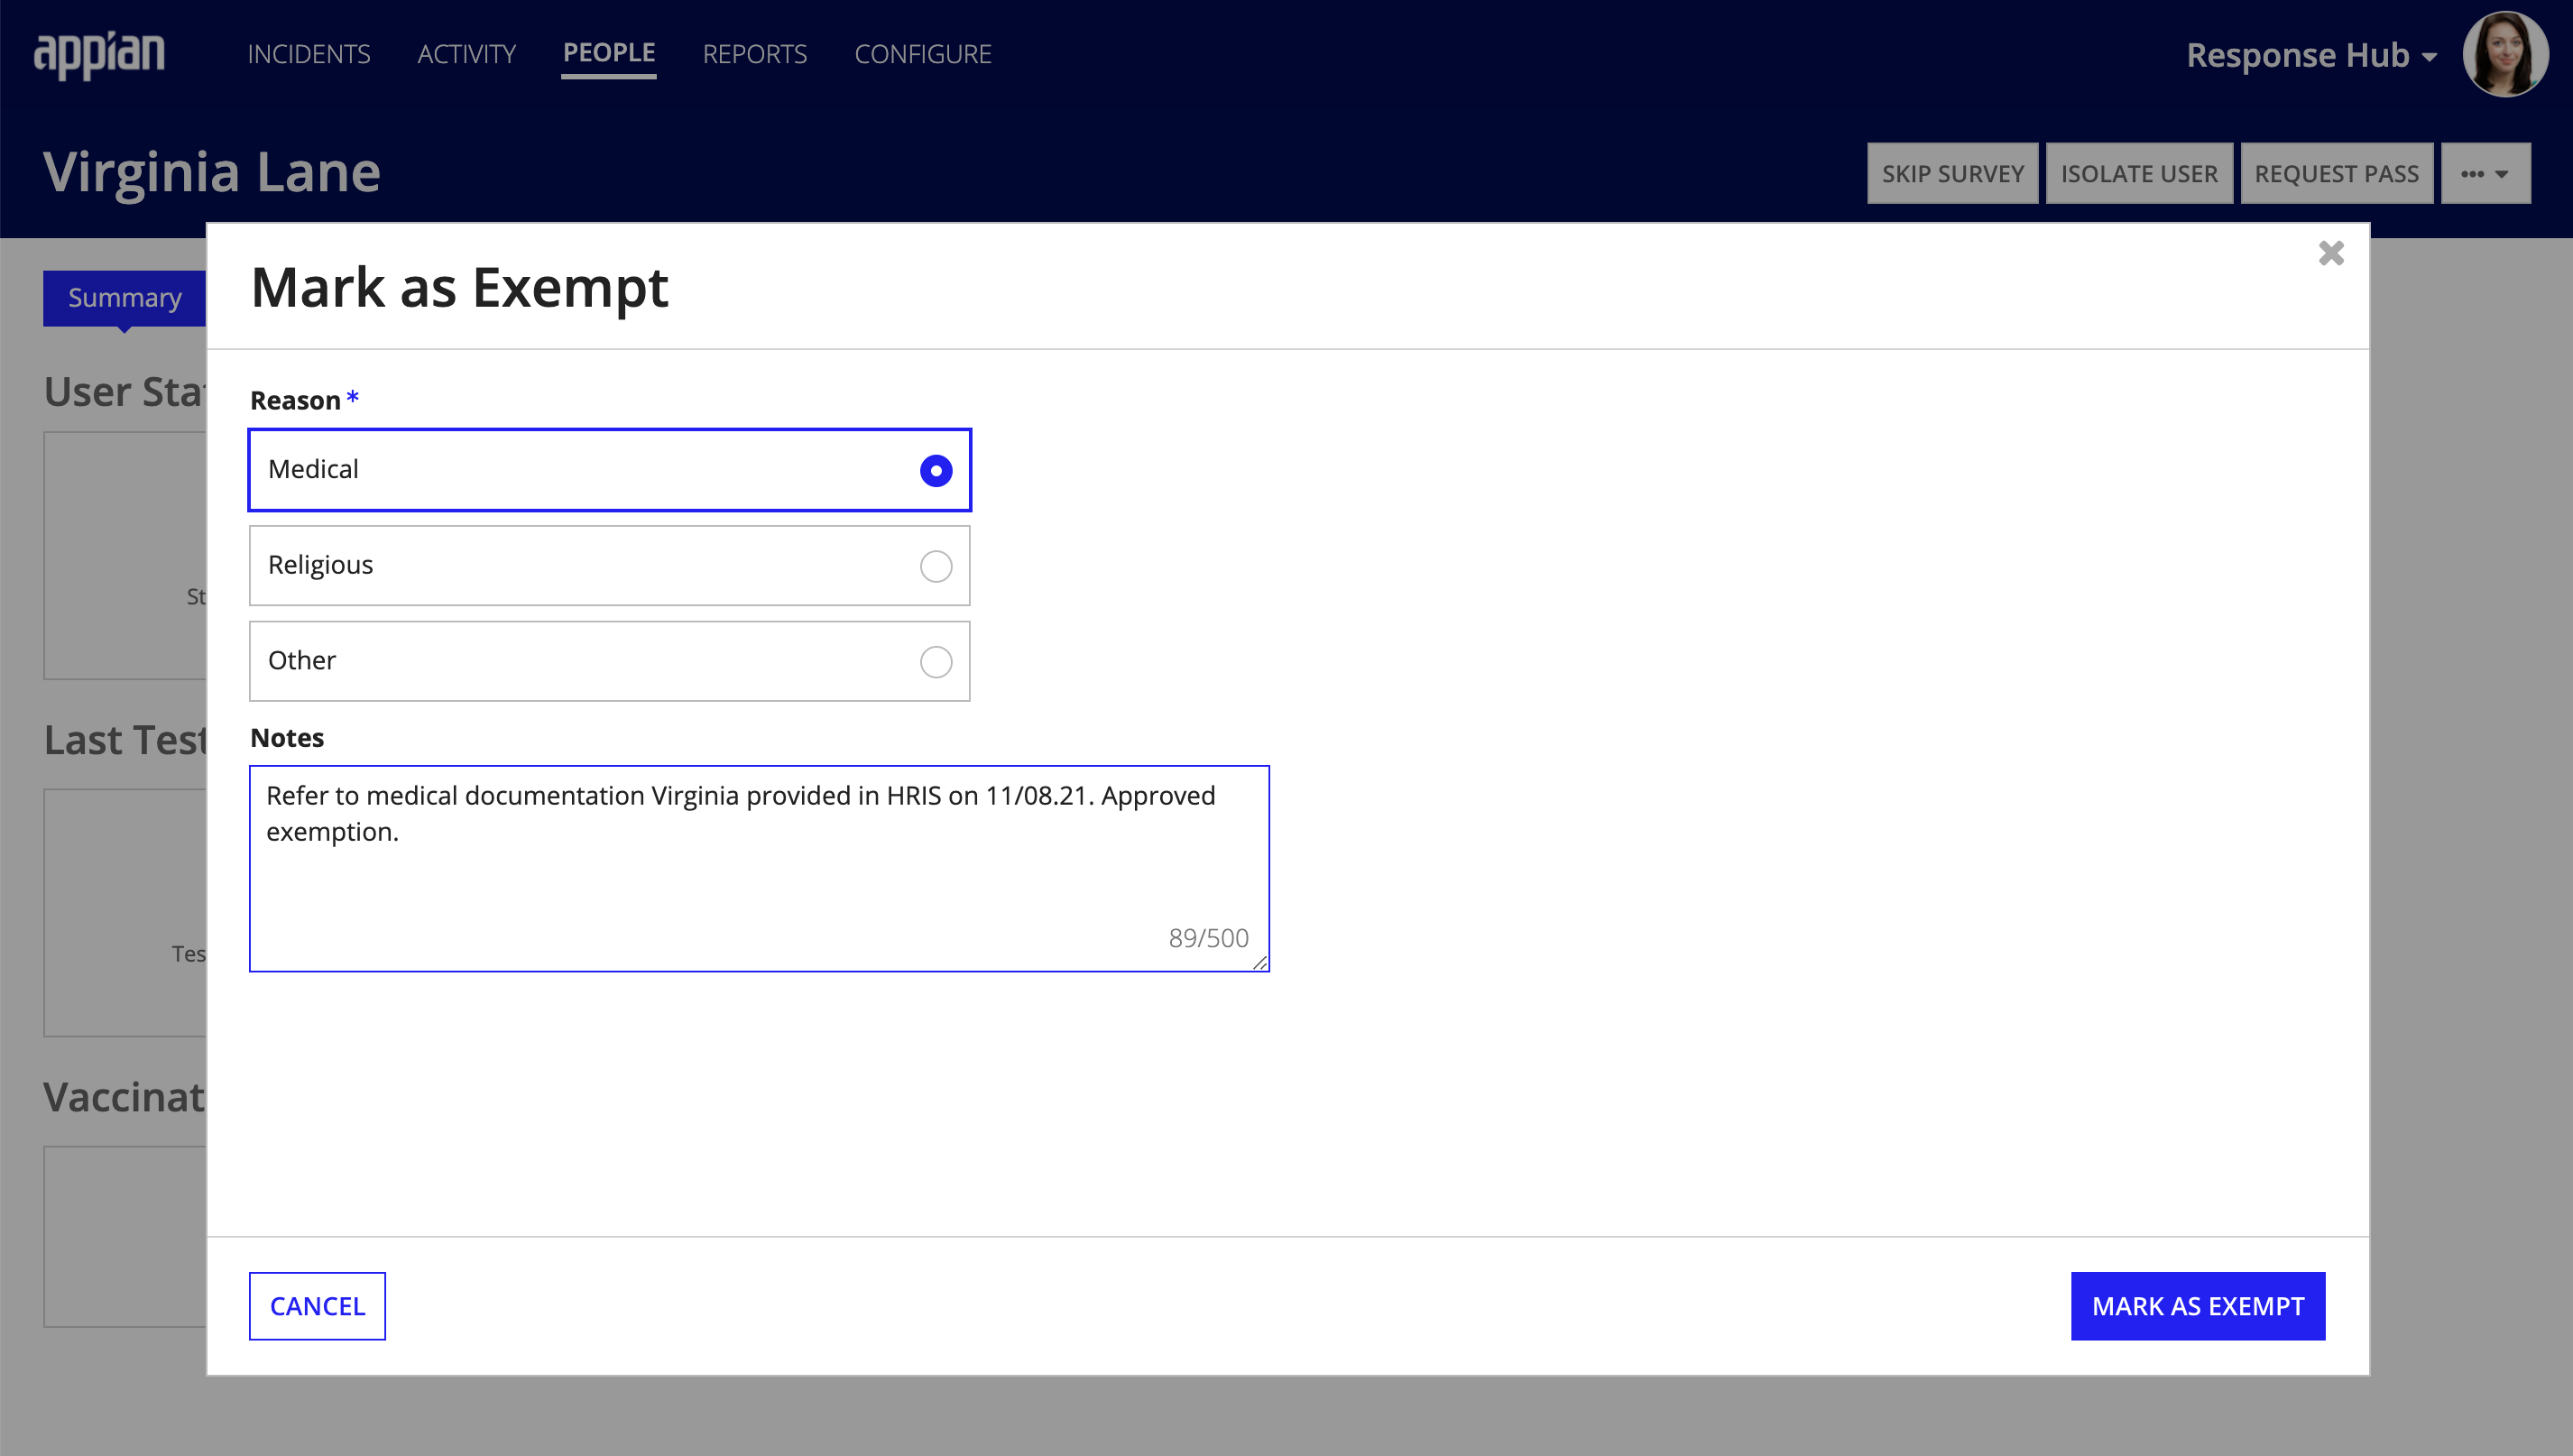
In order to assign a user an exemption, you must select a reason for the exemption and enter notes to document the exemption.
After you update the employee's People record by marking them exempt from the Summary tab, the employee will see their vaccination status as read-only in their user profile.
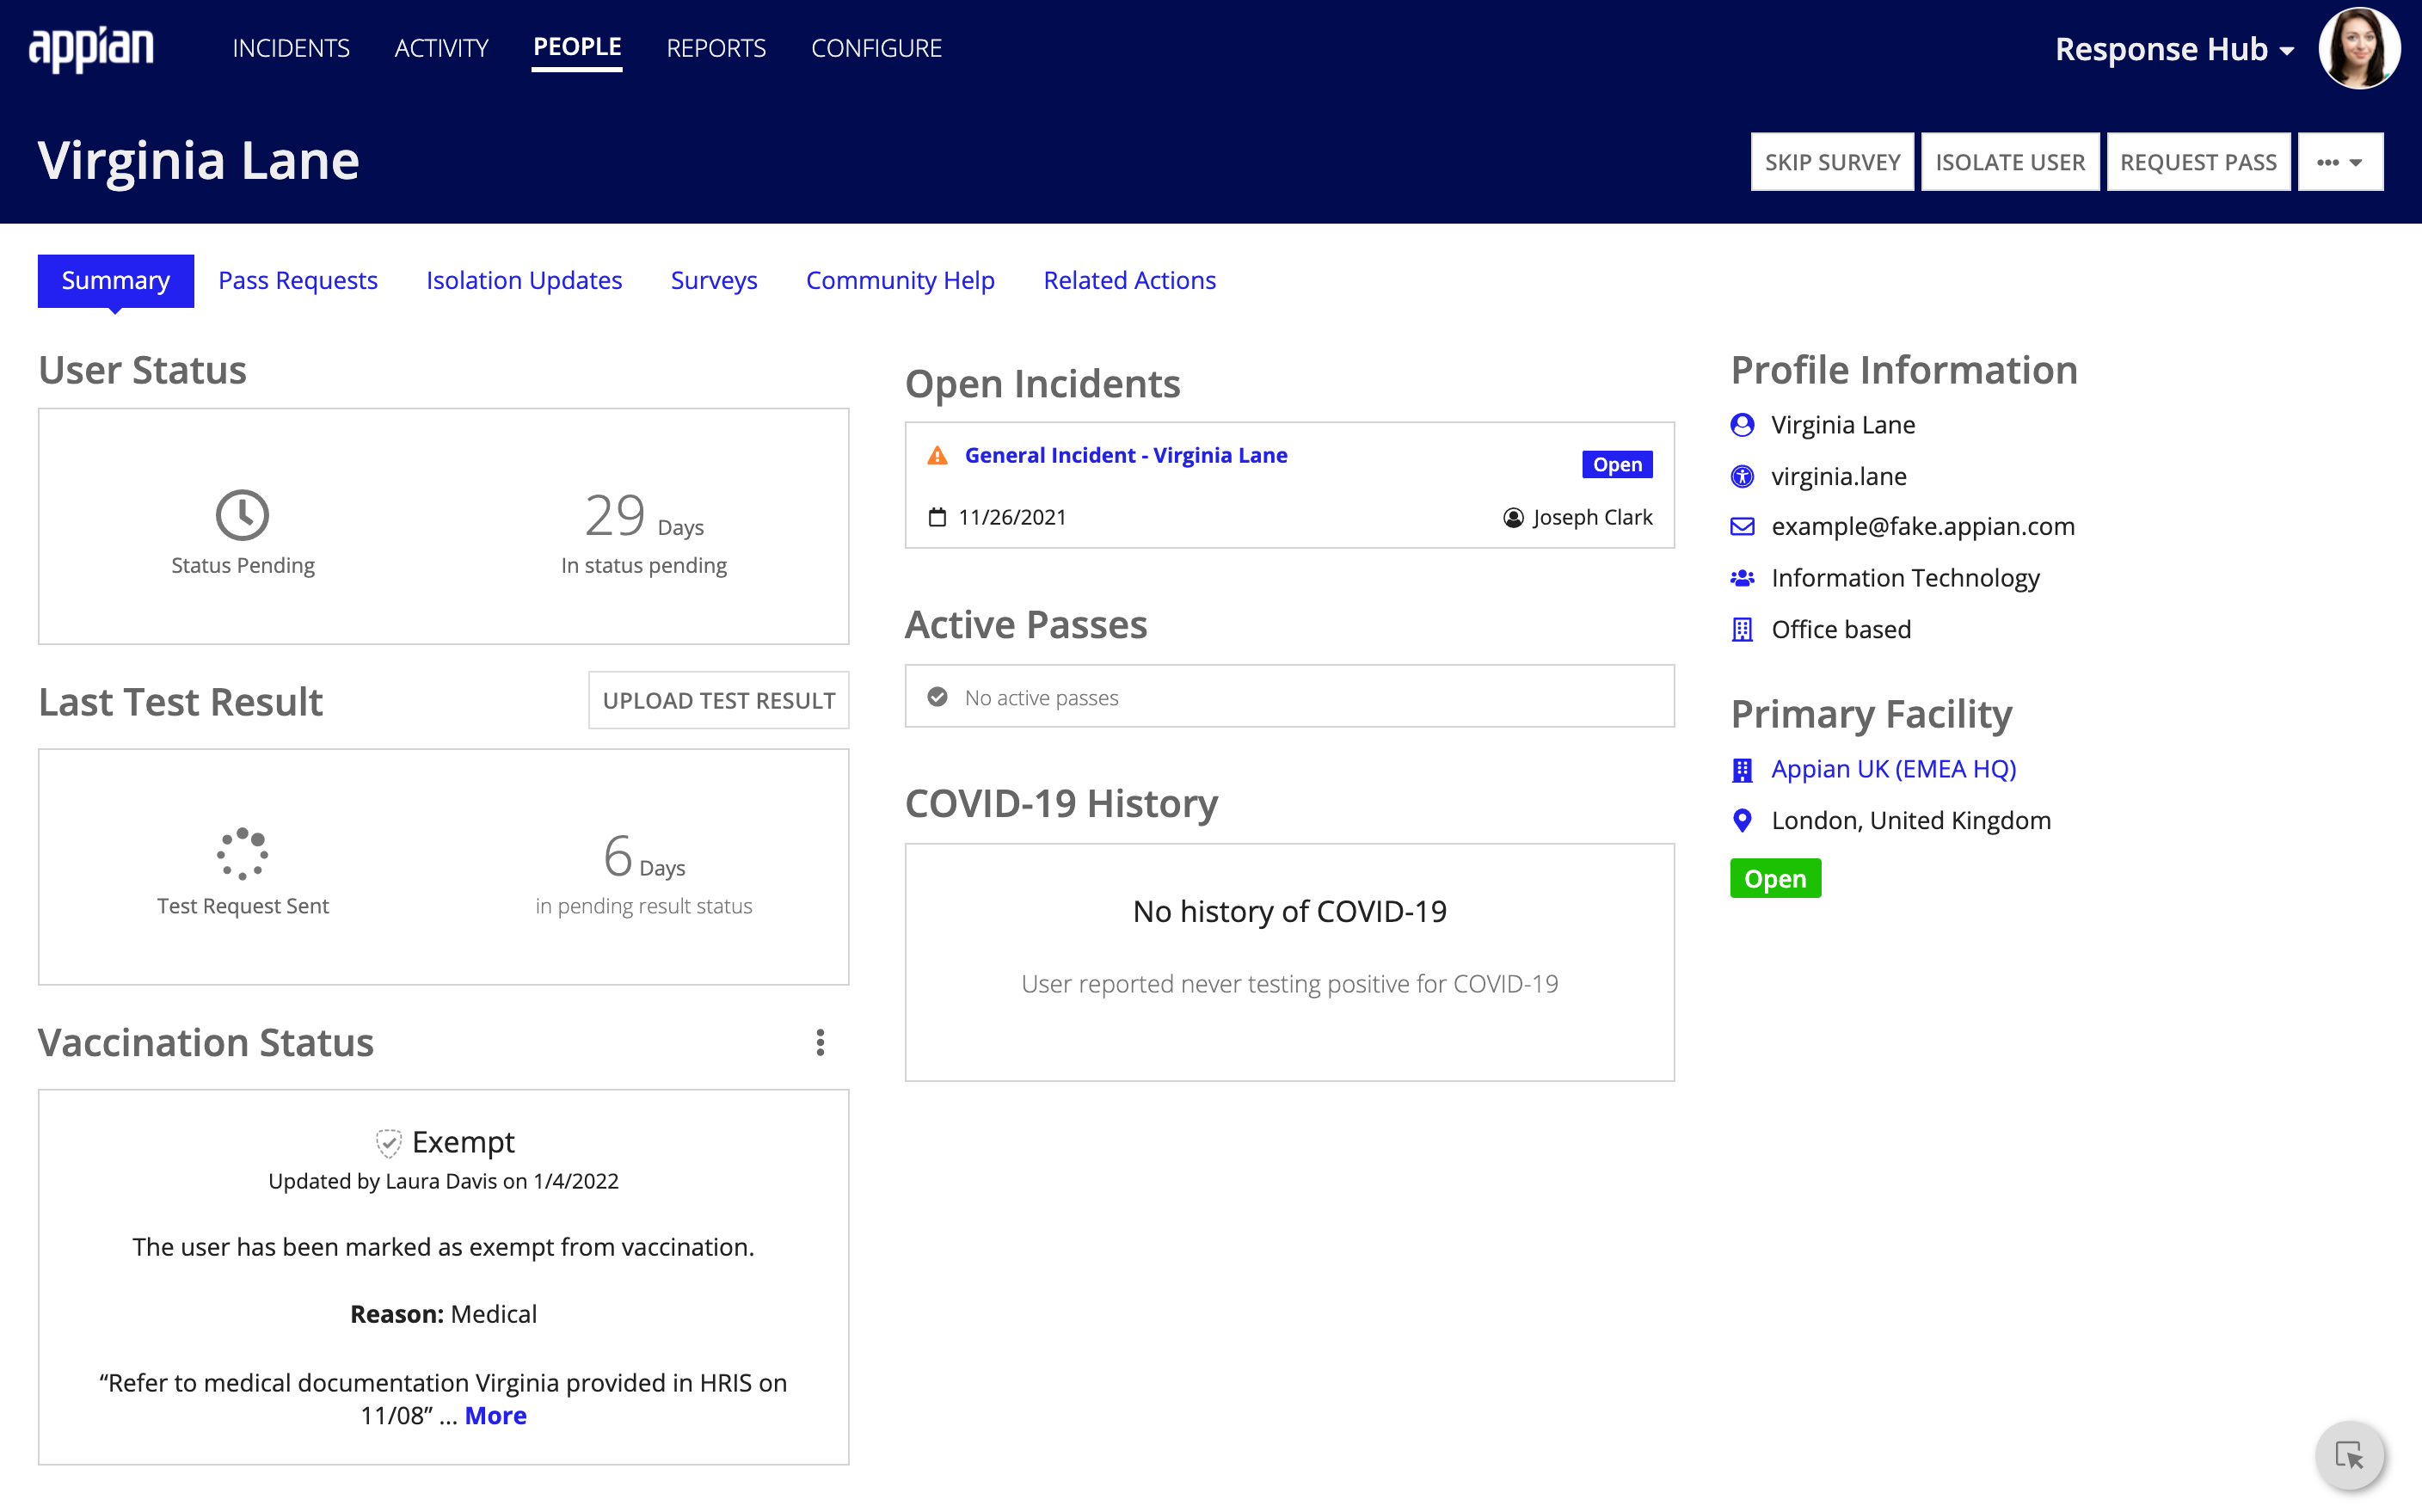
If a user who has an exemption decides to get vaccinated at a later date, you must first remove the exemption from their People record before they can update their profile with a new vaccination status. Removing the exemption will delete any data associated with the exemption and reset the user's vaccination status to the status that was recorded prior to them being marked as exempt. It will also enable the user to select a different vaccination status.
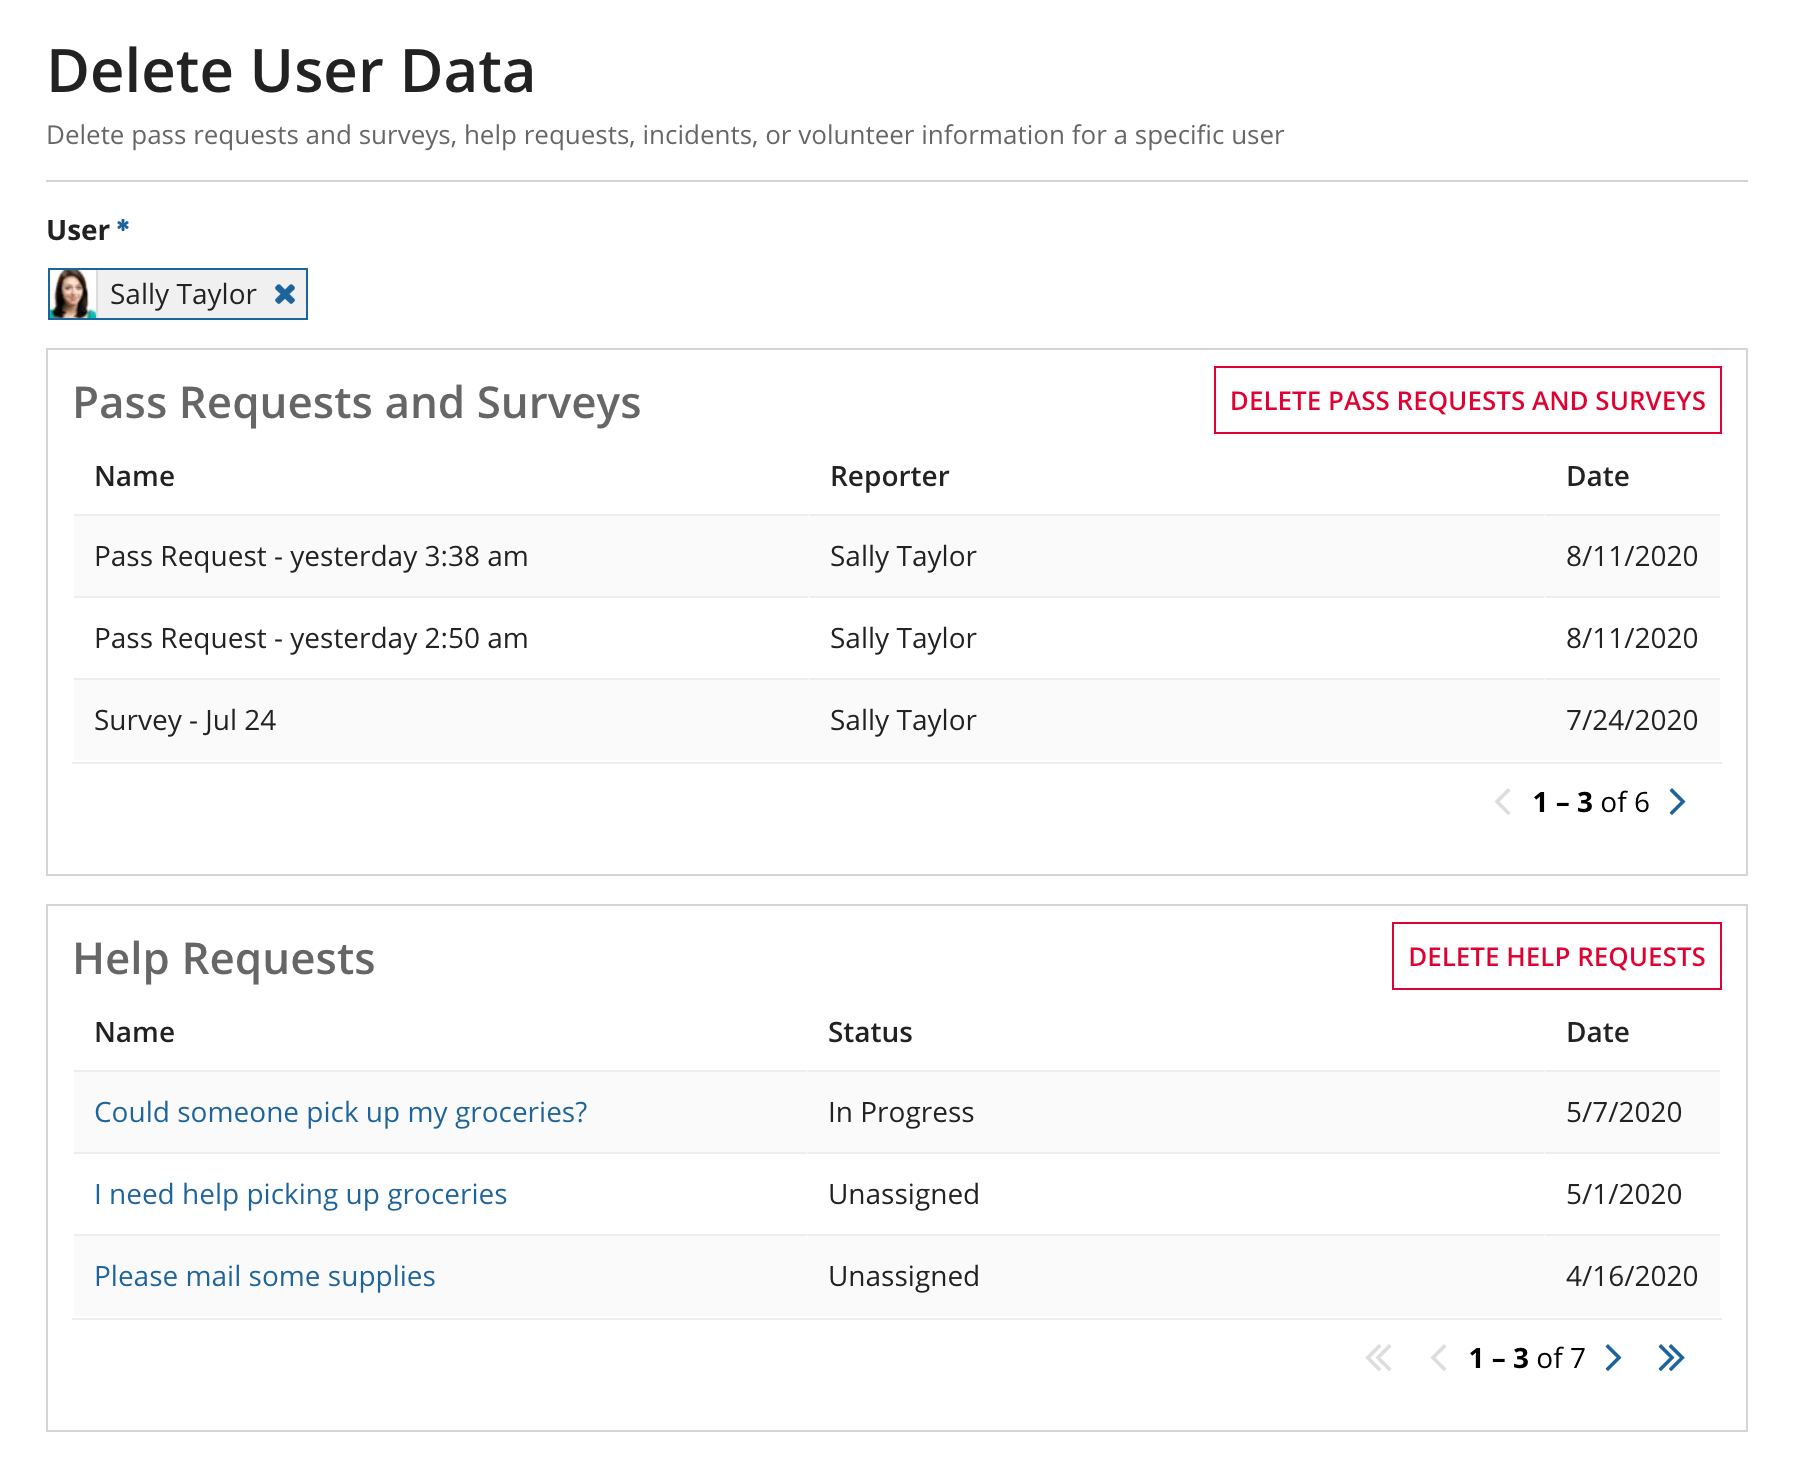
If a user requests to have their data removed from Workforce Safety, response managers can do this using the Delete User Data option. This option allows you to delete user pass requests and survey responses, help requests, incidents, or volunteer information.
Deleting data affects assignments for existing incidents and help requests. For example, if a volunteer is assigned to a help request and their data is deleted, the help request will become unassigned.
COVID-19 isolation incidents cannot be deleted from this page.
Tip: You can't delete specific rows of information. You can only delete all of the information of a certain type.
To delete user data: