| This content applies solely to Workforce Safety, which must be purchased separately from the Appian base platform. This content was written for Appian 21.4 and may not reflect the interfaces or functionality of other Appian versions. |
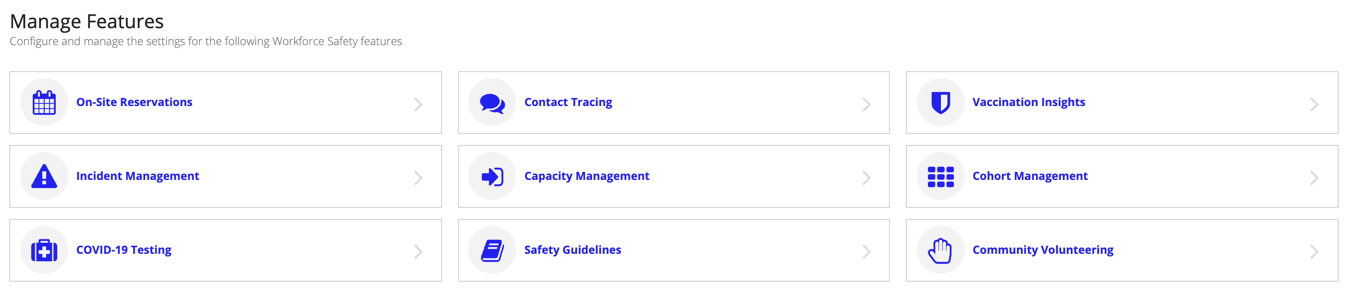
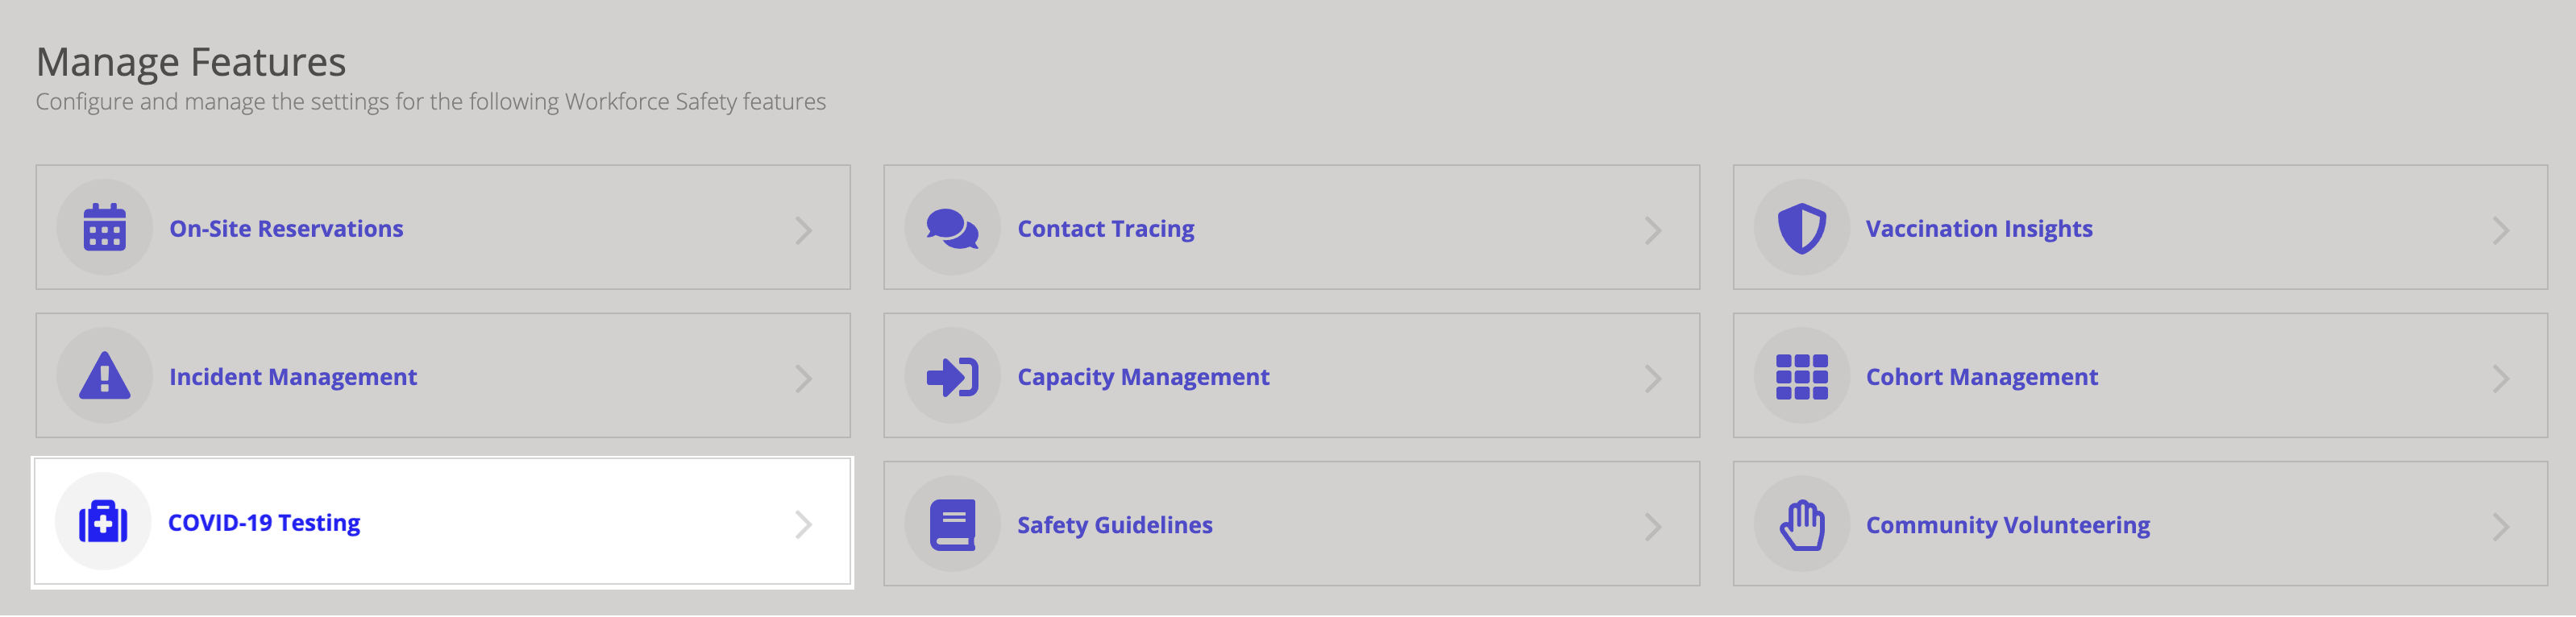
From the Manage Features section, you can easily configure and manage the workflows and settings for specific Workforce Safety features to create and report incidents, request specific COVID-19 health information you want your employees to submit, identify who employees came in contact with while on site, and much more.

Response and configuration managers can quickly and easily toggle some features of Workforce Safety on or off.
This section describes the site features that you can configure from the Manage Features section, including:
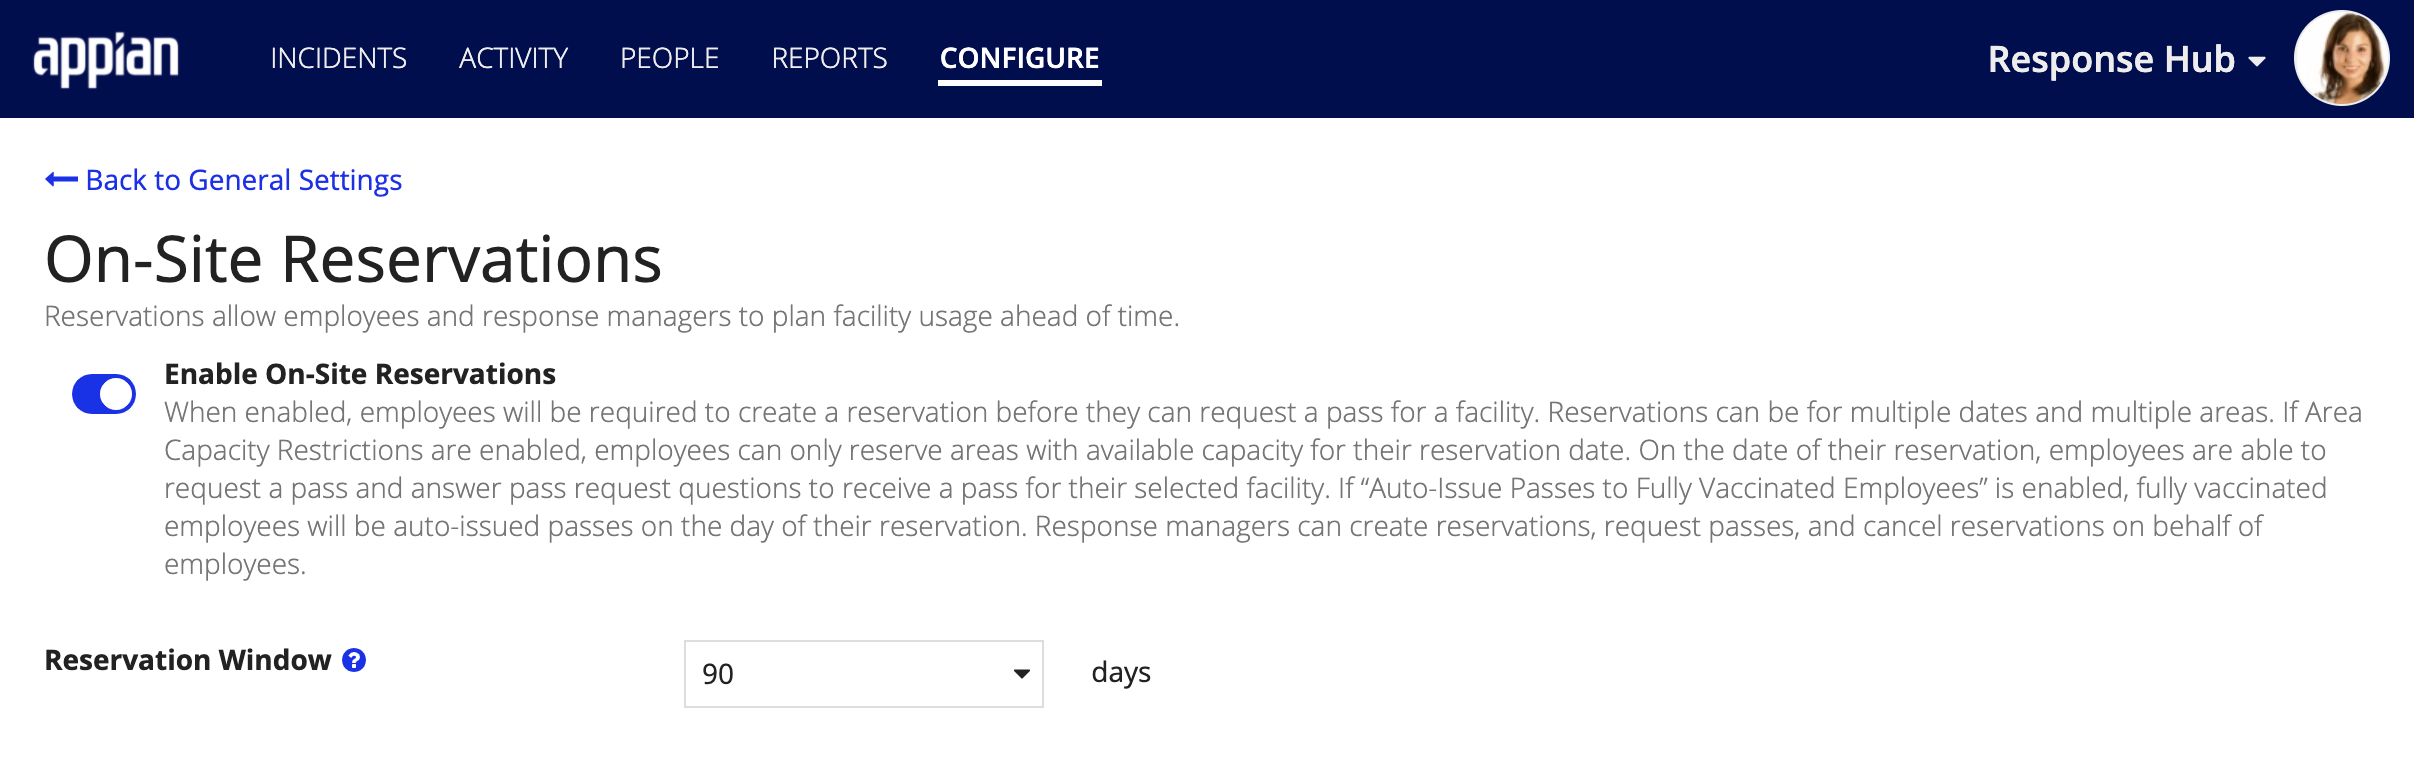
On-site reservations allow your employees to create reservations to ensure they have a seat in advance of their on-site visit. When this feature is enabled, you'll know which employees to expect at a given facility on any given day, providing you with the information you need to effectively manage your site capacity. This allows you to quickly determine how many resources you'll need at each of your facilities and if you'll need to conduct pre-visit protocols at a specific site.
Response managers also have the ability to create on-site reservations for other users.
By default, the Enable On-Site Reservations feature is toggled off. When toggled on, users are impacted in the following ways:
To enable on-site reservations:
Note: When this feature is toggled on, a warning message displays to inform you how many current employees reservations you have in the system and the impact of turning this feature off.
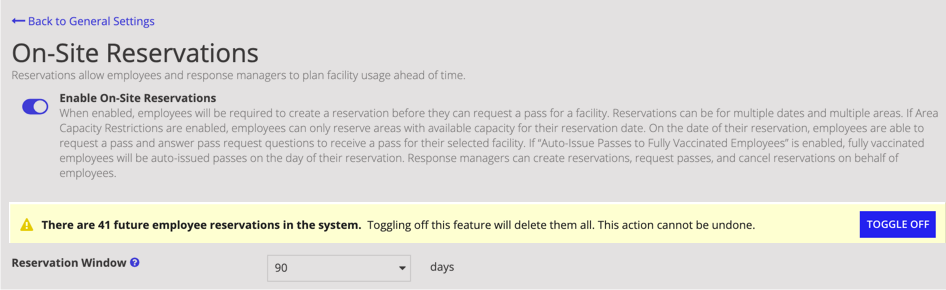
Turning the Enable On-Site Reservations toggle off deletes and cancels all active reservations. After a reservation is deleted or canceled, it cannot be retrieved but must be recreated by the user or a response manager.
Control how far in advance your employees or response managers can create a reservation by configuring the Reservation Window setting. This setting allows you to quickly and easily define the number of days in advance of an on-site visit you want to allow an employee or response manager to create a reservation.
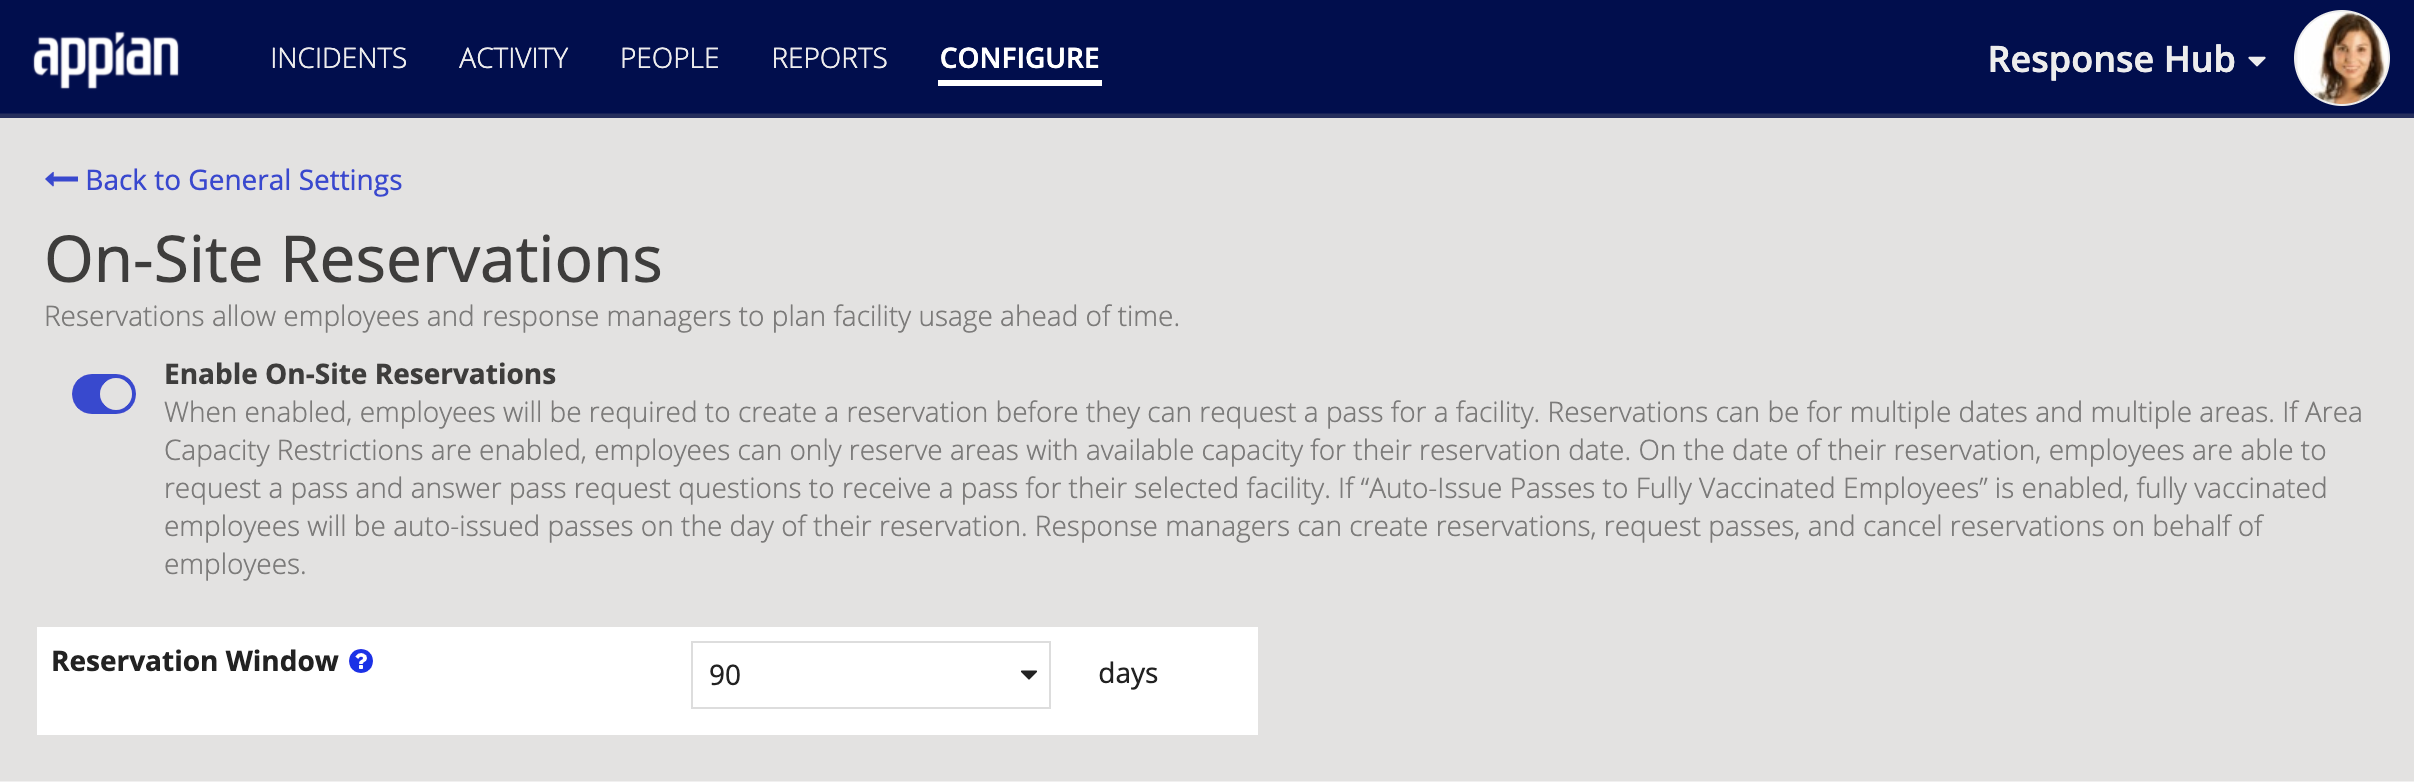
Simply use the Reservation Window drop-down menu to choose a timeframe, between 3-90 days, that defines the number of days your users can create an on-site reservation before their selected reservation date.
Contact tracing allows your users to log the people and areas that they had contact with on a specific day. From the Manage Features section, you can configure when you want the contact tracing workflow to display for your users.
After users have requested a pass at least once, they can log the people and areas they were in contact with during a given day. While users can always log their contacts through the Log your contacts section of the homepage, this feature adds a contact logging step before users can request a pass.
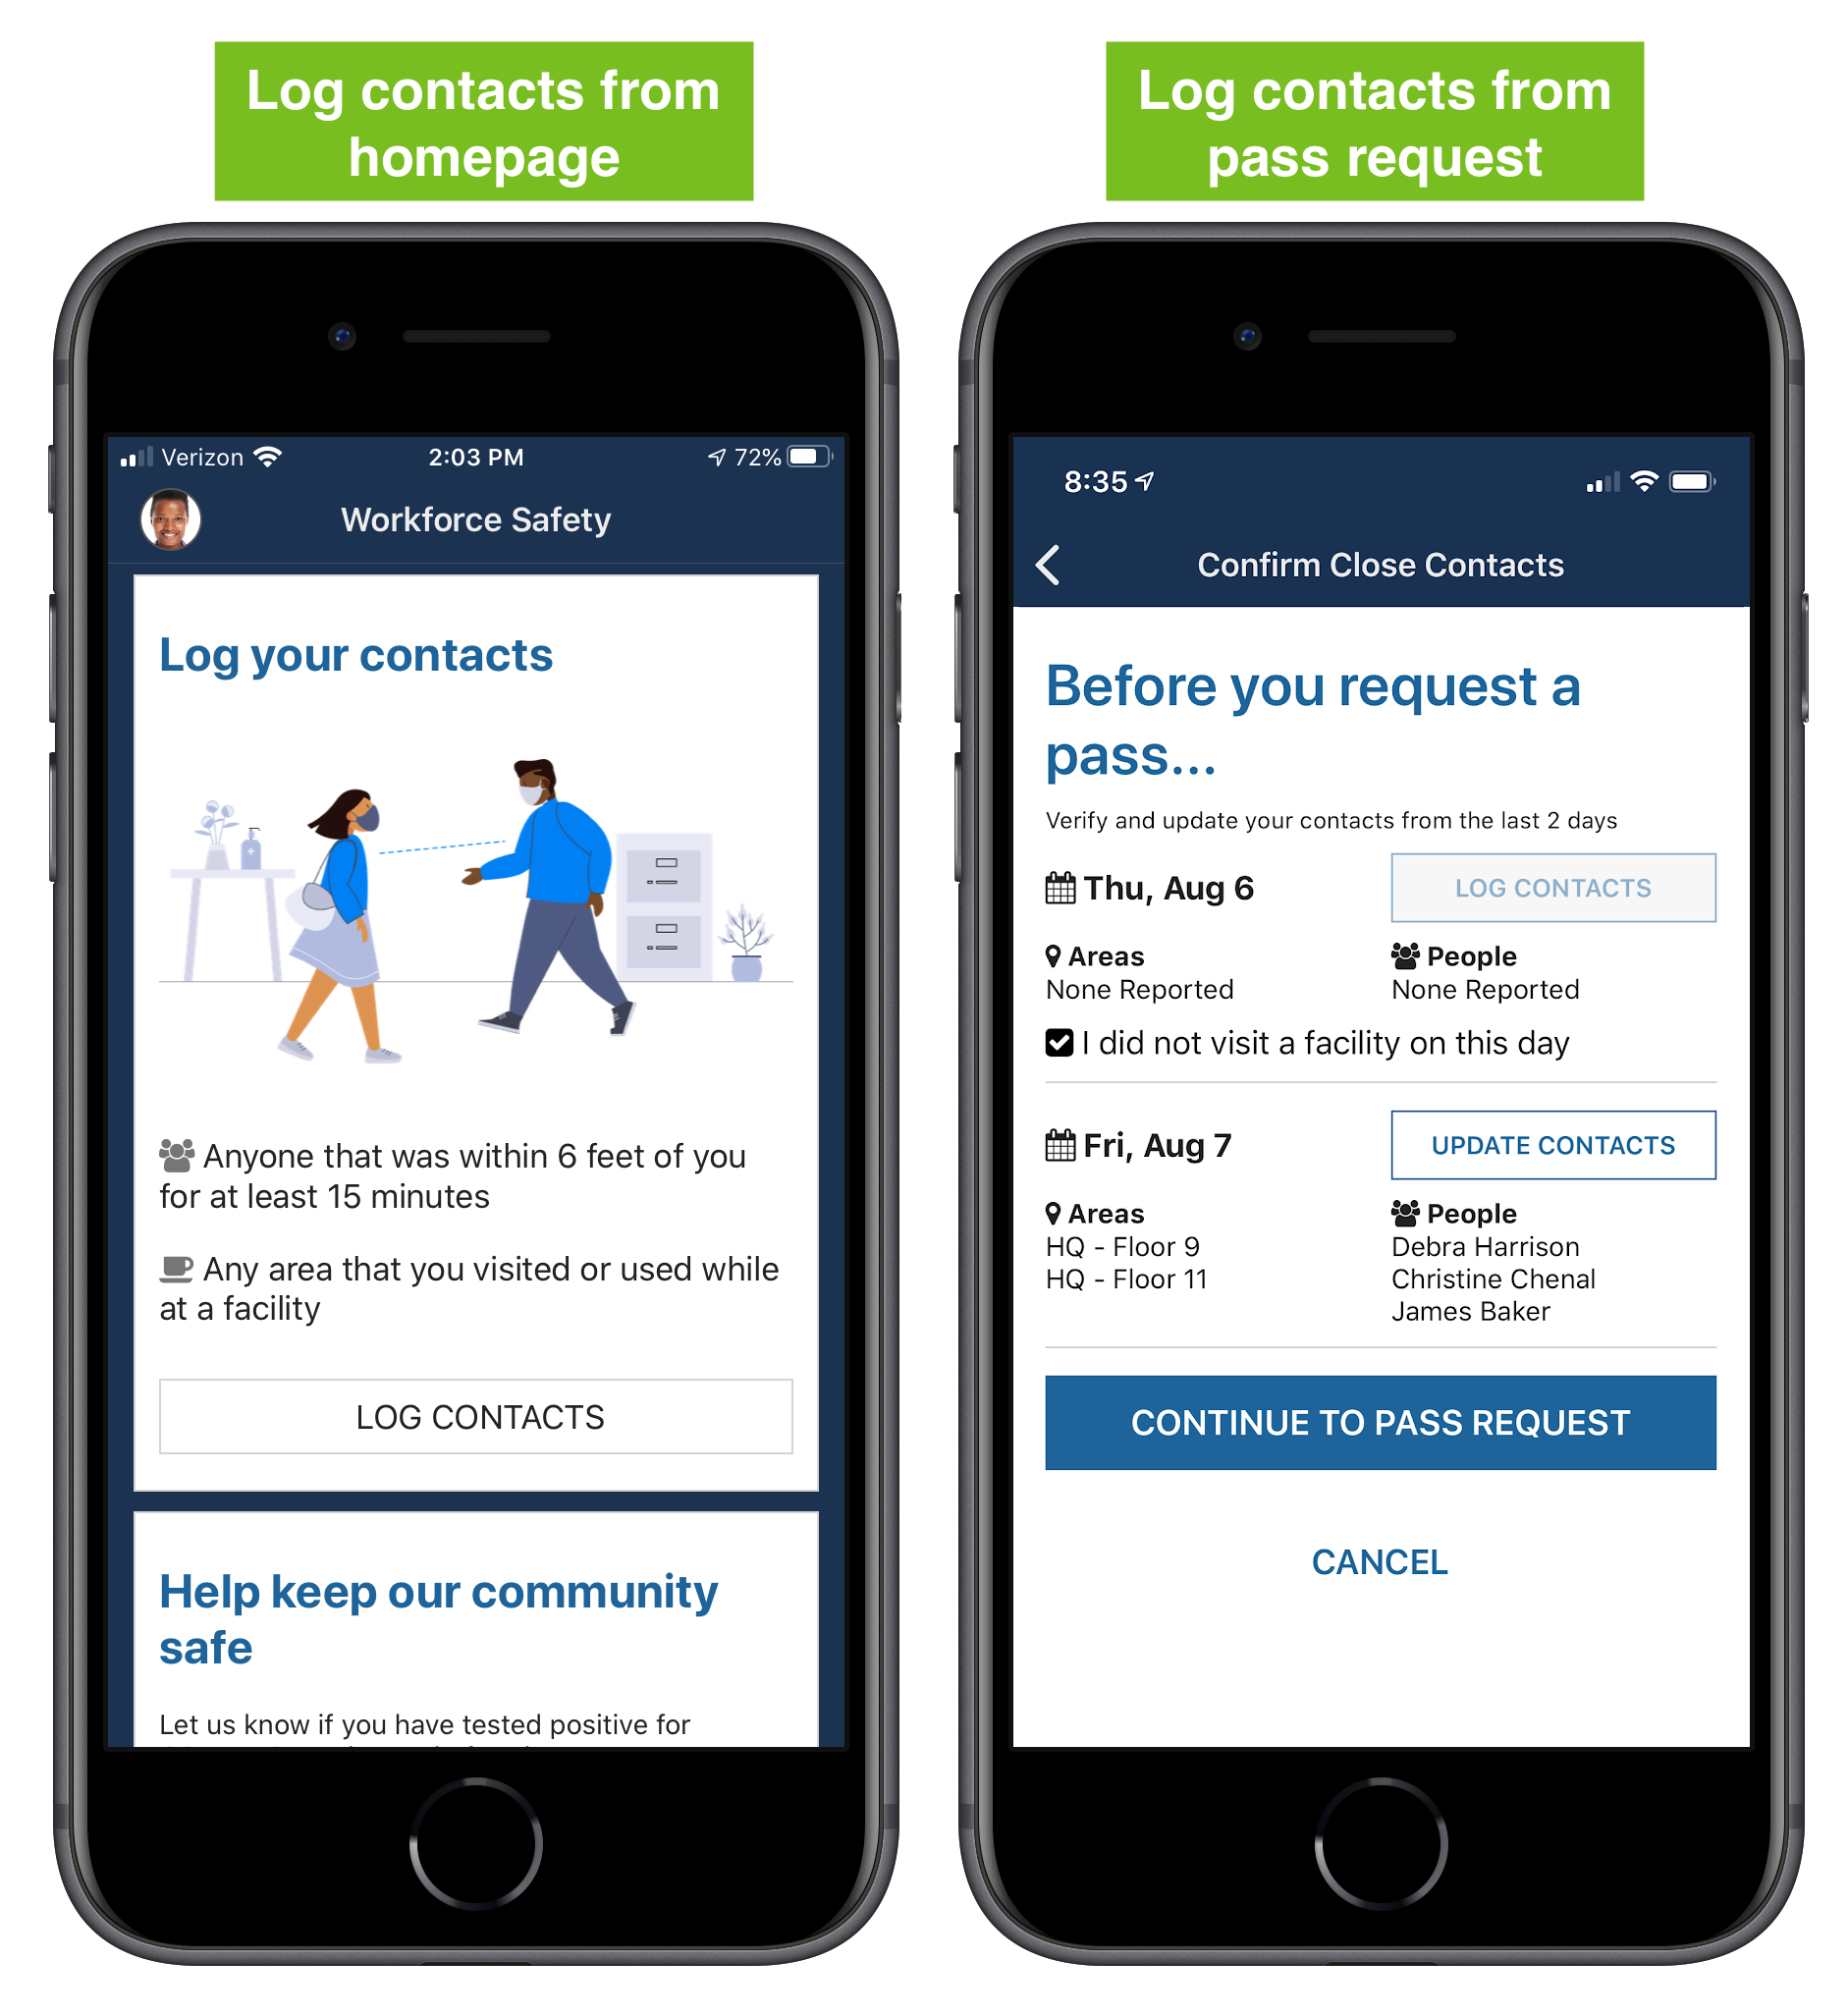
When toggled on, users will be required to review the contacts they have logged for the last two days they visited a facility before completing the pass request questionnaire or log their contacts for those days. Users will log or update logged contacts before completing the pass request questionnaire.
If toggled off, users will not be asked to log their contacts before each pass request. They will still be asked to log their contacts from the homepage.
After receiving their first pass, internal users can log the people and areas that they recently had contact with while they were onsite from the solution's landing page.
If toggled off, internal users will not be able to log the people and areasthey had contact from the landing page.
Understanding how many of your employees have been vaccinated or tested positive for COVID-19 can help you make critical decisions about your pandemic response. Vaccination Insights allows you to configure and manage the health information workflow.
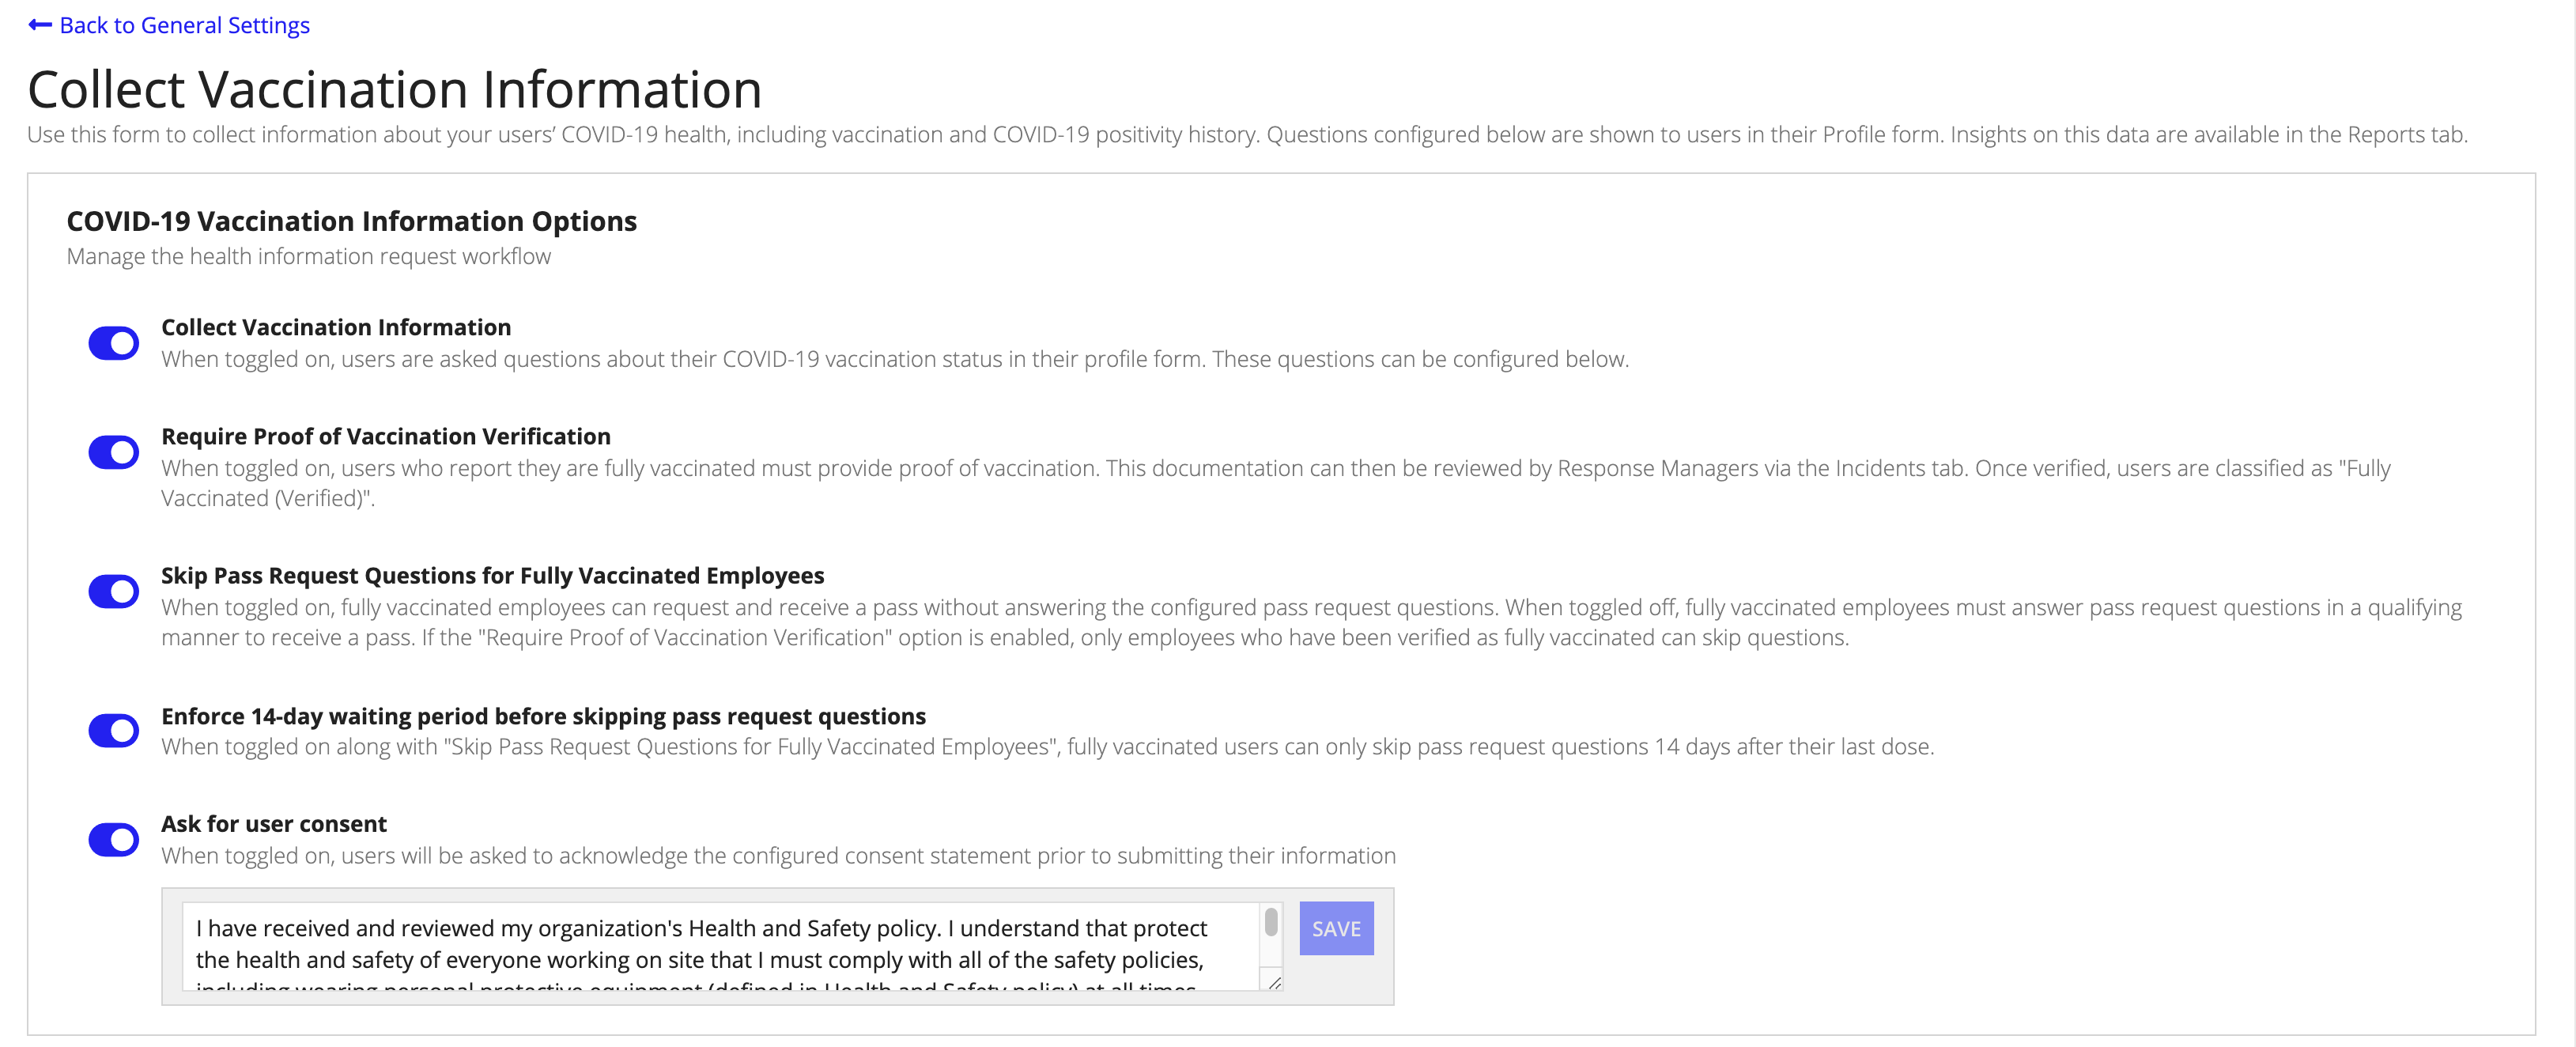
When you enable this feature, Workforce Safety collects COVID-19 health information from your users via their Profile form. You can easily configure, activate, and require specific questions to collect the health information you need. This may include collecting information from your users about a 1 or 2-dose vaccine series they received and any additional booster doses, whether or not they are partially or fully vaccinated, as well as the date when they received their last vaccine dose.
Easily require users who report they are fully vaccinated to provide proof they received all of the vaccinations required by your organization in order to meet the Fully Vaccinated status. When you toggle the Require Proof of Vaccination Verification setting on, users who report they are fully vaccinated must provide proof of vaccination by uploading documentation or taking a photo from their mobile device of their vaccination documentation.

When toggled on, fully vaccinated employees can request and receive a pass without answering the configured pass request questions. When toggled off, fully vaccinated employees must answer pass request questions in a qualifying manner to receive a pass. If the "Require Proof of Vaccination Verification" option is enabled, only employees who have been verified as fully vaccinated can skip questions.
The Ask for user consent feature allows you to configure whether or not you want to require users to provide consent before they submit their vaccination status or other COVID-19 health information.
Use the form in this section to populate the consent form with a text notice that adheres to your organization's legal and compliance requirements.
When toggled on, users will be asked to acknowledge the configured consent statement prior to submitting their information.

When toggled off, users are not required to provide consent.
Easily configure health-related questions to collect information about the vaccination status and COVID-19 health information of your users, including their:
From the Vaccination & COVID-19 History Configuration section, you can determine which questions you want to activate and which questions users are required to answer. Users will see all configured and active questions in their Profile form.
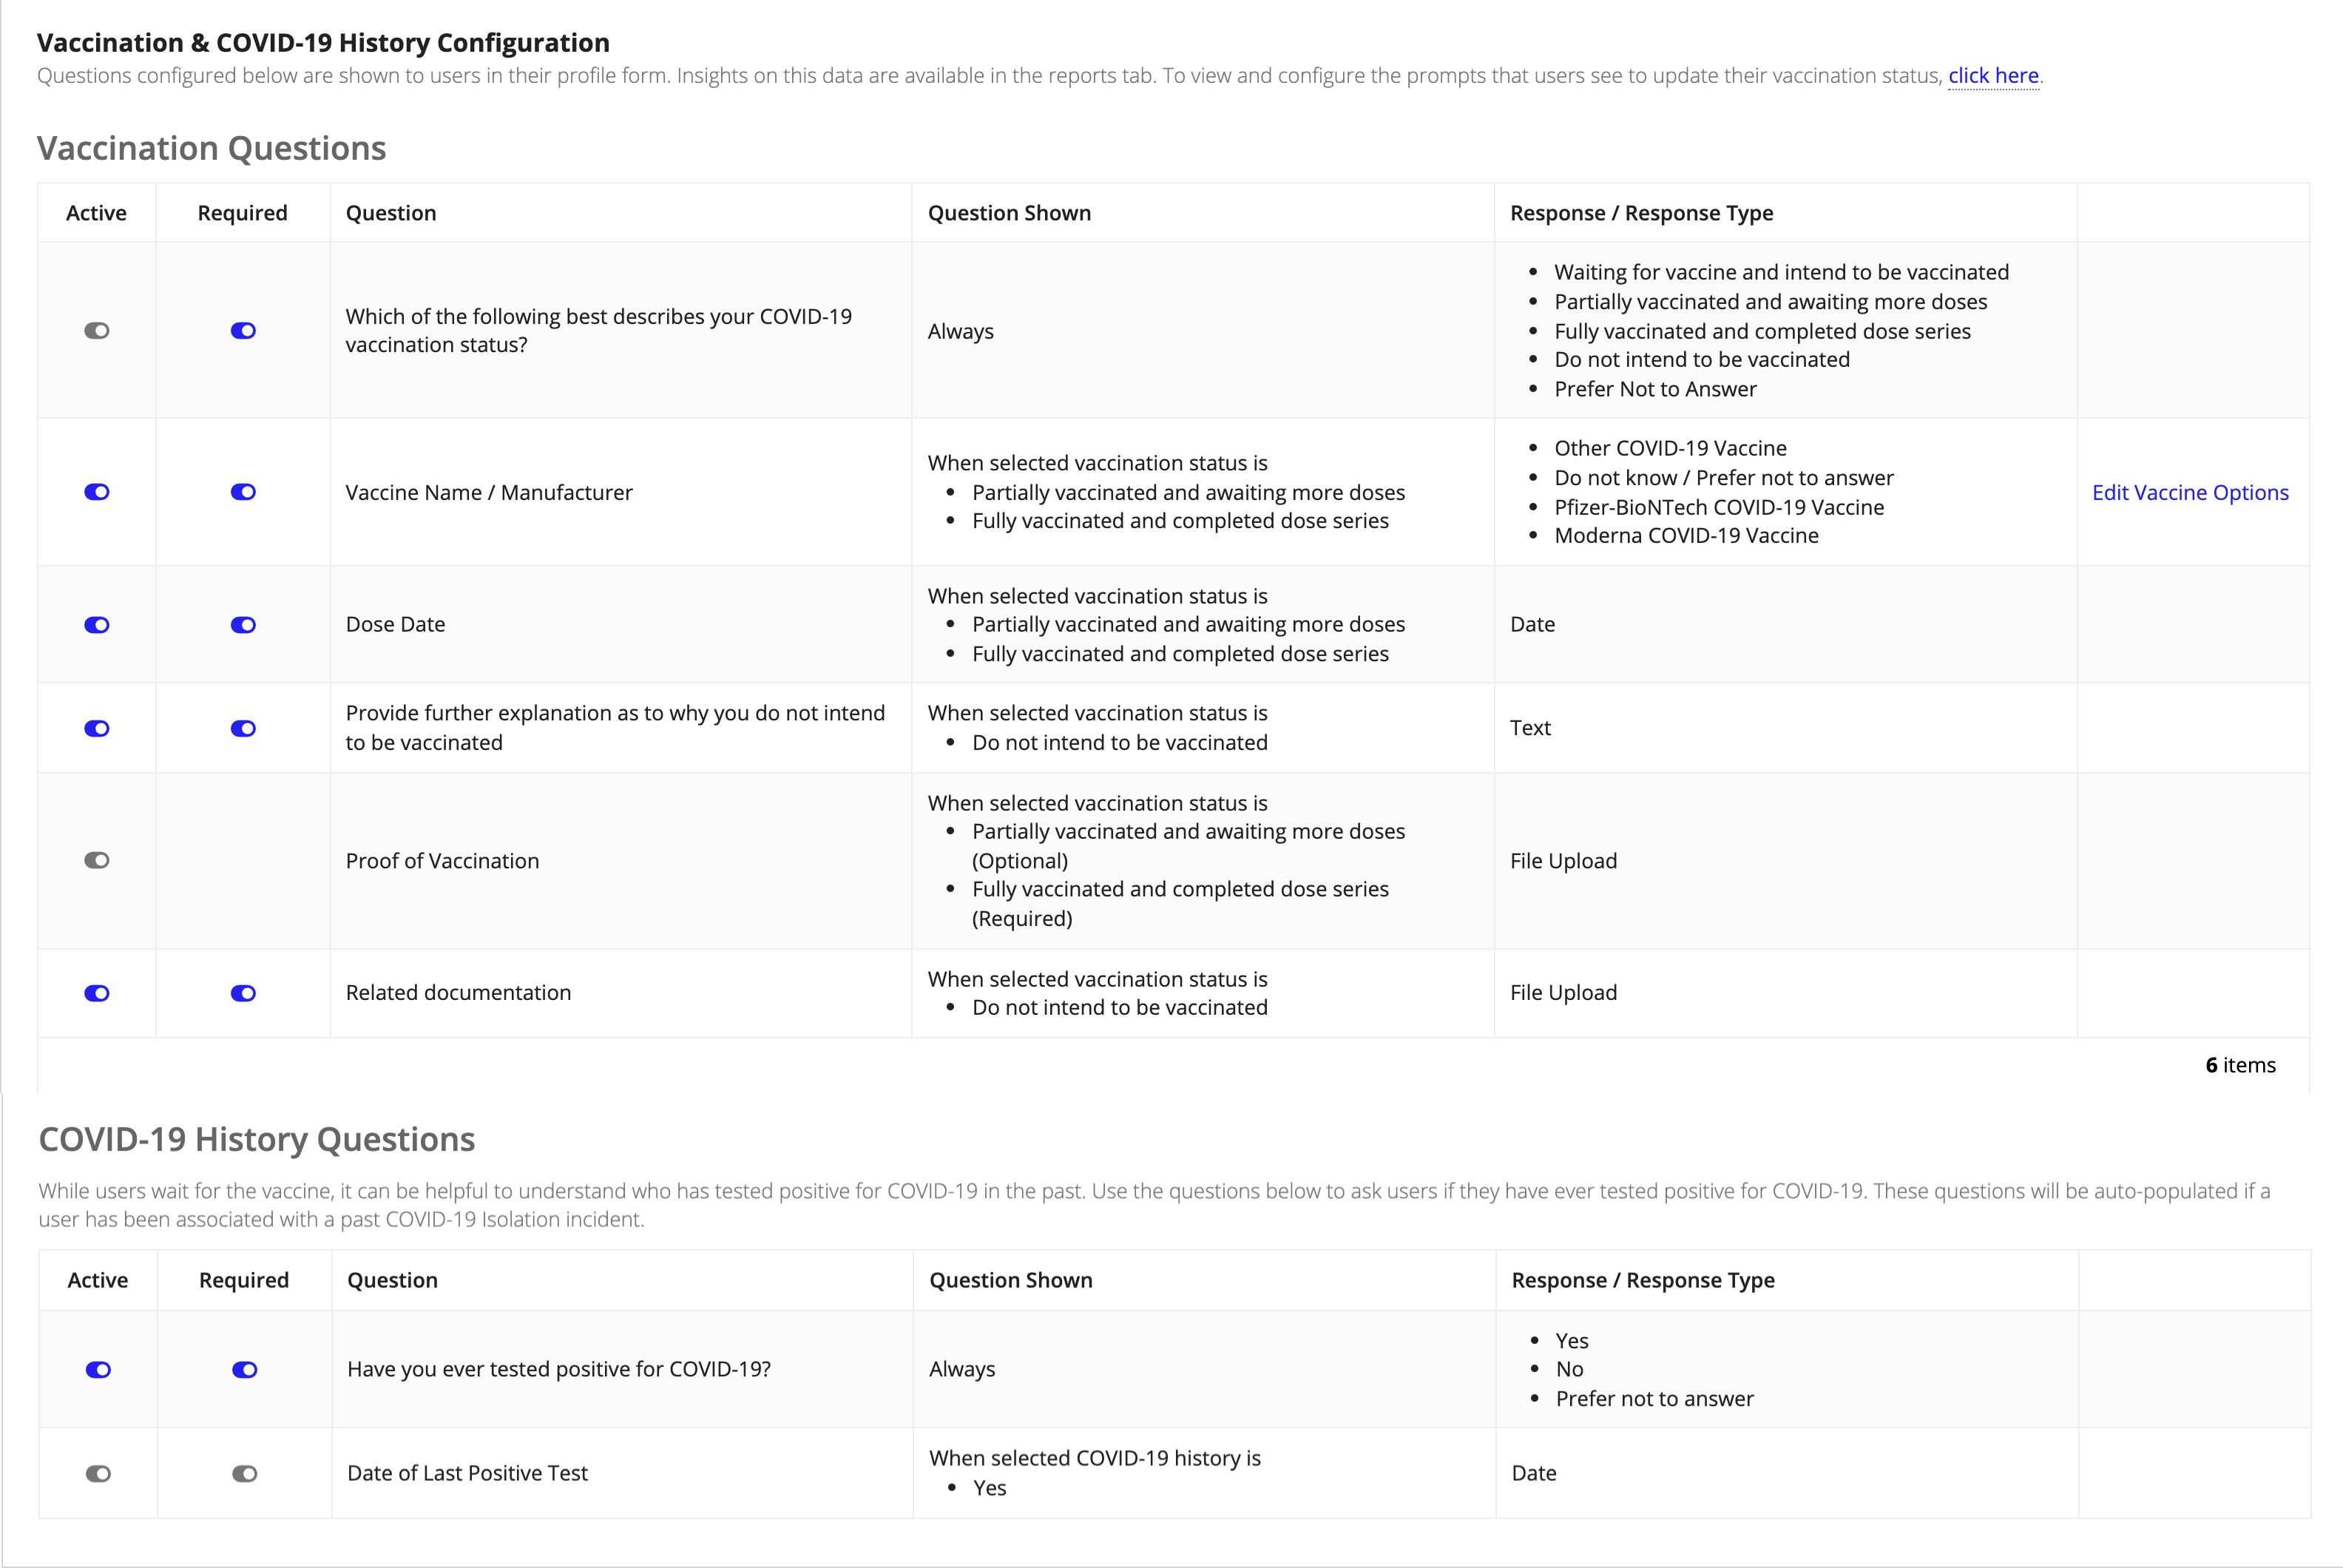
If you require users to answer the Vaccine Name/Manufacturer question, you may want to edit the answer selections users can choose from when answering this question in their user profile.
Click Edit Vaccine Options to open the Edit Vaccine Options setting.
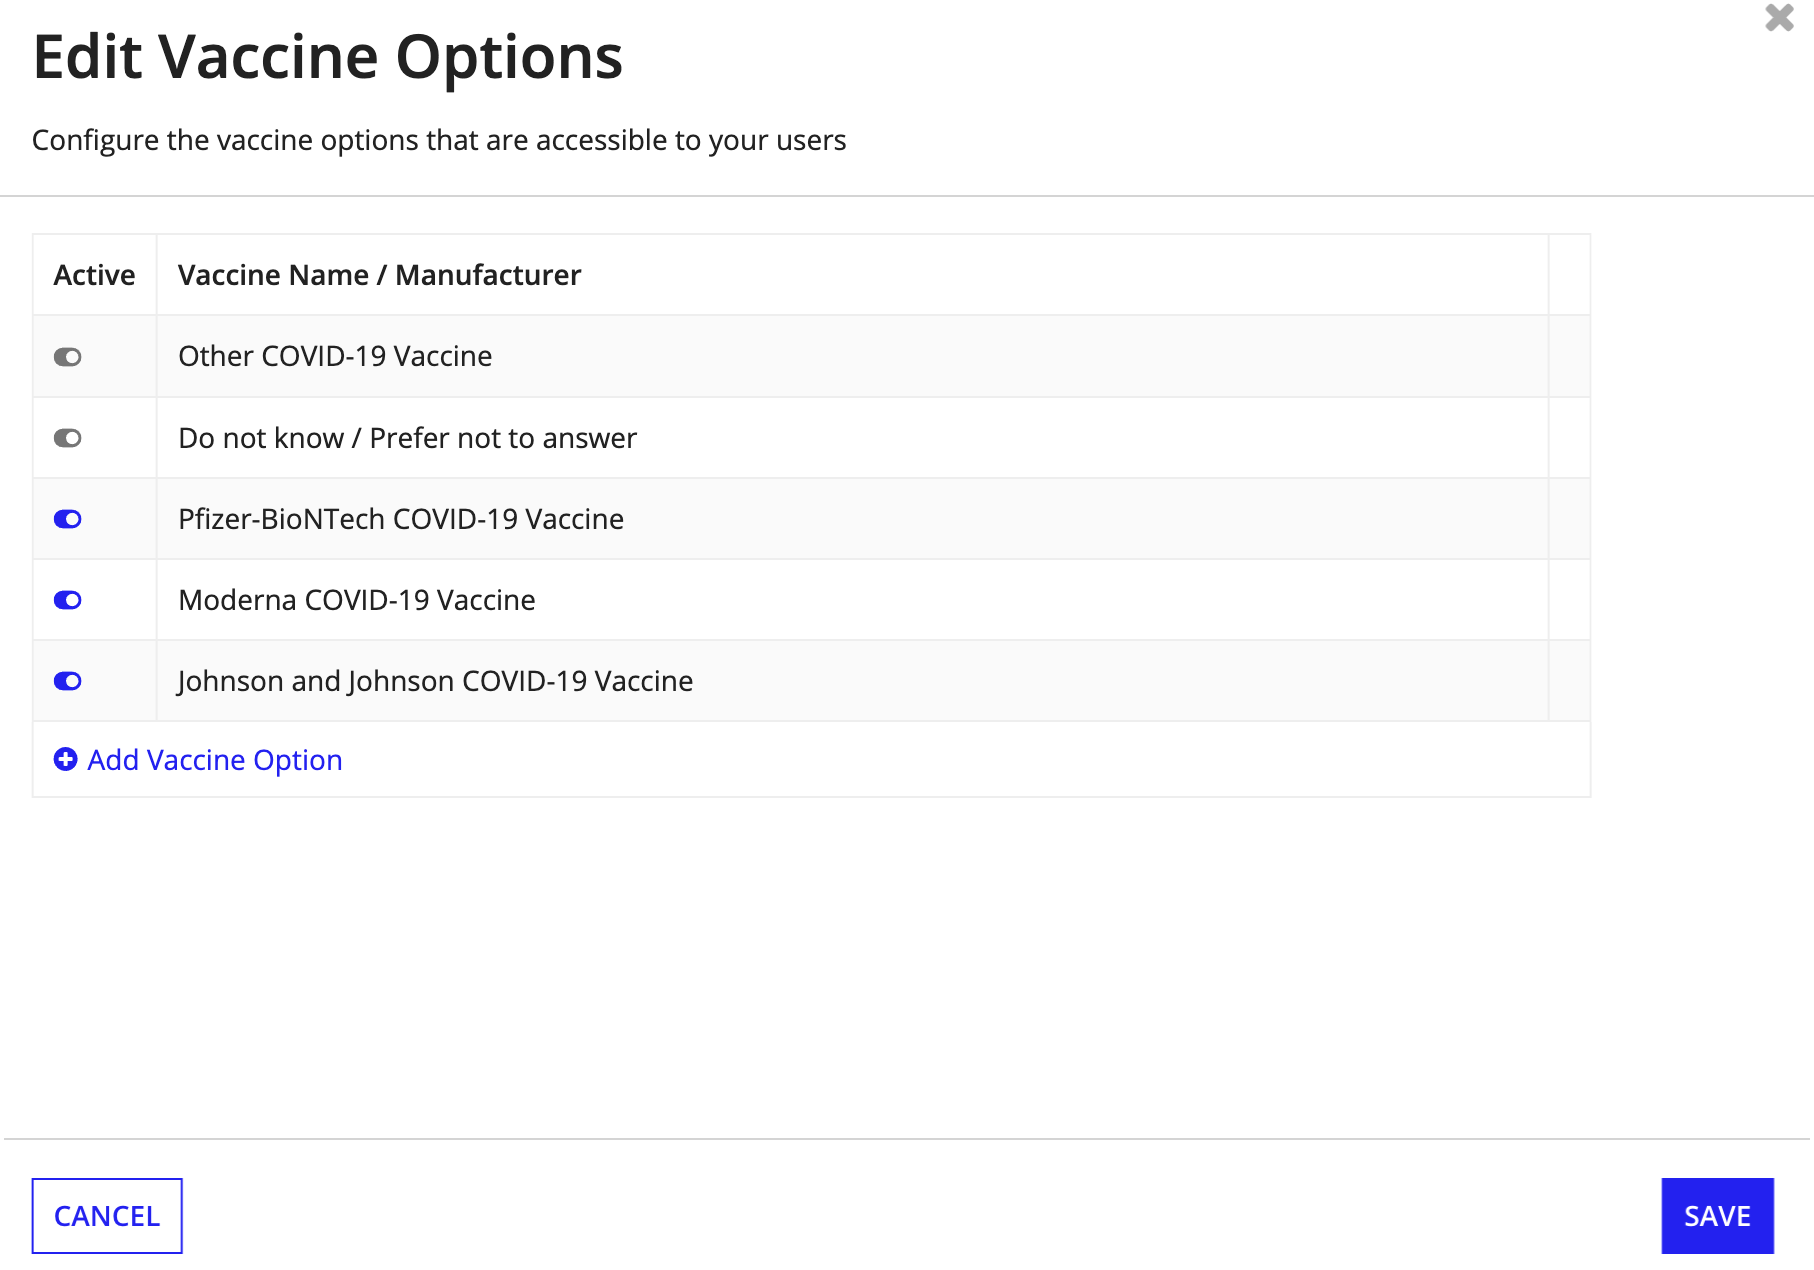
By default, Workforce Safety ships with the following answer selections:
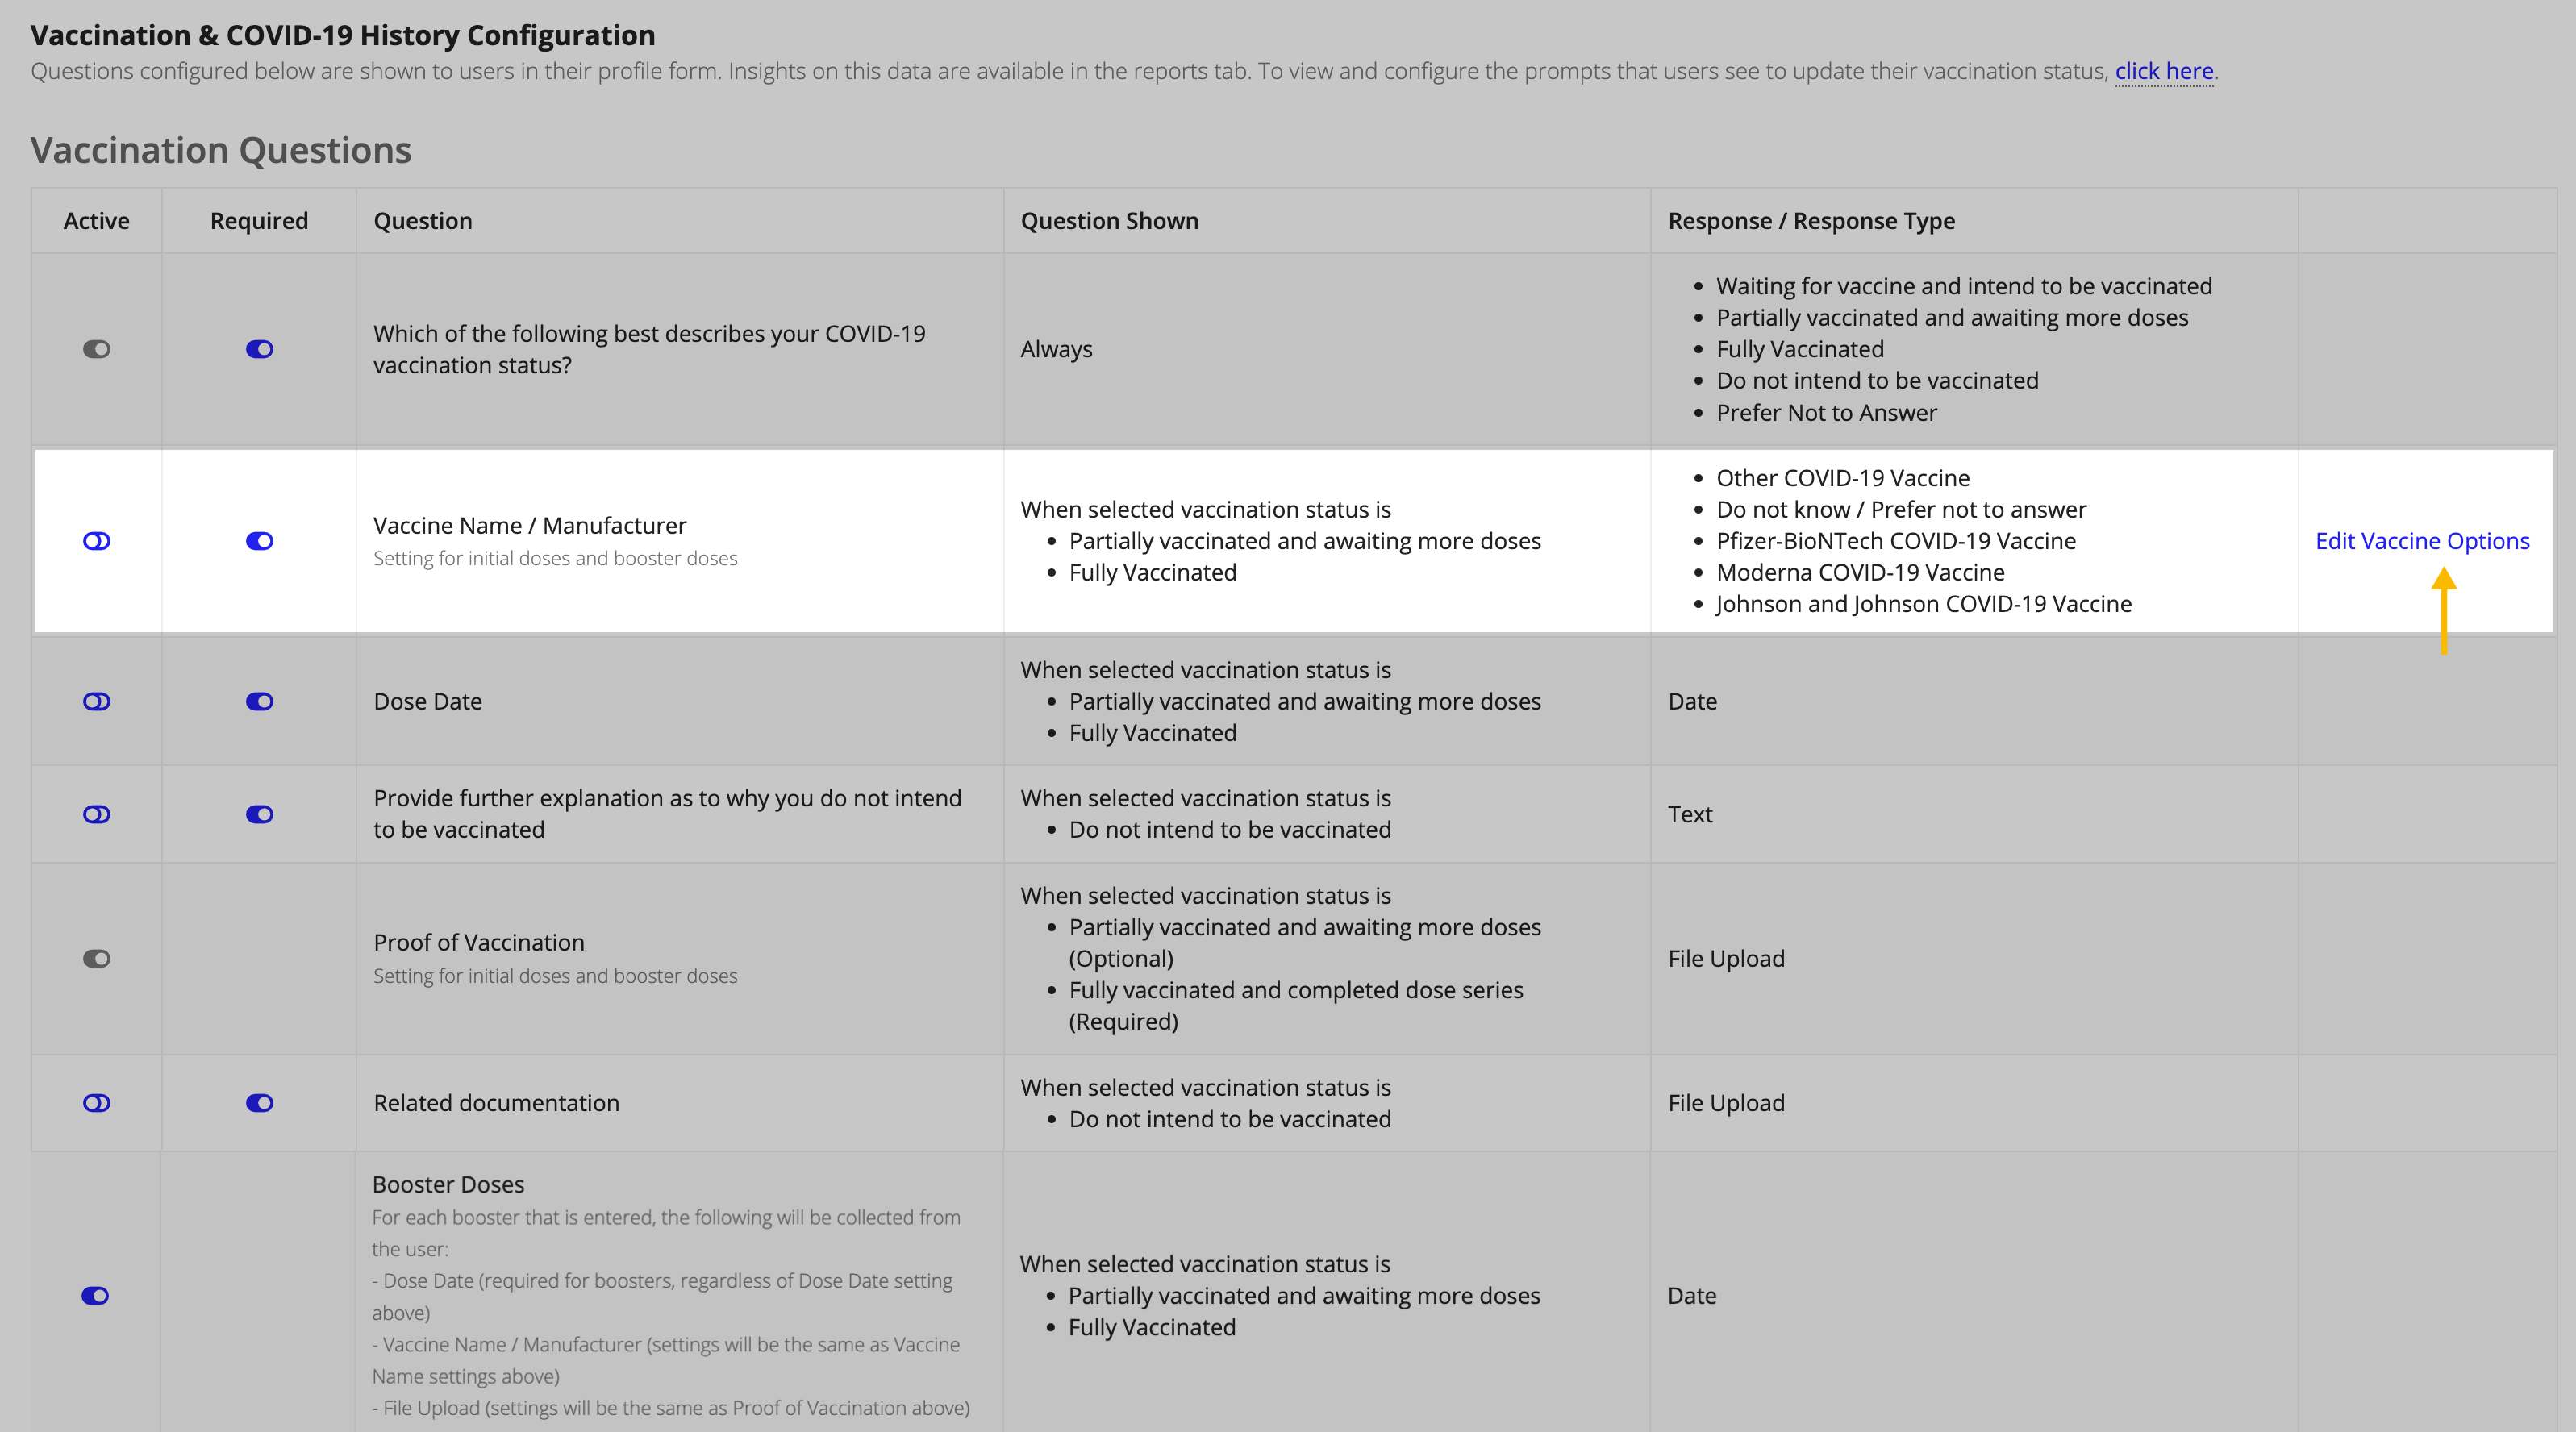
You can enable any answer choice by toggling on its Active setting. To disable one of the default answer choices, simply toggle the Active setting off. When answering the Vaccine Name/Manufacturer question in their user profile, users will not see any answer choice that has been disabled.
You can also add a new answer option by clicking Add Vaccine Option.
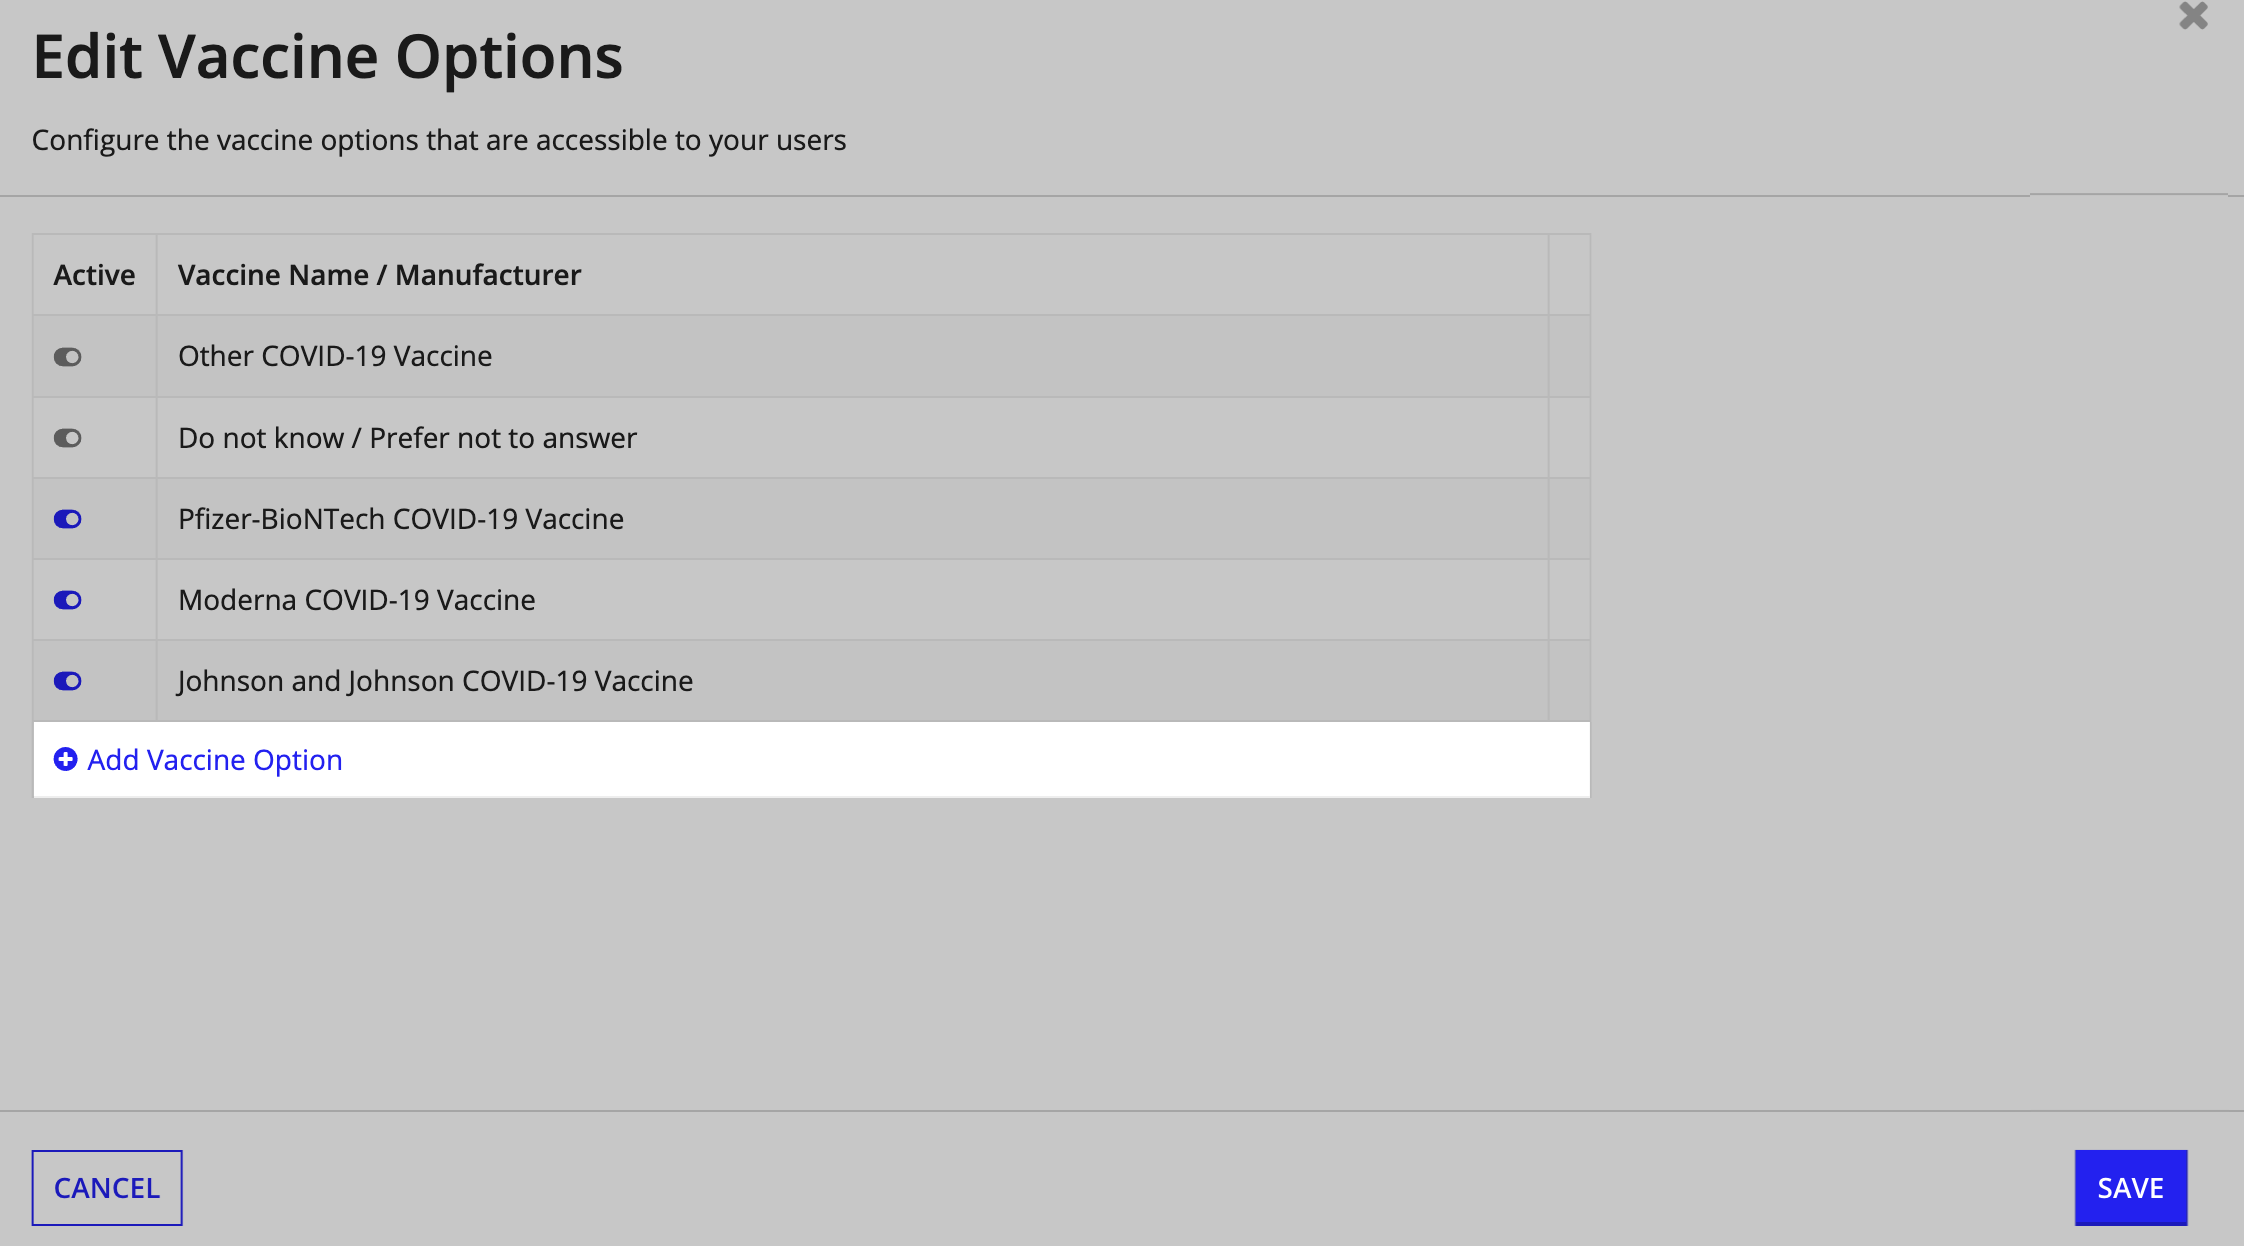
A new field will open that allows you to enter a new vaccine name and manufacturer or a new answer option. Add as many options as you want and click SAVE to update the options list.
Effectively managing incidents is an important aspect of your COVID-19 response and helping your employees feel safe. Response managers can configure incident settings to help keep track of user activity within your organization.
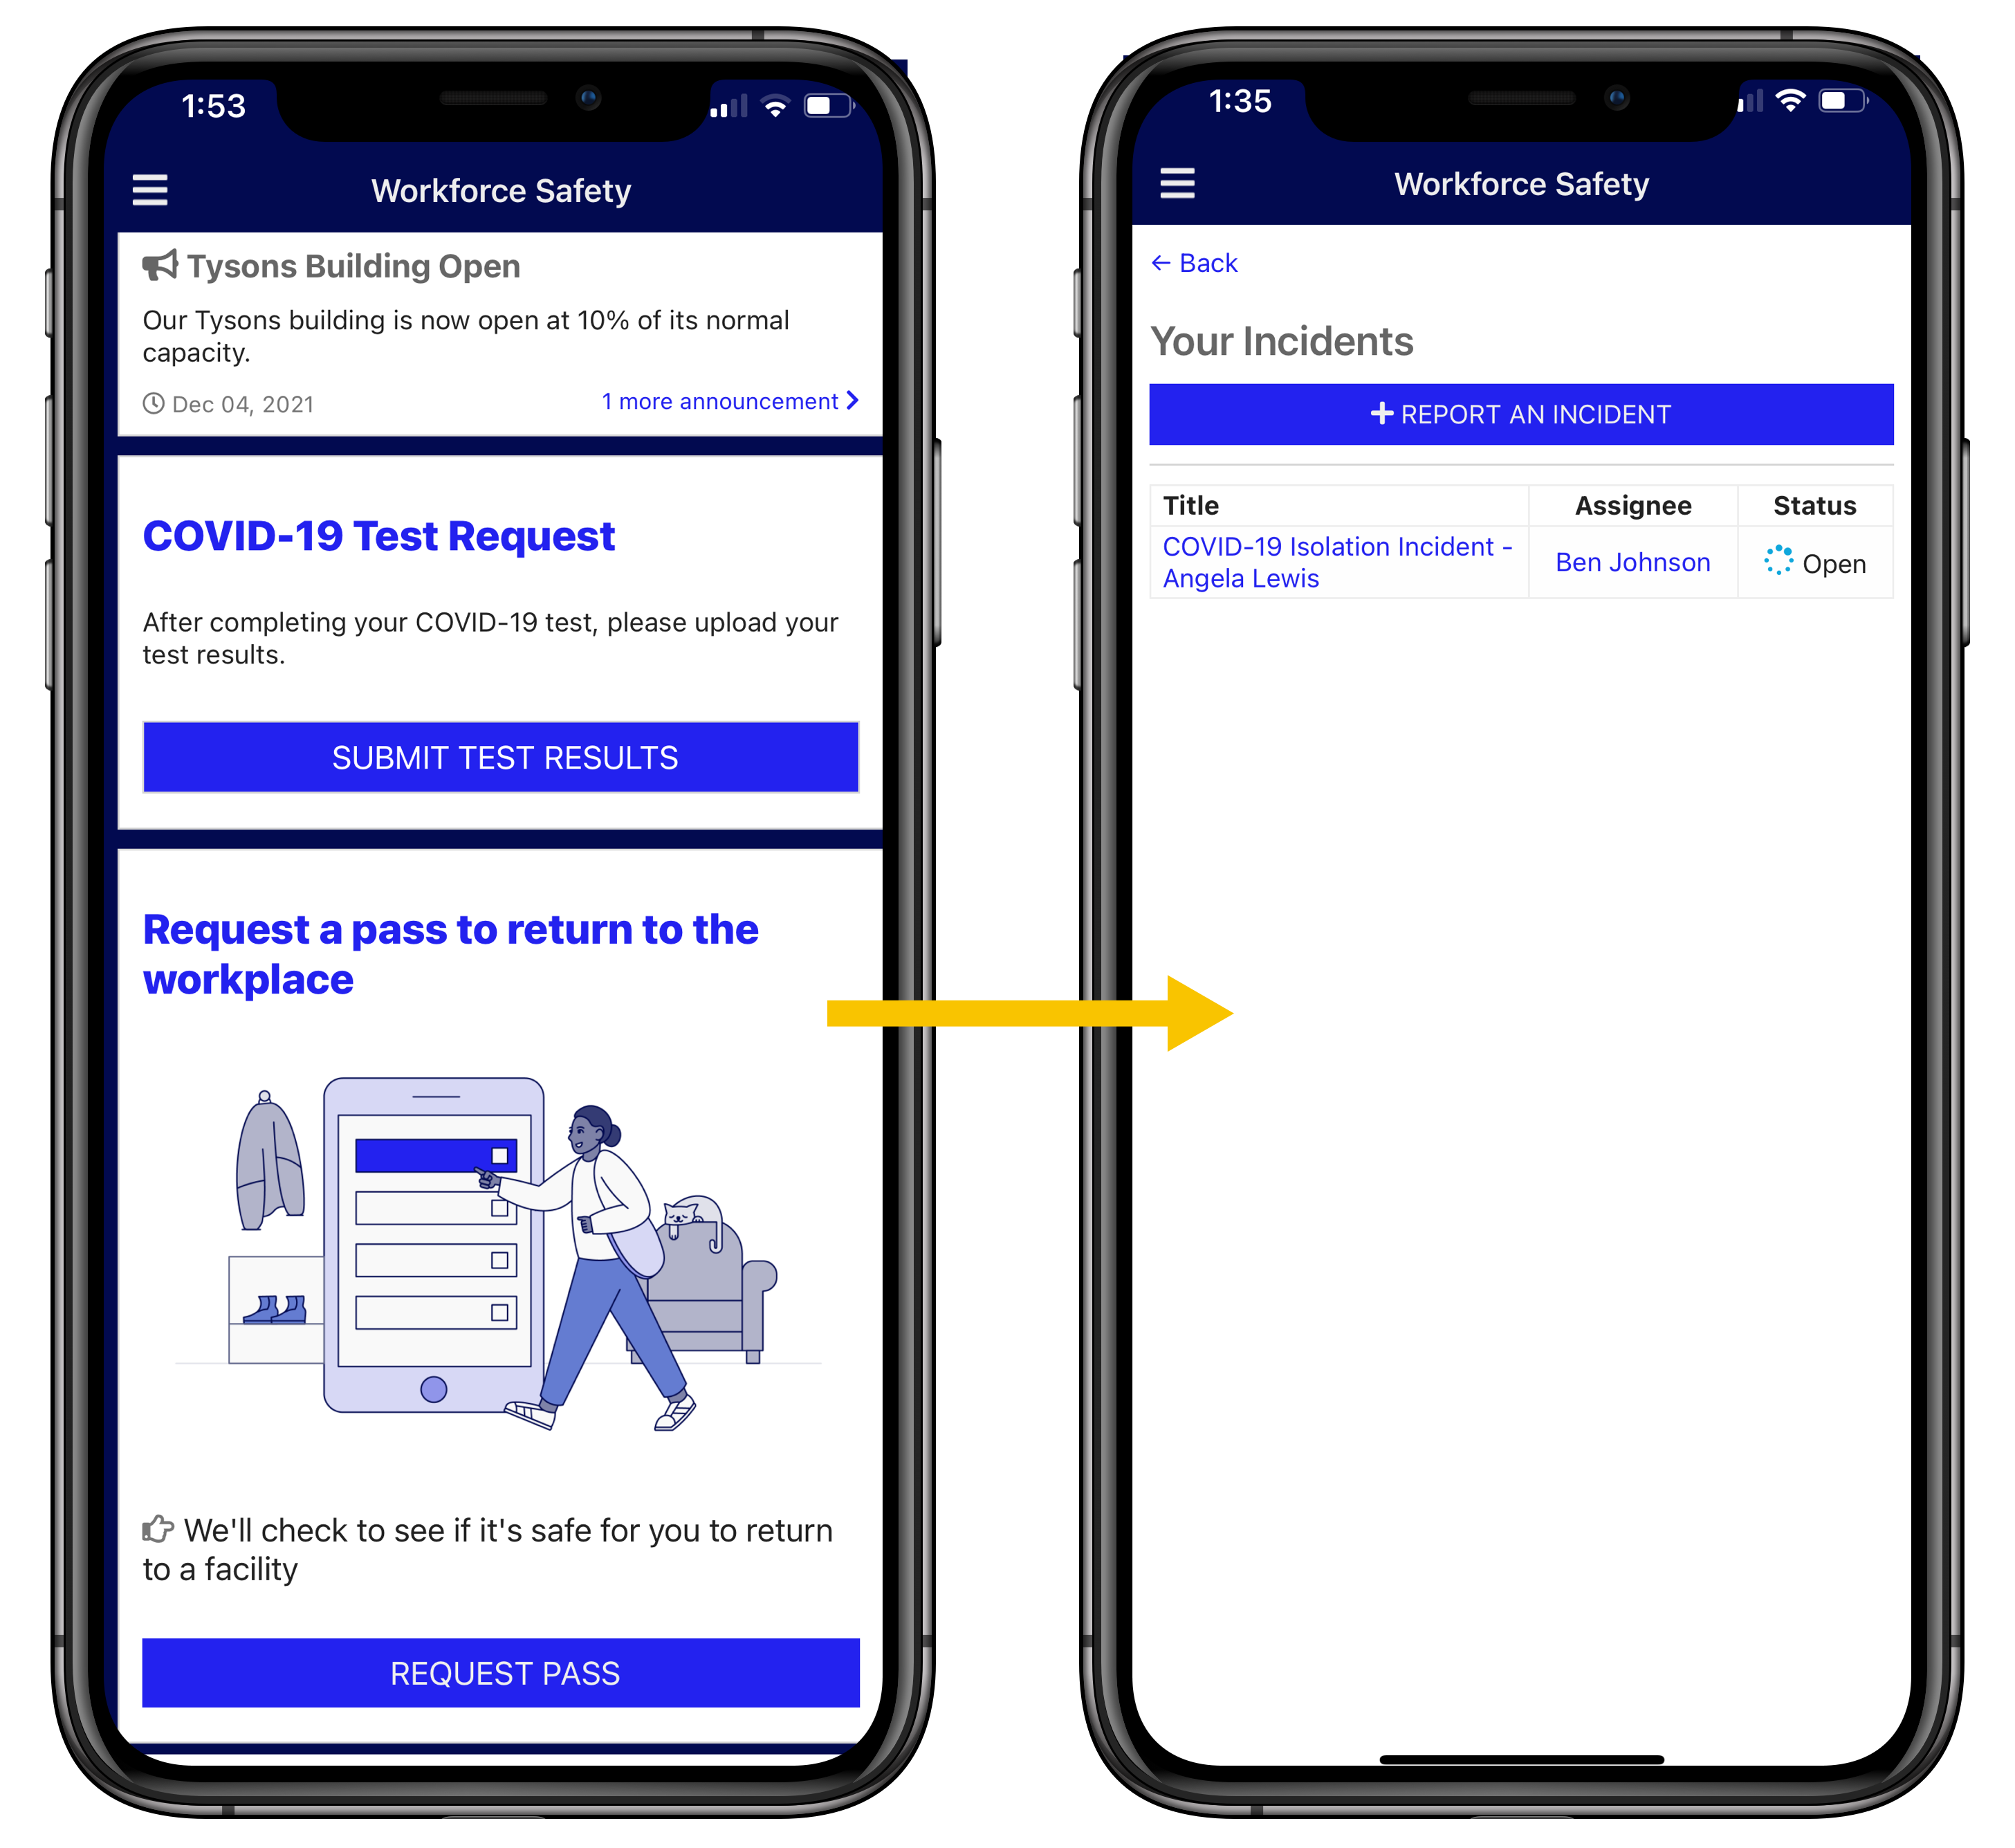
This feature allows users to report an issue to response managers by creating an incident.
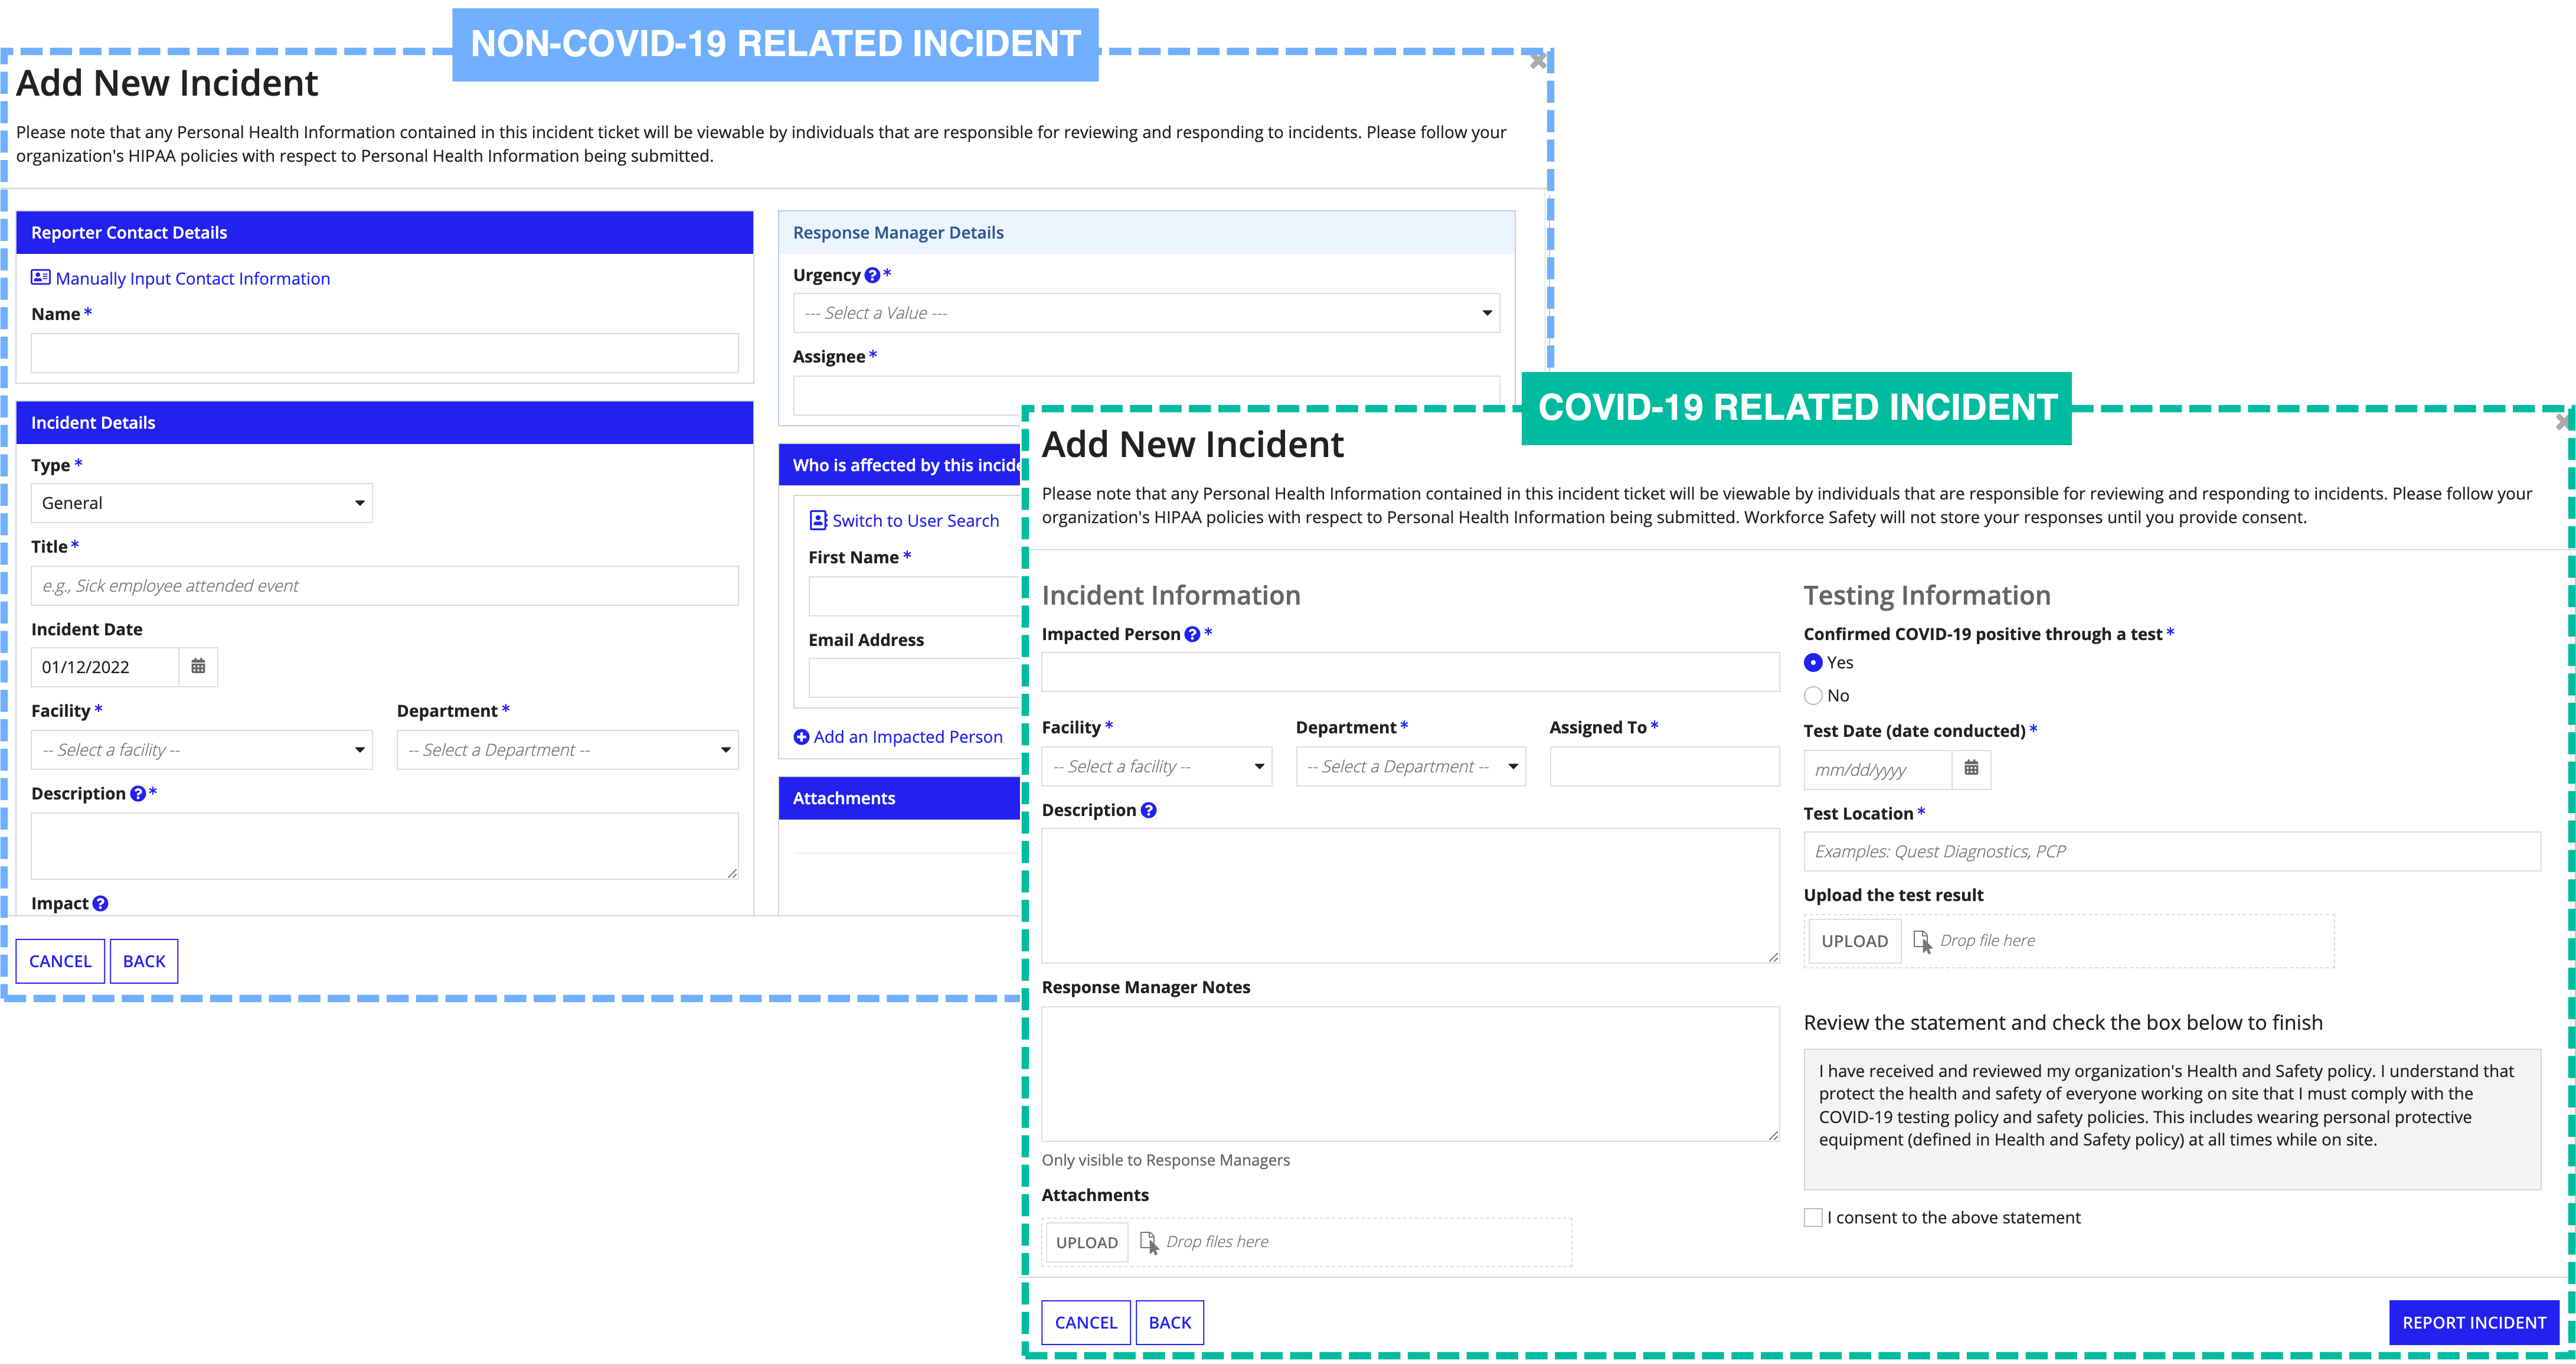
If you prefer to turn this feature off, the report incident section will no longer display on the homepage. If the user has reported an incident in the past, they will still see the Incidents icon so they can view their past incidents.
Toggling this feature off has no effect on creating incidents based on responses to pass requests, surveys, or isolation updates. Response managers still have the ability to create incidents.
Response managers can configure the incident management settings needed for their organization, including:
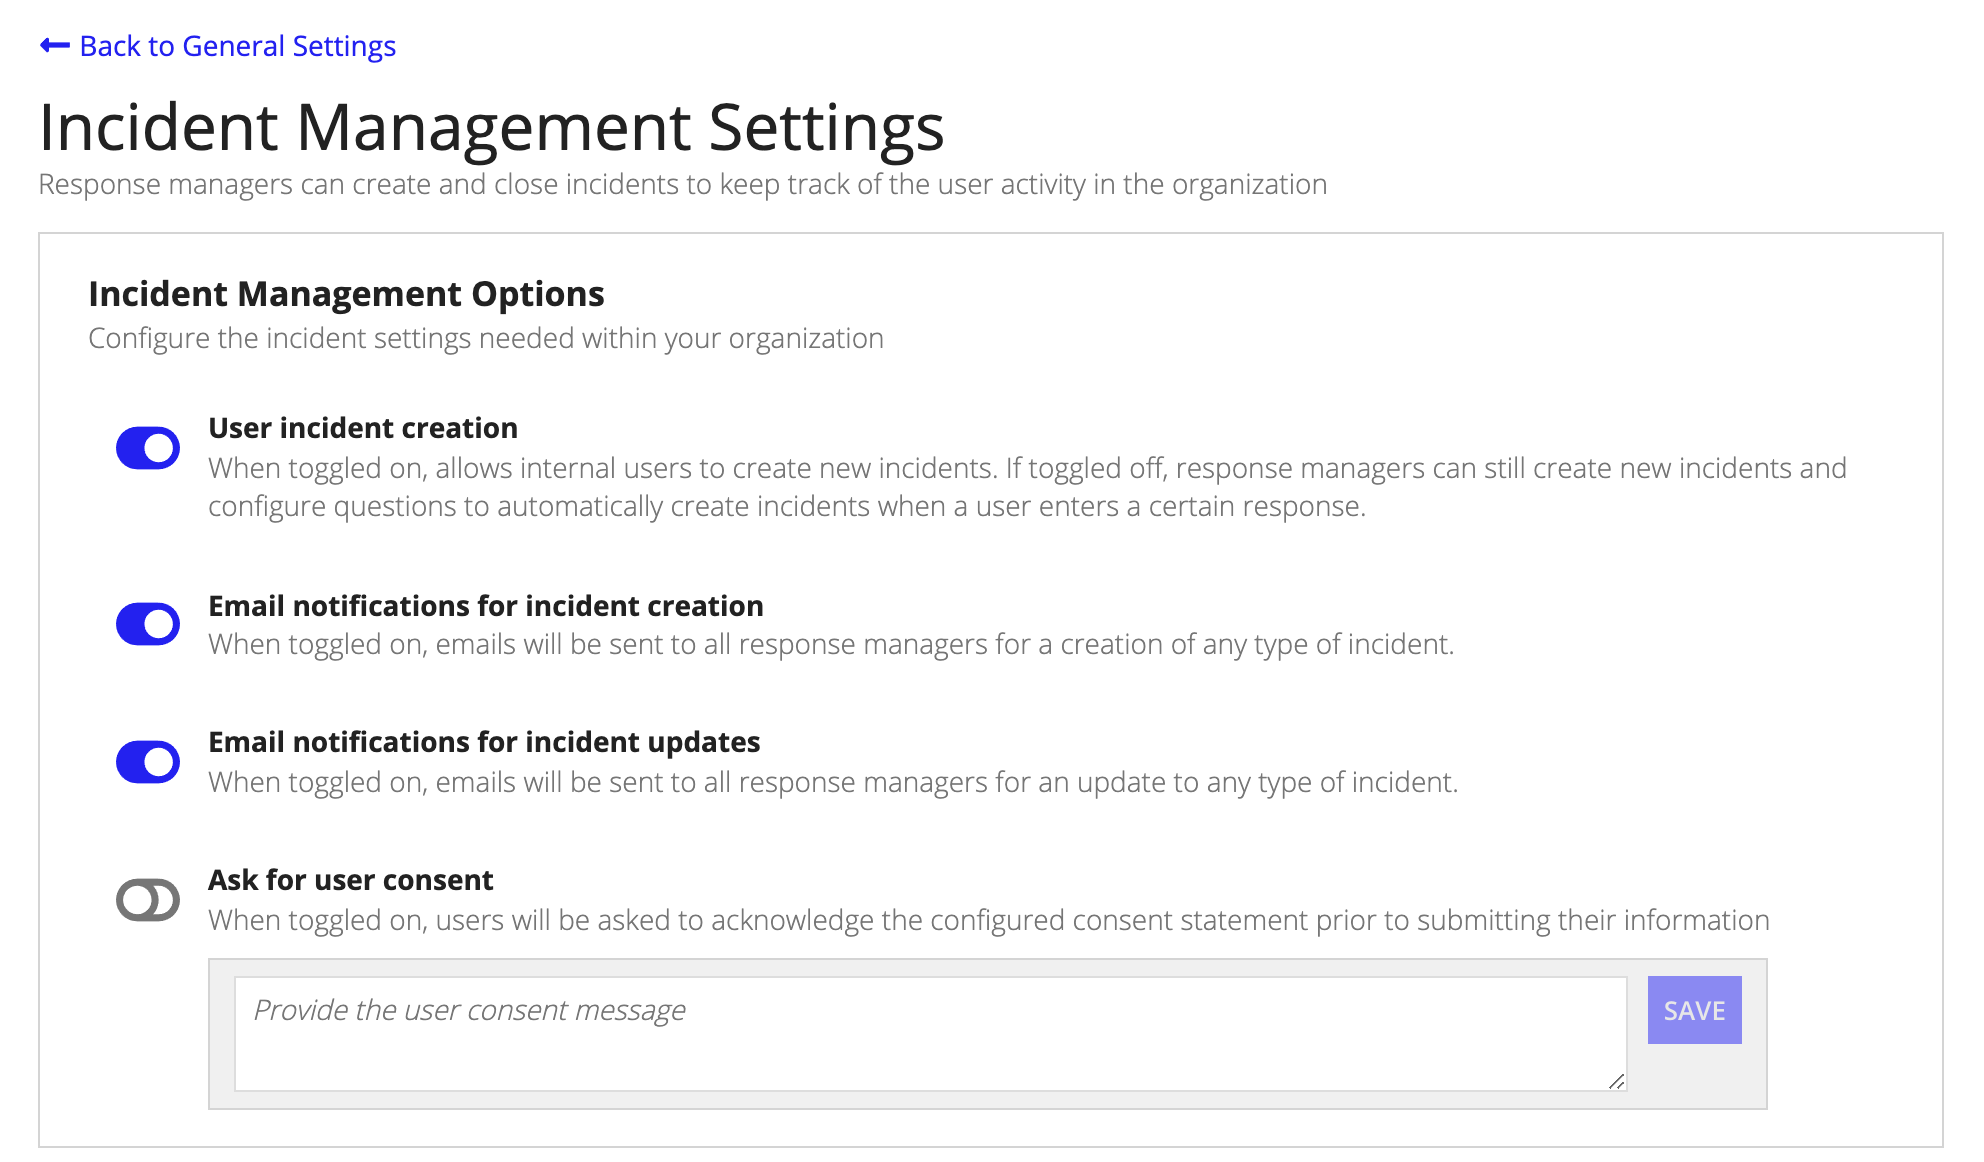
Quickly and easily toggle these settings on and off to manage how incidents are handled. For example, when the User incident creation setting is toggled off, only response managers can create new incidents or trigger the automatic creation of a new incident when a user enters a certain response to a configured questionnaire.
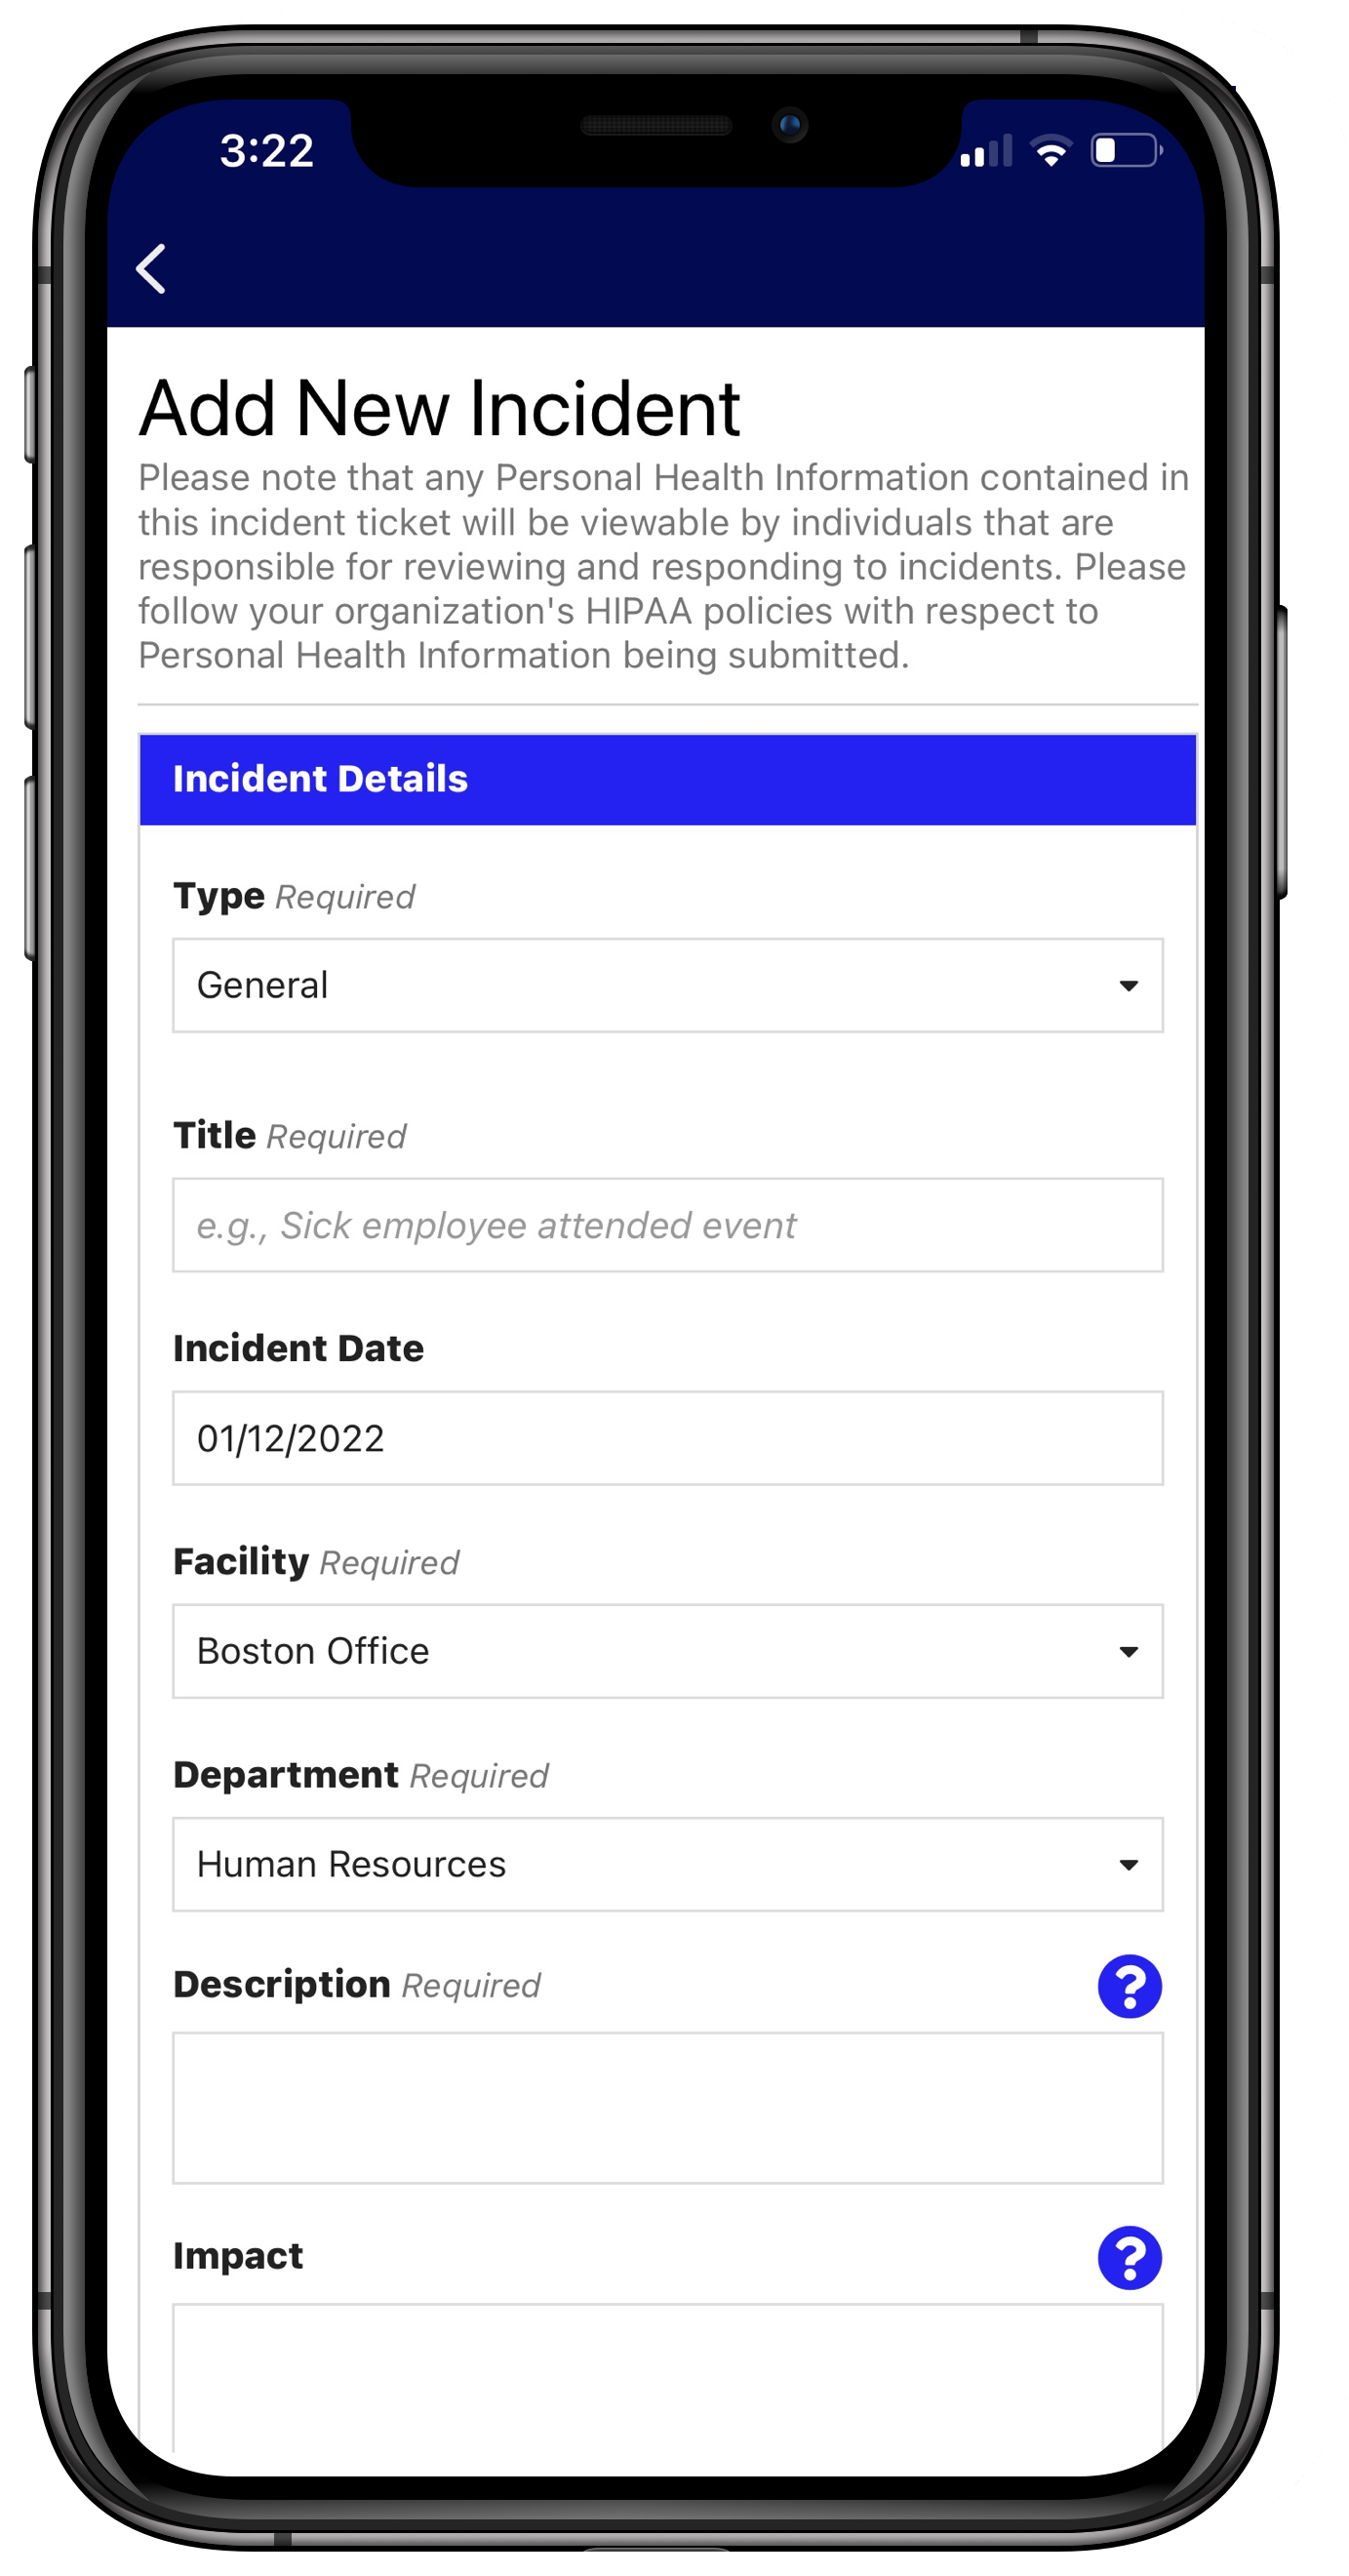
From the CONFIGURE page, response and configuration managers can add new incident types and rename any incident type they created. This allows users to select a incident type from the configured list when they fill out the incident form, if the User incident creation setting is toggled on.
To add a new incident types:
Click SAVE INCIDENT TYPES.
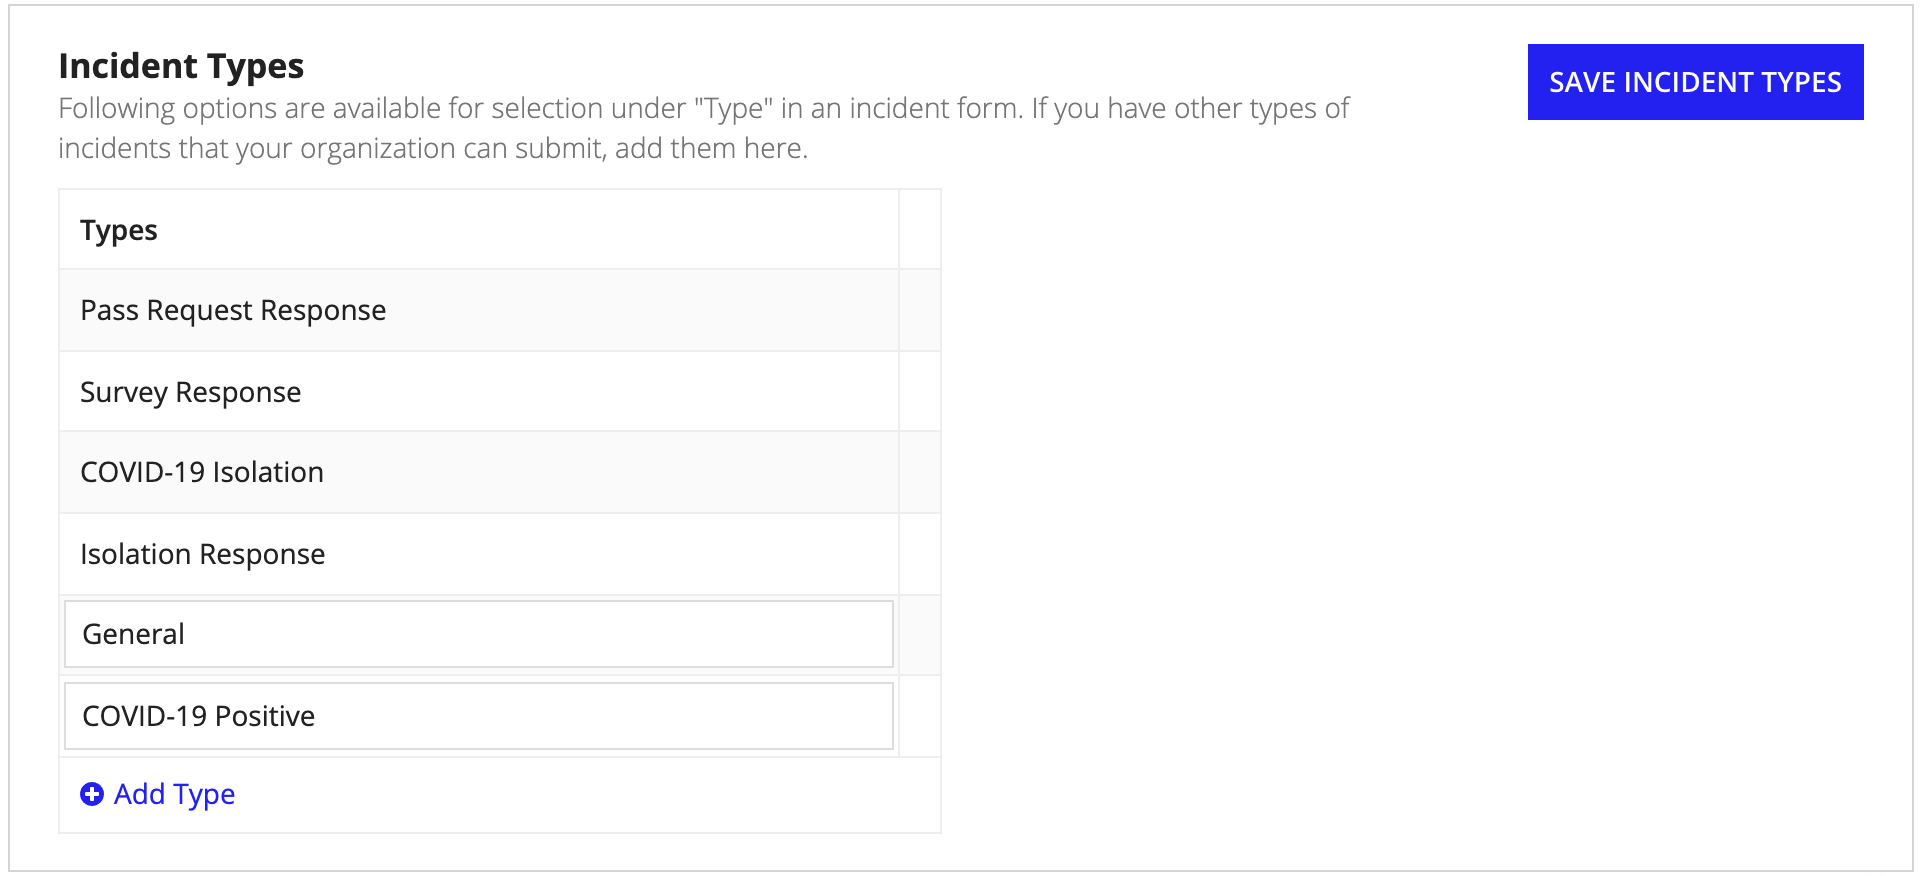
Note that from the Incident Management Settings page you are able to rename incident types that you created only. To rename an incident type that shipped with the solution, see the Solution Customization User Guide for Workforce Safety version 13 and later and Workforce Safety v8.1-v12.x Custom Bundle File Configuration for Workforce Safety version 12x and earlier.
In order to more easily maintain social distancing in your facilities, you can limit the capacity of each area that you have configured in Workforce Safety.
Every time a user receives a pass, Workforce Safety keeps track of how many passes have been generated for that area. Once the maximum capacity is reached, users can no longer request a pass for that area.
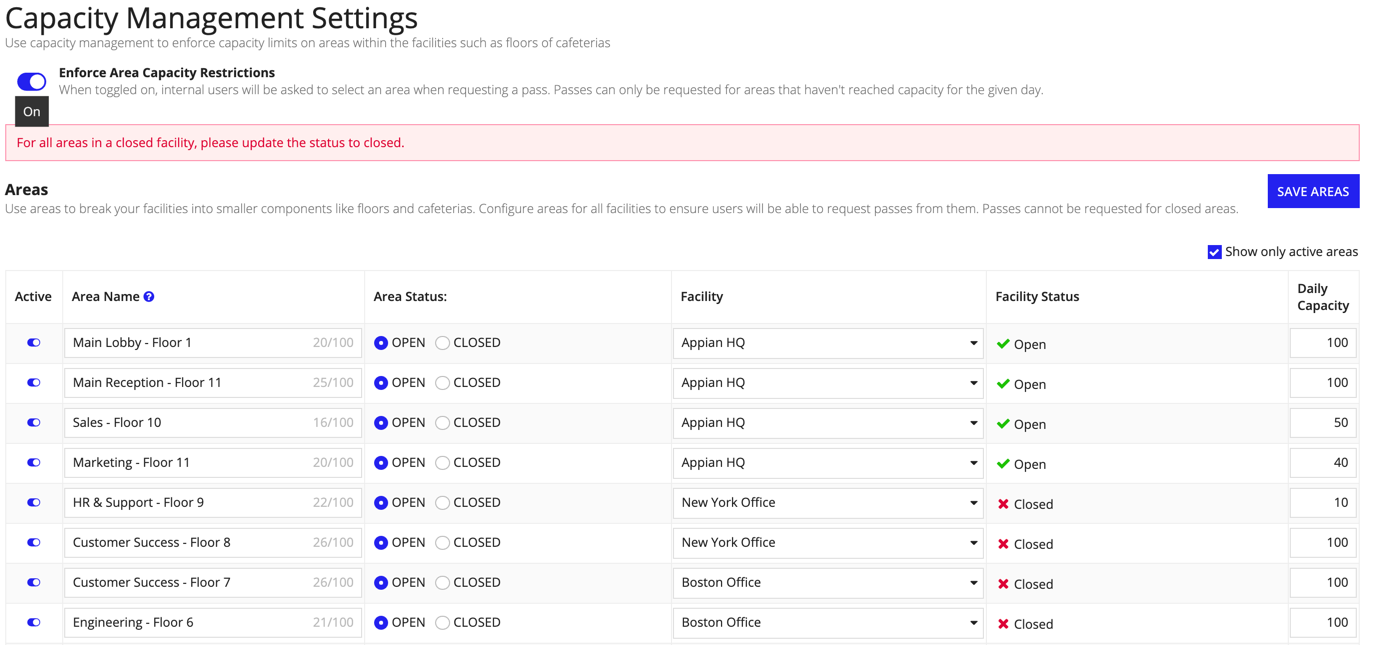
If it is necessary to override the capacity limit, response managers and screeners can request a pass on behalf of a user and choose to override the limit.
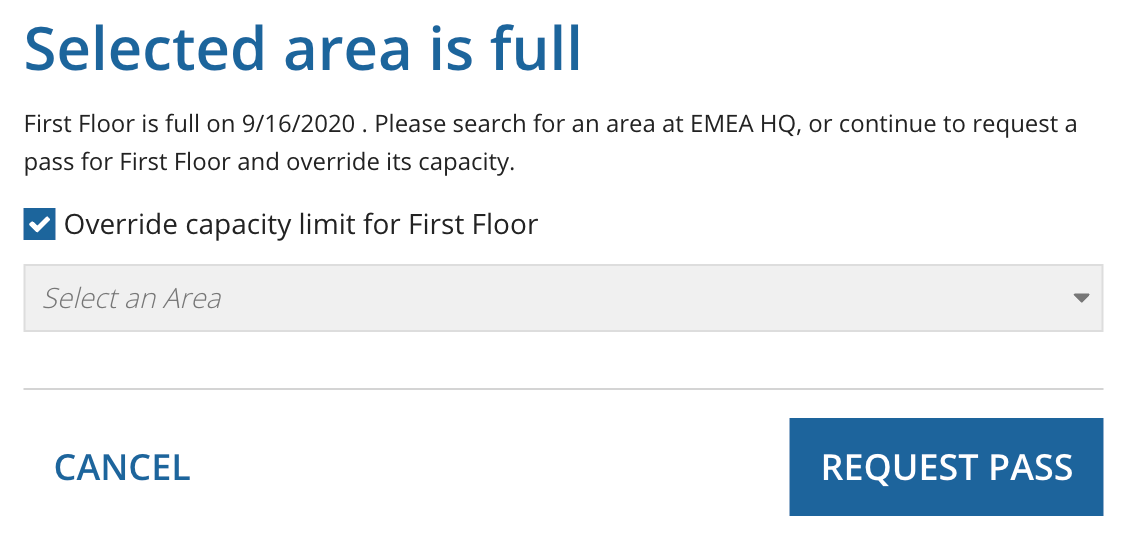
When this feature is toggled on, users will be asked to select an open area when they request a pass. If they don't choose an area, the area with the most capacity will be selected for them.
Note: It is very important to configure at least one area for each facility before toggling on this feature. Users can't request a pass for facilities that don't have any areas configured.
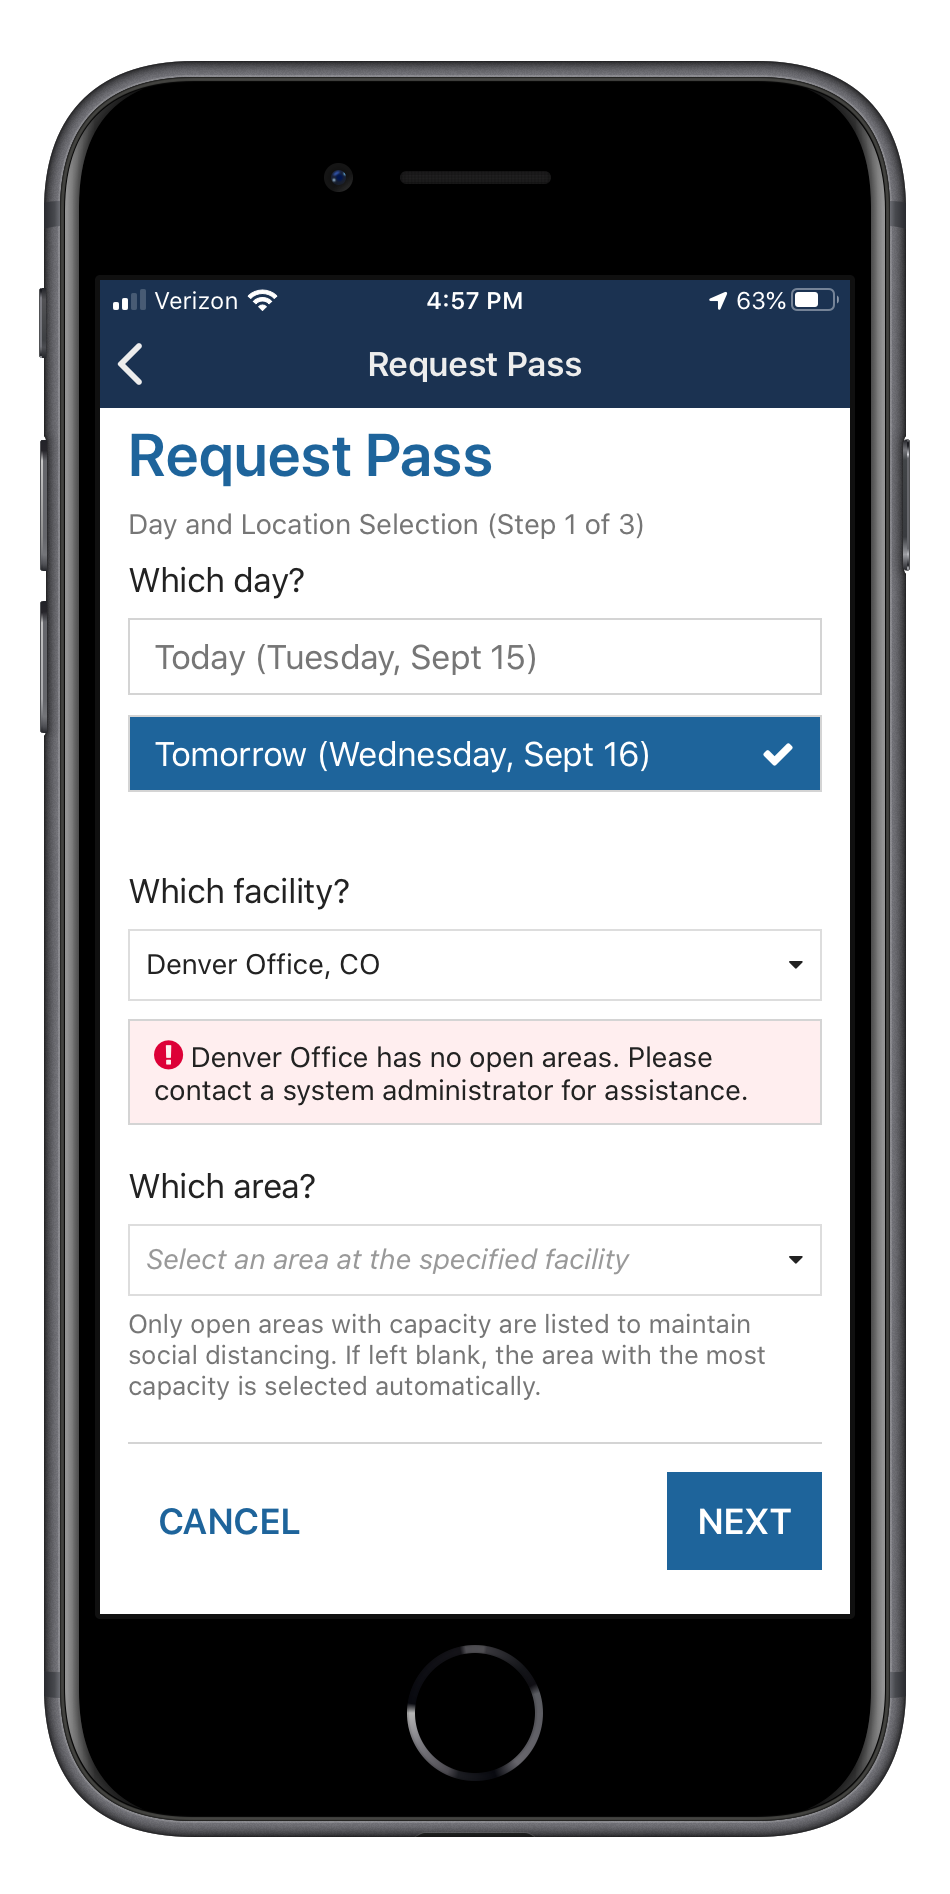
If areas are not configured for a facility, they will not be able to request a pass for that facility.
Cohorting is identifying groups (cohorts) and keeping them together to limit contact between members of each group. This can help limit the spread of COVID-19 to people outside of a cohort.
In Workforce Safety, you assign departments to cohorts, then assign days of the week to each cohort. Users can only request a pass for days that are assigned to their cohort.
When Cohort Management is toggled on, you can manage cohorts by assigning departments to cohorts and assigning days of the week to each cohort.
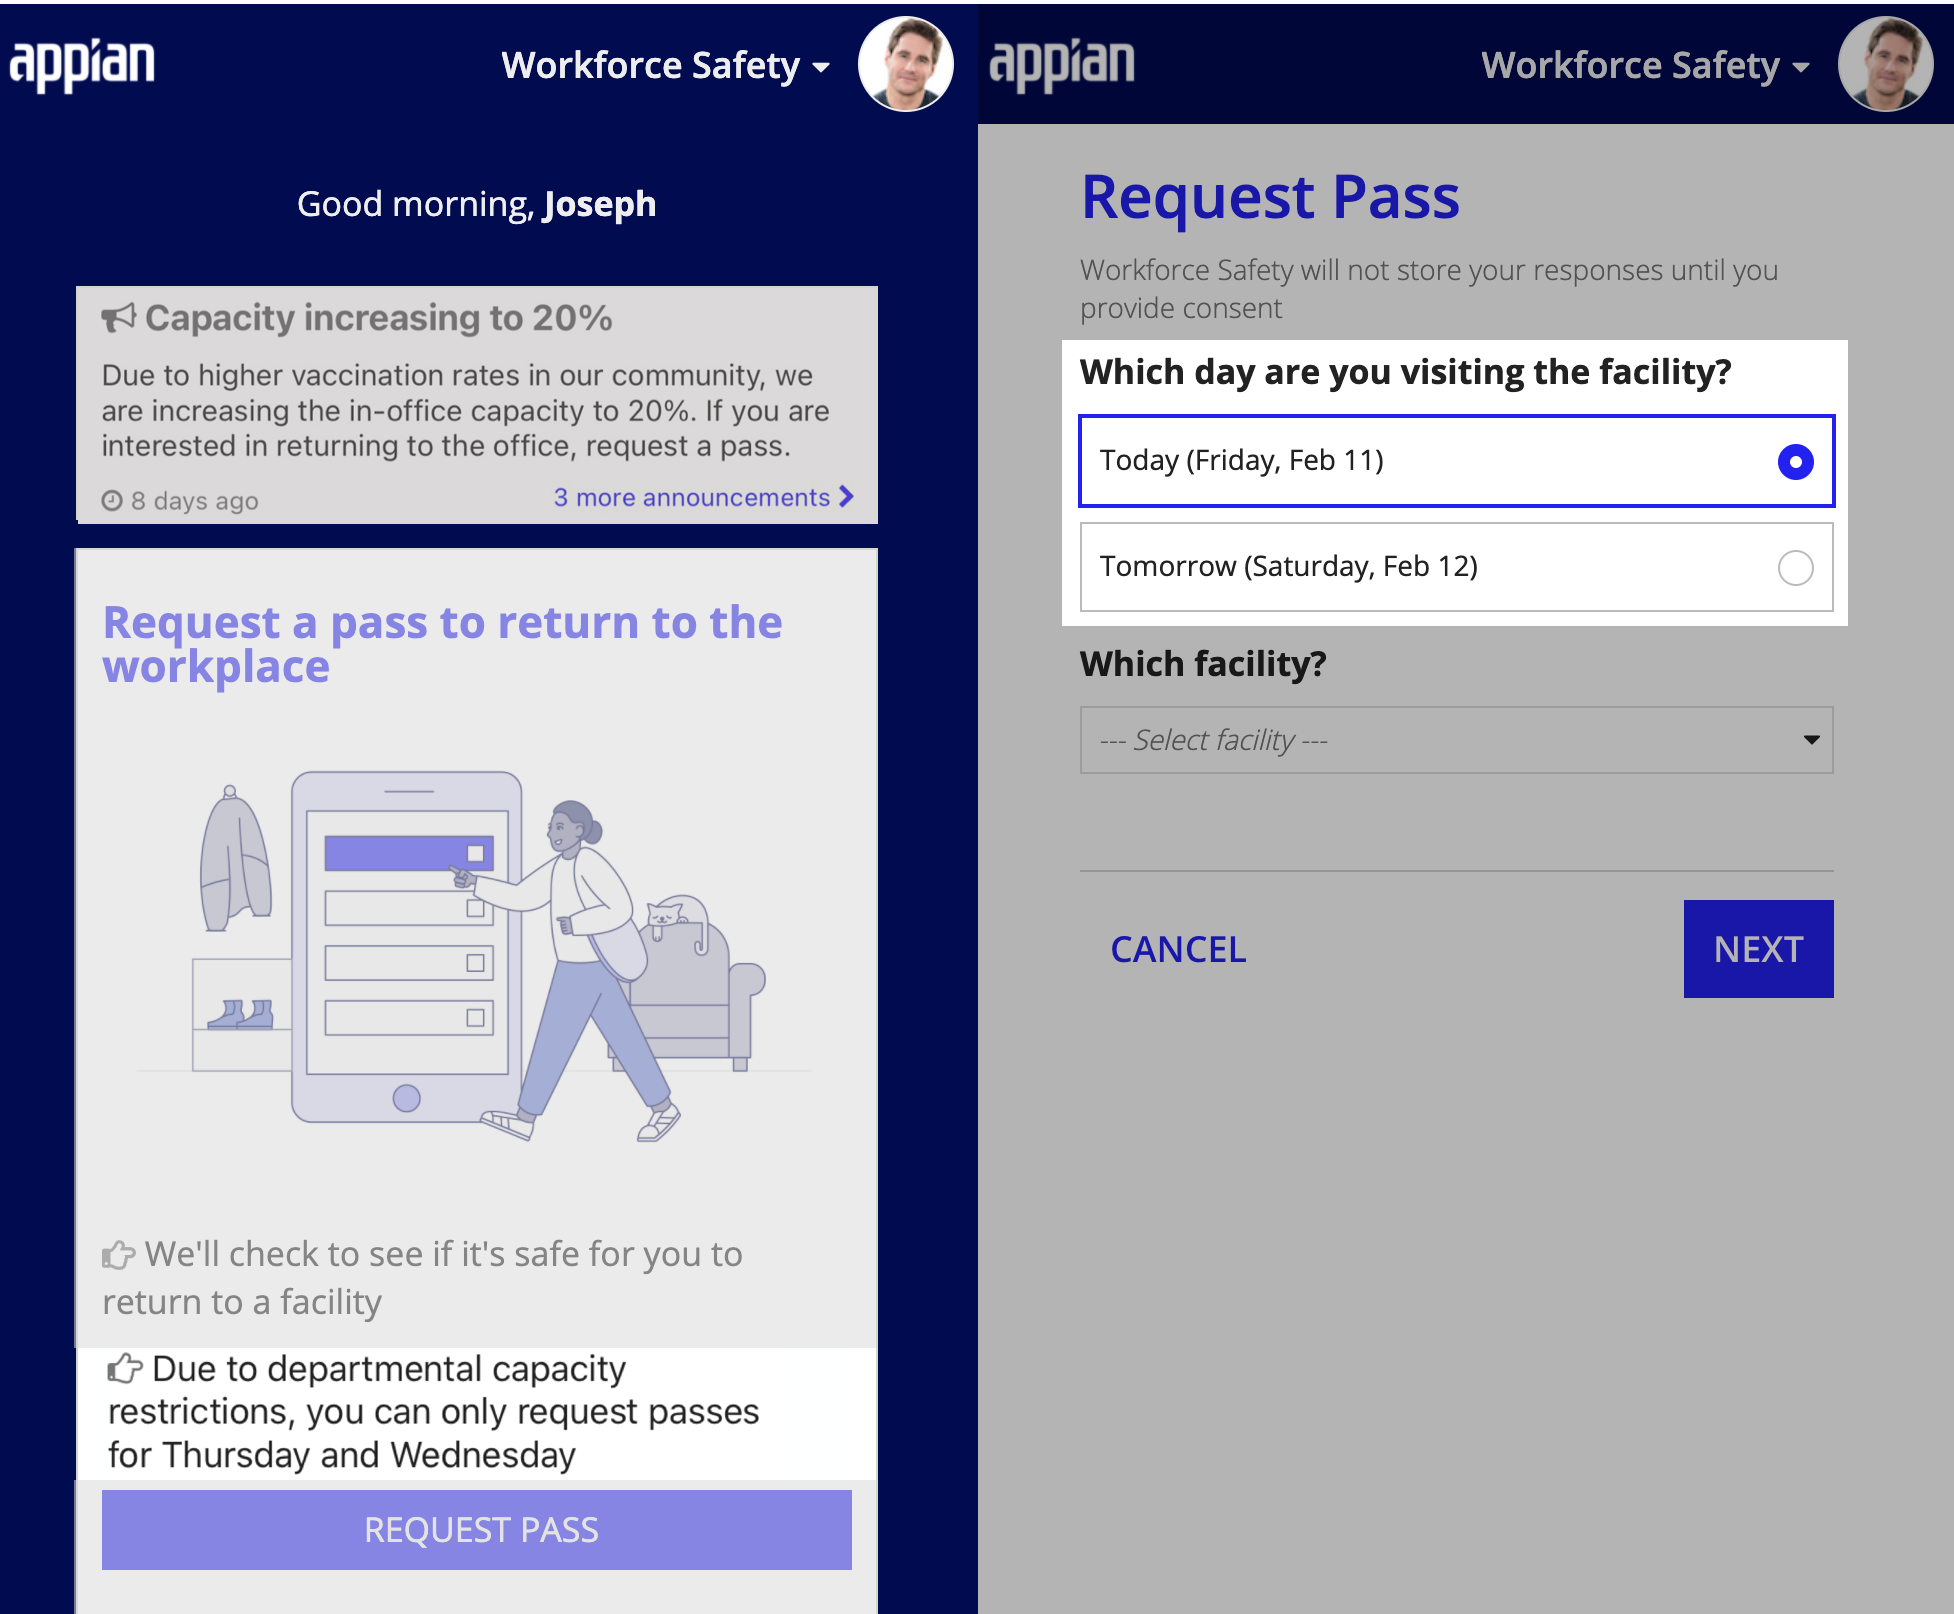
Tip: If you don't modify the default cohort, all users will see a message on their homepage that says "Due to departmental capacity restrictions, you can only request passes for Sunday, Monday, Tuesday, Wednesday, Thursday, Friday and Saturday."
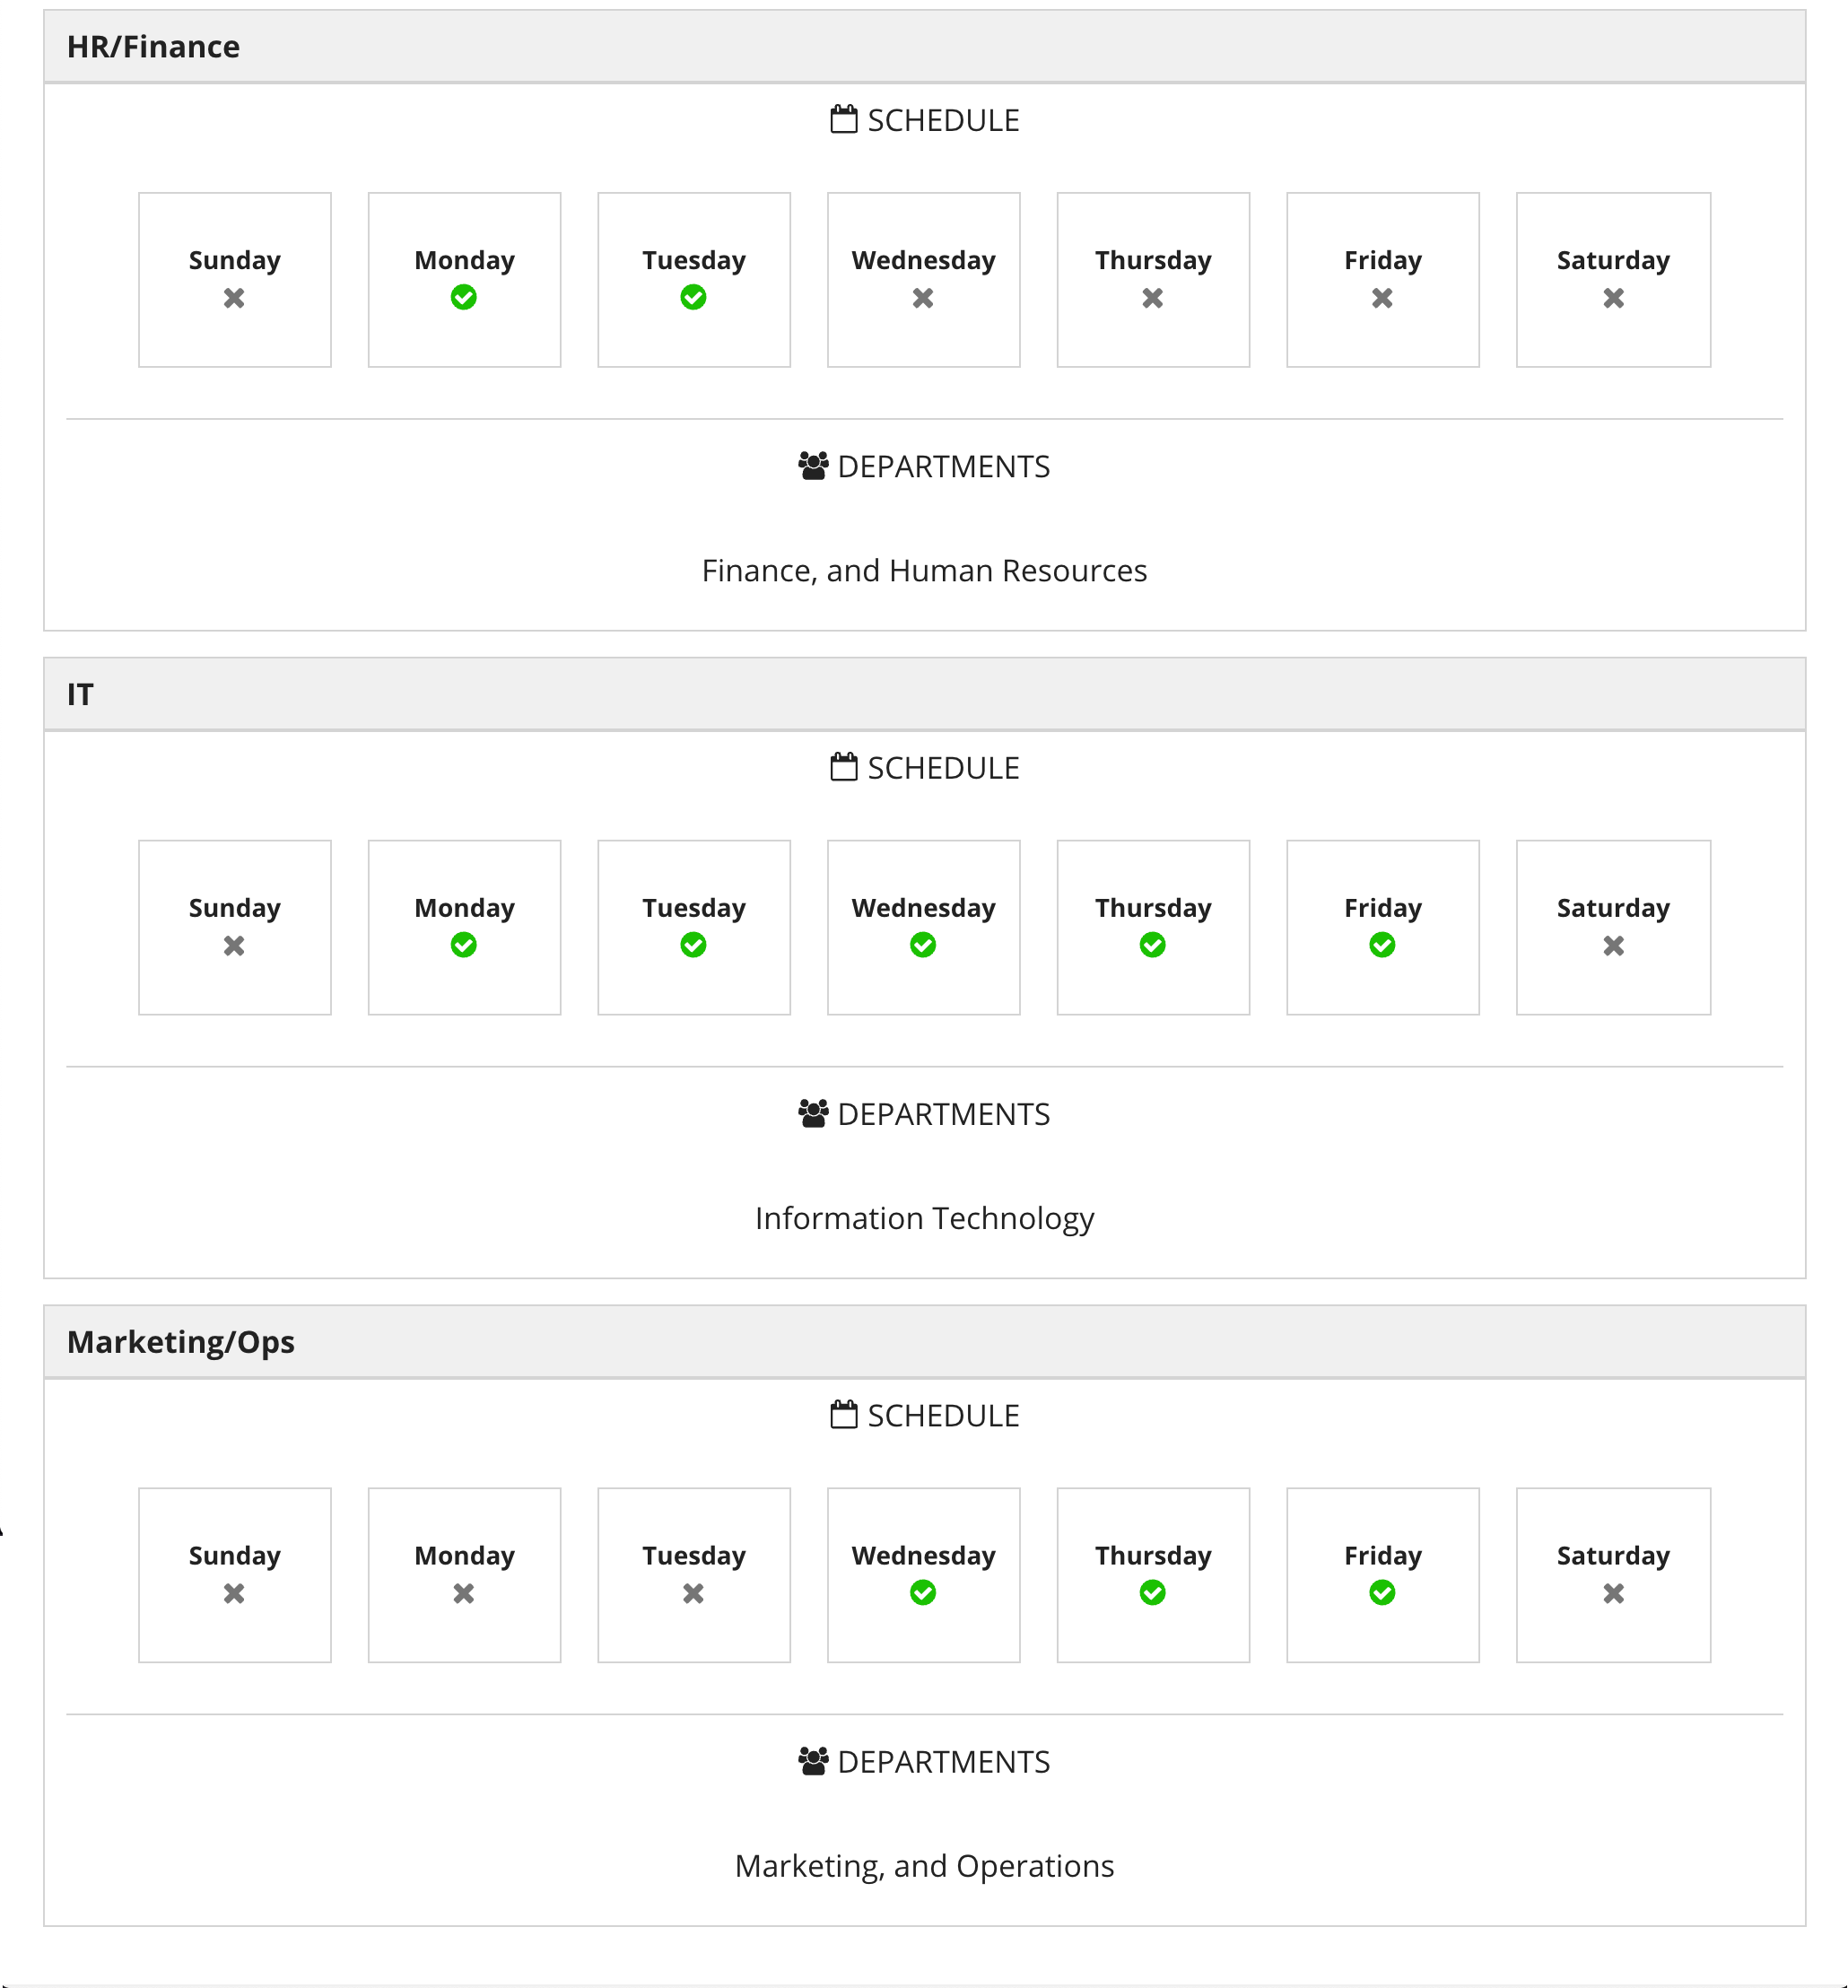
When a user requests a pass, Workforce Safety checks which cohort the user is in, based on the department in their profile.
The Request Pass section on their homepage will let them know which days of the week their department can request a pass for. When they request a pass, they will only be able to select days that are assigned to their cohort.
Note: If you toggle off Cohort Management after modifying cohorts, you will lose all modifications.
The following are some restrictions to keep in mind when you are adding or editing cohorts:
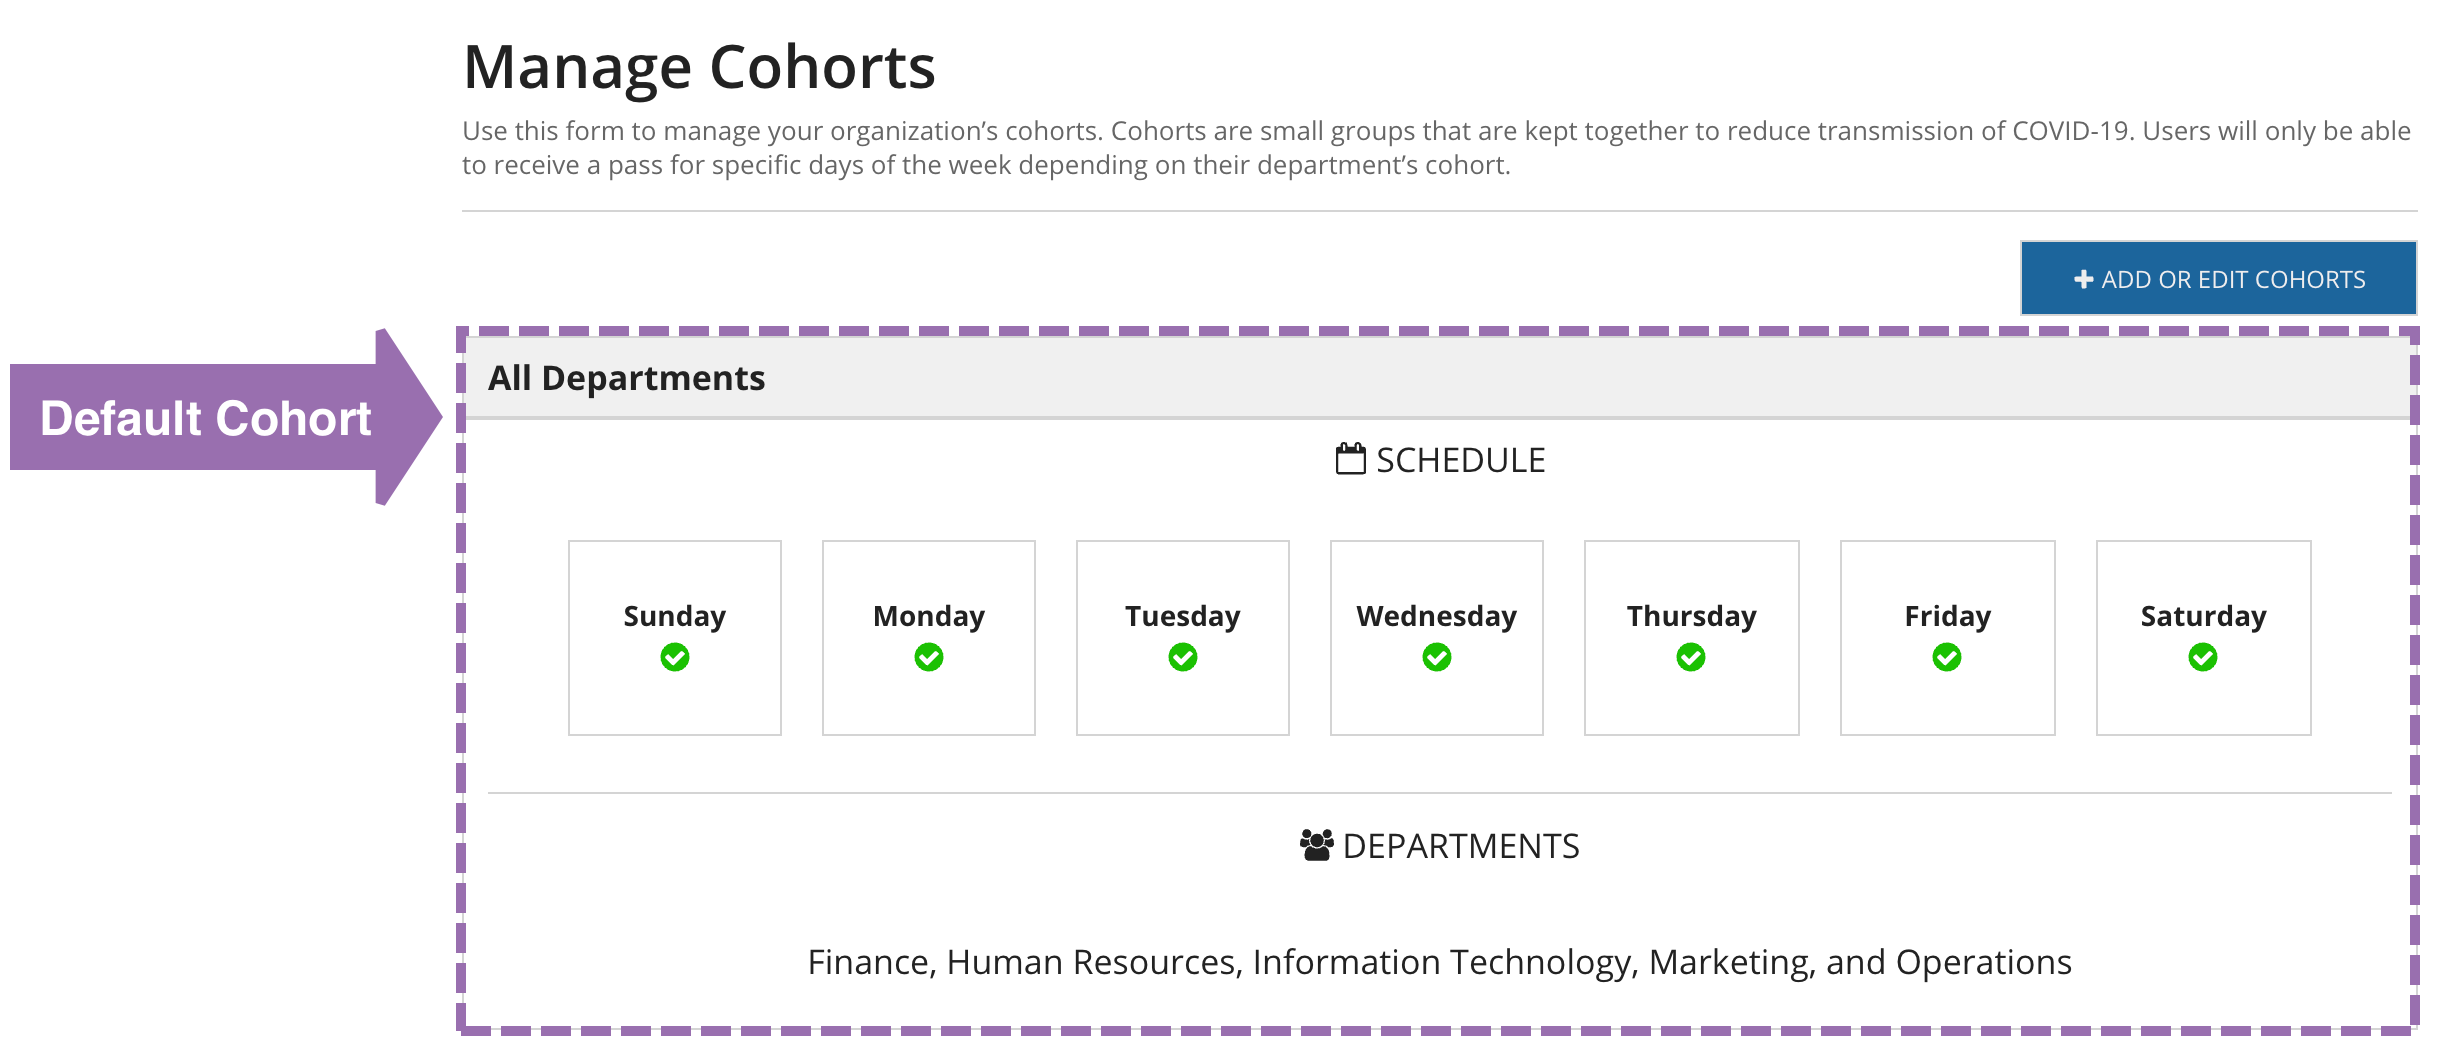
After Cohort Management is toggled on, a default "All Department" cohort is created. All departments are added to this cohort and all days of the week are selected for it. You can modify this cohort and create new cohorts by managing cohorts.
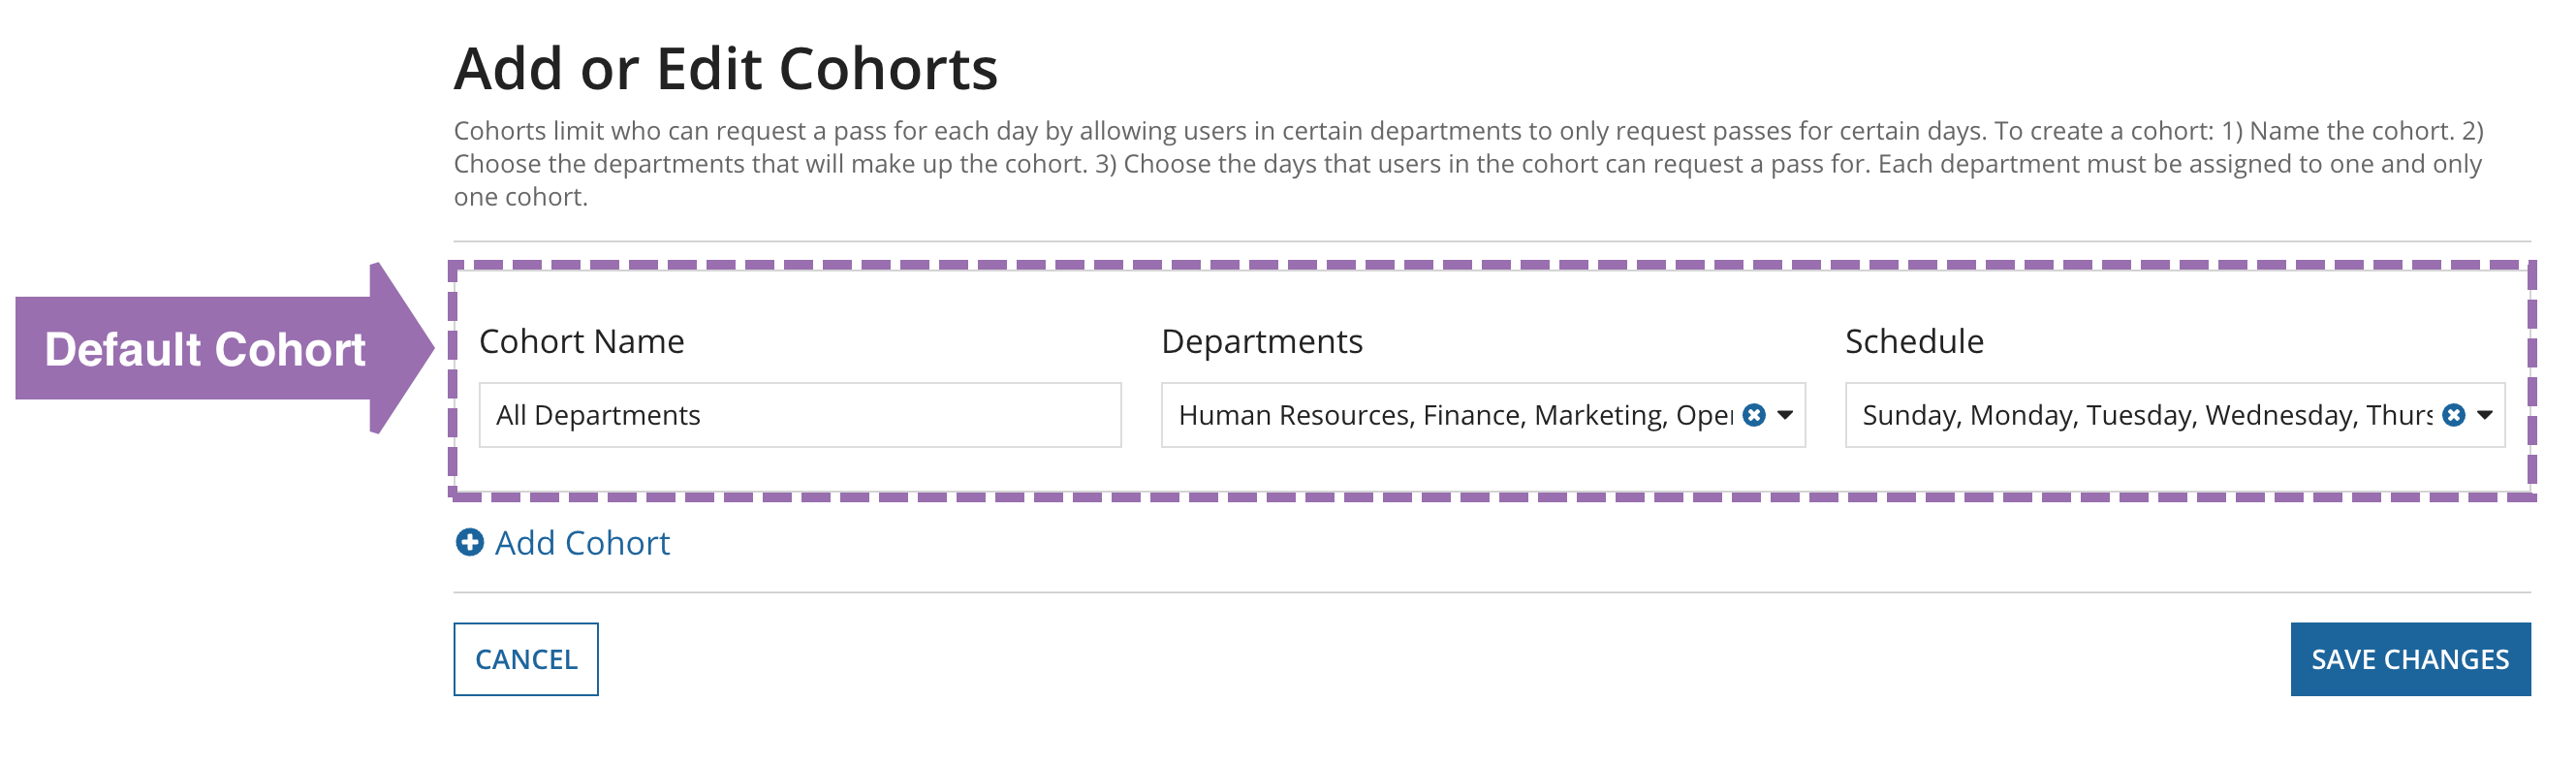
Because each department can only be in one cohort, before you add any new cohorts you have to remove departments from this cohort. We also suggest renaming it from "All Departments."
To enable cohorts:
(Default) to the name can help you identify this as the default cohort later. This is important if you add any new departments.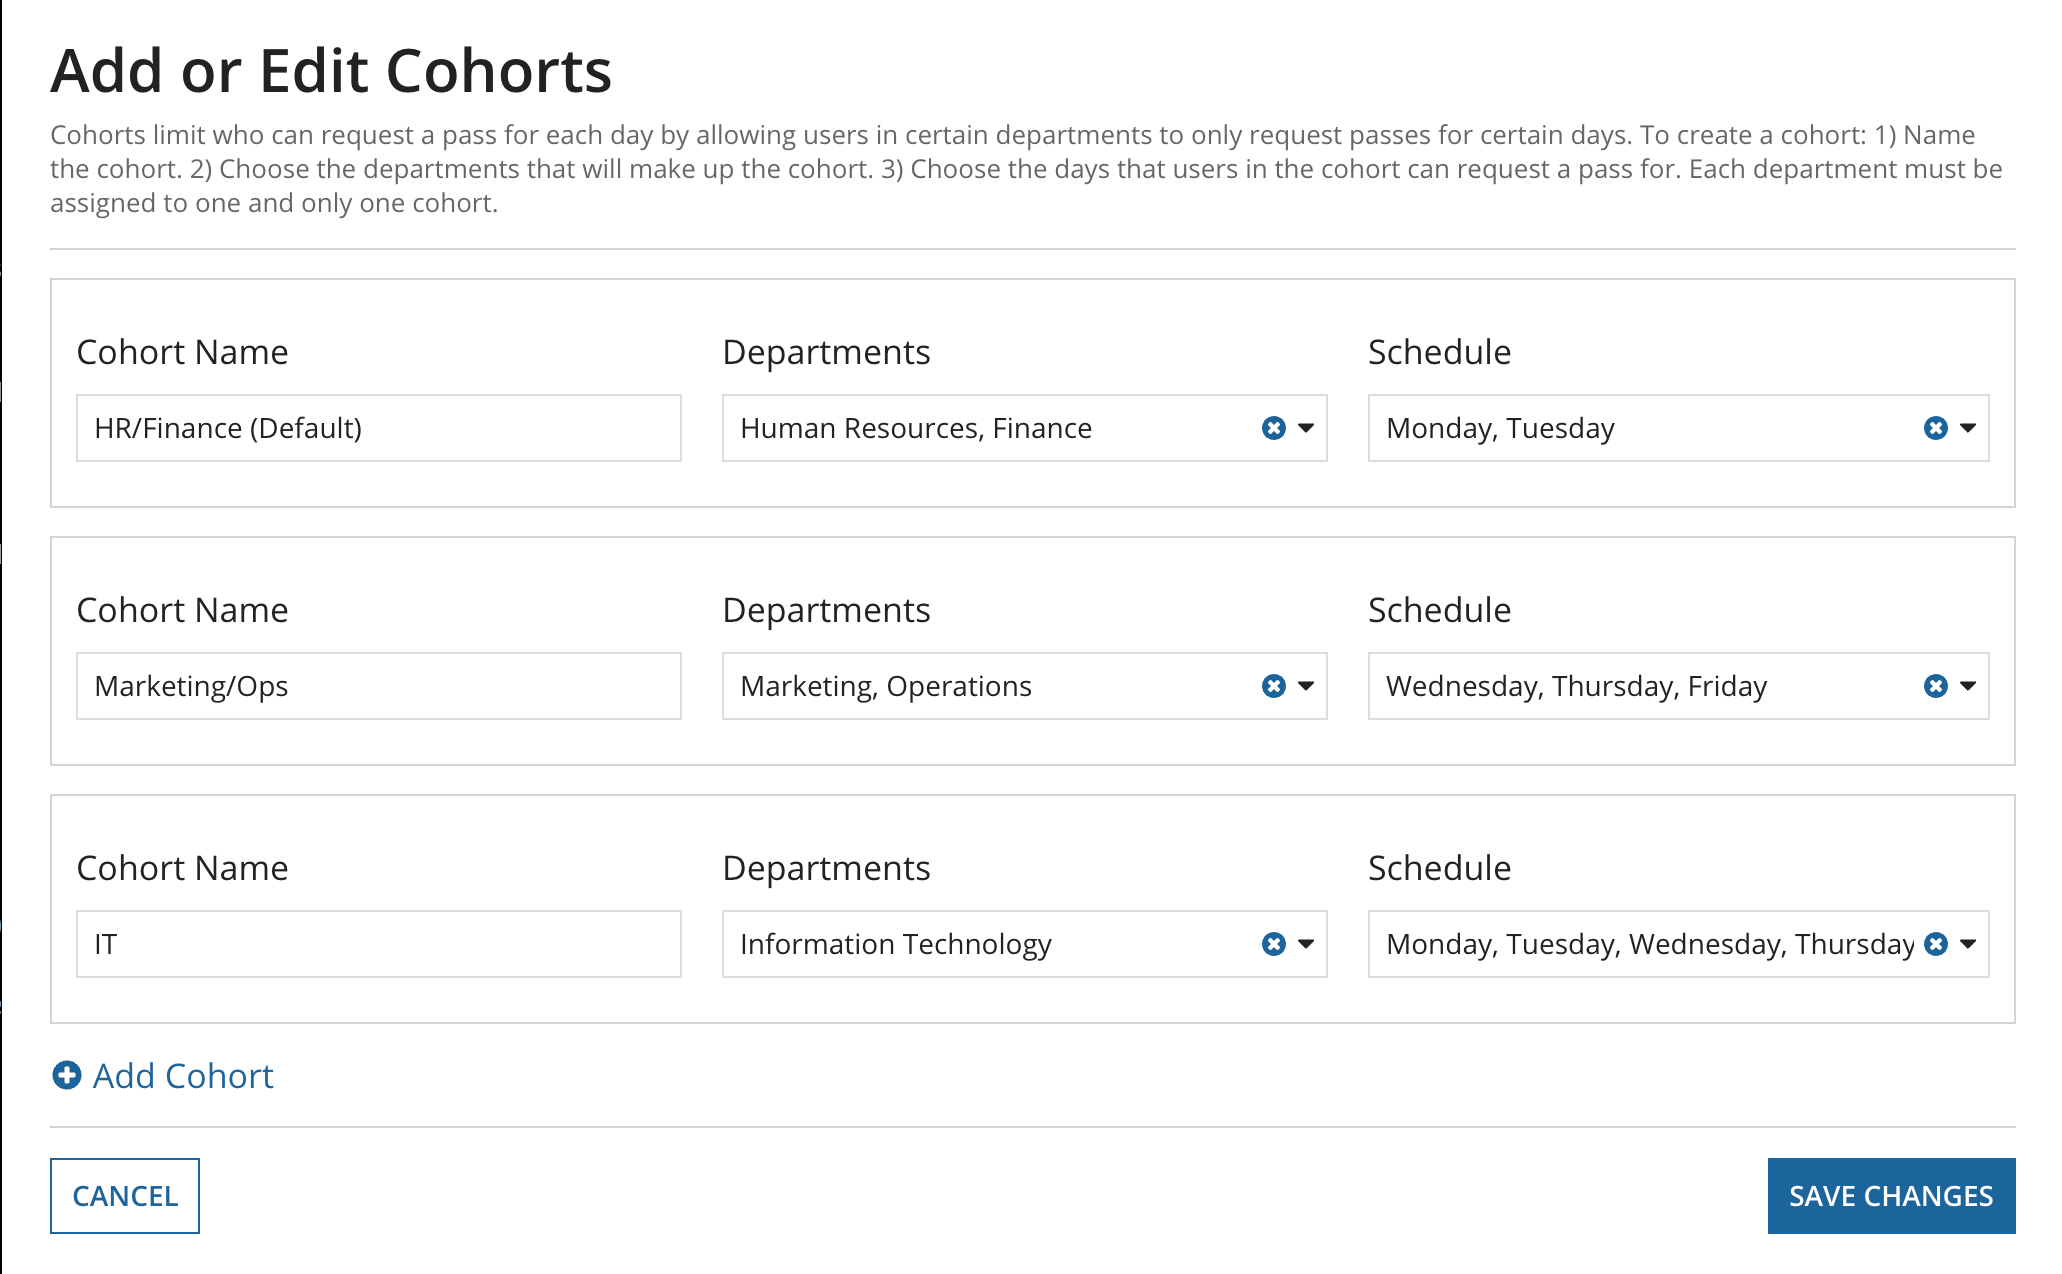
The configured cohorts display on the Manage Cohorts screen.
The COVID-19 testing workflow allows you to manage the settings for the COVID-19 test results collection process for your employees. This includes requiring user consent to collect employees test results, configuring automated test requests, and tailoring the user messages displayed during the COVID-19 test results collection process.
Easily require users to provide consent to collect their COVID-19 test information by enabling the Ask for user consent option. Tailor the consent message users see so that it fits your organization's policies and procedures.
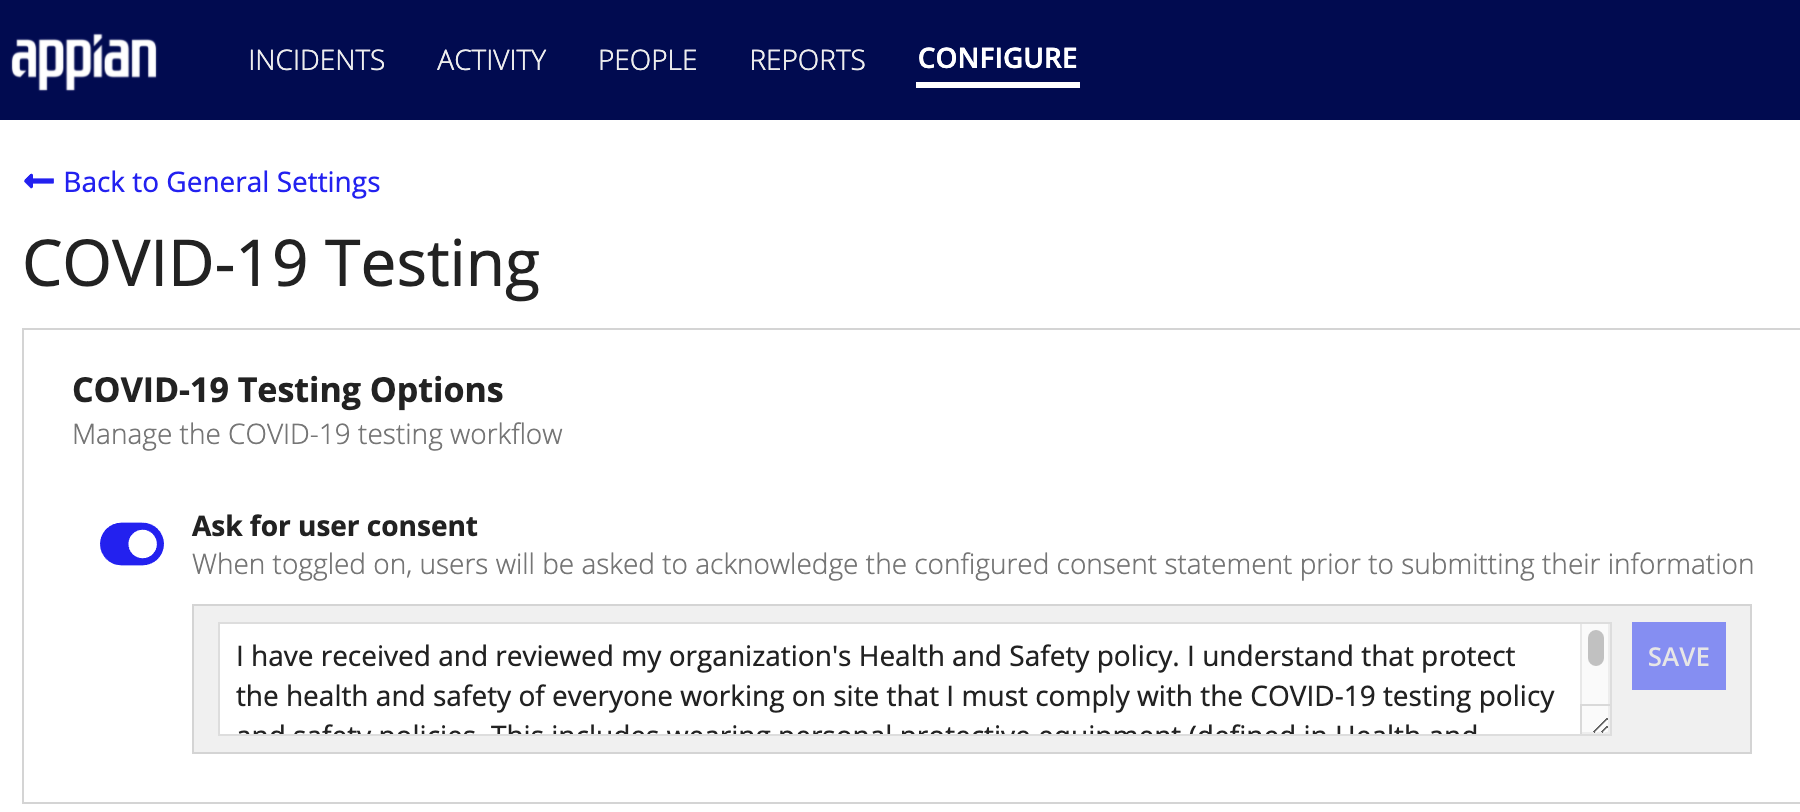
When toggled on, users will be asked to acknowledge the configured consent statement prior to submitting their COVID-19 test information. You must enter and save your consent message before you can enable this setting.
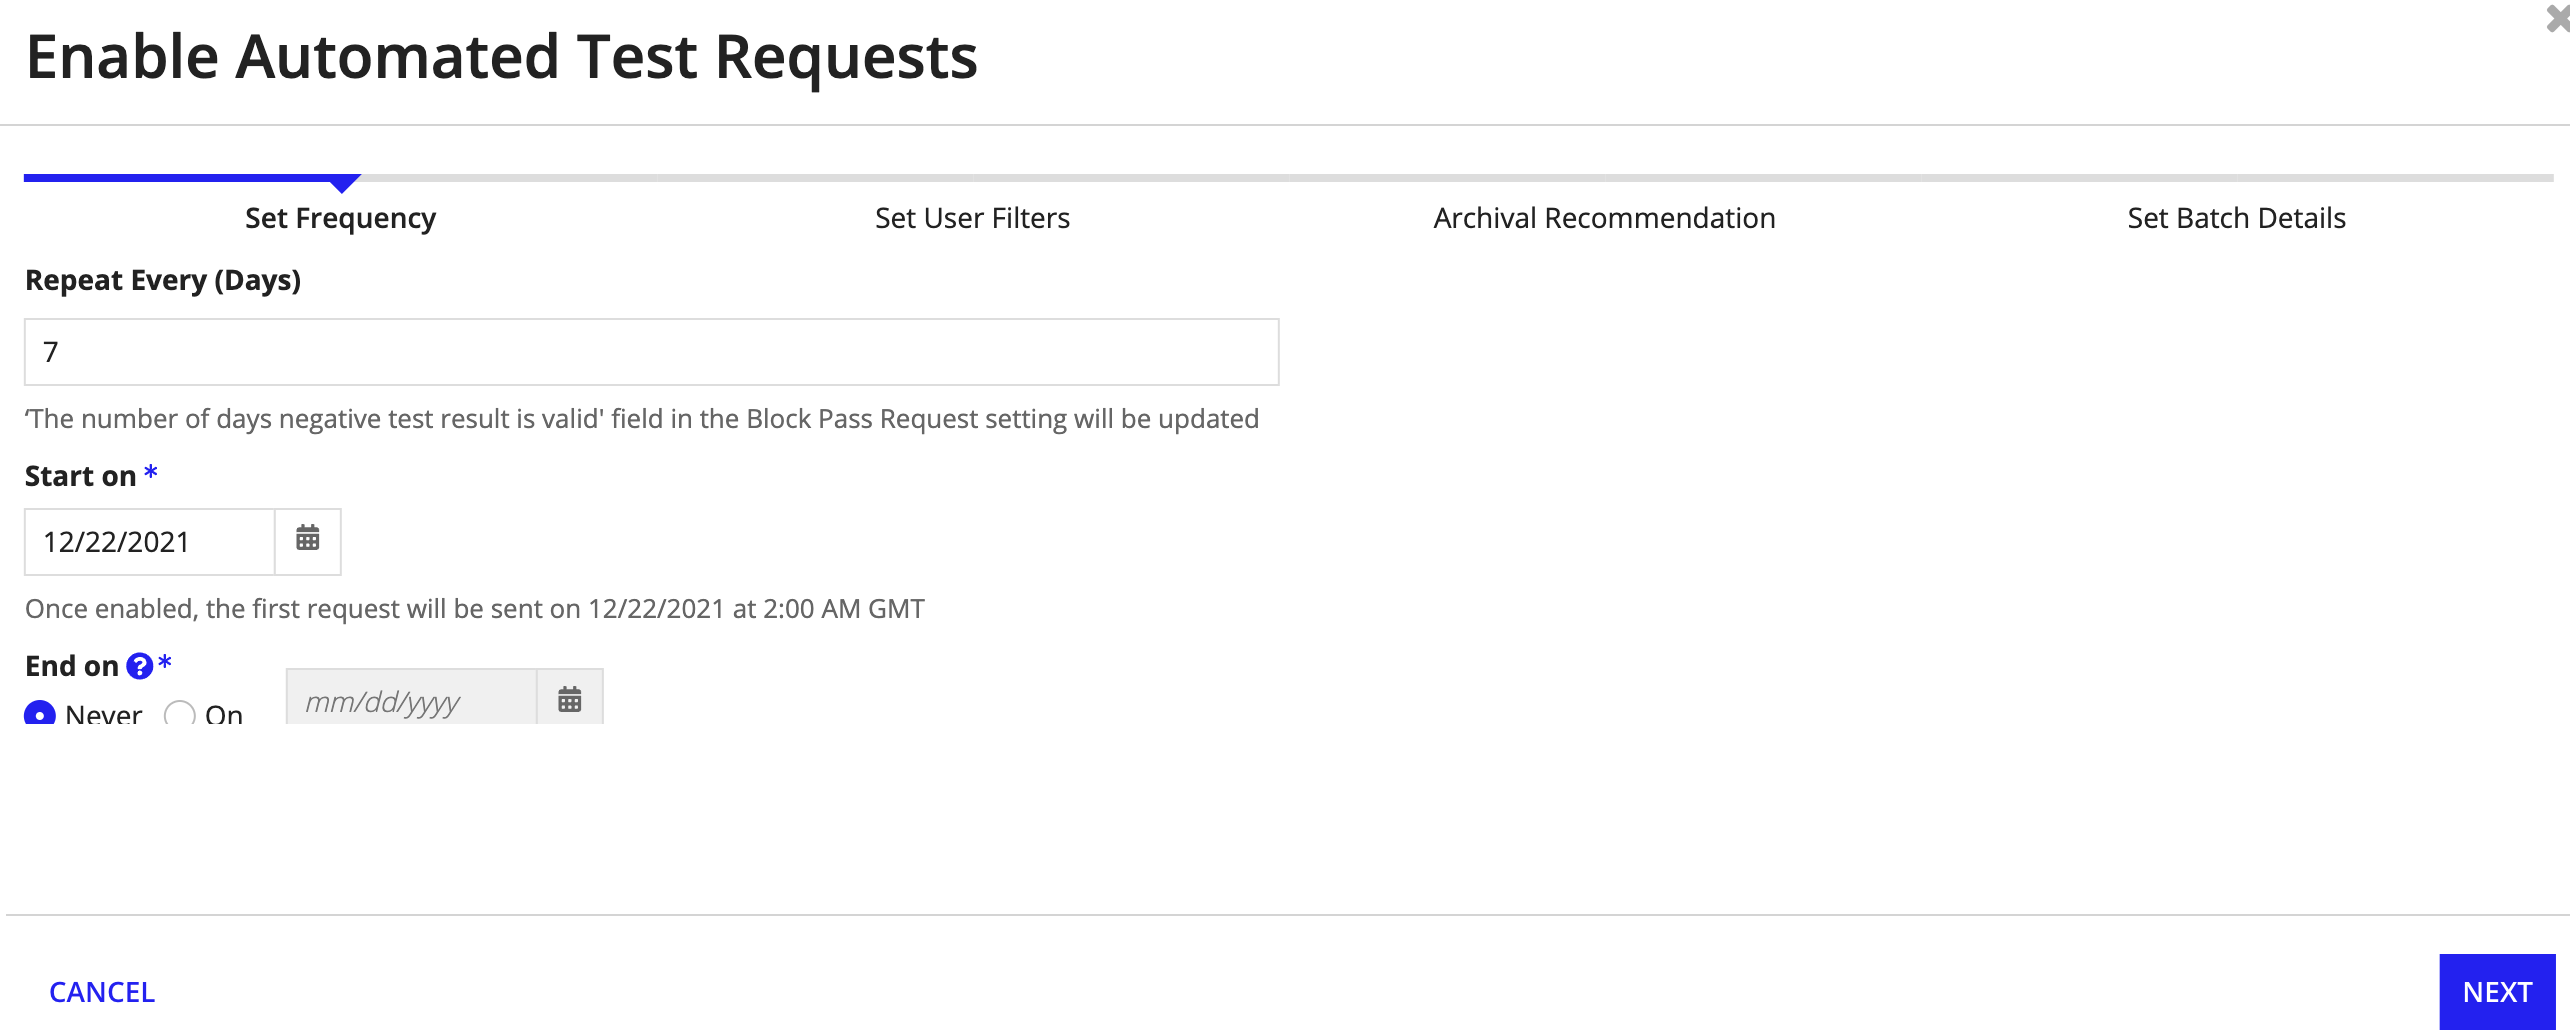
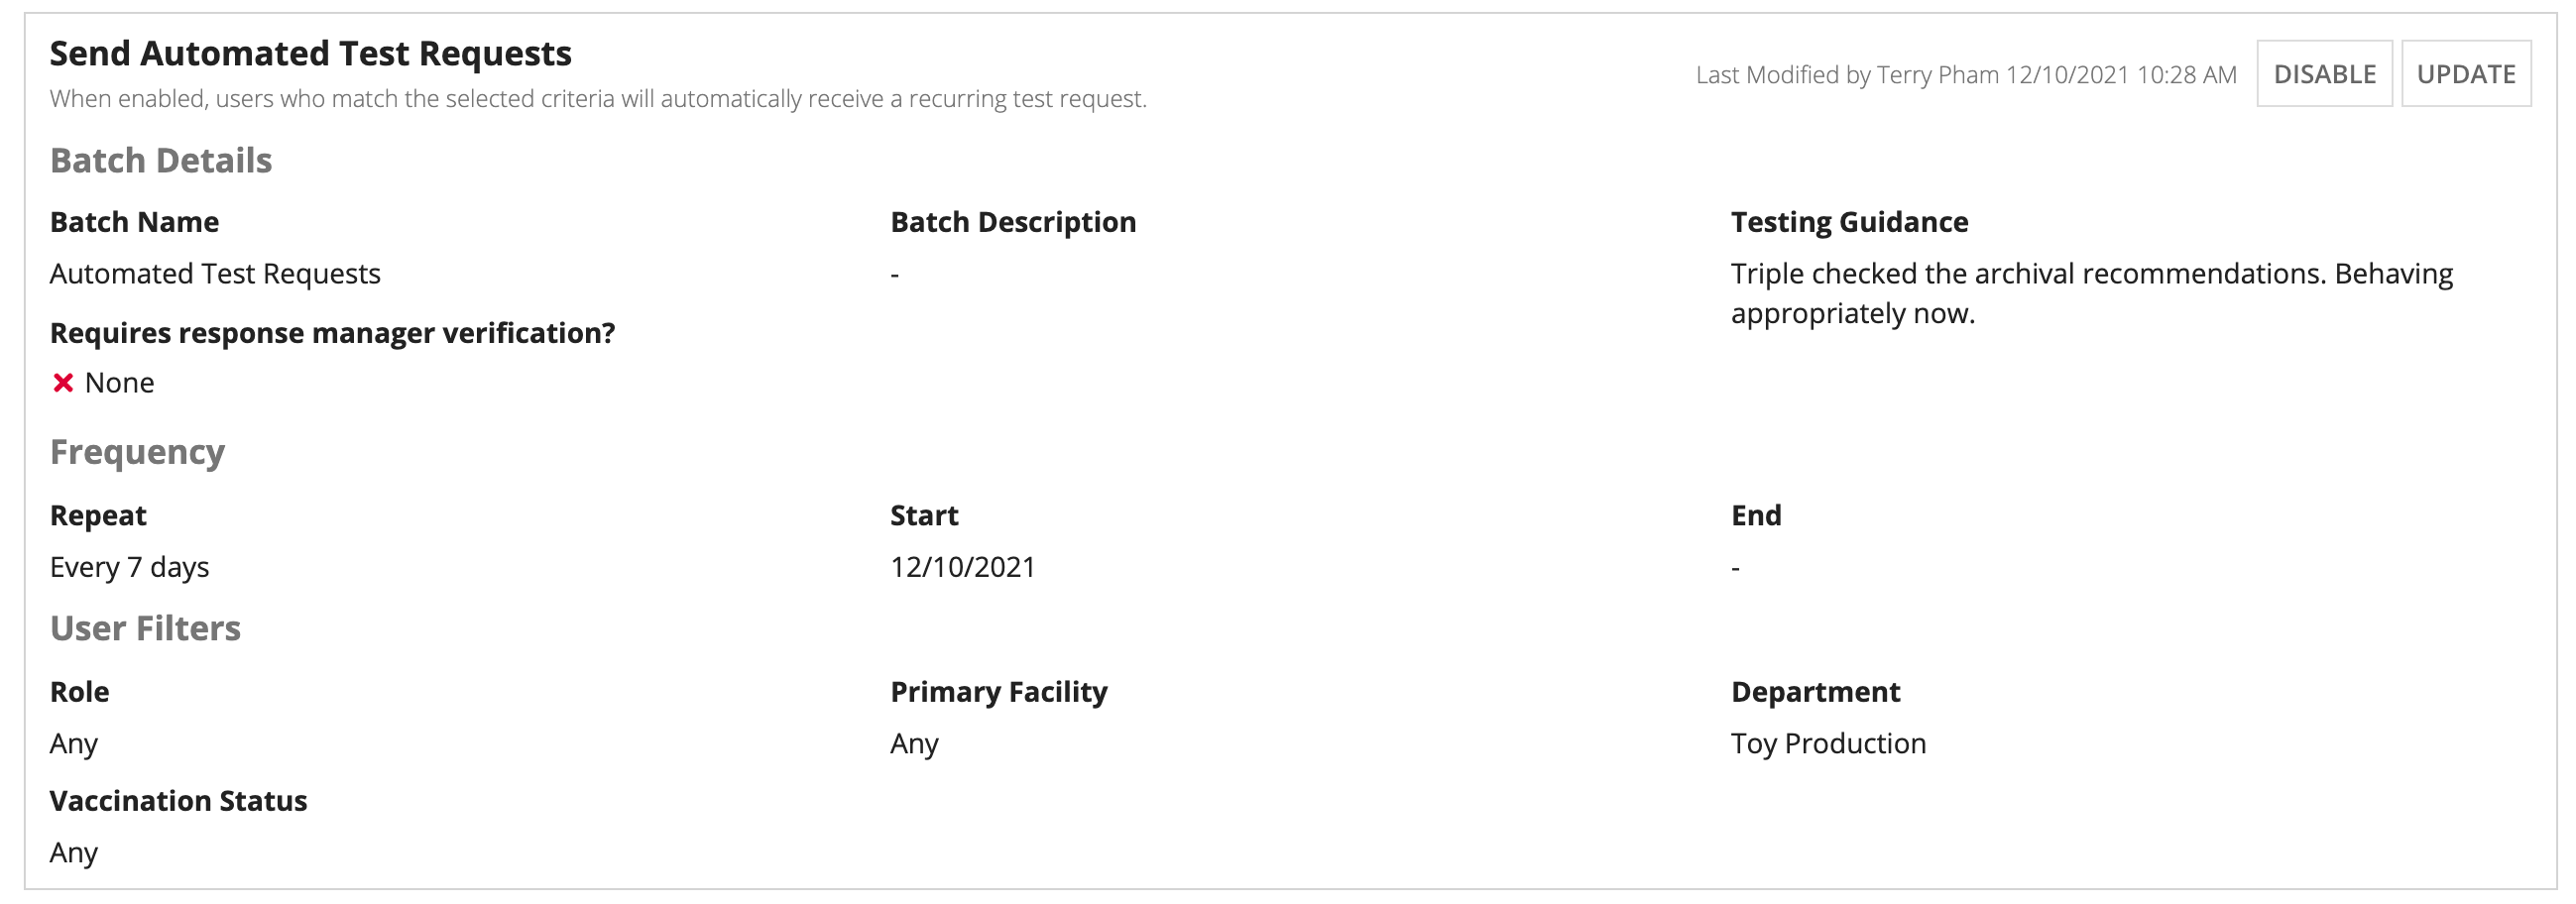
Your organization may require employees to submit their COVID-19 test results before they can request a pass to come on site or as a way to track the health of your employees. The Automated Test Requests feature allows response managers to use a batch request to ask a group of users to take a COVID-19 test and submit the results.
Easily configure the schedule and frequency of the automated test requests so that the process starts and ends on a specific date and repeats every set number of days based on a defined interval or configure the schedule to run continuously.
When enabled, this feature will automatically send a test request and email notification to all employees who match the user filters defined in the Automated Test Requests configuration at run-time. When affected users log in to the Workforce Safety solution, they'll receive a prompt to submit their COVID-19 test result.
Note: To ensure your Workforce Safety solution continues to work with optimal performance and does not encounter slowness due to growing data entries, we recommend that you have your system administration configure the data archival feature before configuring Automated Test Requests.
To configure the Automated Test Requests frequency:
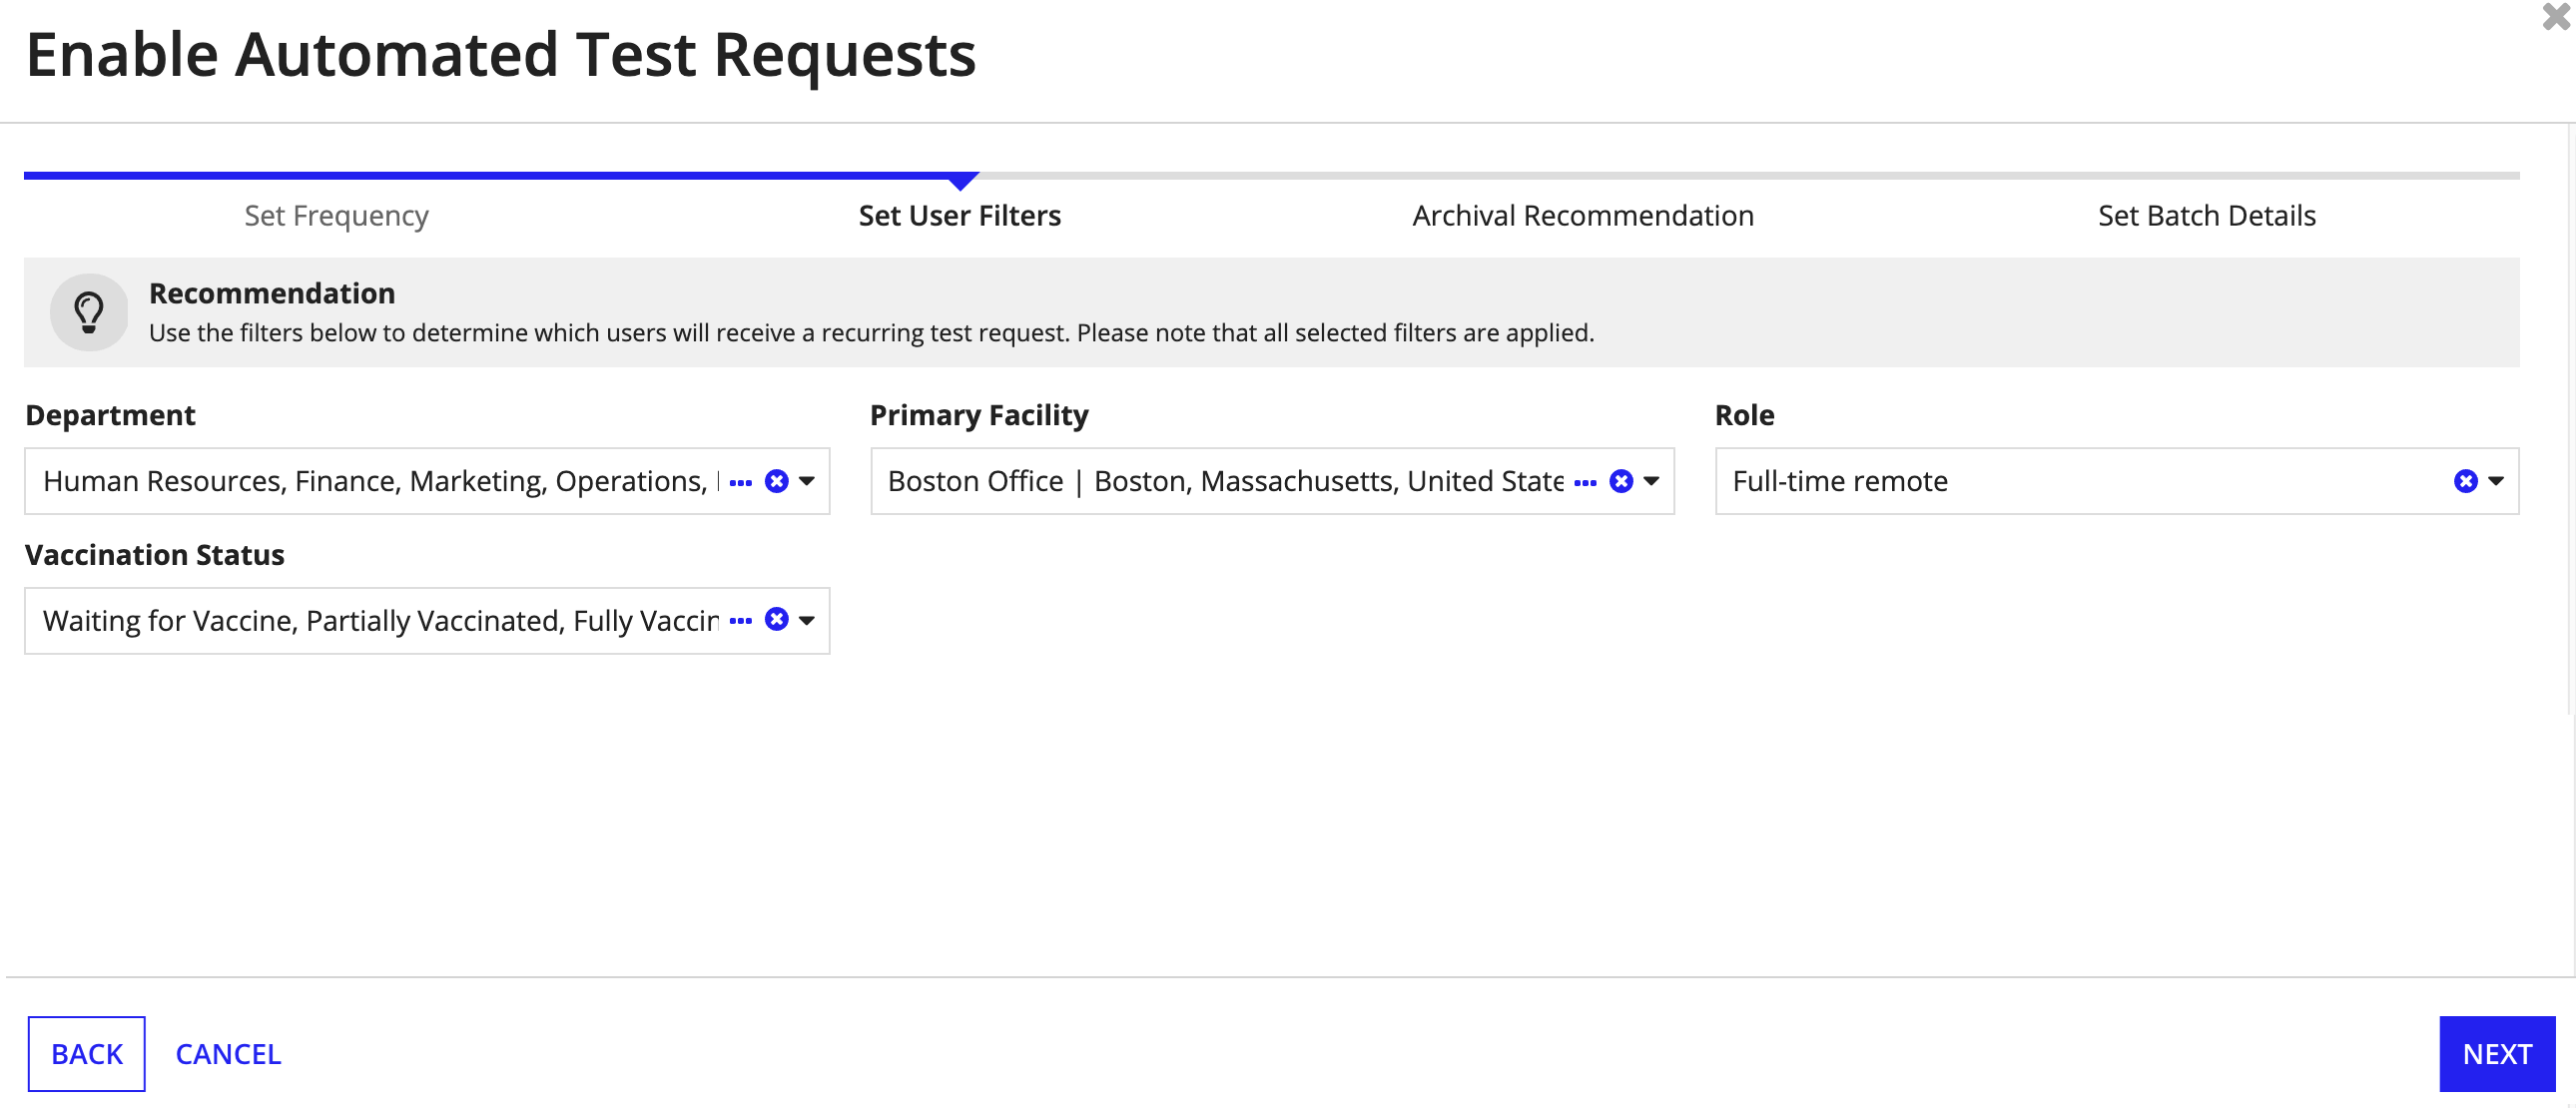
Next, you will need to define the users that should receive a recurring test request notification by selecting specific user filters. Note that all of the filters you select are applied.
To set user filters for Automated Test Requests:
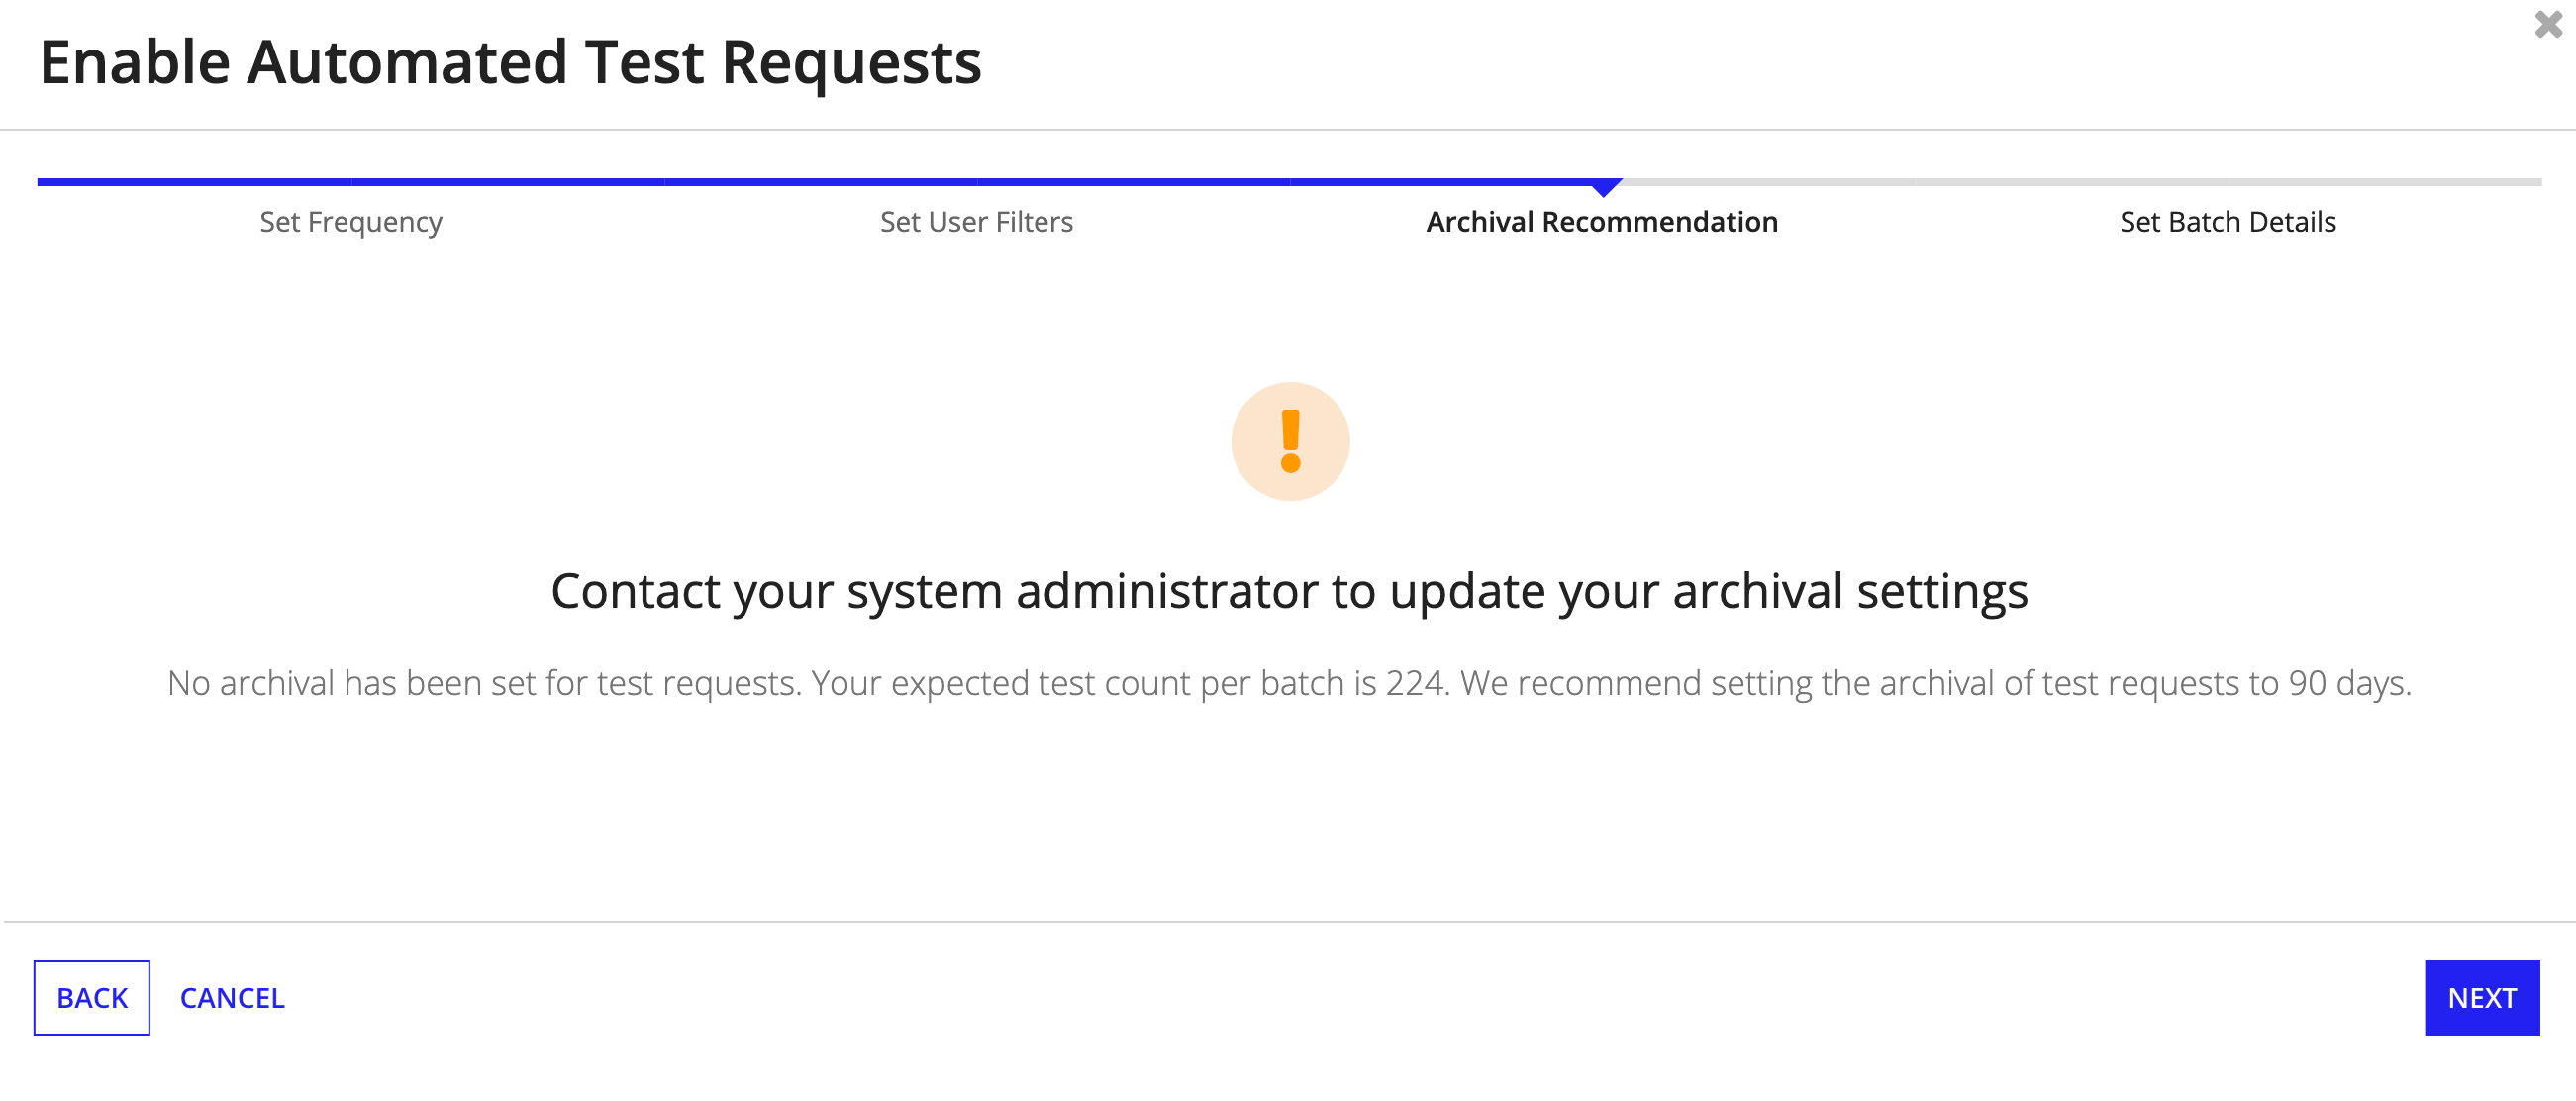
If no data archival settings are set for your Workforce Safety solution, you will see a recommendation message reminding you to contact your system administrator to update the archival settings. Large batch size may impact system performance and cause high data loads. Provide your system administration with the batch details and data management recommendation provided in the Archival Recommendation message.
Finally, you need to configure the batch details:
Click ENABLE.
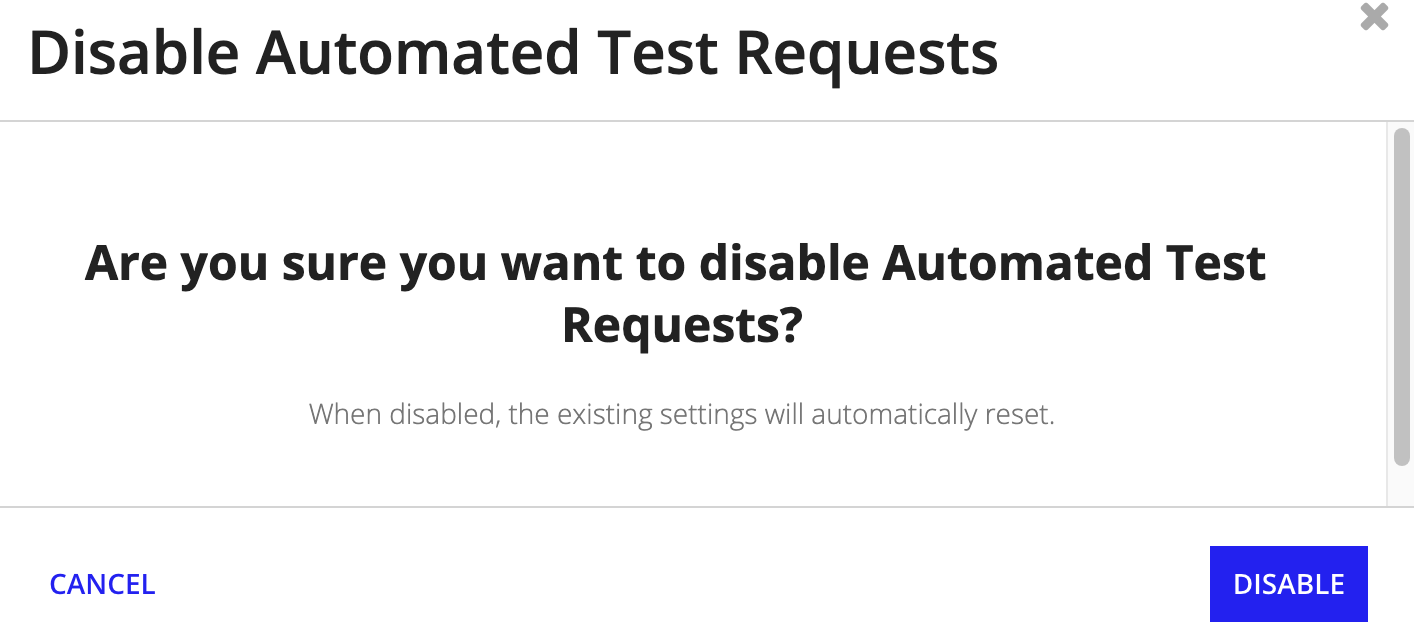
If you no longer want to require your employees to submit their COVID-19 test results, you can quickly disable the feature by clicking Disable.
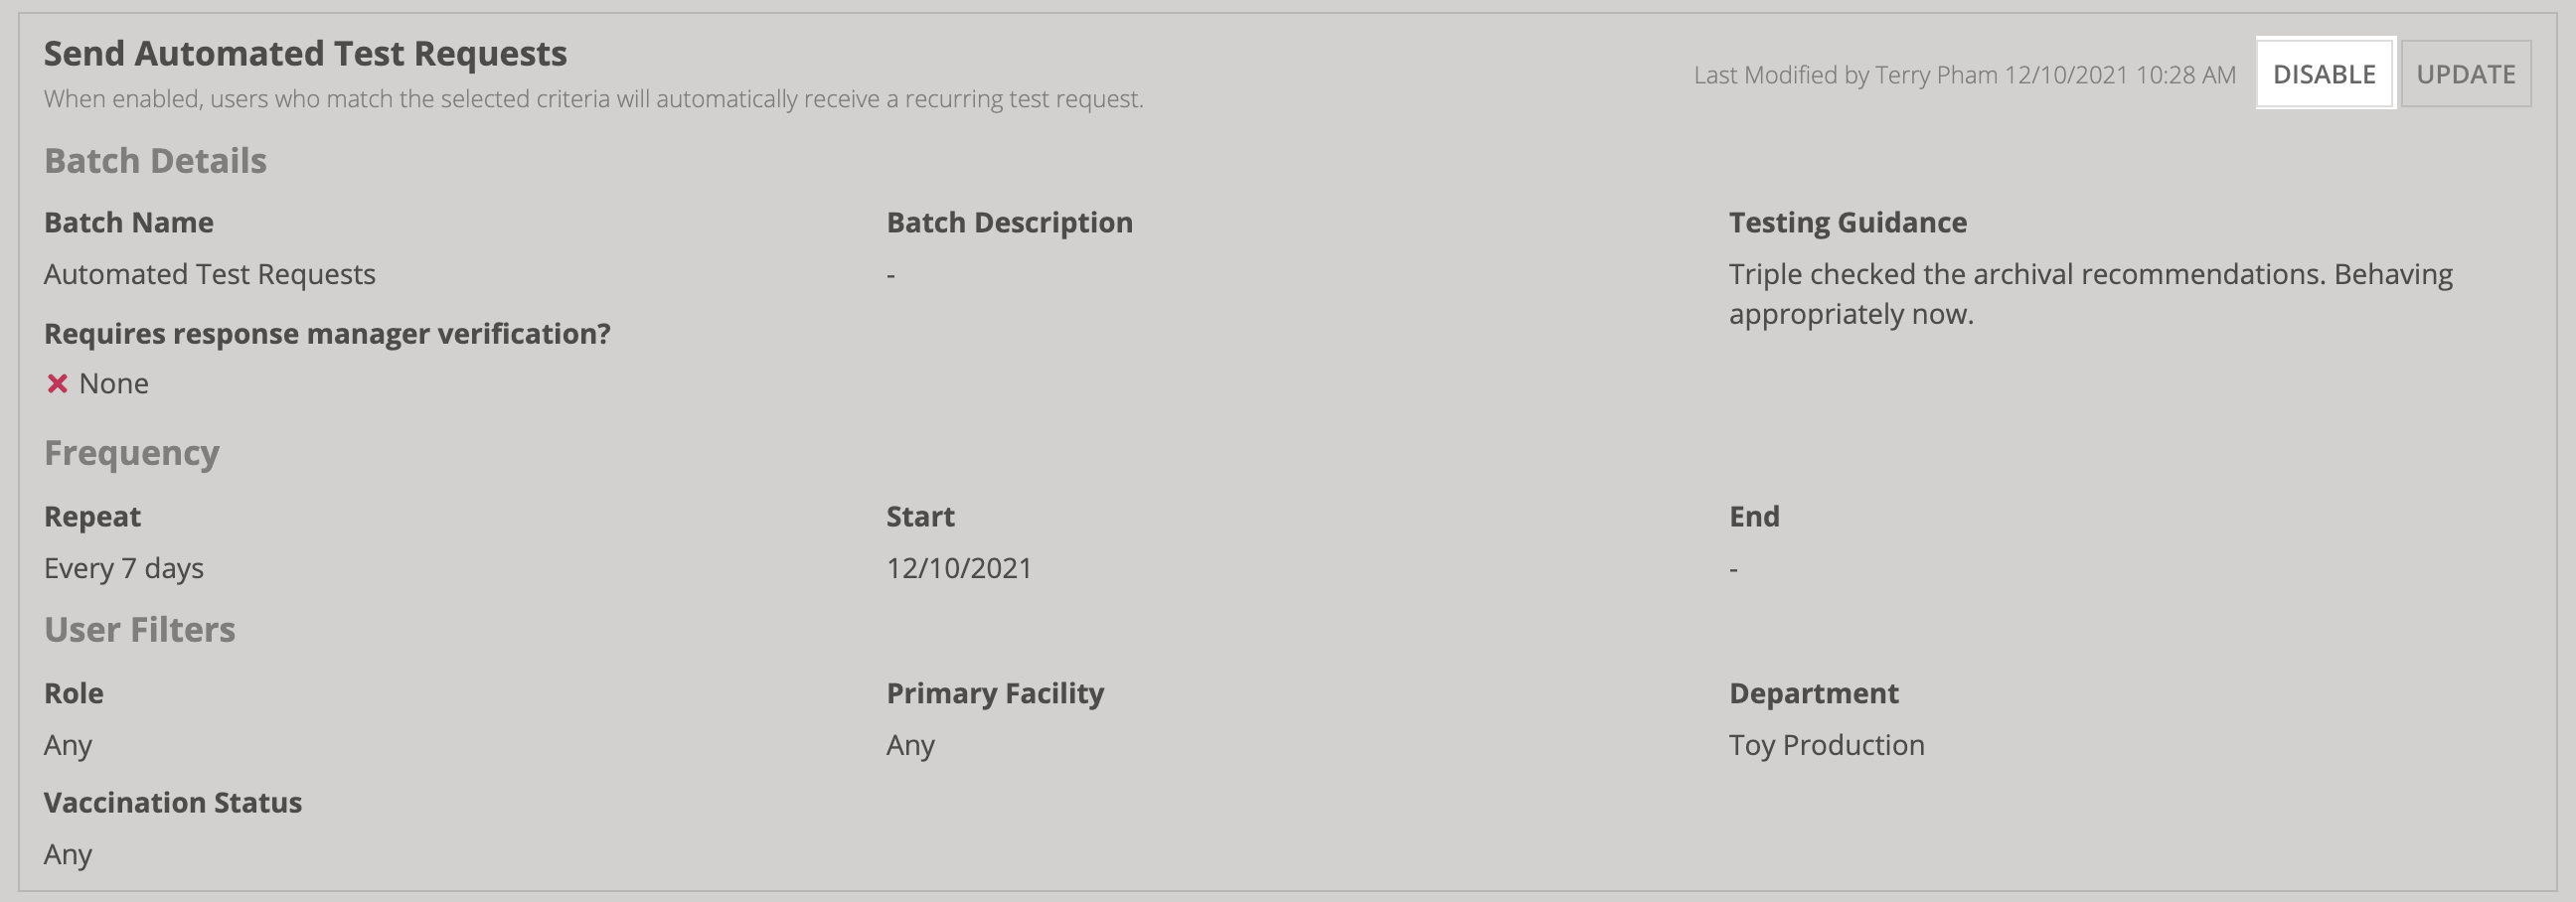
When disabled, this feature will automatically reset the existing features and users will no longer receive automated test requests.
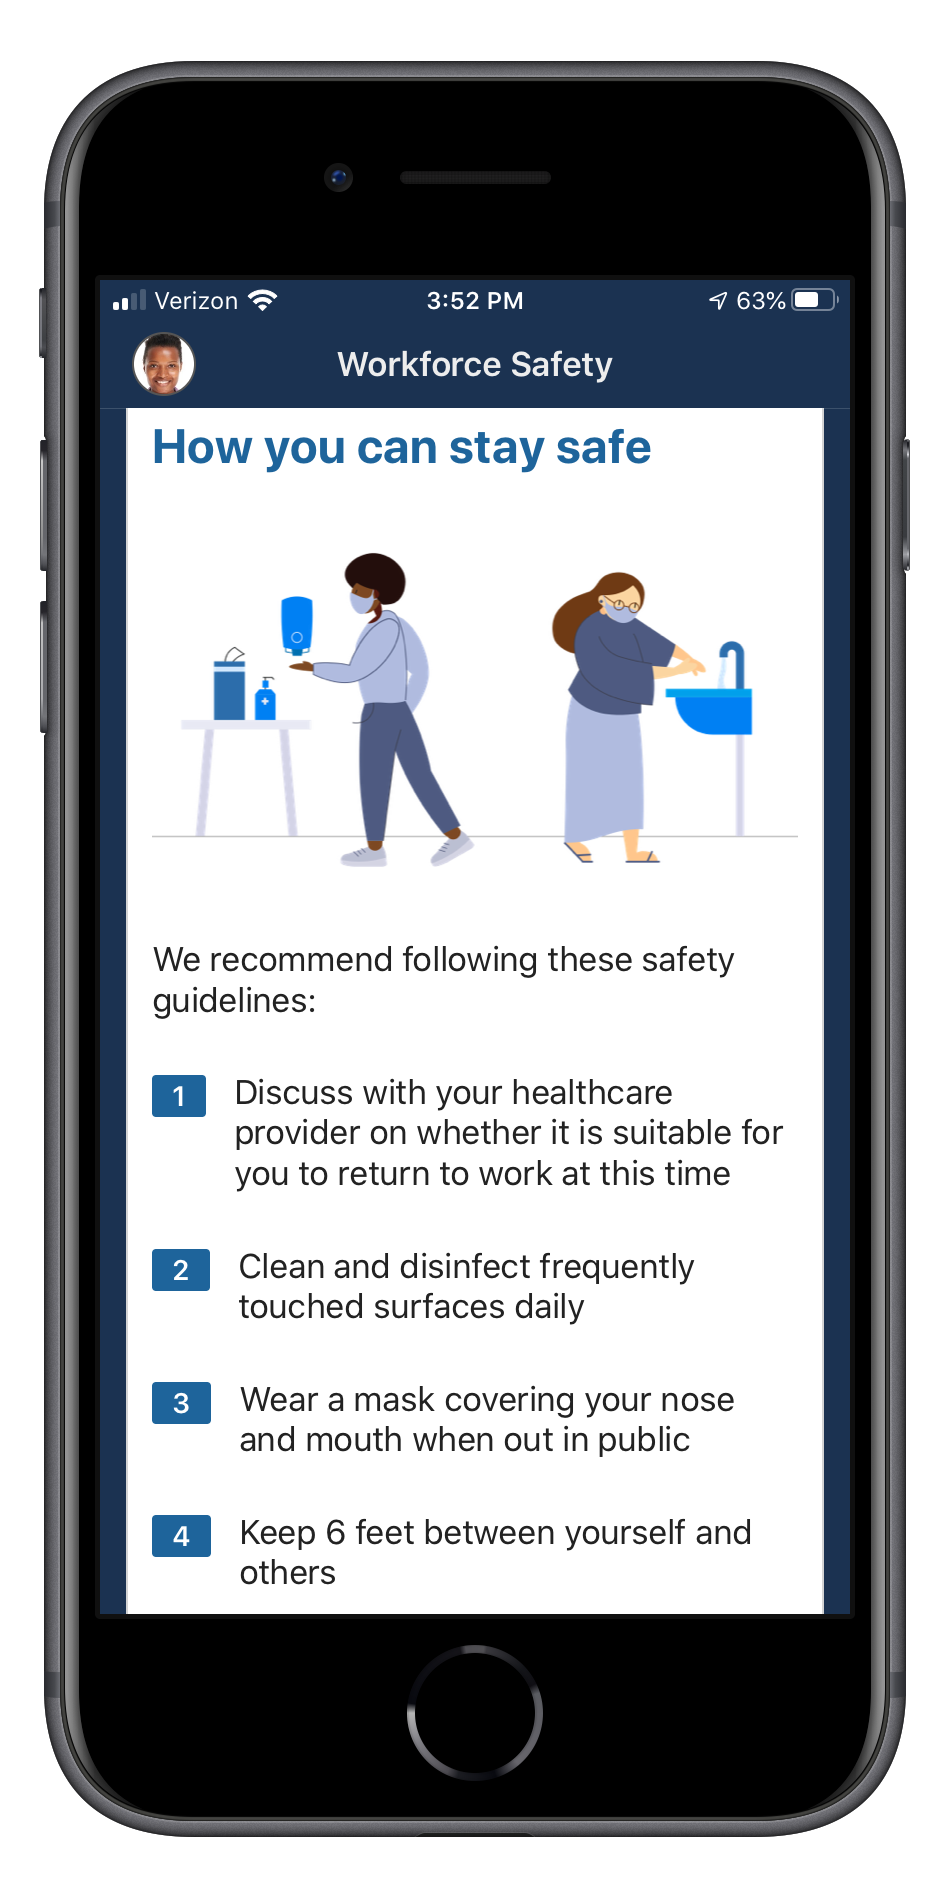
When you are configuring the questionnaire questions, for each question response you can select guidelines to display to the end user based on their response.
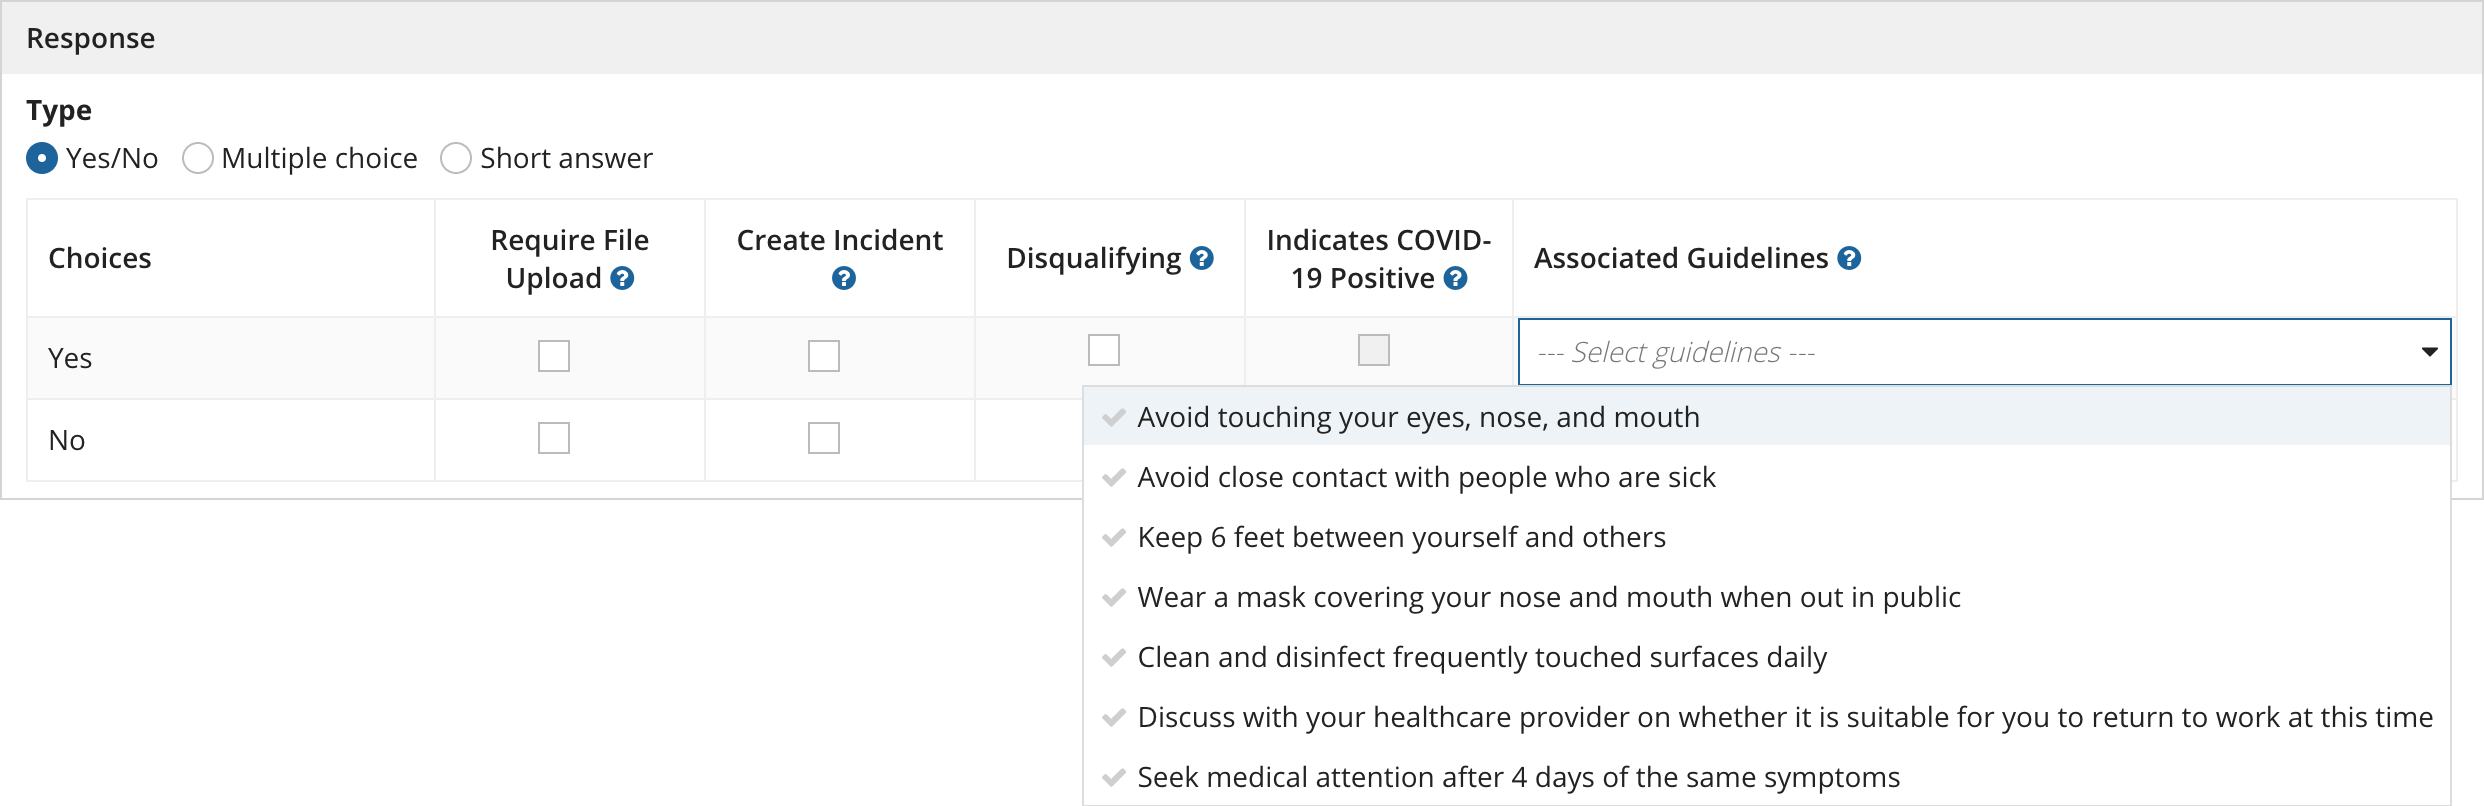
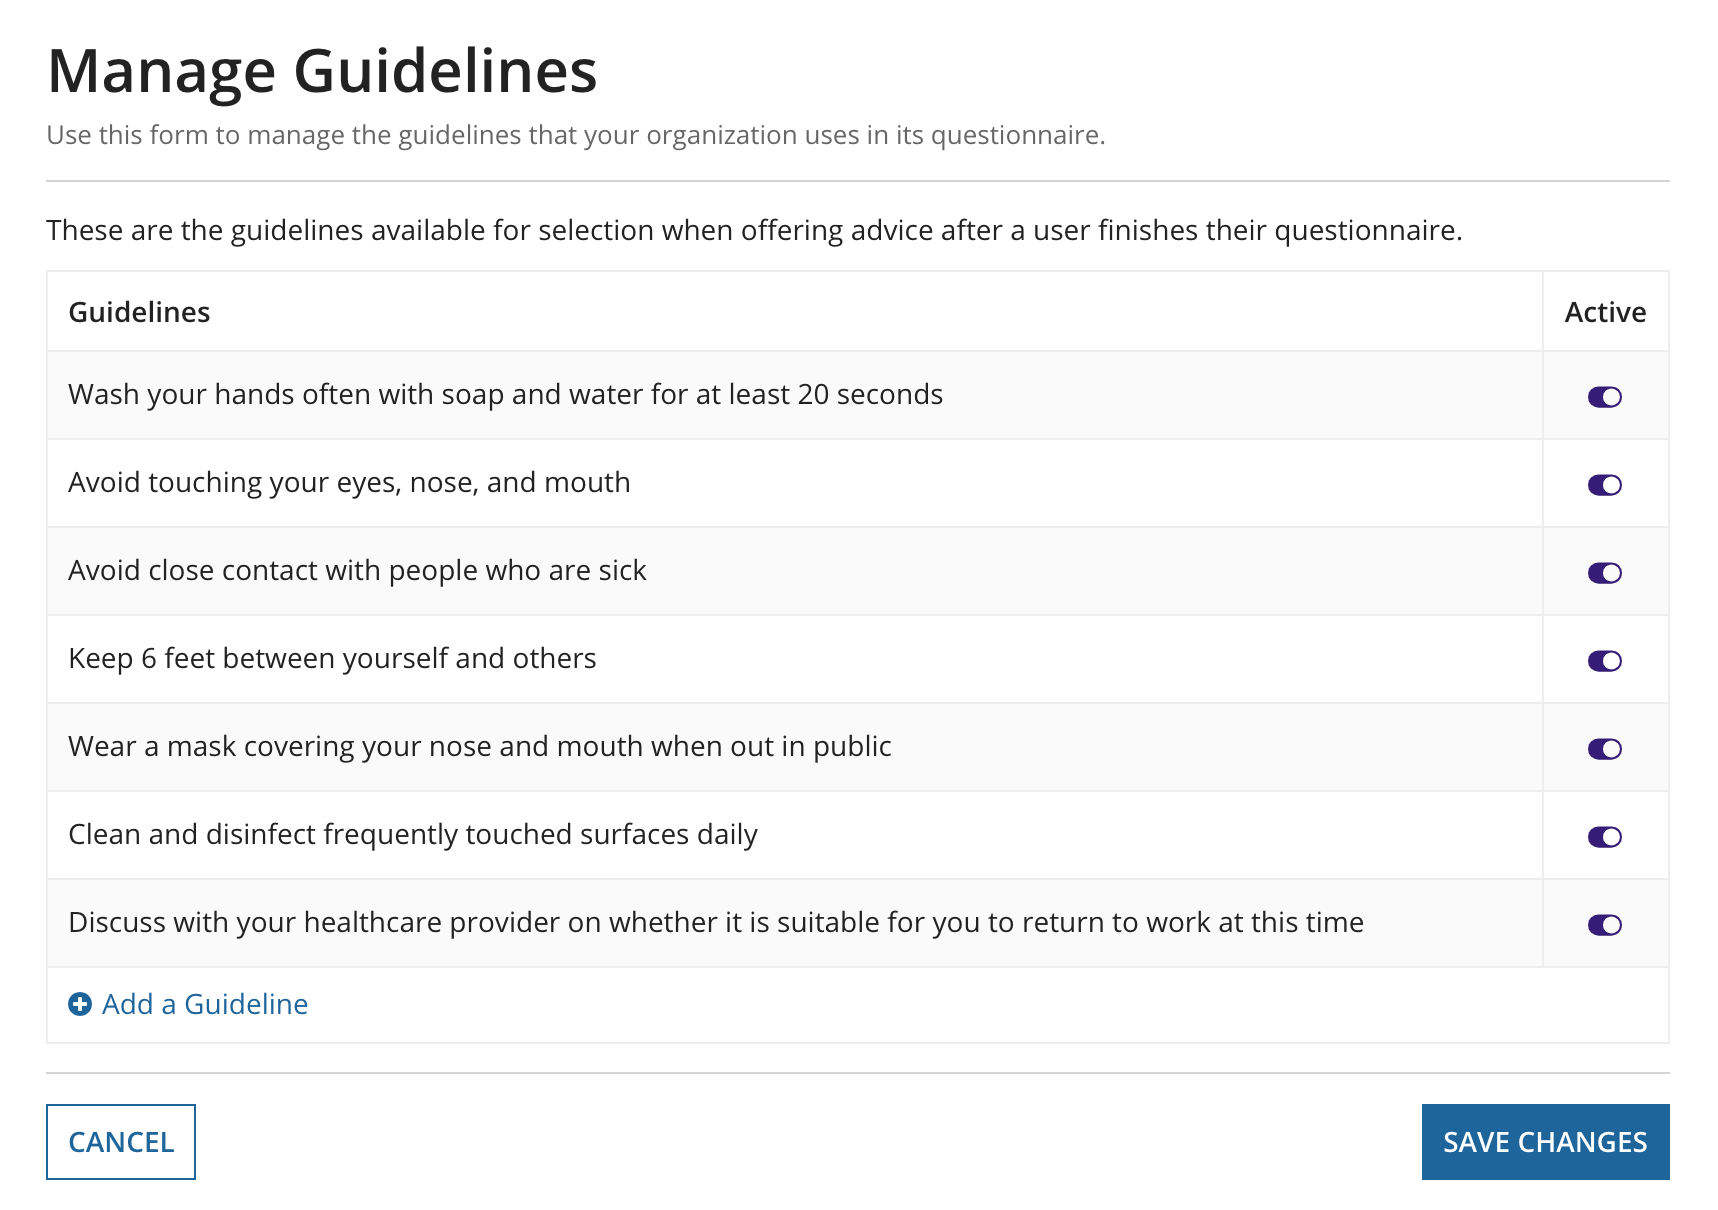
After a user requests a pass, a How you can stay safe section displays on the homepage that shows them guidelines they should follow during the crisis. Workforce Safety comes with some guidelines out of the box, but response and configuration managers can update these guidelines by adding new ones and deactivating old ones.
To manage guidelines:
The community volunteering and help requests feature helps strengthen workplace communities in a time of need with peer-to-peer support. Easily match volunteers with workplace community members in need of assistance.
This feature allows users to make a request for help or sign up to volunteer to fulfill these help requests.
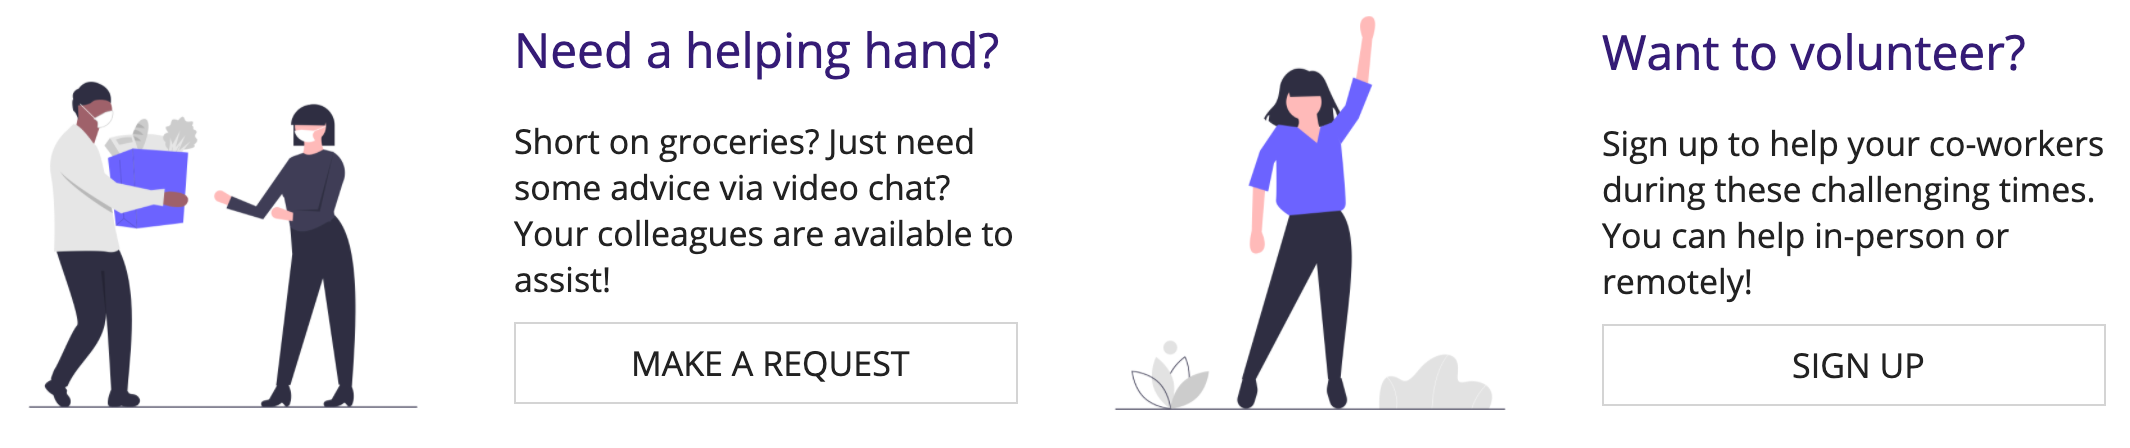
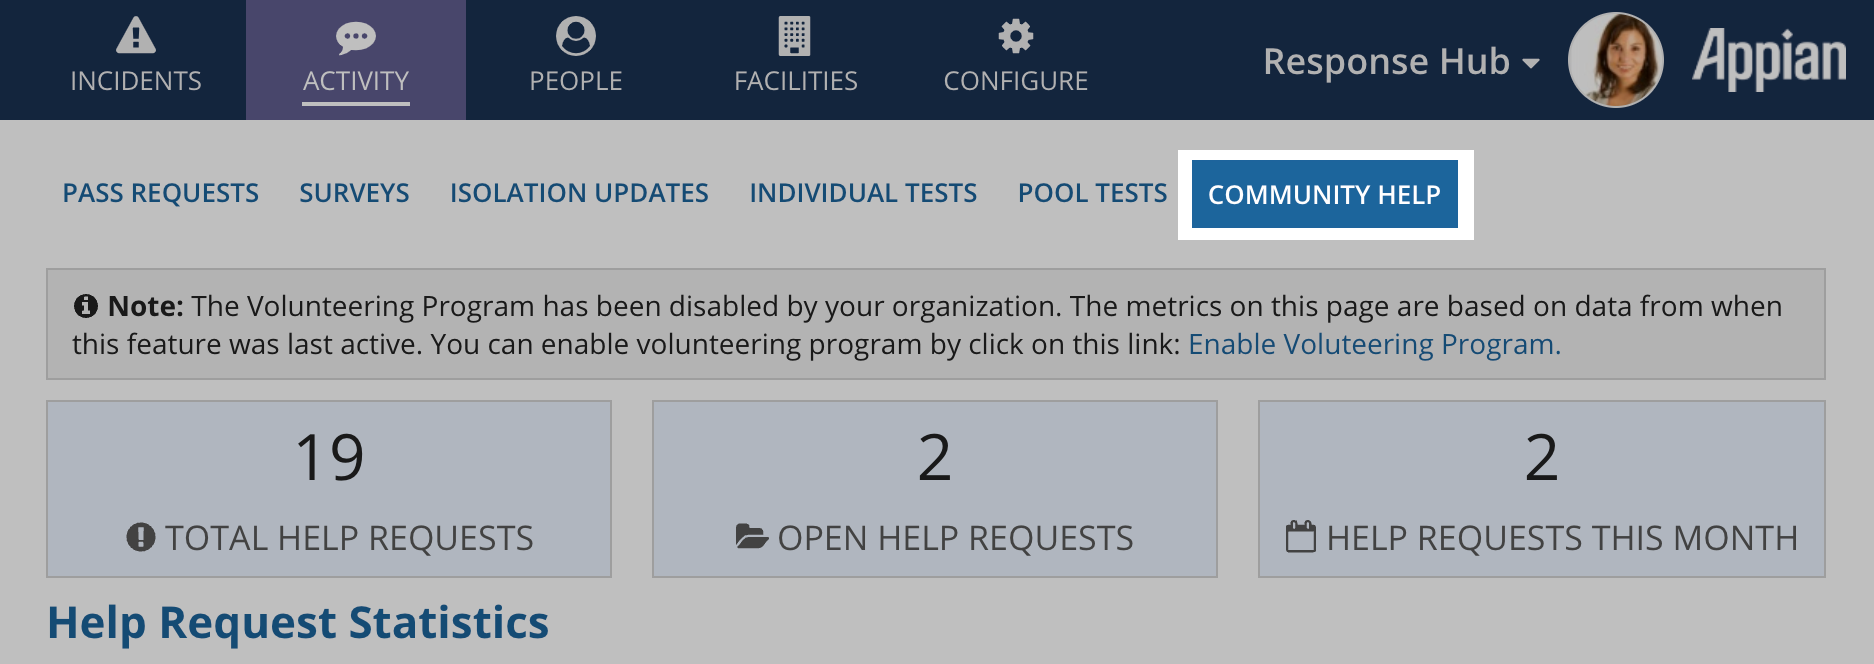
This feature is turned off by default. If you prefer to turn it on, users will see a Community Help icon on the bottom of their homepage. When they click it, they will be able to submit a help request or sign up to volunteer.
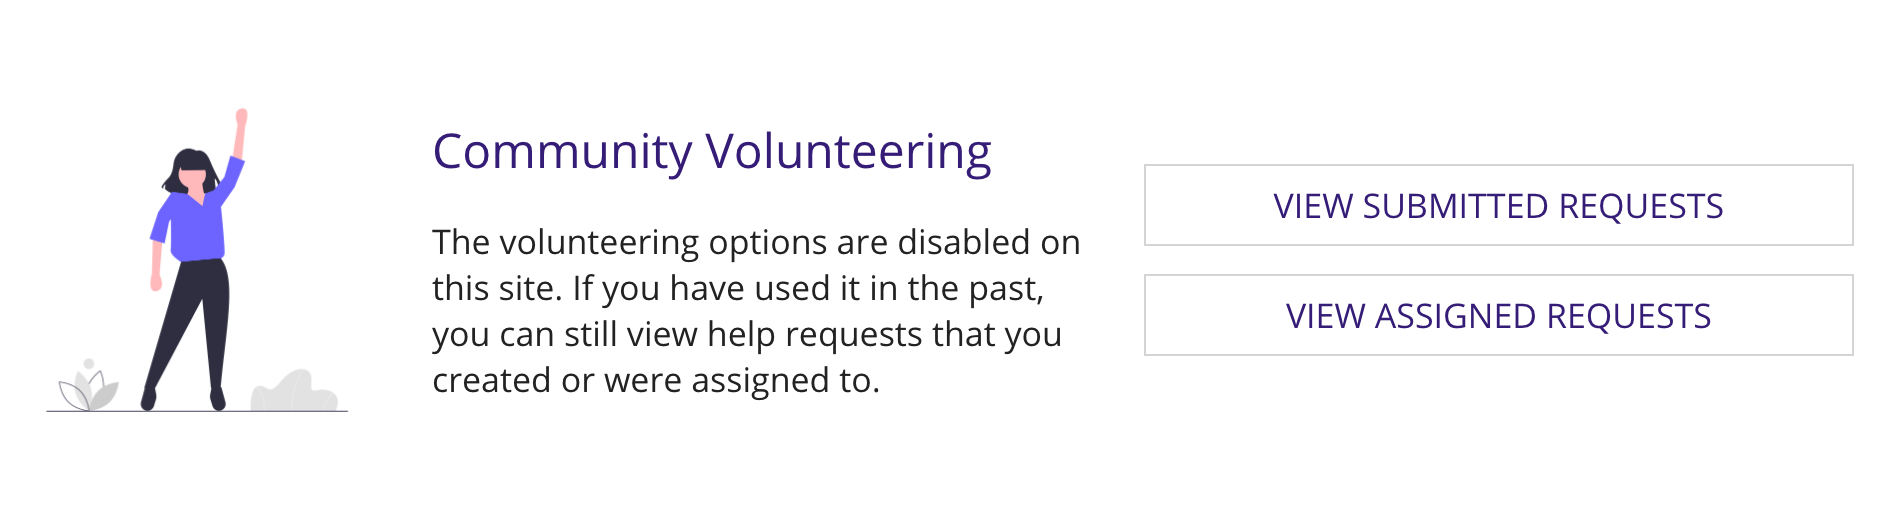
If you have used this feature in the past and decide to turn it off, users who have created help requests or signed up to volunteer will still see the Community Help icon. When they click it, they will be able to view their submitted or assigned requests.
Additionally, in the Response Hub, past help requests and volunteer information will still be visible in the COMMUNITY HELP tab.
Response managers, coordinators, and configuration managers can manage the volunteer categories.
Volunteer categories are used in help requests and volunteer forms. When users request help, they can select from these categories to indicate what they need help with. Volunteers can select from these categories to indicate how they can help. The solution automatically includes some default volunteer categories to get you started.
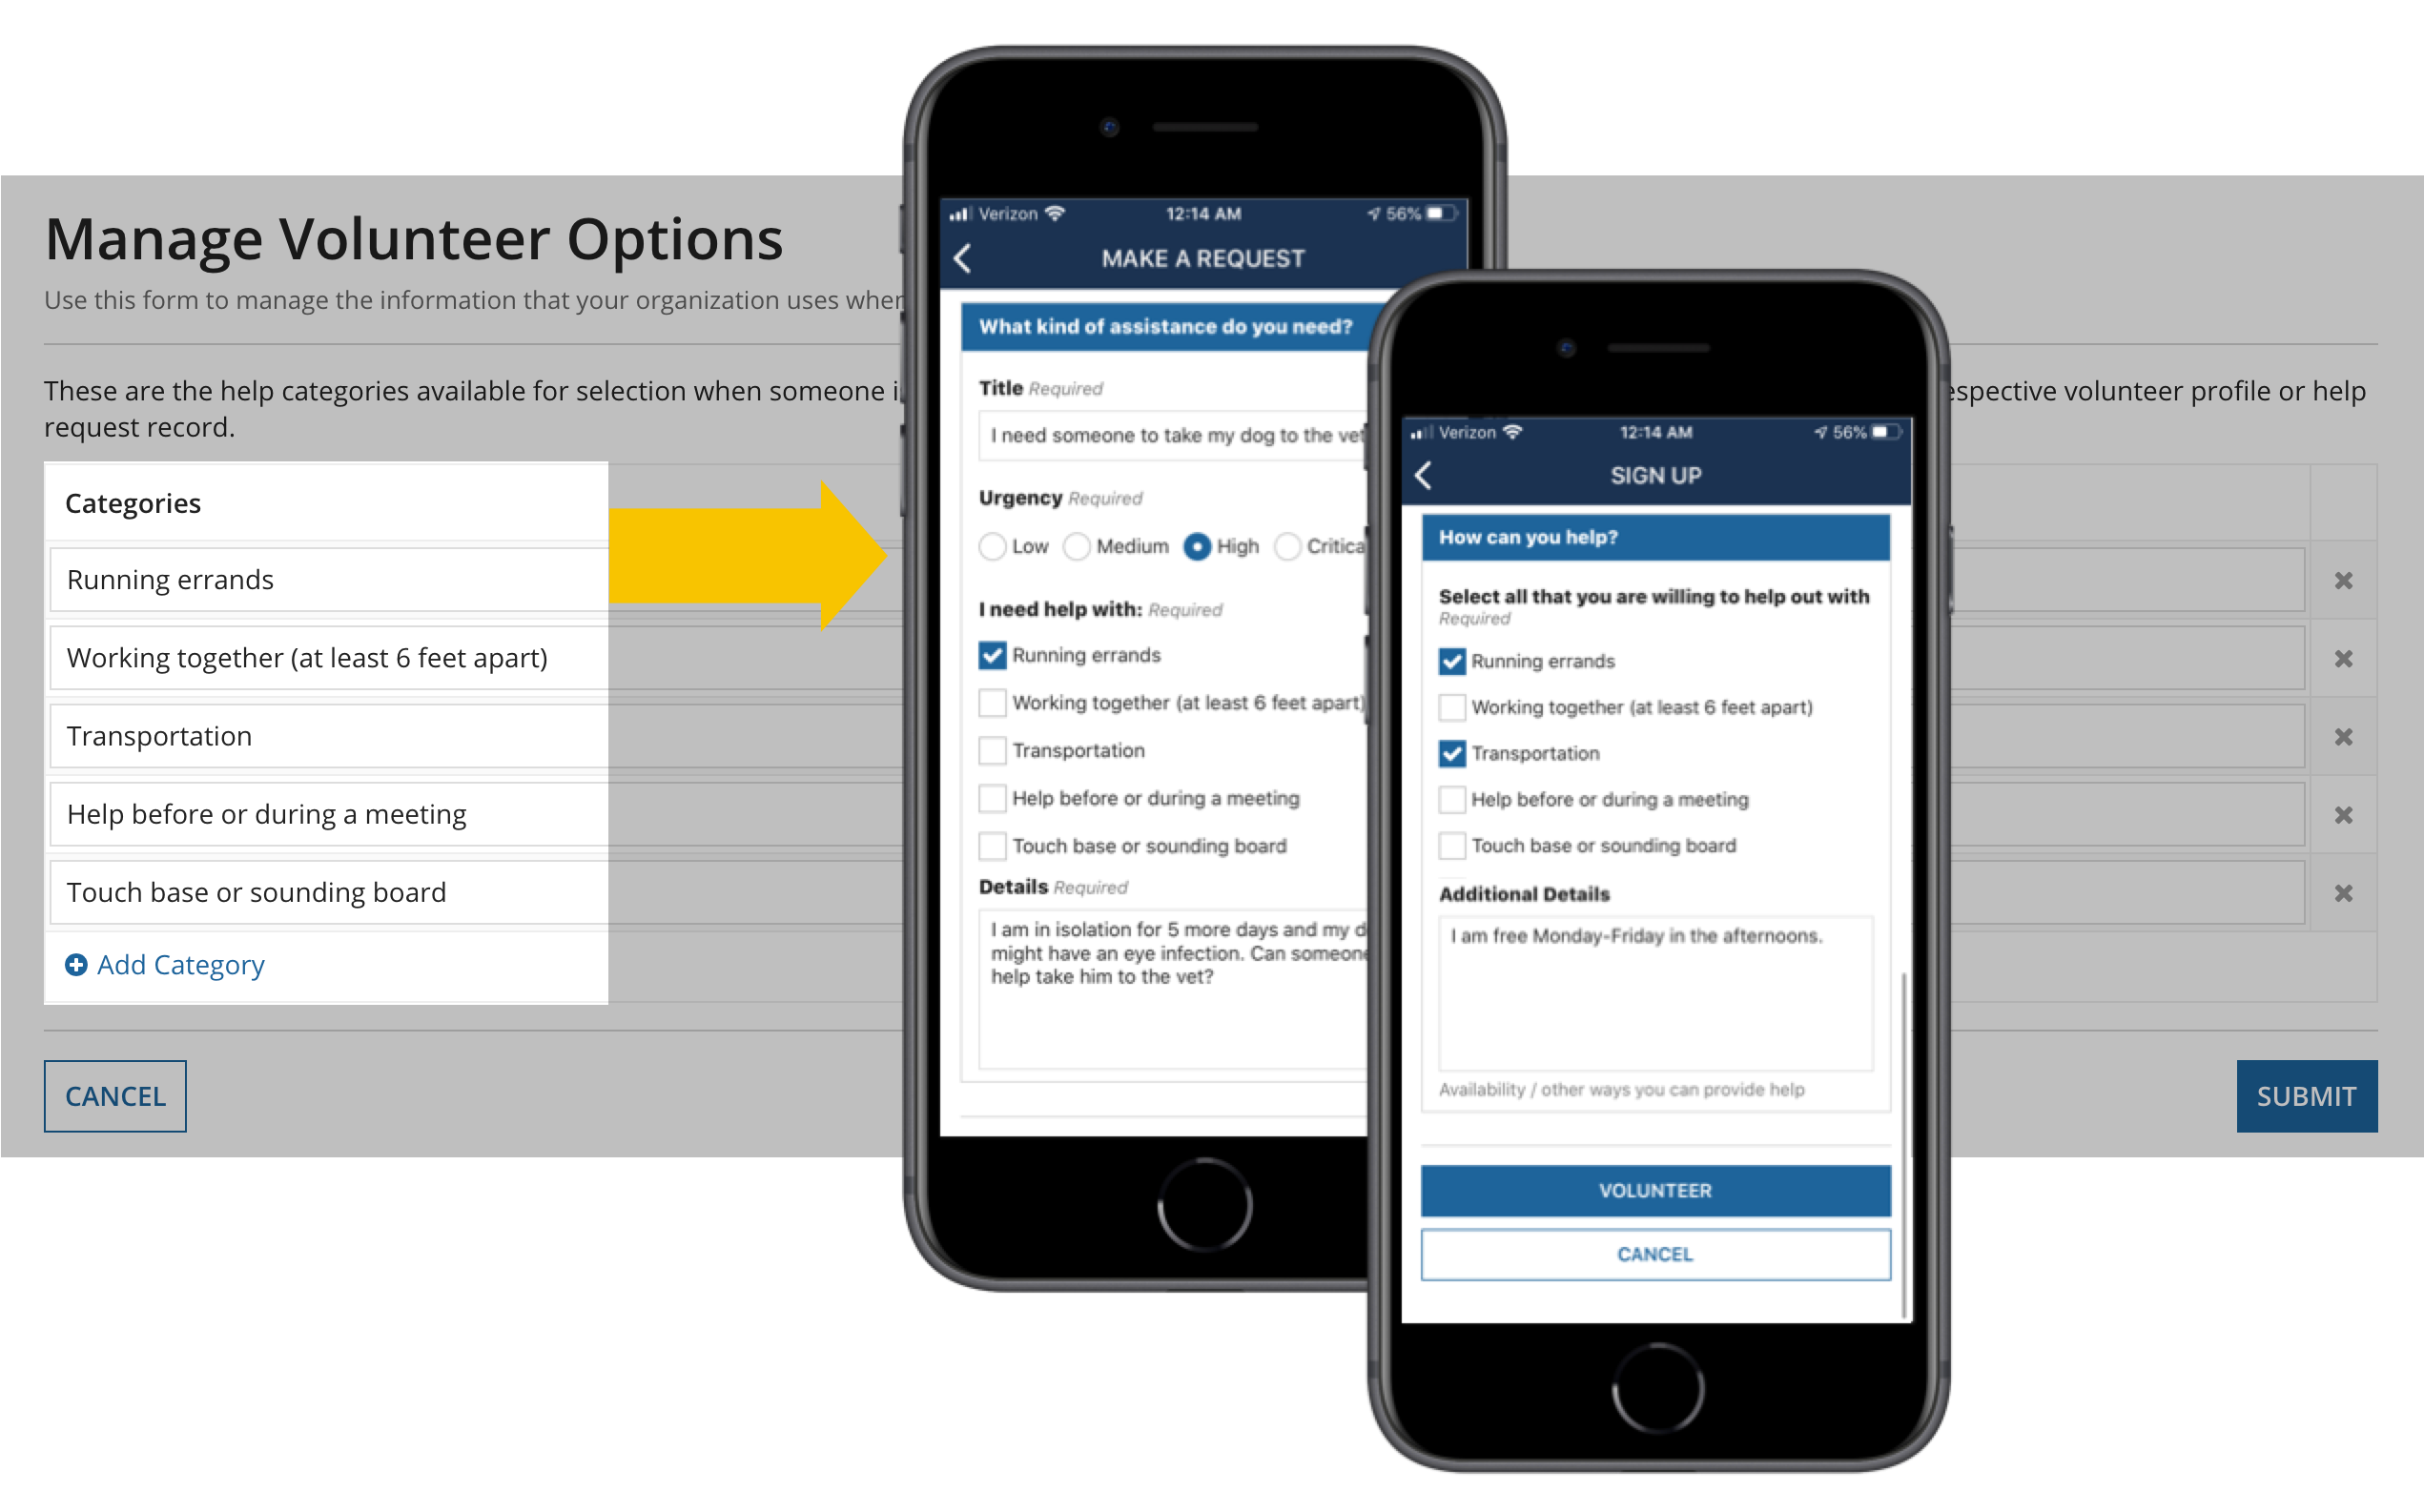
After a volunteer category is added, it can't be deleted, but it can be renamed. This is also true for the default volunteer categories.
To update or add volunteer categories:
