| This content applies solely to Workforce Safety, which must be purchased separately from the Appian base platform. This content was written for Appian 21.4 and may not reflect the interfaces or functionality of other Appian versions. |
You may want to create target announcements and send them to specific users? Or schedule an announcement that you want to post at a future date and time? Workforce Safety allows you to send an announcement to all users or send an announcement to specific departments and facilities only using the Announcements feature in the Employee Communication and Resources section. The solution also allows you to configure scheduled announcements and view a list of all of your current, scheduled, and archived announcements.
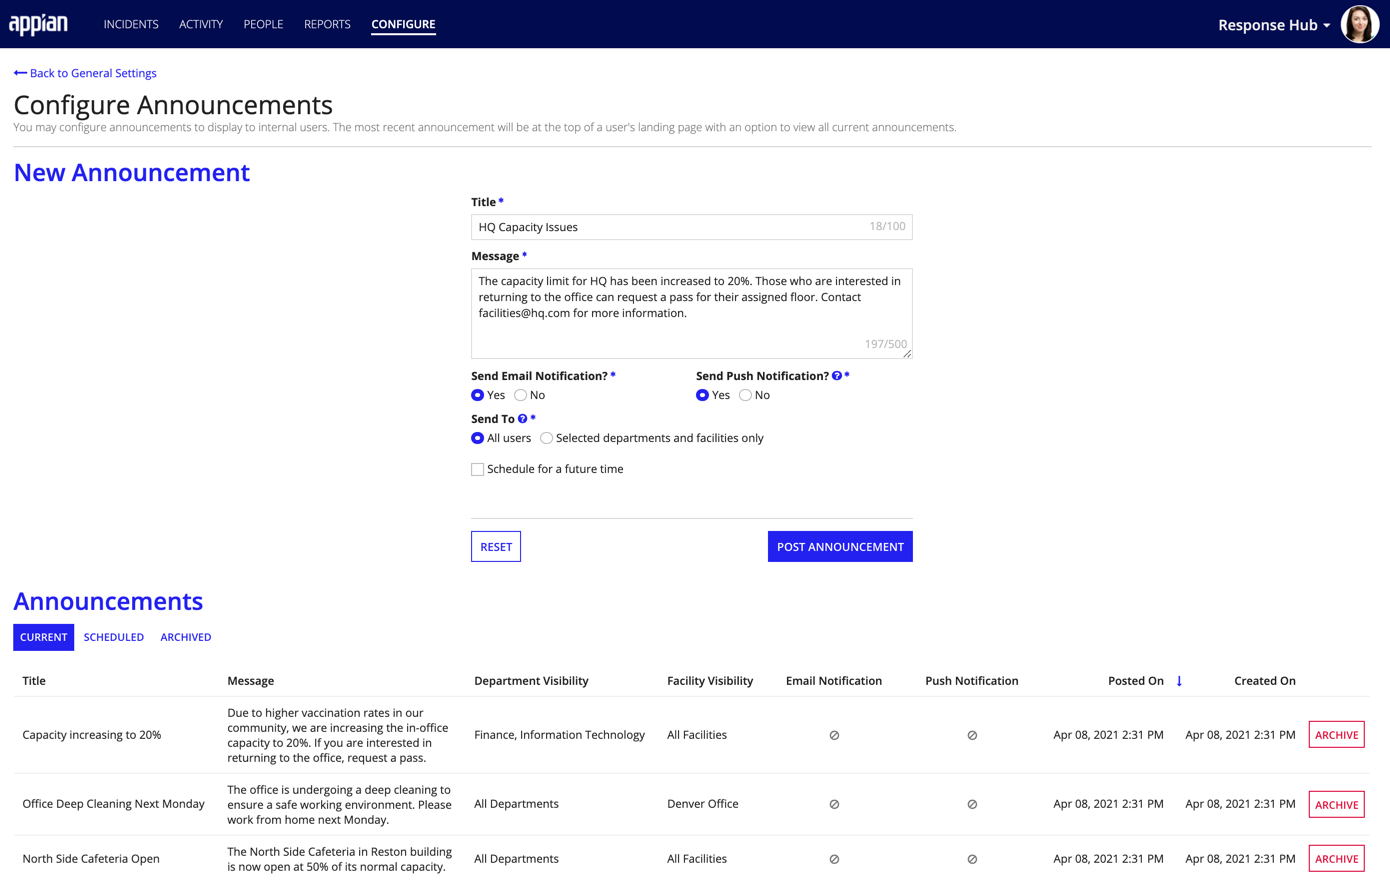
There's no limit, you can create as many announcements as you need.
If you choose to send an announcement to users in a specific department or facility, you can select one or multiple departments, facilities, or both for the target the announcement. Users in the selected groups are the only ones who will receive email and push notifications for the announcement. They are also the only ones who can view the announcement on their landing page.
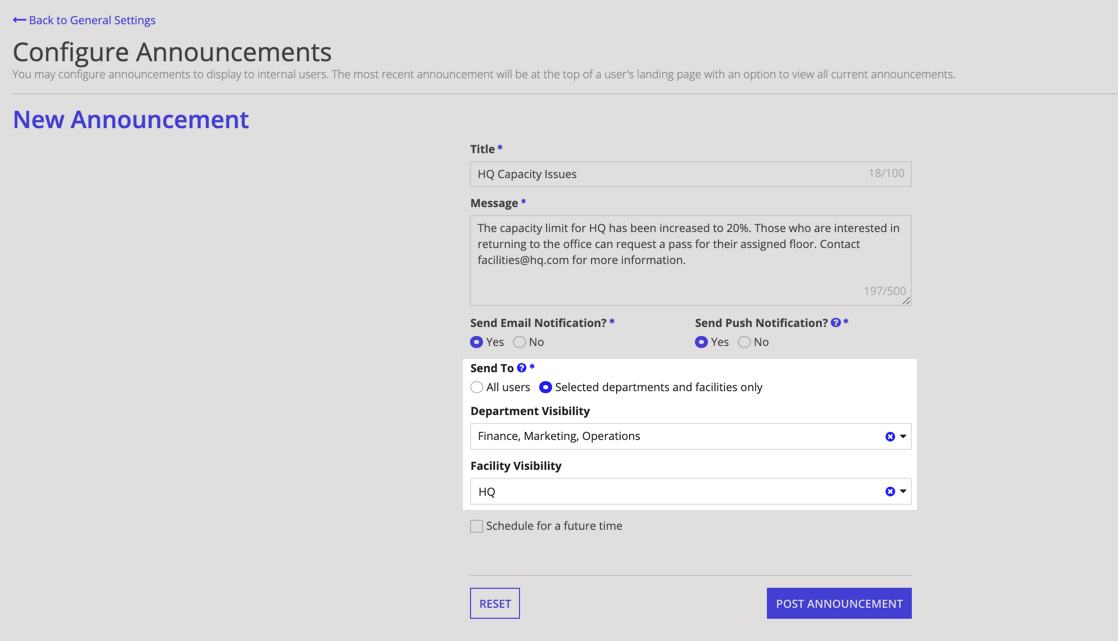
To configure an announcement for specific users:
To schedule an announcement for a date and time in the future, simply check the Schedule for a future time checkbox when configuring your announcement. Select the date and time for your scheduled announcement using the Scheduled Date & Time picker.
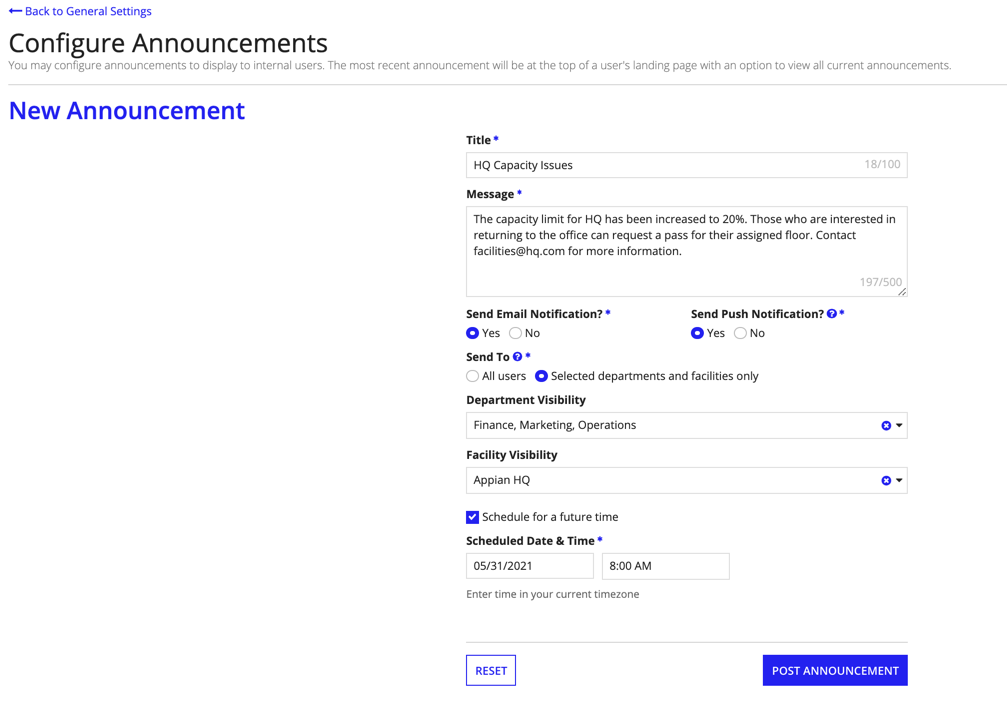
Note that all announcements are sent at the same time to your selected audience. For example, if a response manager in Chicago scheduled an announcement for 9 AM (CST), employees in New York would see the announcement displayed on their landing page at 10 AM (EST).
If you configured your announcement with email or push notifications, they will also be sent at the scheduled time.
Need to review your current or archive announcements, or review or cancel a scheduled announcement? You can view all announcements in the Announcements grid.
From the Announcement grid, you can select the CURRENT tab to view all of your announcements that have already posted. Need to archive an announcement? Locate the announcement you want to archive and simply click ARCHIVE at the end of the row. Click the ARCHIVED tab to view all of your archived announcements.
If you made a mistake when creating a scheduled announcement or no longer want to post an upcoming announcement, select SCHEDULED to view a list of your upcoming announcements and click CANCEL to delete the scheduled announcement.
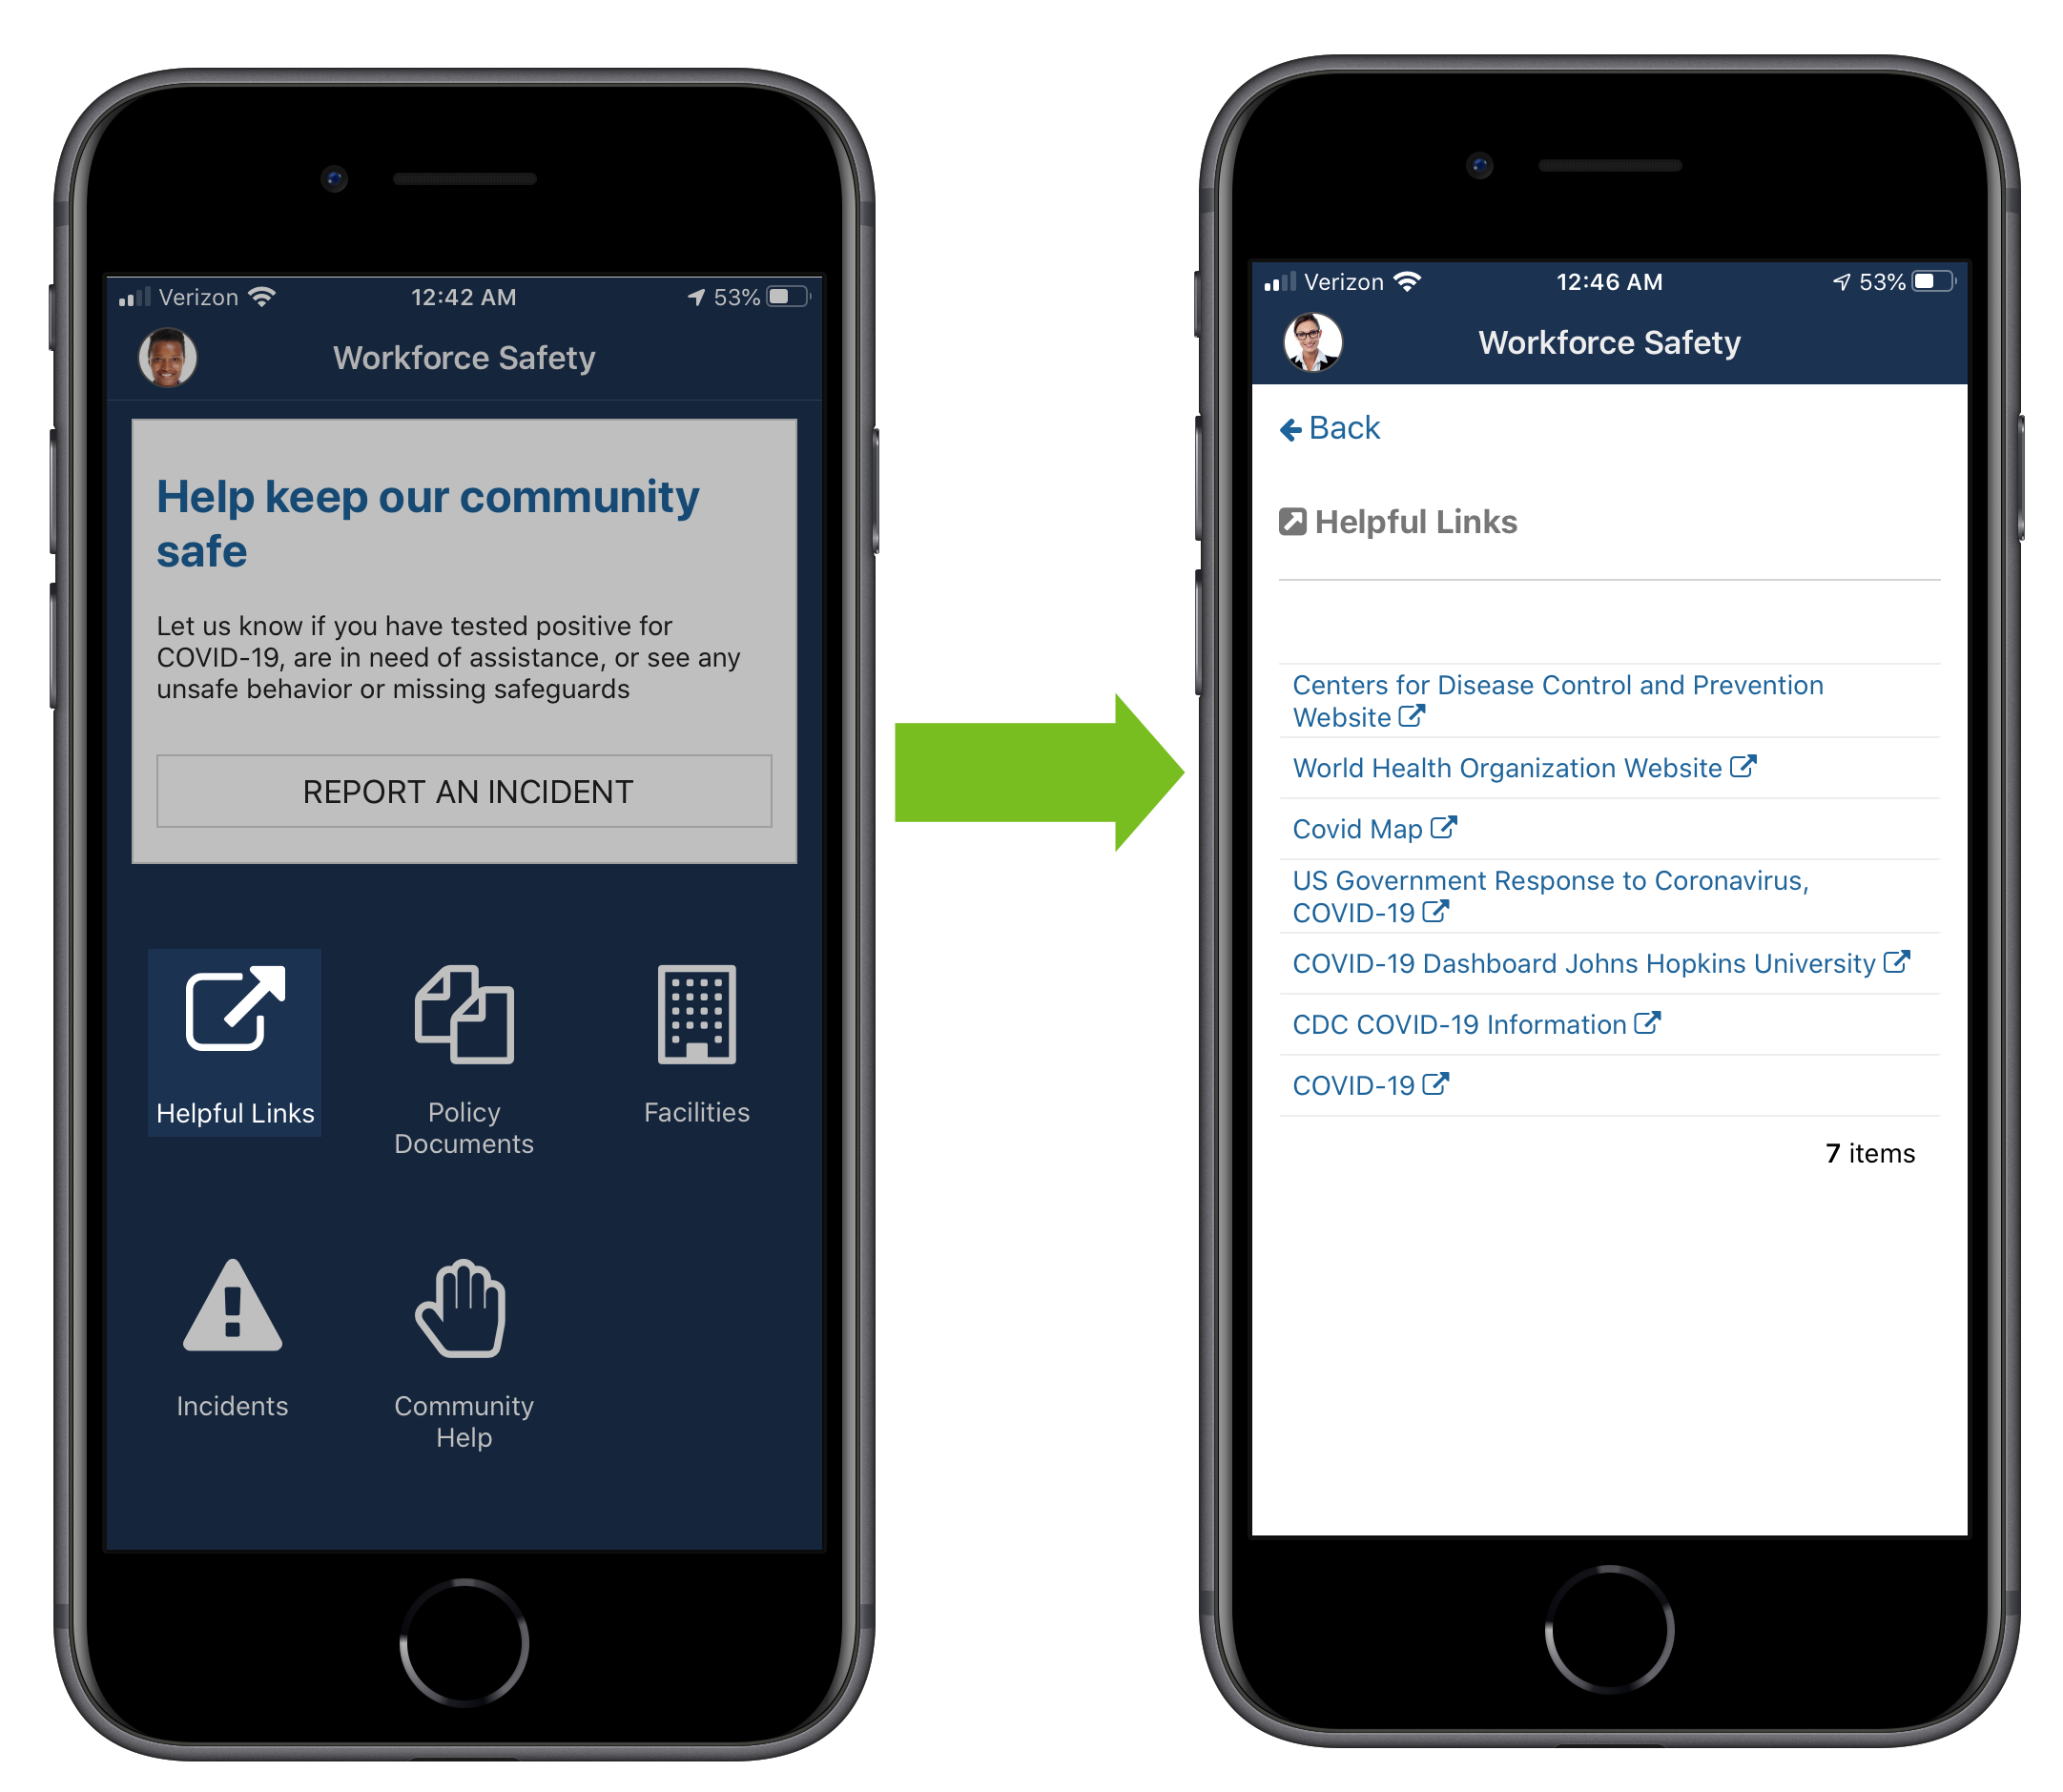
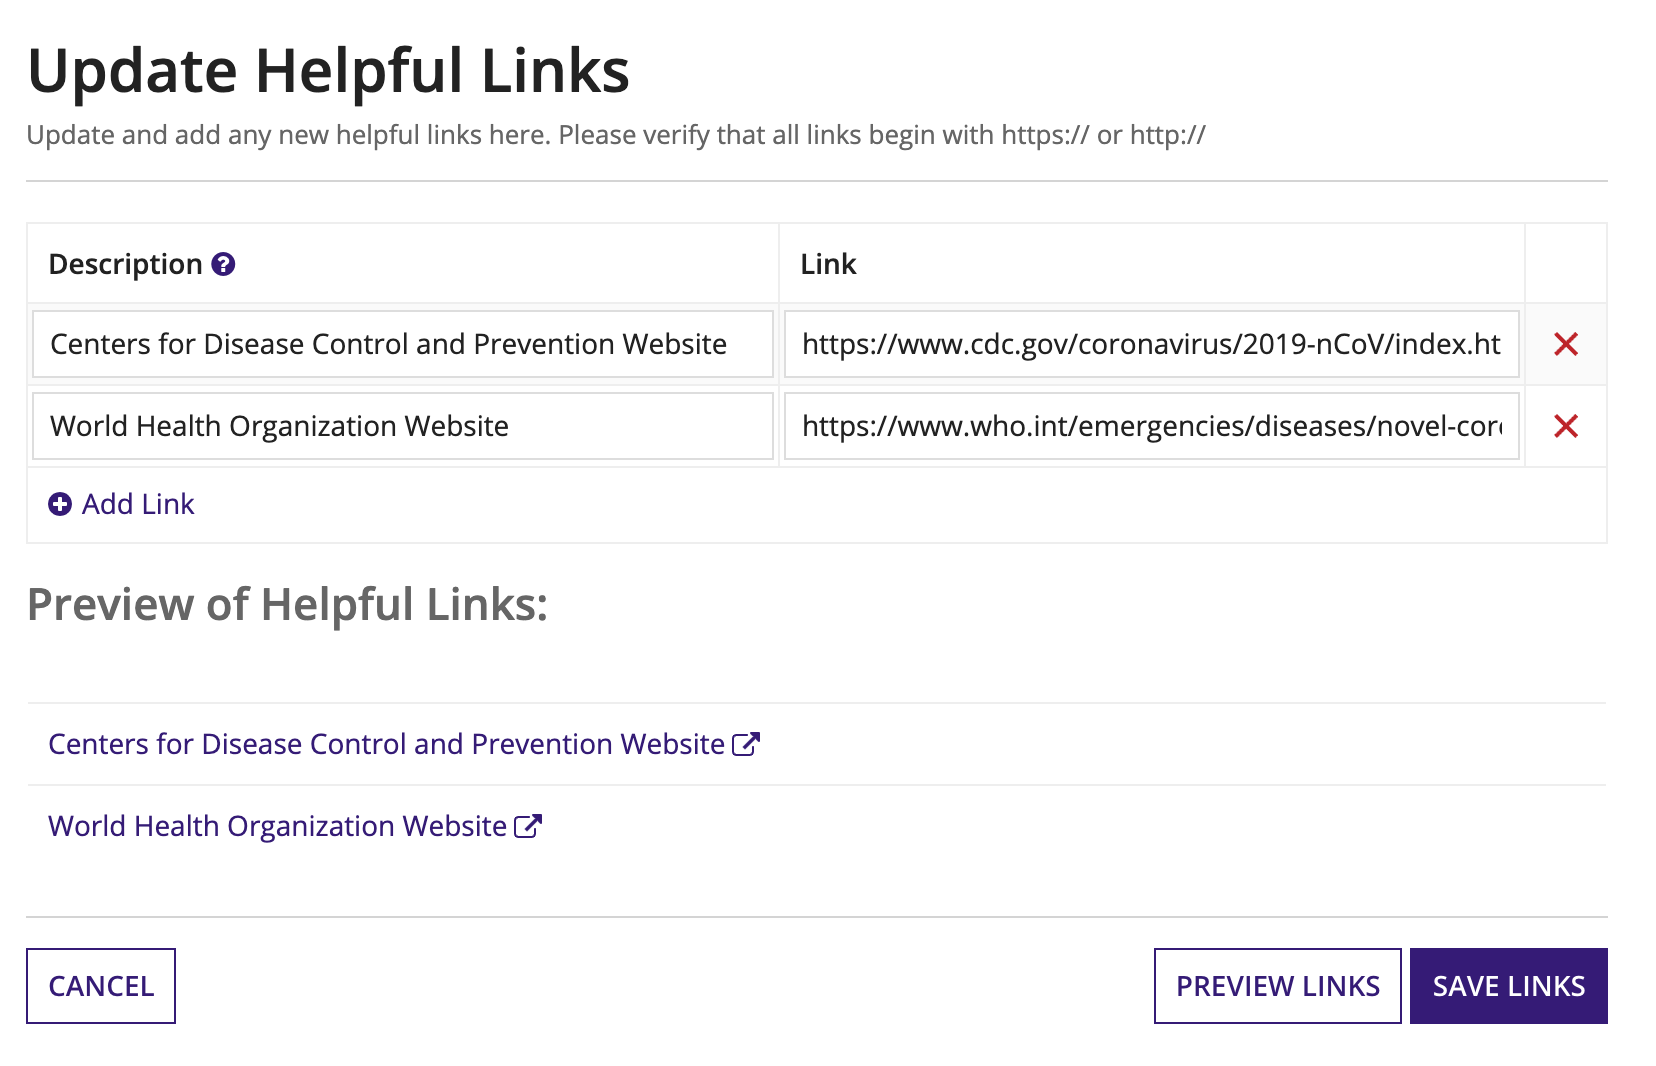
During a crisis, information is constantly changing. That is why Workforce Safety allows response and configuration managers to share helpful links with users. These links are accessed on the Workforce Safety site by clicking Helpful Links.
To update helpful links:
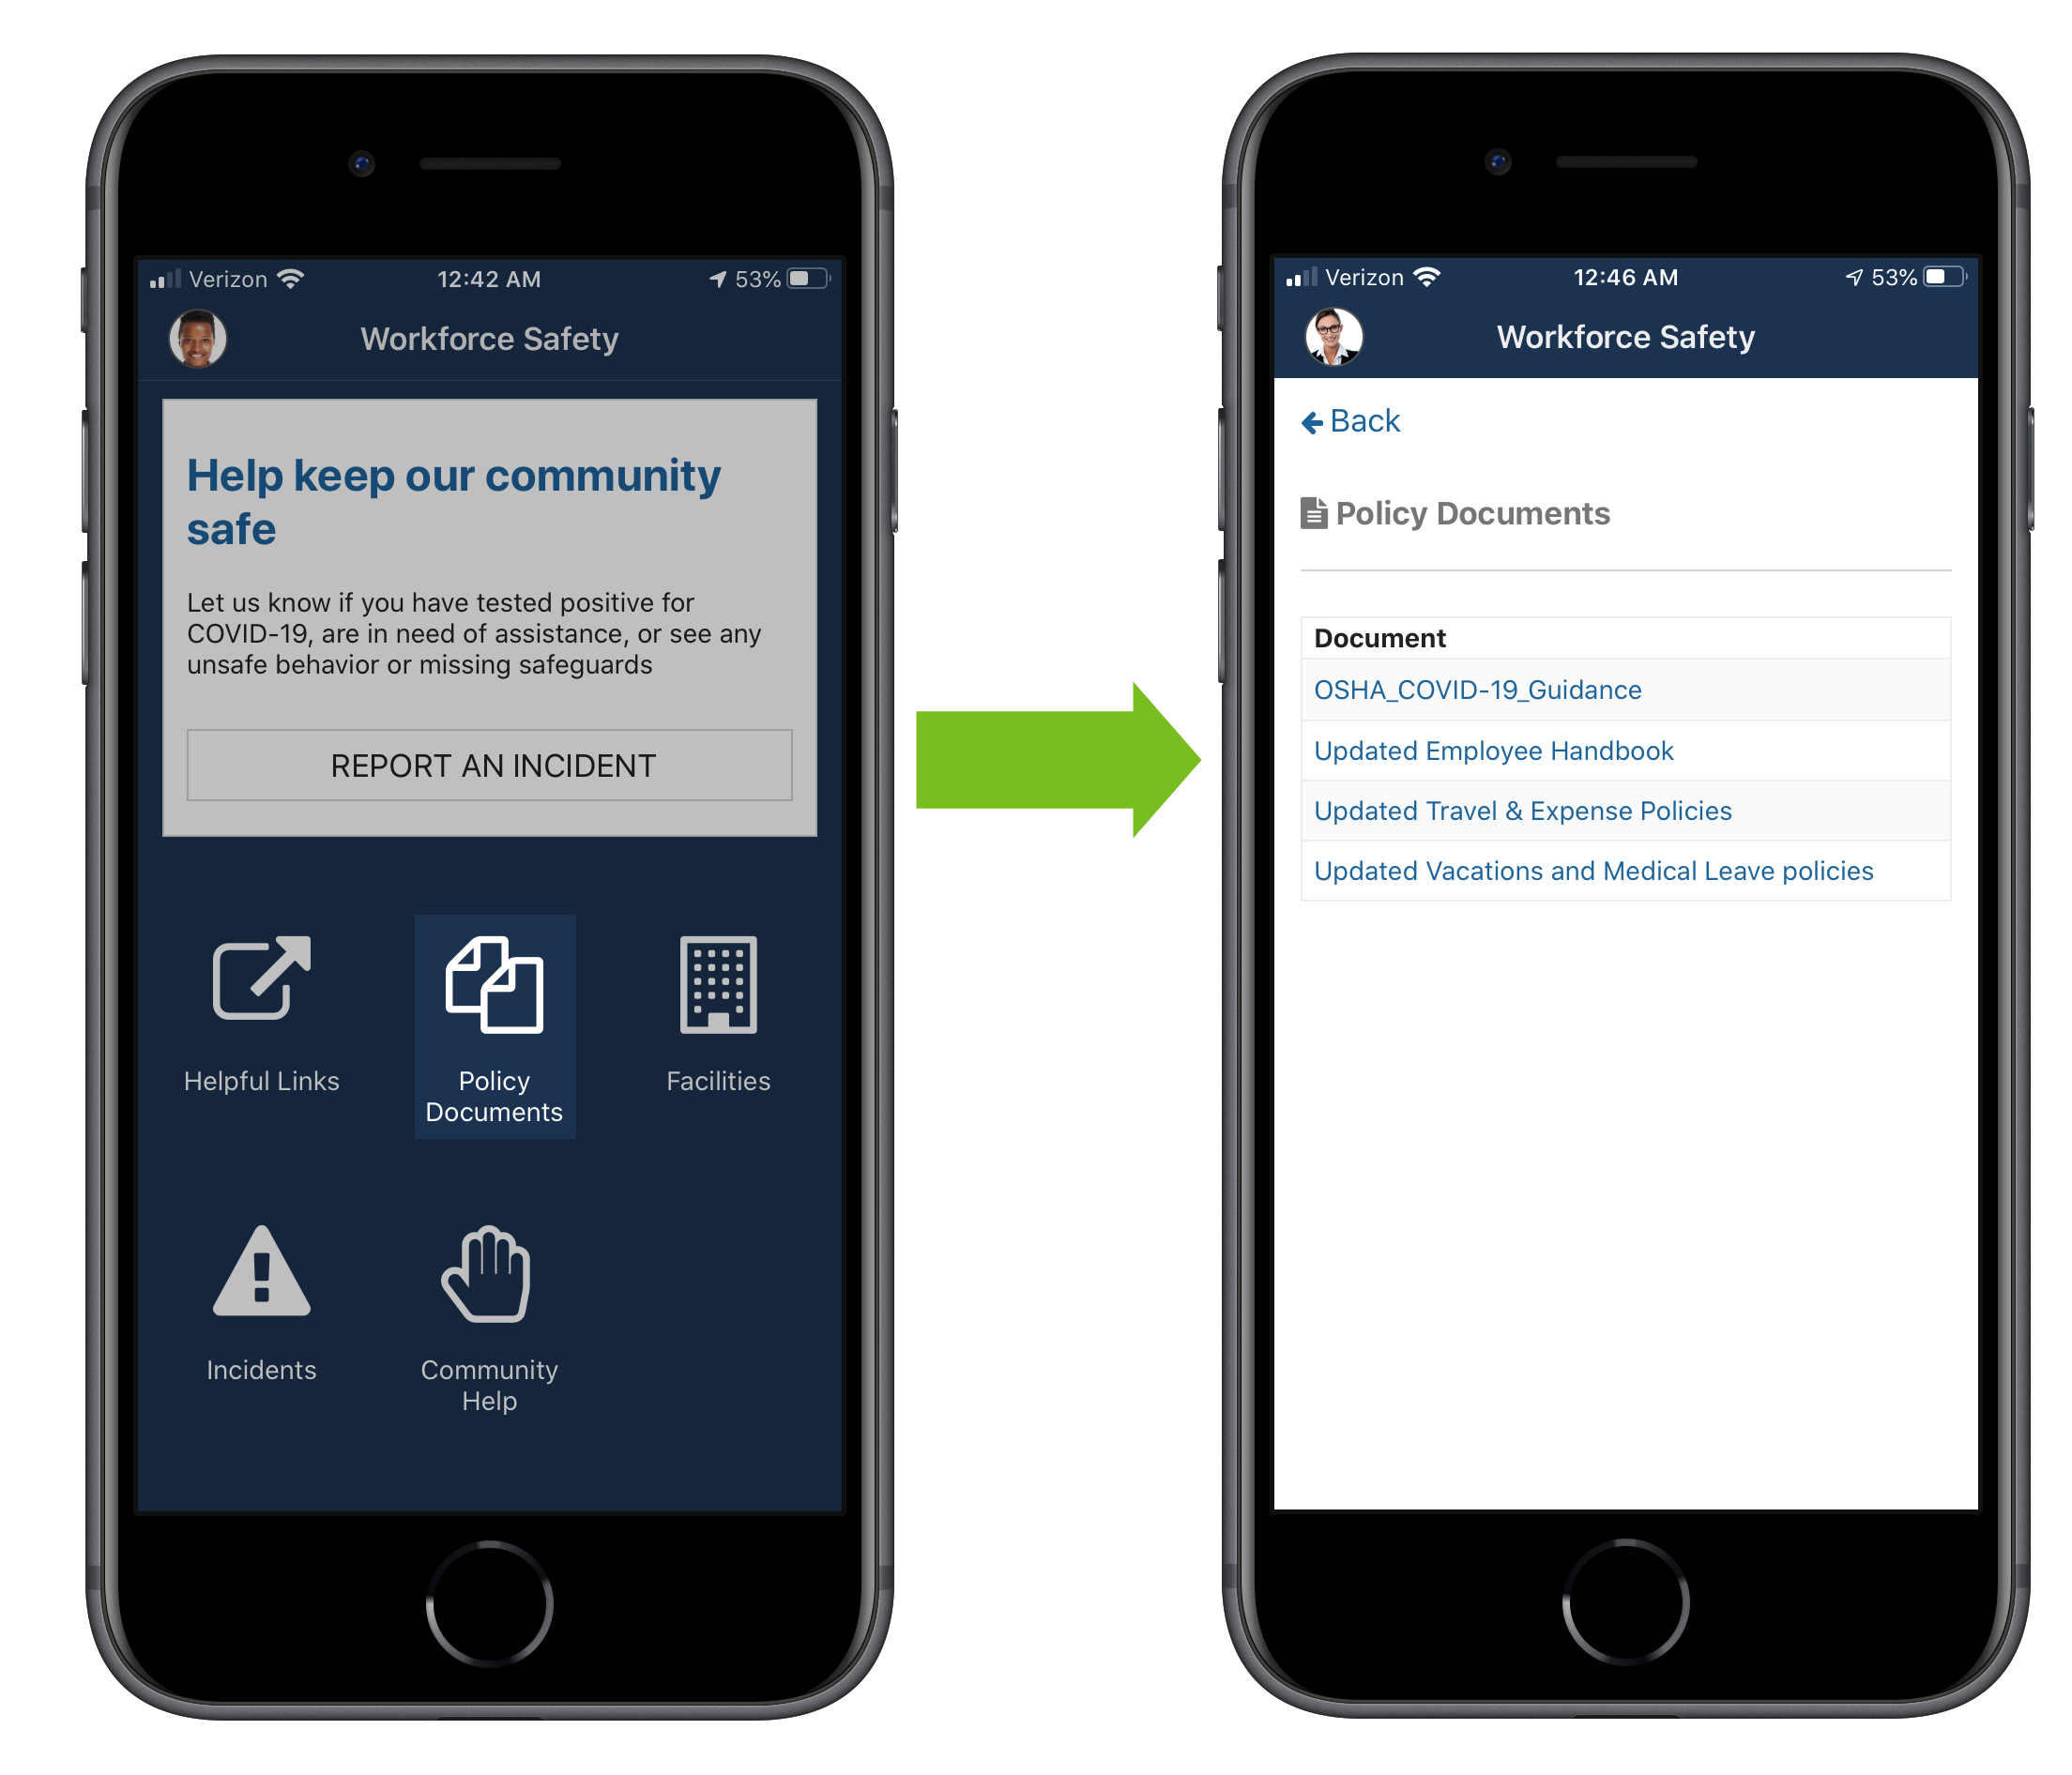
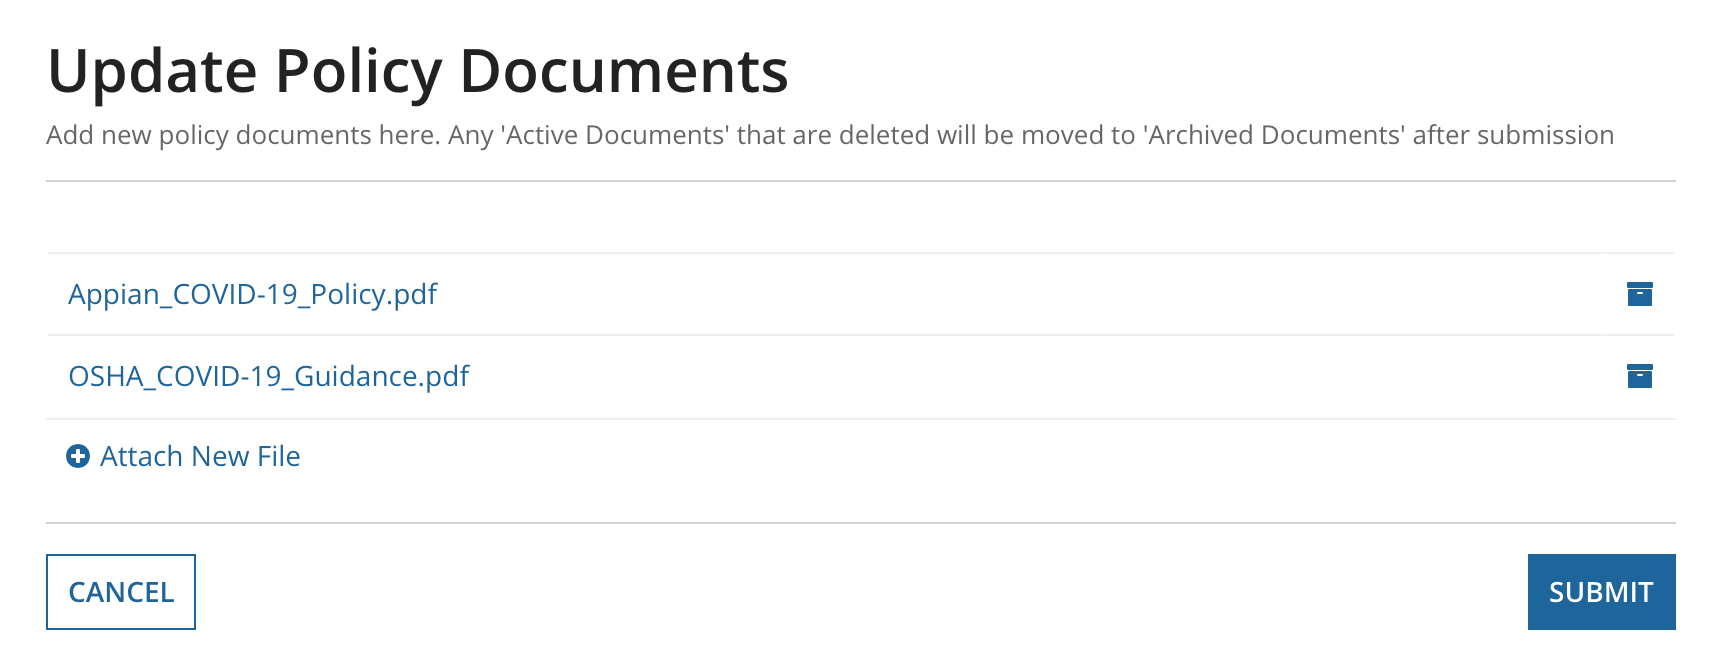
A crisis situation may lead to rapid changes in policies. Response and configuration managers can ensure that their users have access to the latest policies in one place using the Policy Documents link on the Workforce Safety site.
To update policy documents:
Workforce Safety gives you the ability to modify several messages users will see. These include the message that displays to users after they are put into the Isolation status and the default message that is sent to users when response managers request a new test.
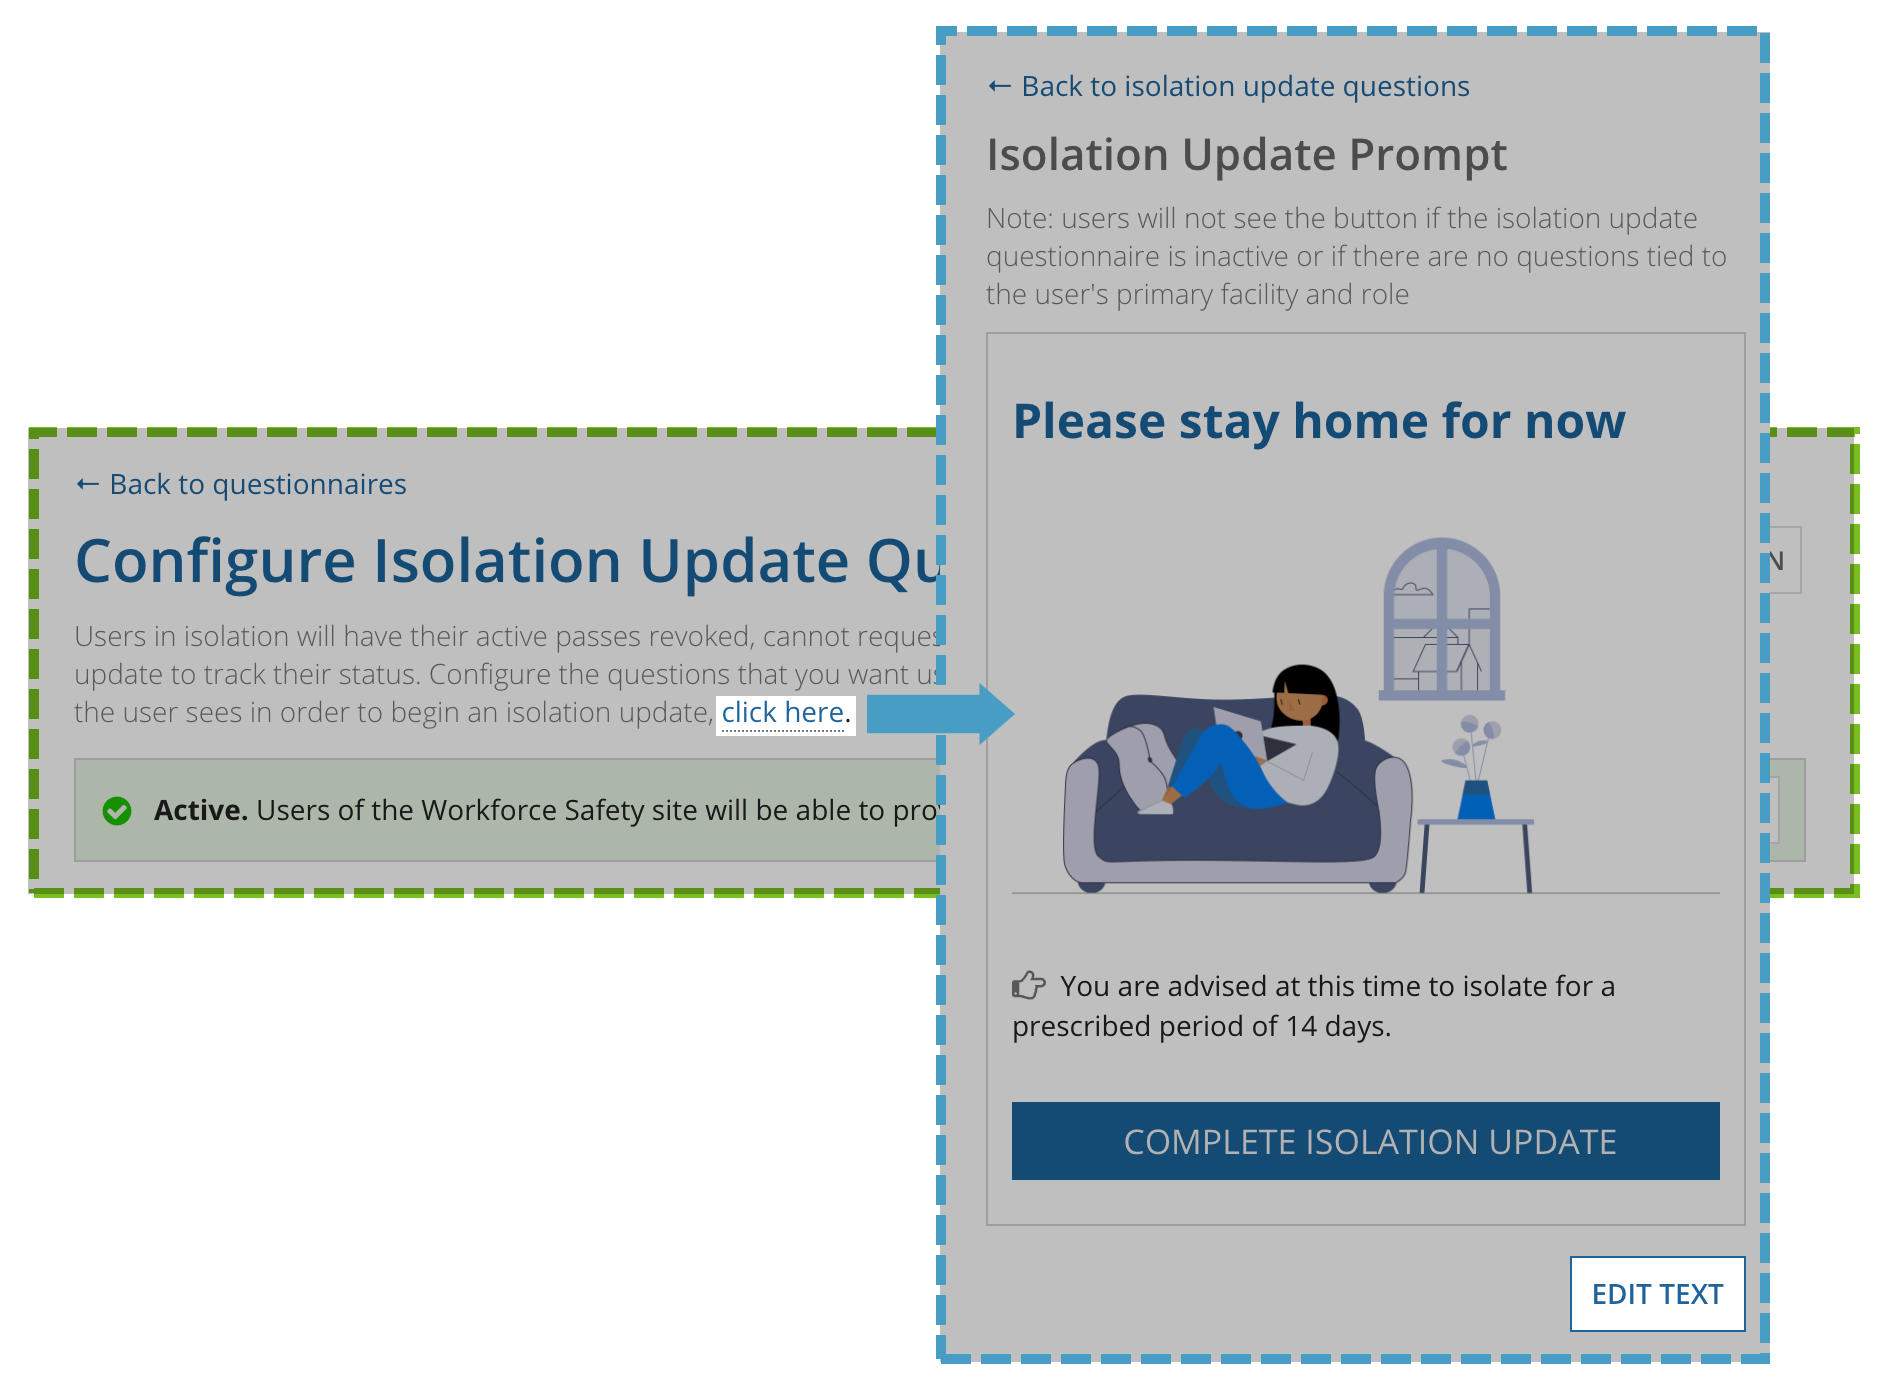
When users are placed into isolation, instead of a pass request section on the homepage, they see an isolation update section. The default message that displays on the homepage for isolation updates is "You are advised at this time to isolate for a prescribed period of 14 days."
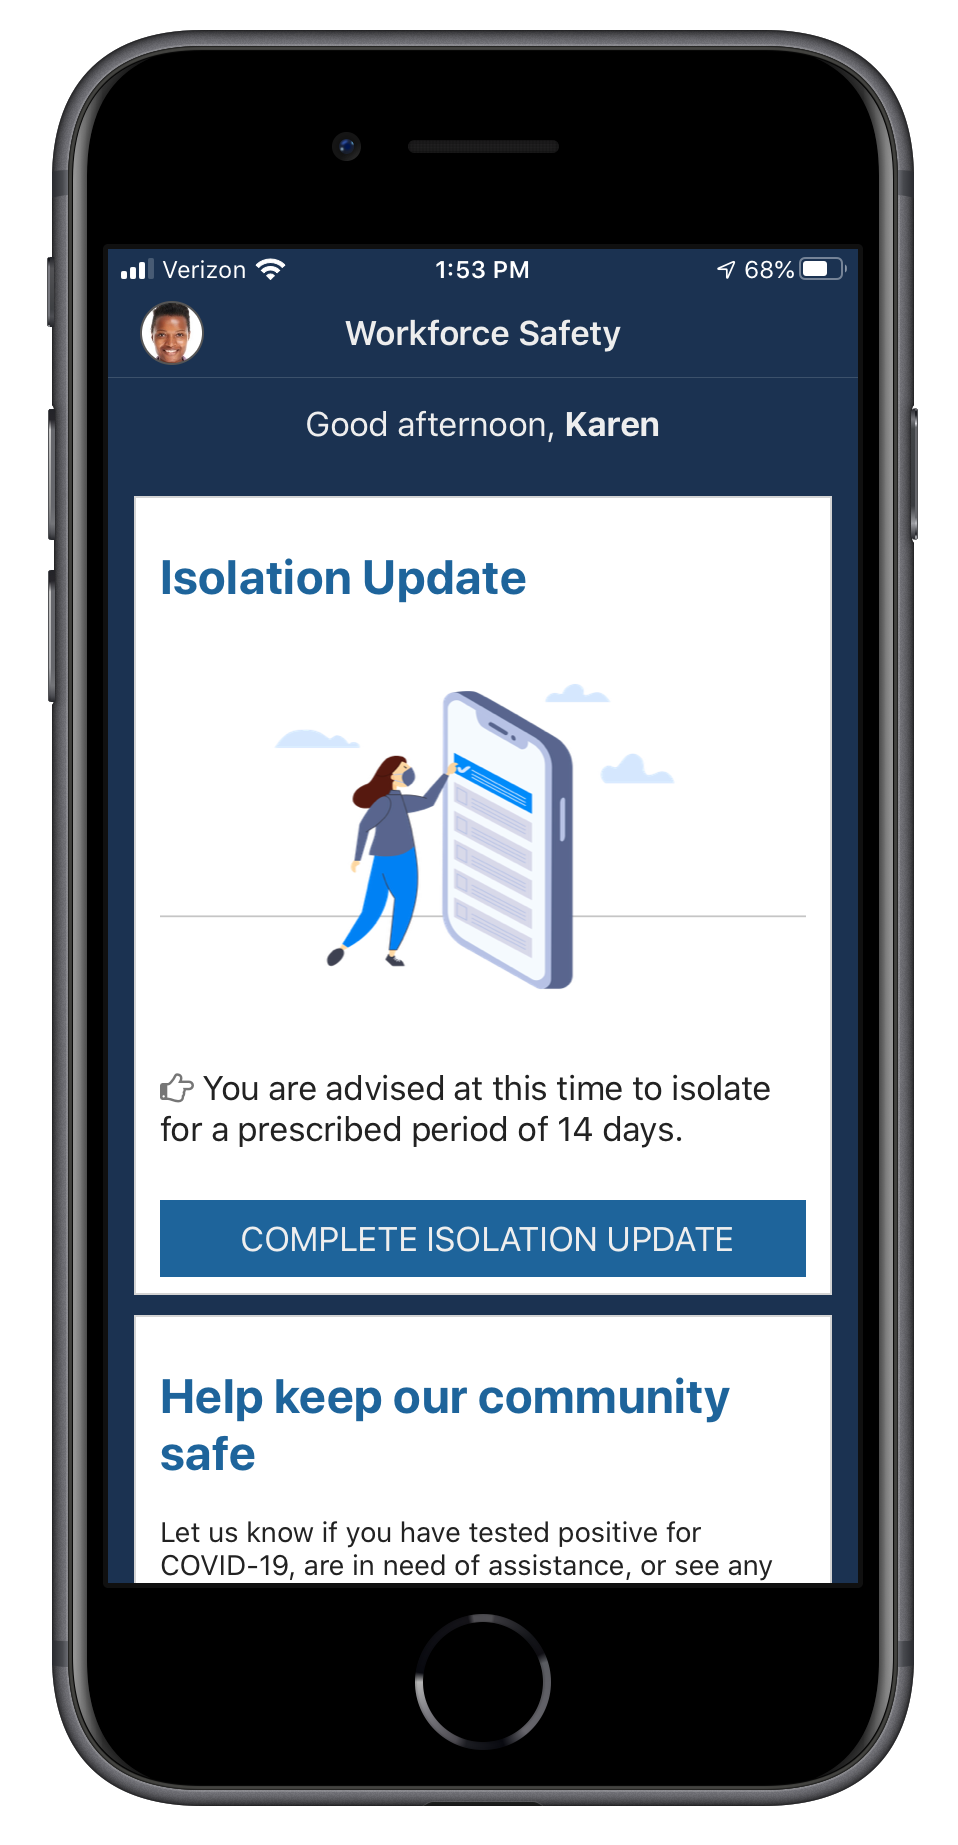
You can update this message to whatever you want. For example, you may want to include guidance on how often you want users to complete the isolation update.
To modify the isolation update prompt:
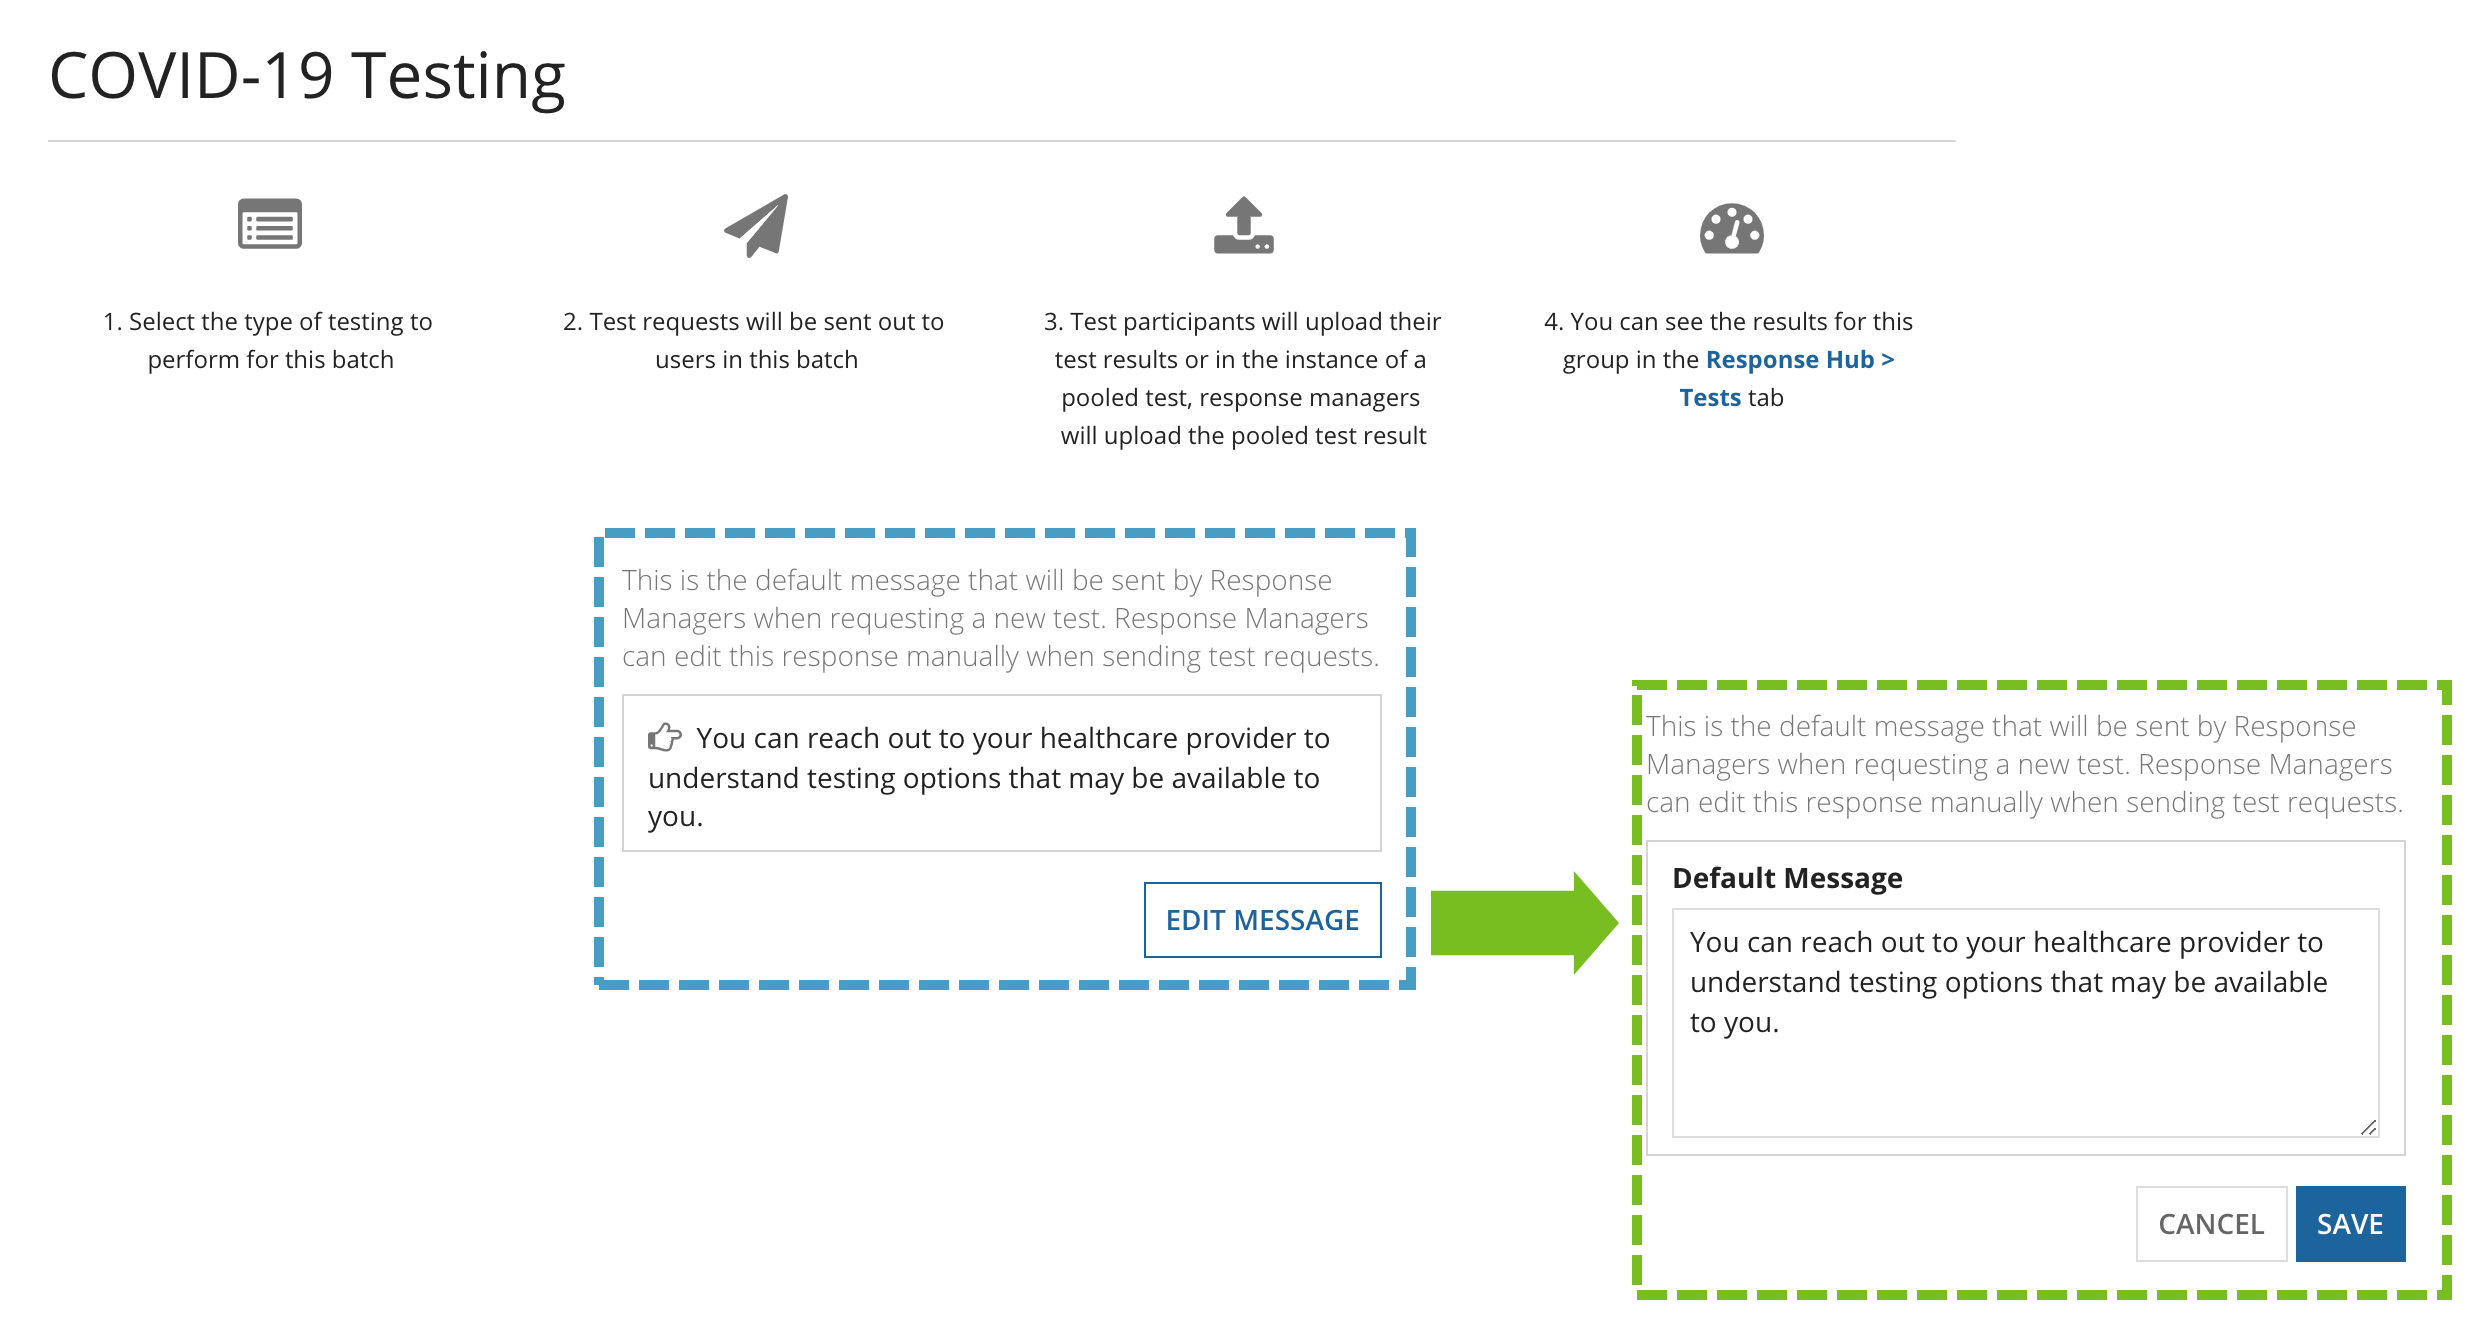
When response managers request a test from users, they can update the Testing Guidance to tell users how to get tested. By default, this message says "You can reach out to your healthcare provider to understand testing options that may be available to you."
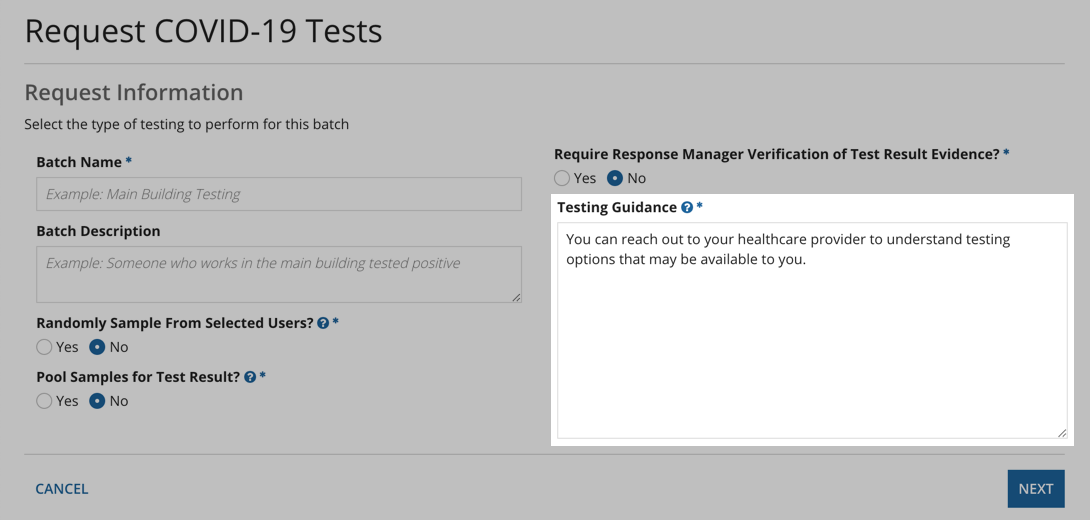
This displays on the message that users see after they have been sent a test request and they click VIEW TEST OPTIONS > I need to take a test.


Note that this message also displays if a test request is sent automatically when Workforce Safety is configured to automatically remove users from isolation based on a negative test result.
Note: The message "You can also visit the EverlyWell Site to verify your eligibility for a test kit. If eligible, place your order on the EverlyWell site" will always display for non-pooled test requests.
This allows organizations to take advantage of the partnership that Appian has with Everlywell to offer easy access to FDA-authorized COVID-19 at-home testing from within Workforce Safety.
If you have more specific guidelines, you can modify this default message so that response managers don't have to update it every time.
To modify the default message for COVID-19 testing requests:
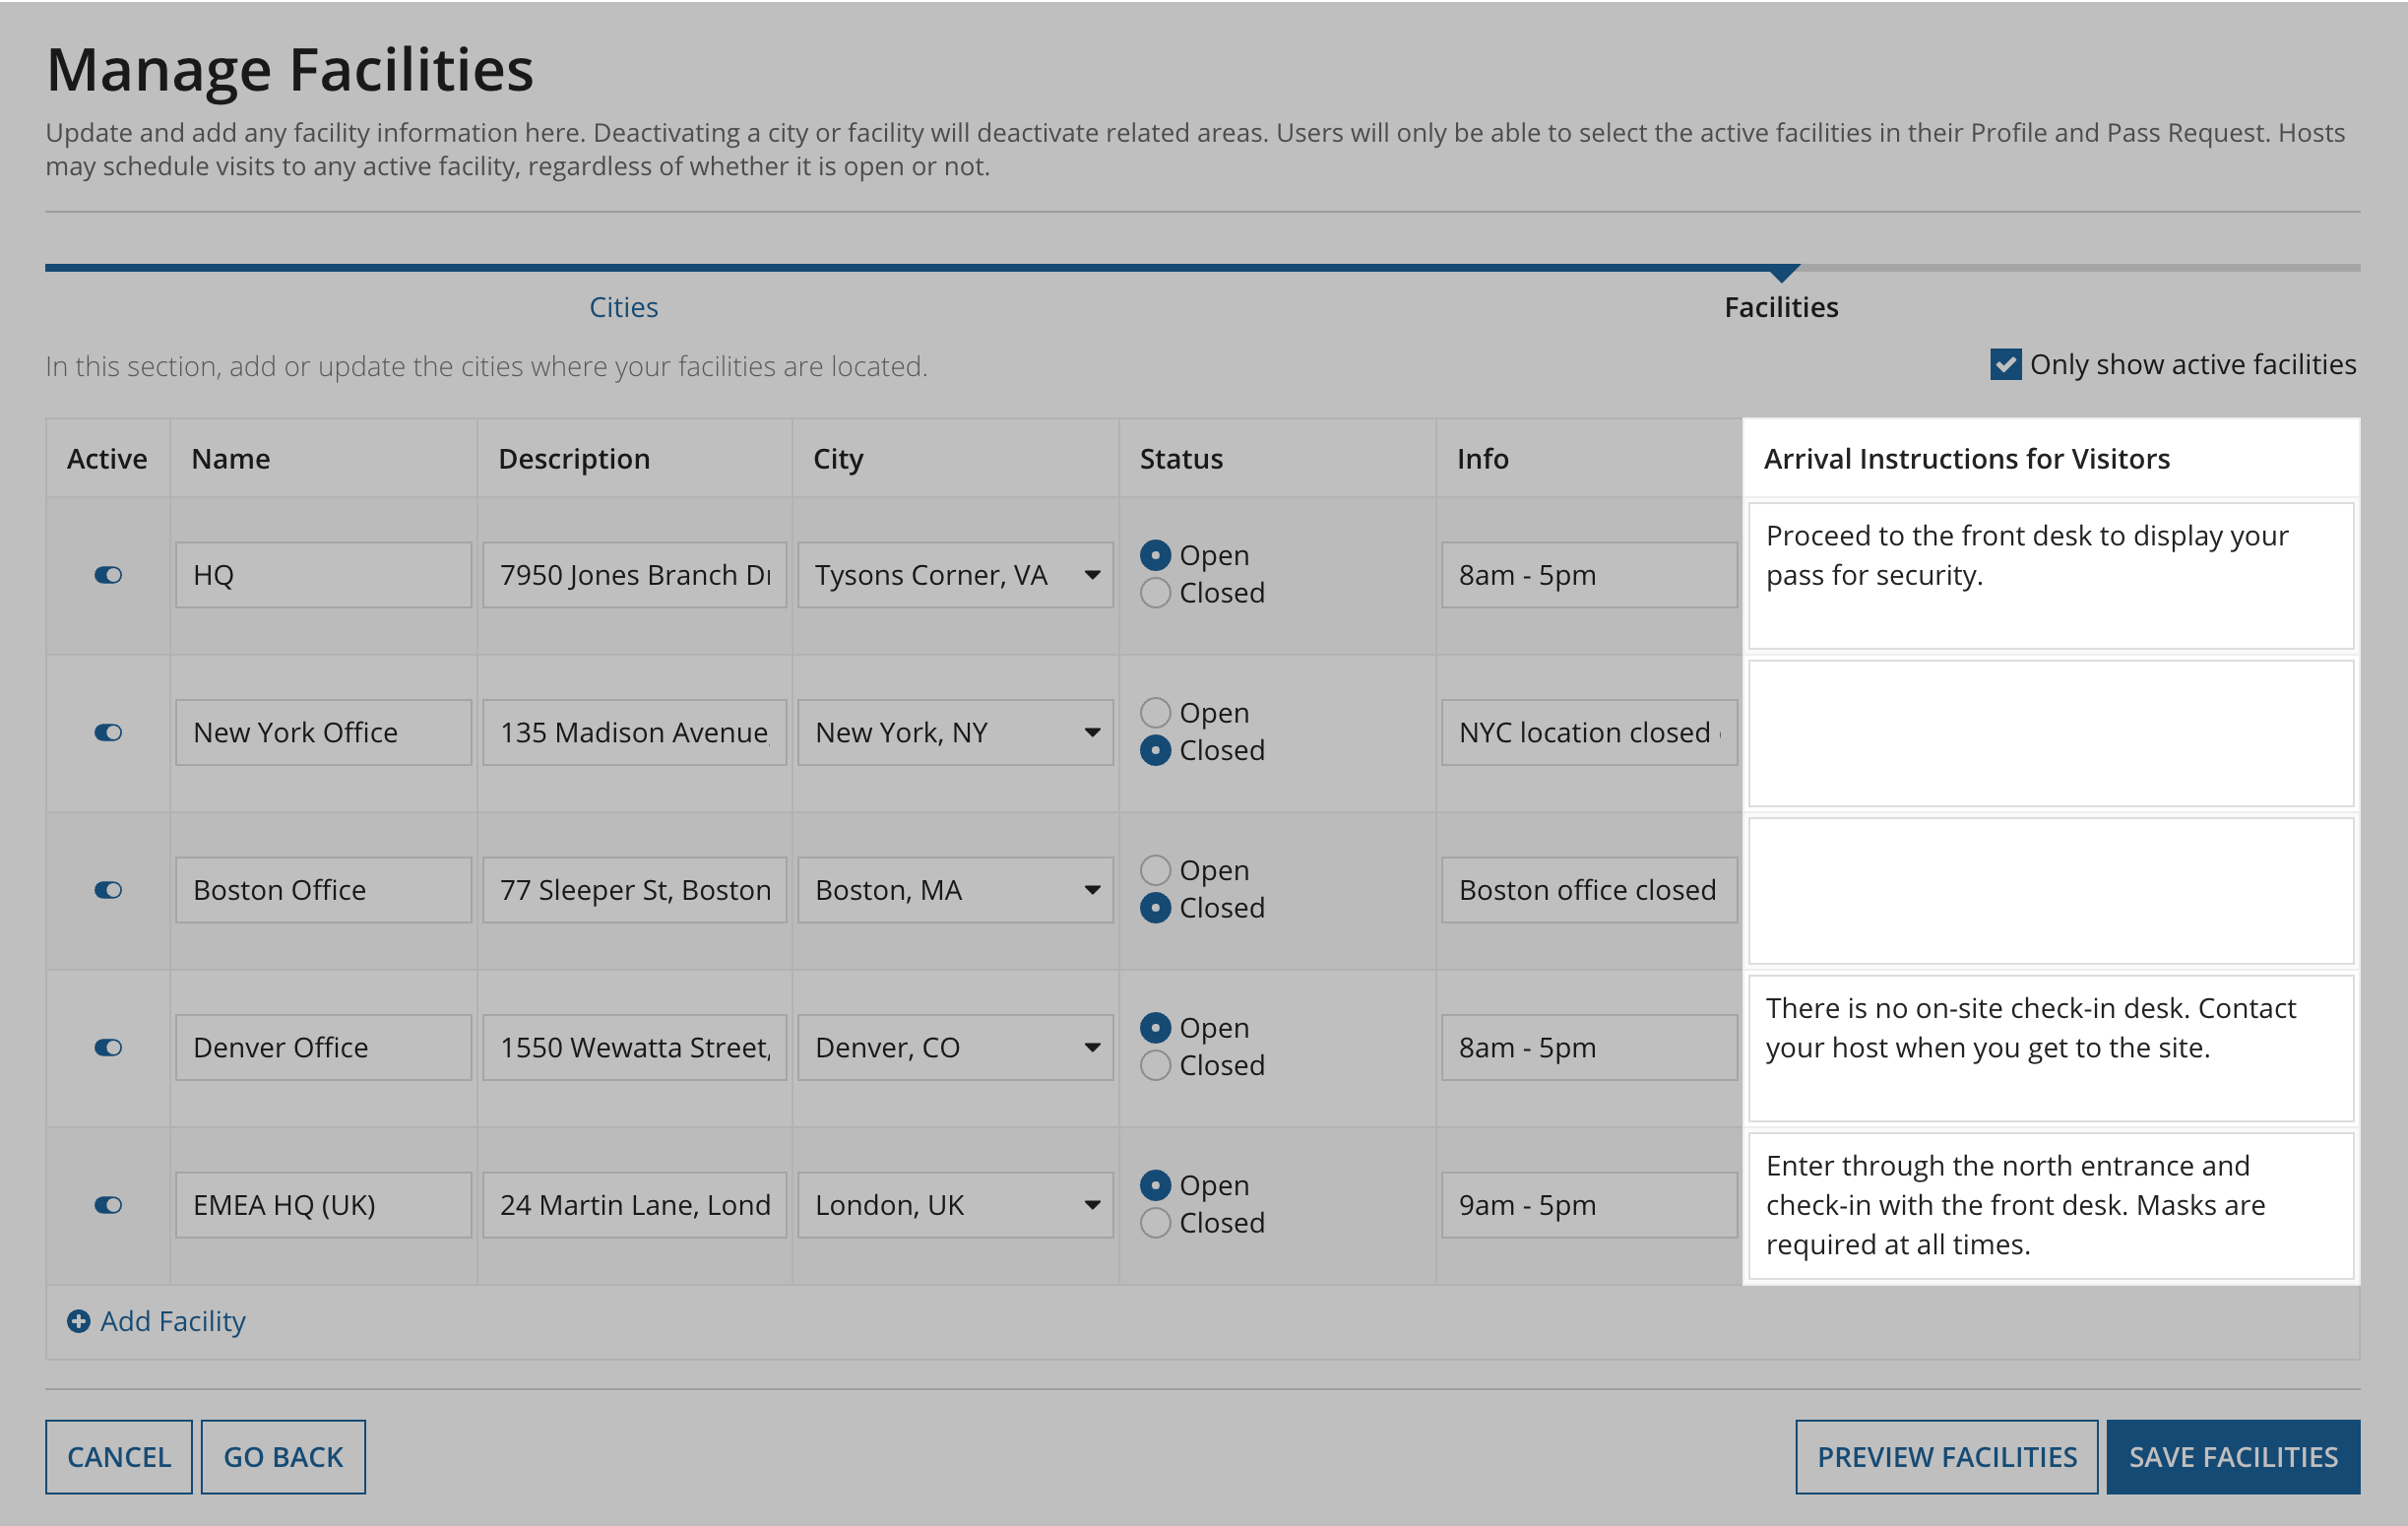
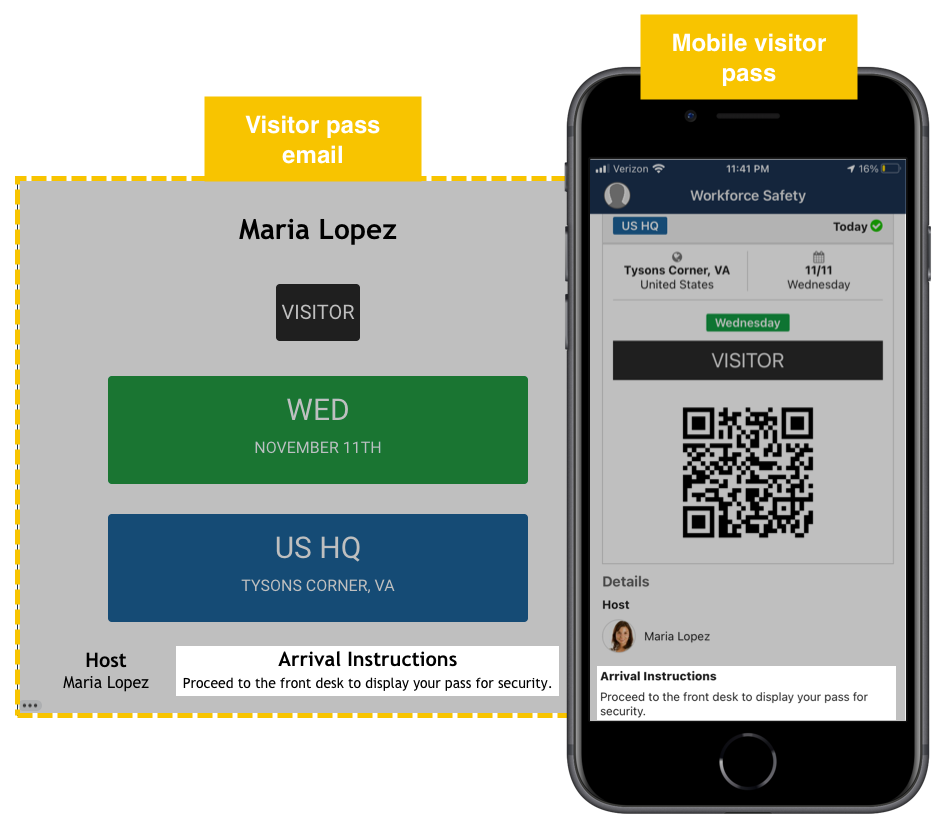
Arrival instructions display on visitor's mobile and email passes. Each facility can have different arrival instructions. You can configure this in the Facilities configuration.
To update the arrival instructions for a facility: