This version of Workforce Safety is not supported and this content is no longer being maintained. See
What's New with Workforce Safety? for information on the latest release.
|
| This content applies solely to Workforce Safety, which must be purchased separately from the Appian base platform. This content was written for Appian 21.4 and may not reflect the interfaces or functionality of other Appian versions.
|
From the Facilities tab, response managers, facility managers, and configuration managers can add, edit, open and close facilities, and inactivate and reactivate facilities.
Add a new facility
You can quickly add one or more facilities by specifying the following information for each location:
- Facility name
- Description
- Country (the state or province field only displays for Canada and the United States)
- Street address, city, and zip code
- Open or closed status
- Arrival instructions
- Additional information
When you add a new facility, by default, it's set to active. If you need to add a number of facilities at one time, you can import multiple facilities using an Excel spreadsheet.
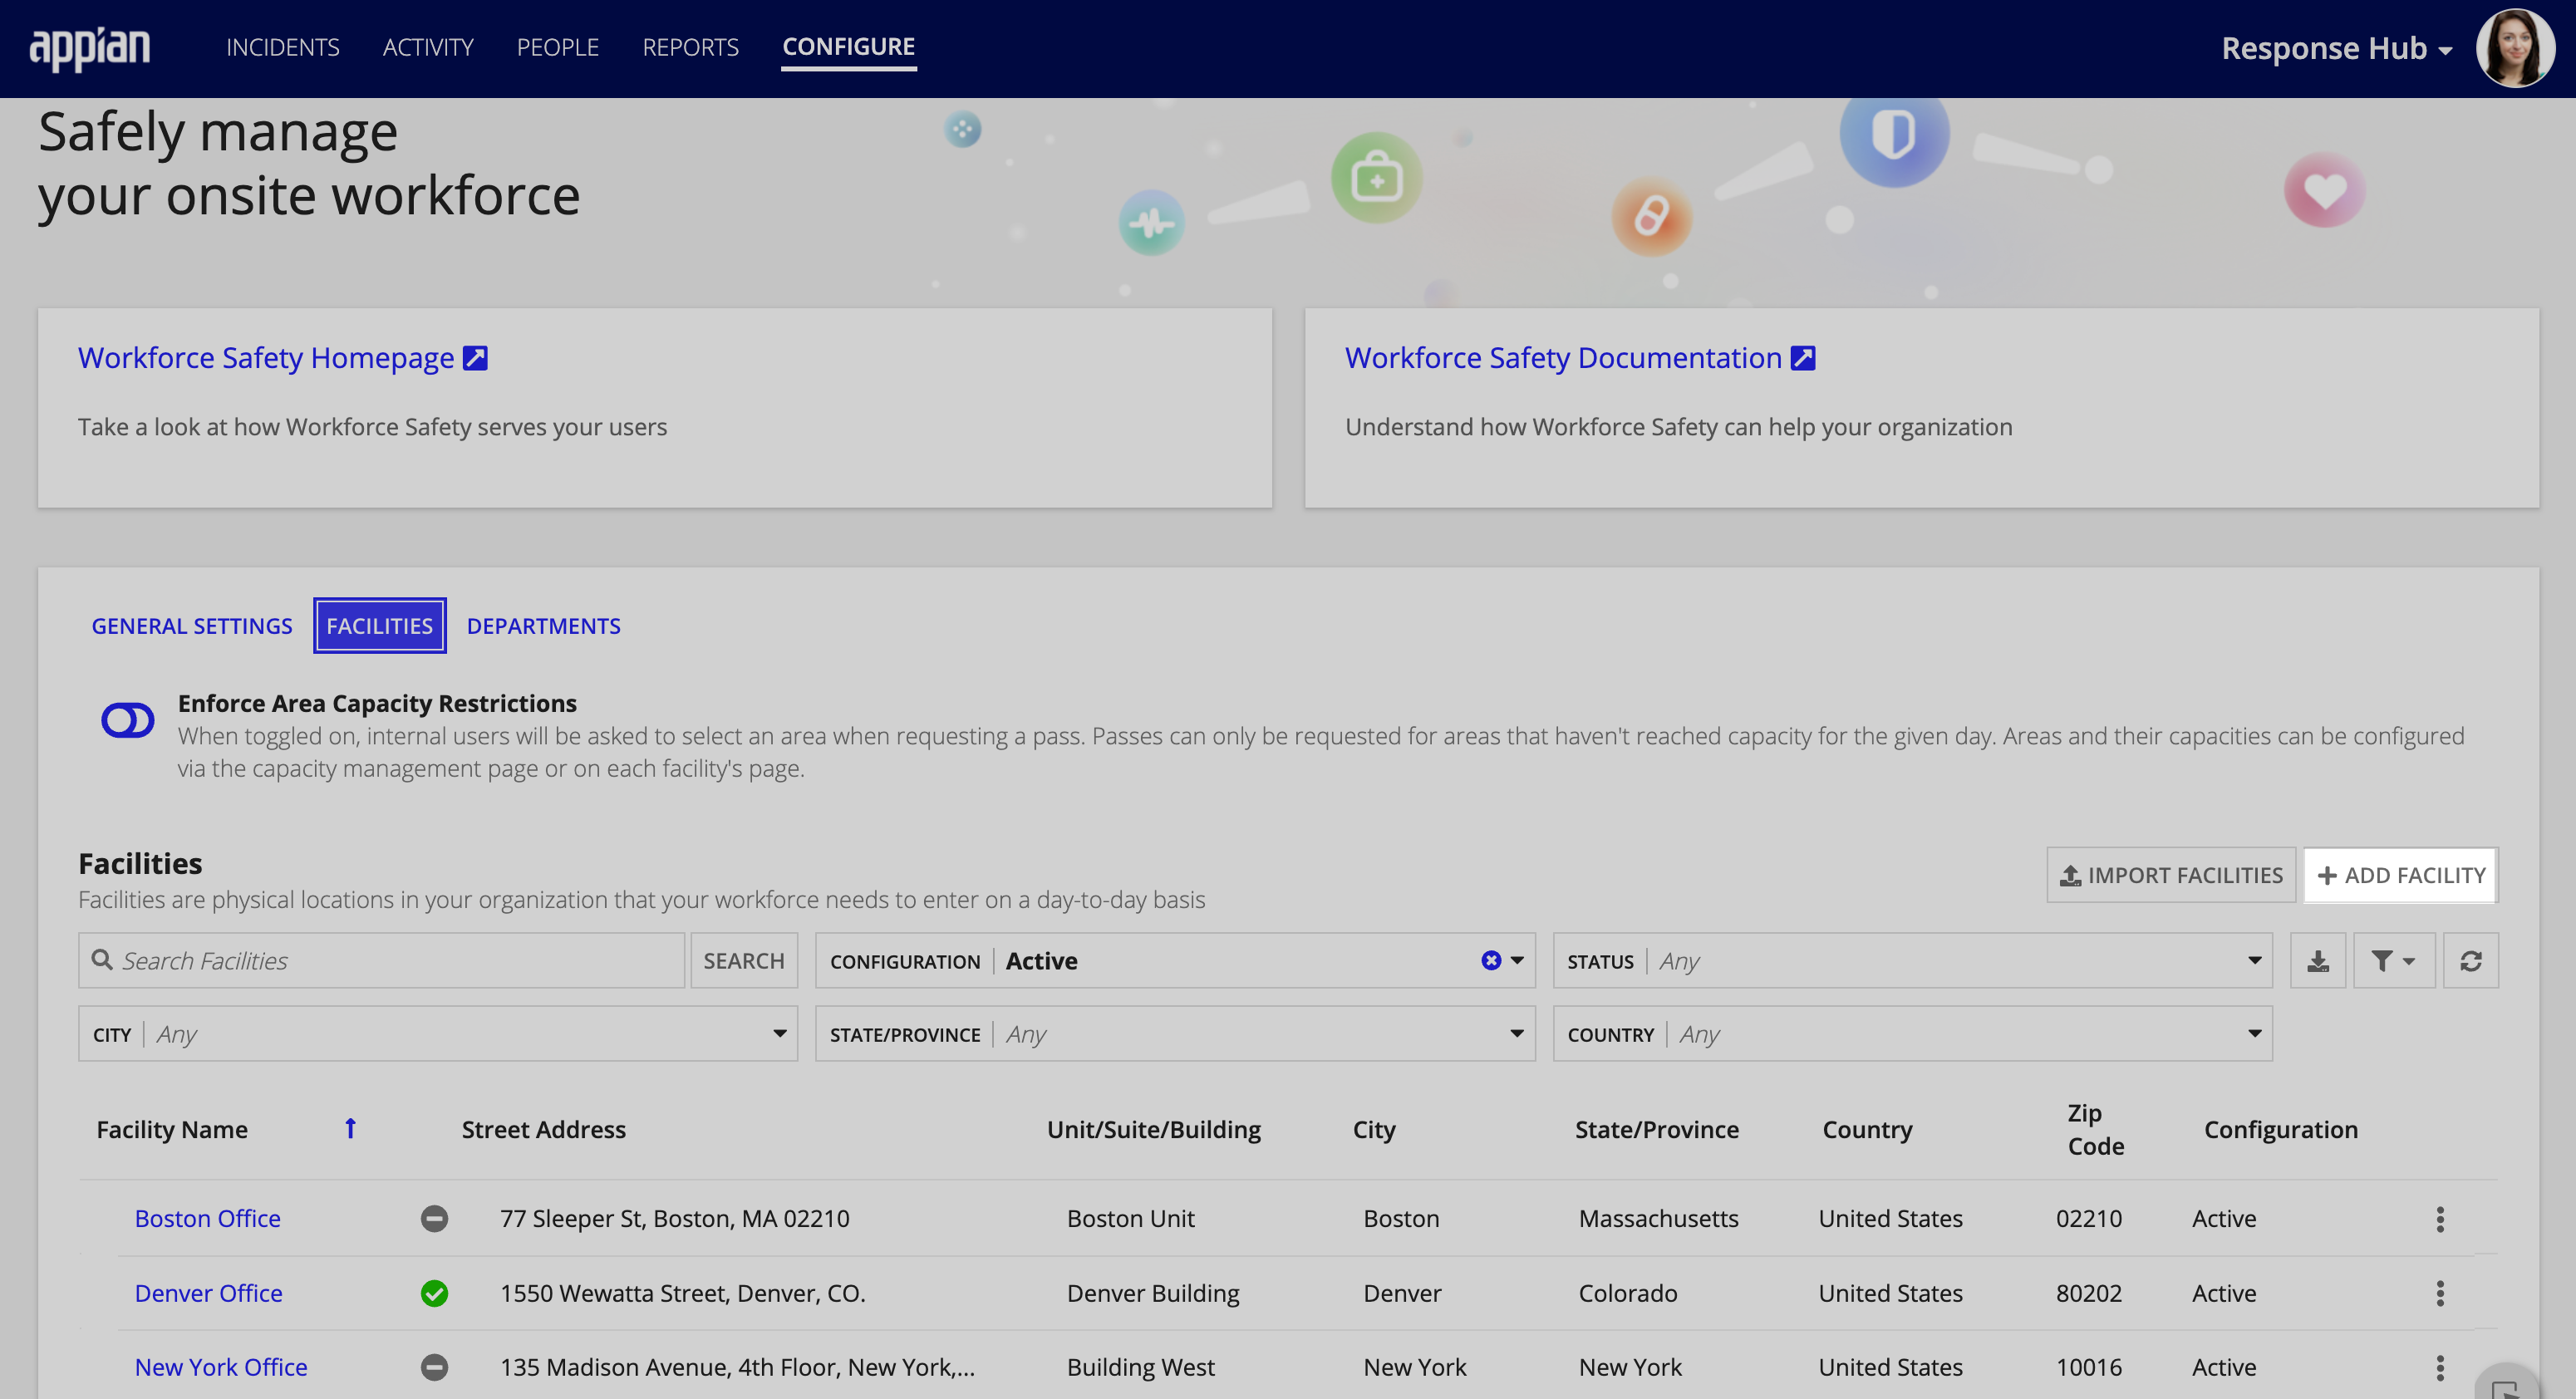
To add a facility:
- From the CONFIGURE page, click FACILITIES.
-
Click ADD FACILITY.
- In Name, add a unique facility name.
- Workforce Safety displays a validation error, if you attempt to add a facility name that already exists.
- (Optional) In Description, enter a facility description.
- Enter the Country for your facility, and the State/Province only if applicable for your region.
- Enter the Street Address, City, and Zip for your facility in the corresponding fields.
- Note: The street address you enter for the facility is included in visitor notifications so they know exactly where to report for an on-site visit.
- Set the facility status to Open or Closed.
- Users and visitors can request a pass for an open facility.
- Users cannot request a pass for a closed facility but visitors can.
- (Optional) In Info, enter any additional information you want to communicate to users and visitors about the status of the facility, like operational hours.
- (Optional) In Arrival Instructions for Visitors, enter any instructions or additional guidance that you want to communicate to visitors that are visiting the facility.
- Click SAVE to add the single facility. Alternatively, you can click SAVE AND ADD ANOTHER to save the facility and add another facility.
Import facilities
From the FACILITY page, you can also perform a bulk import when you want to add multiple facilities at one time. Workforce Safety allows you to import an Excel spreadsheet or CSV file that contains all of your facilities to the solution so that you can easily upload them all at one time.
To import your facilities, you can download and use the Facility_Import Excel template that Appian provides. Use this template to copy your facilities and create your own CSV file. If you already have your own CSV file or spreadsheet of your facilities, be sure to use the same column headers and format provided in the sample template file before performing a bulk upload.
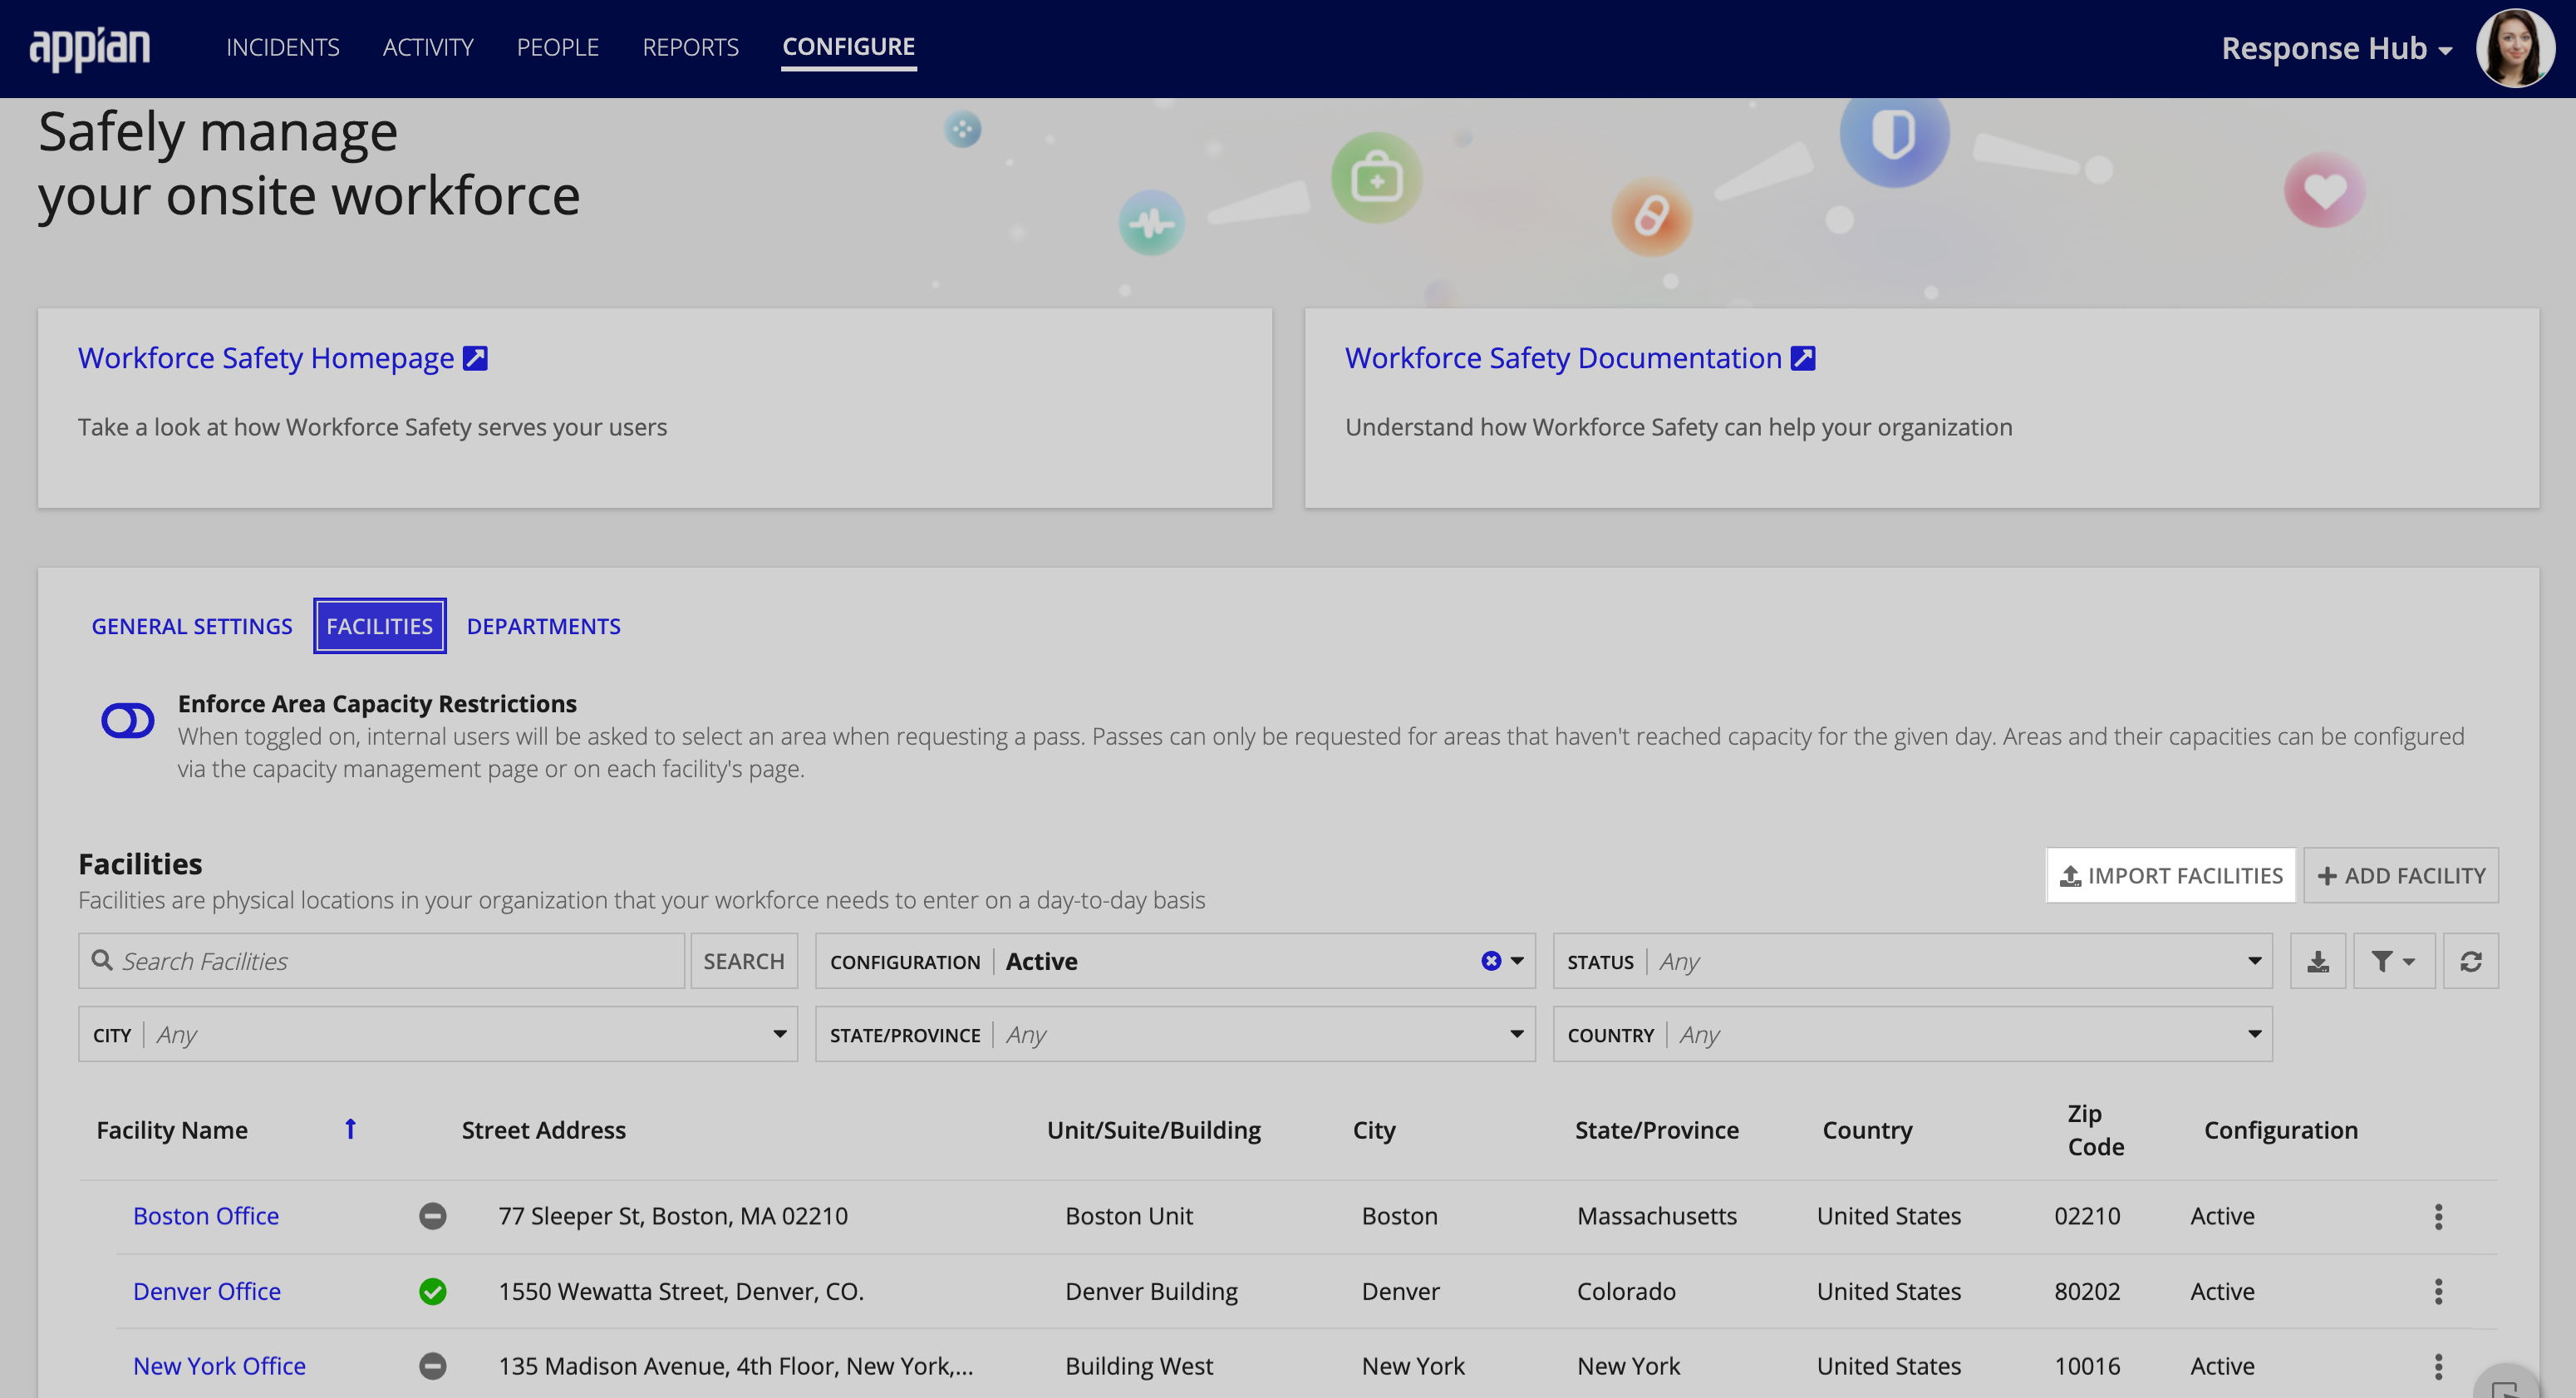
To import your facilities:
- From the CONFIGURE page, click FACILITIES.
- Click IMPORT FACILITIES.
- Click UPLOAD.
- Locate and select the facilities spreadsheet you want to upload.
- Click NEXT to preview a list of your facilities before importing.
- In this preview, Workforce Safety allows you to perform inline editing to correct any errors in your facilities information.
- Click IMPORT.
Edit an existing facility
Operational adjustments may require you to quickly make site changes, including changing a facility's status to indicate whether it is open or closed. You can easily edit an existing facility from the Facilities list.
Designating a facility as open or closed determines whether users and visitors have access to request a pass for the facility. When a facility is closed visitors can still receive passes but internal users cannot.
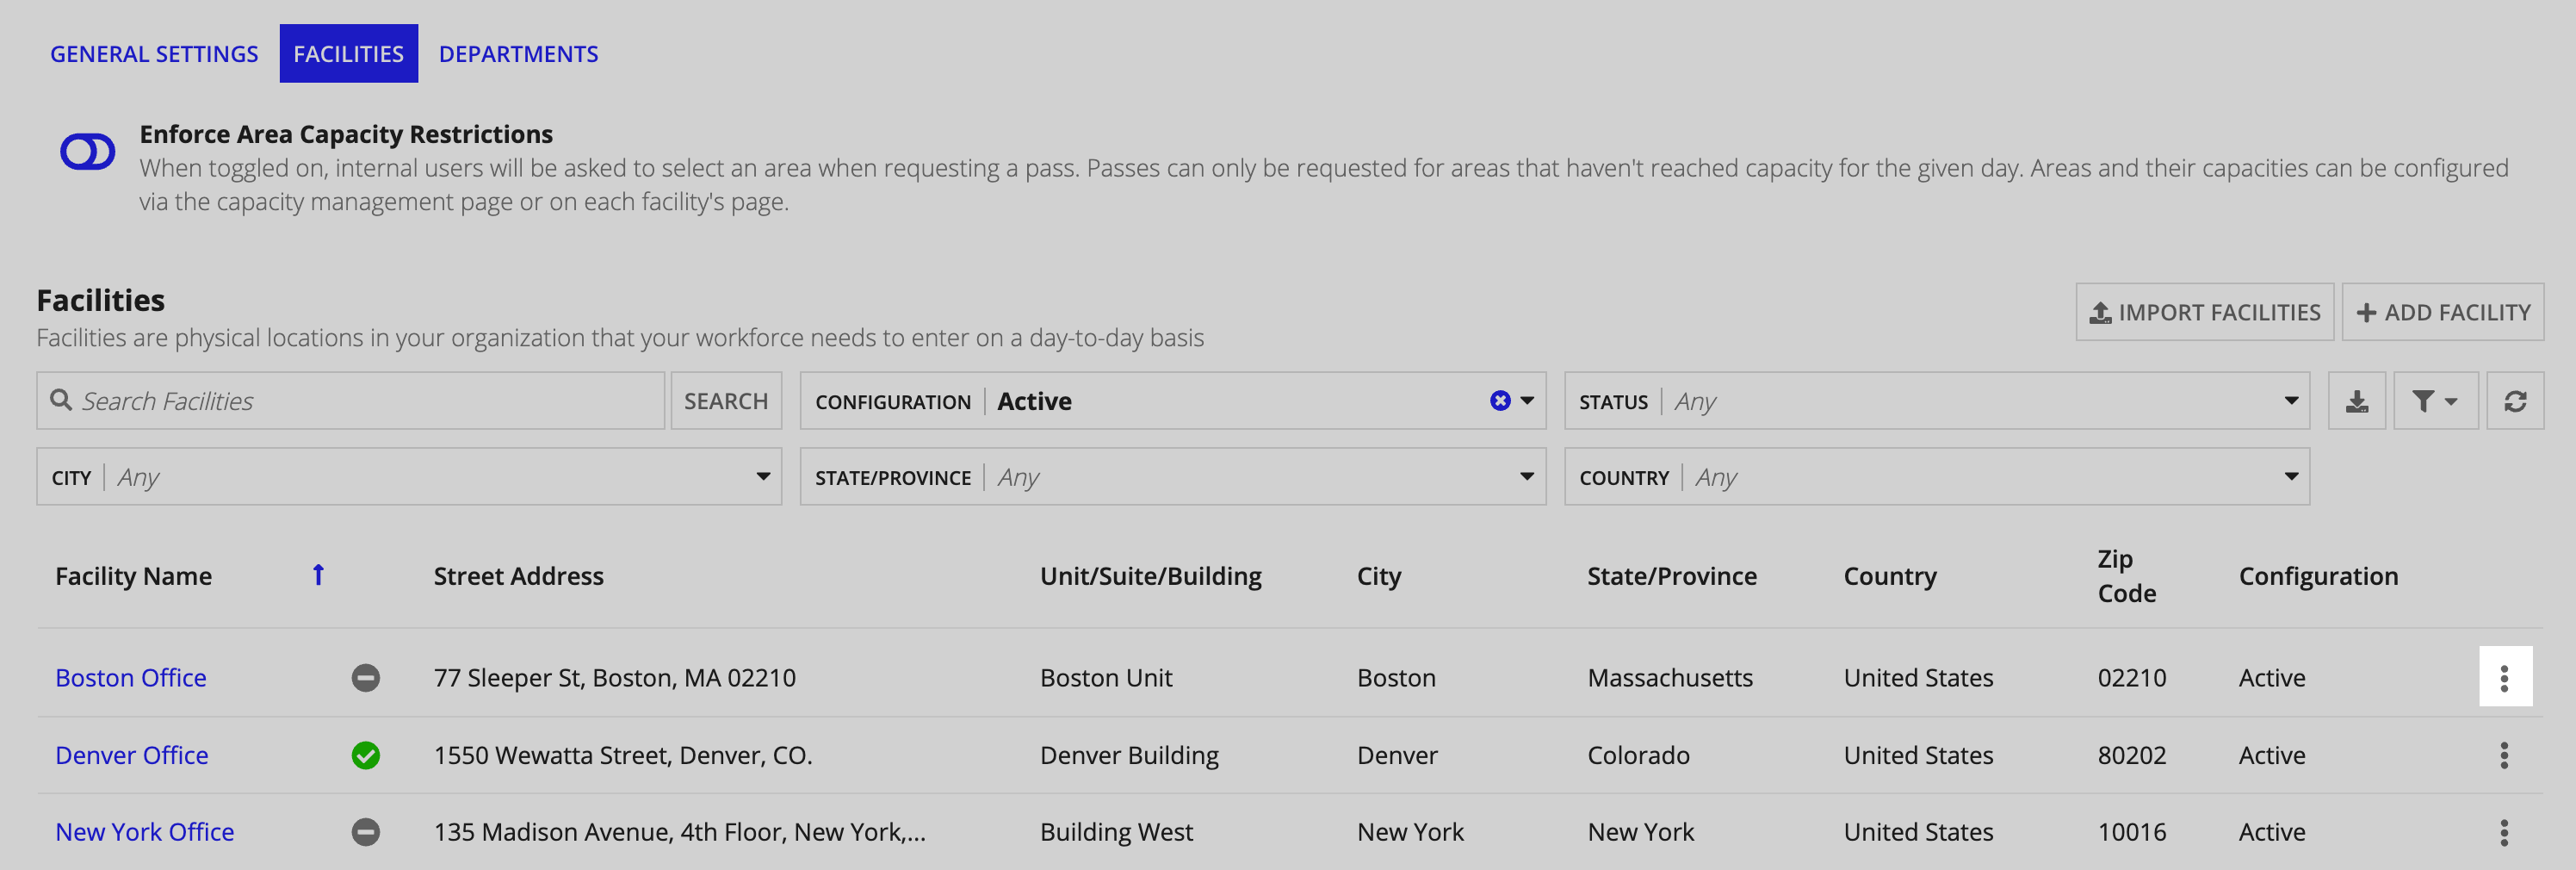
To edit a facility:
- From the Facilities list, locate the facility you want to update.
- Click the ellipsis icon at the end of the row and select Edit.
- In the Edit Facility dialog, modify the information you want to change.
- Click SAVE.
Note that when you update a facility's open or closed status, be sure to update the status for the corresponding areas.
Deactivating and reactivating facilities
If you would like to completely remove a facility from the facilities list because it is a duplicate, you made an error when entering the facility, or the facility is permanently closed, you can inactivate the facility.
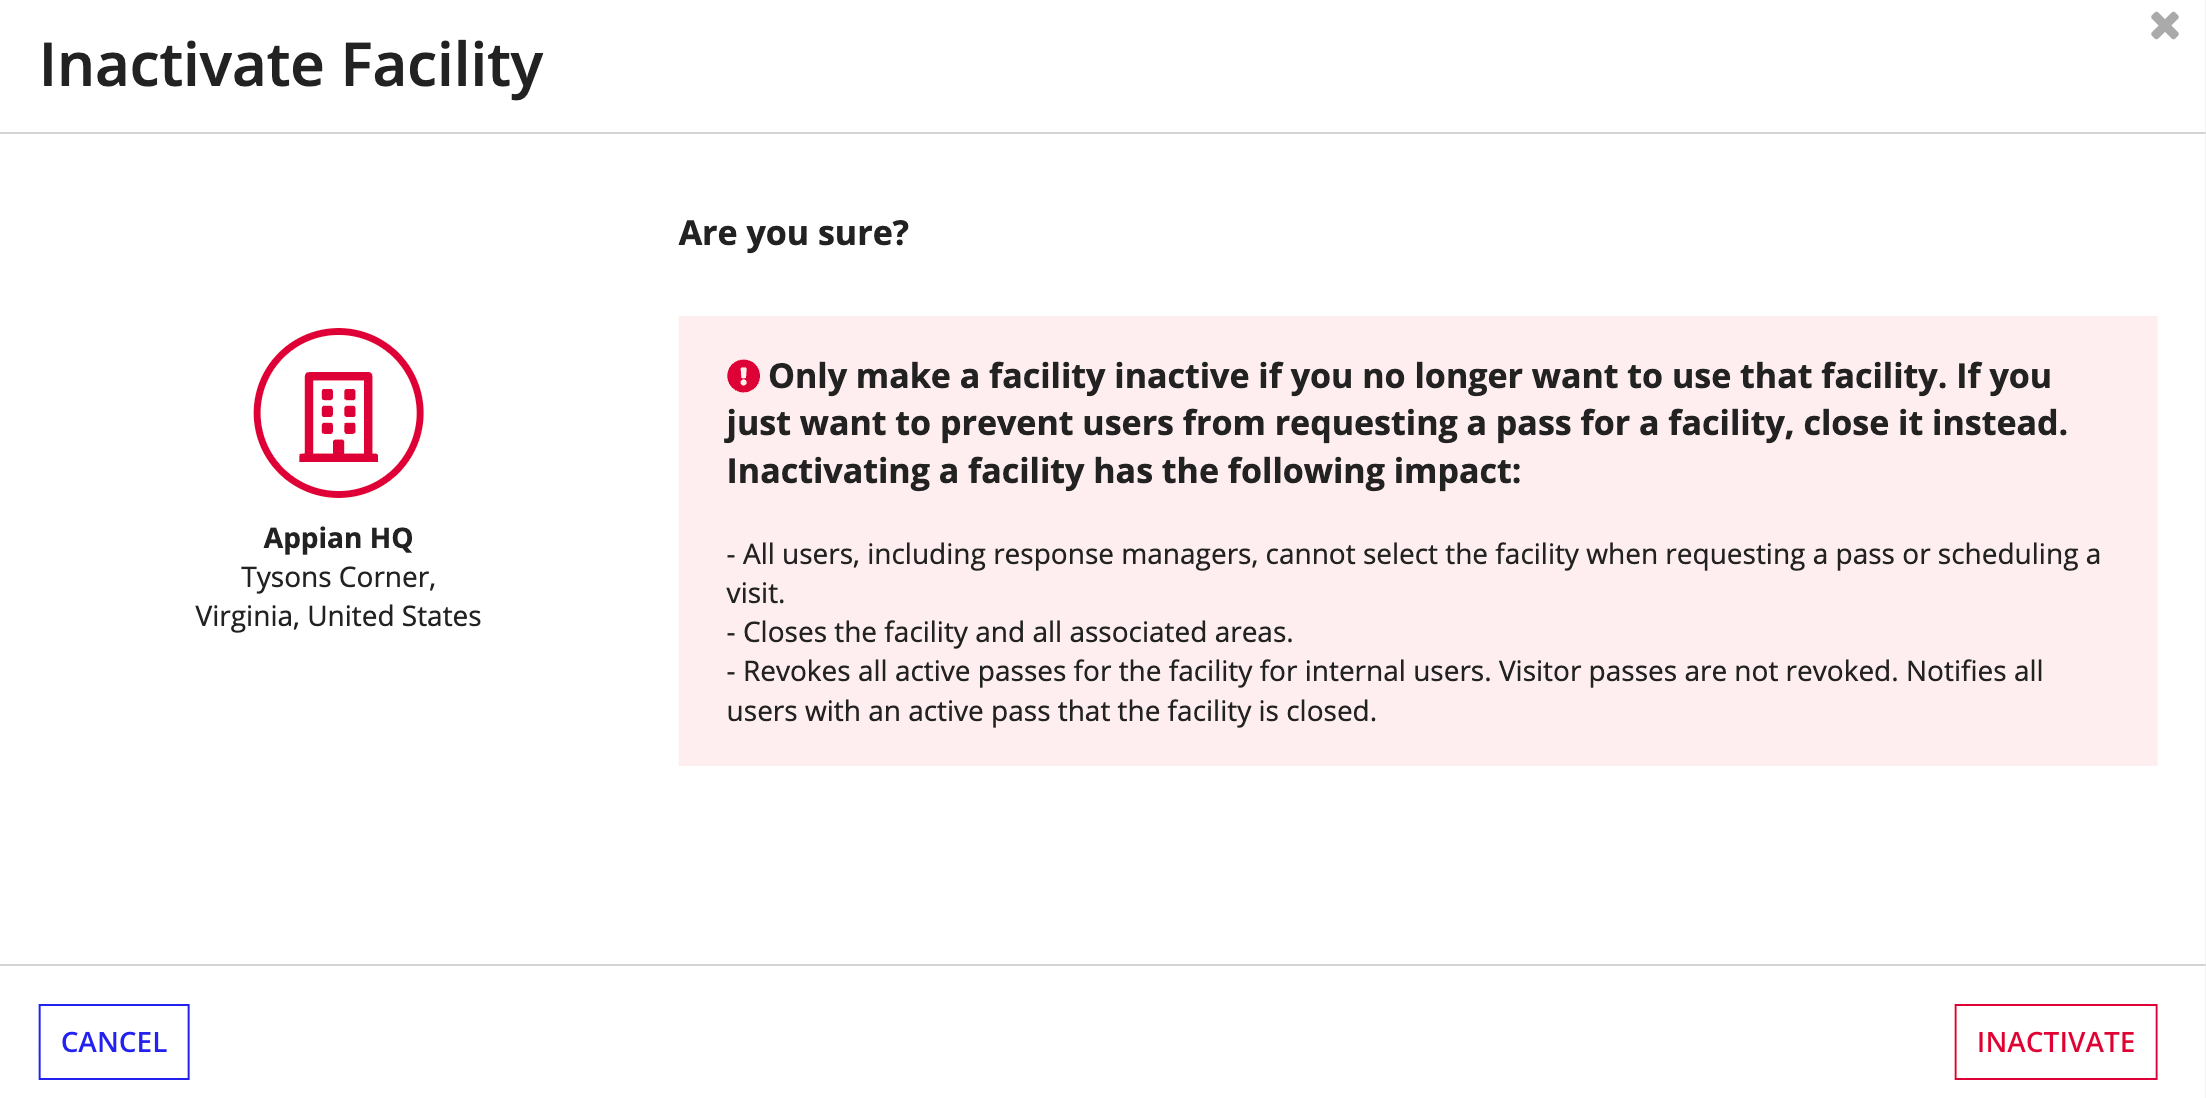
Inactivating a facility is different than updating the site status to closed, which indicates that the facility is temporarily unavailable to users and visitors. Inactivating a facility causes the following actions to occur:
- Triggers a facility closure and deactivates all associated areas.
- Prevents all users, including response managers, from submitting a pass request for the facility.
- Revokes all active user passes to the facility. Visitor passes are not revoked.
- Sends a facility closure notification to all affected users.
- Removes the inactive facility from the facilities list that users have access to view. Note: Inactive facilities still show up in the Pass Request report.
If you no longer want to use a facility, inactive it. If you still plan to use the facility in the future but want to prevent users from requesting a pass for the facility, close it instead.
Note: Response managers can still view inactive facilities from the facilities list.
To inactivate an active facility:
- From the Facilities list, locate the facility you want to update.
-
Click the ellipsis icon for the facility you want to deactivate and select Set to Inactive.
-
From the Make Inactive dialog, click MAKE INACTIVE.
To reactivate an inactive facility:
- From the Facilities list, locate the facility you want to activate.
- Click the ellipsis icon for the facility you want to reactivate and select Set to Active.
- To allow users to request a pass to the facility, edit the facility to update the status to Open.
Reactivating areas
When a facility is deactivated, any areas that were configured to use the facility will also be deactivated. Note also that any departments that were associated with the deactivated facility, will be removed from the Where should this department report to? list.
To reactivate an inactive area:
- From the CONFIGURE page, click Capacity Management in the Manage Features section.
- In the Areas list, locate the area you want to reactivate.
- Click the ellipsis icon for the area you want to reactivate.
- Click Activate..
