This version of Workforce Safety is not supported and this content is no longer being maintained. See
What's New with Workforce Safety? for information on the latest release.
|
| This content applies solely to Workforce Safety, which must be purchased separately from the Appian base platform. This content was written for Appian 21.4 and may not reflect the interfaces or functionality of other Appian versions.
|
After configuring your facilities, your response managers, facility managers, and configuration managers can designate work or break areas for each facilities. This might include floors and conference rooms in each facility that you want to make available for use. They can also set a daily capacity for each area to limit the number of internal and external visitors that can use the area each day.
If Enforce Area Capacity Restrictions is toggled on, the number of passes that can be generated for an area will be limited to the daily capacity of the area. This can help maintain social distancing in your facilities. Note that if this feature is toggled on, each facility must have at least one open area configured. If not, users won't be able to request passes for that facility.
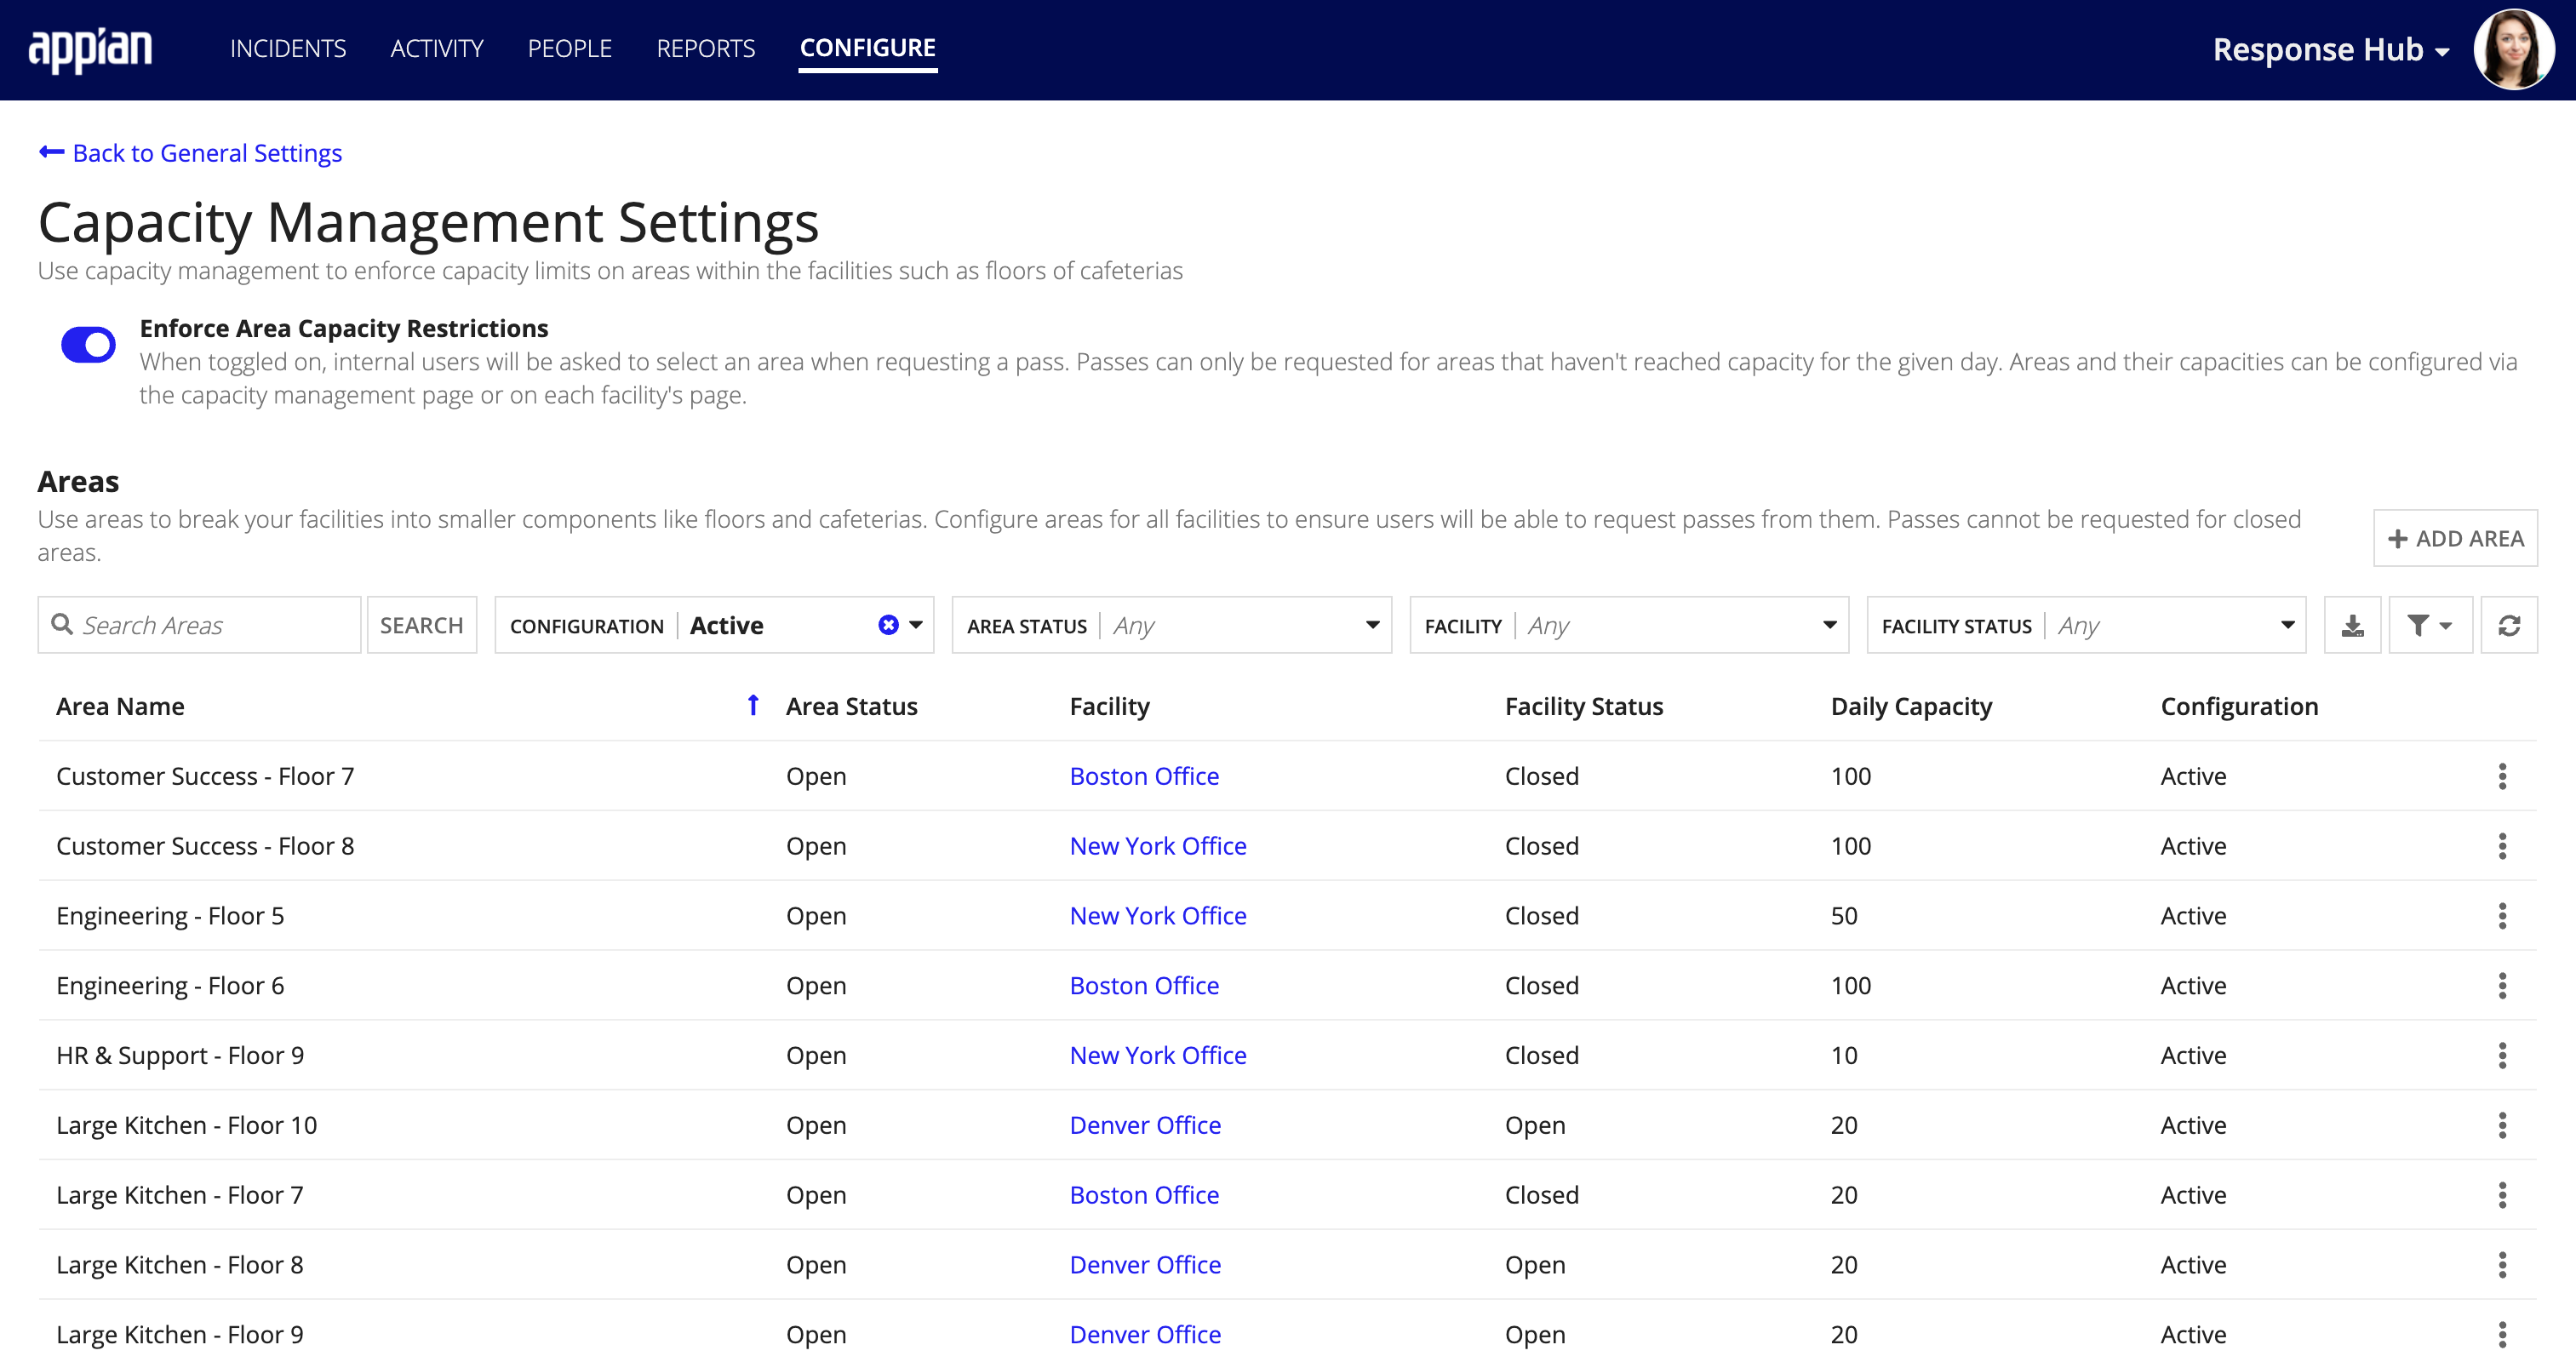
Note that when you close a facility, all areas associated with the facility are also closed. To ensure your response managers and employees know that areas in a closed facility are unavailable for pass requests, you must update the Area Status of all associated areas to closed.
If you made a mistake when entering an area and would like to remove it from the list of areas, you can deactivate it. This is different from updating the area status to closed, which indicates that the area is closed temporarily.
When you deactivate an area, the following happens:
- Deactivated areas will not show up as an option to select in any pass requests moving forward.
- Existing passes will continue to have the deactivated area.
- Deactivated areas still show up in pass request reporting.
- Any deactivated areas will no longer go towards capacity restrictions.
Add an area
To effectively manage your facilities and site capacity, you can divide a facility up into smaller sections by adding individual areas. You may want to configure areas for all of your facilities to ensure users will be able to request passes from them. Note that passes cannot be requested for closed areas.

To add areas for your facilities:
- From the CONFIGURE page, click Capacity Management in the Manage Features section.
- From the Capacity Management Settings page, toggle the Enforce Area Capacity Restrictions setting on.
- Click ADD AREA.
- Enter the following information for each area you add:
- Area Name: The name you assigned to the area.
- Area Status: Options include Open or Closed.
- Note: Users are unable to request a pass for a closed facility.
- Facility: The facility that the area is assigned to.
- Note: After selecting a facility, its current status will display under Facility Status. If the facility is closed, a validation message will display under Area Status informing you that the facility you selected is closed and you need to select another facility or update the facility status.
- Daily Capacity: The maximum number of people the area can support daily.
- Click SAVE to add the new area to the Areas list or click SAVE AND ADD ANOTHER to add another area.
Manage areas
You can manage your existing areas by updating the area name, area status, or daily capacity. You can also deactivate an area to completely restrict it from future use.
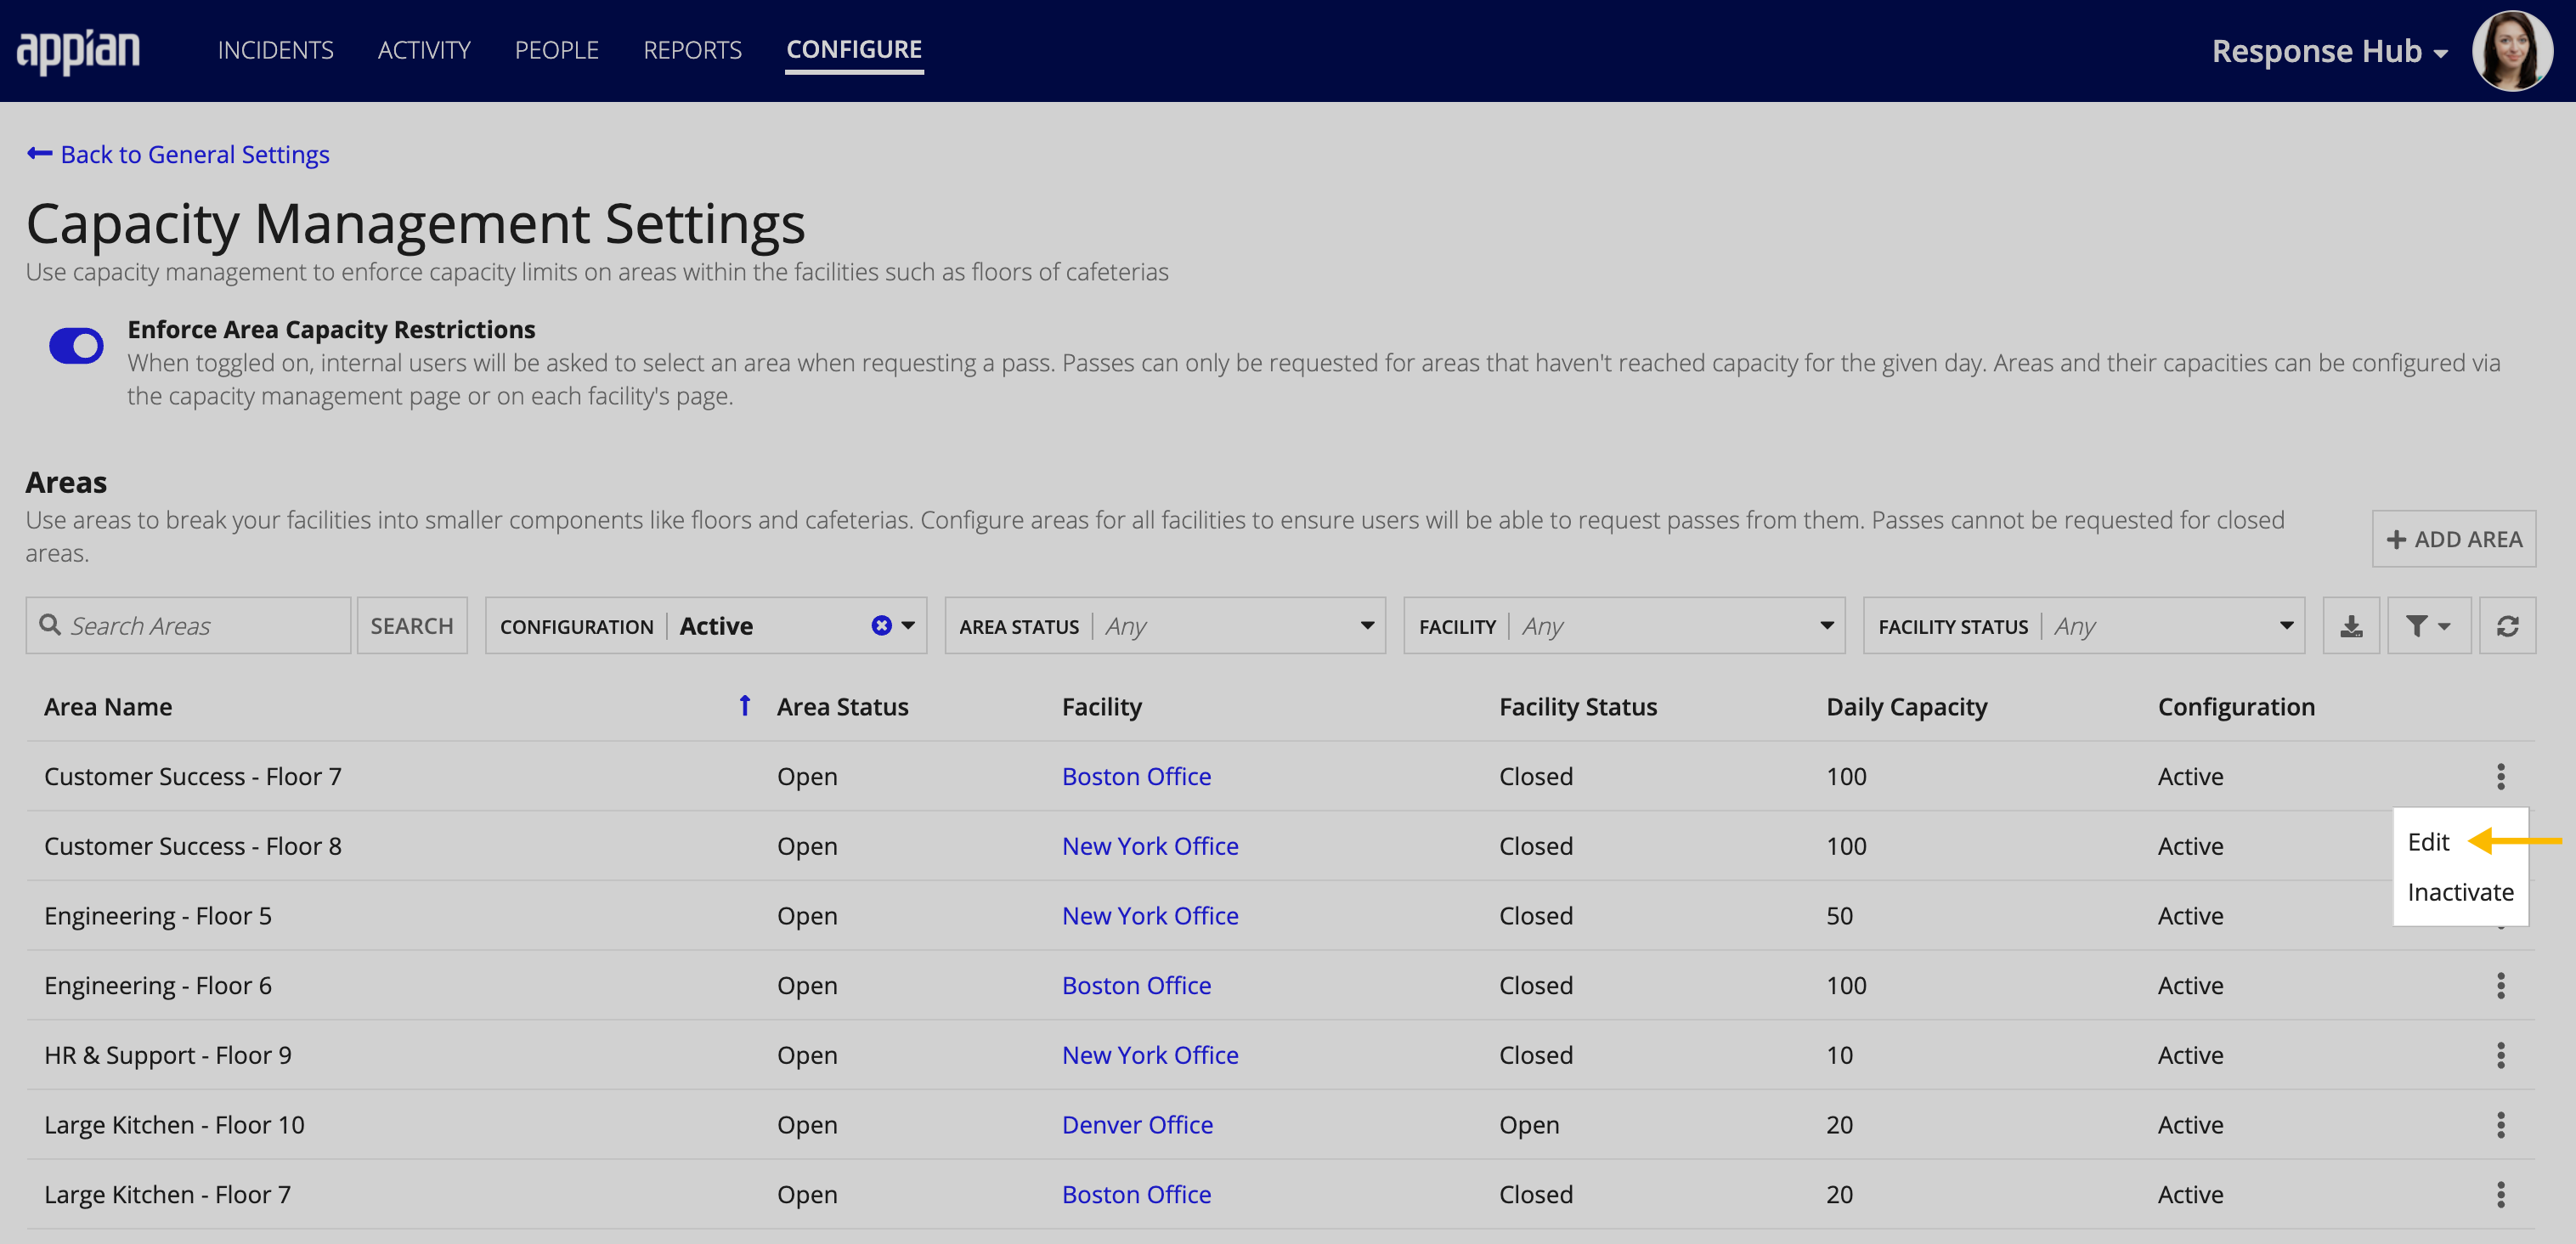
To edit an existing area:
- From the CONFIGURE page, click Capacity Management in the Manage Features section.
- Locate the area you want to update in the Areas list.
- Click the ellipse icon for the area you want to update.
- Click Edit.
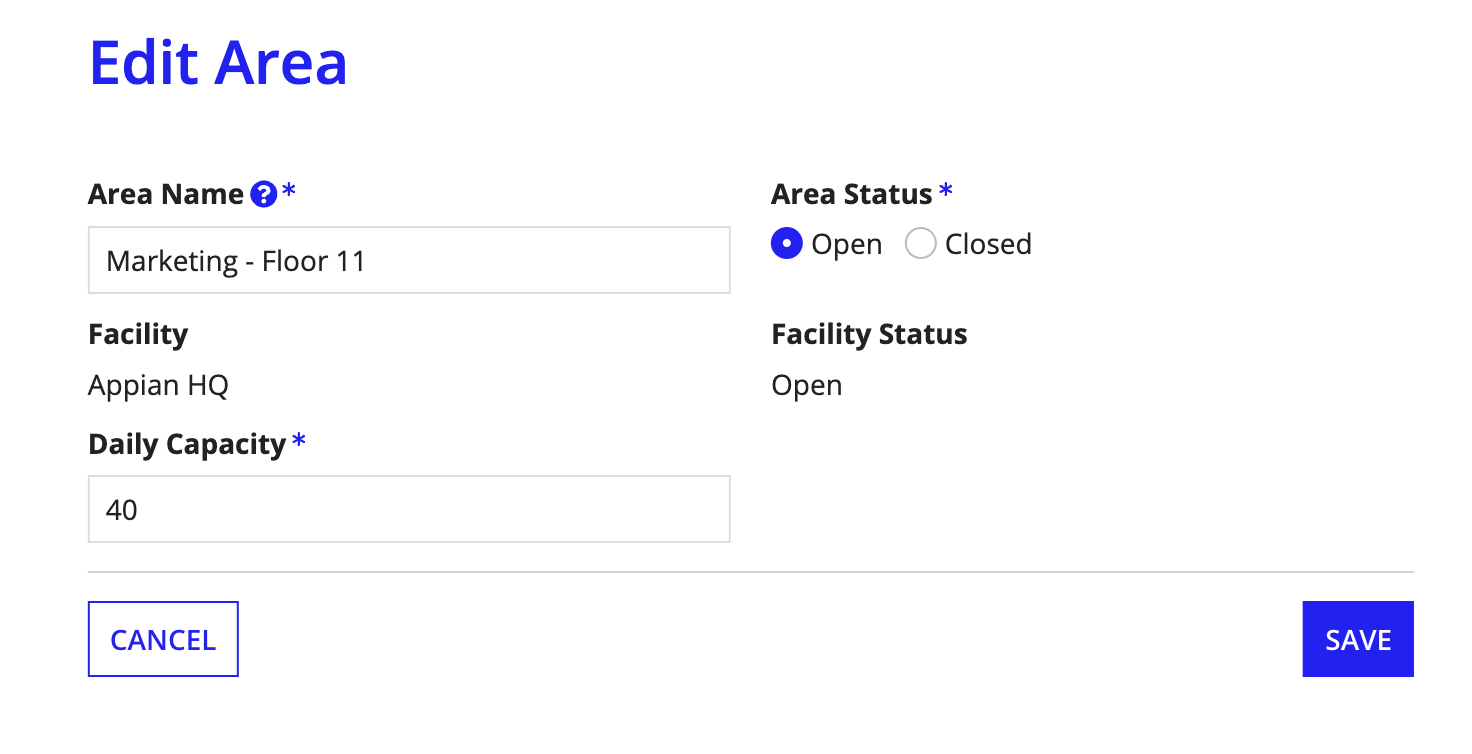
- Update any of the following information for the existing area:
- Area Name: The name you assigned to the area.
- Area Status: Options include Open or Closed.
- Note: Users are unable to request a pass for a closed facility.
- Daily Capacity: The maximum number of people the area can support daily.
-
Click SAVE.
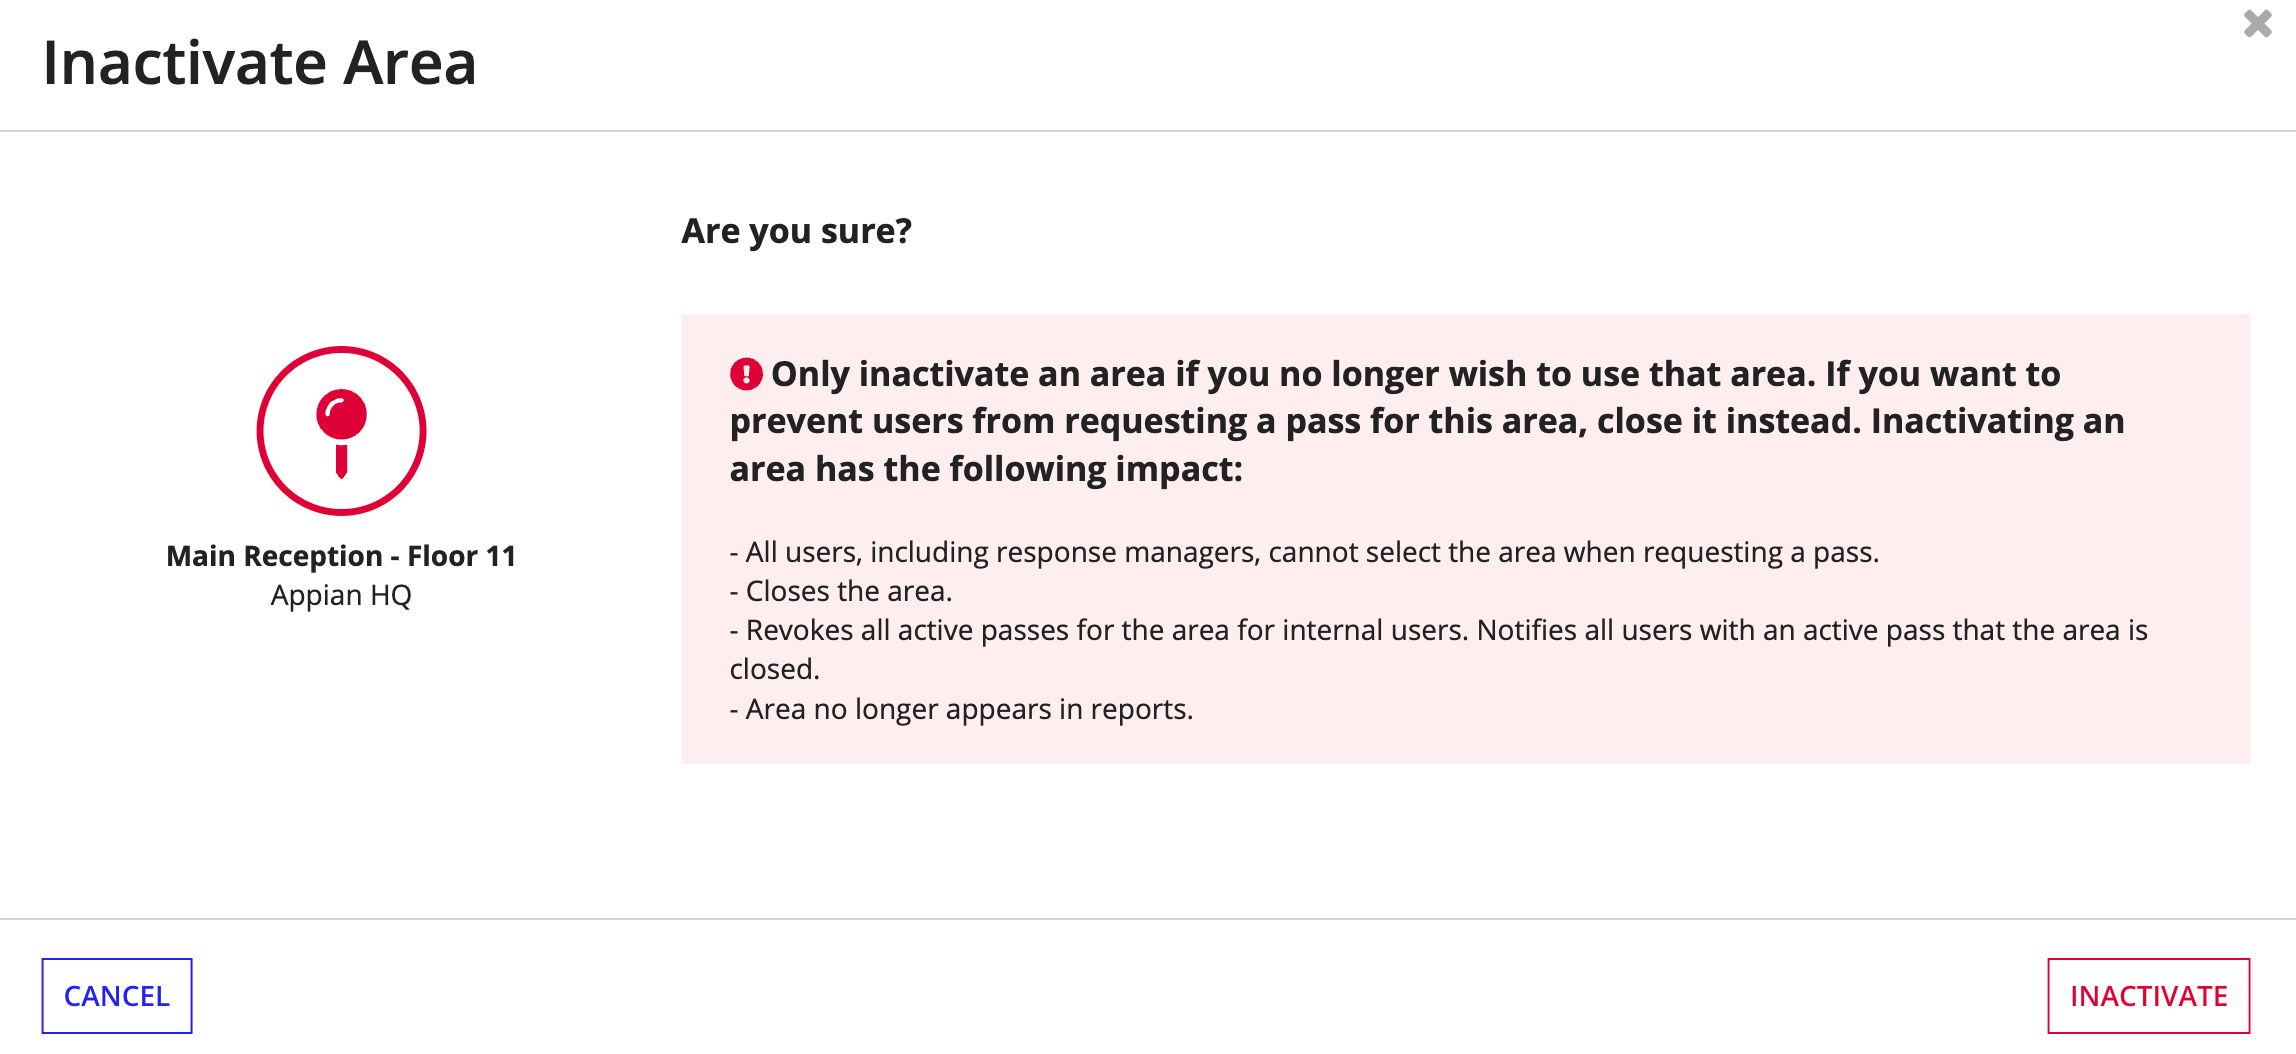
Deactivating and reactivating areas
Workforce Safety allows you to permanently close an area and restrict it from use by deactivating it. Deactivating an areas has the following results:
- The area is no longer available for users, including response managers, to select when requesting a pass.
- Closes the area from user access.
- Revokes all active passes for the area for internal users. Notifies all users with an active pass that the area is closed.
- Removes the area from all reports.
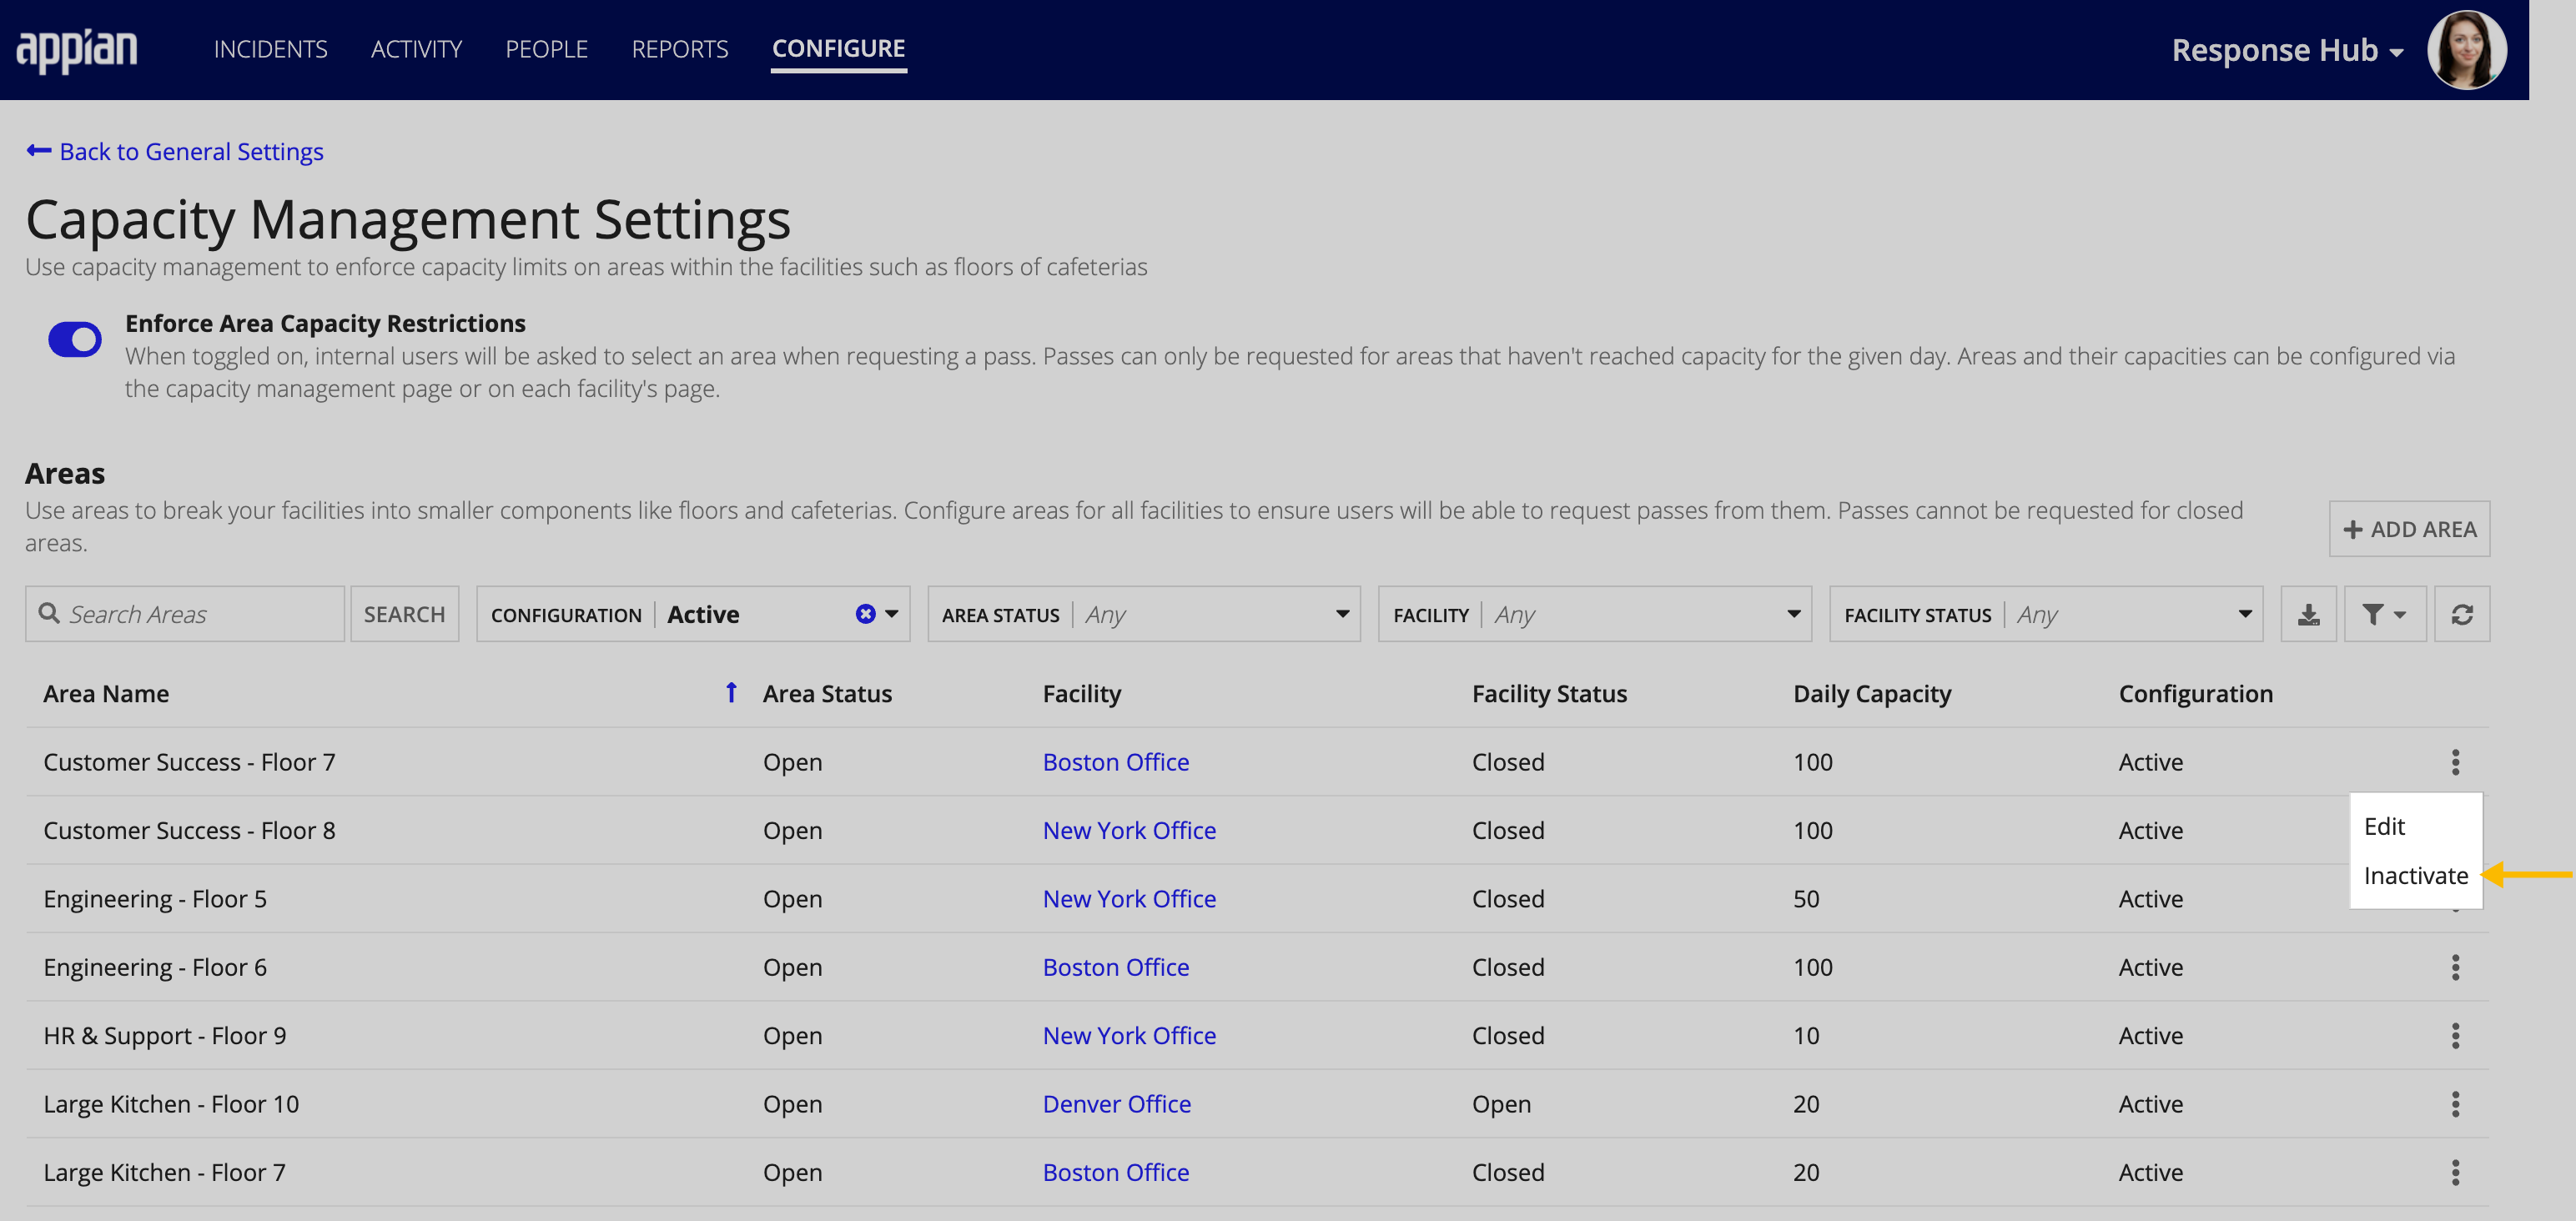
To deactivate an area:
- From the CONFIGURE page, click Capacity Management in the Manage Features section.
- In the Areas list, locate the area you want to deactivate.
- Click the ellipse icon for the area you want to deactivate.
- Click Inactivate.
- Note: Before proceeding, be sure to read the warning message to make sure you understand the impact of deactivating an area.
-
Click INACTIVATE.
To reactivate an inactive area:
- From the CONFIGURE page, click Capacity Management in the Manage Features section.
- In the Areas list, locate the area you want to reactivate.
- Click the ellipse icon for the area you want to reactivate.
- Click Activate.
