| This content applies solely to Workforce Safety, which must be purchased separately from the Appian base platform. This content was written for Appian 21.4 and may not reflect the interfaces or functionality of other Appian versions. |
Response and configuration managers can configure and manage specific system settings from the GENERAL SETTINGS tab, including site branding, user groups, and data management for the Workforce Safety solution.
Want to change the look and feel of your site? See what site branding options are available to modify in configure site branding.
Easily manage user access to site information by configuring group membership.
Finally, manage your data archival process by configuring what data you want the system to archive and when.
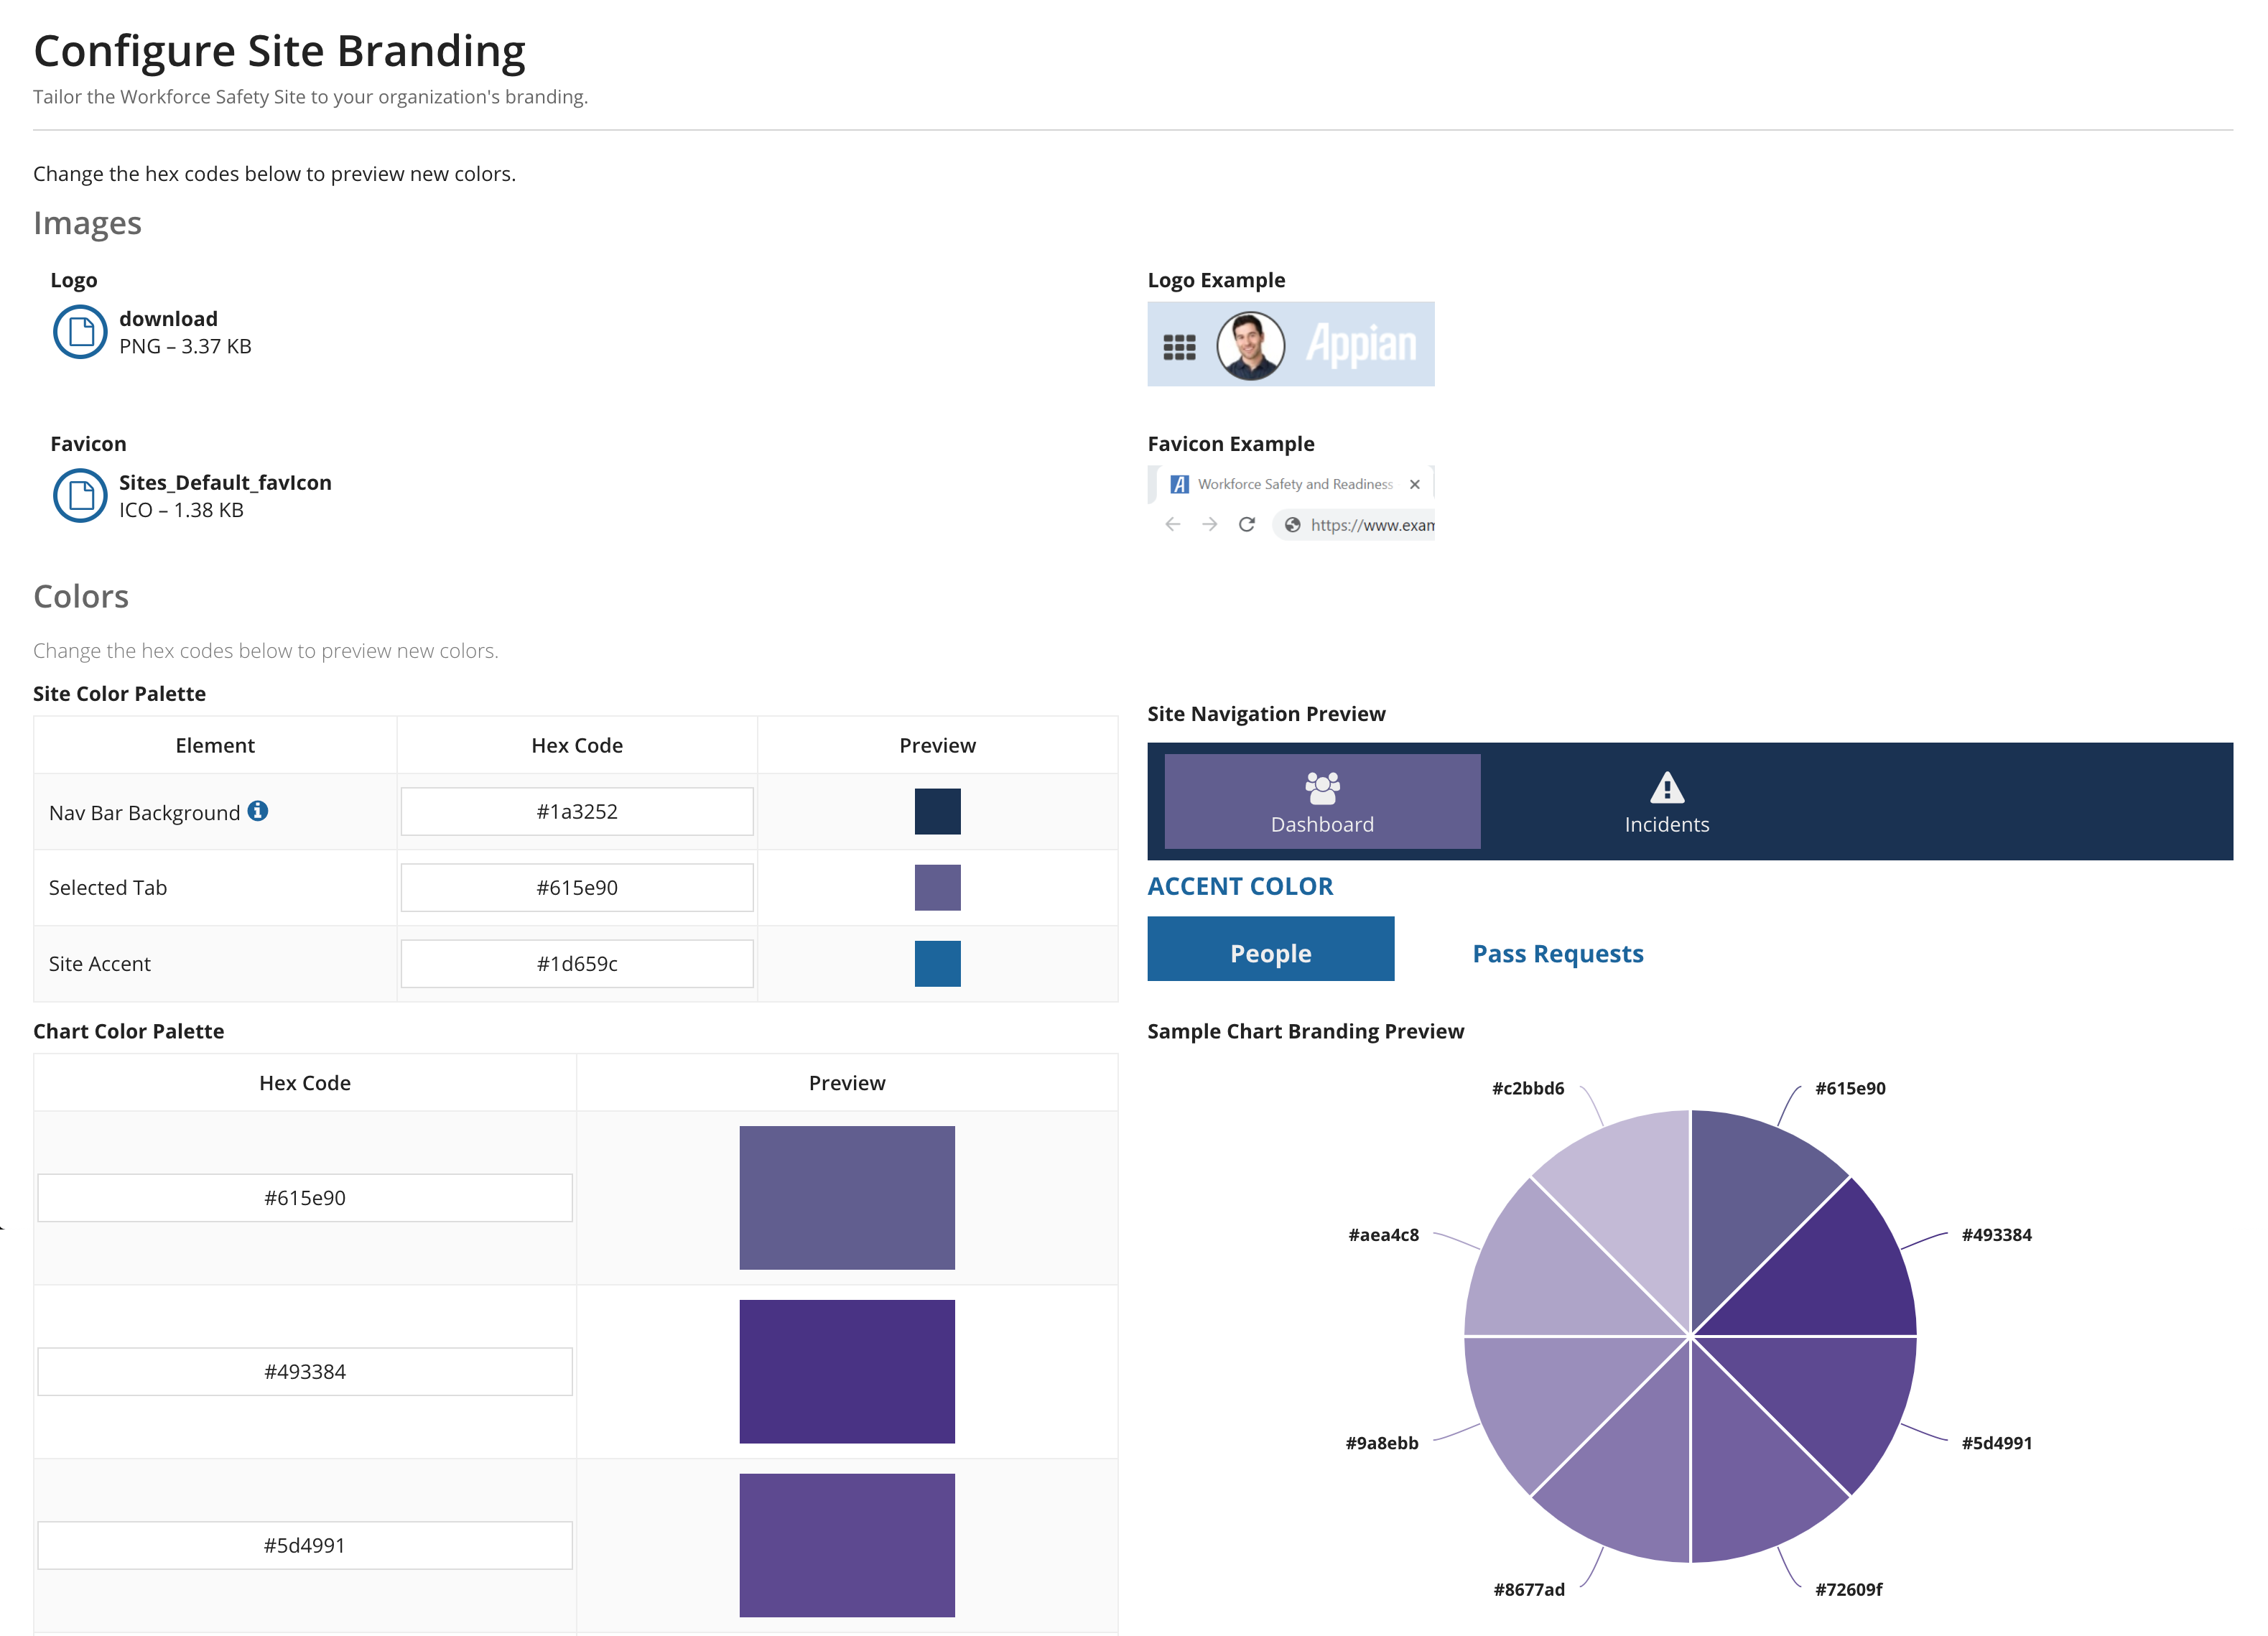
Response and configuration managers can tailor the look of Workforce Safety for your organization by changing the colors and logos.
To configure the branding:
Tip: The Site Accent color controls elements such as font, button, and tooltip elements.

There are seven different groups for the Response Hub:
Workforce Safety AdministratorsWorkforce Safety Configuration ManagersWorkforce Safety CoordinatorsWorkforce Safety Facility ManagersWorkforce Safety Response ManagersWorkforce Safety ScreenersWorkforce Safety HostsEach of these groups has a different level of access in the Response Hub. Because Workforce Safety contains personal health information (PHI), it is important to make sure that users are placed into the appropriate groups so that PHI isn't inadvertently revealed.
See the Groups Reference Page for more information on the information and actions that each group has access to.
Response managers and administrators can add or remove people from these groups directly from the Response Hub.
To modify group membership:
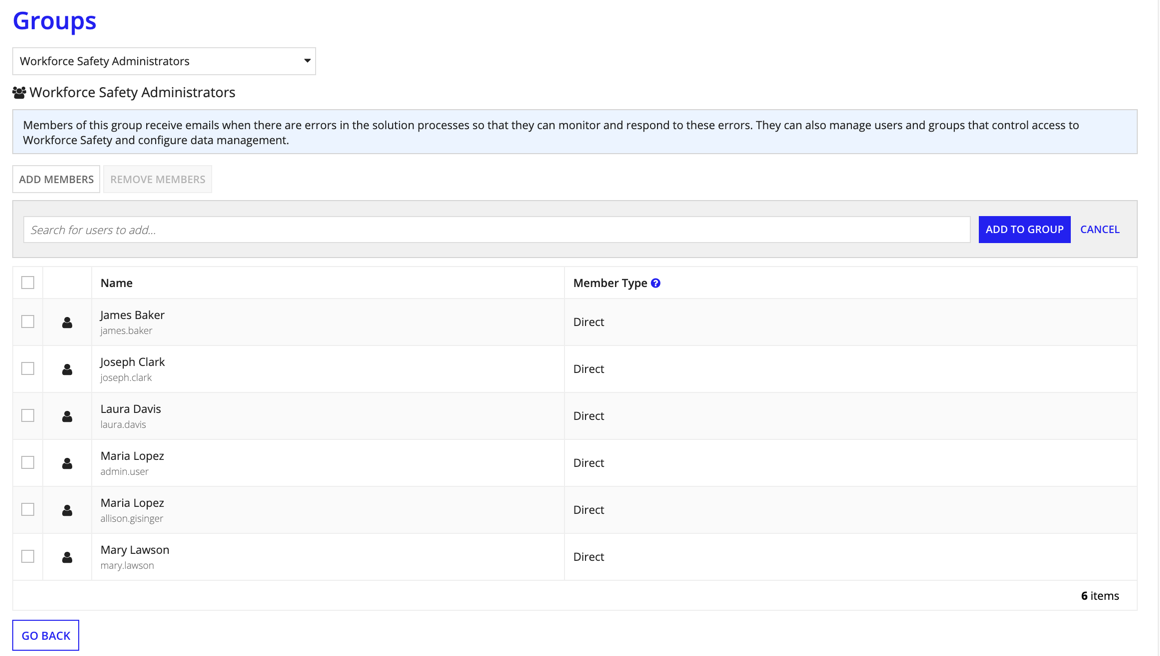
You may notice that the Workforce Safety Screeners group has some indirect members. That is because members of the Response Managers group are automatically members of this group. In order to remove indirect members from the screeners group, you would have to remove them from the Response Managers group.
The longer you use Workforce Safety, the more data your organization creates. Too much data may cause end users to experience slow app performance. If certain data is no longer needed for business purposes, it is a good idea to archive it so that it doesn't affect the performance of Workforce Safety.
Archived data is no longer visible from the Workforce Safety site, but it can be retrieved in the future. This is because it isn't deleted, but moved to a different table in the database.
The Data Management configuration allows administrators to determine what data to archive and when to archive it.
See also:
Only members of the Workforce Safety Administrators group have access to the Data Management configuration. Response managers do not have access to this configuration unless they are a member of the administrator group.
You can archive the following data:
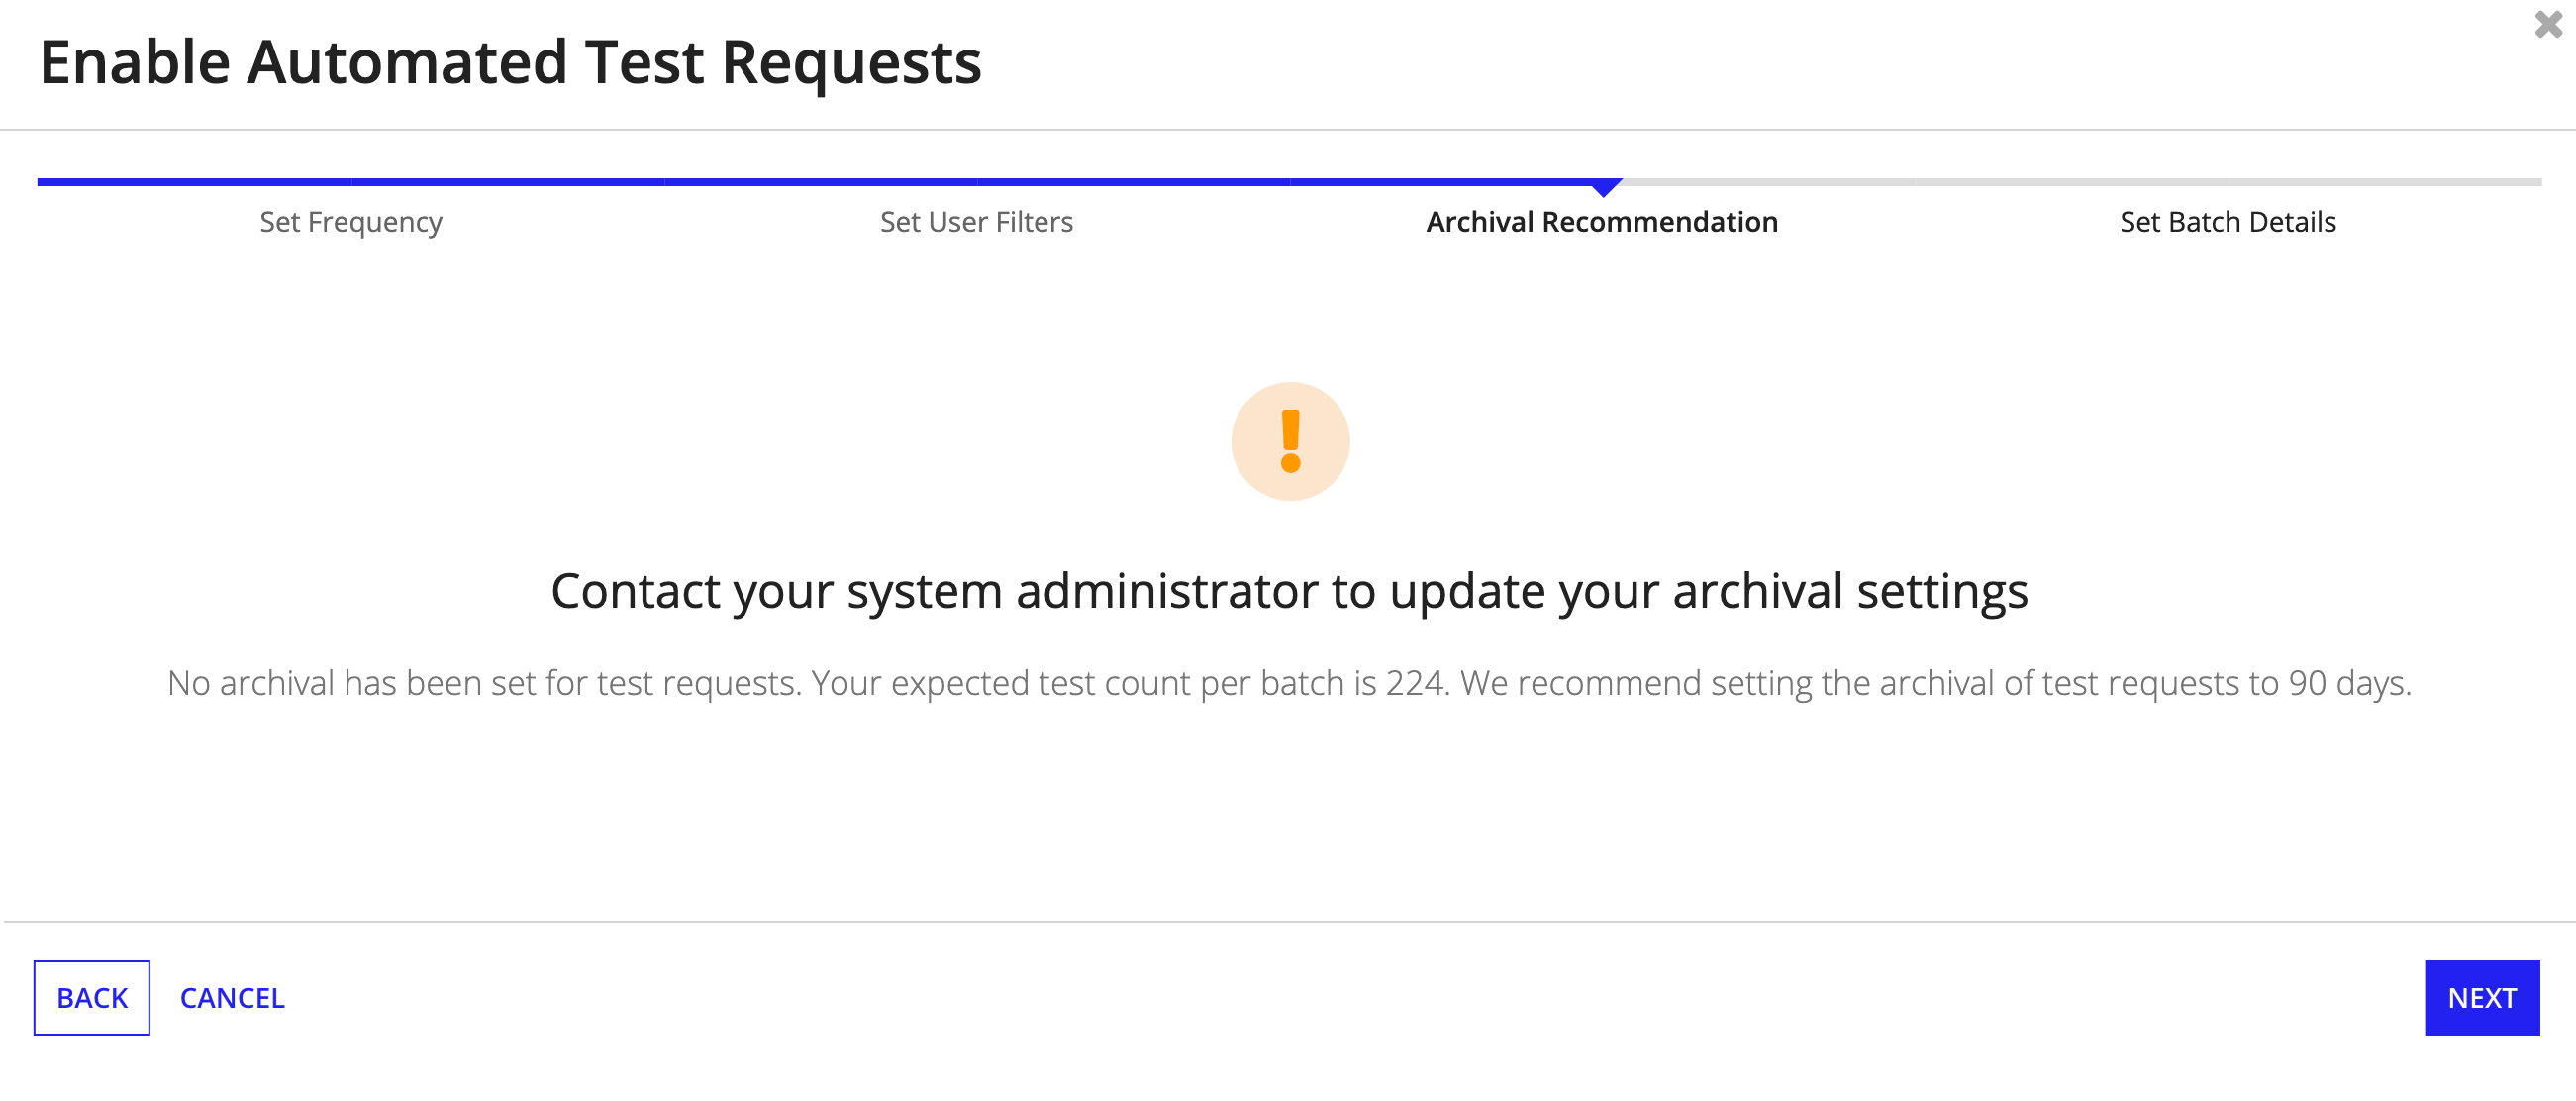
To specify which data to archive and when to archive it:

