| This content applies solely to Connected Underwriting, which must be purchased separately from the Appian base platform. This content was written for Appian 24.2 and may not reflect the interfaces or functionality of other Appian versions. |
IntroductionCopy link to clipboard
Gathering all the information needed for underwriting requires frequent communication between Underwriters and Brokers. Connected Underwriting P&C allows users to send, receive, and review messages via the MESSAGES dashboard.
This page describes how to use Connected Underwriting P&C to manage messages.
View messagesCopy link to clipboard
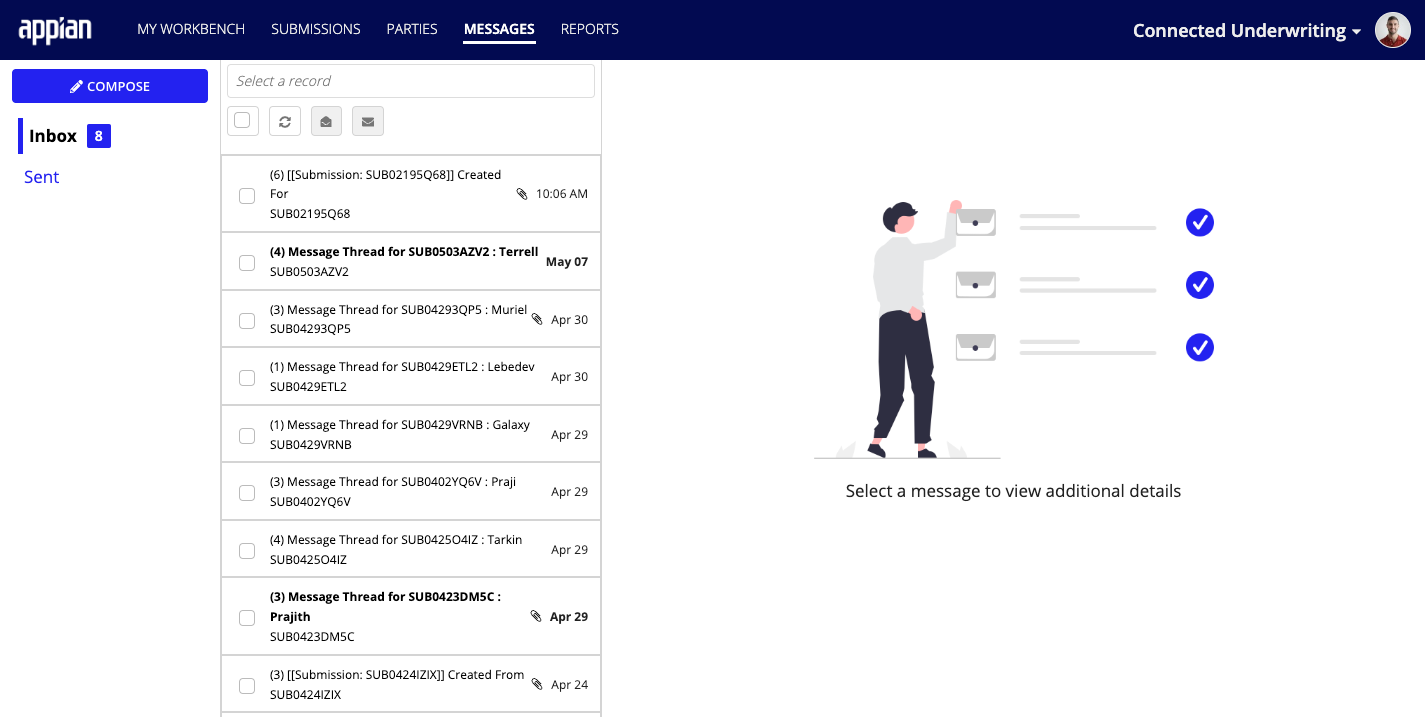
Messages are viewable from the MESSAGES dashboard, which can be accessed by clicking the MESSAGES tab on the navigation bar.

Note: The instructions on this page apply for both Inbox and Sent messages.
Messages are available to the recipient, as well as any watchers on a Submission. The MESSAGES dashboard defaults to a view of received messages (Inbox), the view can be changed to show sent items by using the Sent button in the sidebar.
To find the correct message, the MESSAGES dashboard provides the ability to view messages relating to a specific Submission by using the Select a record field.

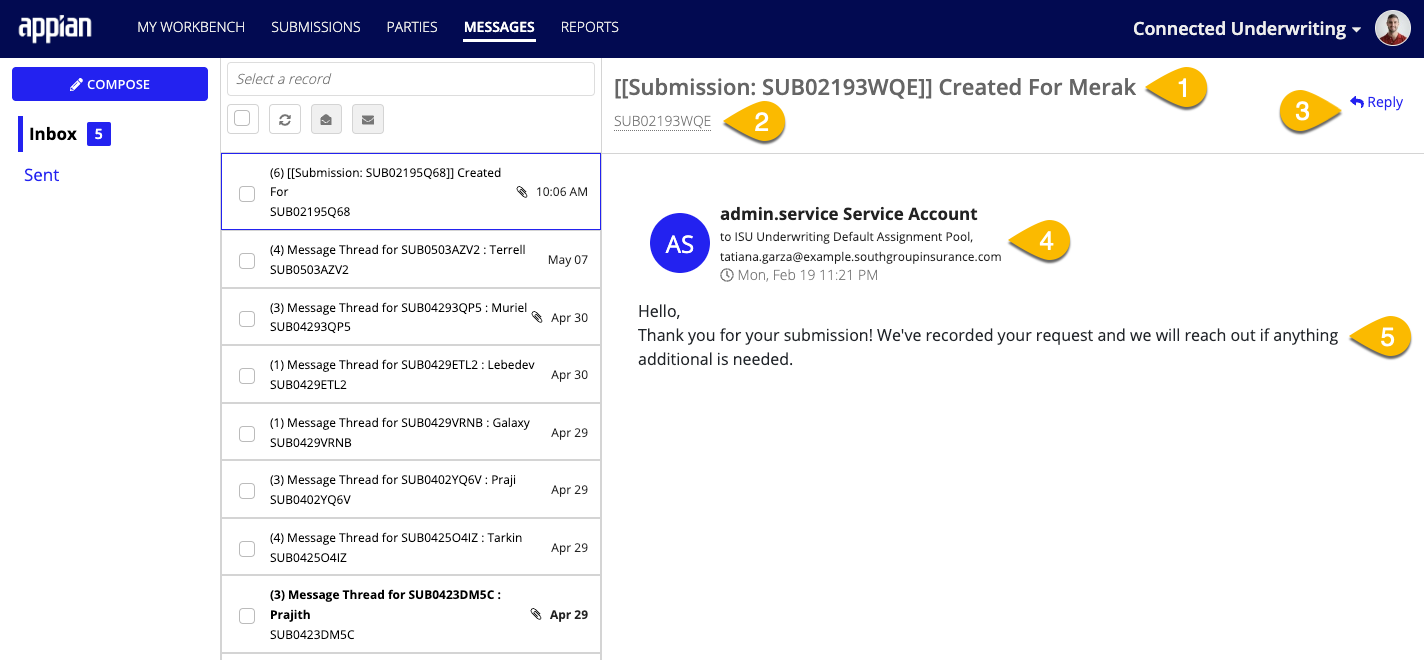
Once you have found the message you want to review, click on it to present a summary view of the item. The summary view of a message shows the following information:
- Subject Line
- Submission Link
- Reply Button
- Sender, Recipient Email Address, Email Date and Timestamp
- The message that was transmitted.
Compose messagesCopy link to clipboard
From the Messages tab, users can also respond to messages and compose new messages.
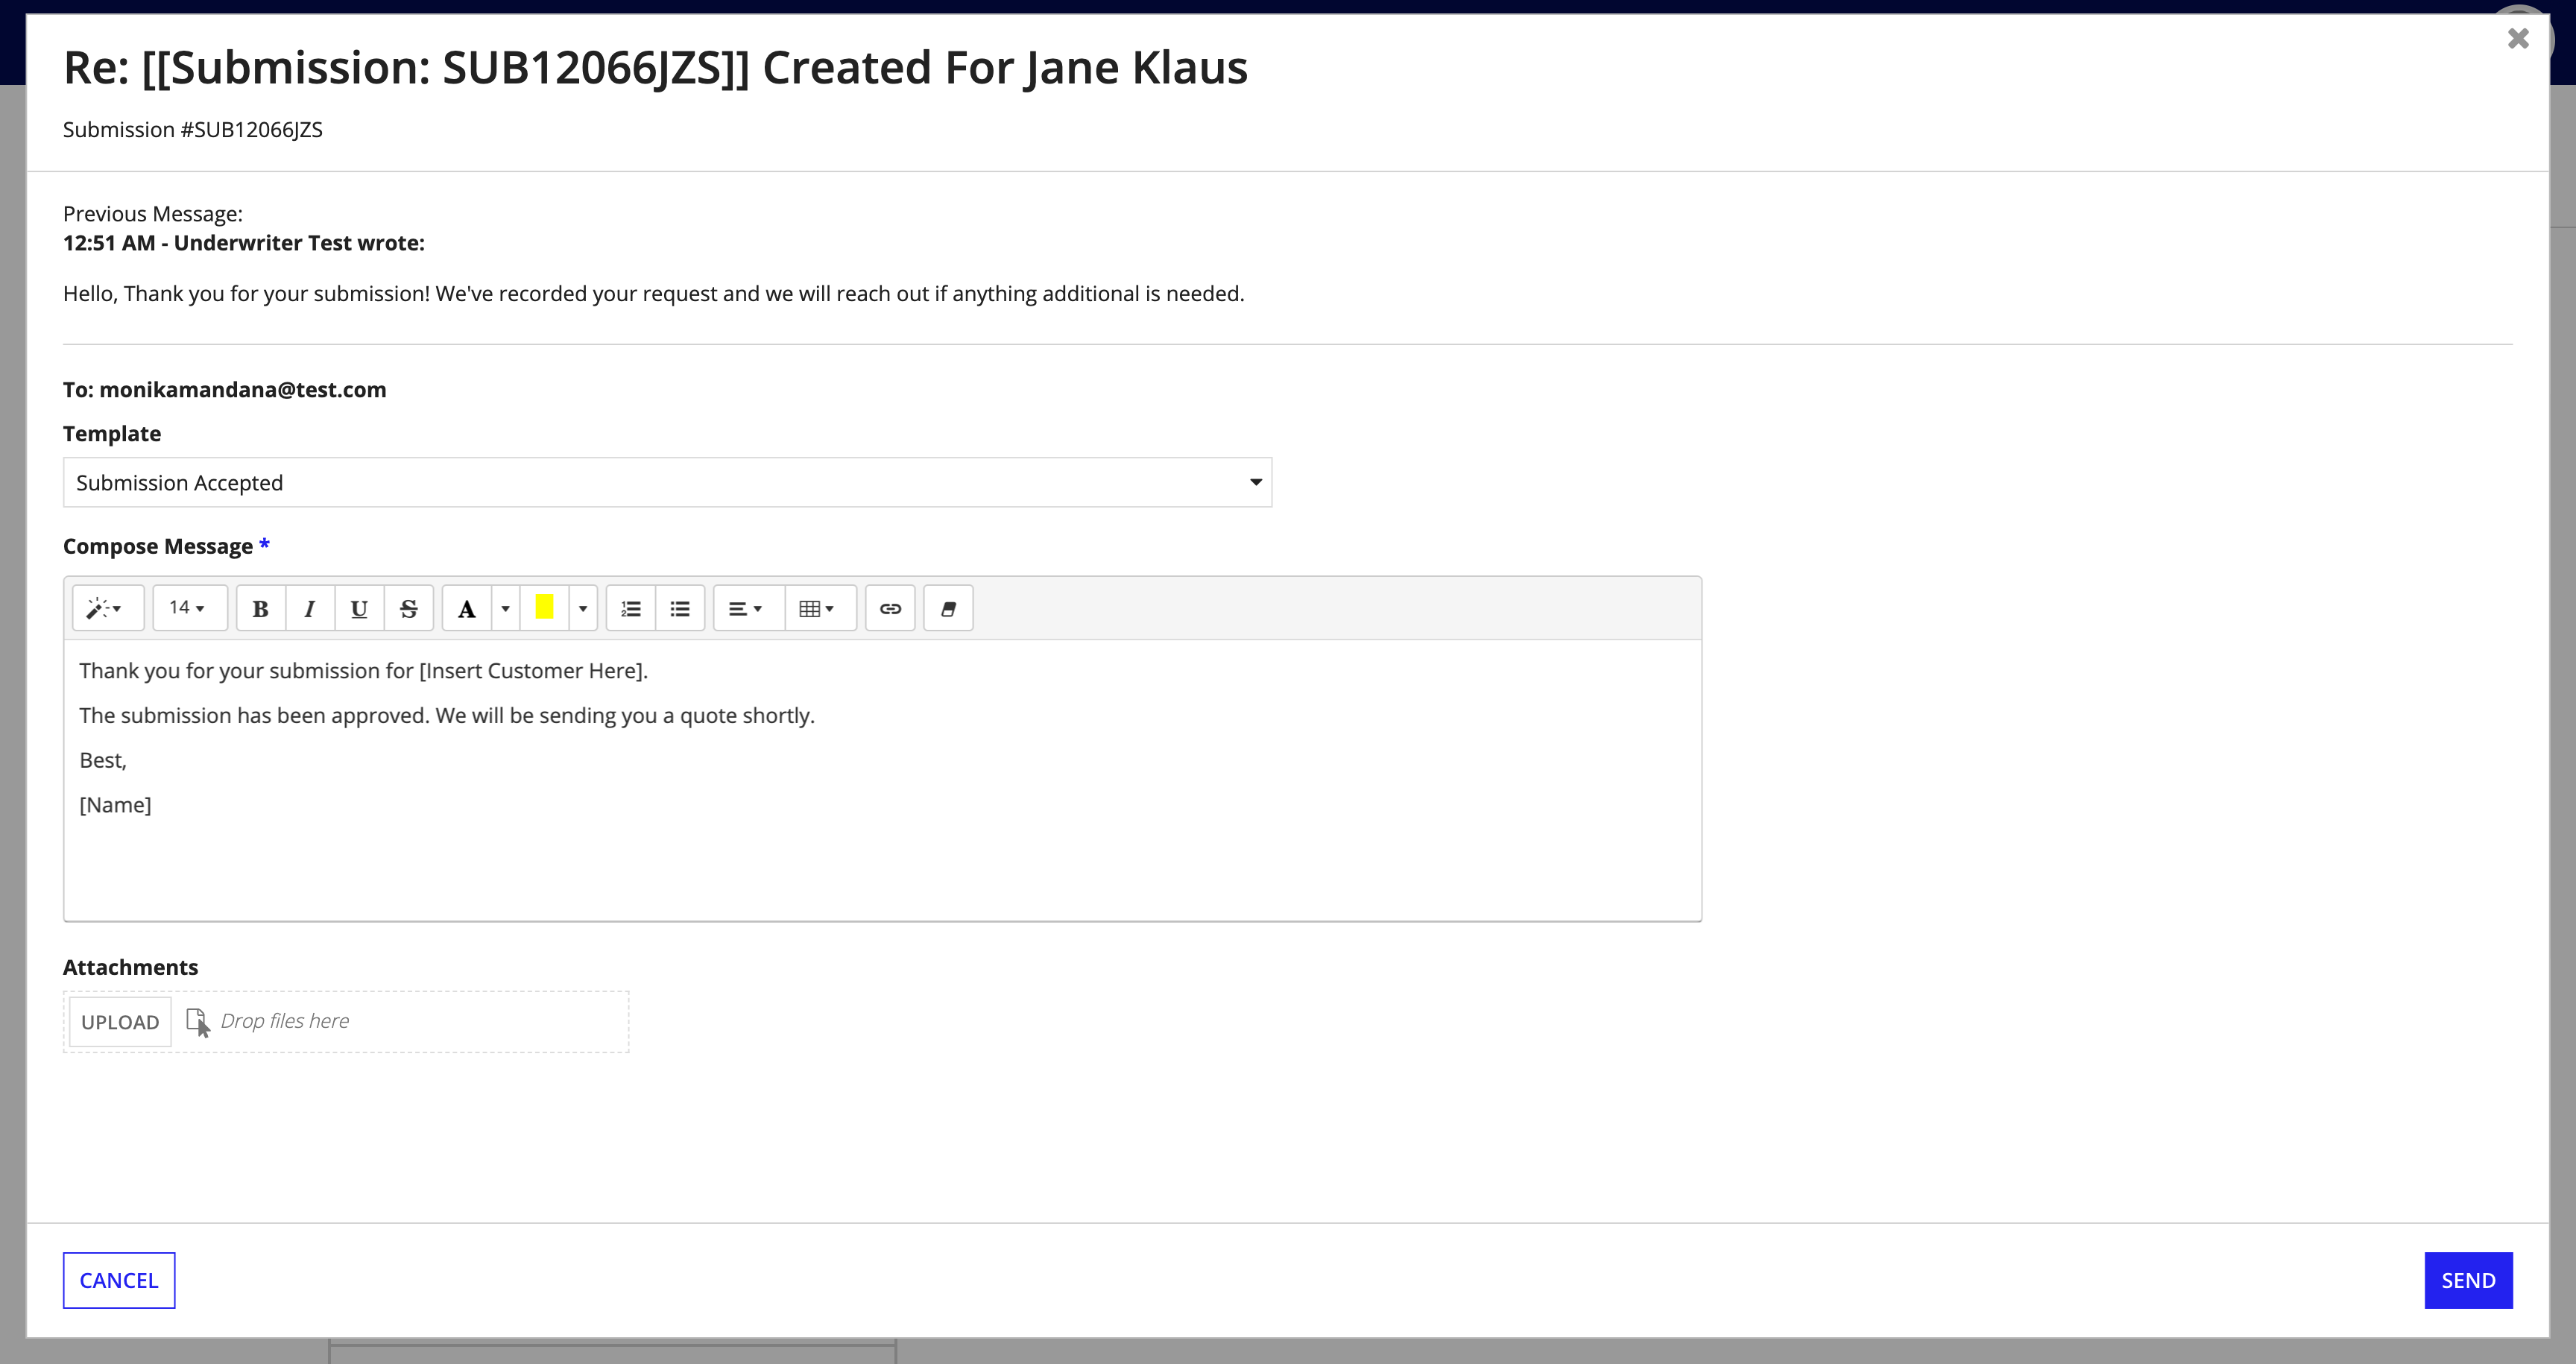
To send a message response:
- From a message, click Reply. This presents the message form.
- Enter a message in the Compose Message field.
- Message templates are available from the Template dropdown list. Selecting a template populates the Compose Message field with editable pre-written text.
- Click UPLOAD to include any attachments.
-
Click SEND.

To compose a message:
- Click COMPOSE to open the Compose Message dialog.
- Enter the Submission record ID or Customer ID in the Submission ID or Customer field.
- In the Template dropdown, select the message template you want to use.
- In the Compose Message editor, write the message you want to communicate related to the Submission or customer.
- Click UPLOAD to attach a document to your message.
- Click SEND.
To learn more information on email templates, visit the Configuring Email Templates page.
Quick actionsCopy link to clipboard
Connected Underwriting P&C includes the ability to take quick action on the messages items listed on the MESSAGES dashboard.

The quick actions are:
- Select All: This checkbox will select all the messages shown on the MESSAGES dashboard.
- Refresh: This will refresh the messages shown on the MESSAGES dashboard, displaying any new items.
- Mark as read: This will mark all checked messages as read.
- Mark as unread: This will mark all checked messages as unread.


