If you are new to Appian and unfamiliar with Appian design objects and concepts, check out Appian Academy Online.
IntroductionCopy link to clipboard
Record types enable you to do more with your data. Regardless of where your data lives, Appian allows you to organize your data into actionable records that allow users to access and update the information that they need.
For example, think about an employee record. What information about the employee would you want to see? You'd probably want to have the employee's name, title, department, and start date readily available. What might you want to do? At some point you would likely have to update the employee's information. You might also need to add a new employee. These common actions can be directly added to your record type and can be referenced in other interfaces and processes.
This tutorial should take less than an hour to complete and will walk you through the steps to create an Employee record type with data sync enabled.
ObjectivesCopy link to clipboard
This tutorial contains five parts:
Part 1: Set up and create the record type: First, we will set up our application and supporting objects, as well as bring together our data and record type to begin connecting our users with the data. To do this, we will:
- Create the Appian Tutorial application.
- Add a managers group.
- Create our record type and data source.
- Add data to our record type.
Part 2: Configure record events: Next, we'll configure record events so we can keep track of who takes action on the employee data and when. As a best practice, all record types that represent major business concepts (like Employees, Orders, or Customers) should have record events configured. To do this, we will:
- Define the different types of events that can occur.
- Generate an Event History record type and Event Type Lookup record type.
Part 3: Configure the record list: Now that our data model is configured, we will structure the way that our users will initially interact with the set of records through the record list. To do this, we will:
- Configure the record list by selecting which columns we want to see in the list.
- Create a user filter for users to filter the records in the list.
Part 4: Define the record views: In this part, we will create a way for users to drill into each record. To do this, we will:
- Generate and configure record views so that users can see specific record data through different perspectives.
- Configure the record title and header to fit our needs.
Part 5: Generate record actions: In the last part, we will allow users to take action on our data from the context of the record list and the records themselves. To do this, we will:
- Generate a create, update, and delete record action
- Display record actions so they appear in the proper locations.
- Secure our actions so only managers can update an employee's information or delete it.
After successfully completing this tutorial, you will be ready to create your own record types.
RequirementsCopy link to clipboard
-
This tutorial takes advantage of codeless data modeling, which requires an environment connected to a supported database. Codeless data modeling supports MariaDB, MySQL, Oracle, SQL Server, PostgreSQL, and Aurora MySQL databases. For example, you can use an Appian Cloud or an Appian Community Edition environment.
-
Ensure you are familiar with the different design objects that will be referenced throughout this tutorial:
Part 1: Set up and create the record typeCopy link to clipboard
Before we can create our record type, we need to create an application. We'll take advantage of Appian's automatic group and folder generation during application creation, so we'll automatically have our initial application infrastructure. We'll also add a group specific to this tutorial, then add the data for our record type.
Create the Appian Tutorial applicationCopy link to clipboard
Tip: The Appian Tutorial application is used throughout Appian tutorials. Skip the steps in this section if you've already created this application in another tutorial.
To begin with, we need to create an application to contain our design objects.
We will be creating the Appian Tutorial application for this tutorial. All of Appian's tutorials use the Appian Tutorial application as the reference application. After completing this tutorial, you can reuse this application as you work through other Appian tutorials.
To create the Appian Tutorial application:
- Log in to Appian Designer (for example, https://us.appian.community/suite/design for US-based users).
- In the Applications view, click +New Application.
-
In the Create New Application dialog, configure the following properties:
Property Description Name Enter Appian Tutorial.Prefix Keep the default prefix, AT, which Appian constructs using the initial characters of each word you entered in the Name parameter. We'll be following the recommended naming standard, and using this short, unique prefix whenever we name an object in this application.Description Leave blank. It's normally a best practice to add descriptions to all design objects. However, to save a little time during this tutorial, we'll skip adding descriptions unless the description displays to the end user. Generate groups and folders to secure and organize objects Keep this checkbox selected, so that Appian will automatically generate standard groups and folders and assign default security groups for this application. - Click CREATE.
-
In the Review Application Security dialog, keep the default security settings. Because we selected the Generate groups and folders option in the previous step, Appian automatically uses the AT Users and AT Administrator groups it generated to set our application security appropriately.
Tip: The security of the application object is unrelated to the security of each of the objects contained within the application. This means that you will need to set security permissions for every object in an application in addition to the application object itself. For more information about security permissions for the application object, see Application Security.
-
Click SAVE.
Right now, the application contains the folders and groups Appian generated automatically. To see these, click Build in the navigation pane. Each design object that you create during the course of this tutorial will appear in this list in the Build view and be associated with the tutorial application.
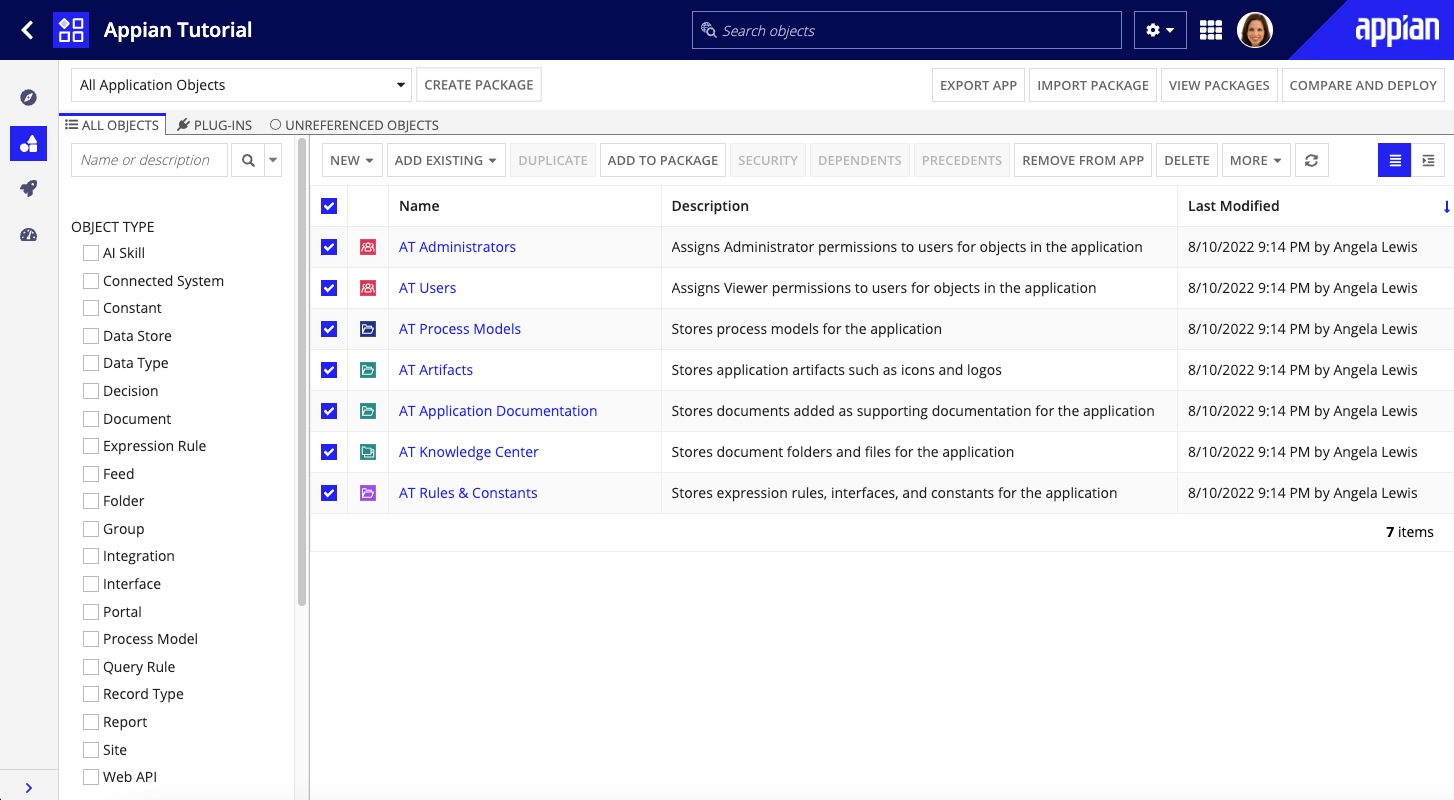
Because we selected the Generate groups and folders to secure and organize objects option while creating the object, Appian generates standard groups and folders for the application, as well as assigns the generated groups as the default security groups for the application.
In this tutorial, we'll be using the following generated groups and folders:
- AT Administrators group to contain all administrators of the Appian Tutorial application.
- AT Users group to contain all users of the Appian Tutorial application.
- AT Rules & Constants folder to contain all our expression rules, constants, and interfaces in this folder throughout the tutorial.
- AT Models folder to contain all our process models throughout the tutorial.
For each object we now create in this tutorial, Appian will pre-populate the AT Administrators and AT Users groups in the object role maps. Most of the time, we'll be able to keep those pre-populated values. The rest of the time, we'll be assigning permissions to an application-specific managers group, which we'll create now.
Add a managers groupCopy link to clipboard
Managers will have a specific part to play in our new application, so let's add a new group for AT Managers.
To add a managers group:
- In the application, go to the Build view.
- Click NEW > Group.
-
Configure the following properties:
Property Description Name Enter: AT ManagersParent Group Enter AT Users, so that users in this group inherit Viewer permissions for the application.Group Members Enter your user name. - Click CREATE.
- In the Review Group Security dialog, keep the default settings. AT Administrators group should be assigned Administrator permissions for the group.
- Click SAVE.
Create the employee record type and add dataCopy link to clipboard
In the last part of the setup, you'll need to create the employee record type and add the data that we'll use throughout this tutorial.
The Use the Write Records Smart Service Function on an Interface recipe will walk you through how to create the Employee record type, set up your data model, and add your employee data.
Part 2: Configure record eventsCopy link to clipboard
Once we have the data structure set up, we want to easily track any actions that occur on the data. For example, whenever a new employee is created, we want to create an event that indicates who created the new employee and when. That way, we have a history of adding or updating employee information.
To track these business events, we'll configure record events. Record events allow us to store the event data in a separate Event History record type. We'll also create an Event Type Lookup record type to store the different types of events that can occur, like Created Employee or Updated Employee. Once we configure record events, we'll capture and display events throughout our application.
To configure record events:
- In the record type, go to Events.
- Click GENERATE EVENT RECORD TYPES.
- Under Include Common Event Types, keep the Created Employee, Updated Employee, and Commented On Employee checkbox selected. This will automatically add event types for creating employees, updating employees, and adding top-level comments to the event history list component.
- Keep Other Event Types blank. We only want to track when employees are created or updated, so we don't need to any additional event types.
-
For Record Type Names, keep the default values:
Property Value Event History AT Employee Event HistoryEvent Type Lookup AT Employee Event TypeReply Thread AT Employee Reply Thread - Keep the Download database script checkbox selected. As a best practice, you should download the script for any database table created from a record type.
- Click GENERATE.
The AT Employee Event History, AT Employee Event Type, and AT Employee Reply Thread record types are generated and display in the Event Configuration. We'll be able to capture and display events later in this tutorial once we generate our record views and record actions.
Part 3: Configure the record listCopy link to clipboard
Now that we have our data model and record events configured, let's configure the record list so users can see a full list of employees. Then, let's add a user filter so users can filter the list by department to find the right employees.
Configure record list columnsCopy link to clipboard
We'll start by configuring the fields displayed in the record list. We only want to display select fields since this data is meant to be viewed at a glance before users drill into each record.
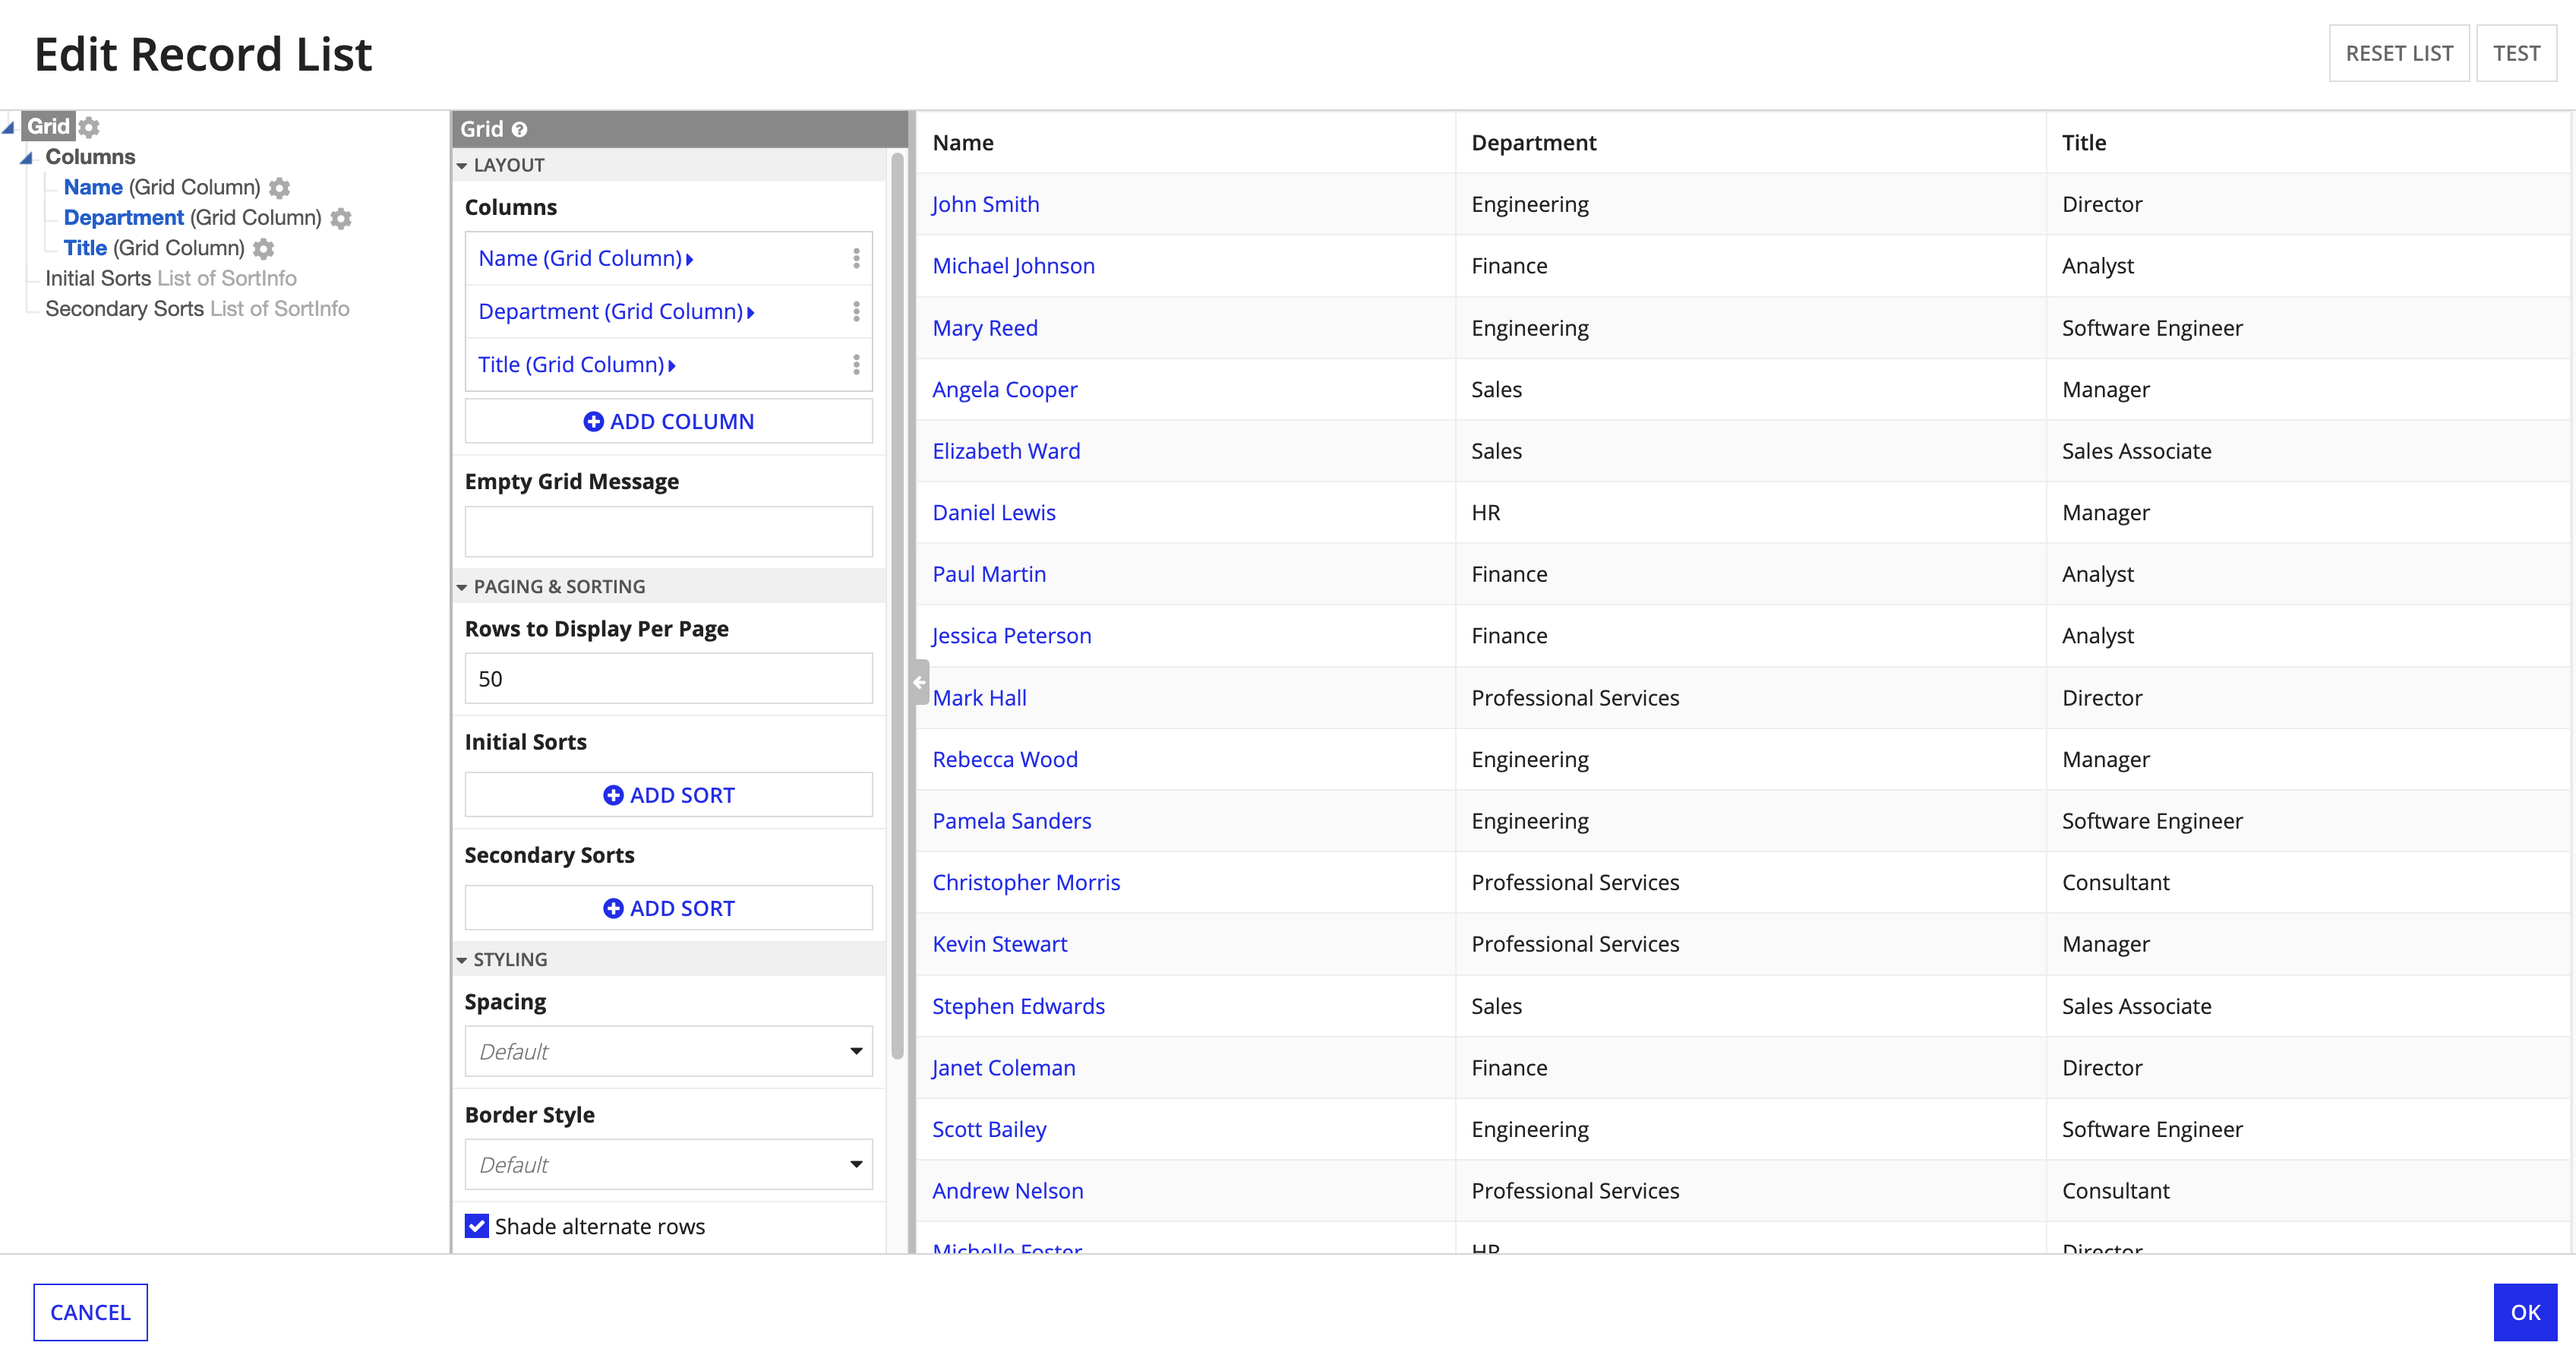
When looking at a list of employees, we really only want to see their name, title, and department. To configure the record list to show only these columns, we are going to remove the ID, phone number, and start date columns, and combine the first and last name columns into one.
To remove unnecessary fields:
- In the record type, go to List.
- Click EDIT LIST.
-
In the Columns section of the Grid configuration, delete the Id column by hovering over and clicking .
Note: We don't need to show the Id column in the record list, because the record field is primarily used by the database to identify records and not used by users.
- Delete the Phonenumber and Startdate columns in the same way.
Next, we will combine the first and last name columns into one Name column. We will also add sorting to allow users to easily sort data in a column, and set the display value to let the column know which record field to show.
To create the Name column:
- In the Columns section, delete the Lastname column by hovering over and clicking .
- In the Columns section, click Firstname.
- In the Label field, change firstname to
Name. - In the Sort Field field, remove firstname and select lastname.
- Under Display Value, click Link.
- Under Links, click List of Links.
- Under Links, click Record Link.
- Hover over Label, then click Edit as Expression .
-
To concatenate the first and last names to show both values in the same field, copy and paste the following expression:
fv!row[recordType!AT Employee.fields.firstName] & " " & fv!row[recordType!AT Employee.fields.lastName] - In the expression, change the record type references to use the record type reference in your environment:
- Remove the existing record field reference.
- Enter
recordType!, then select your AT Employee record type from the context menu. - Enter
.after recordType!AT Employee, and select fields from the first context menu and lastname from the second context menu.
Note: Record type field references are specific to each record type and environment. This means that you need to reference the record type fields from your own environment whenever you copy and paste a record type reference from outside the application.
- Click OK to close the expression editor.
-
Click OK to close the list editor.
- Click SAVE CHANGES.
Test generated user filterCopy link to clipboard
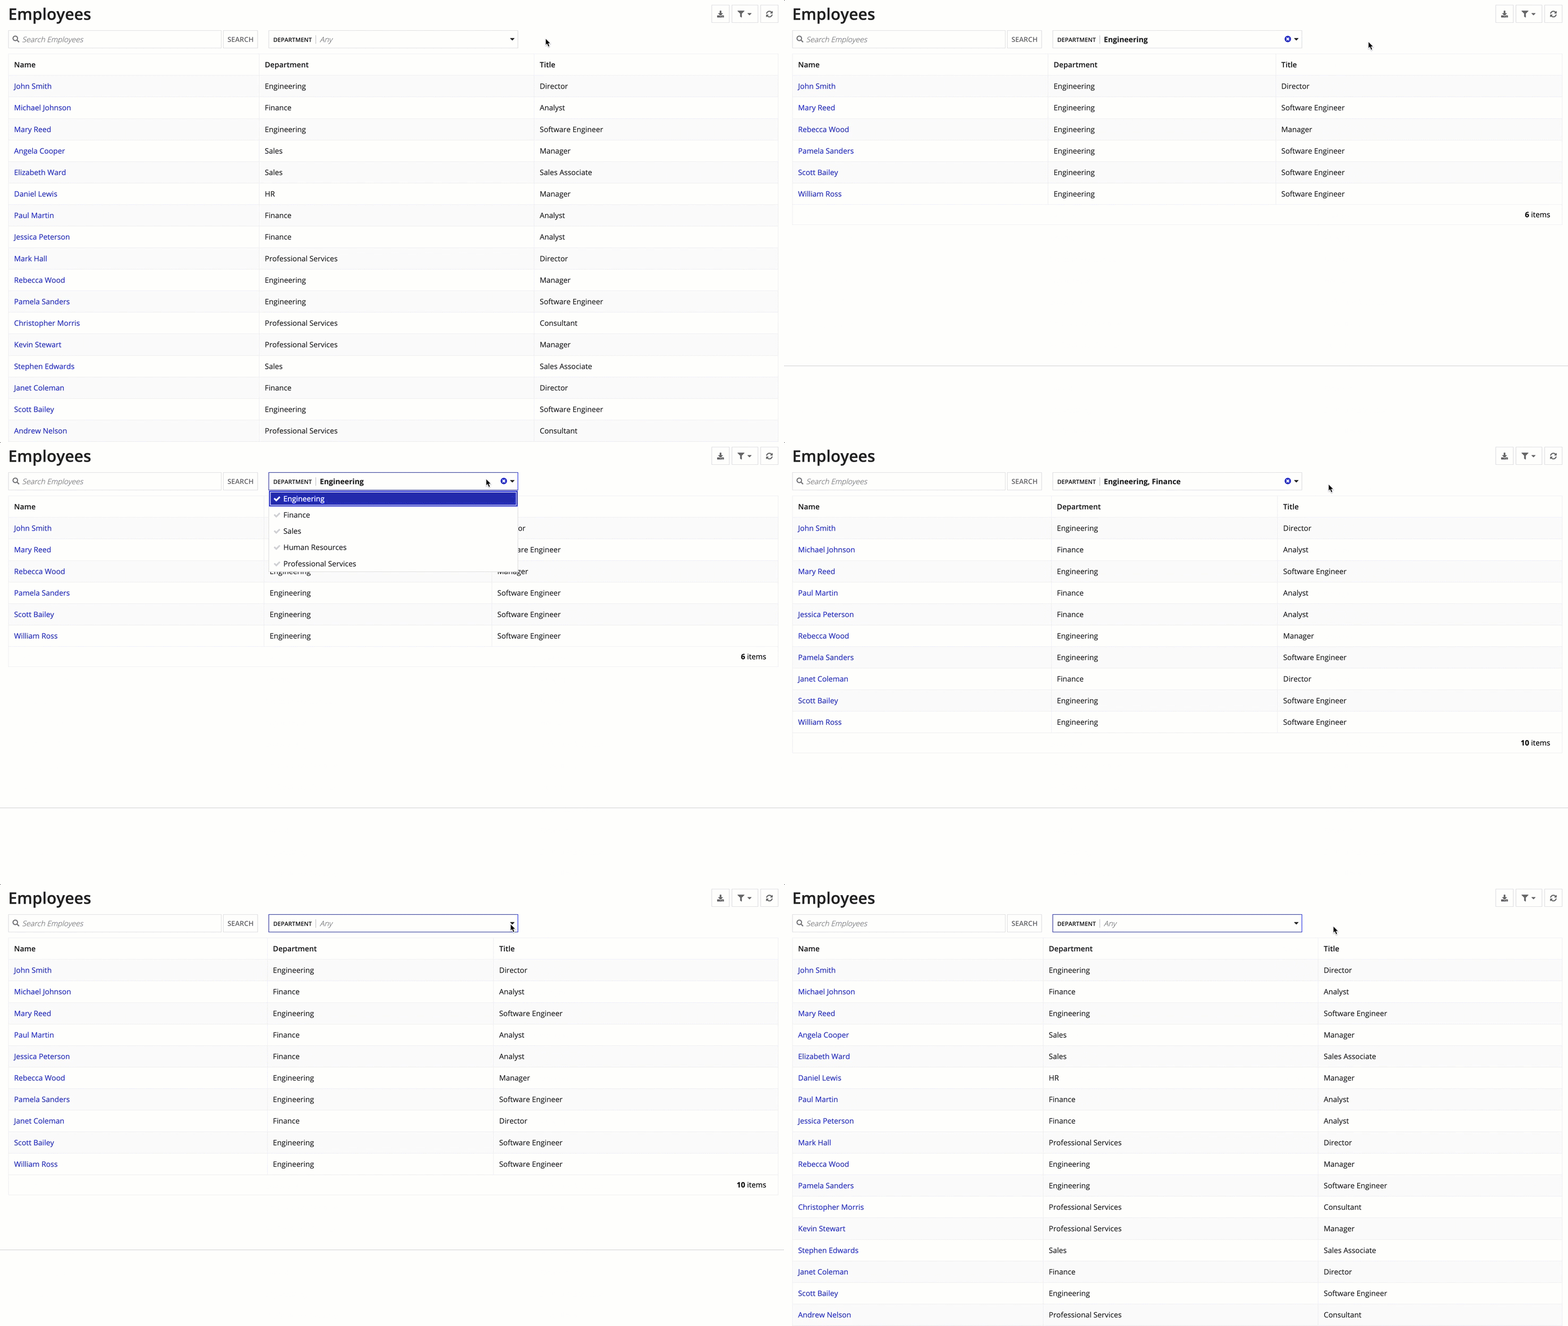
Now that we've configured the record list columns, we can use the user filter to filter by department. Since department data is stored in a many-to-one related record type, the user filter is already configured for us.
To test the generated user filter:
- In the record type, go to List.
- Click the link under URL. The record list will open in Tempo with the column configurations already applied, and it will automatically display the new user filter.
-
Select a value from the Department user filter.
Part 4: Define the record viewsCopy link to clipboard
Next, we will configure the records in the record type by generating a Summary view. The Summary view displays information for a single record. Then, we will configure the record header background color and the record title with the employee's name.
Generate an employee summary interfaceCopy link to clipboard
Because the Employee record type has data sync enabled, you can quickly generate the Summary view interface, as follows:
- Return to the AT Employee record type.
- In the record type, go to Views.
-
Click GENERATE RECORD VIEW.

- For Data Included in Your Record View, leave the default selection of the Employee record type. This will display all fields from the Employee record type in your record view.
- Click NEXT.
-
For Record View Name and Application, leave the default configurations:
Property Value View Name SummaryApplication Appian Tutorial - Click NEXT.
-
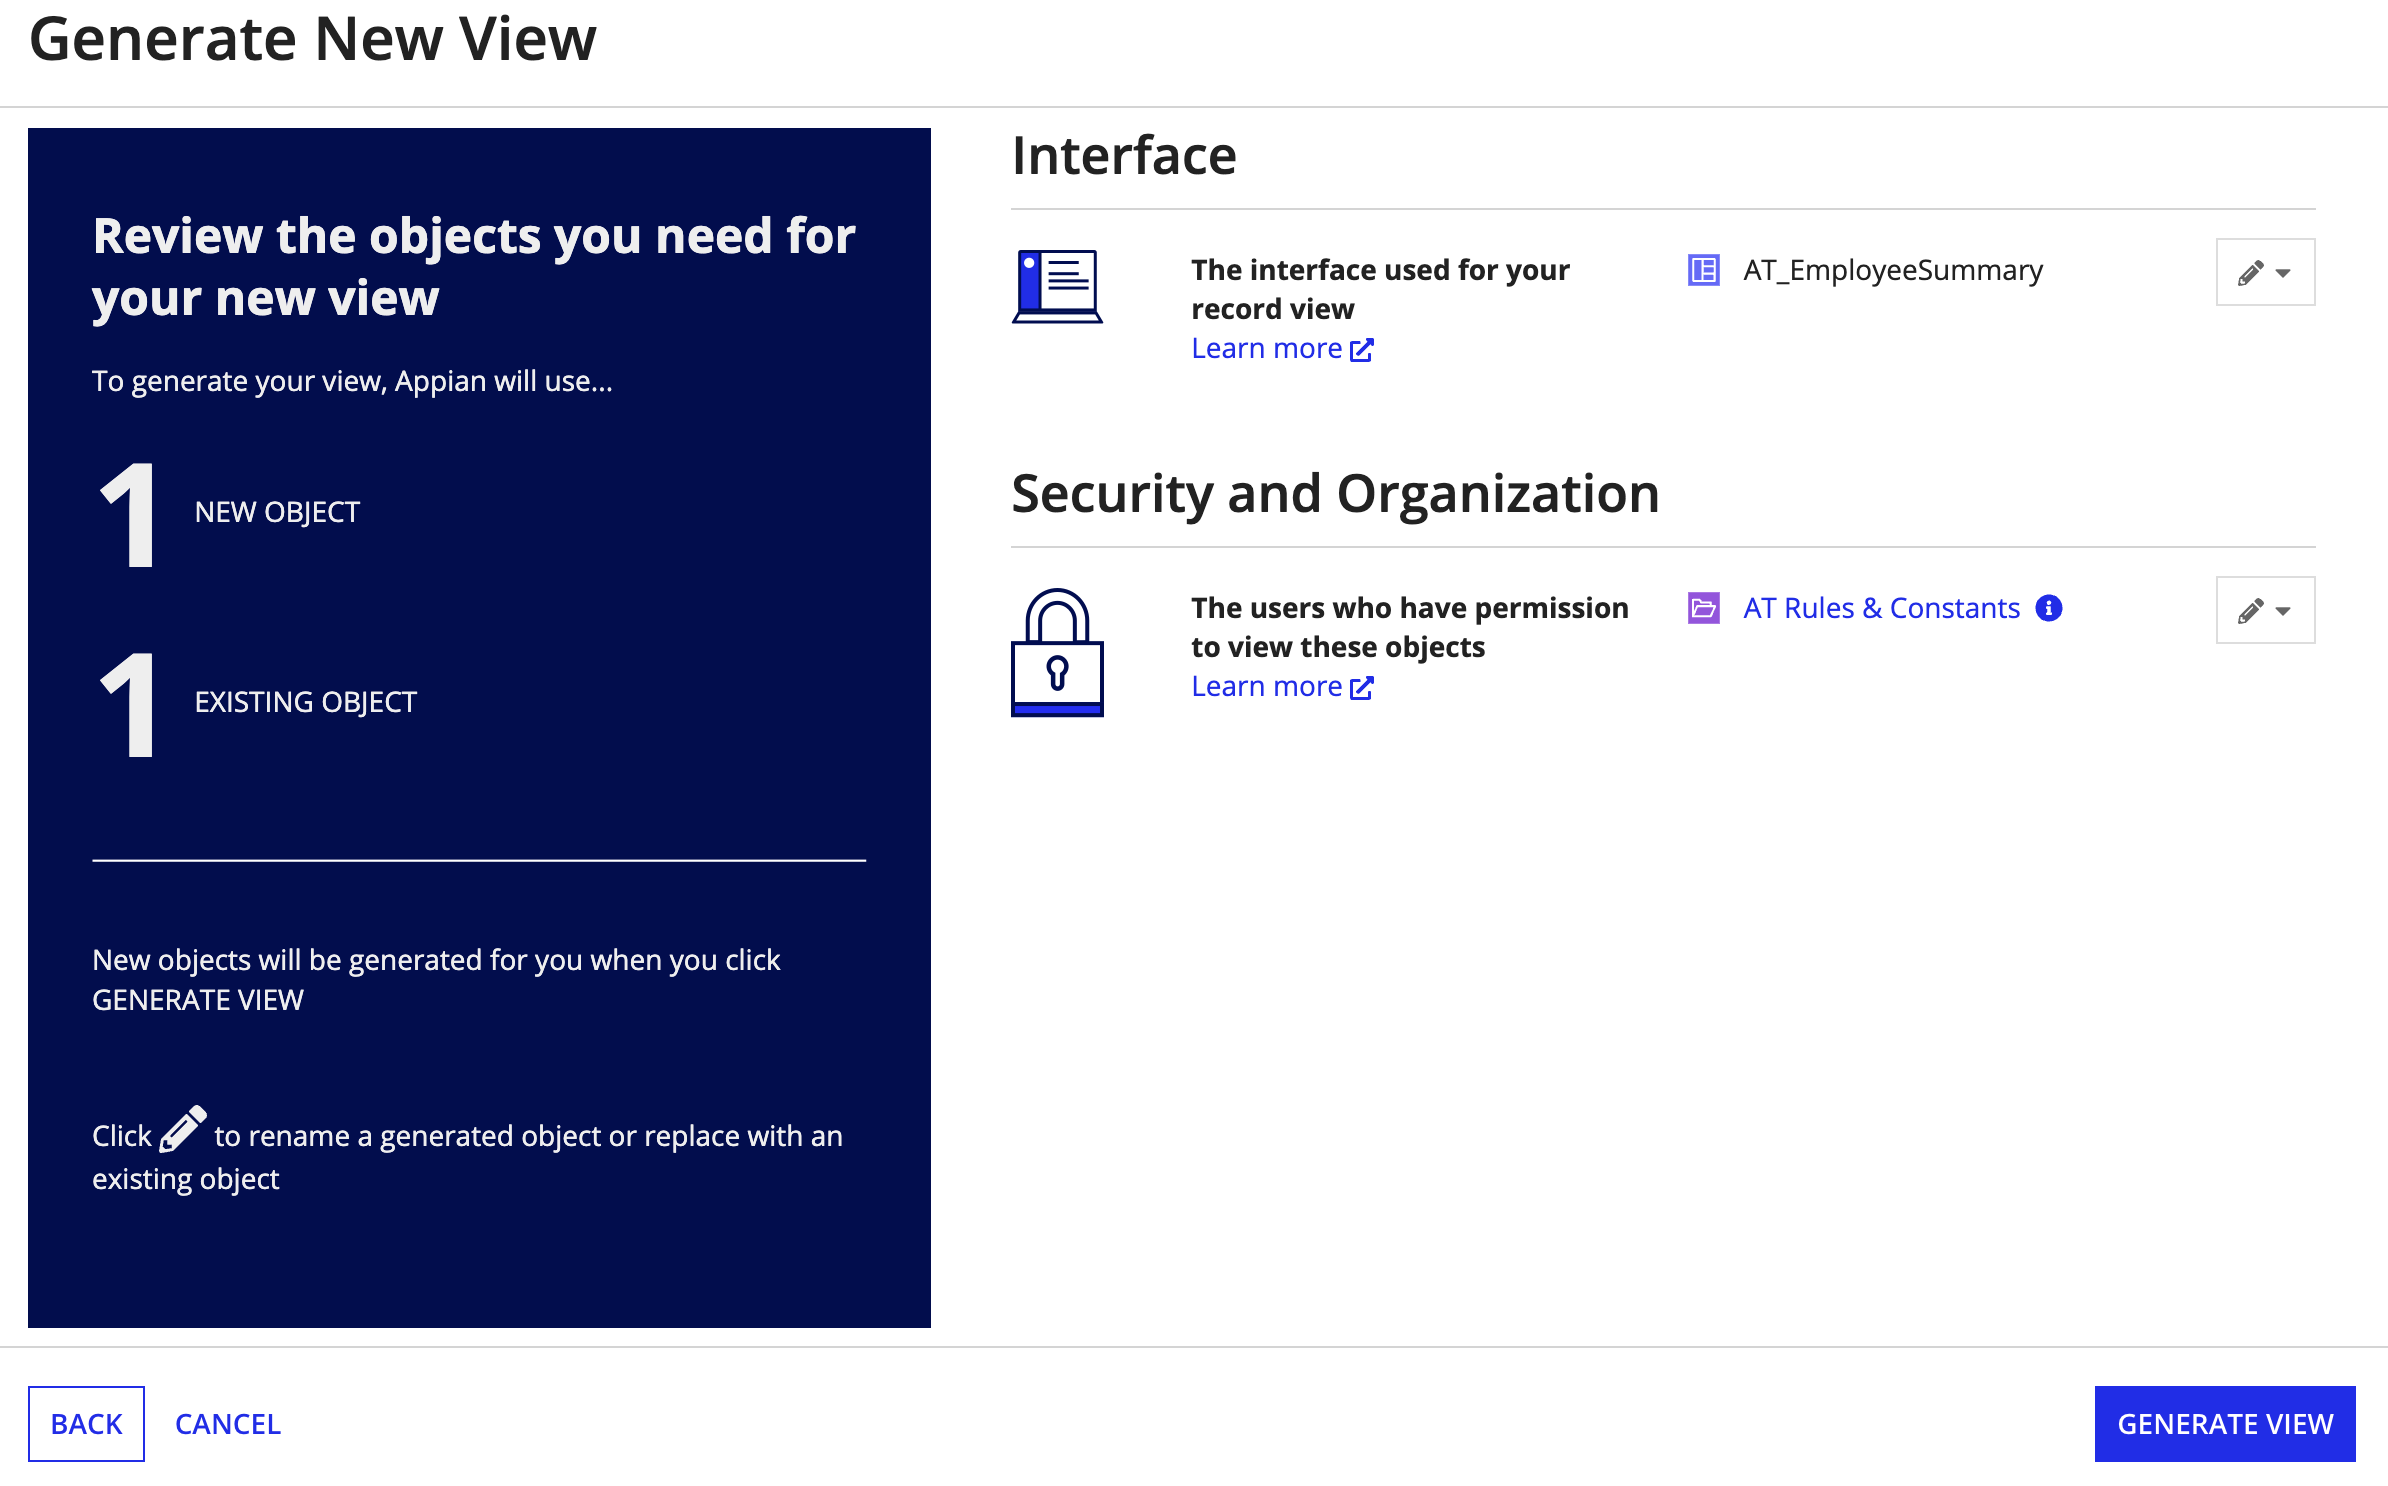
Review the objects that Appian will use for your new record view:
Note: If an existing Rules and Constants folder is being used, Groups will be hidden since they have already been configured for the folder.
- Click GENERATE VIEW. Appian generates the new interface.
-
Click CLOSE. Your new Summary view displays in the Record Views table.
Since we generated the Summary view, Appian automatically added the interface as the Summary view for the record type. All we need to do now is save it.
- Click SAVE CHANGES.
Configure the record header backgroundCopy link to clipboard
Now that our Summary view is configured, let's configure a record header background. The record header background contains the title, breadcrumbs, and related actions on every record view of your record.
You can opt for no background or you can set an image or color. We are going to configure a light blue background:
- In the Header section, for Record Header Background, select COLOR.
- For Color, keep the default Static Color.
- In the hex code text editor, enter
#F3F9FFto select a light blue color.
Notice in the Preview that the header now displays with a light blue background.
Configure the record titleCopy link to clipboard
Now, we'll configure the record title so that it will show the employee's first and last name. We are adding the employee's name as a record title so that a user landing on this page will understand what they are looking at without having to navigate to the record list.
Since our record type has data sync enabled, Appian automatically configures the record title to use the first Text field after the primary key field in the record type. In this tutorial, that field is the employee's first name. We want the title to be the employee's first and last name, so we'll configure an expression that concatenates the firstName and lastName record fields.
- For Record Title, select Expression.
-
In the expression editor, copy and paste the following expression:
1
 rv!record[recordType!AT Employee.fields.firstName] & " " & rv!record[recordType!AT Employee.fields.lastName]
Copy - In the expression, change the record type references to use the record type reference in your environment.
Note: Record type field references are specific to each record type and environment. This means that you need to reference the record type fields from your own environment whenever you copy and paste a record type reference from outside the application.
- Click SAVE CHANGES.
- To preview the Summary view, go to List in the record type and open the link under URL.
-
From the record list, select an employee to view their Summary view. Notice that the employee's full name appears in the record title.
Part 5: Generate record actionsCopy link to clipboard
In this last part of the tutorial, we'll generate some common record actions.
Since the Employee record type has data sync enabled, you can generate actions to create, update, and delete records. Since we only want managers to have the ability to update and delete employee information, we'll also add security on those related actions.
Generate create, update, and delete actionsCopy link to clipboard
We need to create three record actions: Create Employee, Update Employee, and Delete Employee. Luckily, we can generate all of our record actions at once.
To generate the create, update, and delete employee actions:
- Return to the AT Employee record type.
- In the record type, go to Actions.
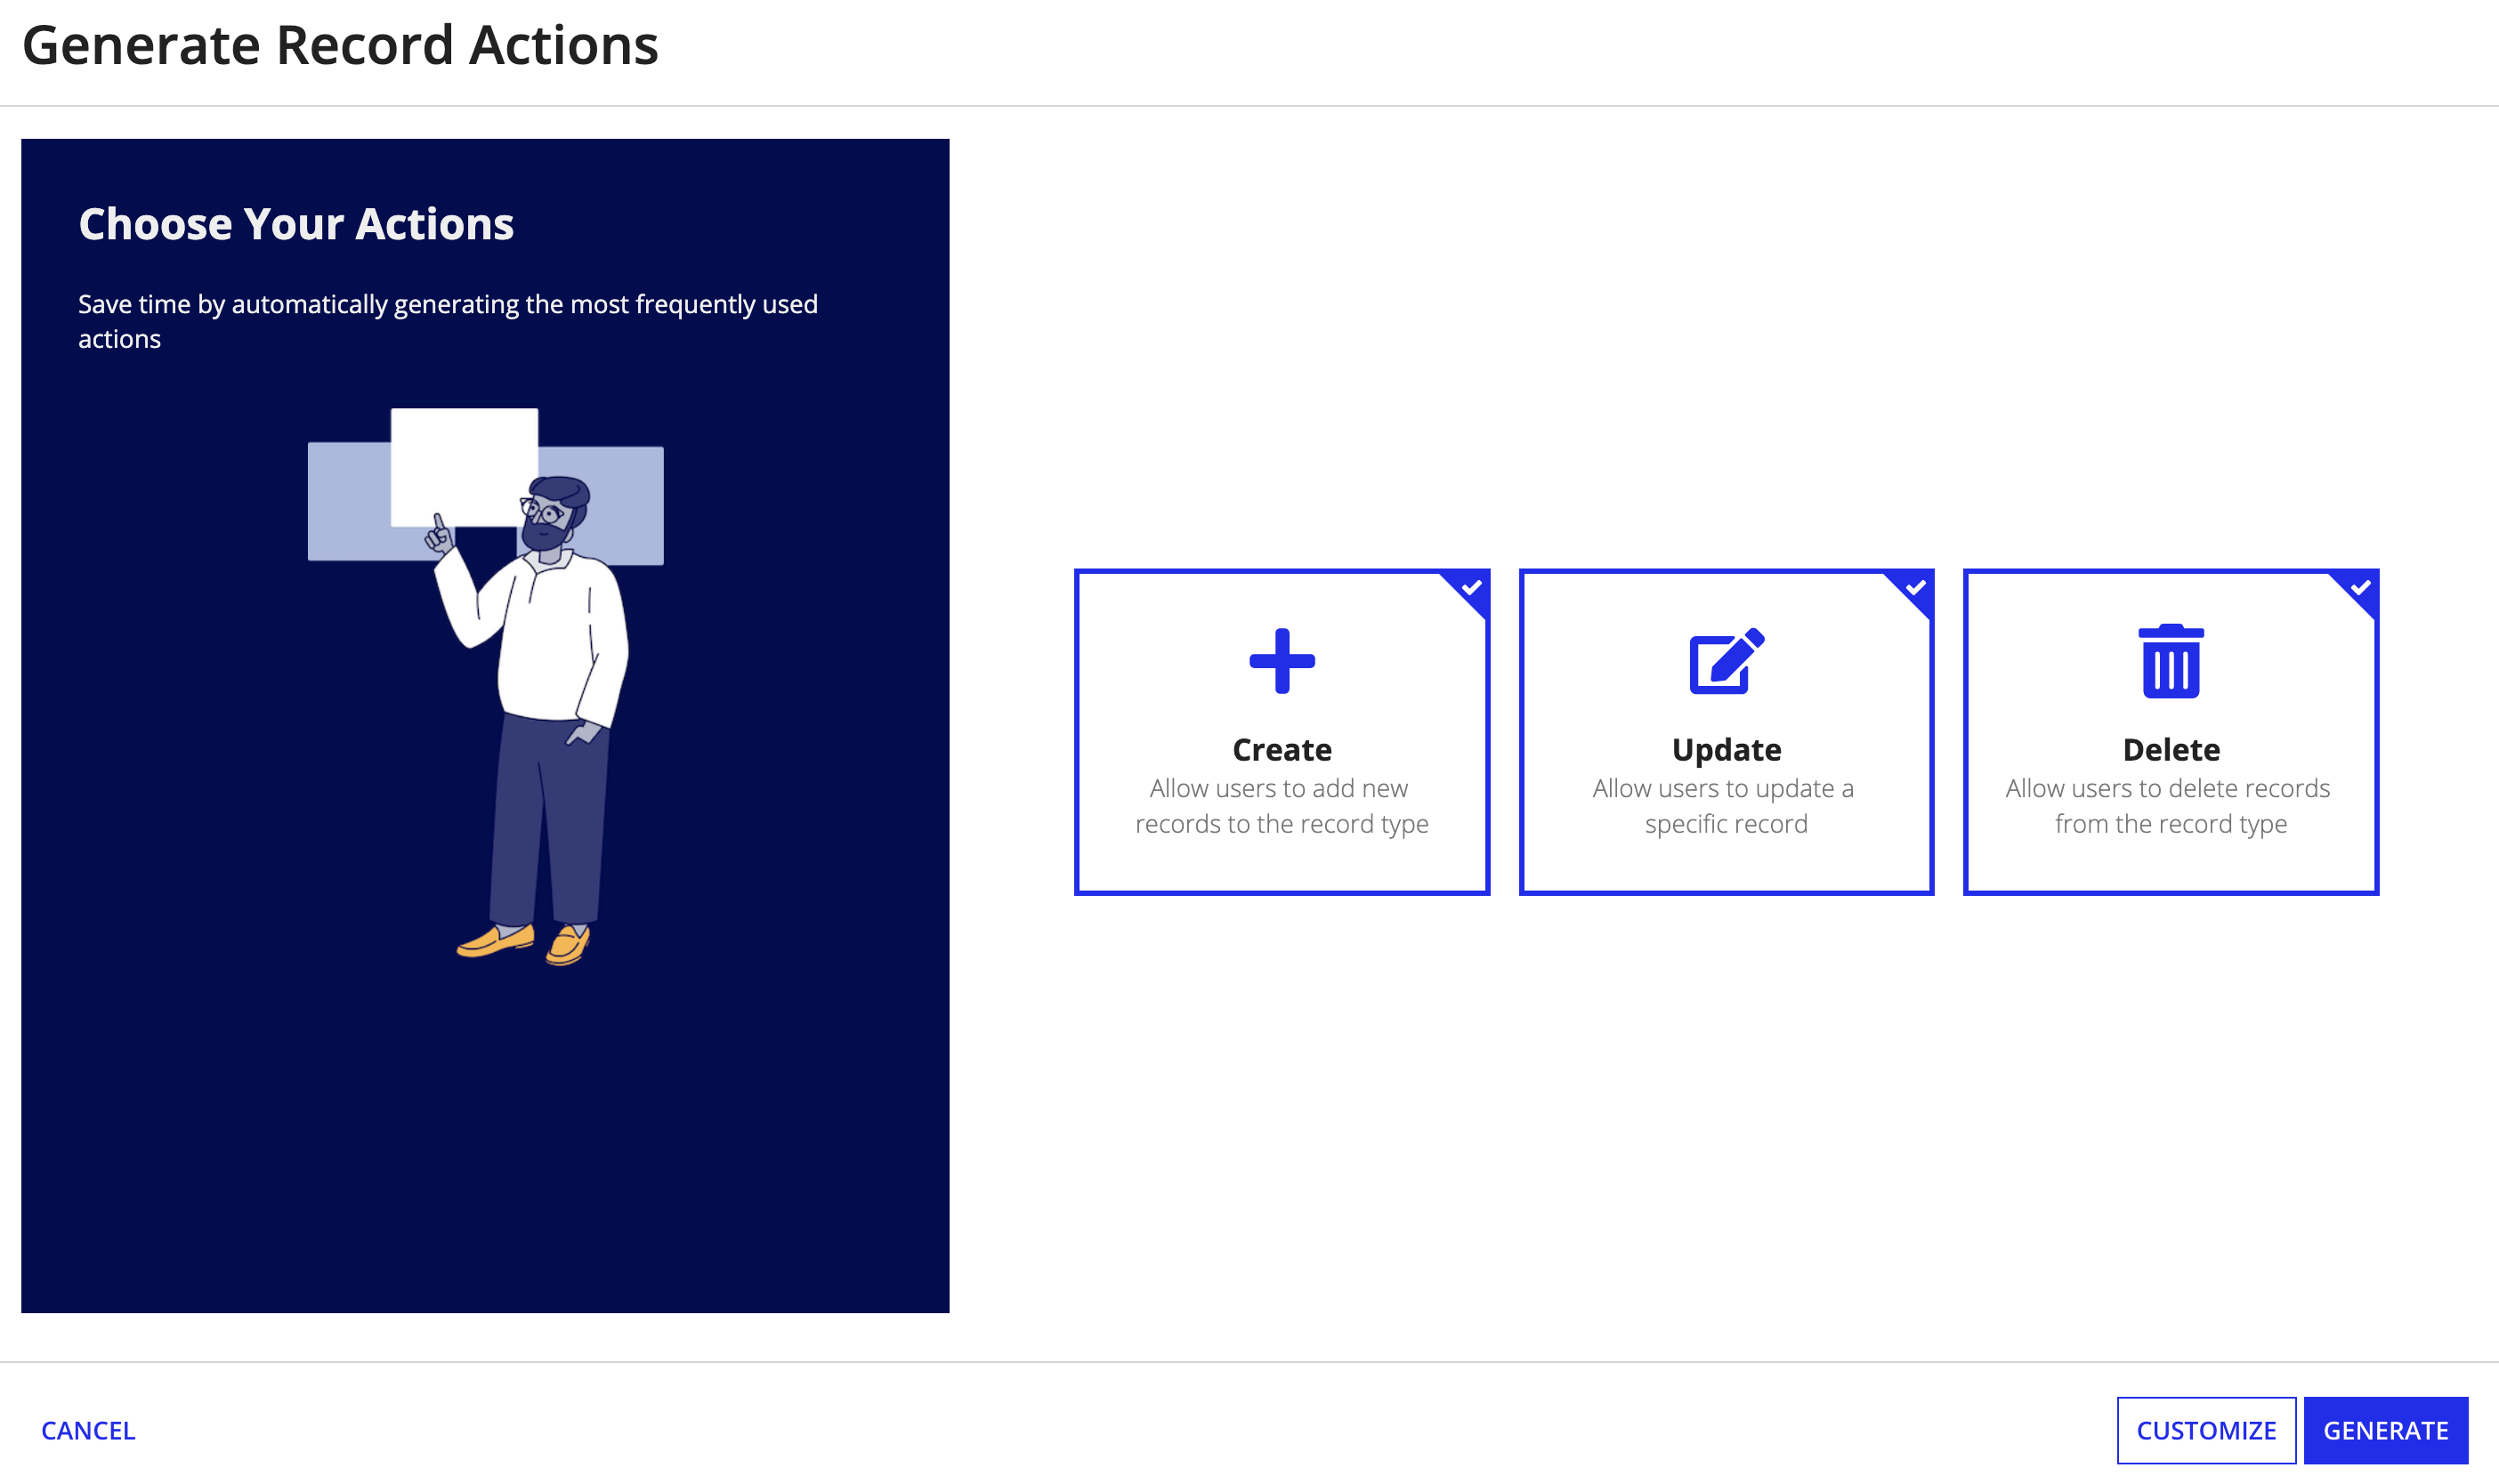
- Click GENERATE RECORD ACTIONS.
-
Keep the default so all actions are selected.
- Click GENERATE.
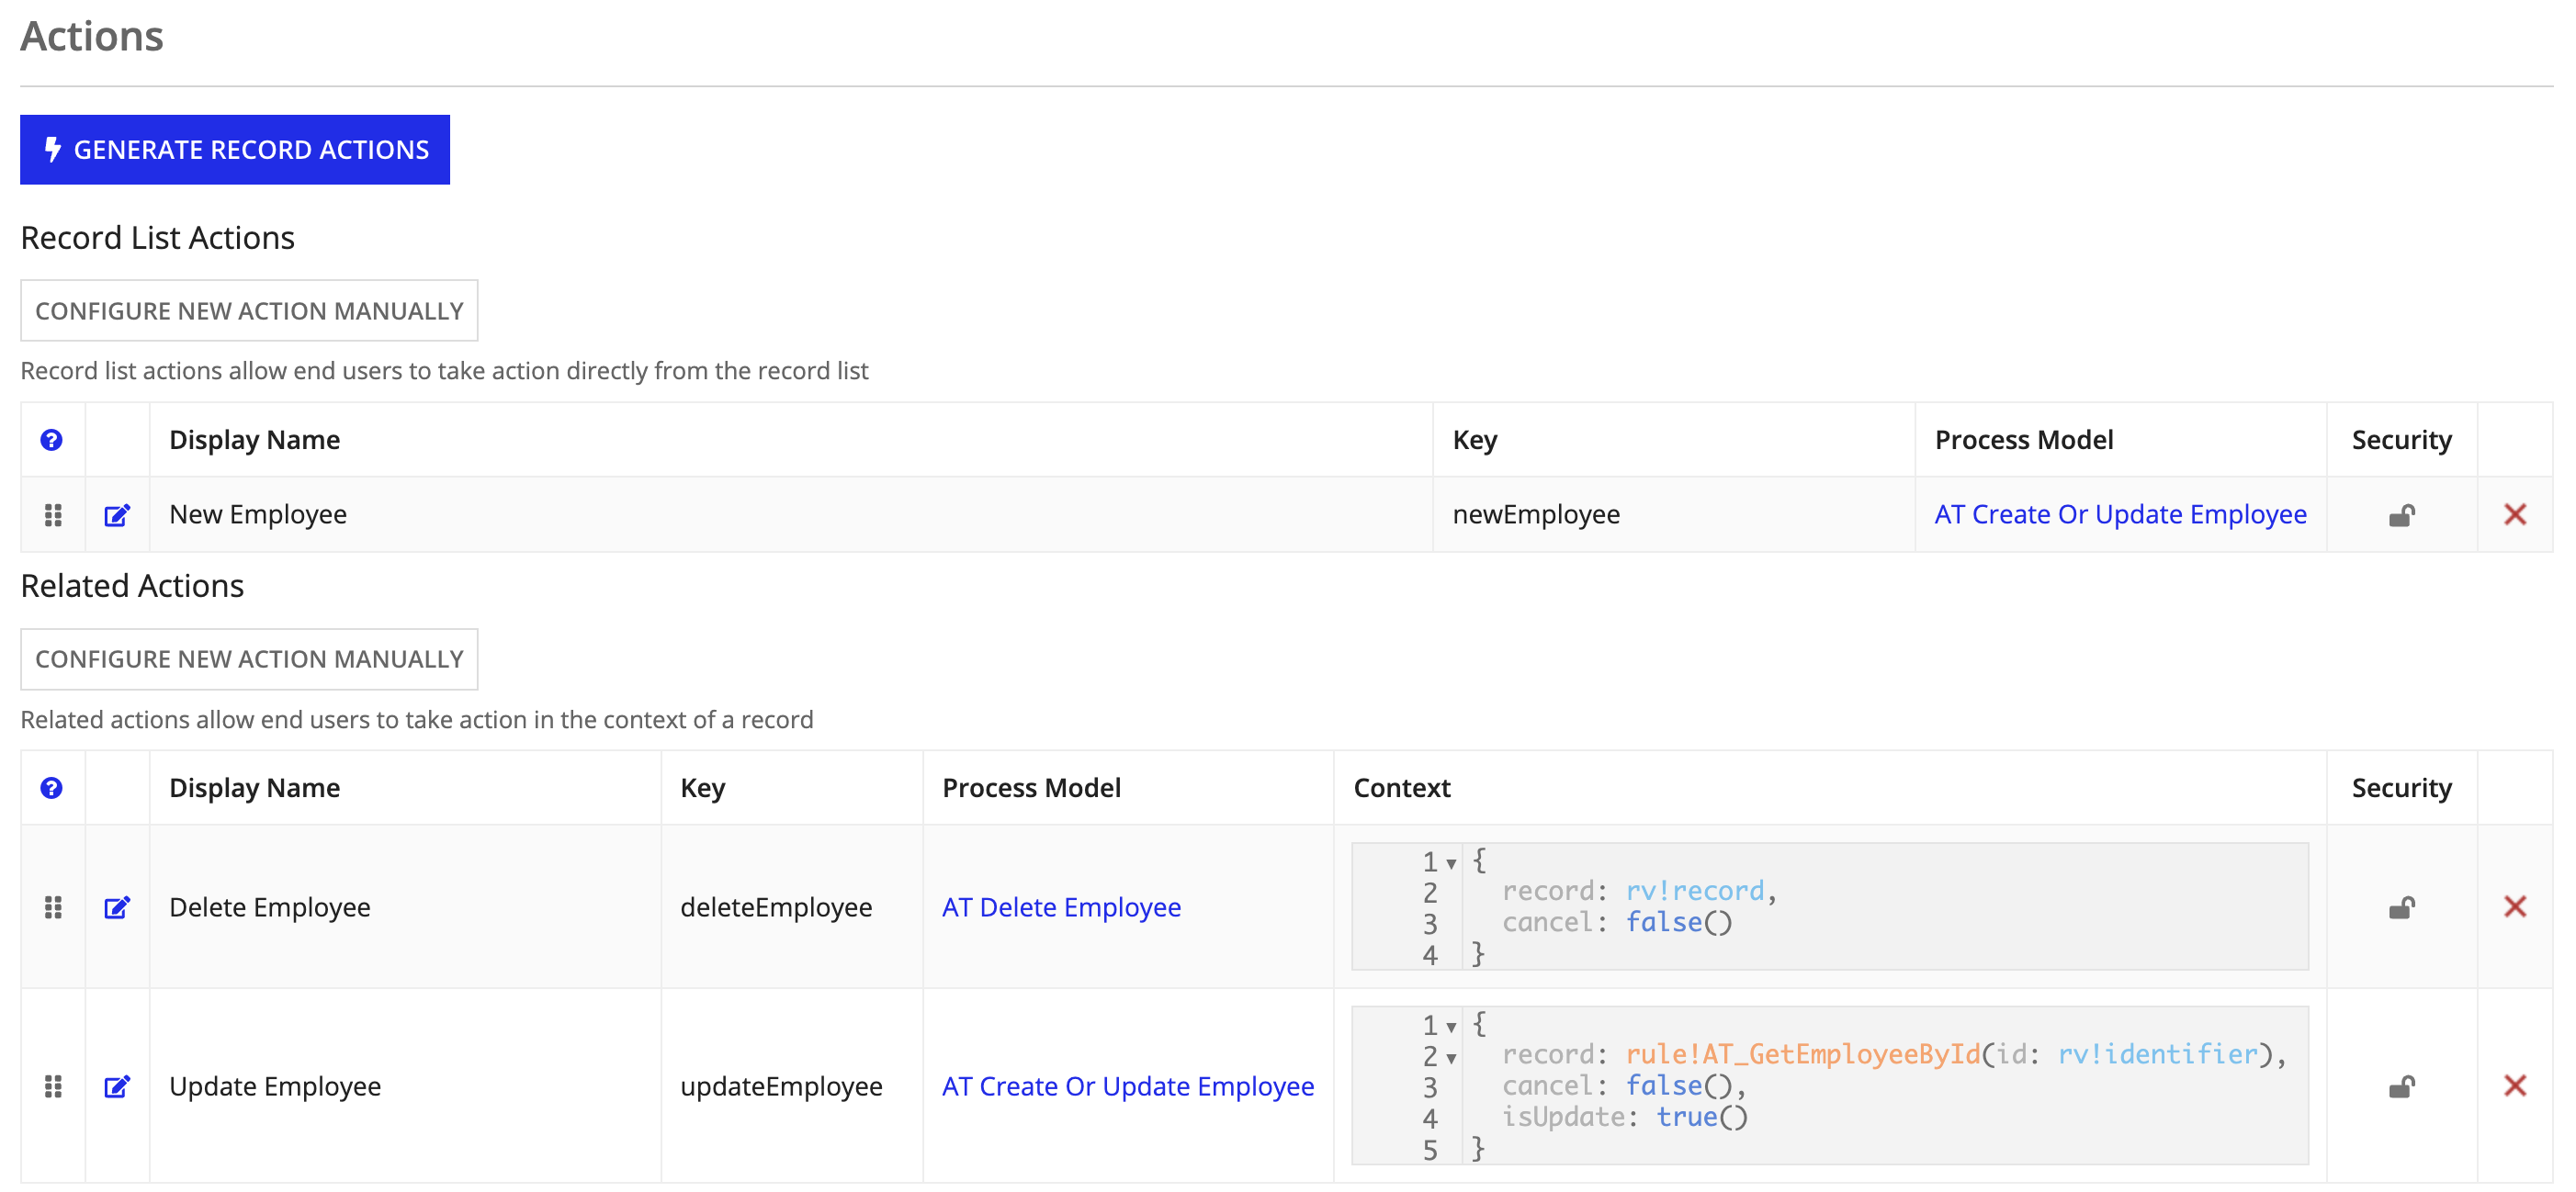
Appian generates the actions, creating and configuring the record actions and the objects supporting those actions in your application. Since we selected the Include Common Event Types option when we generated our event record types, the Create and Update record actions are also automatically configured to write records and events.
Add the related actions to the Summary viewCopy link to clipboard
Now that Appian has done all of the heavy lifting to create our record actions, let's add the Update Employee and Delete Employee actions to the Summary view.
Right now, these related actions will only appear on the Related Actions view on each record, but we'll add a related action shortcuts so managers can more quickly update or delete employee information while viewing the summary.
To add the related actions to the Summary view:
- In the record type, go to Views.
- Click next to Summary.
- In the Edit View dialog, under Related Action Shortcuts, select the checkboxes for Update Employee and Delete Employee.
- Click OK.
- Click SAVE CHANGES.
Set security on the related actionsCopy link to clipboard
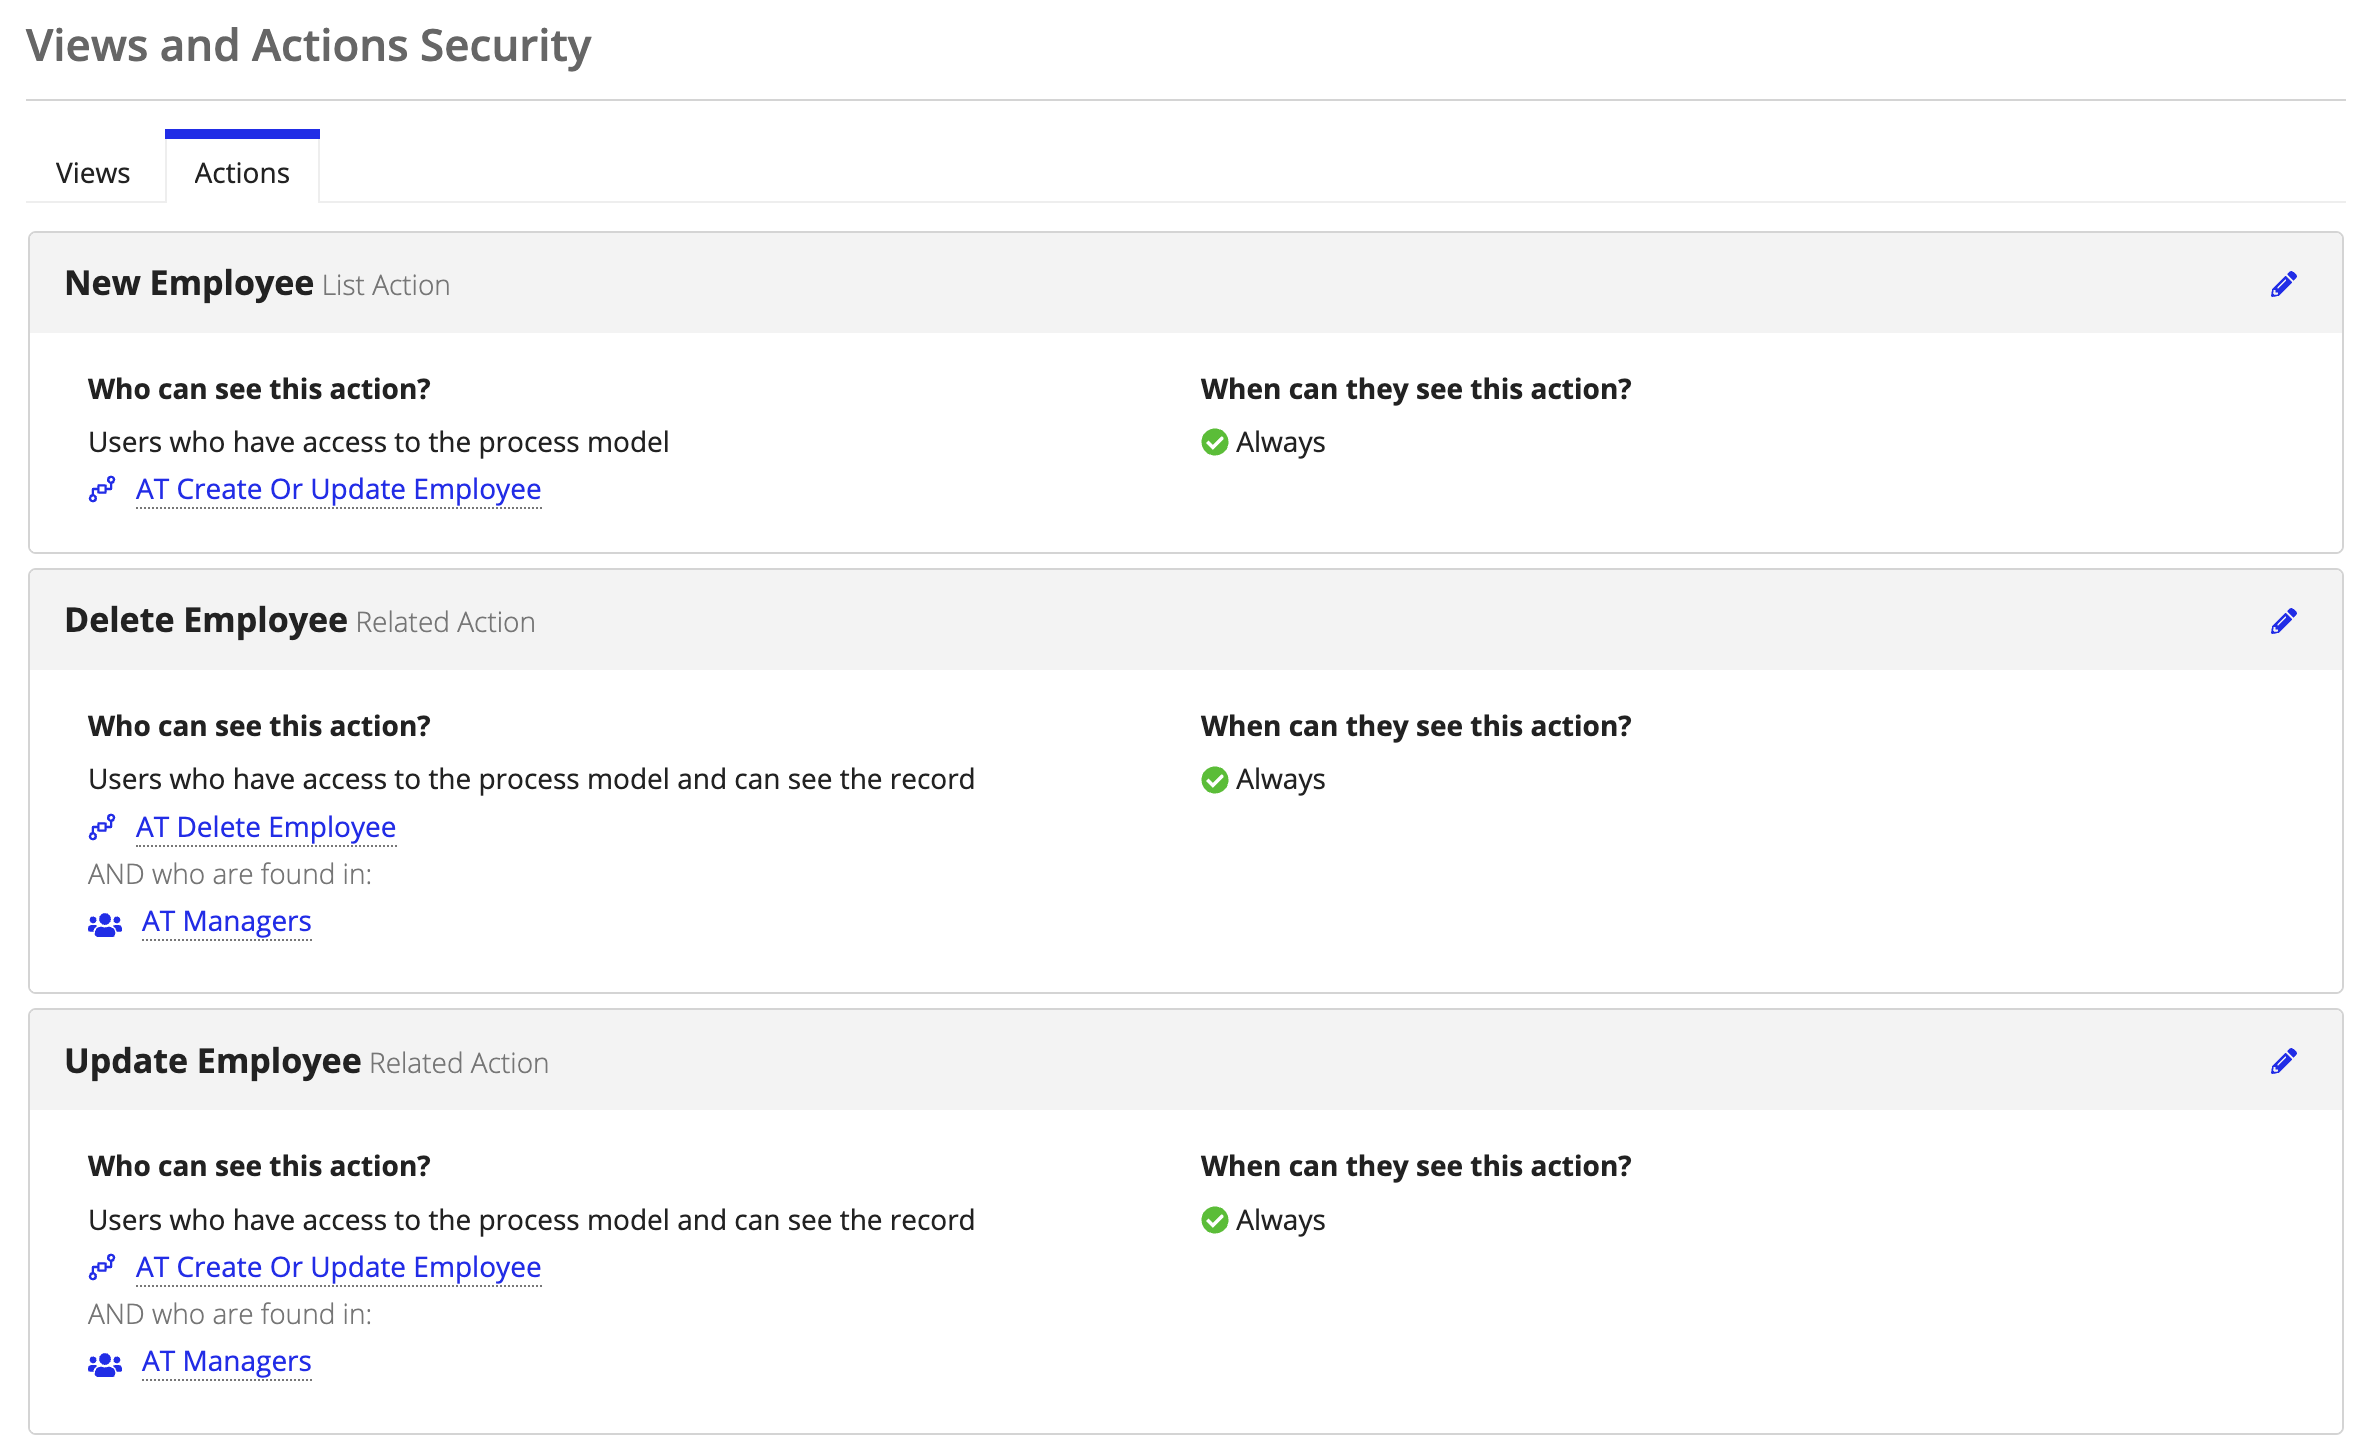
Since we don't want everyone to be able to update or delete an employee's information, we are going to make sure that only those in the manager group are able to view and use these related actions.
To set security on the related actions:
- In the record type, go to Views and Actions Security.
- Go to the Actions tab.
- Click next to the Update Employee action.
- For Who can see this action, select Only users…
- Expand the Found in groups option and search for the
AT Managersgroup. - Click OK.
- Click next to the Update Employee action.
- For Who can see this action, select Only users…
- Expand the Found in groups option and search for the
AT Managersgroup. - Click OK.
- Click SAVE CHANGES.
Now, only managers can update or delete employees.
Test record actionsCopy link to clipboard
In this last step, we'll test out our record actions.
To test the record list action:
- In the record type, go to List.
- Open the link under URL.
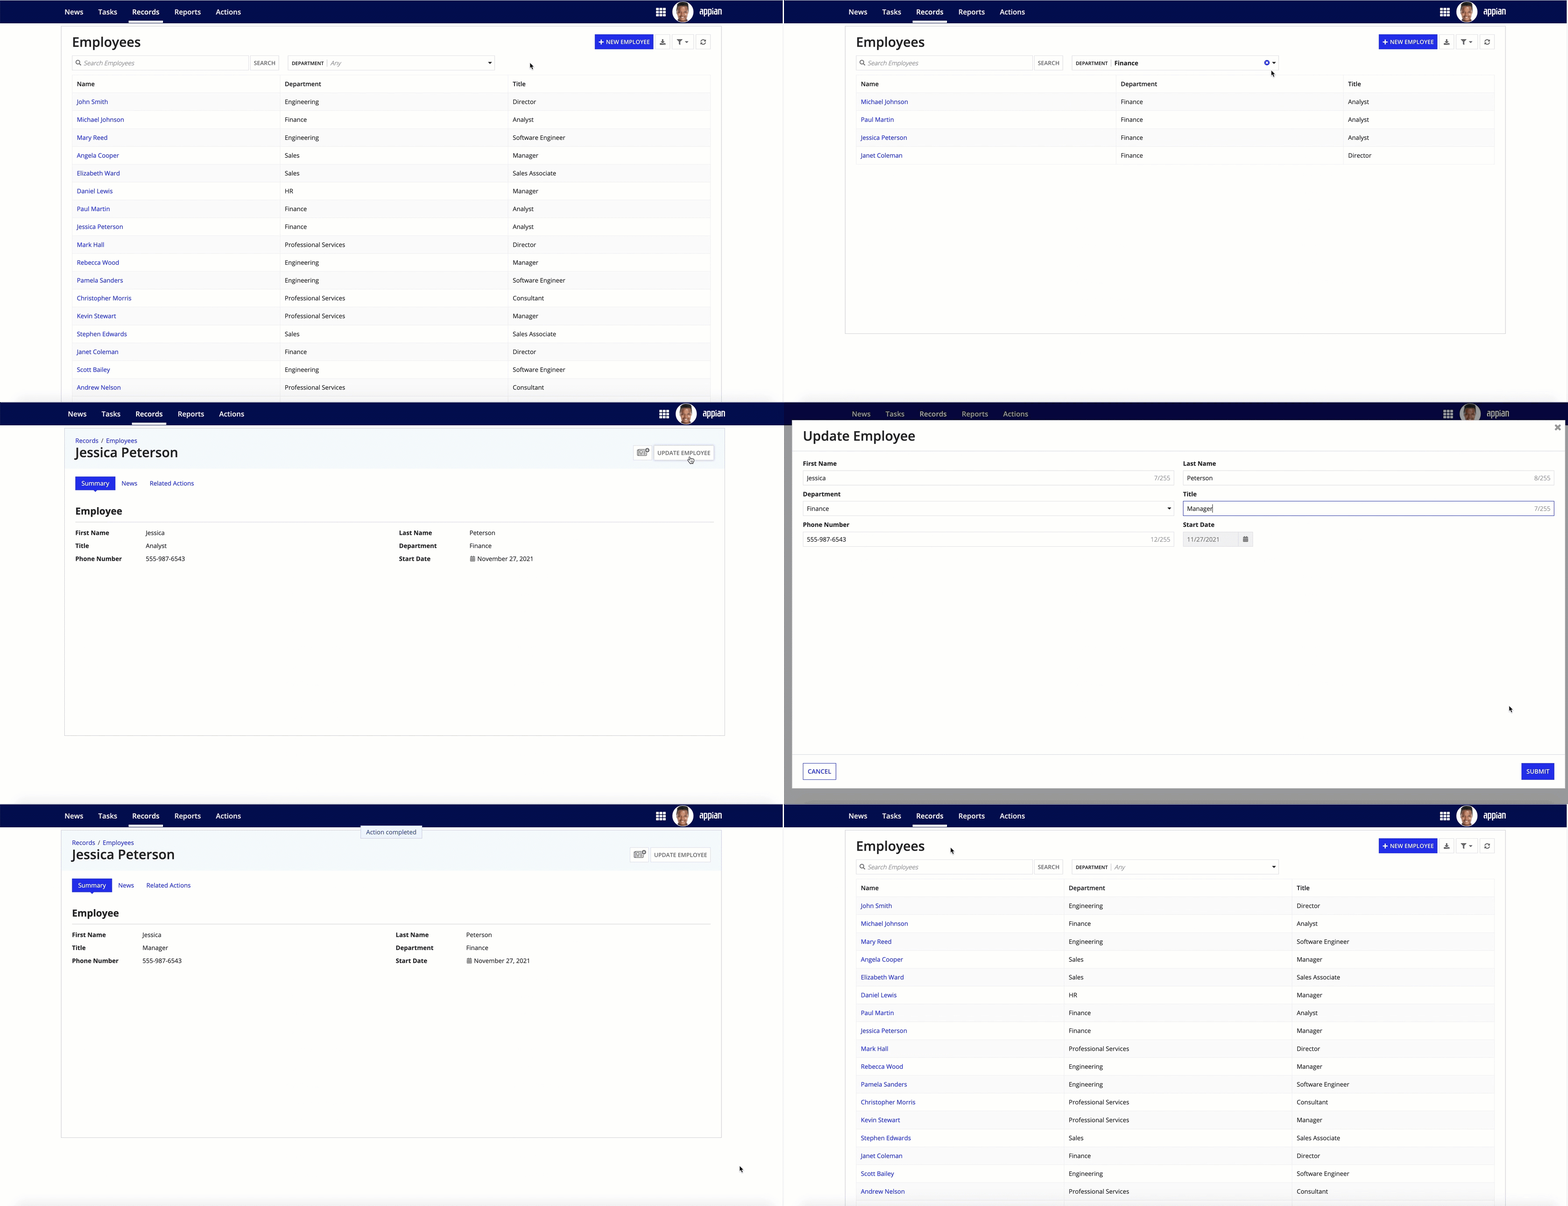
- On the record list, click + NEW EMPLOYEE.
- Enter some information in the form.
- Click CREATE. The new employee should appear in the record list.
To test a related action:
- From the record list, select an employee to view their Summary view.
-
Click UPDATE EMPLOYEE.
- Update some information in the Update Employee form.
- Click SAVE. The Summary view should update to reflect your changes.
Congratulations!Copy link to clipboard
You did it! You made it through all of the parts and steps to successfully create a fully functioning record type with a Summary view, record actions, and a user filter. You are now ready to create record types that enable your own unique business data to do more all on your own!

