OverviewCopy link to clipboard
This page describes the features and functionality available when creating interfaces.
Interfaces can be built in design mode by dragging and dropping components from the palette or in expression mode by generating components via expressions.
If you are familiar with these concepts and want help in building your interface, see the pages in the Build section of this collection.
For functional examples of different design patterns, see the Interface Recipes page. These examples will help you learn key component concepts and can be used as a starting point for your implementation.
ElementsCopy link to clipboard
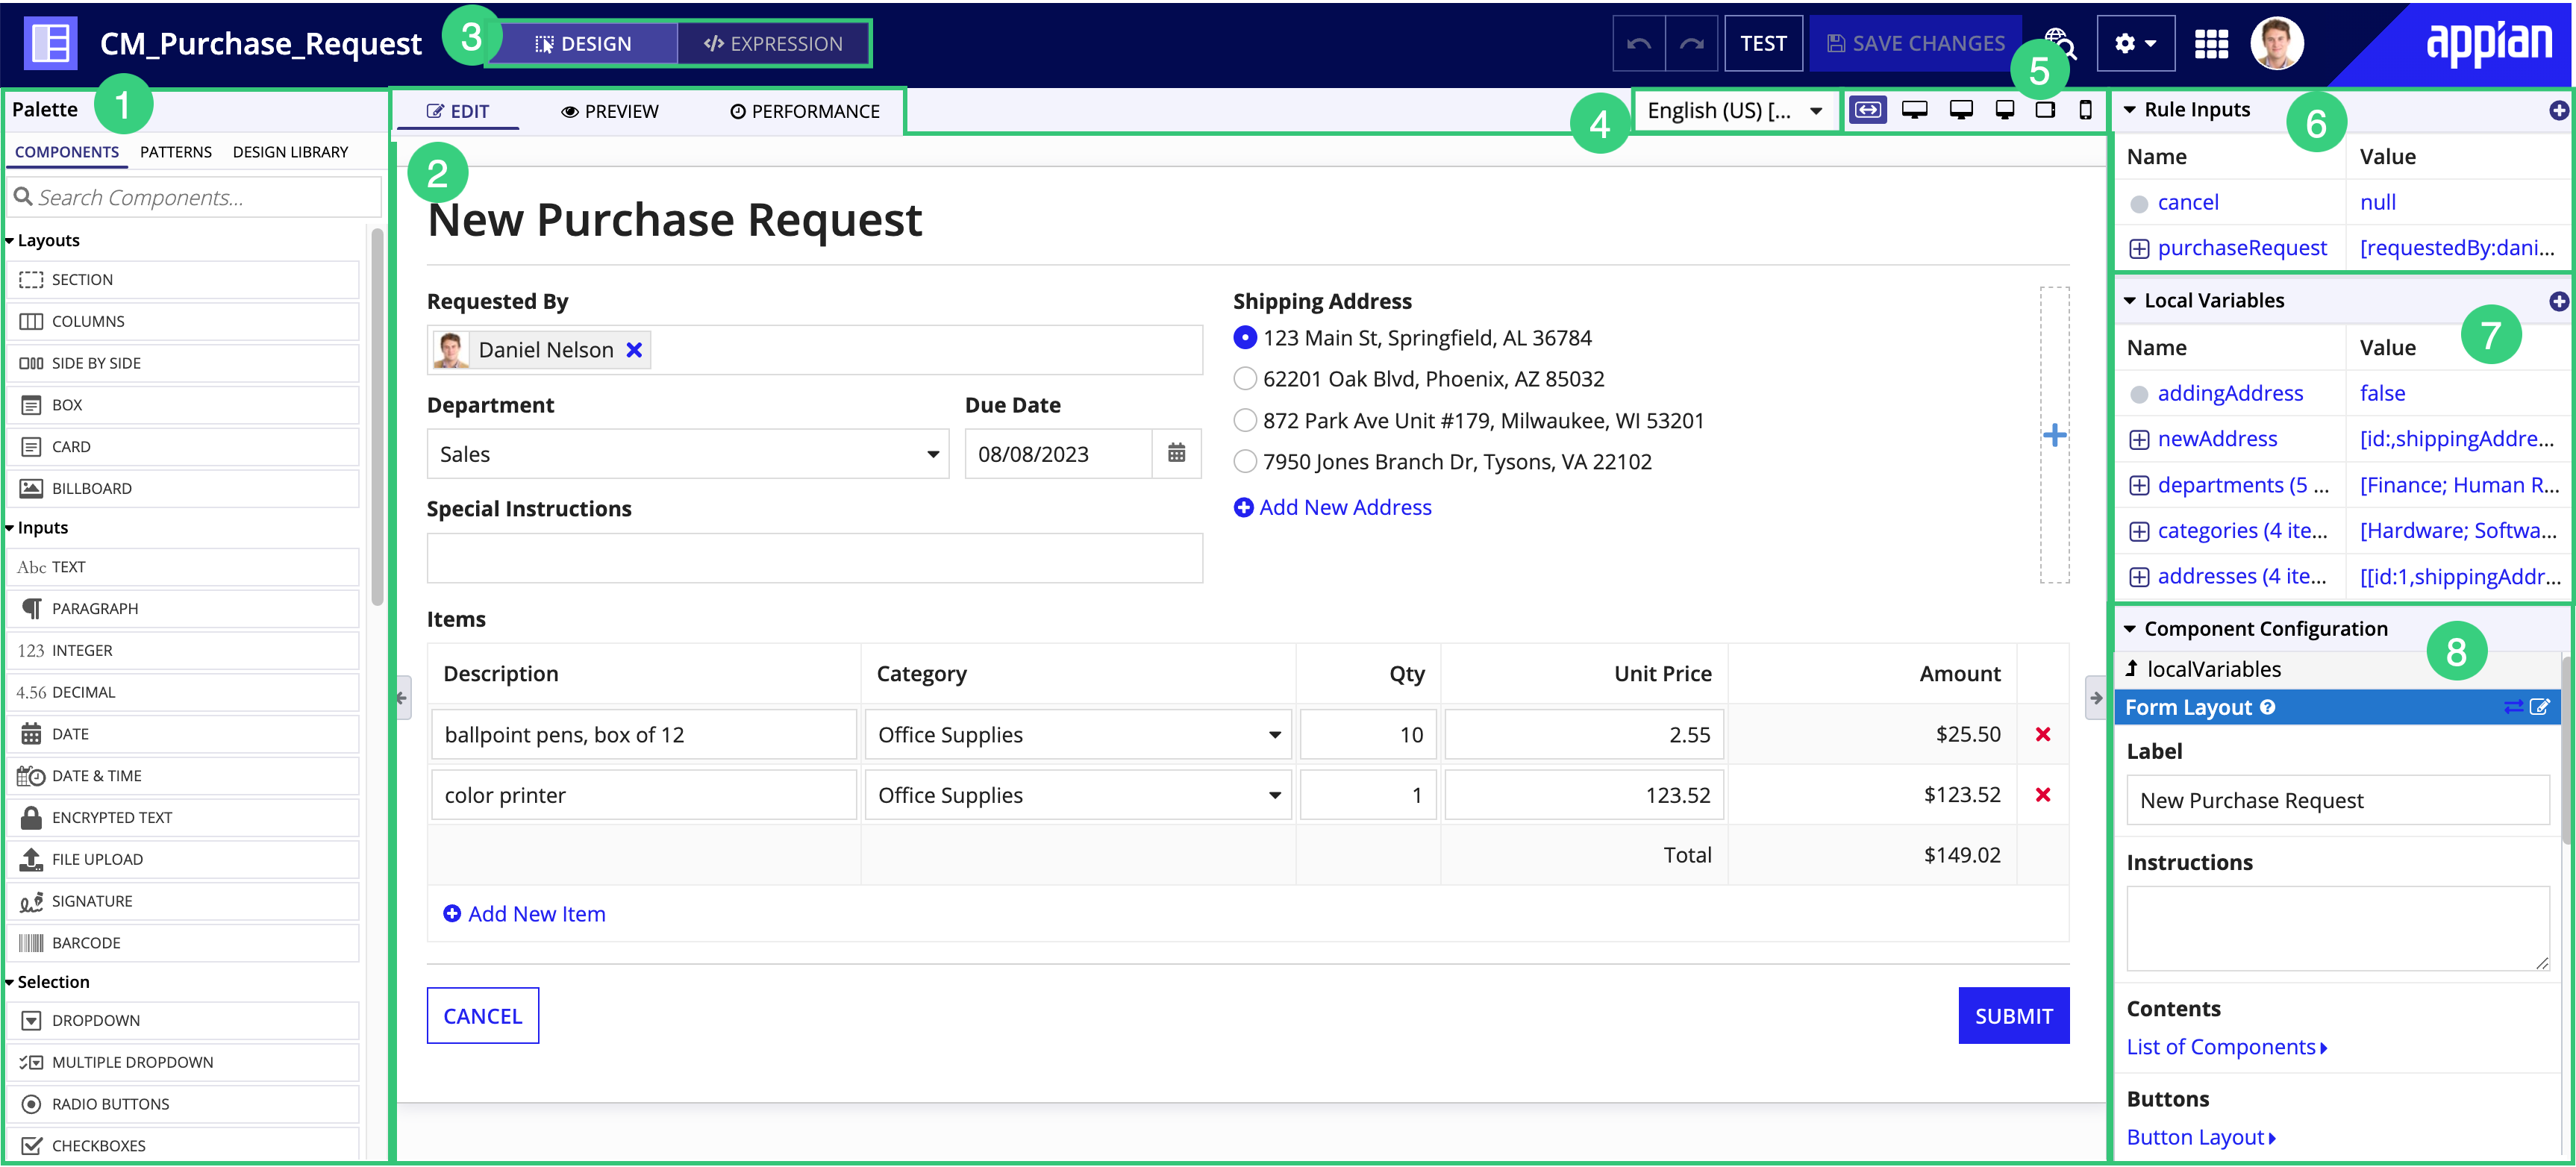
The following image highlights the elements that make up interface designer.
# |
Element |
Description |
|---|---|---|
1 |
Palette |
The palette contains the primary elements you'll use to create interfaces: components, patterns, and the design library. Learn more about the palette. |
2 |
Live view |
The live view is the central panel in design mode. The live view consists of the following tabs:
|
3 |
Design and expression mode buttons |
These buttons allow you to switch between design and expression modes. |
4 |
Locale preview |
The locale preview allows you to select an Appian supported locale and preview how your interface is translated or localized in the selected locale. |
5 |
Form factor preview |
The form factor preview allows you to see how your design appears at different screen widths. |
6 |
Rule inputs pane |
The rule inputs pane allows you to define a variable for a specific data type and reference it in your expression. |
7 |
Local variables pane |
The local variables pane displays the name and value of the local variables defined in your interface. |
8 |
Component configuration pane |
The component configuration pane allows you to configure components and see their nested relationships in your interface. |
Create an interface objectCopy link to clipboard
To create an interface object, select NEW > Interface in the Build view. Configure the initial properties for your interface. Then, Appian displays an interface ready for you to define.
Start with a templateCopy link to clipboard
When the interface has not yet been defined, a list of template options are available in design mode (shown below). These options give you a starting point from which to build your interface.
There are four categories of templates, (1) forms, (2) pages, (3) examples, and (4) builders.
FormsCopy link to clipboard

All forms come with at least a Submit and Cancel button. The different form options represent different arrangements of components and columns.
The Wizard-based templates each contain a functional, multi-page wizard with a confirmation at the end. To modify this for use in your interface, add your own components to the pre-defined pages and add new pages as necessary following the same pattern.
Outlines generate basic expressions for common layouts and use cases. These templates provide structural skeletons to use as a quick starting point that will be enhanced into a richer interface.
PagesCopy link to clipboard
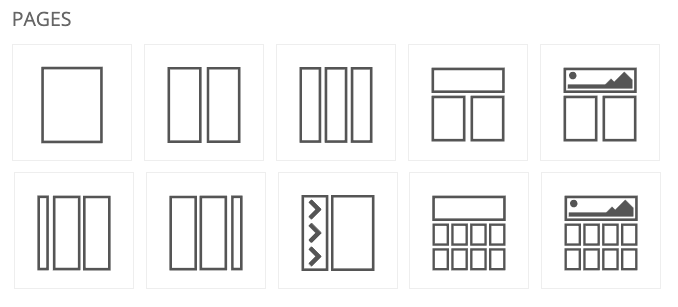
Pages provide only simple arrangements of columns and sections.
ExamplesCopy link to clipboard
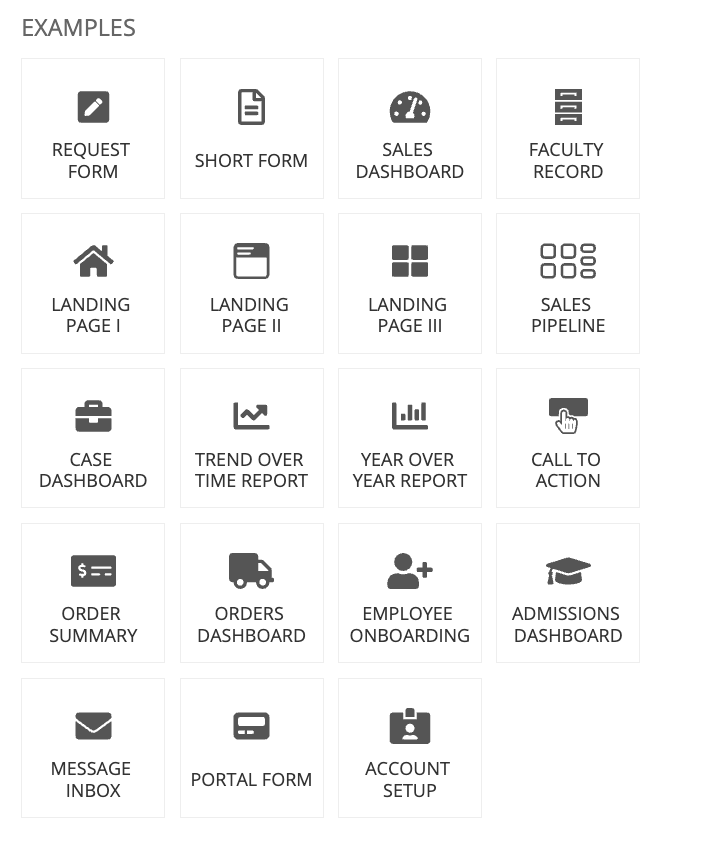
Examples are fully-formed interfaces that demonstrate the richness, density, and dynamism that Appian interfaces can offer. These templates are a great way to get ideas on how to display data and to learn how to apply best practices. However, it is not advised to use these templates as a base that you edit to create your own interface. These examples are configured to use specific test data, and you would have to spend significant time editing the example template to adapt the expressions and inputs to your business case.
BuildersCopy link to clipboard
Builders allow you to quickly create an interface using existing data in your system.
Create from data typeCopy link to clipboard
This option will populate an interface with fields corresponding to the definition in a Custom Data Type (CDT). Simply select a CDT, and choose whether you want the interface to be editable, read-only, or both—then the builder will do the rest. Once the builder is done (it's really fast), Appian displays the generated interface.
All fields defined in the CDT appear as components in the interface. The component type will be a best-match based on the data type of the corresponding field. For example, a text field will be represented with a Text Component in the interface; a date field will be a Date Time Component, etc.
To create an interface based on a CDT:
- In the Builders section of the templates pane, click Create from Data Type.
- In the Data Type field, start entering the name of the CDT you want to use, then select the CDT from the dropdown list that displays.
- Specify what type of action you want users to perform in the interface:
- Editing Data: Users can edit the CDT data in the interface.
- Displaying Data: Users can view CDT data in the interface.
- Both: Users can either view or edit CDT data in the interface, based on whether or not the interface is in read-only mode.
- Click Generate. Appian displays the generated interface.
This generated interface contains the following components:
| Component | Editing Data | Displaying Data | Both |
|---|---|---|---|
| Layout | Form | Columns | Form |
| Title | The CDT name with prefix and underscores removed. | none | The CDT name with prefix and underscores removed. |
| Inputs | An editable input component for each field in the selected CDT. | A read-only input component for each field in the selected CDT. | An input component for each field in the selected CDT. These input components are configured to be editable or read-only based on the readOnly rule input. |
| Buttons | Cancel and Submit | none | Cancel and Submit |
| Rule Inputs | selected CDT and cancel | selected CDT | selected CDT, cancel, and readOnly |
These rule inputs and interface components are connected as follows:
- selected CDT (CDT): All fields defined in the CDT are already connected to the pre-populated components, including the Submit button.
- cancel (Boolean): This rule input is connected to the Cancel button.
- readOnly (Boolean): This rule input is referenced by every component's Read Only parameter. When
true, the components will not be editable. This is a common design pattern for reusing the same interface as both the input form and the display form. See Reusing Interfaces for more information.
Add componentsCopy link to clipboard
Once you've defined your interface with a layout, add components to build out your interface functionality.
For a list of components, see the Interface Components page. For more information about using the palette to drag and drop components, see Adding components to a layout.
Tip: Curate a design library of your tailor-made layouts and components to help govern interface design, promote best practices, and create a consistent user experience in every application. You can drag and drop your design library interfaces to seamlessly incorporate your design standards into any interface.
Preview your interfaceCopy link to clipboard
Previewing your interface is a vital part of the creation and testing process in application development. You can preview your interface and see it live directly from the interface using our multiple preview options.
Preview tabCopy link to clipboard
Selecting the PREVIEW tab allows you to preview your interface without the Palette appearing on the side and test the functionality of interactive components like fields and dropdowns.
Form factor previewCopy link to clipboard
Selecting one of the form factor preview options allows you to test your interface's responsiveness and see how your design appears at different screen widths.
You can select from the following form factor preview screen widths:
- Fit
- Wide Desktop
- Desktop
- Narrow Desktop
- Tablet
- Phone
Locale previewCopy link to clipboard
Selecting a locale from the locale preview allows you to preview how your interface is translated or localized into different Appian supported locales. You can use the localization preview to see how your translation strings and any localization functions, such as a!currency and date time functions, appear in the selected locale.
To learn more about testing translation strings, see Testing translation strings in an interface.
Duplicate an interfaceCopy link to clipboard
Developers with Viewer permissions to this object can duplicate it. There are two ways to duplicate an object:
- From any view in an application, you can select the object you wish to duplicate and use the toolbar option to launch the duplication dialog. The duplicated object will be added to the application you're working in. This capability is only available for single object selections from the grid.
- If you are in an interface, expression rule, integration or decision object, you can select Duplicate from the object's settings menu . From there, you can specify the target application for the new object.
Once you select the Duplicate option, you will see the following dialog:
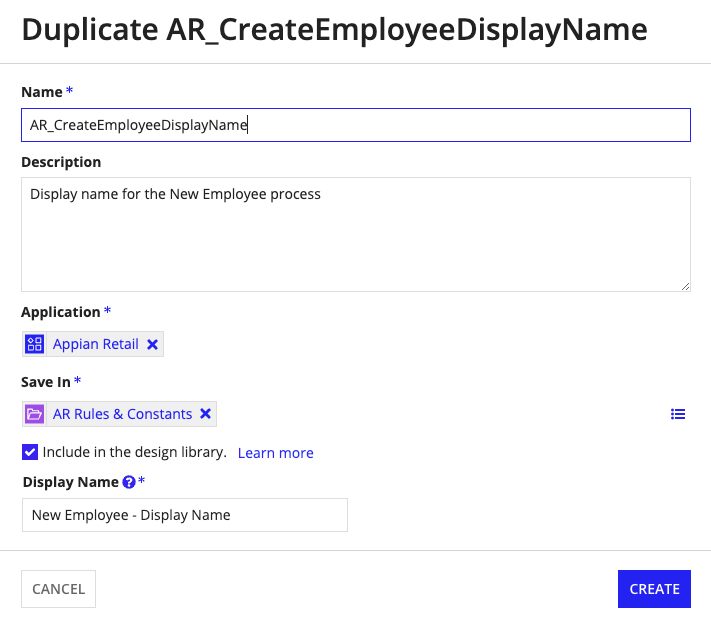
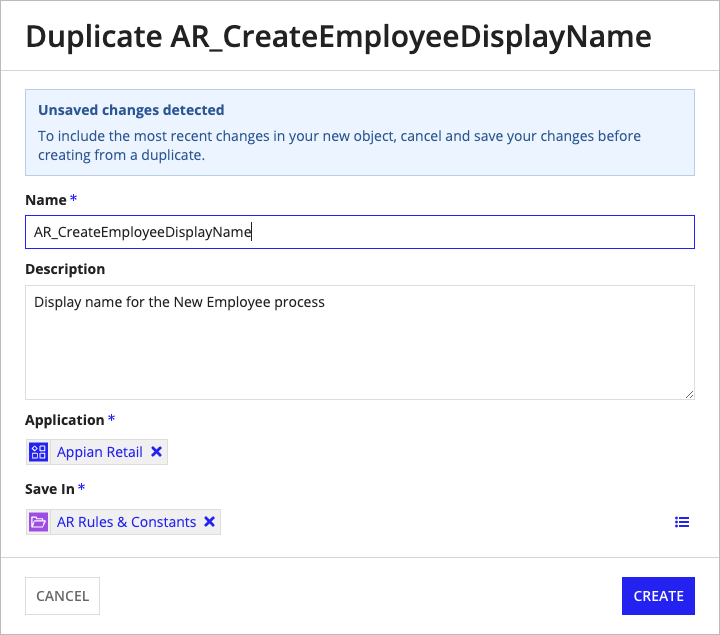
You can only duplicate the most recent version of an object. If you have unsaved changes and attempt to duplicate the object from within the designer, the most recent saved version of the object will be duplicated without the unsaved changes. A banner appears when there are unsaved changes to remind you before duplicating.
Set interface propertiesCopy link to clipboard
To modify the interface properties, go to Properties in the Settings menu, as shown below.
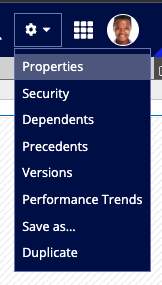
This opens the Interface Properties dialog, where you can modify the description, modify the folder, make the interface available for offline use, and add the interface to your design library.
PropertiesCopy link to clipboard
Each interface has the following properties.
| Property | Description |
|---|---|
| Name | The name that will be used when executing an interface. Names are case-insensitive, but we recommend following the recommended naming standard. Interfaces can be renamed in the Objects view, Build view, and the interface object; see Renaming Design Objects for more information. |
| Description | Supplemental information about the interface that is displayed in the expression editor and the objects grid of some Designer views. |
| Save In | The rule folder that the interface is saved into. |
| Make Available Offline | Makes an interface available for offline mobile. Only applicable if offline mobile is enabled for the environment in the Admin Console. Only enable if you have users who need to use the interface offline. On mobile, offline enabled forms will function as if they aren’t connected to the server, even when online. This may affect your interface design and functionality, so fully test offline interfaces on a mobile device. To learn about offline mobile and how it impacts interface design, check out the Offline Mobile Overview and our Design Best Practices for Offline Mobile. |
| Include in the design library | Makes an interface available in the Design Library tab of the design mode palette for easy access. For more information, see Using the design library. |
| Display Name | The name that displays for an interface you included in the Design Library tab of the design mode palette. |
| Rule Inputs | Rule inputs are used to pass data in and out of an interface. Rule inputs are configured within the interface object.
|
| Default Test Values | A common test scenario that can be used when modifying or testing an interface. Default test values are configured within the interface object. |
| Interface Definition | The interface is defined using an expression that returns one or more interface components. The definition is configured within the interface object, using either design mode or expression mode. |
Editing rule inputsCopy link to clipboard
As naming conventions and requirements evolve, you may need to update the names of your inputs to certain objects. Over time, rules and interfaces can gather many dependents. This can make manual changes to update any keyword references to rules and interfaces difficult and prone to human error.
If you update the name of an input while editing an expression rule or interface, Appian will update any keyword references to that rule input in dependent objects.
There are certain cases when Appian cannot update the dependent object(s):
- The design object is locked.
- The design object is not an expression rule or interface.
- The design object does not use keyword syntax.
- There are more than 20 direct dependents.
If there is a blue banner in the rule inputs pane, Appian is going to attempt an automatic update of the keyword references.
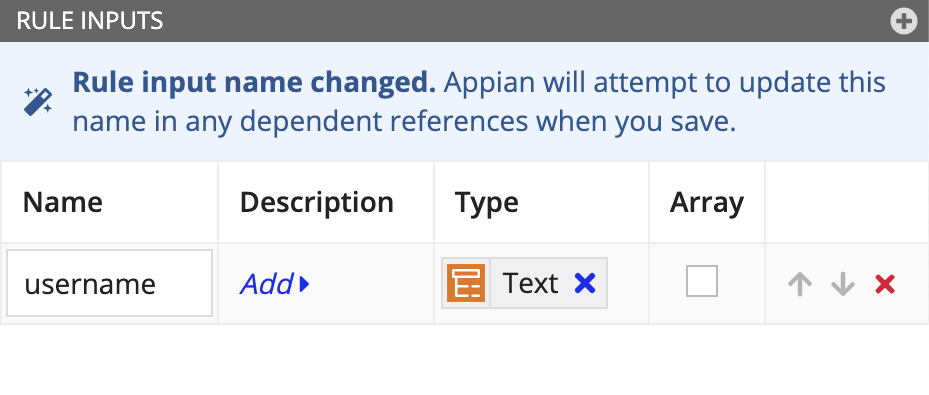
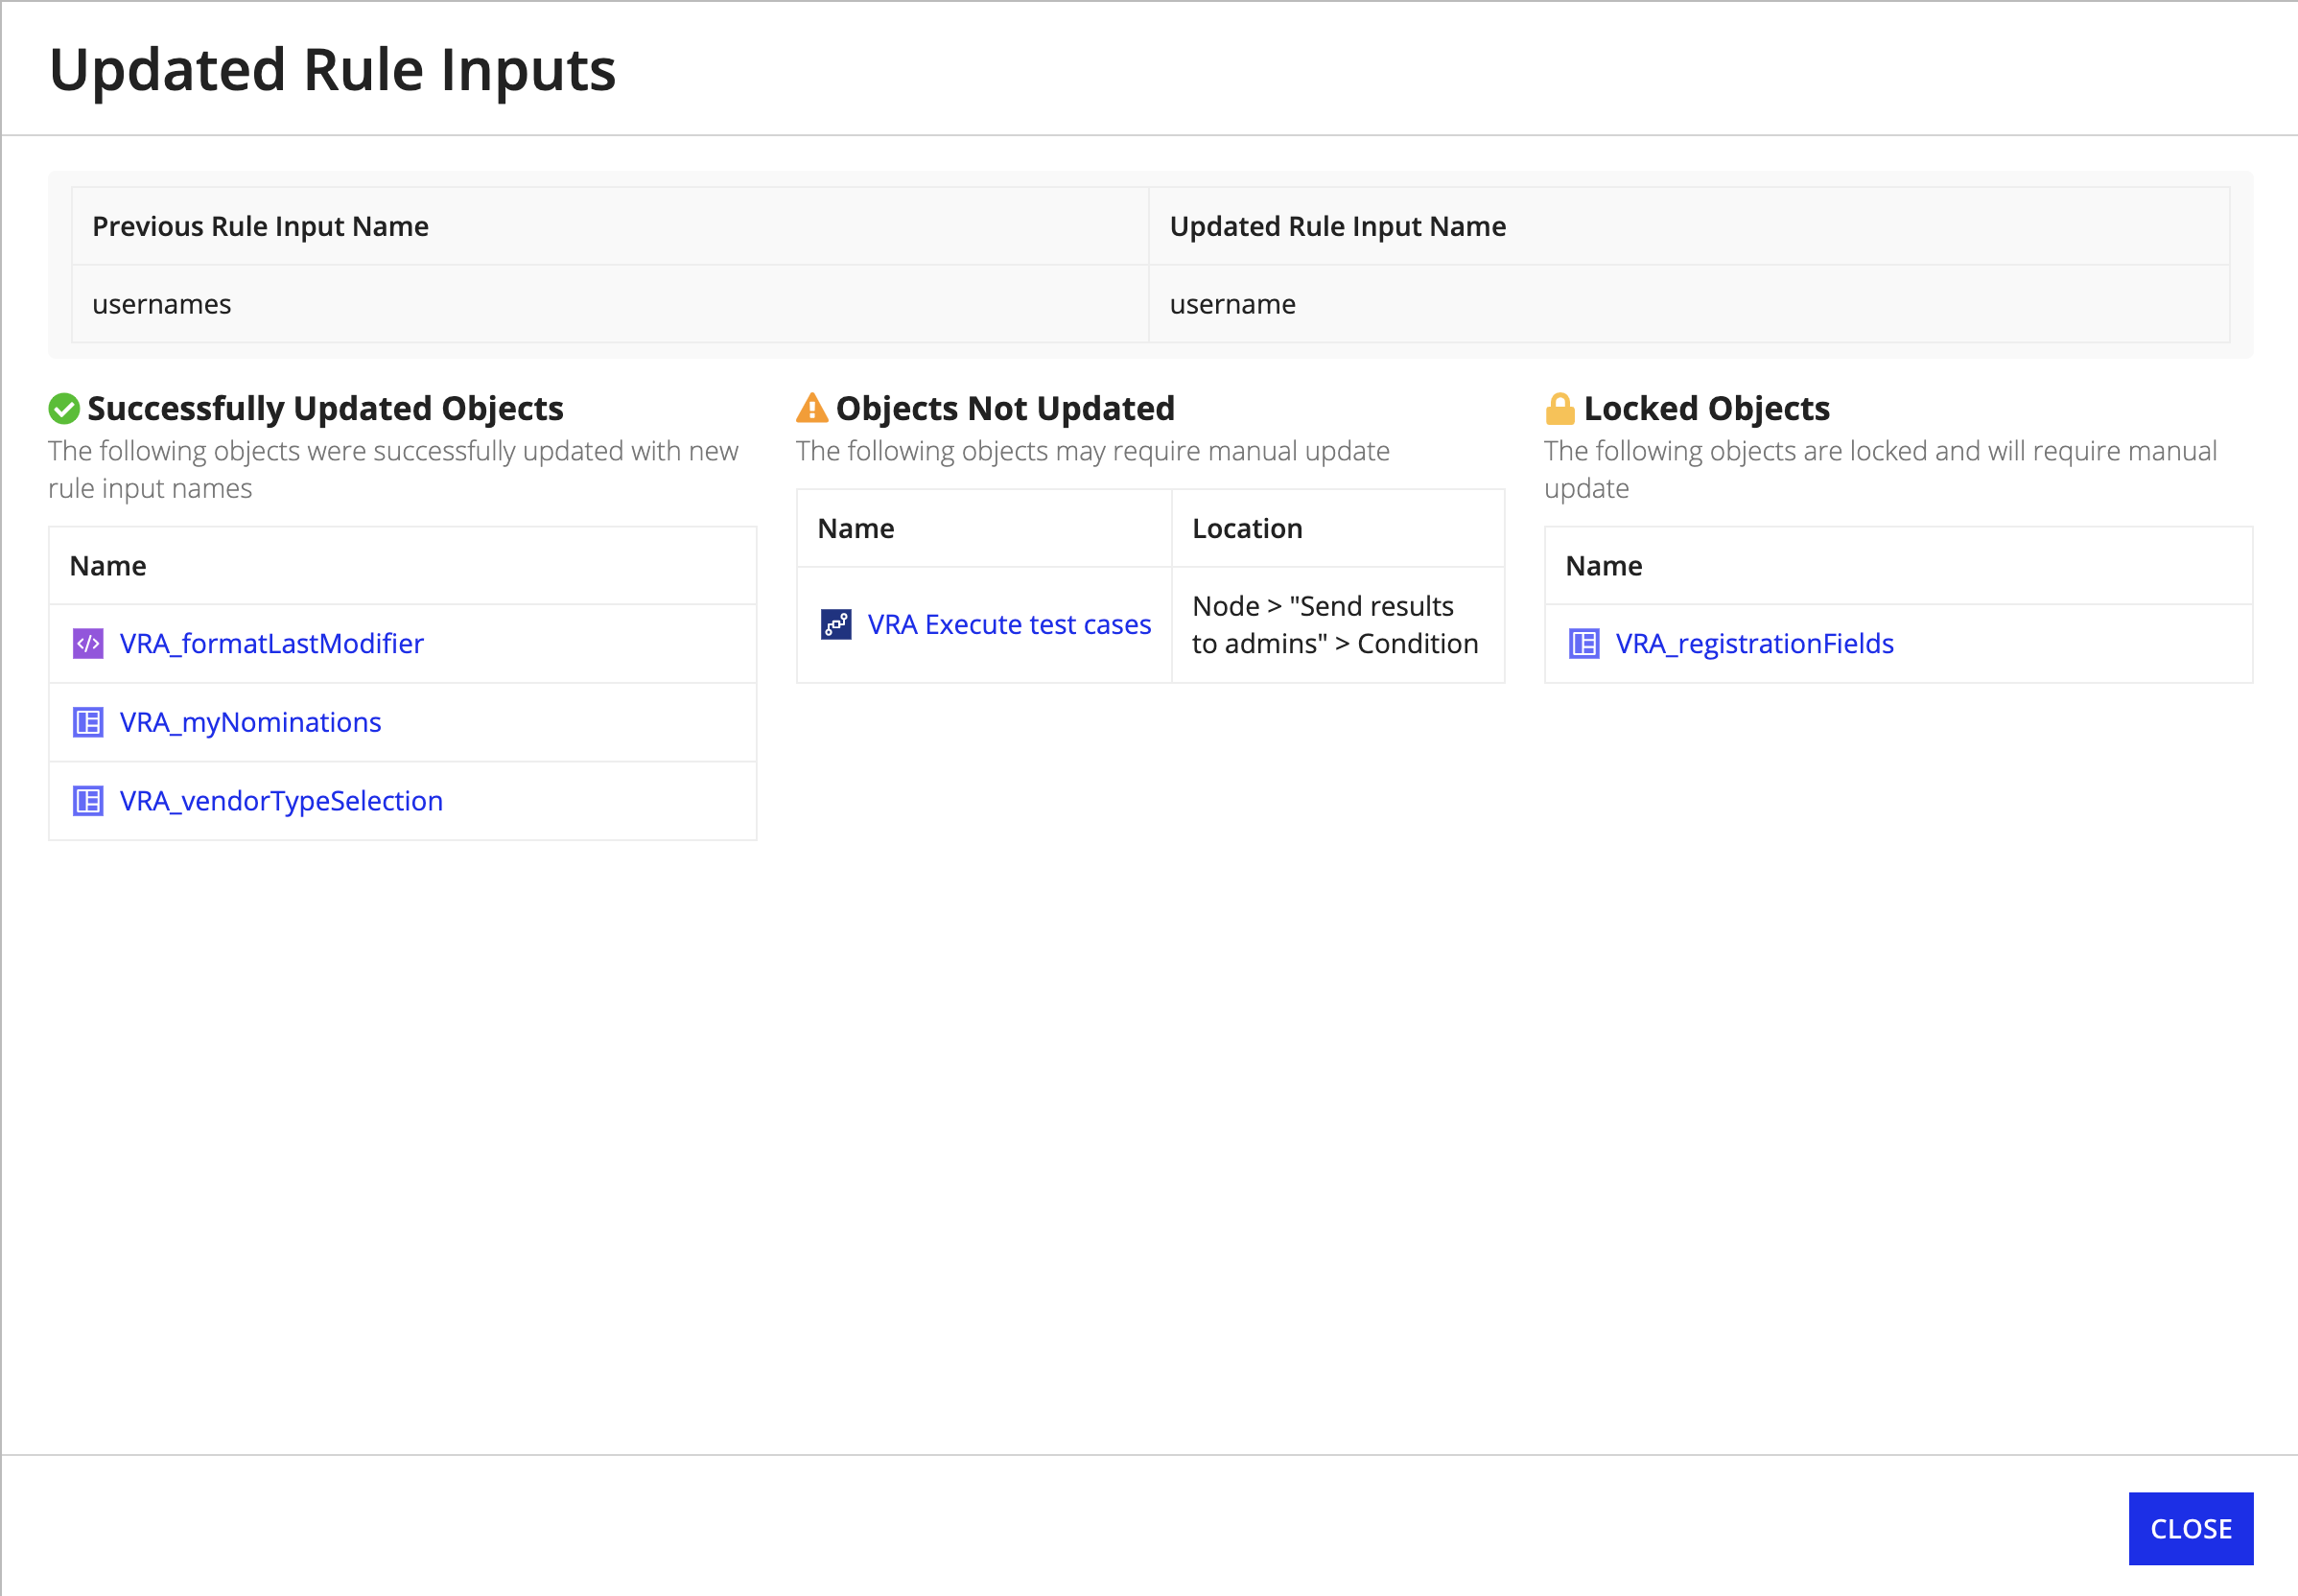
After you save your changes, a dialog will appear with a summary of what dependent objects were updated and any that you may need to update manually.
If you accidentally exit the rename dialog before you've completed all manual updates, use design guidance to find the remaining objects to update. Any object using the wrong keyword reference will be flagged with the invalid keyword syntax design guidance on the health dashboard.
All objects that are updated automatically as a result of the rename will show the developer who renamed the input as the last modifier for the dependent objects.
Edit an interfaceCopy link to clipboard
When you save a new version of an interface, the latest version will be available immediately. This means that record views, reports, process tasks, and other interfaces that use this interface will immediately use the new version. It is important to carefully consider the impact on running processes when changing interface definitions.
Appian recommends the following best practices to help you manage changes to interfaces:
- When calling rules in your interface definition, pass rule inputs by keyword.
- Take advantage of database-backed records and design short-lived processes. See the Database-Backed Record Type Tutorial page for more information.
- If you need the version of your interface to remain in sync with the version of your process, create new interfaces instead of new versions. If you need to create a new version of the interface, create conditional logic to execute the new behavior in the new version. Either approach will let older process instances continue to use the old interface behavior.
Tip: Speed up interface design with keyboard shortcuts.
VersionsCopy link to clipboard
Each time you modify and save an interface, a new version is created. All objects that use the interface will use the latest version. All developers that can view the interface can edit it, and interfaces can be reverted to a previous version at any time.
For information on how to manage object versions, see Managing Object Versions.
Design guidanceCopy link to clipboard
While editing your interfaces, you may encounter design guidance. Appian design guidance reinforces best practice design patterns that you should use in your objects. You'll see design guidance for interfaces while editing expressions within the interface or when updating an interface precedent.
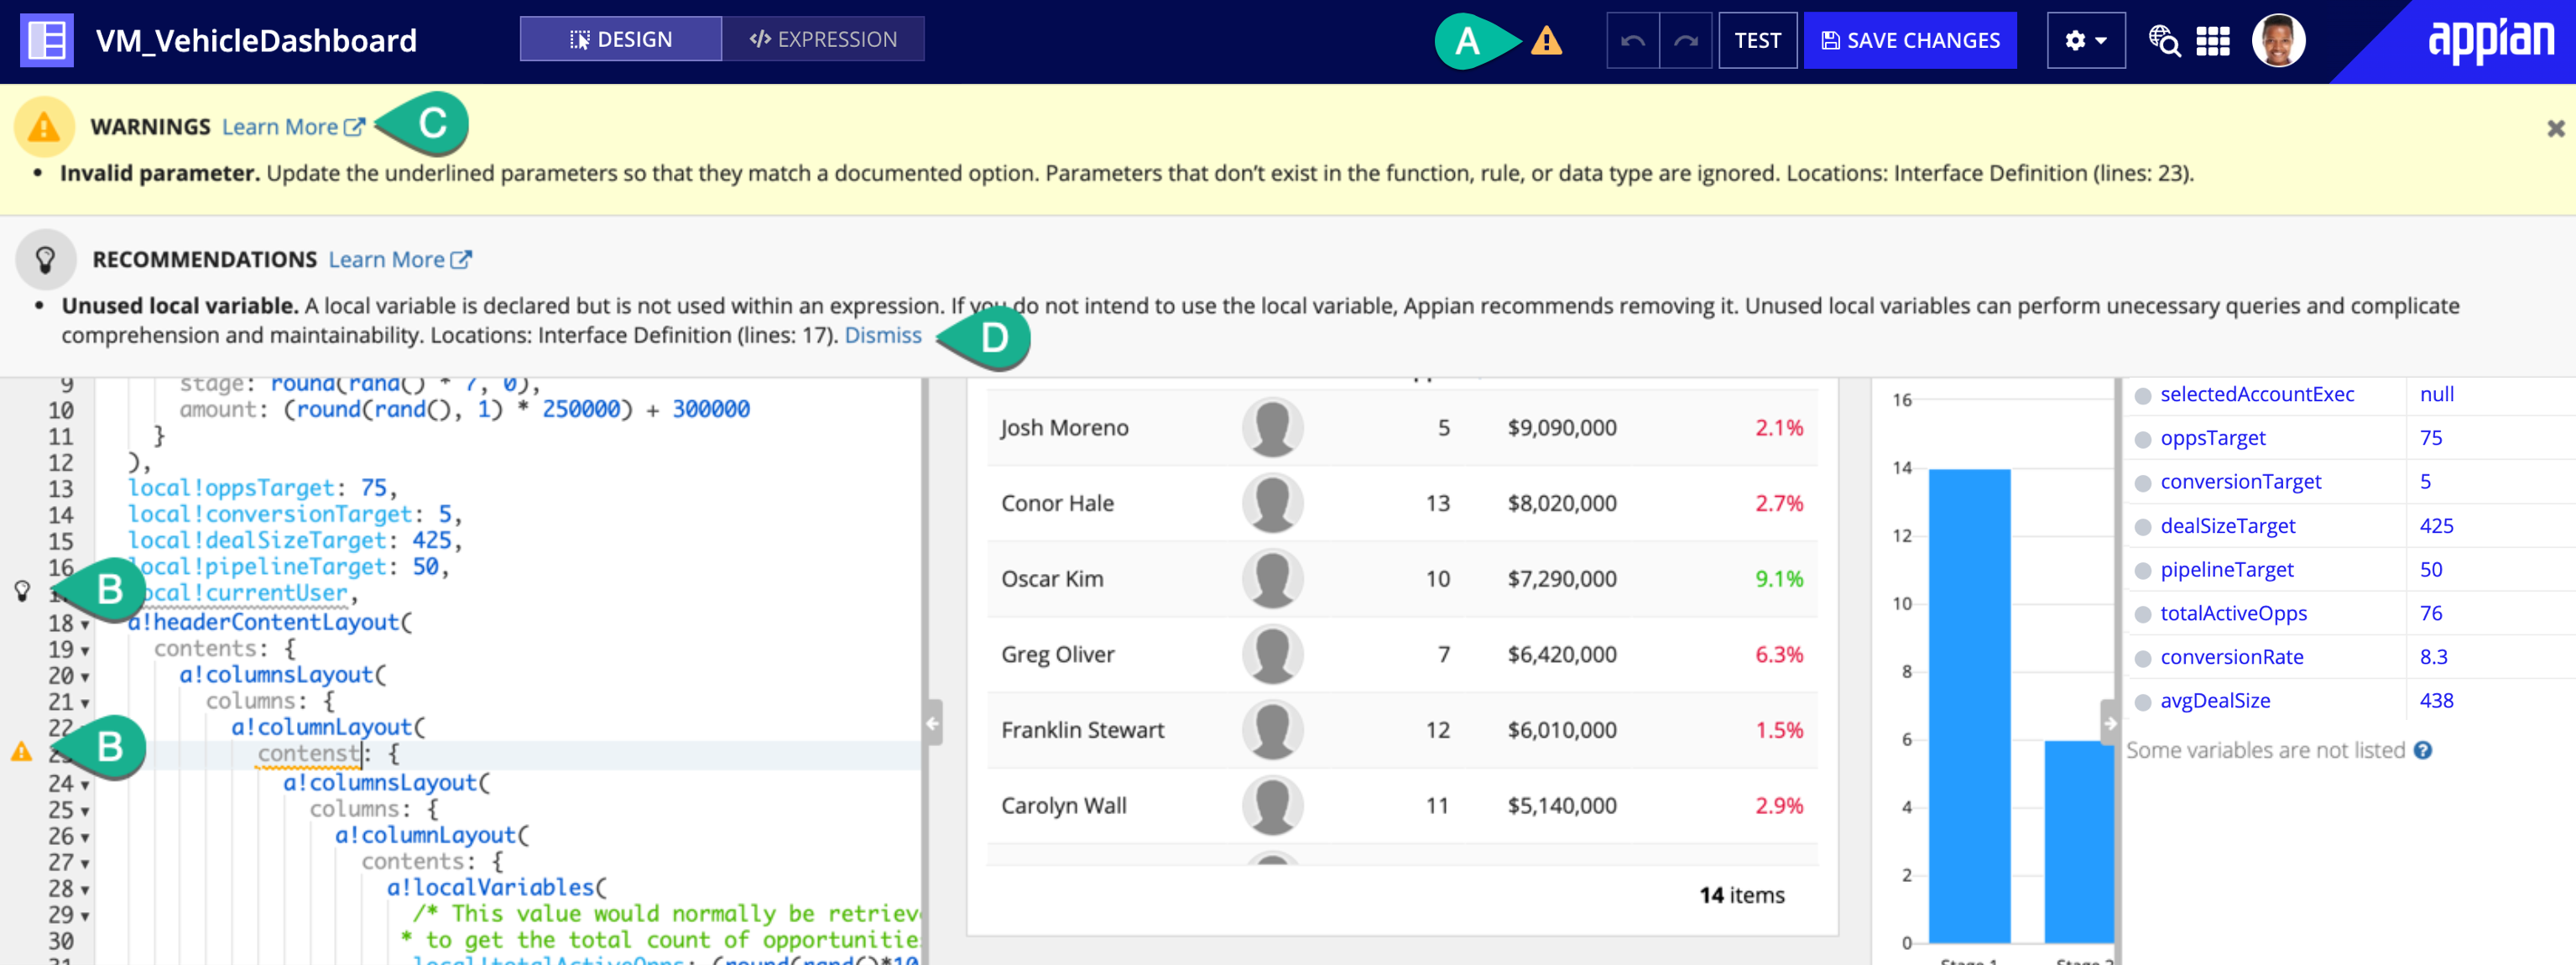
When a recommendation or warning is triggered, you'll see an indicator icon in the header (A) and next to the corresponding line in the expression editor (B).
Click on the icon in the header to learn more about the suggested guidance (C) and how to address it.
If a recommendation isn't relevant, you can Dismiss (D) the recommendation. Learn more about recommendation dismissal.
Warnings cannot be dismissed and should always be addressed to avoid complications when the logic in the object is executed.
You can also find interface guidance on the Health Dashboard.
Design guidance is only provided for the interface's saved default test values. See design guidance for the full list of possible guidance.
Save interface asCopy link to clipboard
If your interface is intended to be used as a report or an application action, you can configure that within the interface using Save as… in the Settings menu.
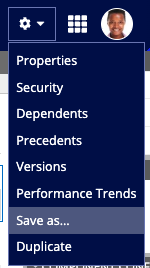
Tip: Some fields in the Save As form may be pre-populated with information based on your interface definition and the application that contains the interface.
Save as reportCopy link to clipboard
You can create a report directly from within the interface object. This automatically creates a report that calls the interface and makes it available from the Reports tab in Tempo.
To save an interface as a report, use the Report option in the Save Interface As dialog.
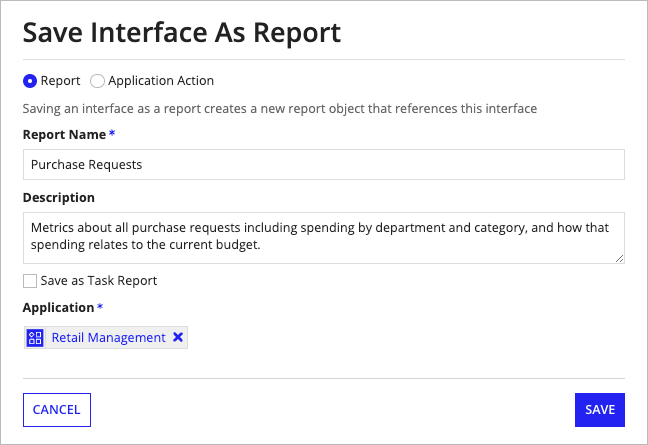
After clicking Save, you will be prompted to set security on your new report. The report will automatically be added to the selected application.
Save as application actionCopy link to clipboard
You can create an application action directly from within the interface object. When you do, Appian automatically creates a process model with a start form that calls the interface. The start form includes a process parameter for each input. Then, Appian creates an action on the selected application, making it available from the Actions tab in Tempo.
To save an interface as an action, use the Application Action option in the Save Interface As dialog.
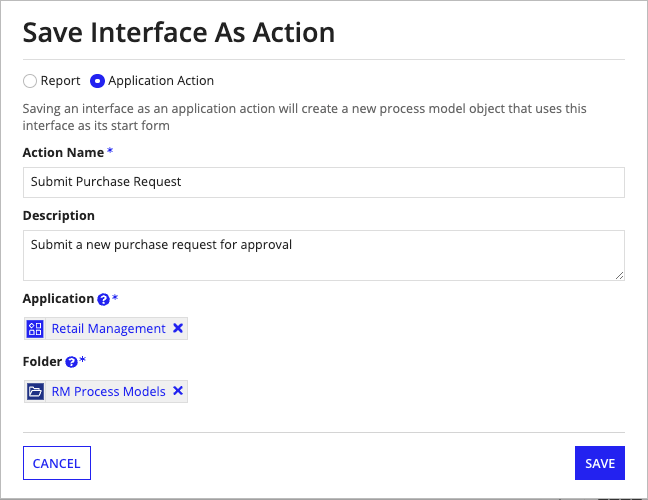
After clicking Save, you will be prompted to set security on your new process model. The process model will automatically be added to the selected application and the application will be published.
SecurityCopy link to clipboard
Interface object securityCopy link to clipboard
Tip: Any user can invoke any interface that is used by a process, record view, report, or site page they can access. For example, if a user is a member of a group that has Viewer permissions to a Tempo report, they will, by default, be able to view the report's interfaces.
For more information on how to secure Appian objects that can display interfaces to users, see Tempo Report Security, and Record Type Object Security.
The security role map of an interface controls which developers can see or modify it and its properties. By default, interfaces inherit the security of the folder that they are saved in. See Editing Object Security to modify an interface's security.
The following table outlines the actions that can be completed for each permission level in an interface's security role map:
| Actions | Administrator | Editor | Viewer | Deny |
|---|---|---|---|---|
| Evaluate the interface | Yes | Yes | Yes | Yes |
| View the interface definition | Yes | Yes | Yes | No |
| Duplicate the interface | Yes | Yes | Yes | No |
| Update the interface definition | Yes | Yes | No | No |
| View the security | Yes | Yes | No | No |
| Rename the interface | Yes | Yes | No | No |
| Delete the interface | Yes | No | No | No |
| Update the security | Yes | No | No | No |
Data securityCopy link to clipboard
Security for the data displayed on an interface is based on the security of the underlying data source. Users must have at least Viewer permissions to the data to view it within an interface. If a user does not have Viewer permissions to part of the data on an interface, the interface may fail to load.
Note: Hiding data through interface expression configurations does not secure the underlying data. It only determines what does not display on the interface.
For more information on how to configure the security of the underlying data source, see Data Store Security and Process Security.
Expression evaluation contextCopy link to clipboard
In general, the interface expression runs under the context of the user viewing the interface. In the specific case where a user is viewing a process task that has been accepted by another user, the interface expression runs under the context of the task owner (the user who accepted the task).
See the User Contexts for Expressions page for more information on what user context is used when evaluating activity class parameters.

