
| The capabilities described on this page are included in Appian's advanced and premium capability tiers. Usage limits may apply. |
This page explains the different sync options you can configure to keep your synced data up to date with the source.
OverviewCopy link to clipboard
After you enable data sync on your record types, you should configure different sync options to keep your data up-to-date with your source and readily available in Appian.
You can configure options to:
As your record type syncs data, you can monitor syncs to see when data is synced, how much, and if there were any errors while syncing.
Sync all dataCopy link to clipboard
You can re-sync all your source data in Appian by triggering a full sync.
Appian recommends scheduling a full sync to occur once each day, so your synced data remains available and up-to-date with your source.
You can also manually trigger a full sync by:
- Saving the record type.
- Clicking START FULL SYNC in the record type.
- Using an import customization file.
When re-syncing all of your source data, your record type may exceed the row limit or fail to sync. To ensure you have consistent and reliable access to your data, you should also configure the following full sync options:
Schedule a full syncCopy link to clipboard
Appian recommends scheduling a full sync to occur once each day. When the scheduled sync occurs, Appian will purge your existing synced data and replace it with the latest data available in your source.
For faster syncs, Appian recommends scheduling full syncs outside of peak traffic or working hours. When working with multiple synced record types, consider scheduling each full sync to occur at a different time to have optimal sync performance.
To schedule a full sync:
- On your record type, go to Sync Options.
- Under Sync All Records, select the Schedule a full sync checkbox.
-
Select the time and the timezone when you want the sync to occur each day.
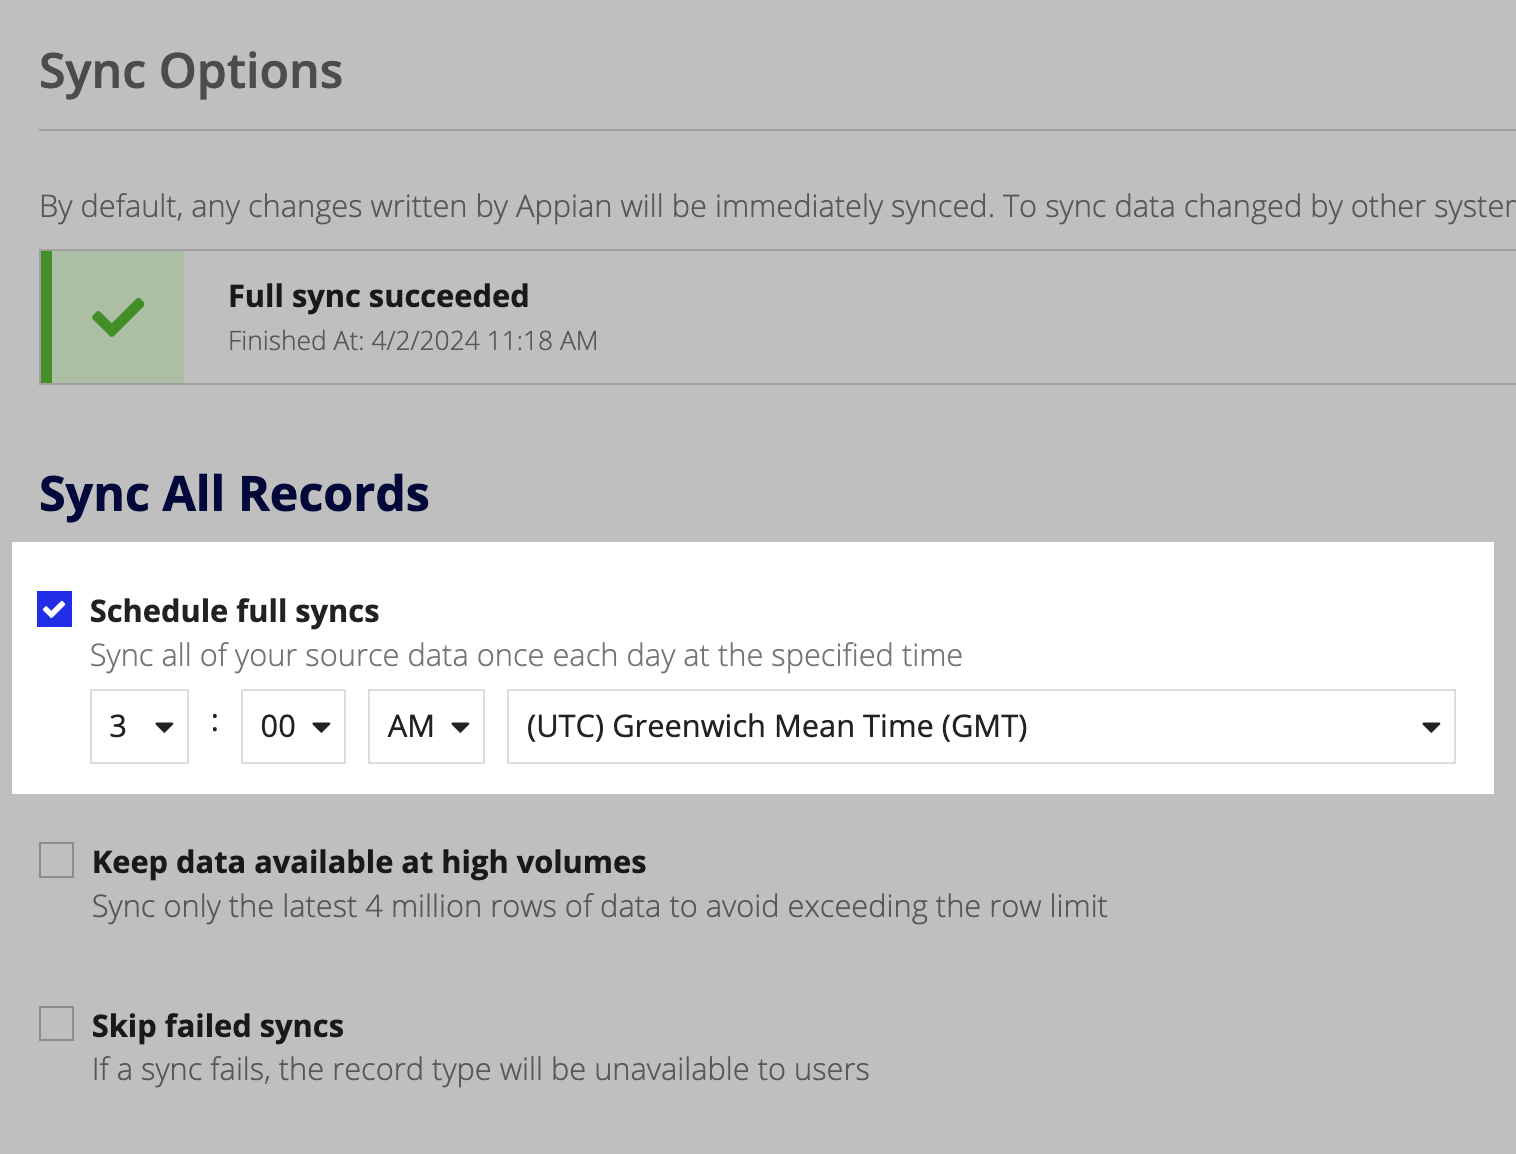

- Click SAVE CHANGES.
Keep data available at high volumesCopy link to clipboard
As your business grows, so does the volume of your business data. To ensure you have consistent and reliable access to your growing data source, enable the Keep data available at high volumes sync option on your record type.
When enabled, this setting will dynamically sync the latest 4 million rows of data whenever a full sync occurs. This will also prevent the record type from exceeding the synced row limit. You decide which data is the latest by providing a field to sort by, like lastModified, createdOn, or the primary key field. Then, we’ll sort by the selected field in descending order so we only sync the most recent data.
For example, let's say you enable Keep data available at high volumes on the Order record type, and sort by the createdOn field. If you have 4,000,002 orders, Appian will sync all but the two oldest orders.
This sync option is only available on record types that use a database as the source. You must also have a scheduled full sync configured on the record type to enable this option. A scheduled full sync will ensure that the record type syncs the latest data at least once a day.
If your record type exceeds the synced row limit after using a smart service that automatically syncs changed data or the Sync Records smart service, the sync will succeed as long as the record type is within 10% of the synced row limit.
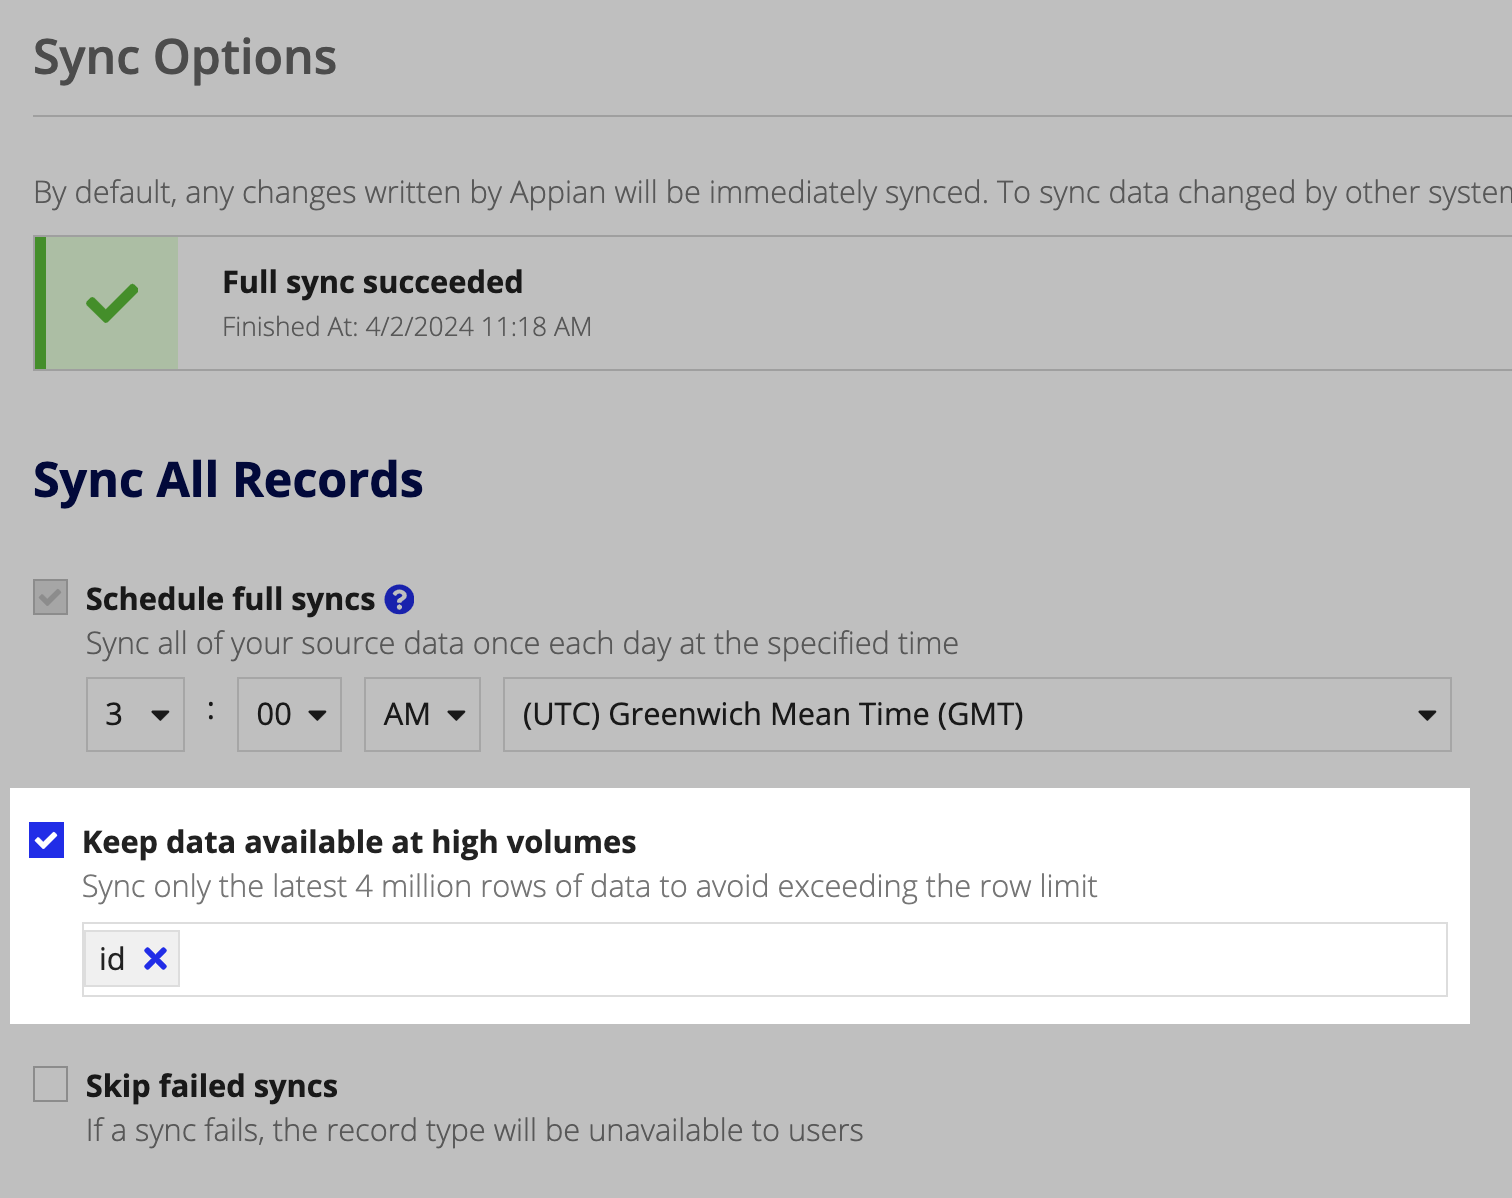
To keep data available at high volumes:
- In the record type, go to Sync Options.
- Under Sync All Records, select the Keep data available at high volumes checkbox.
-
Select the primary key field or a field of type Date or Date and Time to sort by the latest data. Appian will sort by this field in descending order.
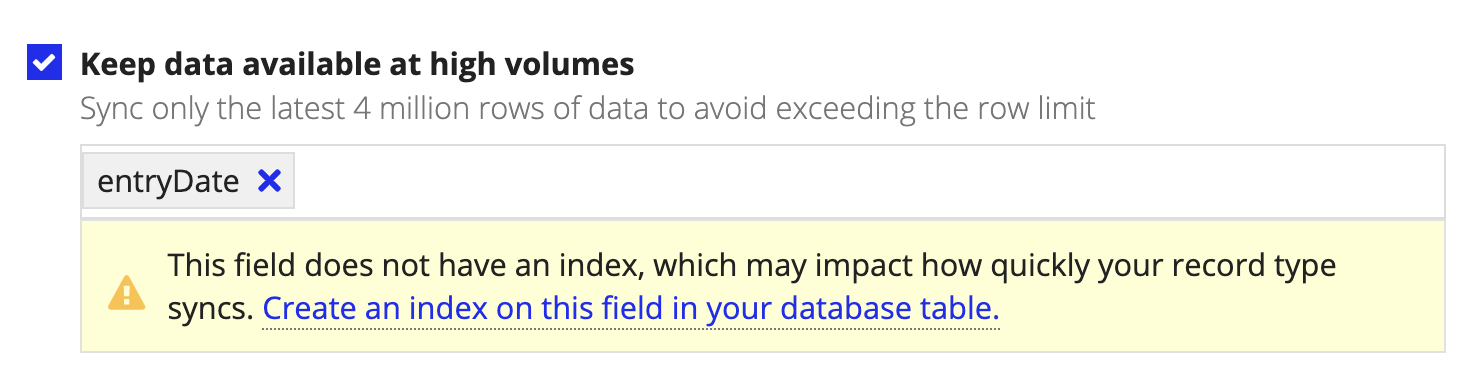
Tip: To ensure that your data continues to sync quickly, the selected field should have an index configured on your database table. If the field does not have an index, you can generate a database index directly from the record type.
- Click SAVE CHANGES.
Generate a database indexCopy link to clipboard
When configuring the Keep data available at high volumes sync option, the selected field to sort by must have an index configured on the database table. This will ensure your data continues to sync quickly.
To generate a database index:
- Select a field to sort by.
-
From the banner, click Generate an index on this field in your database. This banner only appears if the selected field does not have a database index.
- Click GENERATE.
Appian will automatically create the index on the field in your database and generate an index script. Ensure you save the generated index script for future deployment.
If you generate a database index from the record type, but the field is still identified as lacking an index, there may have been an issue publishing the index. This may be a result of generating an index with the same name as an existing index in your database table. If this is the case, rename the existing index on your table before attempting to generate a new one.
Skip failed syncsCopy link to clipboard
When a sync fails on a record type, all references to the record data will be unavailable. This will cause any interfaces, queries, or reports that reference your record type to also be unavailable.
To give you the time and flexibility to troubleshoot sync failures, the Skip Failed Syncs setting is enabled by default on all new record types.
When this setting is enabled, any failed full syncs will be skipped and the record type will use data from the last successful full sync. Since the record type is using data from the last successful sync, all references to the record type will remain available.
If your data is time sensitive and you do not want to skip failed syncs, you can also disable this setting at any time.
To skip failed syncs:
- In the record type, go to Sync Options.
-
Under Sync All Records, select the Skip failed syncs checkbox.
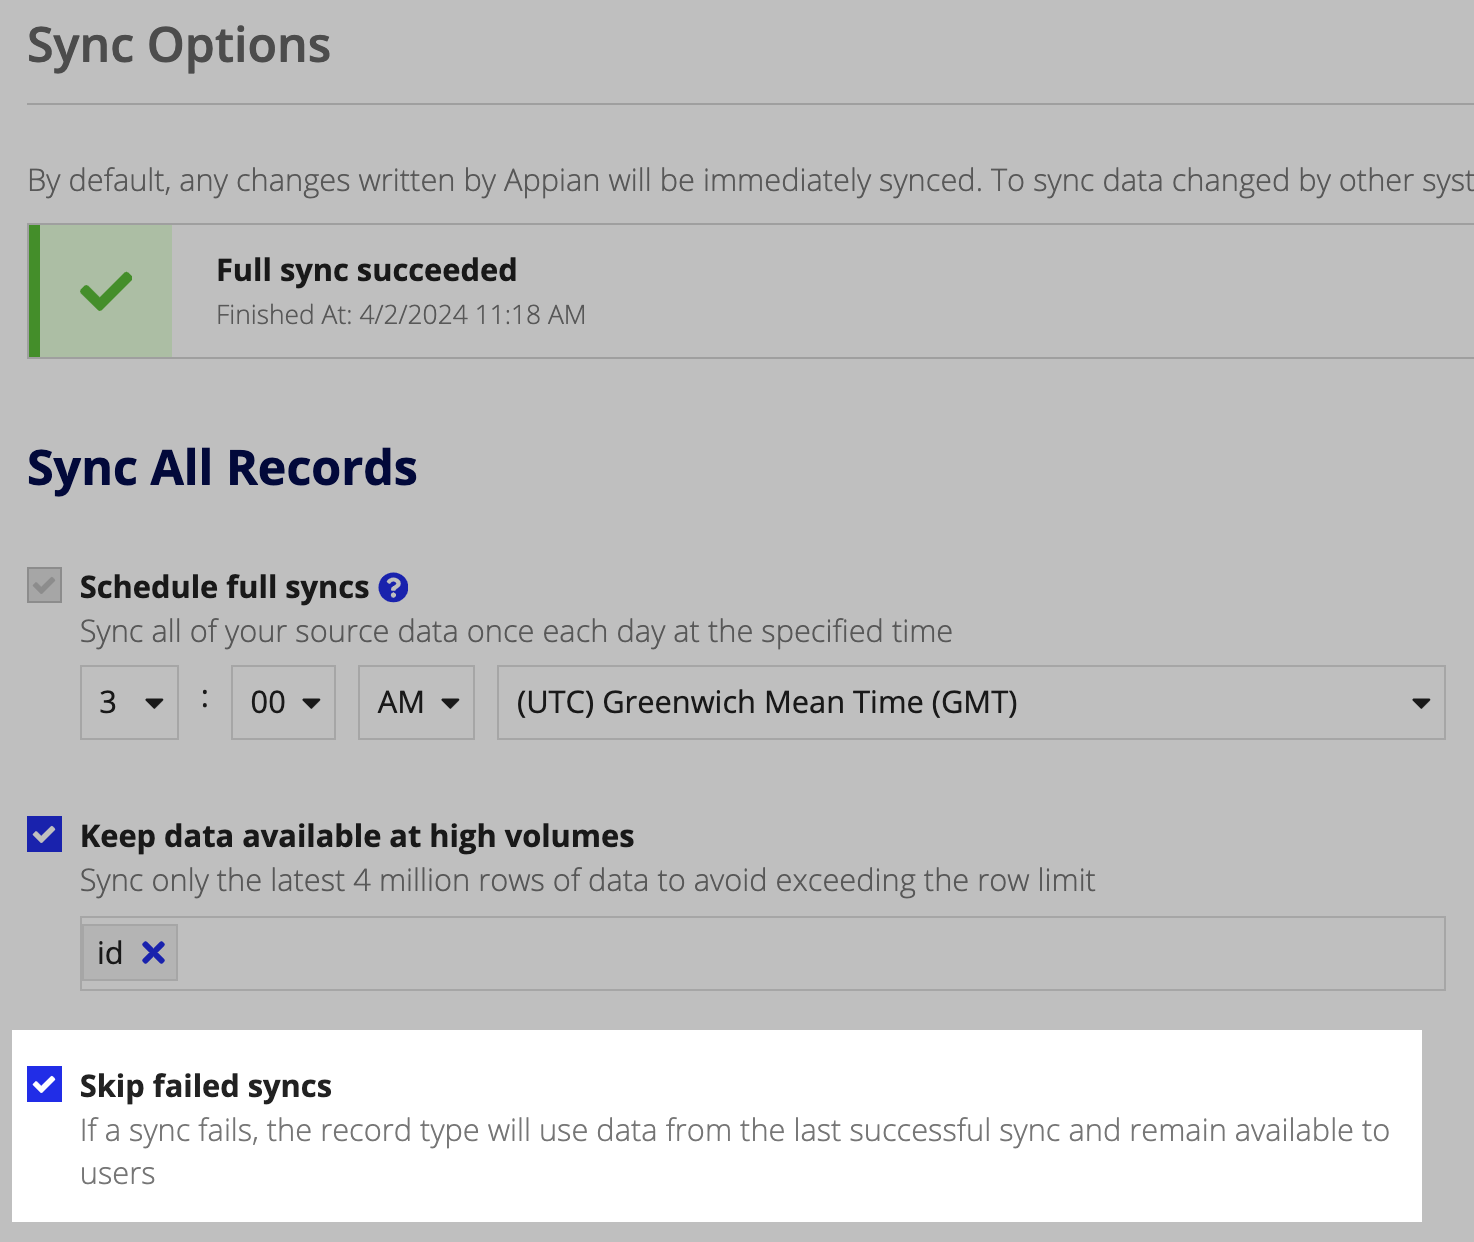
- Click SAVE CHANGES.
Add a rate limitCopy link to clipboard
When syncing data from a web service, Appian will make a series of requests to the web service until it returns all of the data. This can result in many requests in a short amount of time to the source system, and some systems may start to reject requests if too many arrive within a certain interval.
To prevent overloading the web service, you can configure a rate limit on your service-backed record types to determine the maximum frequency of requests during a full sync.
To add a rate limit:
- In the record type, go to Sync Options.
- Under Sync All Records, select the Add a rate limit checkbox.
-
Use the dropdown to choose the number of batch requests made to the source when a full sync occurs.
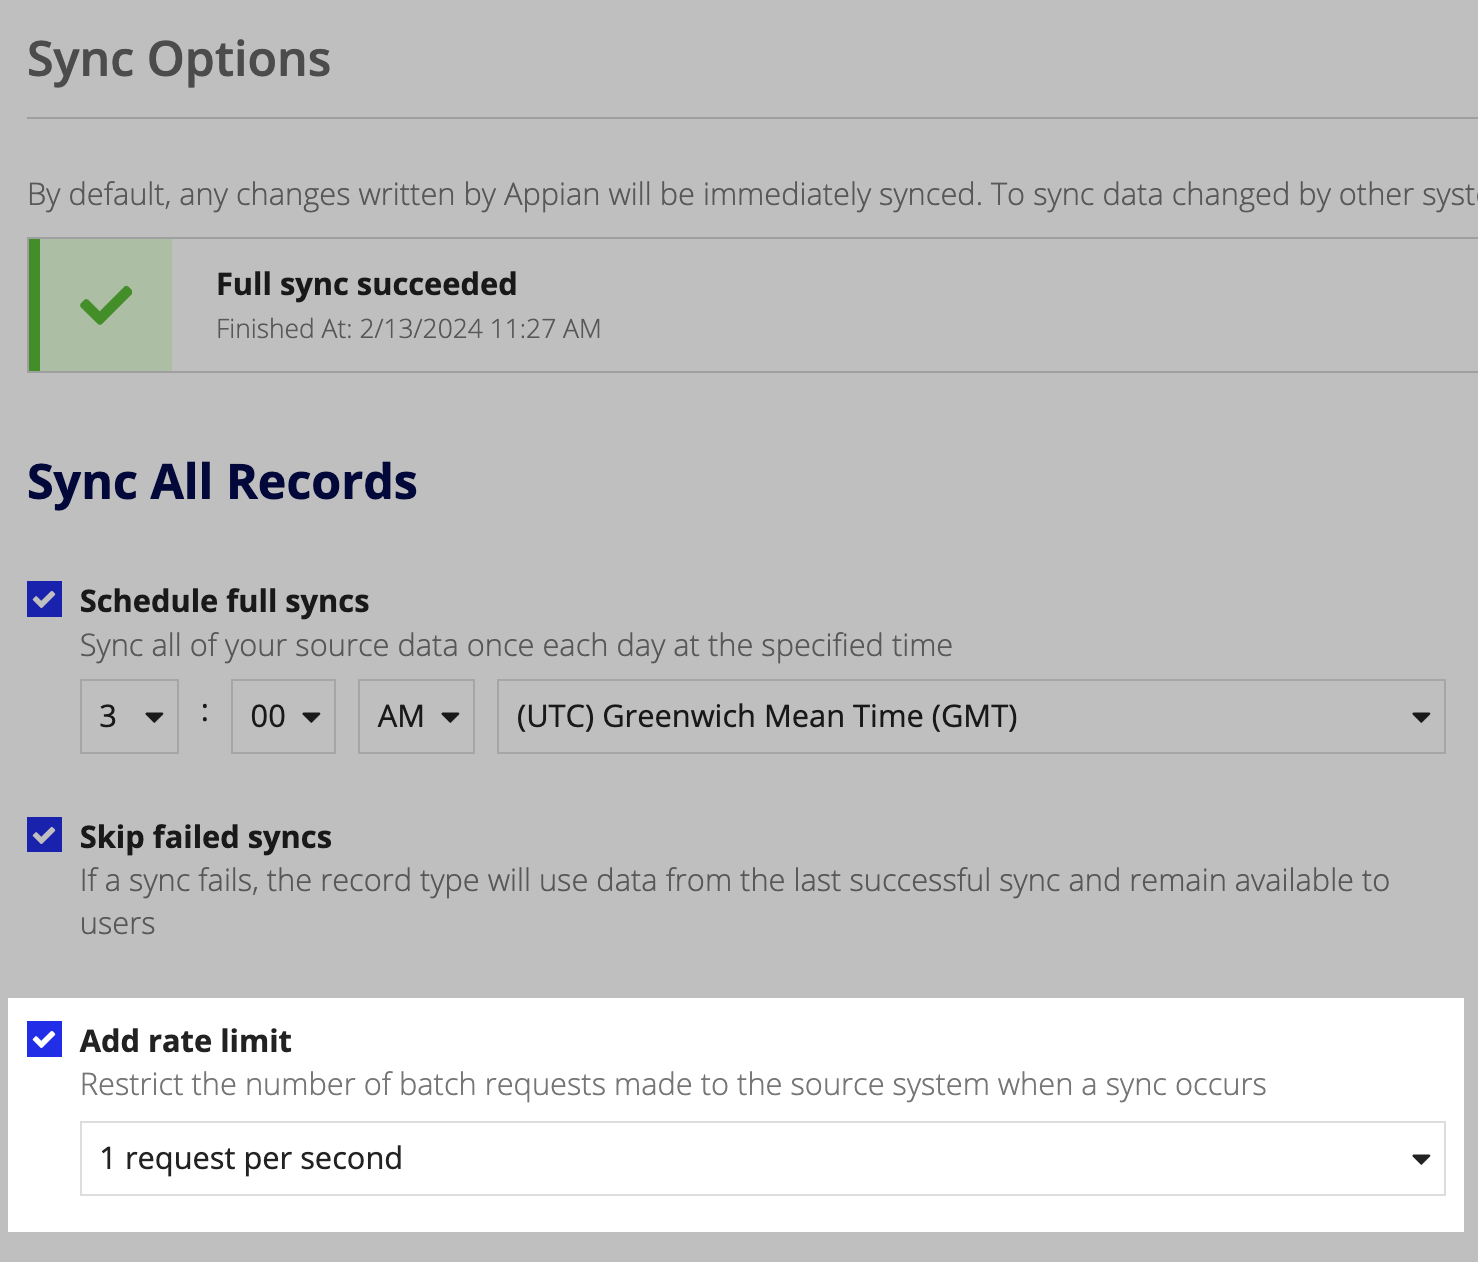
- Click SAVE CHANGES.
The rate limit is only applied when a full sync occurs. If other requests are made to the web service at the same time as the sync occurs, the total number of requests could still exceed the rate limit, so we recommend including a buffer.
For example, if the web service allows up to 10 requests per second, it's safer to choose 5 requests per second for the sync rate limit to account for other simultaneous requests.
Additionally, the rate limit determines the maximum number of requests in the given time period. As a result, the actual rate could be slower if additional formatting or manipulation of the data is necessary after the request is made.
Sync changed dataCopy link to clipboard
In addition to configuring full syncs to sync all source data, you can use certain smart services to automatically sync your changed data. This means that when you use Appian to add, update, or delete data, we’ll write those changes to your source and immediately sync them in Appian—no extra configuration necessary.
If you need to use other smart services that don’t automatically sync data, or a daily full sync is not frequent enough to capture changes from other systems, you can specifically use the Sync Records smart service to capture those changes.
Use smart services that automatically sync dataCopy link to clipboard
To keep your synced data fresh, use the following smart services in your process models, interfaces, or expression rules to update your source data and automatically sync those changes in Appian. Syncs triggered by these smart services are called smart service syncs.
Note: Only the following smart services automatically sync changed data. To sync data changed by other smart services or other systems, use the Sync Records smart service.
| Smart Service | Supported Data Source |
| Write Records | Database |
| Write to Data Store Entity | Database |
| Write to Multiple Data Store Entities | Database |
| Delete Records | Database |
| Delete from Data Store Entities | Database |
| Call integration | Salesforce |
Considerations for updating dataCopy link to clipboard
-
Smart services that do not automatically sync data: Appian will not automatically sync updates made using other smart services, plug-ins, or external systems.
For example, the following services and tools will not automatically trigger a sync:
- Query Database smart service.
- Execute Stored Procedure smart service.
- Call an integration smart service to update data in any other web service besides Salesforce.
- Manual edits using tools like phpMyAdmin or MySQL workbench.
To sync these types of data changes, configure a full sync, or use theSync Records smart service.
-
Smart service functions in portal interfaces: A sync will not occur when you use these smart service functions directly in a portal interface. To sync data changed by a portal, use
a!startProcess()to trigger a process containing a smart service that automatically syncs data. Learn more about working with data in a portal. -
Writing to Salesforce: If the Salesforce integration fails to write to the source, then a sync will not occur. Likewise, if Appian does not receive a notification that the write to the source was successful, the sync will not occur.
-
Writing to a database using a data store entity: To use any of the smart services using a data store entity, you will need to create a custom data type (CDT) to write to the source. Depending on how your table data is structured in the CDT, the maximum number of rows that can be synced will vary:
- If you're using a flat CDT, you can sync up to 50,000 rows at a time.
- If you're using a nested CDT, you can sync up to 1,000 rows at a time.
If you update more than the maximum number of rows, the smart service will successfully write to the data source, but the sync will fail.
Additionally, your CDT should not contain any fields that accept an array of values. If you write data to a field that accepts an array of values, those changes cannot be synced.
Use the Sync Records smart serviceCopy link to clipboard
If you're not using smart services that automatically sync data to update your data, and a daily, full sync is not frequent enough to capture your data changes, you can use the Sync Records smart service to sync your data changes.
This smart service allows you to specify which data to sync from the source. You can use it to sync data in any record type with data sync enabled, including your service-backed record types. Since data sync does not automatically sync changes written to a web service, this smart service allows you to more frequently sync your service-backed record types.
Note: To use the Sync Records smart service with a service-backed record type, you must configure a Sync Expression. Learn how.
There are a few ways to sync your data using this smart service:
- Generate a web API that includes the
a!syncRecords()function and add the API's URL to your source system's webhook so it can notify Appian of changes and sync them. - Use the
a!syncRecords()function in an interface so end users can choose to sync data whenever they submit a form or click a button. - Use the Sync Records smart service in a process model to trigger a sync after a call to an integration or stored procedure executes, or to start a sync using a record action.
Depending on your business needs, the way you choose to use this smart service or function may vary. See the Sync Records smart service page for examples.
Generate a Sync ExpressionCopy link to clipboard
To use the Sync Records smart service with a service-backed record type, you must first configure a Sync Expression on your record type.
A Sync Expression is similar to a record data source expression; the only difference is that you pass individual record identifiers to your Sync Expression to fetch and return a row or set of rows from the web service. This enables Appian to sync specific rows of data from the web service when you use the Sync Records smart service.
You can generate a Sync Expression directly from your record type. Appian will create a new expression rule that calls your integration and retrieves a set of records using their identifiers.
To generate a new Sync Expression:
- In the record type, go to Sync Options.
- Under Sync Changed Records, locate Configure Sync Expression and click + GENERATE EXPRESSION RULE.
- Under Sync Expression, click Create Sync Expression.
- For SELECT INTEGRATION, select or create an integration object that returns data based on the record identifiers:
- Select Create a new integration to create a new integration object using a connected system. If you do not have a connected system, click Create Connected System to create one.
- Select Use an existing integration to choose an existing integration object.
- Click NEXT.
-
For CREATE EXPRESSION RULE, configure the following properties:
Property Description Name Enter the name for your expression rule. Description Enter a description for your expression rule. Application Specify the application where you want Appian to create the expression rule. Save In Specify the folder where you want to save the expression rule. - Click CREATE. The created objects appear in the dialog.
- Click the generated expression rule to modify the Sync Expression as needed.
- Return to the record type and click OK.
- Click OK to close the dialog.
- Click SAVE CHANGES.
Once you generate the expression, you may need to modify it to work with your application. For example, you may need to select fields from the response that match your record type's fields. You can then get started using the Sync Records smart service throughout your application.
Use an existing Sync ExpressionCopy link to clipboard
If you already have a Sync Expression configured, you can select the existing expression rule to use as your Sync Expression.
You can use any expression rule as your Sync Expression as long as it calls your integration and returns data based on a set of record identifiers.
To use an existing expression rule as your Sync Expression:
- In the record type, go to Sync Options.
- Under Sync Changed Records, locate Configure Sync Expression and click + GENERATE EXPRESSION RULE.
- Under Sync Expression, enter the name of your expression rule.
- Click OK.
- Click SAVE CHANGES.
Modify the Sync ExpressionCopy link to clipboard
After you generate the Sync Expression, you have the flexibility to update the existing configurations or add your own.
You may consider modifying the expression if you want to:
- Change the default
local!deleteMissingRecordsbehavior so that the sync fails when any requested records are not returned by the integration. - Add more error handling and customized messages.
- Format the data returned by your integration.
- Add paging.
Monitor your data syncsCopy link to clipboard
To ensure that your data is syncing successfully, you can check the status and history of syncs associated with your record type.
Record sync statusCopy link to clipboard
In the Monitor view of Appian Designer, the Record Sync Status tab displays the status of the most recent sync for all record types with sync enabled that you have access to view. This tab contains a grid that displays the record types with their source type, sync status, and the time of the last sync.
From this tab, you can:
- Click the link on the record type to view its Sync History.
- Start a full sync.
- Cancel an active full sync.
- Access any errors or warnings that arise during the course of a sync.
Learn more about the Record Sync Status tab.
Sync historyCopy link to clipboard
You can also view detailed information about the syncs that occurred for a specific record type. From either the Monitor view of Appian Designer, or from the Sync History tab of your selected record type.
The record type’s sync history will display information on the past and currently running syncs, including the sync status, the times of the sync, and any errors that may have occurred.
A record type can have the following sync statuses:
| Icon | Status | Meaning |
|---|---|---|
| Running | A manual or scheduled sync is taking place, the record type is saving, or the record type is being imported to the environment. | |
| Canceling | A manual or scheduled sync is being canceled. | |
| Completed | A manual or scheduled sync, record type save, or record type import has successfully completed. | |
| Failed | An error occurred while attempting to sync the record type and the record type is unavailable. Click the link next to the icon to open the Sync Alerts dialog. | |
| Failed and Skipped | An error occurred while attempting to sync the record type, but the record type is still available. Since this sync was skipped, queries will return data from the most recent successful sync. Click the link next to the icon to open the Sync Alerts dialog. | |
| Failed and Retrying | The sync initially failed and the system will retry a few times before failing. After failing, the record type will be unavailable. | |
| Canceled | A manual or scheduled sync was canceled. The record type returns to the previous sync status. If the previous sync status was Failed, then the record data will be unavailable. Click the link next to the icon to open the Sync Alerts dialog. | |
| Approaching Limit | The record type was able to sync but it's approaching the row limit. | |
| Limit Reached | The record type was able to sync but the row limit has been reached. |
When a sync fails, the record type will either have a status of Failed or Failed and Skipped. System administrators and users with Administrator permission to the record type will also receive email alerts whenever a sync fails.
For more information on the different types of sync errors and steps to resolve these errors, see Troubleshooting Syncs.