| The RWM application was deprecated with Appian 24.1. The application will no longer be updated or pre-installed for new Appian Cloud sites with Appian RPA enabled. RWM will be removed in a future release and we encourage customers to use the Operations Console to manage robots instead. |
IntroductionCopy link to clipboard
Business users who want to centrally automate and deploy a robotic process require tools that can provide the necessary governance to manage the entire lifecycle of each robotic process.
Key questions that business users often ask are:
- What is the expected value of automation?
- What other enterprise applications are impacted by this automation?
- By when should the robotic process be automated?
- Whose approval is required prior to developing the process?
Automation Planner helps answer all of the above questions and more.
Automation Planner consists of five key pages:
DashboardCopy link to clipboard
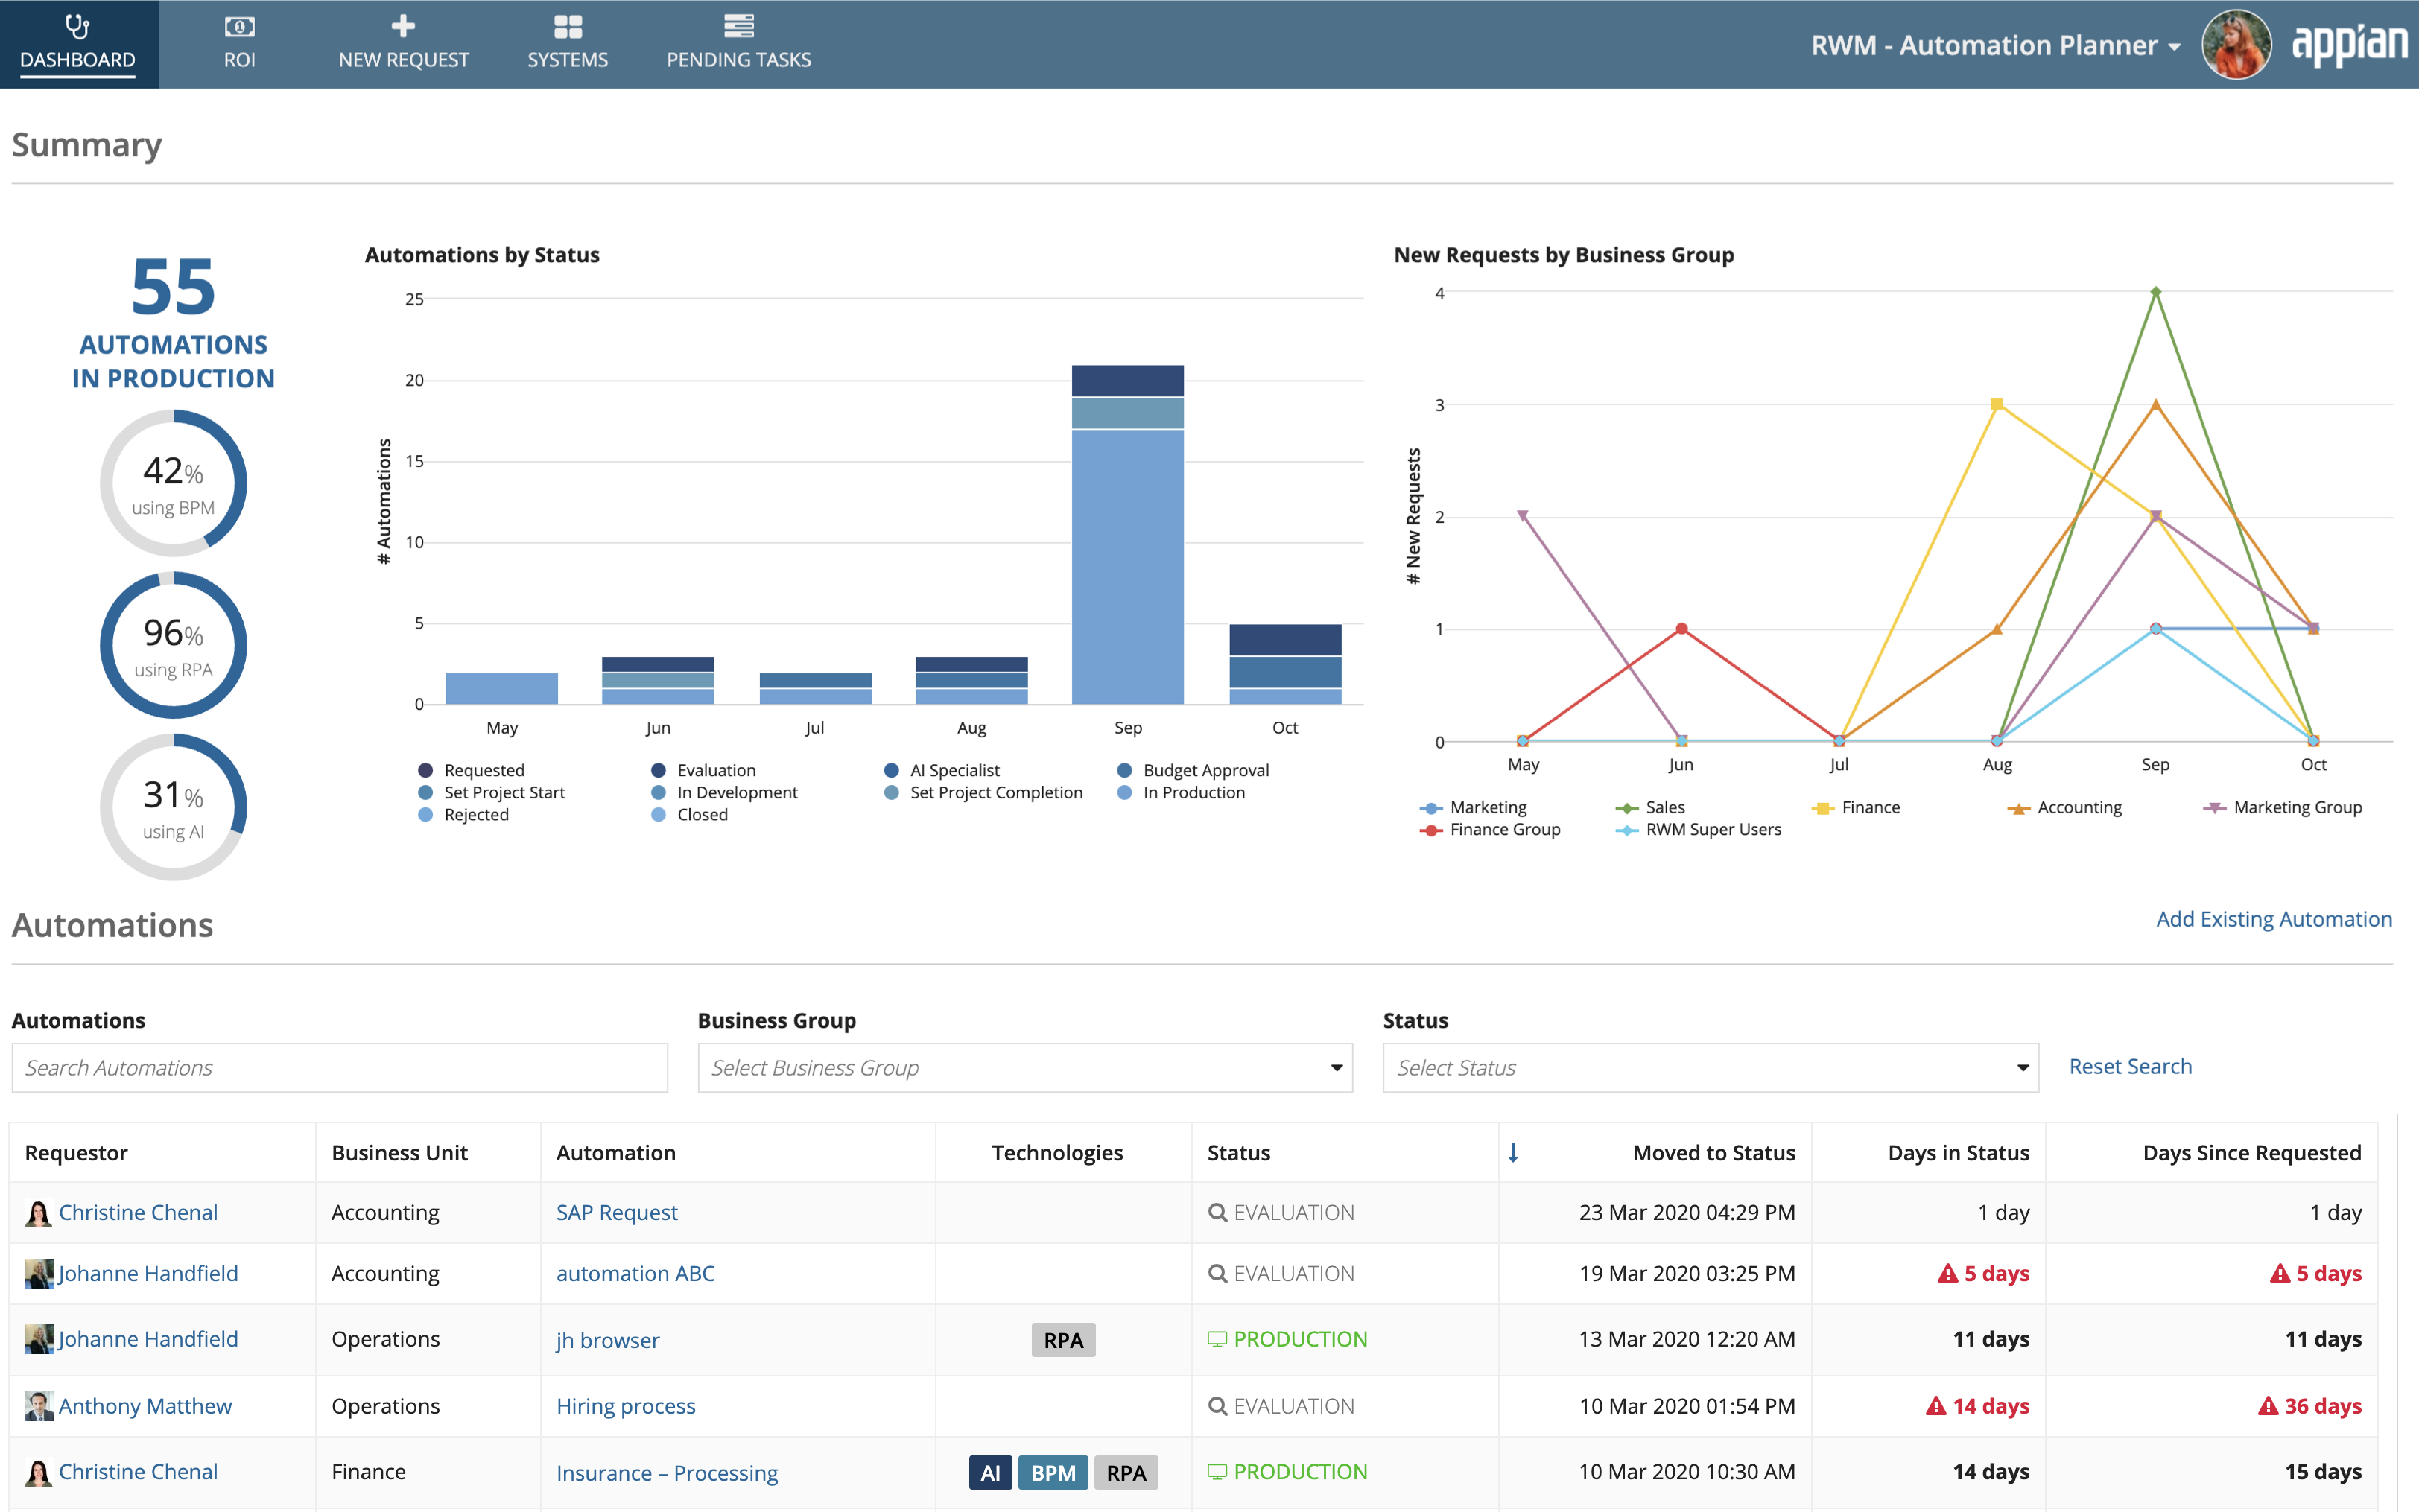
You're brought to the Dashboard when you open Automation Planner. It usually takes a few weeks from the time the automation request is made to the time the request is approved, actual automation development is done, and the automation is deployed to Production. During this time, the requester and other stakeholders might be interested in the status of a particular automation request, which may involve business process management (BPM), robotic process automation (RPA), or artificial intelligence (AI). The Request link appears on the dashboard, which allows users to view the status of a particular automation request, all the automation requests in production, and requests by status made in the last six months. A request can be initiated from the New Request tab.
Request Status ReportCopy link to clipboard
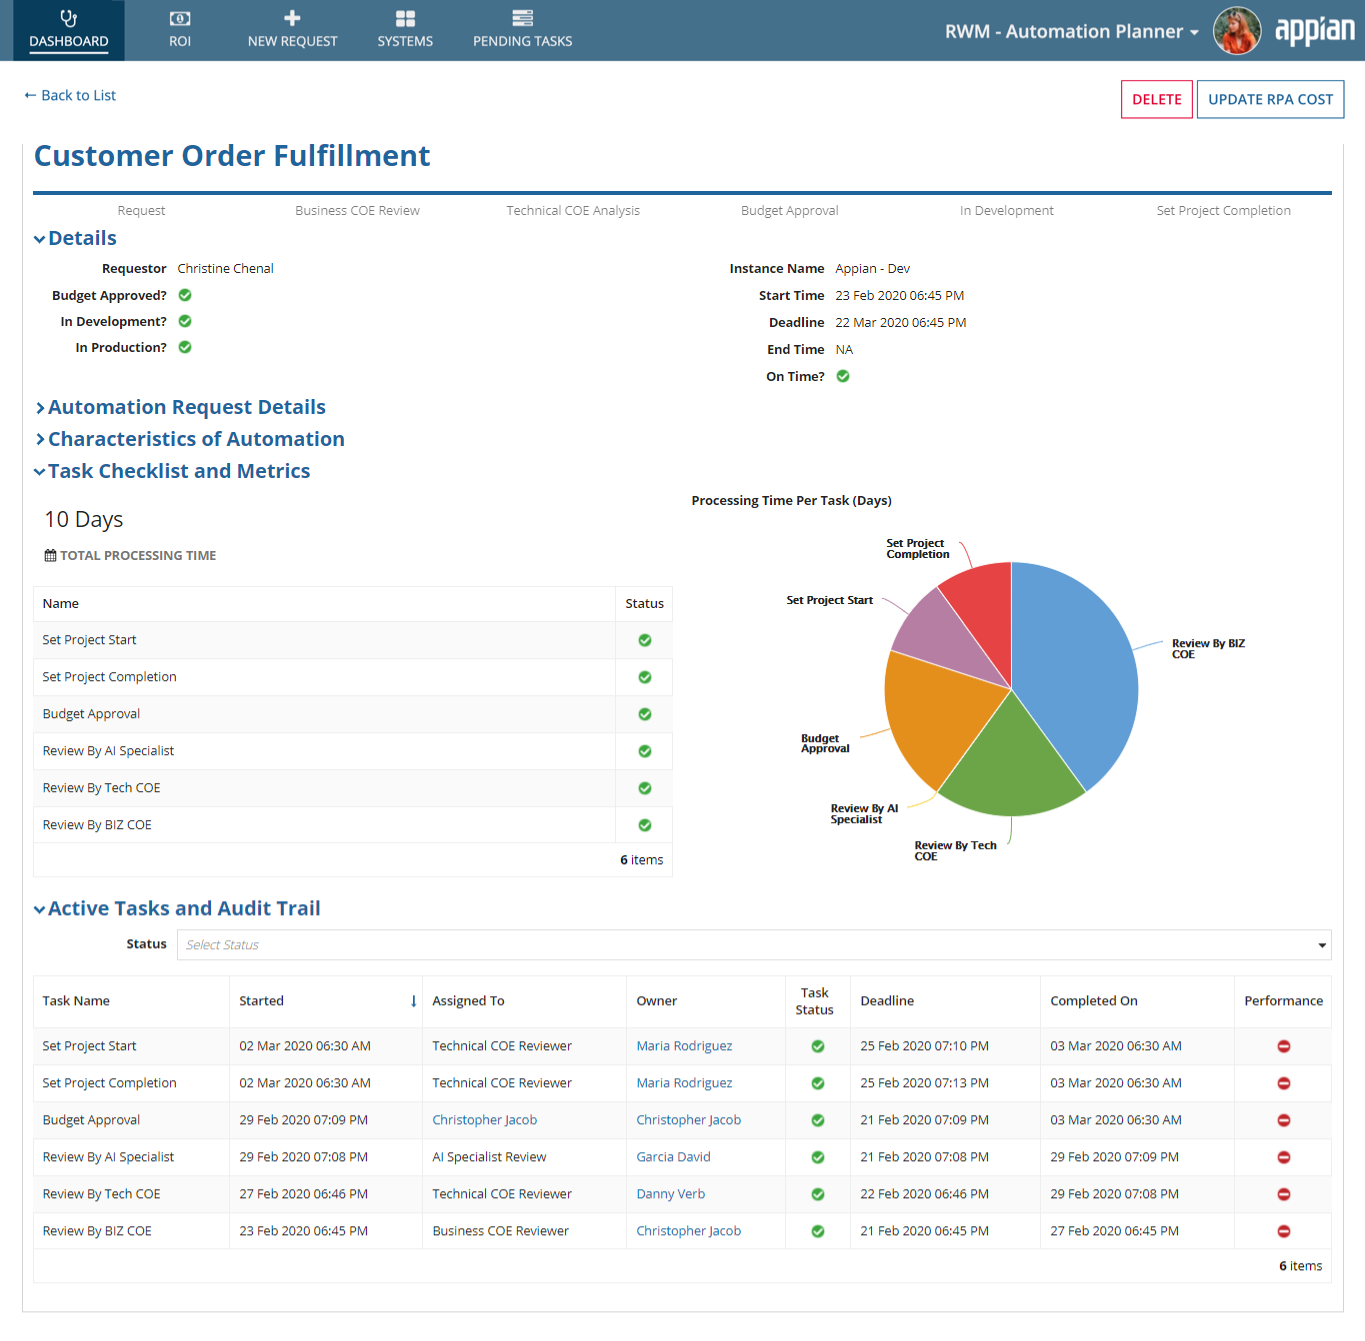
From the Dashboard, click the link in the Automation column to view the request status report.
This report shows you comprehensive information about the request. It gives information regarding all the approval stages, deadlines, and current stage in the request lifecycle. The report also allows the requester to edit the details of the request before the budget approval stage gets completed. When a requester edits the request, the flow will start from the beginning. Once the production mapping is done, the Technical Owner can delete the request, which will remove the request from the Automation Planner.
Add existing automationsCopy link to clipboard
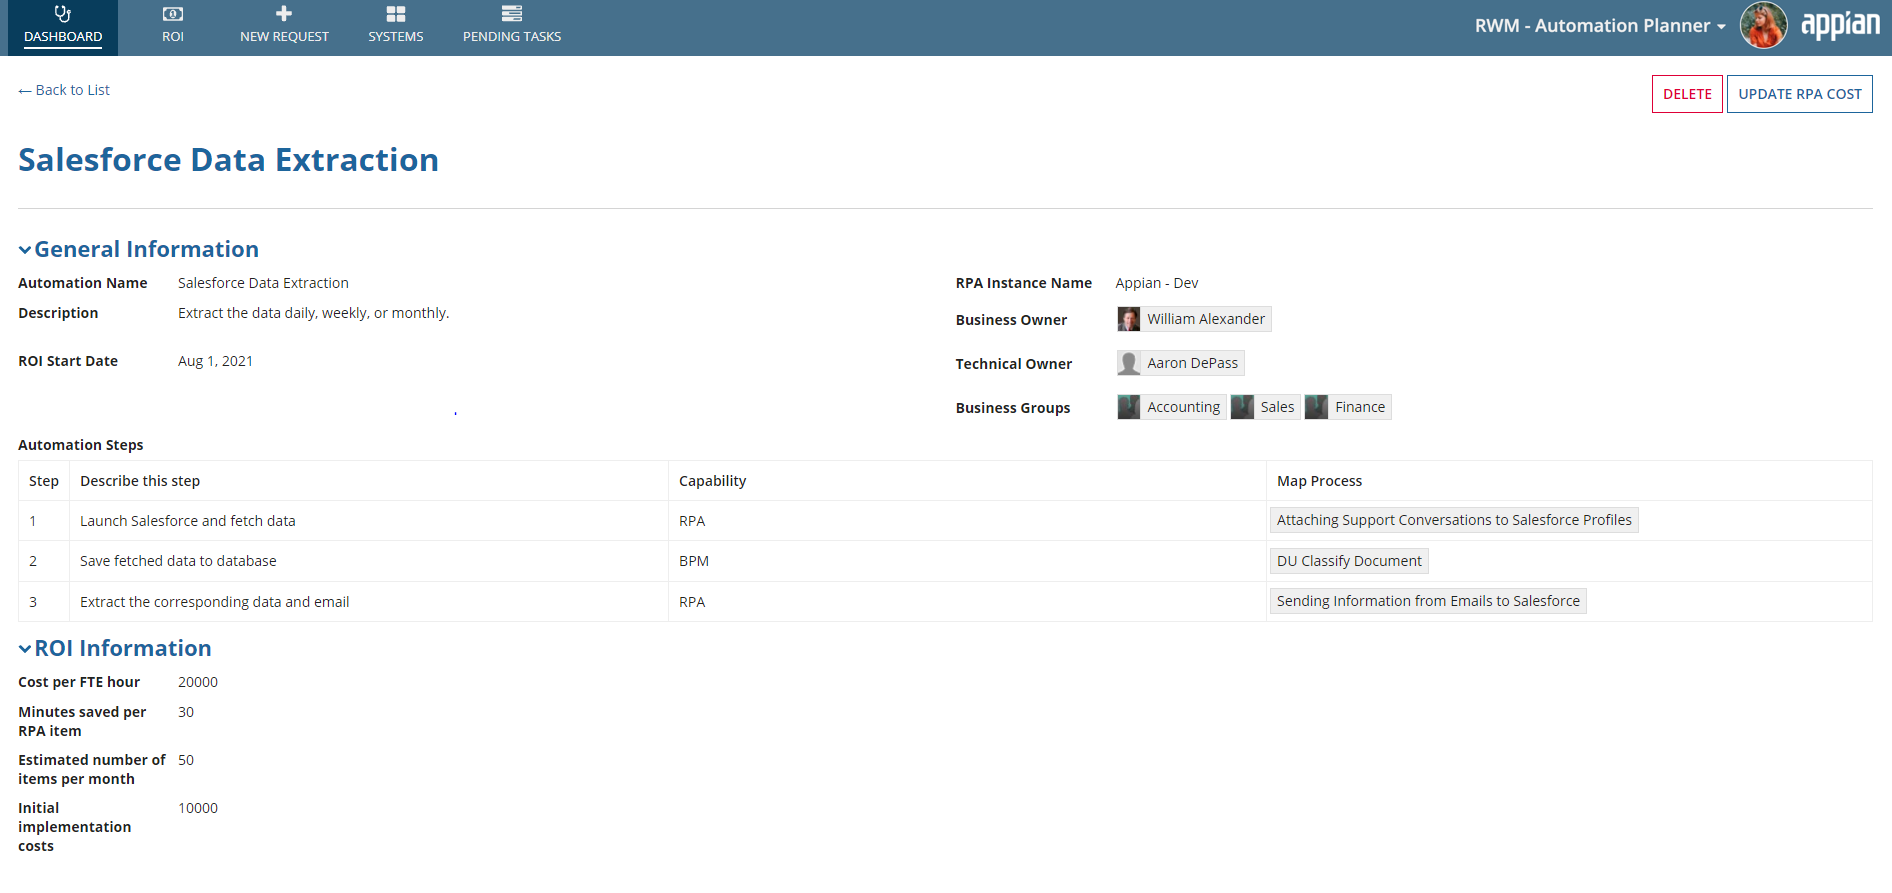
RWM captures valuable information about an automation during the request, approval, and implementation stages. This data is used to calculate valuable metrics such as ROI to help you determine if the automation is providing you the value you expect. If your business launched automations to production before using RWM to manage the request and approval process, you can still capture that information in RWM.
To add details on an existing automation:
- Go to the Dashboard in Automation Planner.
- In the Automation table, click Add Existing Automation.
- In the General Information area of the form, enter details on the automation.
- For the ROI Start Date field, you can select a date up to three years in the past. If you choose a date within the current month, you won't be asked to validate cost information after finishing this form.
- In the Map Automation Steps area, add steps in the automation that correspond to Appian processes. You need to add at least one step where RPA is selected as the Capability.
- In the ROI Information area of the form, enter details on the automation's costs and savings.
- Click NEXT.
- On the next screen, confirm the cost information for previous months, if your ROI Start Date was more than a month ago.
- Click SUBMIT to save the automation details.
Once added, the automation appears in Automation Planner.
ROICopy link to clipboard
A sustainable and growing automation practice needs to show its value through return on investment (ROI). Visit the ROI page within Automation Manager to see how automations are saving your business both time and money.
On the Time Savings tab, you'll see key metrics summarized: automations saving time, total hours saved per month, and total hours saved in the past year. The Cost Savings tab shows you automations that save your business money, as well as the total savings for the past month and year. Both tabs show detailed data for each automation in the Automations table. Use the Filters to refine the information shown in the table.
Take a deeper look into ROI calculations to show how automations save your business time and money. RWM's ROI projections can also help you prioritize high-value automation projects and plan future improvements for existing automations.
New RequestCopy link to clipboard
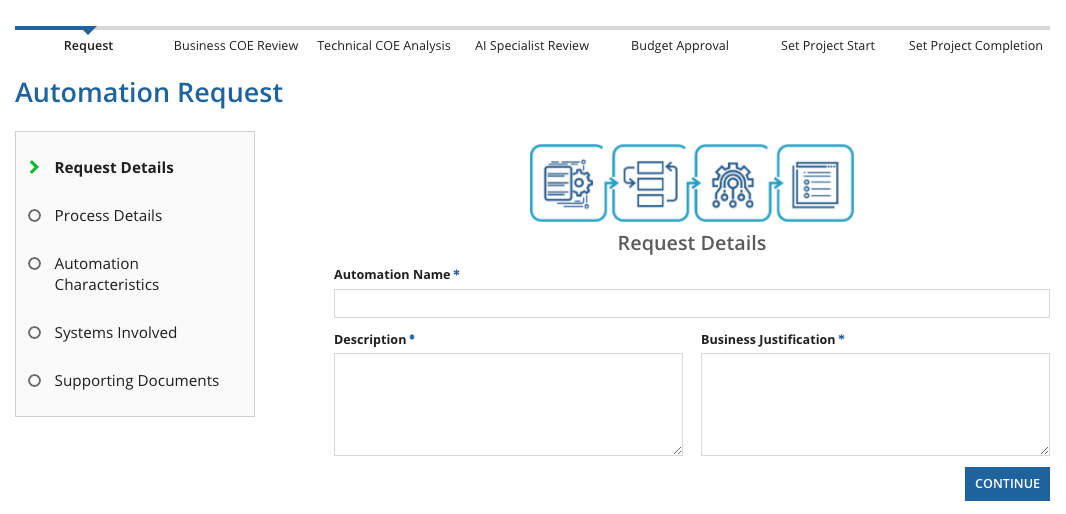
Business users typically start off by creating a new Automation Request, which asks for key information such as the process name, process owner, business justification, and service-level agreements.
Note: When requesting a new automation, the following special characters should not be used in the name: \/;:"|?'><*. Text and paragraph fields do not support emojis and -.
It also captures information pertaining to the current manual operation. This information is vital to compare the value of the robotic process with the current manual effort. If the value of the automation is perceived to be low and the business justification is low, then it gives the approver (typically business head) an opportunity to either ask for additional information or reject the automation request.
Thus, this tab helps act as a vanguard to help businesses achieve better ROI and bring better governance to the automation practice within the Center of Excellence (CoE).
Once the business user submits the automation request, a built-in Appian workflow is initiated where the Business Owner and then the Technical Owners are notified and their approval is required. Based on the Technical Owner's decision, the flow will move towards the AI Specialist Review or Budget Approval. Once all the necessary approval is done, the request will move to the Development phase and later to the Deployment phase.
Commonly requested informationCopy link to clipboard
The Automation Request form asks for a lot of information for a proposed automation. Before you begin, prepare to provide the following:
- Automation's name, description, and business justification
- Date commitments, such as when you want the automation to go live and when it will end
- Time commitment, such as how many hours a person will have to spend developing the automation and maintaining it per month
- Who owns the process
- Additional considerations, such as service-level agreements (SLAs)
- Software, systems, and other components the automation will interact with, such as images, documents, emails, chats, etc.
- Supporting documentation such as videos or text-based content to help demonstrate the vision
Tip: Administrators can customize these questions, so your form may appear different.
Budget approvalCopy link to clipboard
The Budget Approval step in the request process lets the appropriate stakeholders review the financial impacts of the proposed automation.
This step in the workflow includes a break-even chart, which compares the initial implementation and maintenance costs with the projected savings. This chart helps you pinpoint the point in time when the savings crosses the initial investment.
On this page, you'll also see the automation's projected break-even graph with and without the automation, as well as a table of cost comparisons. If no Project projected shutdown date is selected, the break-even graph uses three years as a default timeframe.
SystemsCopy link to clipboard
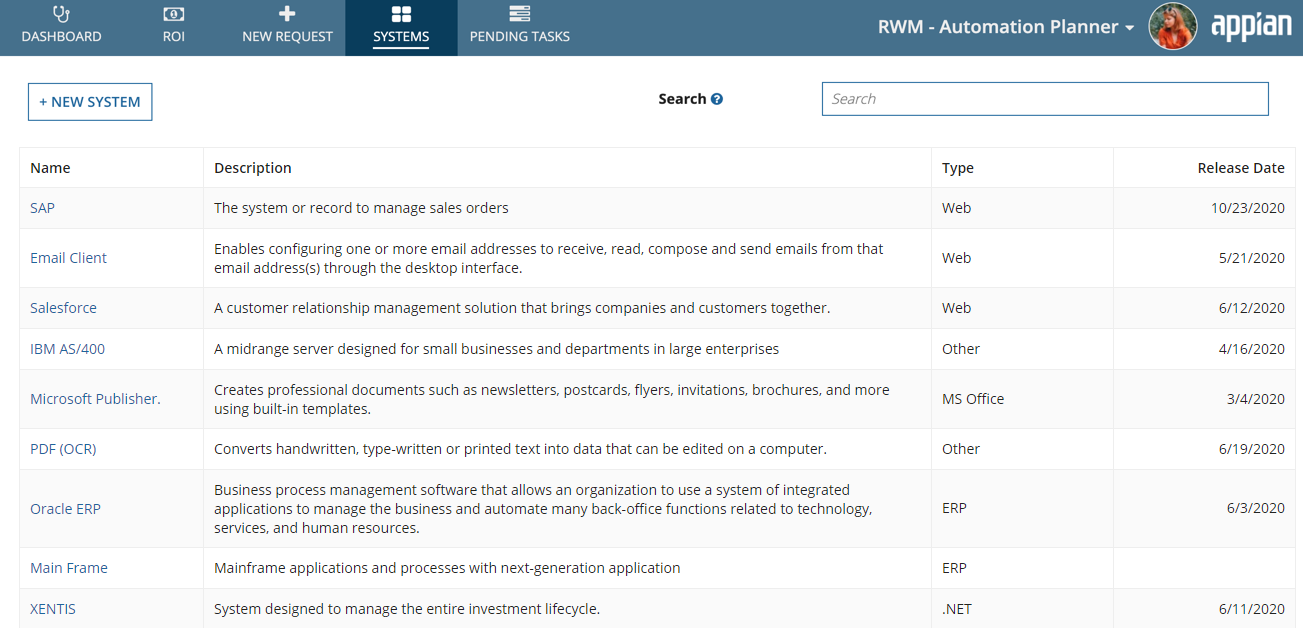
Use this page to add or modify enterprise systems that are in the department or enterprise. These systems are involved in creating a new automation request. Users can select the related systems when they request an automation so approvers can quickly understand how both the system and automation will be impacted.
System Impact AnalysisCopy link to clipboard
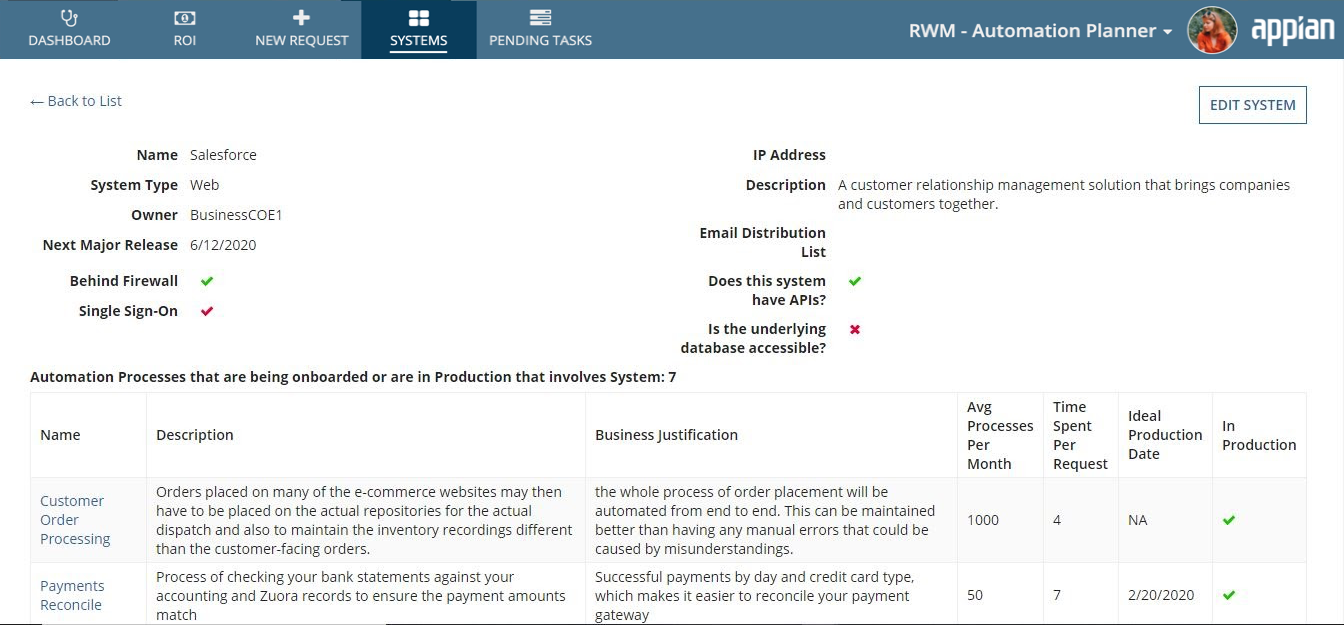
Once the automation request has gone through Value Assessment and is deemed to be of merit, the next step would be to go through the System Impact Analysis. In this step, users (typically, the Technical Owner) needs to analyze which enterprise system is impacted by the automation of this process. This analysis will help the Technical Owner understand the security and integration impacts of this automation.
The Technical Owner of the automation process will also assess the requested release timeline and assess the feasibility of such a request.
Pending TasksCopy link to clipboard
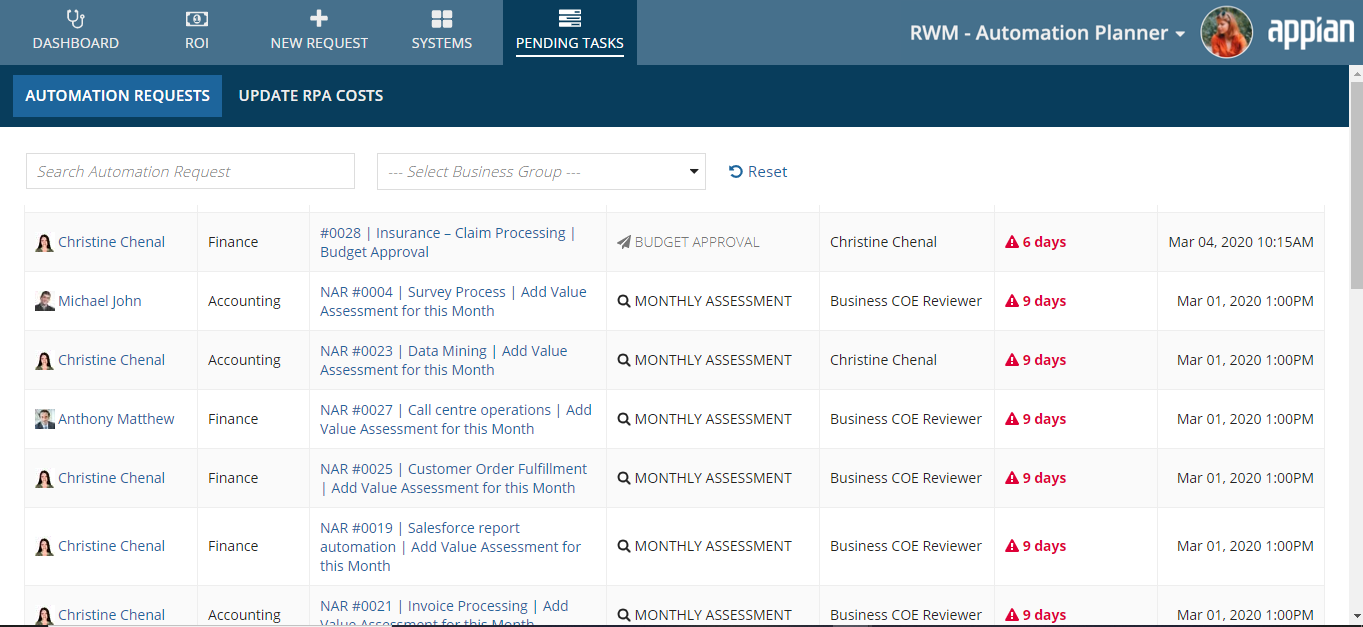
This page is used to view the list of tasks assigned to the particular group of users, which may be the Automation Requester, Technical Owner, Business Owner, AI Specialist Reviewer, etc. It will show the details of all the tasks assigned to that group of users. Tasks are assigned once the request has been raised. Within the request, a user can give the specified details so that the process continues to the next level of approval.
The Pending Tasks page also includes a tab Update RPA Costs which allows users to update the data for automations in production which impact ROI report calculations. Learn more about this in the ROI calculations page.

