| This content applies solely to Vendor Management, which must be purchased separately from the Appian base platform. |
IntroductionCopy link to clipboard
Vendor Management (VM) is as flexible as any application developed on the Appian Platform. In order to make sure your application remains scalable and aligns with best practices, we have provided instructions to guide you through some of the most common changes.
After you have installed VM, there are several configurations you will likely perform to customize the application for your organization’s processes.
This page outlines the order we recommend for configuring the default application to work for your organization after installing VM. However, all of these instructions can be used to modify the application at any time.
Updates in Appian Designer should be done with caution by someone familiar with Appian development.
Step 1: Configure user groups and securityCopy link to clipboard
Configuring user groups and security is a good place to start.
You will need to know:
- If your organization has any additional business roles that are not covered in the default business groups.
- What users should be members of each business group.
For more information on groups and security, see Groups Reference Page.
Step 2: Configure set up opportunity management processCopy link to clipboard
You can modify the solution to fit your organization's processes and data requirements by configuring fields, labels, and document templates.
Configure fields and UI textCopy link to clipboard
It is likely certain fields and UI text throughout the set up process will not exactly match your organization's terms. You can configure a number of them.
The following fields and UI text are configurable:
- Accept and Reject buttons.
- Contracting personnel labels.
- Tasks and Approach item labels.
Configure document templatesCopy link to clipboard
The solution provides an example document template that will not exactly match your organization's templates. You can add your own templates into VM.
You will need to know:
- What templates are needed
- What type of document the template is
Each document template will need to be added to a knowledge center. Add each template to the document template reference table as described on the Reference Data Tables page.
Step 3: Create opportunity approachCopy link to clipboard
After you have configured your application, you can create the opportunity approach to be used during the opportunity management process. The opportunity approach determine which tasks will be assigned by default for each new opportunity that is set up.
You will need to understand your organization's current opportunity processes including:
- What phases of the opportunity can occur.
- The distinct types of opportunities that have a standard set of tasks.
- All of the tasks required to complete the various types of opportunities.
- What types of tasks your organization will need.
- Which business groups are responsible for each task.
- What tasks rely on other tasks to be completed first.
- What timeframe does the task start in the opportunity management process.
When users create new tasks, they can choose from: Create Document from Template, Attach Document, Review, or Confirmation.
Step 4: Set up SAM.gov integrationCopy link to clipboard
Vendor Management comes with an integration to SAM.gov, which allows you to retrieve vendor data from the SAM.gov website. In order to set up this integration, you will need to register for a key from SAM.gov and configure the application to use the key provided. This section provides instructions for registering for your key and configuring your application.
Caution: If you do not plan to use this integration, you must toggle the AS_VM_BOL_IMPORT_FROM_SAMGOV_TOGGLE constant value to False in Designer.
Register for SAM.gov keyCopy link to clipboard
To set up this integration, you will need to register for an API key:
- Navigate to Sam.gov.
- Create a new account by choosing to sign up.
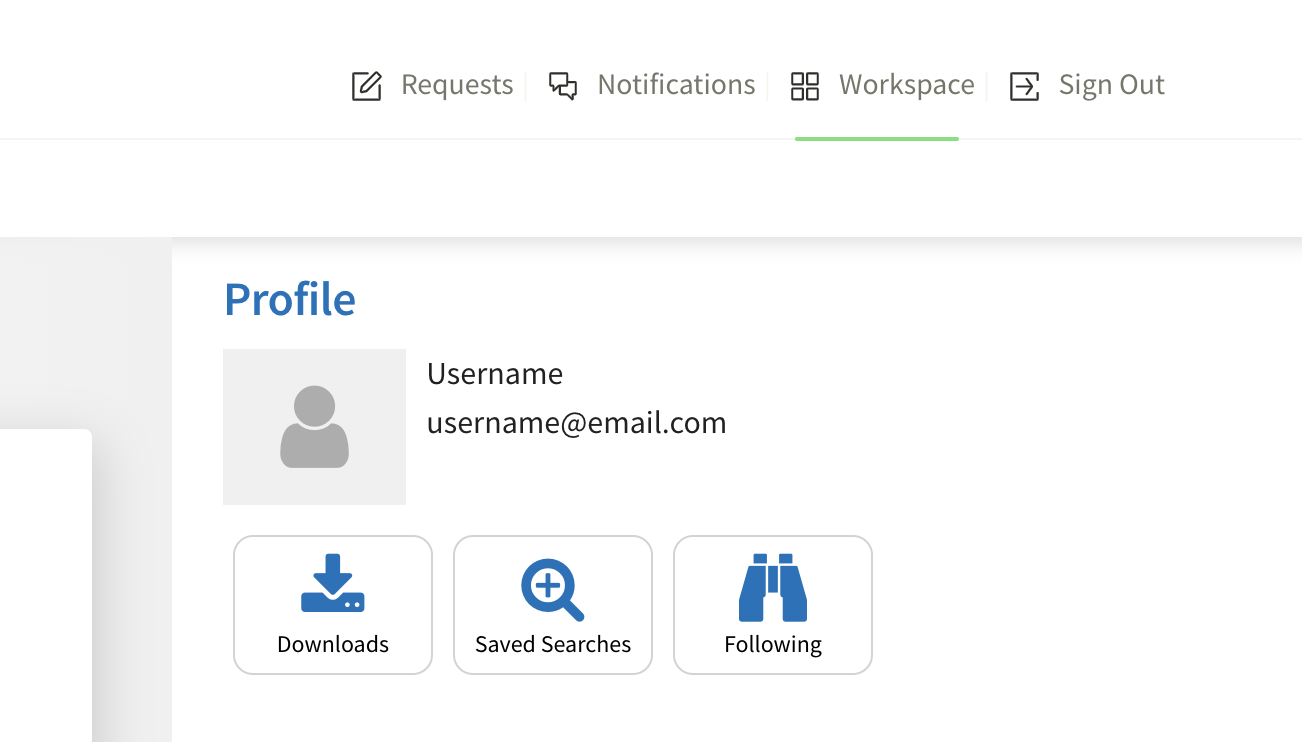
- Go to the Workspace tab.
-
Select the Profile link above your user name and icon.

- You can then request an API key. Copy this API key when it is generated.
Configure applicationCopy link to clipboard
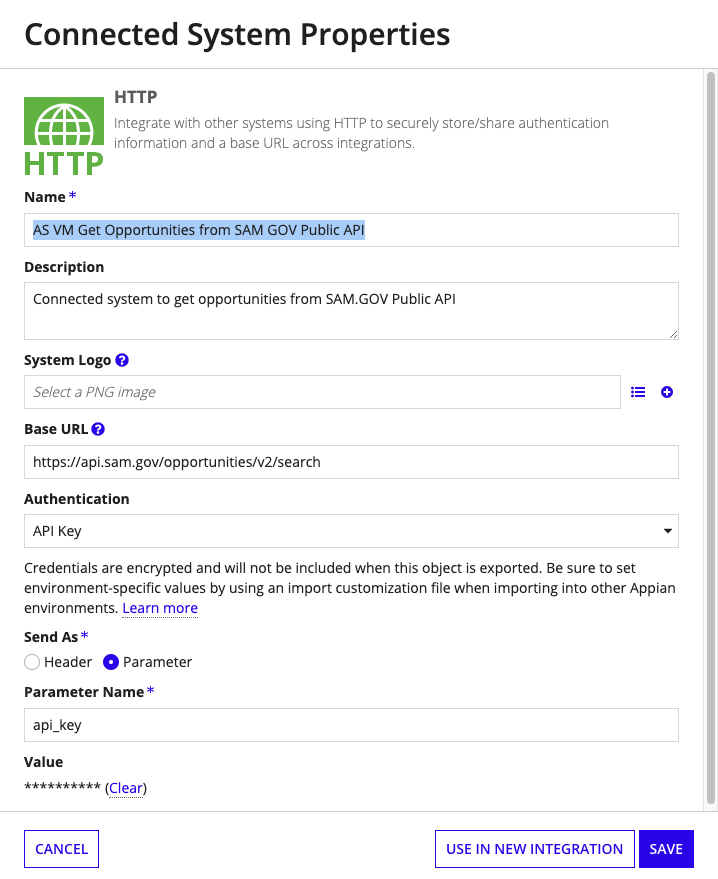
After receiving your email from SAM.gov, you will need to configure your application to use the saved API key.
- Access your Appian Designer.
- In your application, select
AS VM Full Application. - On the left side under object type, select Connected System.
- Select
AS VM Get Opportunities from SAM GOV Public API. - Find the Value field and click the Clear link next to it.
- In the cleared Value field, paste the saved API key.
-
Click SAVE.

Step 5: Set up SLG or Federal toggleCopy link to clipboard
Note: The VM solution will be either Federal specific or State and Local Government (SLG) specific depending upon this customization. Appian recommends performing this customization as a one-time activity after the VM solution is installed.
You can customize the type of registration for your vendors depending on whether you are a federal or state agency. When vendors register themselves, they will be defaulted to the type of registration you configured.
Go to Enable or disable State and Local Government Toggle to learn more about enabling or disabling the SLG toggle.
