| This content applies solely to Connected Underwriting, which must be purchased separately from the Appian base platform. This content was written for Appian 22.4 and may not reflect the interfaces or functionality of other Appian versions. |
After installing Connected Underwriting, there are several configurations you will likely perform to customize the solution for your organization's processes. In order to make sure your solution remains flexible and aligns with best practices, we have provided instructions to guide you through some common configurations.
This page outlines the order we recommend for configuring the default solution to work for your organization after completing the installation process. However, all of these instructions can be used to modify the solution at any time.
Note: Updates in Appian Designer should be done with caution by someone familiar with Appian development.
To make sure you always have the default interfaces, expression rules, and process models to refer back to, we suggest performing the following steps if you need to customize the solution:
AS_IO_FM_UnderwritingSummary_CUSTOM.Note: Do not create copies CDTs. This would require you to update every reference to the CDT throughout the application. Instead, modify the default CDTs provided in the application.
Following this paradigm will reduce the time and effort required to upgrade or add an additional solution to your environment.
Configuring user groups and security is a good place to start. You will need to know:
For more information on how to configure groups and security, see the following pages:
Note: The email poller pulls files and emails directly from your Outlook inbox. It is important to ensure security best practices such as virus scanning are correctly configured in Outlook before installing the plugin to your environment.
For Connected Underwriting inbound email polling to function properly, an email account must be created. Follow the steps below to create a new MS accounts and share credentials.
Note: One inbox should be created for each Appian environment. The following steps must be completed for each inbox.
To create an inbox for inbound email polling:
It is recommended to import the included Connected Underwriting Admin Console .zip package and import customization properties file prior to configuring the integration credentials. Details can be found in the Installing CU document.
After admin console import, the following steps can be repeated to change credentials:
isu-mail-poller-msgraph.customMailPollerTableName and customMailPollerDocTableName unless you intend to modify the Appian Poller table names (not recommended).ISU_EMAIL_POLLER_CONF_TEXT_MAILBOX. Update this constant to match the full email address that will be polled (i.e. test@microsoft.com).For additional support on the Microsoft Email Poller, visit the MS Graph Poller on Appian Community.
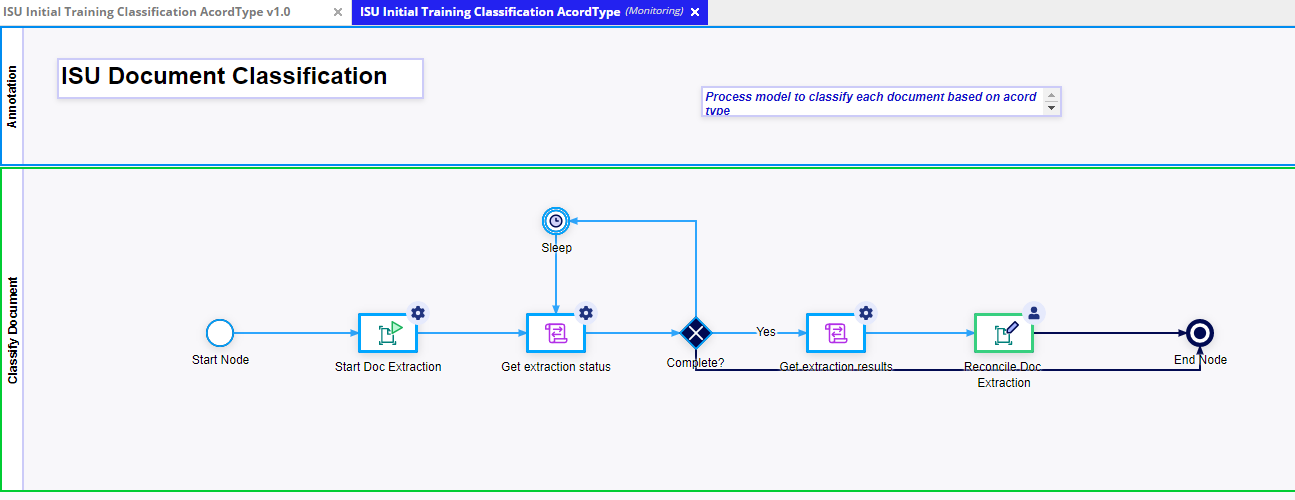
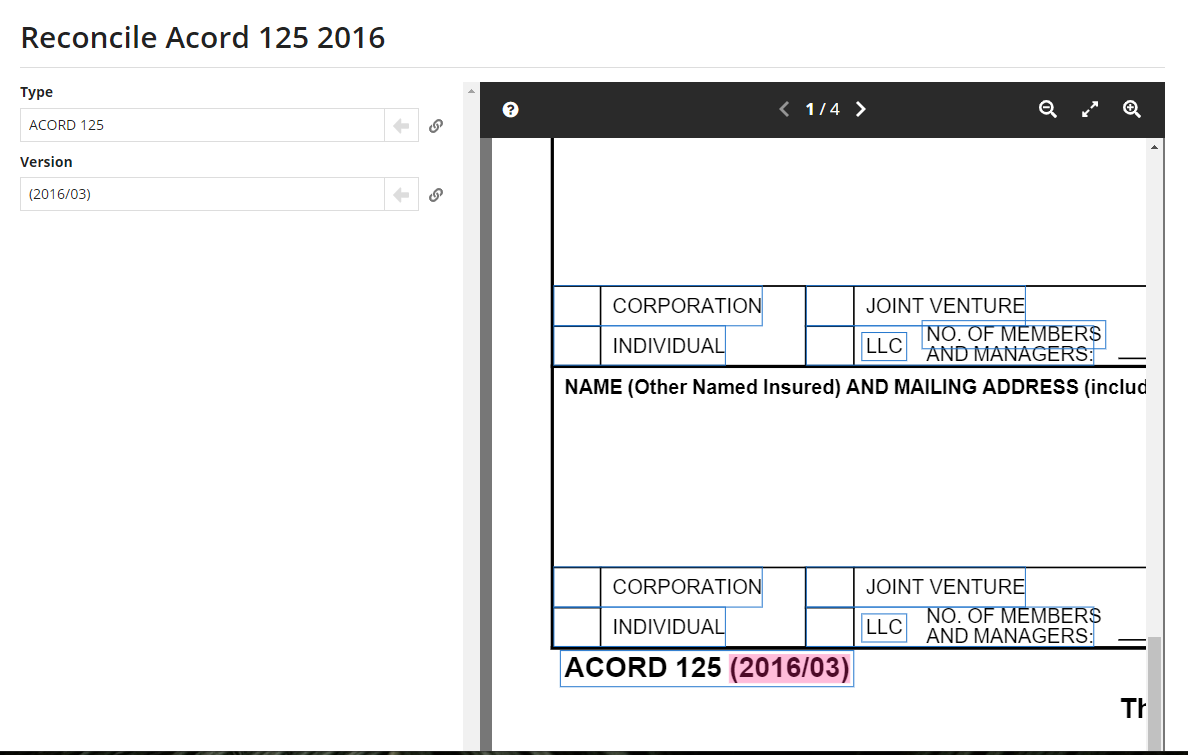
Connected Underwriting uses Appian Native Intelligent Document Processing (IDP) Extraction capabilities to quickly classify extractable documents and then extract key data to save into the Submission. The solution supports extraction of key fields in the ACORD 125, ACORD 140 and ACORD 127 forms.
Note: Connected Underwriting provides IDP extraction support for up 125K documents per month. If you expect to exceed this document extraction threshold, contact Appian Support for assistance.
Upon installation, users with Designer access should run the ISU Initial Training Classification AcordType process model and complete the task to classify the form. This task only needs to be completed once.
To run this process model:
After installing Connected Underwriting, business users can set up their scoring tables and submission score rules so that their submissions can have a score to help underwriters evaluate and triage what to focus on. To set up scoring tables and the submission score rules, please review Configure Submission Score and Scoring Tables.
There may be additional fields your organization would like to use with the Submission Score rules and scoring tables, or your organization may want to relabel some fields. For instructions on how to modify those fields, see the following pages:
You can migrate data like customer and broker information into Connected Underwriting from other systems that your organization is using. This process is generally very unique and has its own nuances that depend on many factors.
Migrating Customer and Broker Data provides the general steps to move customers, and broker data into Connected Underwriting.
The Connected Underwriting solution provides a native integration with Microsoft PowerBI, allowing users to connect their customer data and reports directly with their CU solution. When you configure the PowerBI connected system, users can easily surface historical claims information related to your submission records and other information from downstream processes directly in the CU solution.
See Integrating with Microsoft PowerBI for information on configuring this connected system.
Setting Up Connected Underwriting
