| This content applies solely to Connected Underwriting, which must be purchased separately from the Appian base platform. This content was written for Appian 22.4 and may not reflect the interfaces or functionality of other Appian versions. |
The Connected Underwriting solution provides the ability to integrate with the following applications:
Verifying a customer's identity for a new submission is an important part of the underwriting process. Connected Underwriting helps to automate part of this process by integrating with the OFAC Consolidated Screening List API from Trade.gov. This is an optional integration that requires you to complete the OFAC prerequisites in Appian Designer. See Prerequisites for more information.
This integration searches customer names against eleven export screening lists of the Departments of Commerce, State, and Treasury to help institutions screen potential parties to regulated transactions. After completing the prerequisites, you can use the integration to run sanctions checks in your Connected Underwriting solution.
If you want to make additional changes to your OFAC integration, see Modifying OFAC Integration for additional customization options.
The OFAC Consolidated Screening API is a free, public API. In order to use the service, your organization must generate access tokens. Simply, subscribe to the Consolidated Screening List API to obtain an access token.
Once you have your OFAC authentication information:
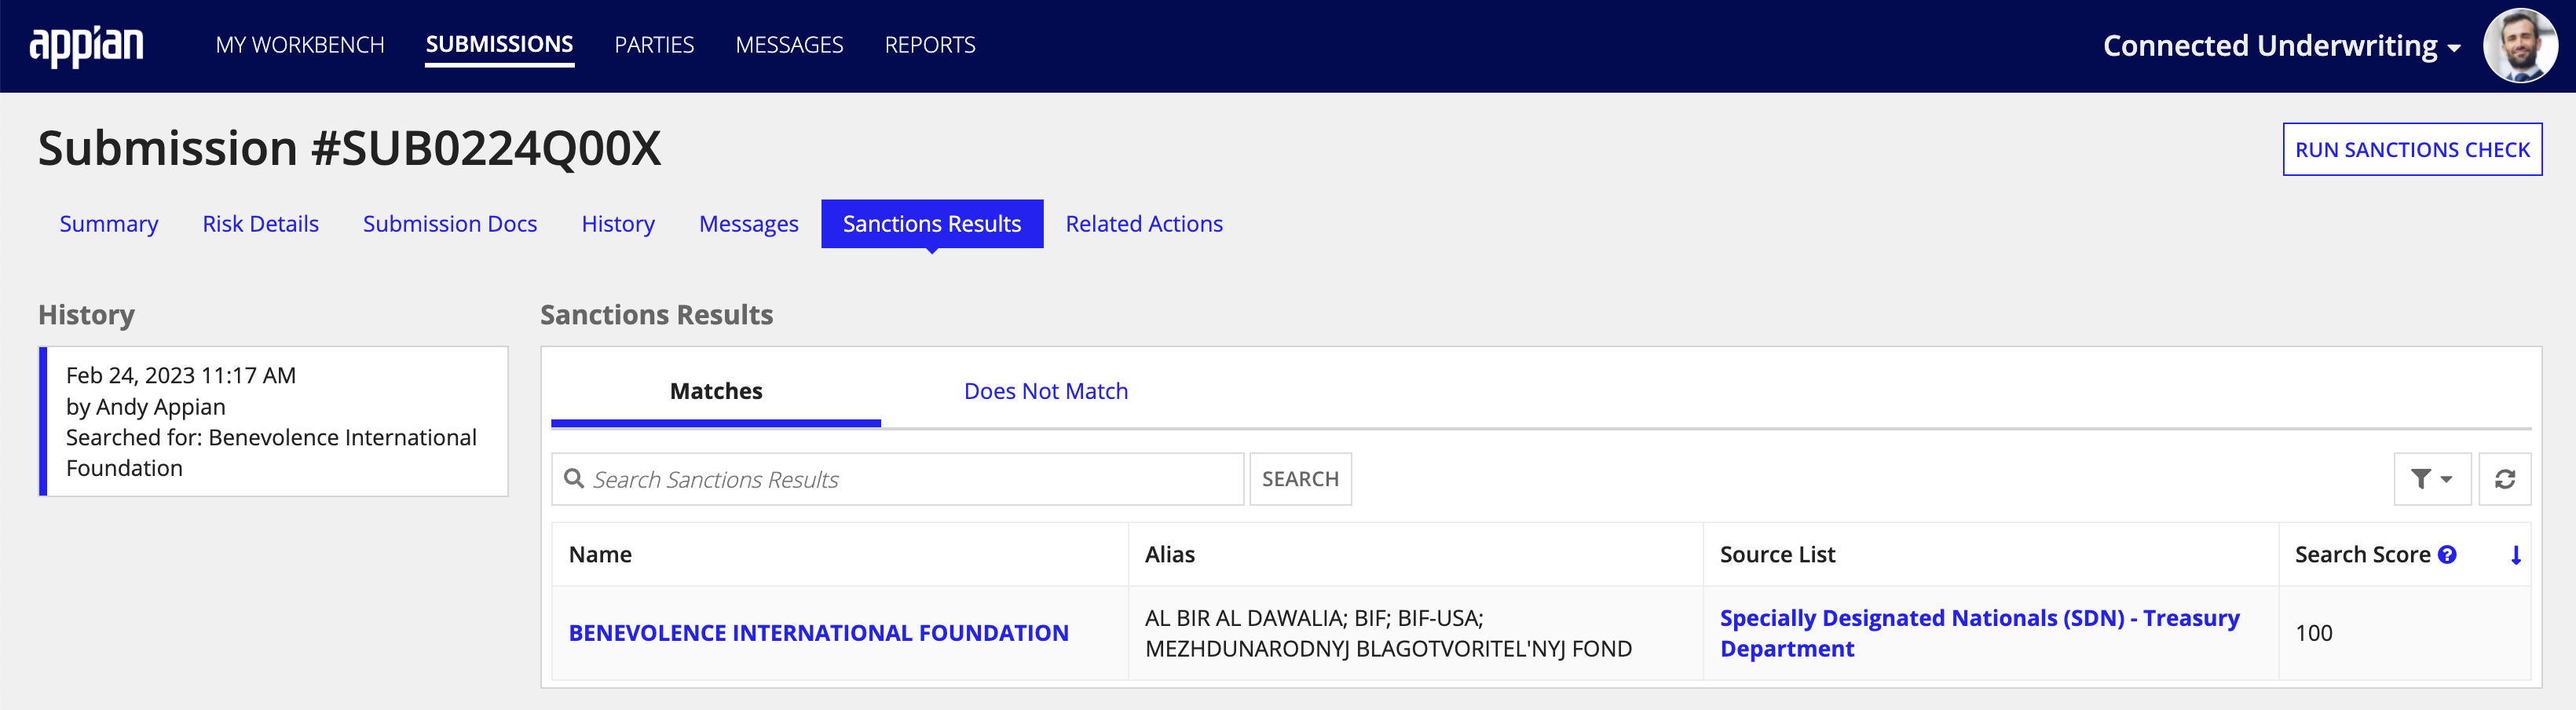
ISU Trade.Gov Consolidate Screening connected system.The OFAC integration uses the customer's name to search against the OFAC consolidated screening list. An OFAC check is completed with a Run Sanction Check task during review of submission.
Caution: There can be a time lag of up to one hour between the time a Source has updated a screening list and when that update appears in the Consolidated Screening List API.
A sanctions check task will be created automatically after a submission is created. The task will appear in the Tasks grid, which you can find on the related Submission record.
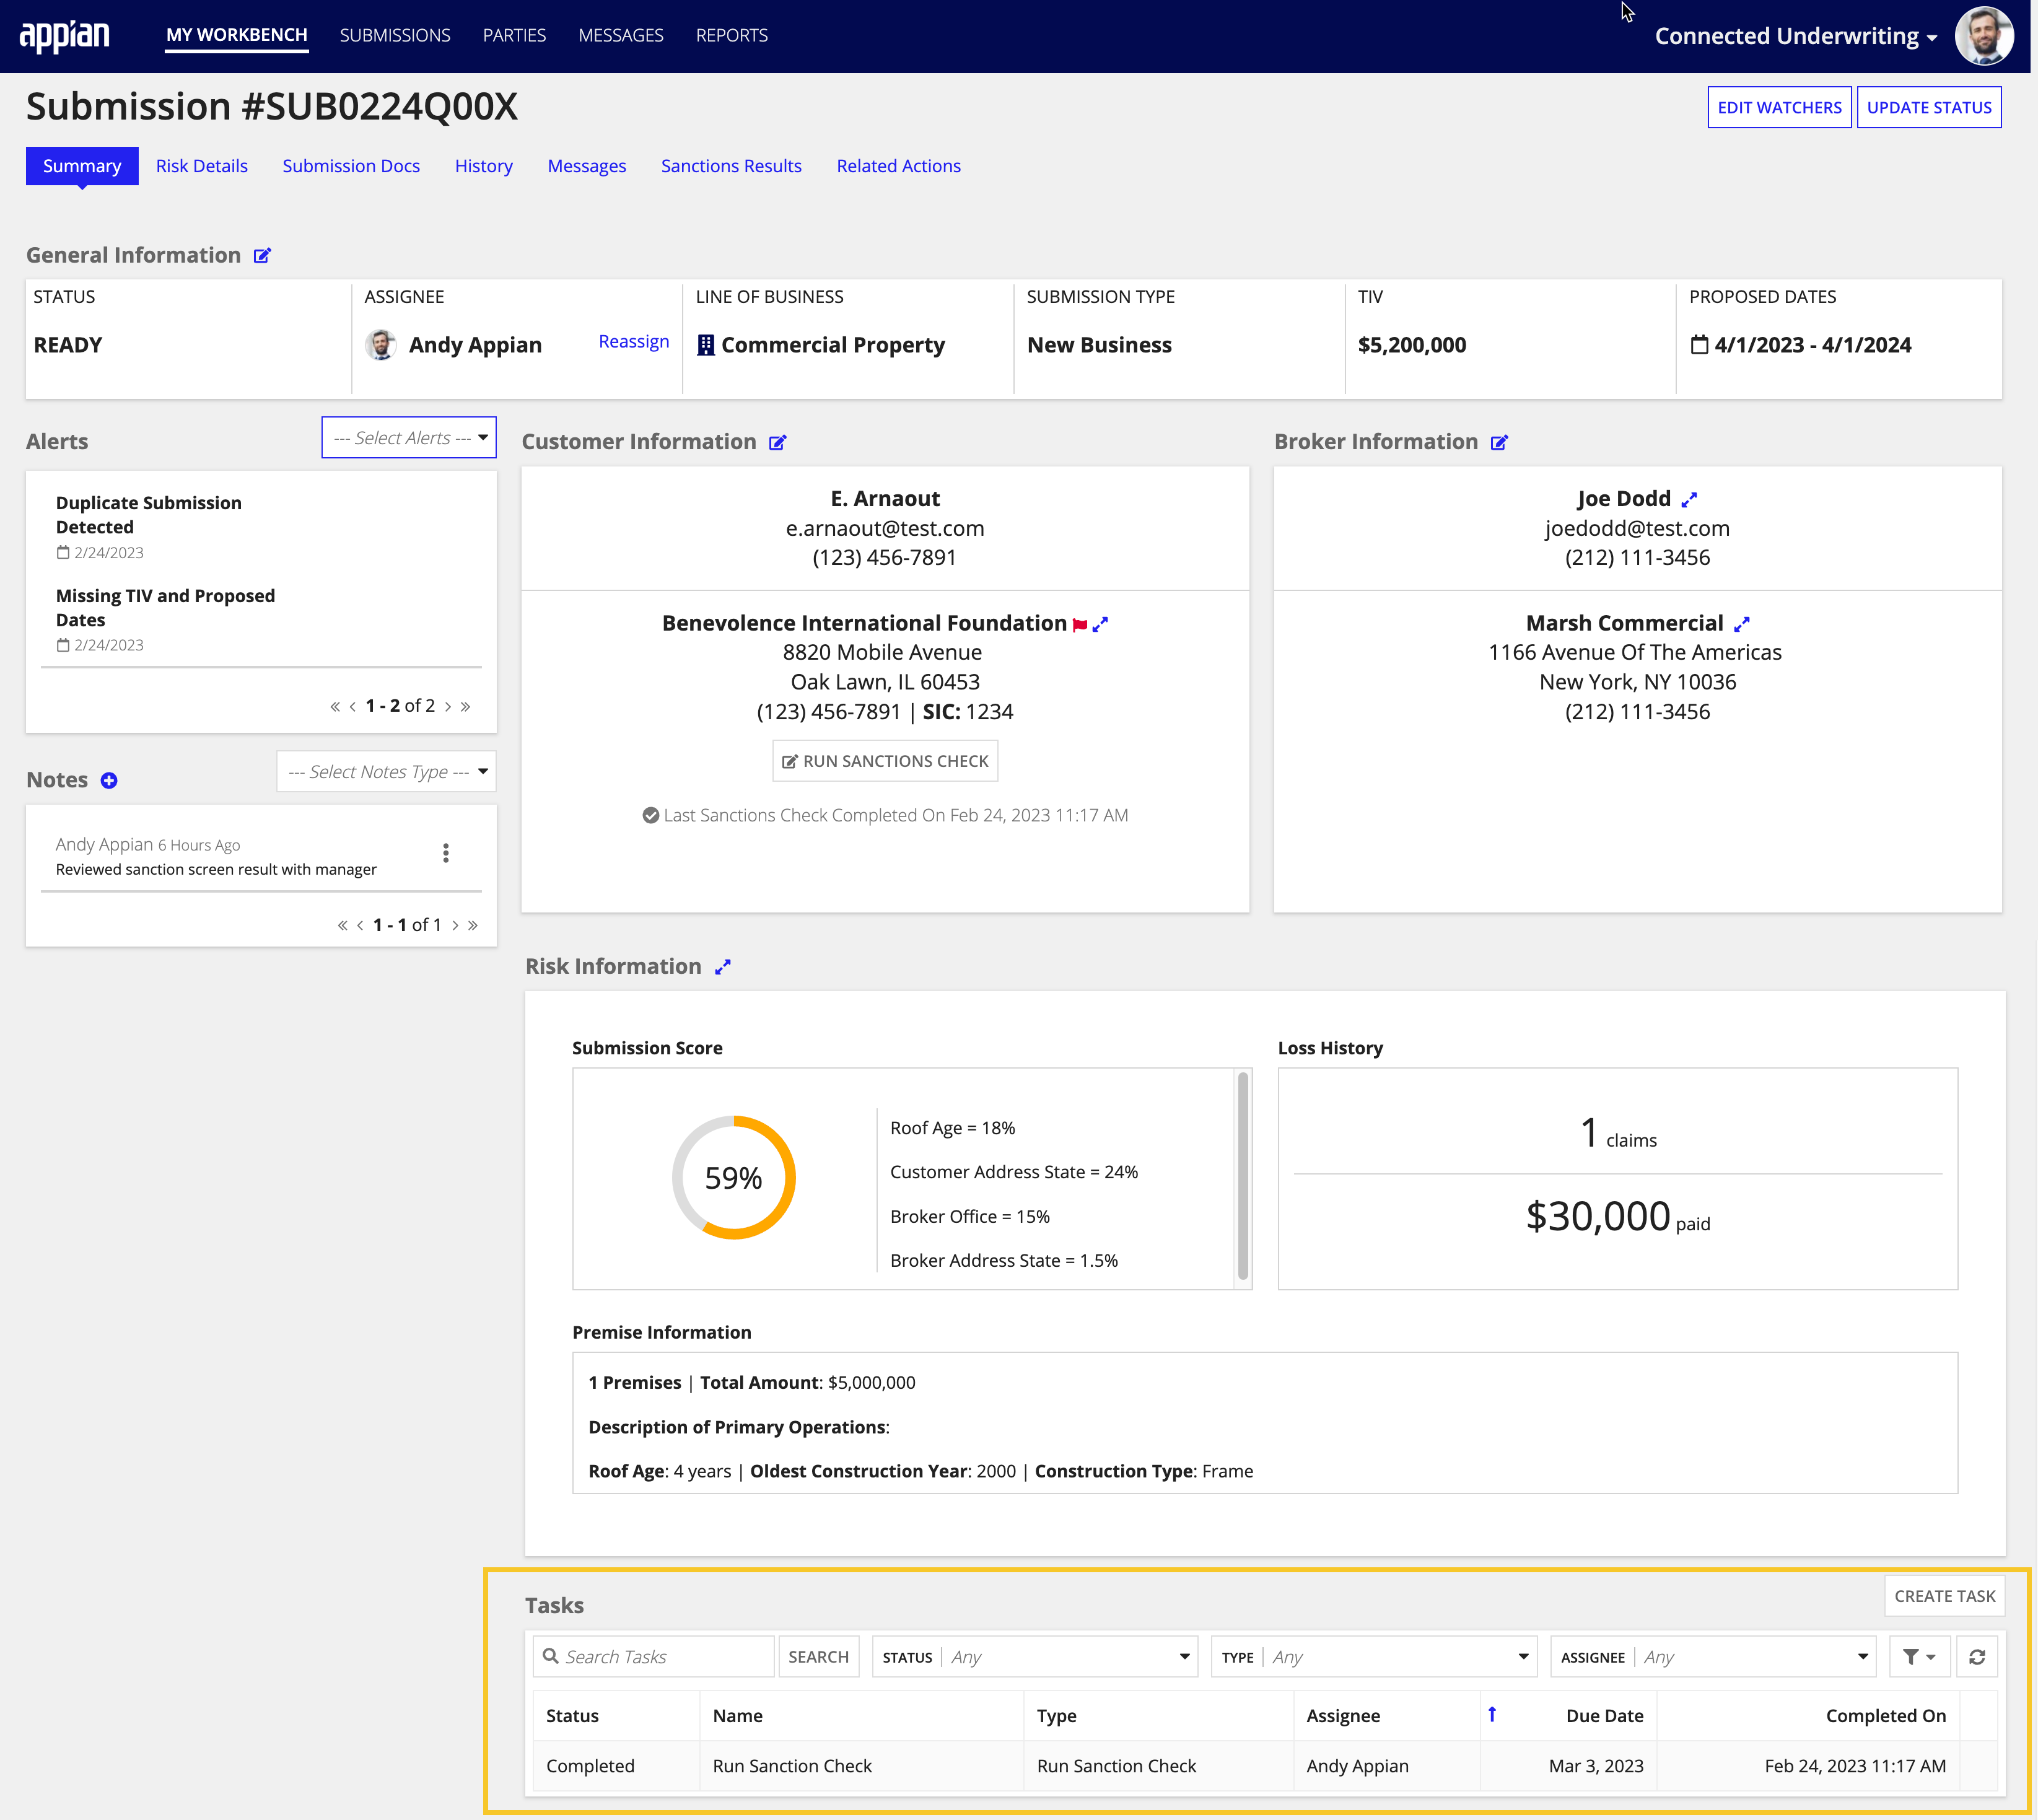
Once a user is assigned to a Submission, the sanctions check task will also be assigned to that user.
Caution: The Consolidated Screening List API is not the system of record for these screening lists. Users are strongly encouraged to refer to the website of the source agency for further instructions when finding a potential match.
To resolve a Run Sanction Check task:
If a party matches the party name on the consolidated list, the user must check the official publication of restricted parties in the Federal Register or the official lists of restricted parties maintained on the Departments of Commerce, State and the Treasury websites to ensure compliance with the restrictions terms and conditions placed on the parties.
Links to additional details for parties on Specially Designated Nationals and Blocked Persons list ("SDN List") and all other sanctions lists administered by OFAC can be found in the Name field. This includes any of the following sanctions lists:
The Source List field that accompanies each party returned in the API also connects users to the specific webpage that contains additional information about how to use each specific list.
If a user selects relevant results while completing a sanctions check task, these results will be available for all users to view on both the customer and Submission records.
To view the relevant results from either the CUSTOMER or Submission record, click the Sanctions RESULTS tab. The selected results will be listed along with the details on this page.
Connected Underwriting integrates with Microsoft PowerBI to allow you to easily embed coherent, visually immersive, and interactive insights and enterprise-grade, real-time analytics. Easily pull in historical claims information that relates to your submission records and other information from downstream processes like policy quotes, bound policy decisions, and new policy record information.
The PowerBI plug-ins on the AppMarket deliver a connected system to easily access some of the most commonly used APIs, as well as Components to PowerBI’s embedded dashboards, tiles, reports, QnA components, and the Report Builder.
To use the Microsoft PowerBI plugin, you must configure the connected system first. By default, Connected Underwriting includes a connected system for PowerBI authentication using Client Credentials Flow (App Owns Data).
For alternative authentication methods, install and configure the Microsoft PowerBI Connected System Plugin or the Microsoft PowerBI Auth Code plugin and update the ISU_CS_POWER_BI constant to point to this new connected System. In addition, ISU_powerBiPortfolioReports must be updated to set the isAppDataConnectedSystem parameter of reportField to false.
To configure the Client Credentials connected system:
ISU_TXT_POWER_BI_GROUP_ID_PORTFOLIO_VIEW: Set this to the value of ISU_TXT_POWER_BI_REPORT_ID_PORTFOLIO_VIEW: Set this to the value of ISU_powerBiPortfolioReports.
ISU_powerBiPortfolioReports to call dashboardField() instead of the existing reportField(). In addition, replace ISU_TXT_POWER_BI_REPORT_ID_PORTFOLIO_VIEW with a new constant for DASHBOARD_ID. The underlying connected system configuration will remain unchanged.After you configure the connected system, you can use the Microsoft PowerBI plugin with your Connected Underwriting to surface your customer and underwriting claims data and reports in the solution by navigating to REPORTS > Portfolio View.
Caution: If ISU_TXT_POWER_BI_GROUP_ID_PORTFOLIO_VIEW is left null, you will not be able to view the Portfolio View tab under REPORTS.
Managing Integrations
