| This content applies solely to Connected Underwriting, which must be purchased separately from the Appian base platform. This content was written for Appian 22.4 and may not reflect the interfaces or functionality of other Appian versions. |
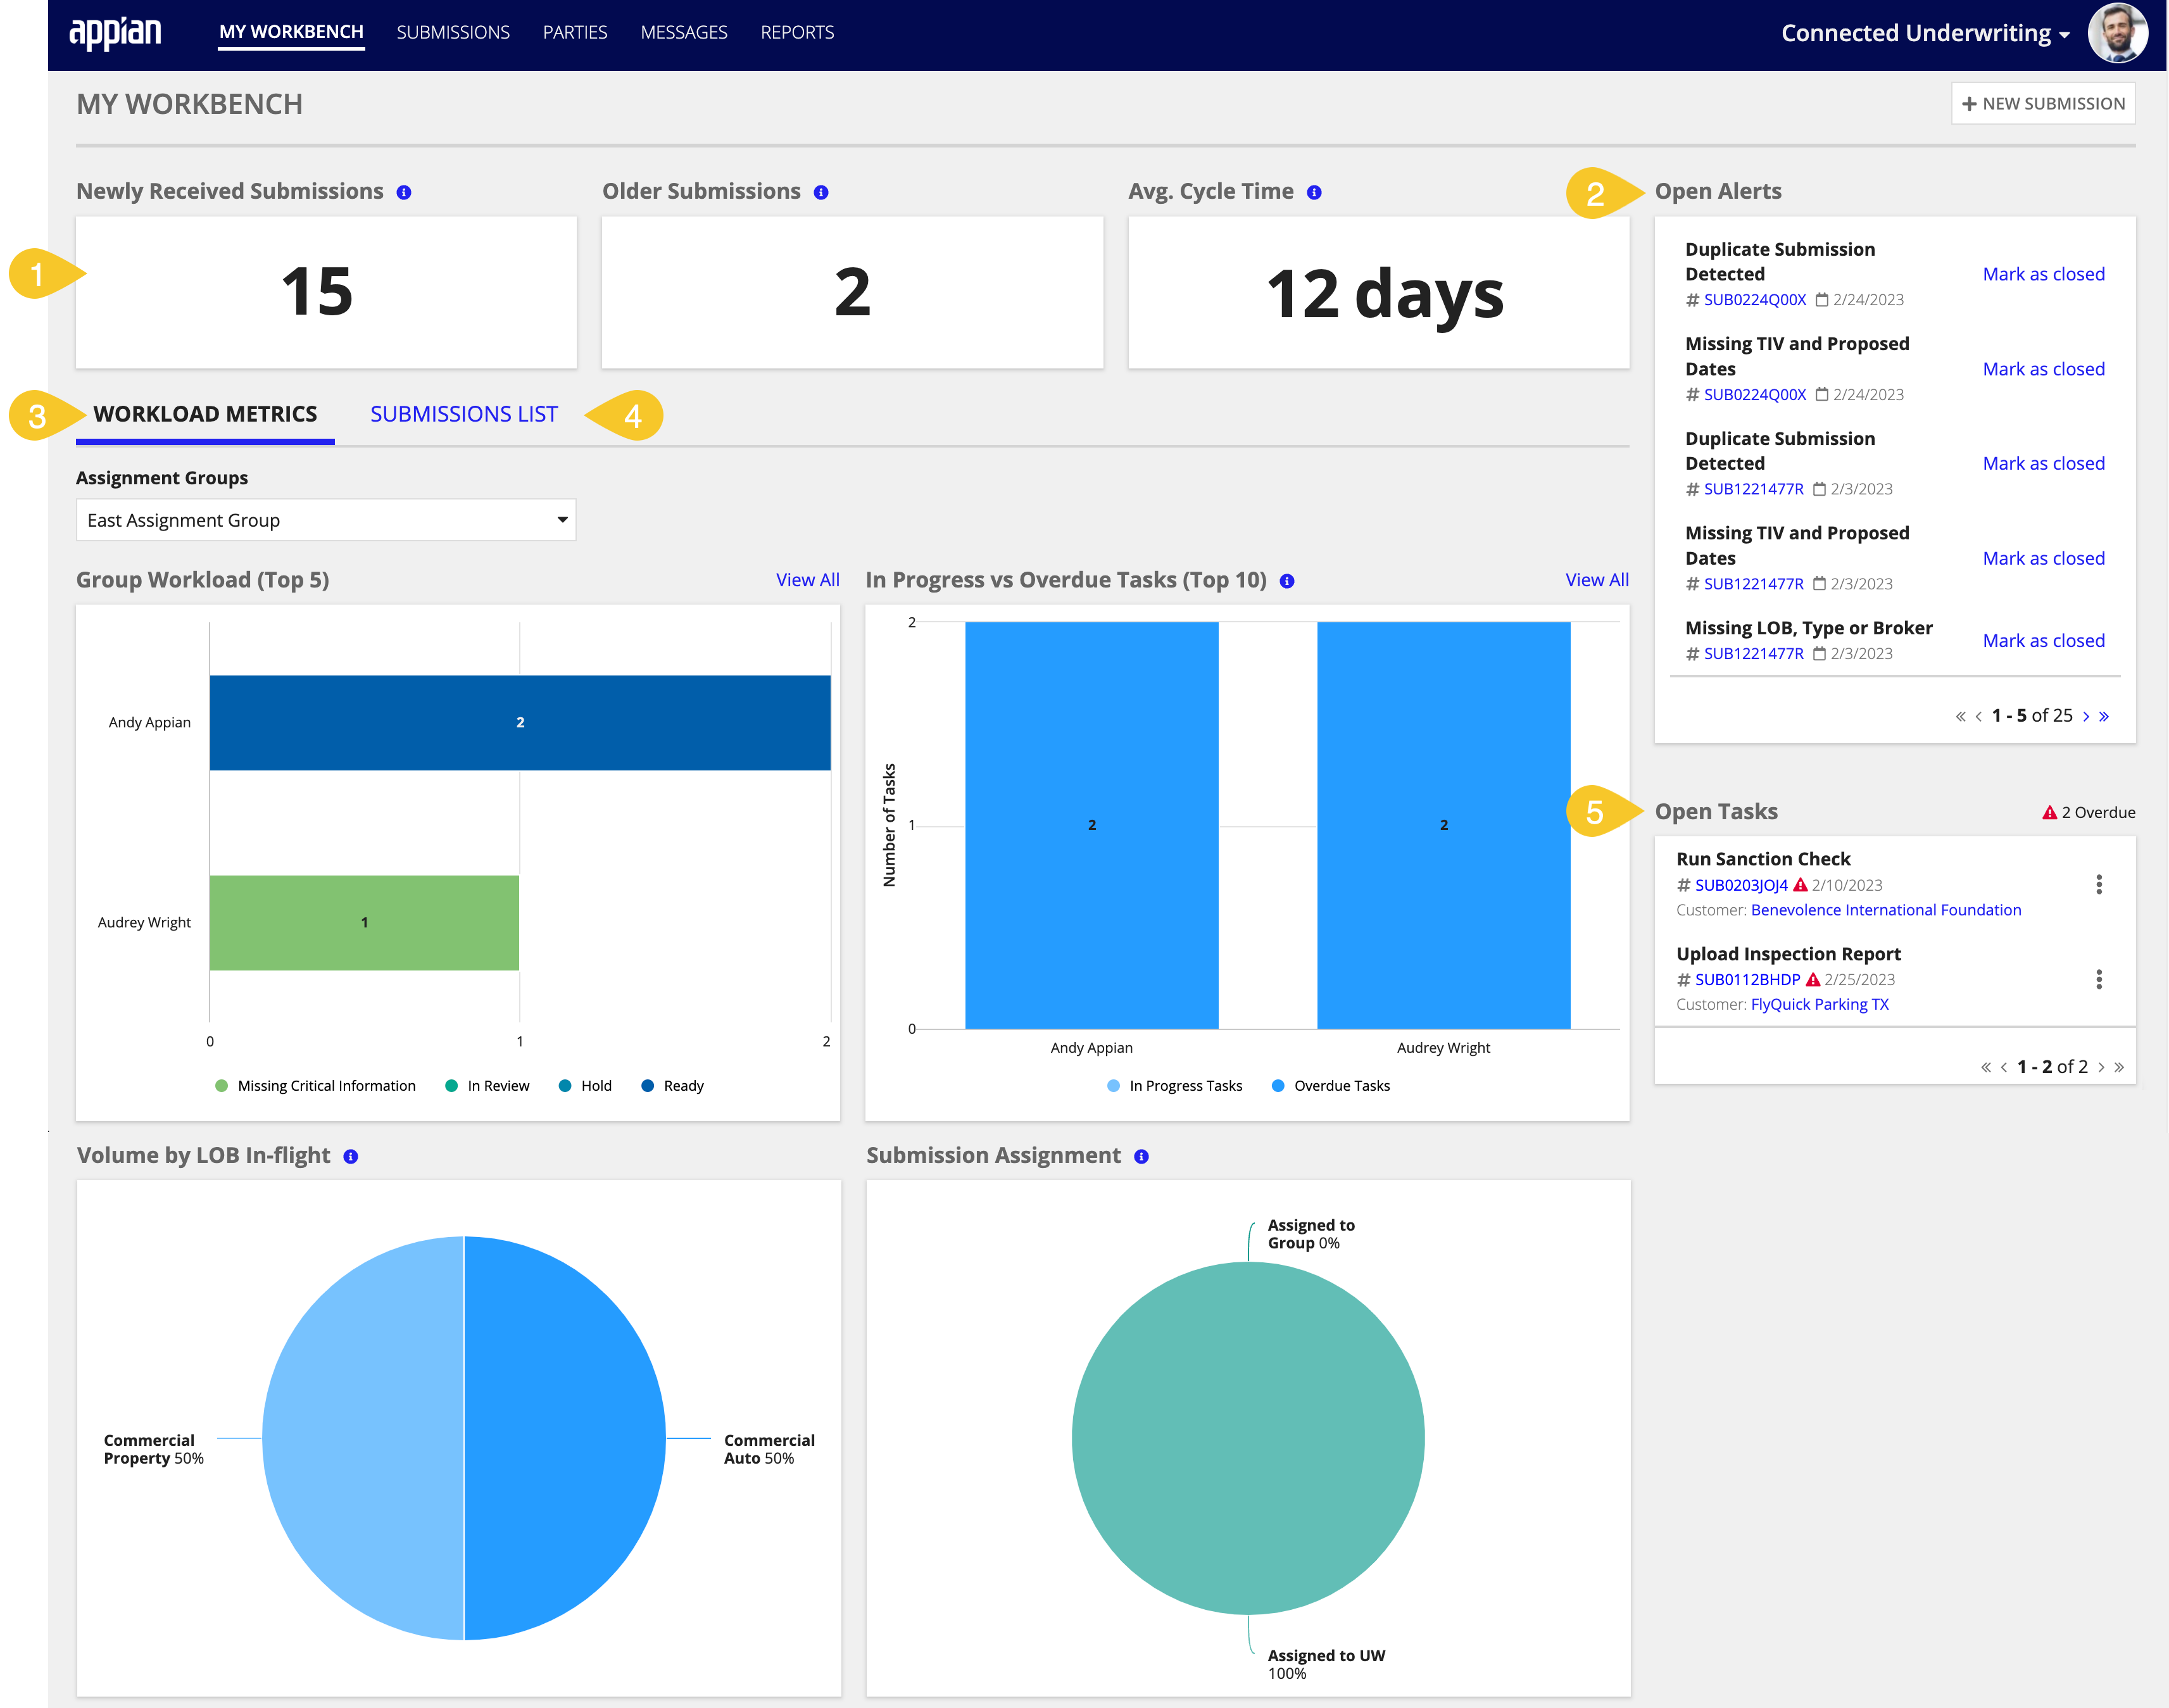
When you log in to Connecting Underwriting, MY WORKBENCH opens by default. From this page, underwriting managers can access all the information they need for the submission underwriting process because it provides a consolidated view of the following data:
Note that underwriters can view the Submissions List and Open Tasks only.
In addition, you can create a new submission, see a complete list of all of your submissions by category, and drill down into a specific submission to view more details.
At the top of MY WORKBENCH, you'll find key metrics about the submissions assigned to you divided into three categories:

The WORKLOAD METRICS tab allows you to view workload data for your various teams, providing visibility into how well your teams are performing in a specific area, including:
Use this data to quickly evaluate individual and team workload capacity, task performance, and your teams' success with meeting submission completion goals you've set for specific lines of business.
Use the Assignment Groups dropdown to switch between group views and see the workload metrics for a specific group.
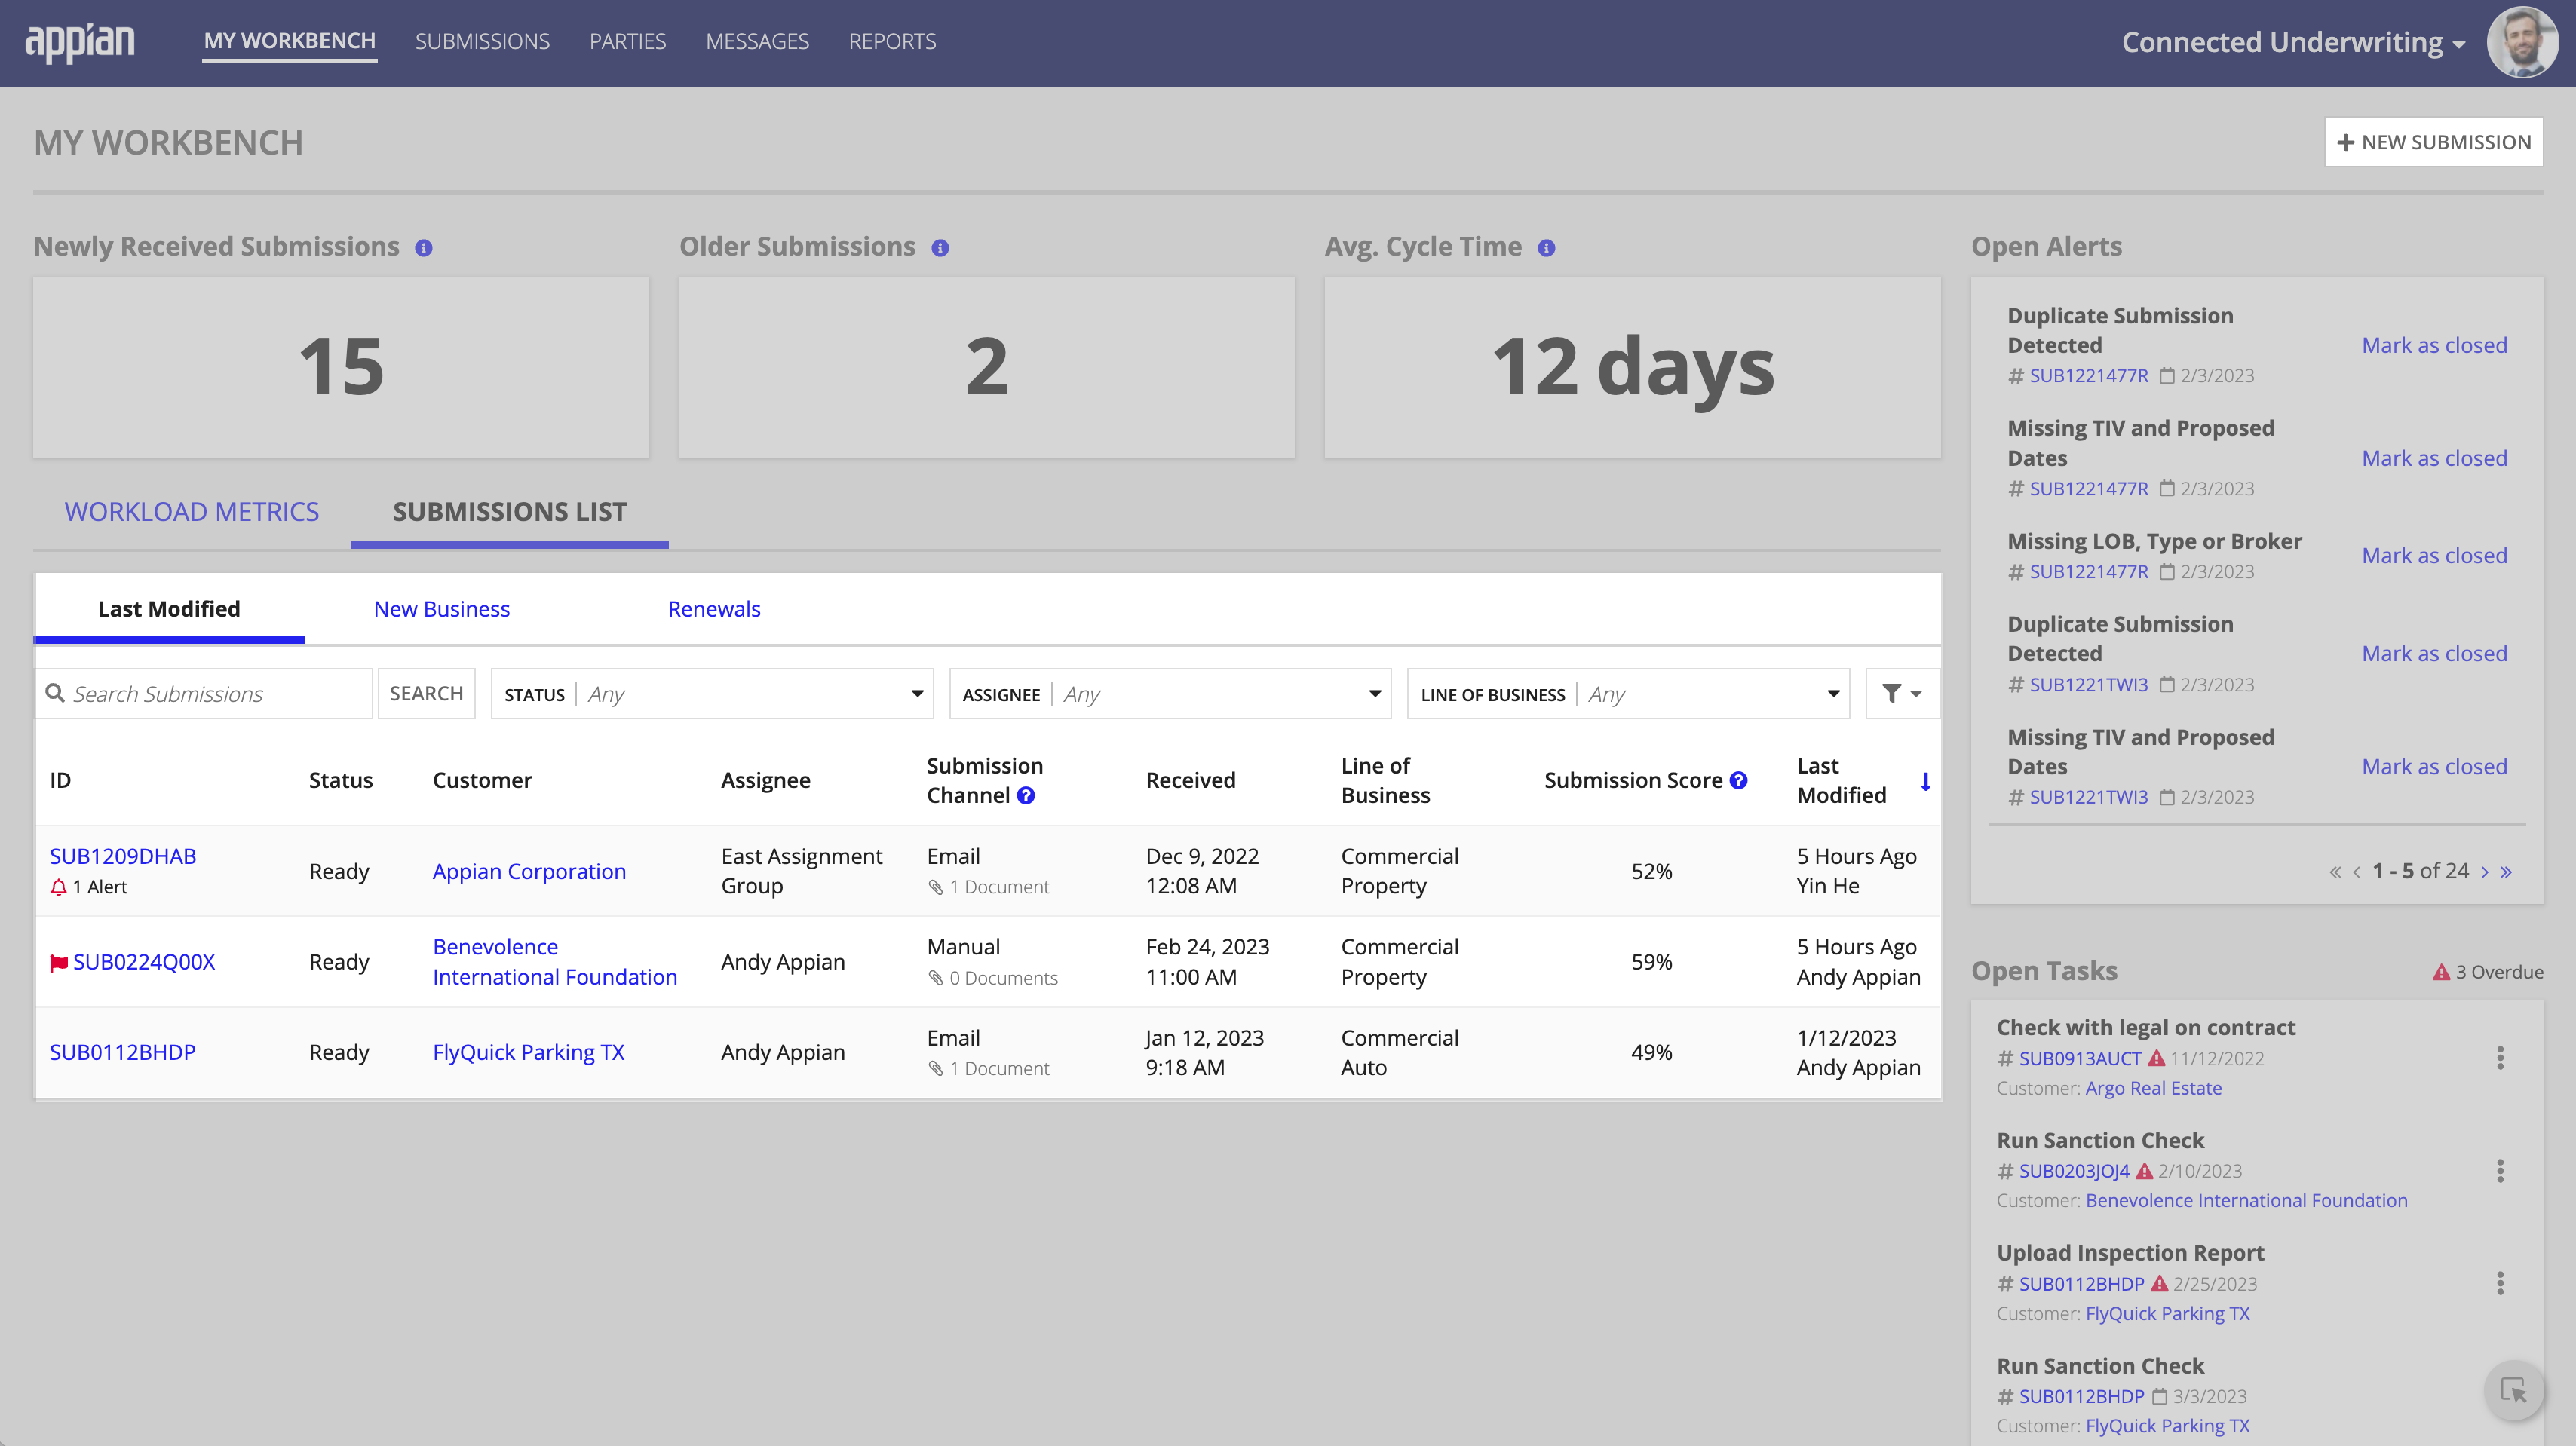
The SUBMISSIONS LIST displays all of the submissions assigned to you and organizes them in the following tabs:
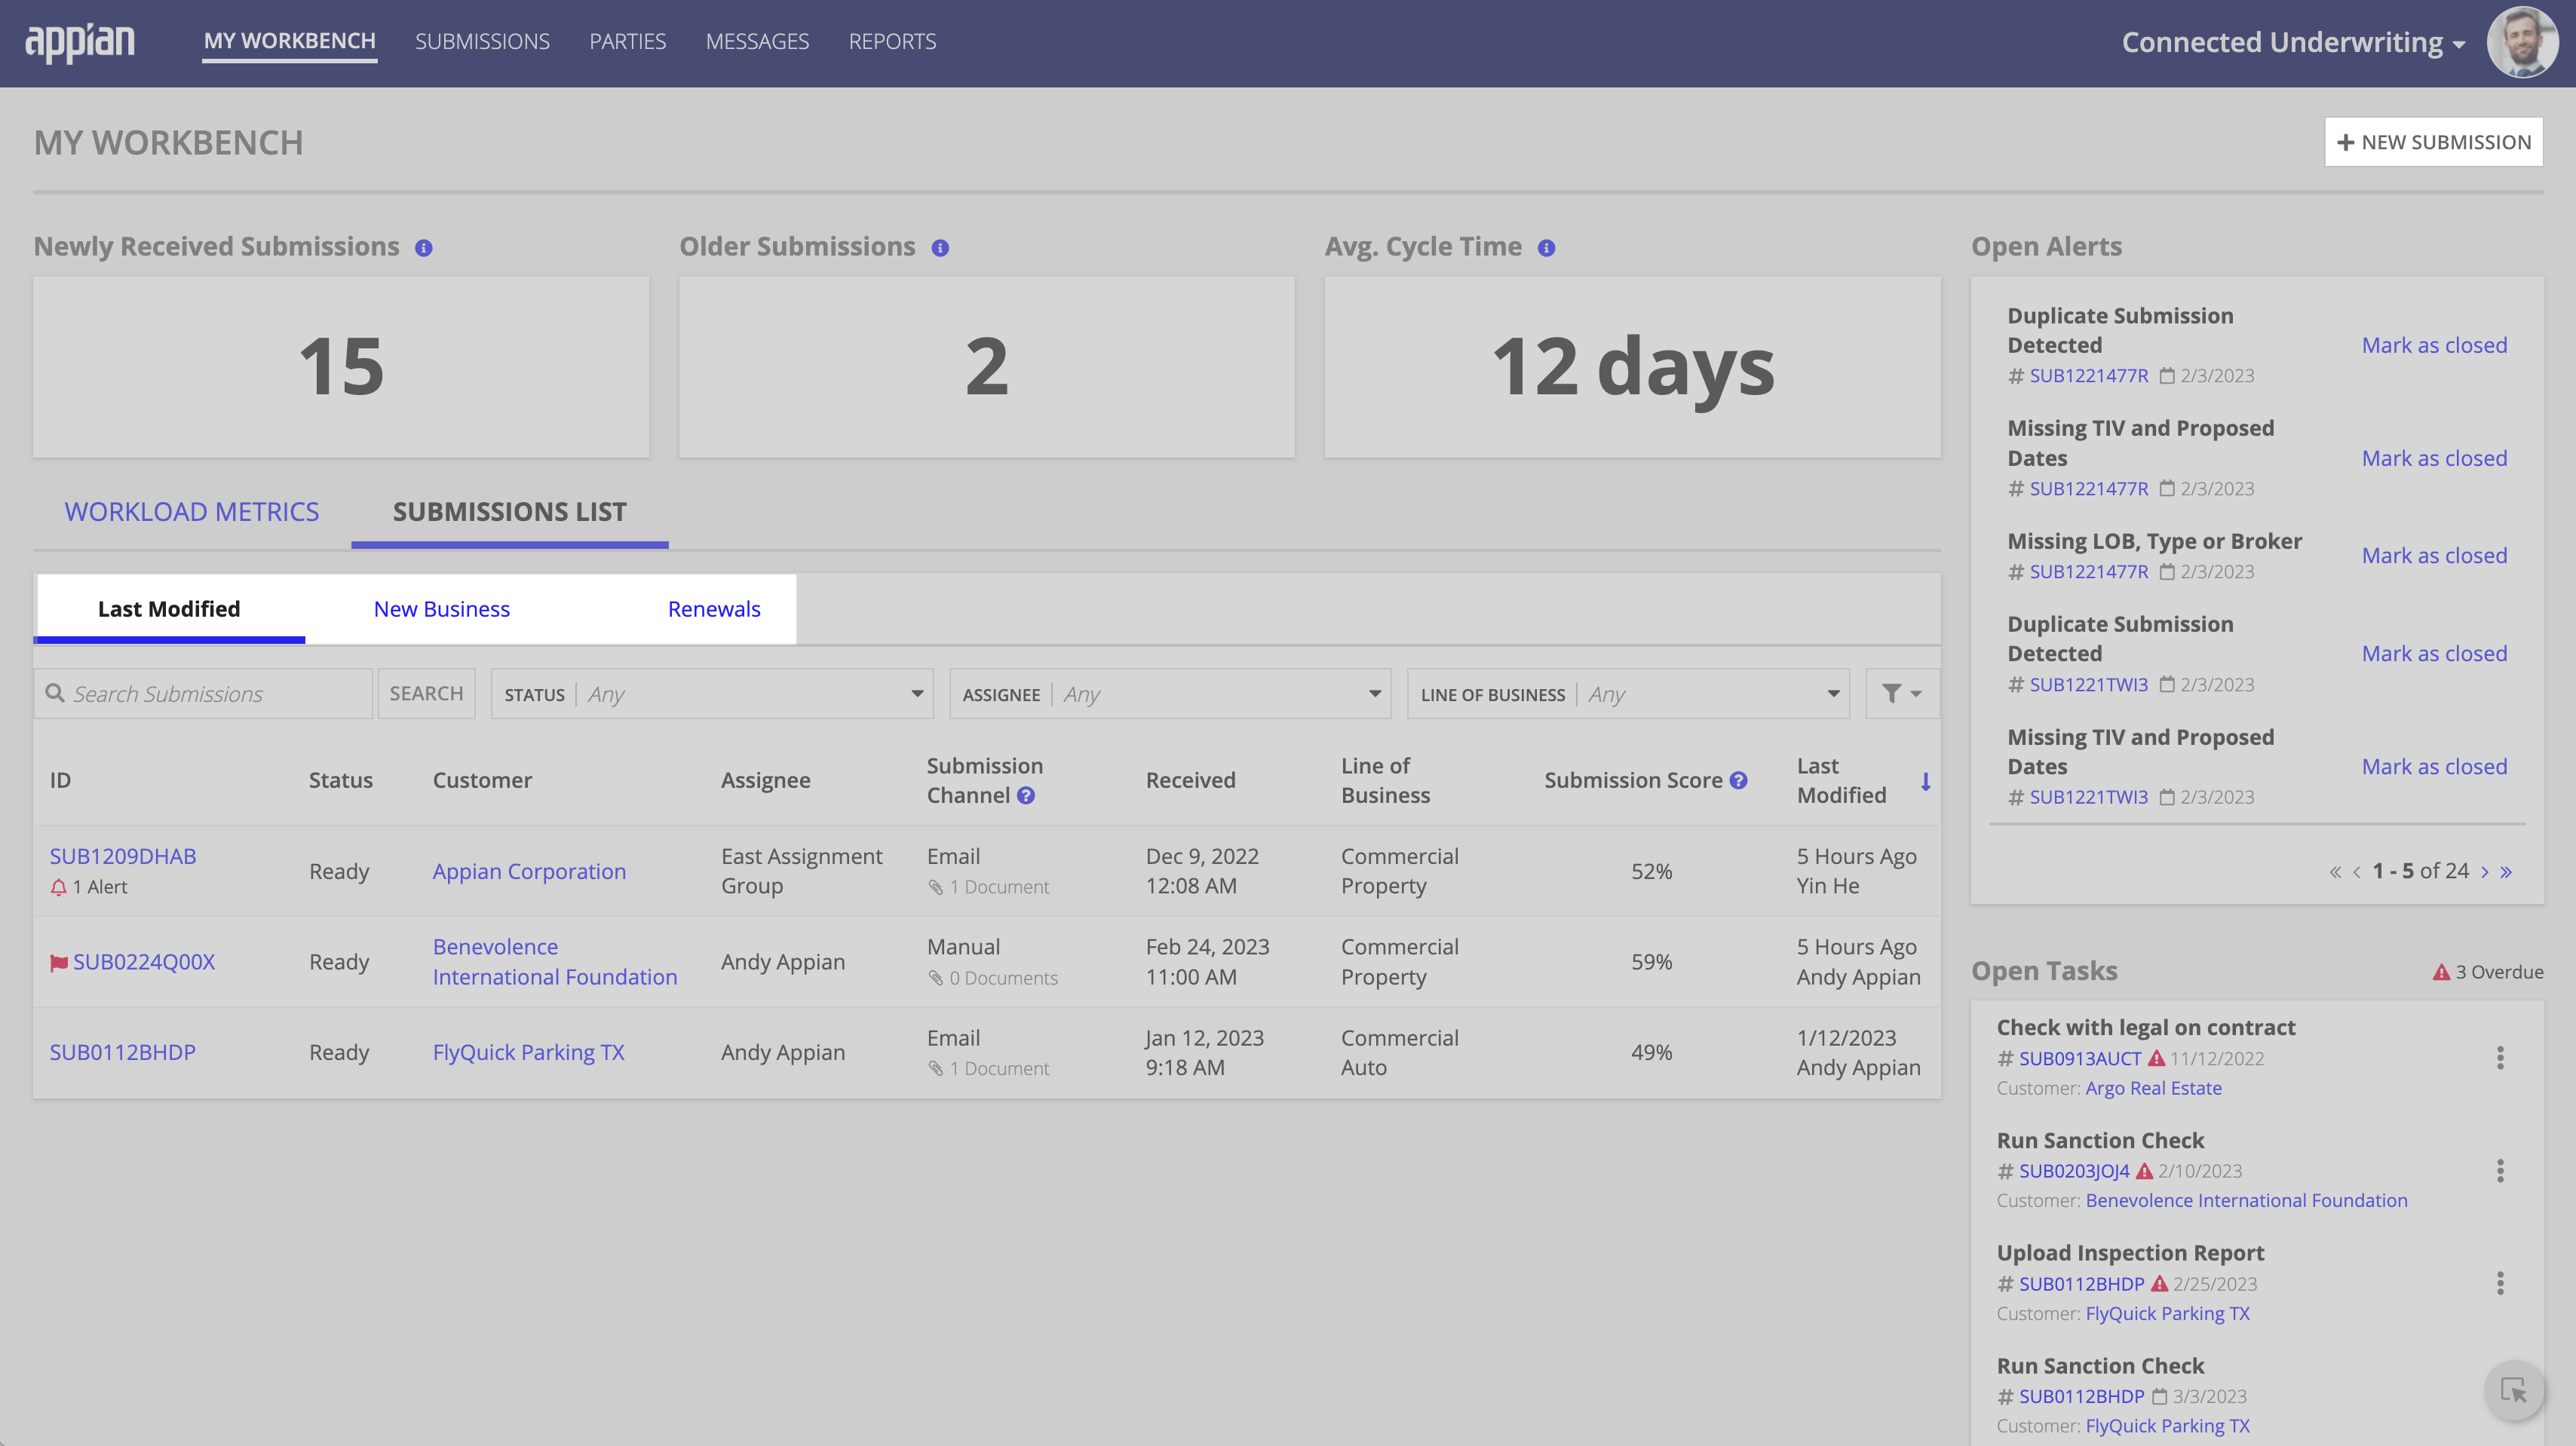
After selecting one of the SUBMISSIONS LIST tabs, you can view all your submissions for that category. You can also search or select one or more filters to return only the submission records you want to see from any SUBMISSIONS LIST tab. Filter options include:
STATUS: ASSIGNEE: LINE OF BUSINESS:
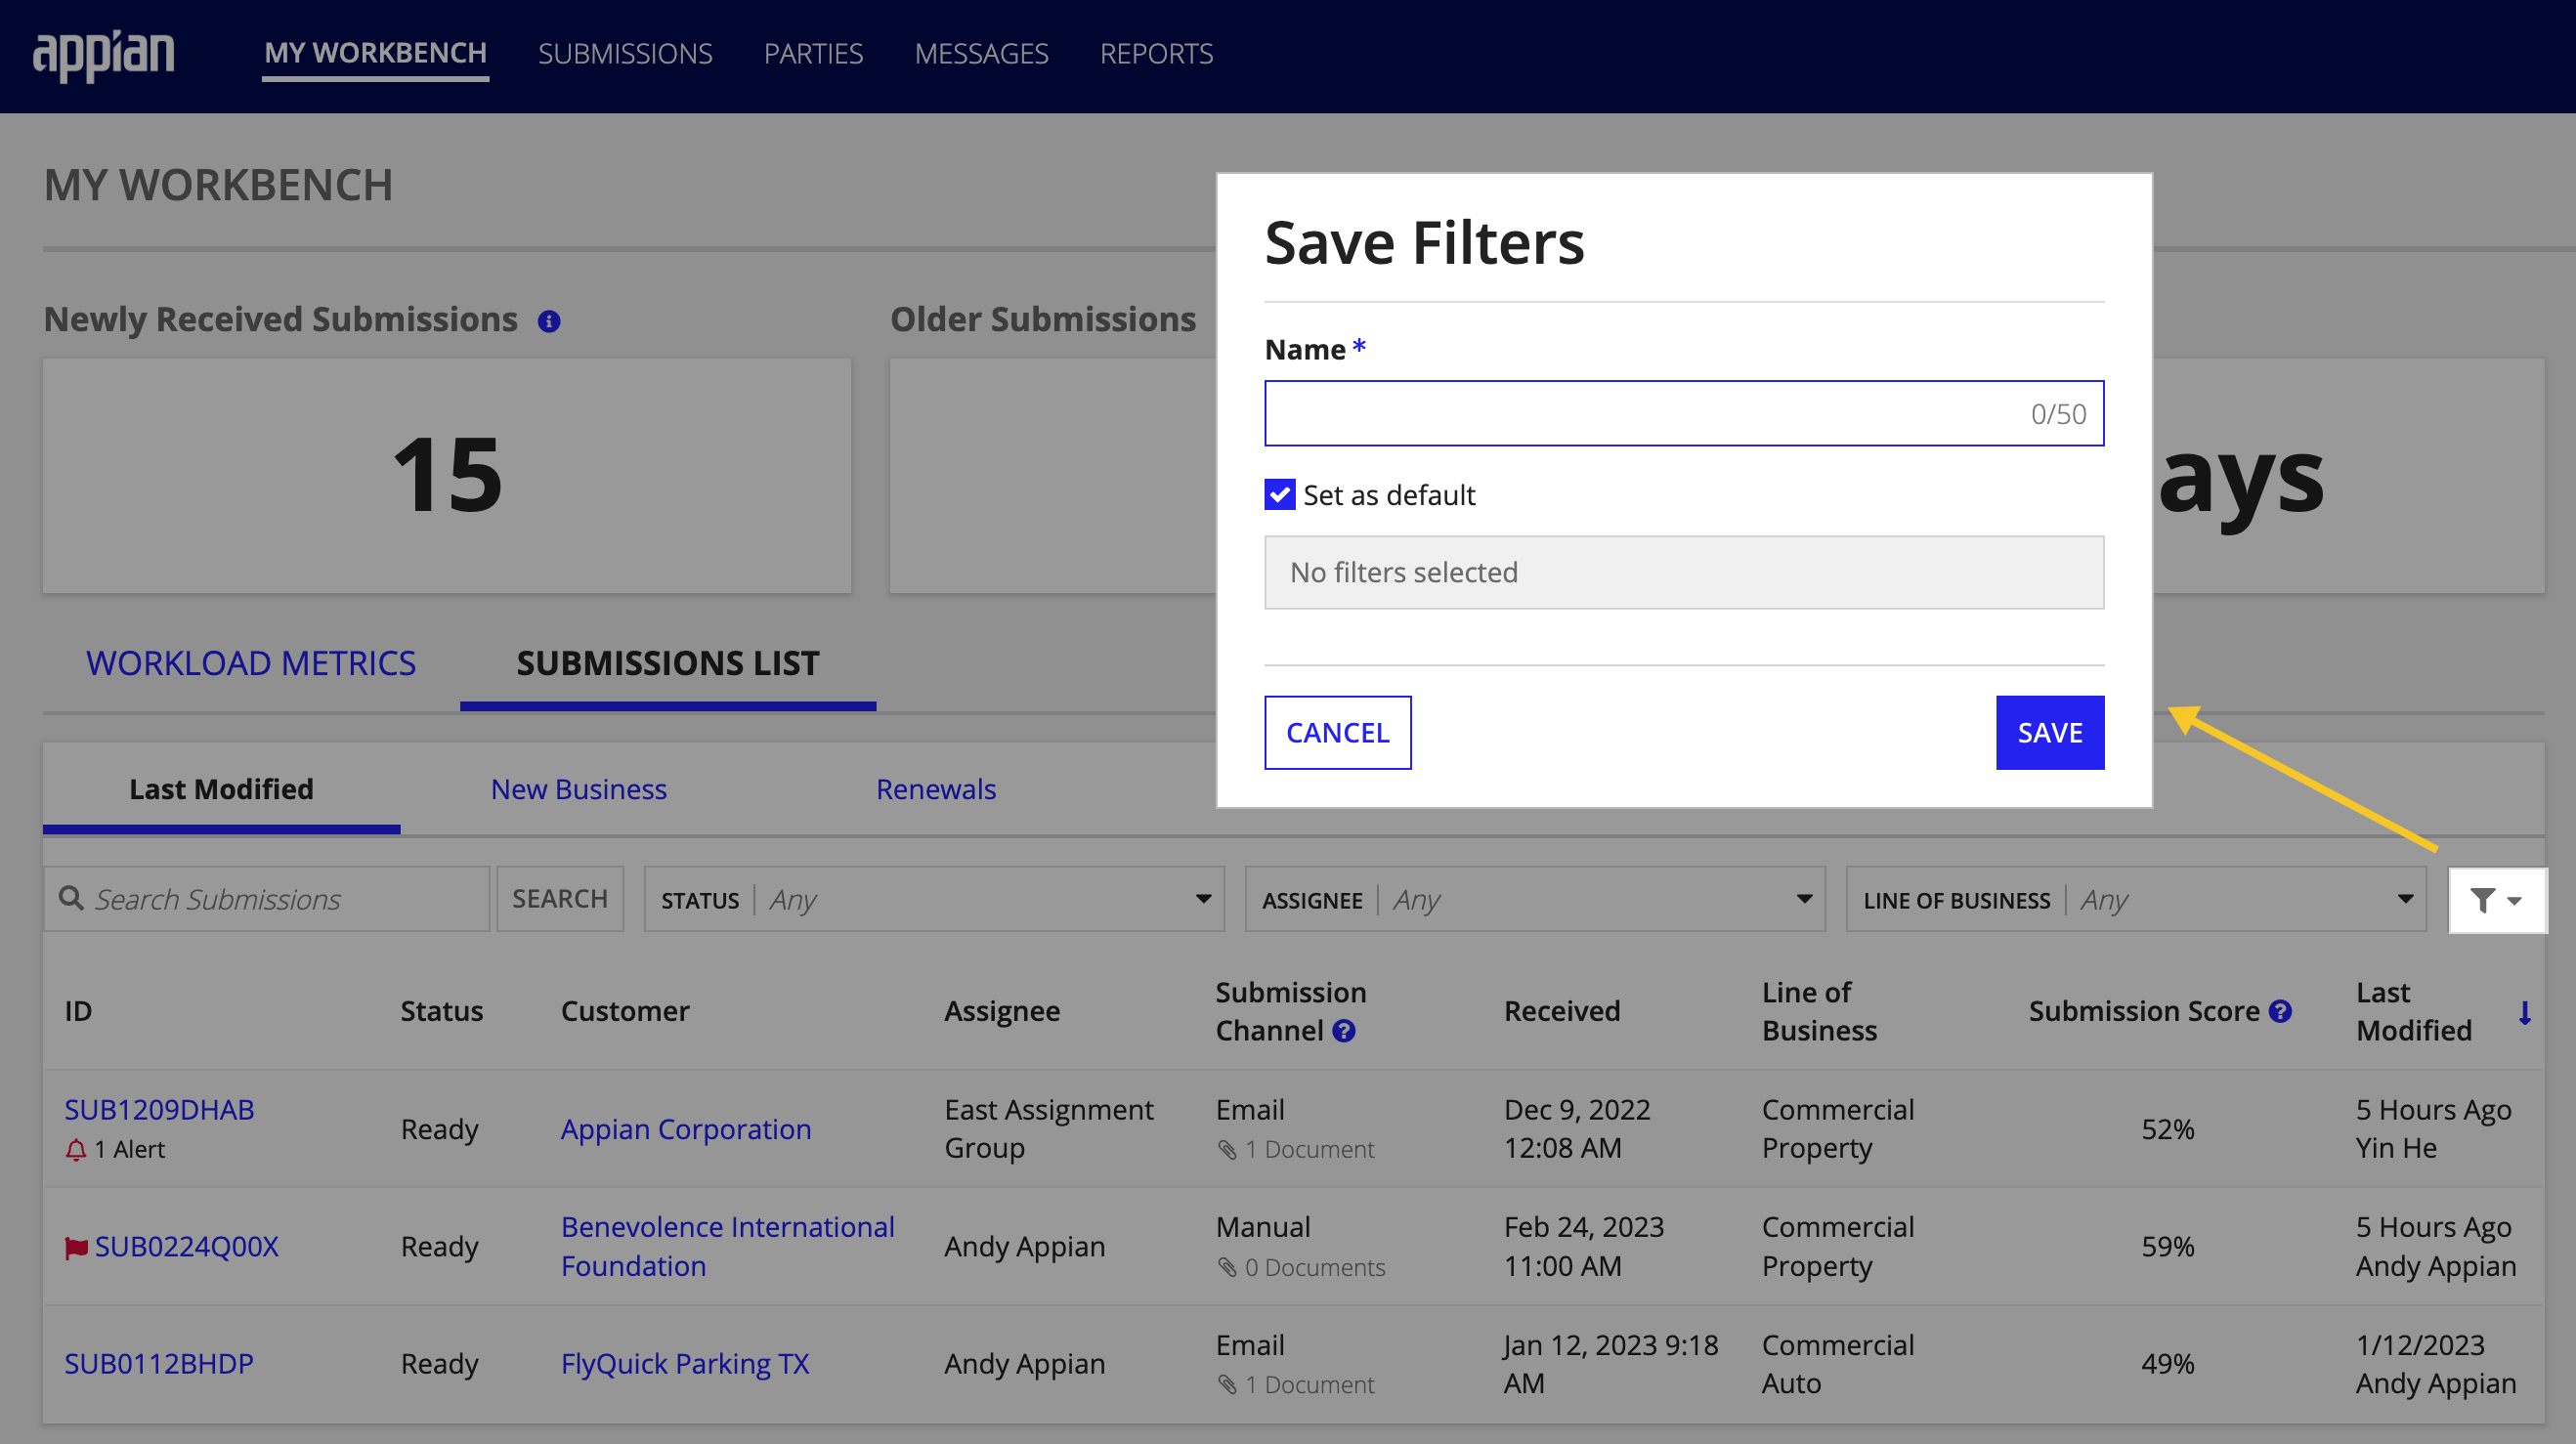
If you find yourself constantly recreating a filter and reusing it to return specific results for a SUBMISSIONS LIST, take advantage of the Save Filters button. With this feature, Connected Underwriting makes it easy to save common filters, saving you time by allowing you to quickly access commonly used filters and eliminating the need for you to recreate them constantly.
Do you need more information on a specific submission record? The Submission record allows you to easily view general information about one of your submissions, including customer and broker information, alerts, risk information, notes, and any tasks associated with the submission. Simply click the record link to drill down into the submission and access more information.
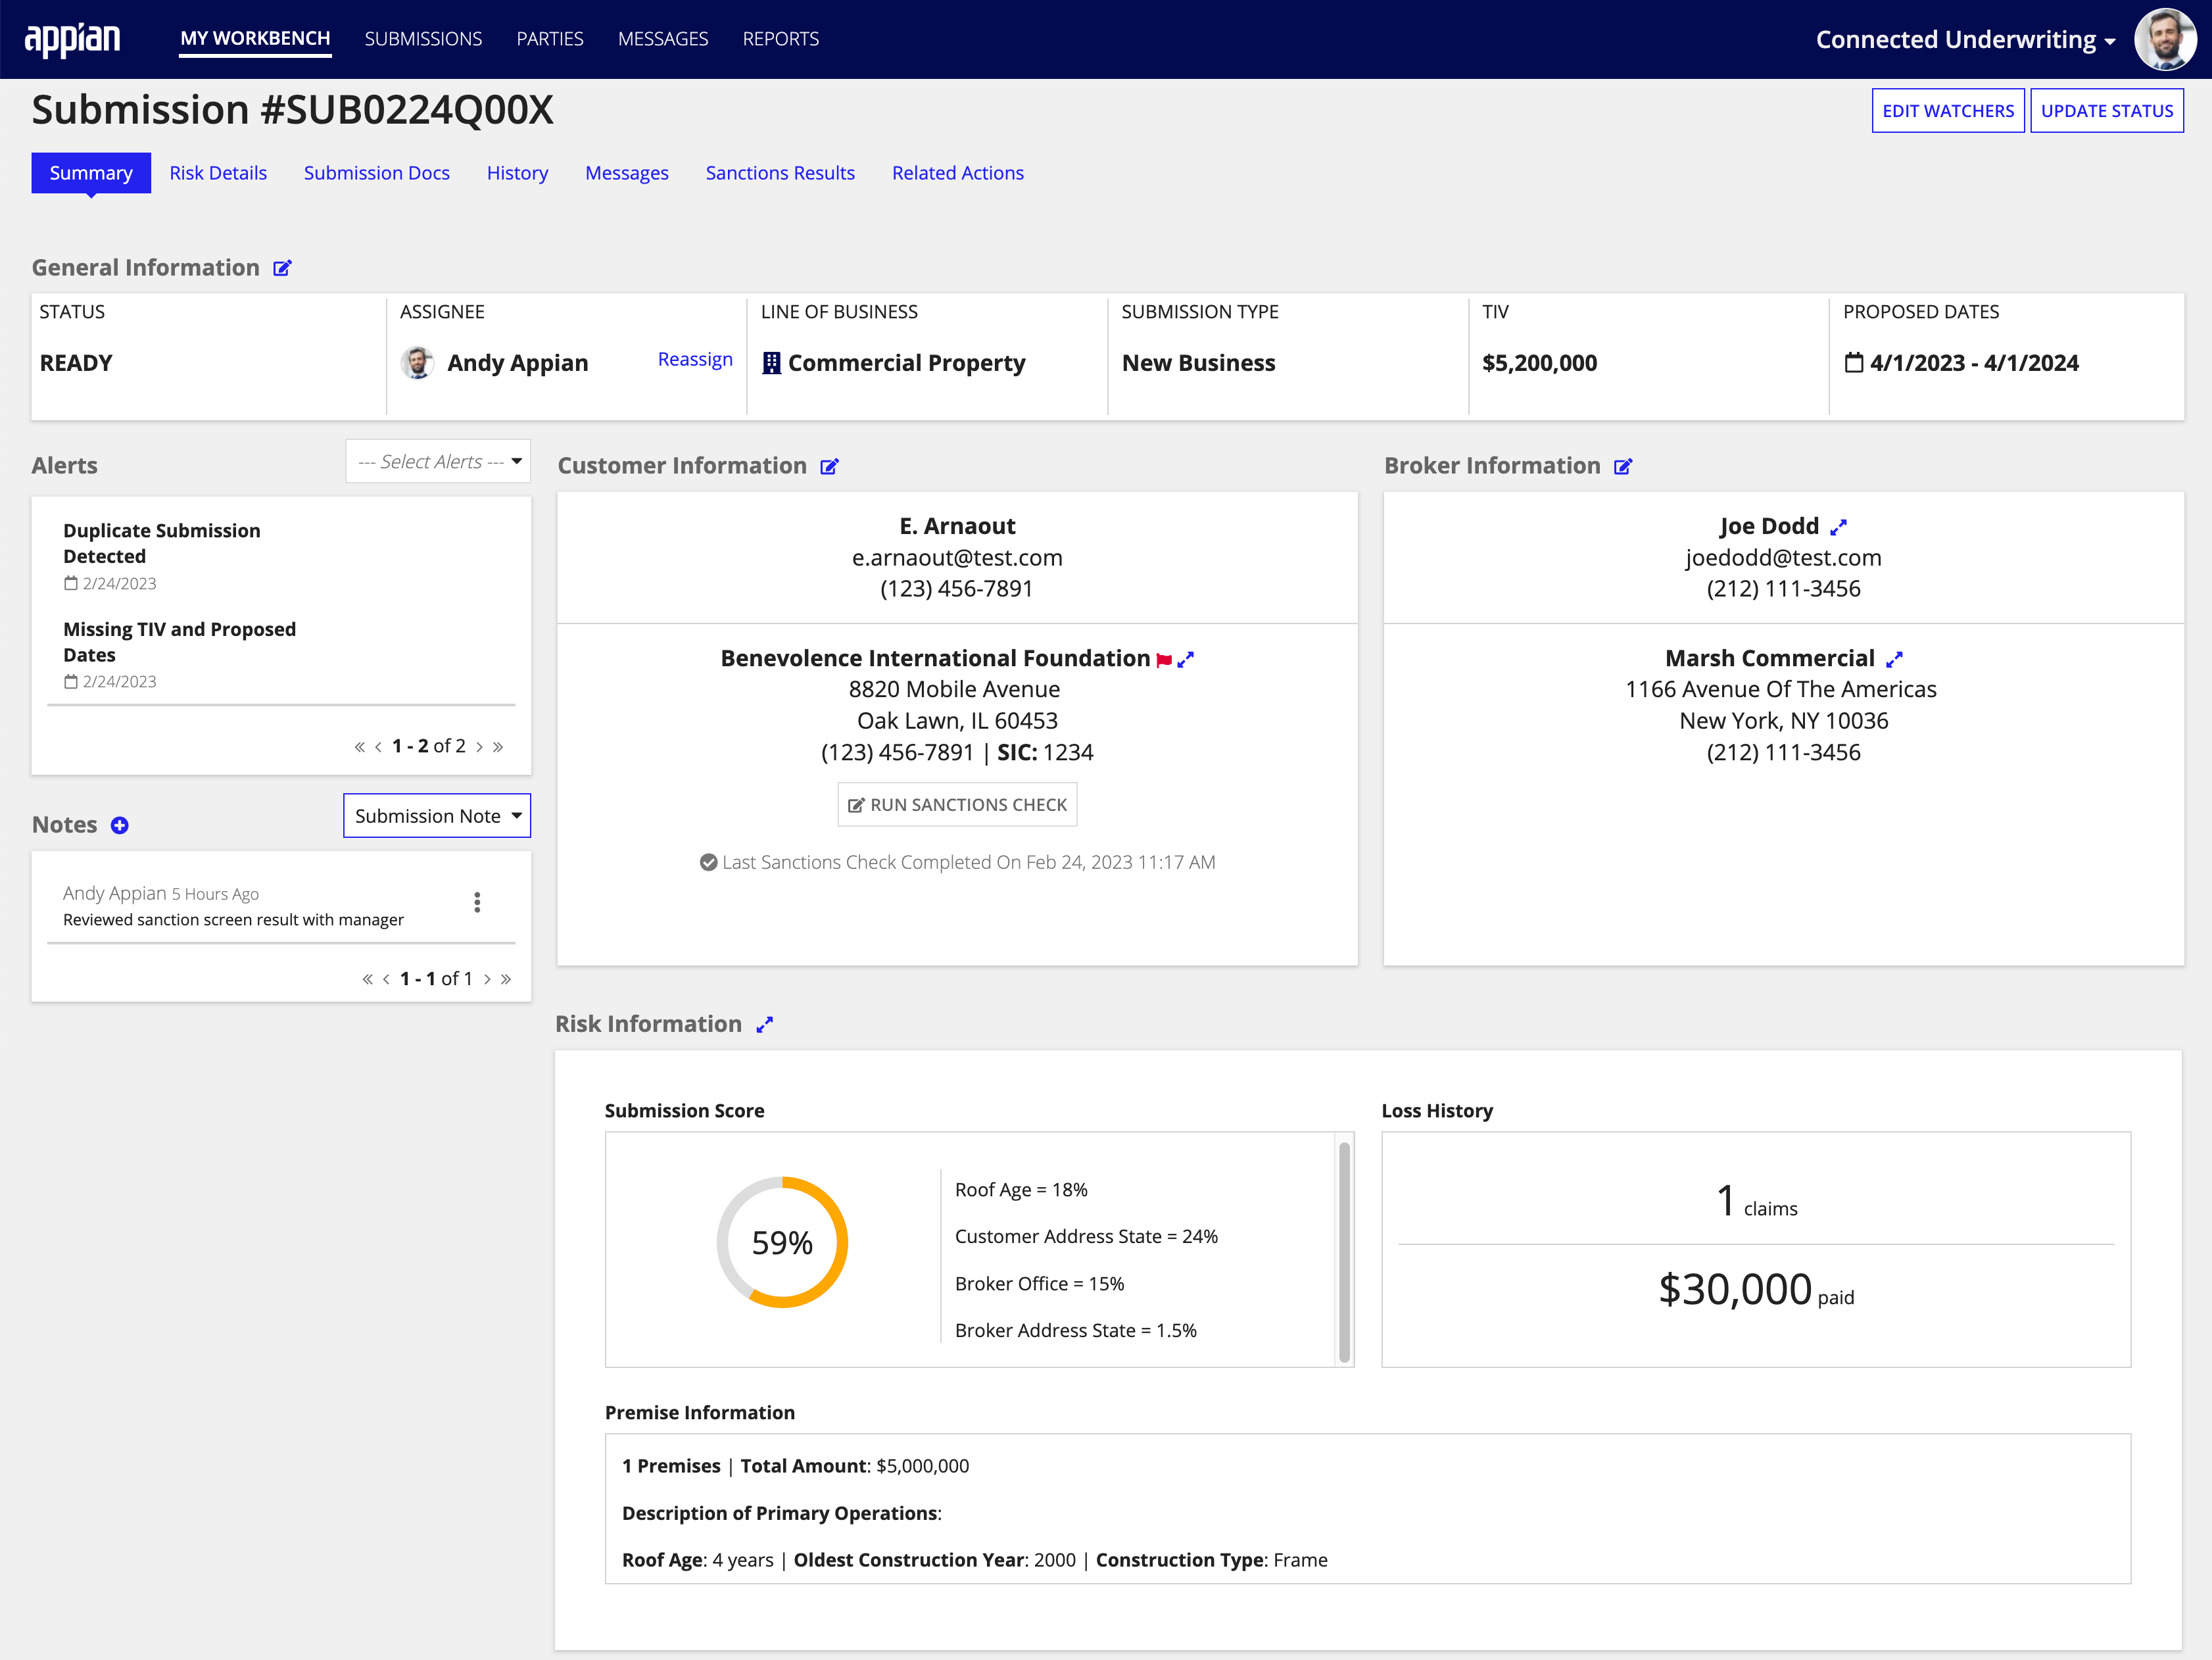
The record view provides all the information you need to identify and triage issues with that submission's underwriting process.
You can create a new Submission directly from MY WORKBENCH using the NEW SUBMISSION button.
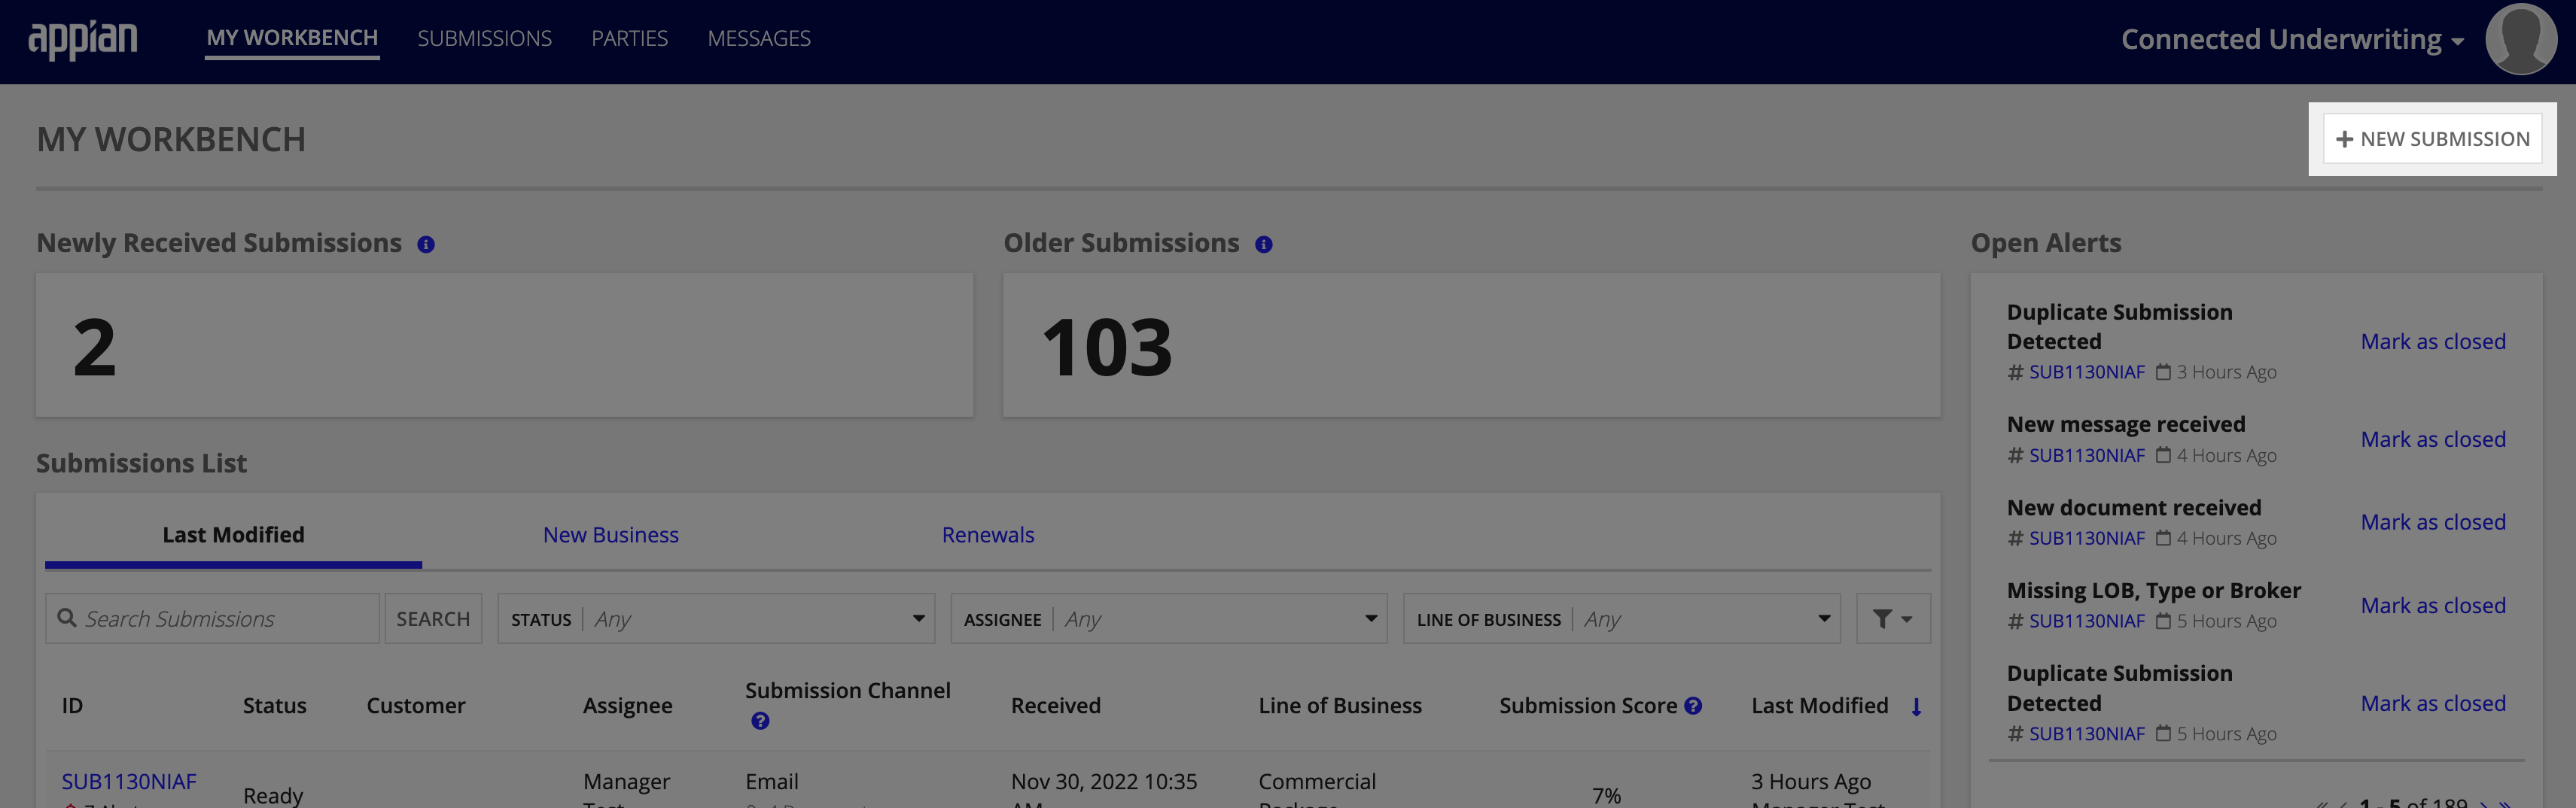
Check out Creating a New Submission for guidance about what information you need to create a new underwriting submission and how to enter it.
The Open Alerts section displays alerts currently open across all submissions assigned to you, the logged-in user. Each alert shows information about when and why the alert triggered.
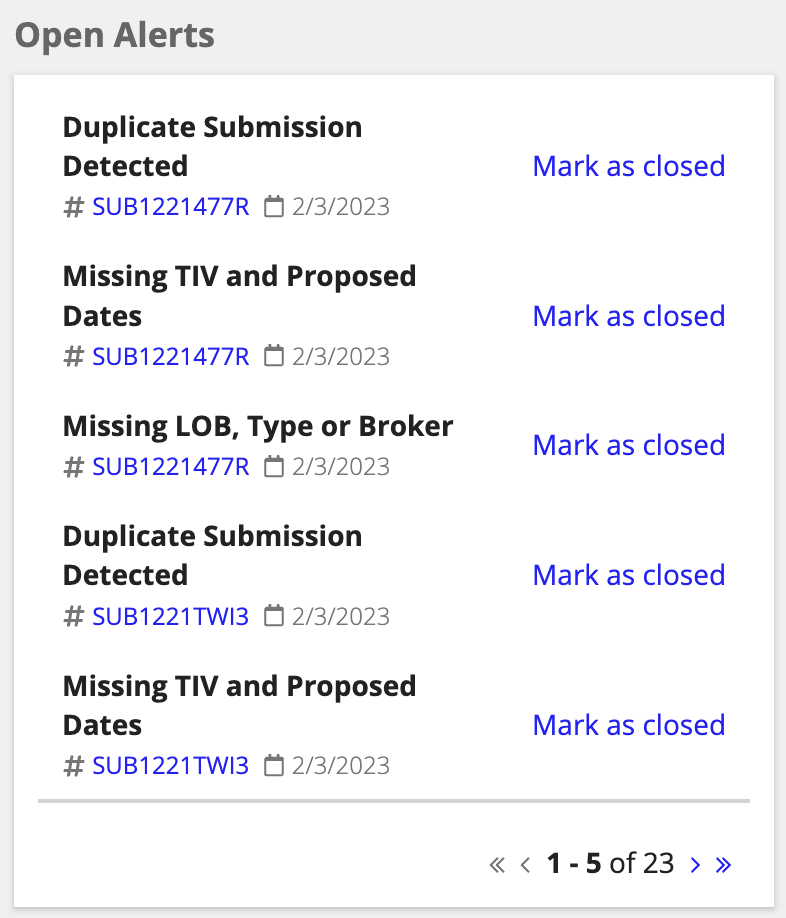
You can dismiss alerts from MY WORKBENCH by clicking the Mark as closed button. For more information about configuring alert conditions, see Managing Alerts.
The Open Tasks section displays tasks currently open across all Submissions assigned to the logged-in user. A task shows information about what is required to complete the item and when the task is due.
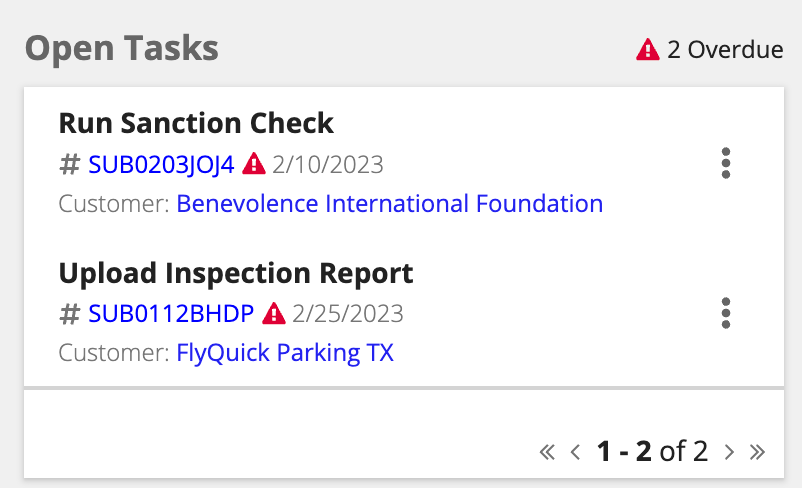
You can update tasks from the Workbench using the button and selecting Reassign, Change Due Date, or Resolve Task.
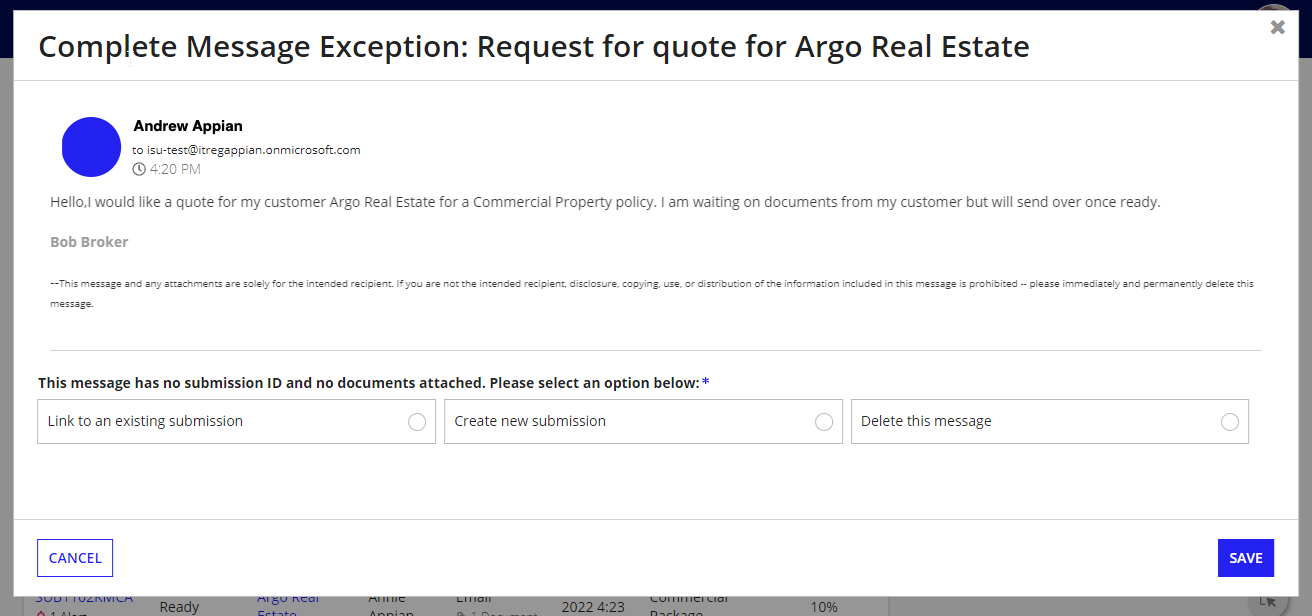
Connected Underwriting triggers message exceptions for two reasons:
A user can click on the message to see a preview and perform an action to triage the message appropriately.

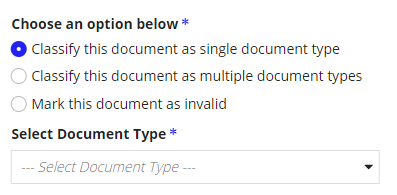
Connected Underwriting will attempt to classify documents supported for IDP extraction automatically. Some documents may require manual classification by a user before extraction can be attempted, such as documents that are combined PDFs. Those documents will pass to the Classification exception queue. A user can see the Document Name, Submission ID, and when it was received before completing the classification task.
Connected Underwriting will run a document extraction process in the background for supported documents. Once the data is extracted, the solution generates a data validation task. The reconciliation task plays an important role in making auto-mappings smarter. As you complete reconciliation tasks, Appian learns how to map the data in your documents to the proper fields in your data type. Over time, this will make auto-extraction more accurate and reconciliation easier and less frequent.
Note: Values selected from the document preview will improve data extraction results. Values entered manually will not. If you have the option, you should select correctly labeled values from the document preview instead of entering them manually.
A user can view the Document Name, Last Opened by, Submission ID, Document Type, and when it was received before completing the reconciliation task.
To complete the reconciliation task:

While you are reconciling the data, icons indicate how the information was entered for each field:
To learn more about Document Extraction, visit the Appian Document Extraction page.
My Workbench
