Free cookie consent management tool by TermsFeed Installing Connected Underwriting [Connected Underwriting v22.4.1.1] Installing Connected Underwriting | Appian 23.1
Page not found in the selected version; redirected to the home page.
Installing Connected Underwriting
This content applies solely to Connected Underwriting, which must be purchased separately from the Appian base platform. This content was written for Appian 22.4 and may not reflect the interfaces or functionality of other Appian versions.

Introduction

The Appian Connected Underwriting solution is an expertly-developed application built on the Appian low-code platform. It allows insurance professionals to streamline the underwriting submissions process for new and existing businesses.

Installing Connected Underwriting consists of six main steps:

  1. Download the software package.
  2. Deploy Connected Underwriting plug-ins to the Appian environment.
  3. Create the database objects in the business data source.
  4. Import the Connected Underwriting application into the Appian environment.
  5. Configure Outlook Graph Poller

This guide provides how-to instructions for installing the Connected Underwriting solution.

System requirements

  • Appian platform running version 22.4 or greater.
  • A supported version of MariaDB as a business data source.
    • Note: Instructions below are for MariaDB databases. For use with other databases, the SQL script used in Step 3 for installing and upgrading will need to be modified.
  • A supported web browser.

Verifying Appian version and database type

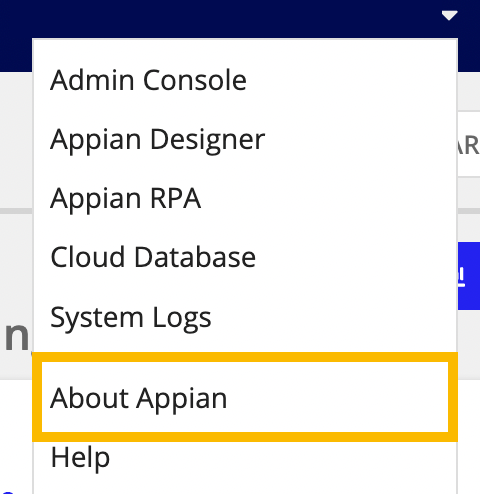
To check the Appian platform version and database, click About Appian from the navigation bar.
cu-installing_cu-about_appian.png

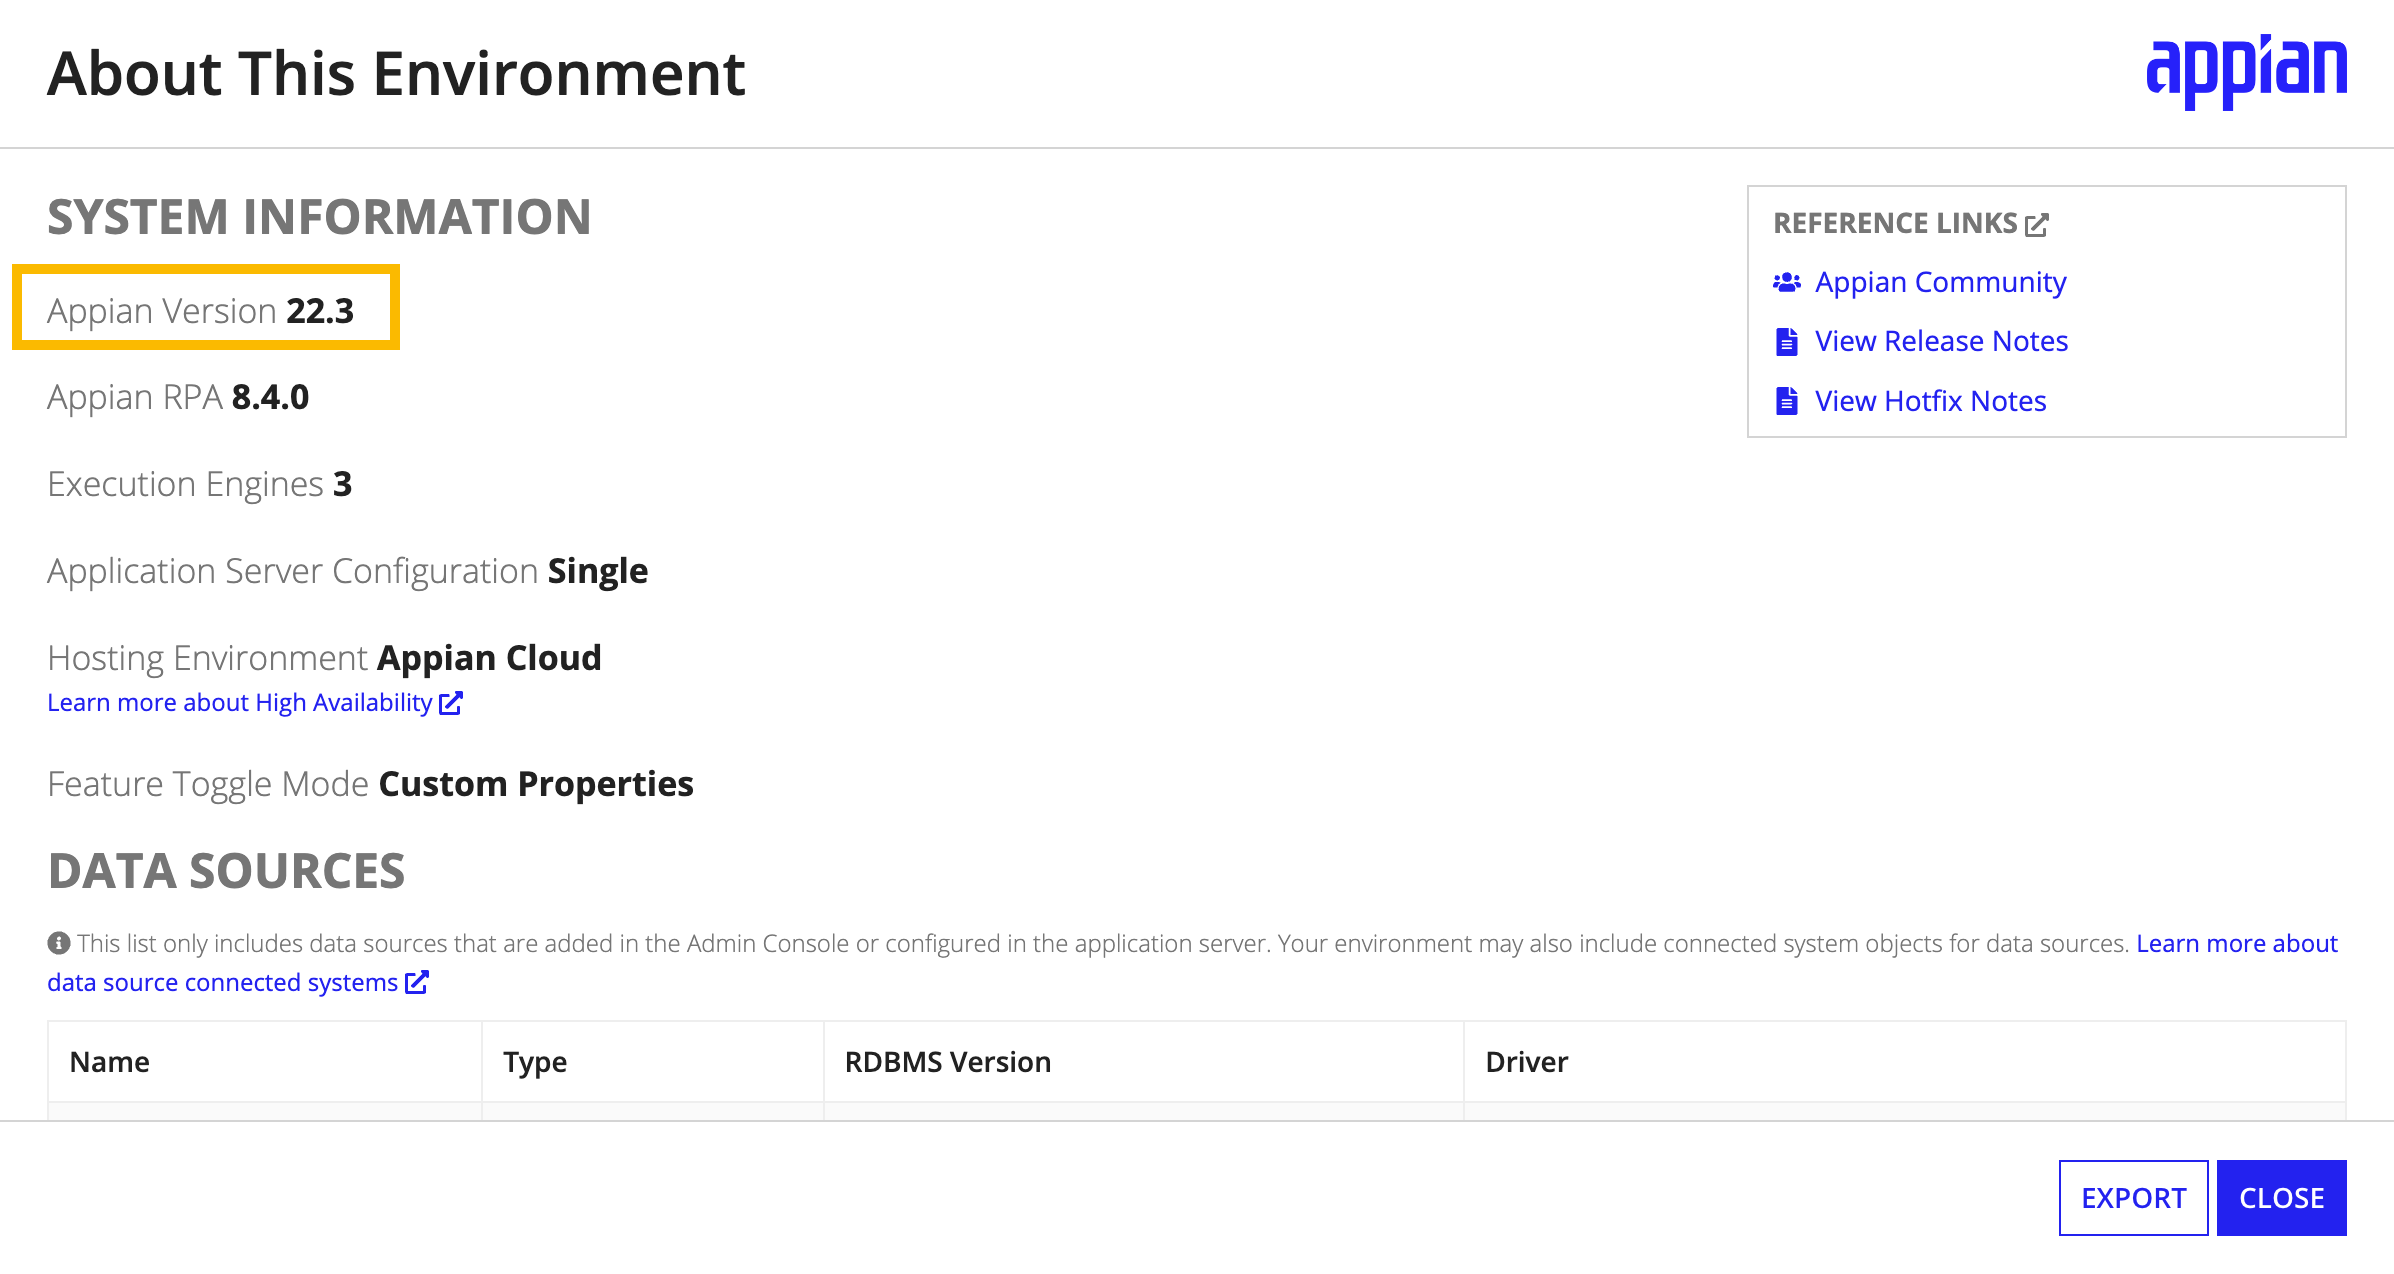
Refer to the Appian Version number under System Information.
cu-installing_cu-appian_version.png

To check the solution version, search for the ISU_TXT_APP_VERSION constant from Appian Designer.

Technical support

During the installation, if you experience any technical difficulty, log into Appian Community and open a support case. All users of Connected Underwriting can also email Appian Support at support@appian.com.

Installing Connected Underwriting

Installing Connected Underwriting consists of six main steps:

Follow the steps in this section in order to install the Connected Underwriting solution. Before starting the install process, review the System Requirements to ensure all minimum requirements are met.

Step 1: Download the software package

The first step in installing Connected Underwriting is downloading the software package containing the following files. You will use these files in the remaining setup steps.

  • 01.ConnectedUnderwritingv1.1.0.sql: SQL script for creating the database objects needed for the Connected Underwriting application.
  • ConnectedUnderwritingv1.1.0zip: Application package to import into Appian.
  • ConnectedUnderwritingv1.1.0.properties: Import customization file for configuring the solution package.
  • ConnectedUnderwritingv1.1.0.AdminConsole.zip: Admin console package to import into Appian
  • ConnectedUnderwritingv1.1.0.AdminConsole.properties: Import customization file for configuring the Admin Console imports.

To download the software package:

  1. In MyAppian, navigate to the Support tab.
  2. At the top of the page, select DOWNLOADS and then SOLUTIONS.
  3. In the grid, click Connected Underwriting v22.4.1.1.0.
  4. Under Downloads, click Connected Underwriting Installer and agree to the License Agreement.
  5. Click Connected Underwriting Installer to download the ZIP file.
  6. Unzip Connected Underwriting v22.4.1.1.0 to access the installation files.

Step 2: Deploy plug-ins

Connected Underwriting relies on the following plug-ins to be deployed and configured in the target system before you can import the application files.

Appian Cloud environments

To deploy the plug-ins for an Appian Cloud environment:

  1. In the target environment, log in as the deployment user.
  2. Navigate to the Admin Console.
  3. On the left side of the console, click Plug-ins.
  4. Click ADD PLUG-INS.
  5. Search for and click Appian Solutions.
  6. Click DEPLOY.
  7. Repeat the above steps, but search for and click the following:
    • Appian Regular Expression Functions
    • Microsoft PowerBI (App Owns Data)
    • Microsoft PowerBI Component Plugin
    • Content Tools
    • MSGraph Email Poller
    • PDF Tools
    • PDF Utilities
    • Rich Text Editor

Self-managed environments

To deploy the plug-ins for a self-managed environment:

  1. Download the following plug-ins from the Appian AppMarket:
  2. Follow the Deploying Plug-ins instructions to deploy the plug-ins listed above.

Step 3: Create database objects

You will need to run a DDL script in your database to create the structure for the database tables, views, and other objects that are a part of the Connected Underwriting application.

To create the database objects:

  • In your MariaDB business database, import and run the sql DDL file that was downloaded in Step 1.

Step 4: Import the application

Next, import the application files into the target environment.

To import the application:

  1. In the target environment, log in as the deployment user.
  2. Navigate to the Appian Designer.
  3. Click IMPORT.
  4. Click UPLOAD and choose the ConnectedUnderwritingv4.1.0.application.zip file that was downloaded in Step 1.
  5. Select Include related import customization file and click UPLOAD. Select the ConnectedUnderwritingv4.1.0.application.properties file downloaded in Step 1.
    • Note: If you have credentials for any integrations, you may include them in the properties file.
  6. Click INSPECT To ensure that there will be no complications on import.
    • Note: Inspection could take several minutes and may time out, but the import will continue in the background.
  7. Click IMPORT.
    • Note: The import may time out due to file size, but the import will continue in the background.
  8. Review the import results.

Note:  If the business database is not called Appian, a warning will occur when inspecting/importing the data stores. To fix this, open each data store object and update the Data Source after the import completes.

Step 5: Configure email poller

Note:  The email poller pulls files and emails directly from your Outlook inbox. It is important to ensure security best practices such as virus scanning are correctly configured in Outlook before installing the plugin to your environment.

After following the setup steps for creating an Outlook inbox and Azure application account, these credentials must be provided to Appian to allow the poller to run.

The Connected Underwriting application comes with Admin Console configs to allow for easy entry of these credentials. To fill them out, first import the Admin Console .zip file downloaded in step 1:

  1. In the target environment, log in as the deployment user.
  2. Navigate to the Appian Admin Console.
  3. Click IMPORT > UPLOAD and choose the ConnectedUnderwritingv4.1.0.adminConsole.zip file that was downloaded in Step 1.
  4. Select Include related import customization file and click UPLOAD.
  5. Select the ConnectedUnderwritingv4.1.0.adminConsole.properties file that was downloaded in Step 1.
    • Note: Poller credentials can be provided directly in the properties file, or can be provided via the manual steps described below. In either case, do not modify the default values for customMailPollerTableName and customMailPollerDocTableName unless you intend to modify the Appian Poller table names (not recommended)
  6. Click INSPECT to ensure that there will be no complications on import.
  7. Click IMPORT and review the import results and ensure there are no errors
  8. In the Admin Console, navigate to Third-Party Credentials and verify a new item labeled isu-mail-poller-msgraph exist.
  9. Enter isu-mail-poller-msgraph and provide the Azure secret, tenet, and applicationID configured when enabling a polling inbox. Do not modify customMailPollerTableName and customMailPollerDocTableName unless you intend to modify the Appian Poller table names (not recommended).
  10. Click SAVE
  11. Use Quick Search to open the following constant: ISU_EMAIL_POLLER_AND_PROCESSOR_ENUM_BOOL_RUN_EMAIL_POLL_AND_PROCESSOR_PM and set it to True if not set already. Use this constant when you want to enable/disable poller operations.

See configuring the email poller for more information.

Next steps

Now that you've installed the solution and the database is set up, you're going to want to configure the solution for your organization's needs. How to Configure Connected Underwriting outlines the steps you will need to take to modify the solution to work with your organization's requirements.

Additional specifications such as branding and timezone can be set in the Appian Admin Console.

Installing Connected Underwriting

FEEDBACK