OverviewCopy link to clipboard
This article explains how to set up a SharePoint connected system to manage your documents and folders.
For instructions on how to integrate your SharePoint connected system with your Appian connected system, see Integrating SharePoint with Appian's Connected System.
For information that pertains to all connected systems, see Connected System Object.
PropertiesCopy link to clipboard
Two forms of authentication are available for SharePoint: Authorization Code (per user) and Client Credentials (single system login).
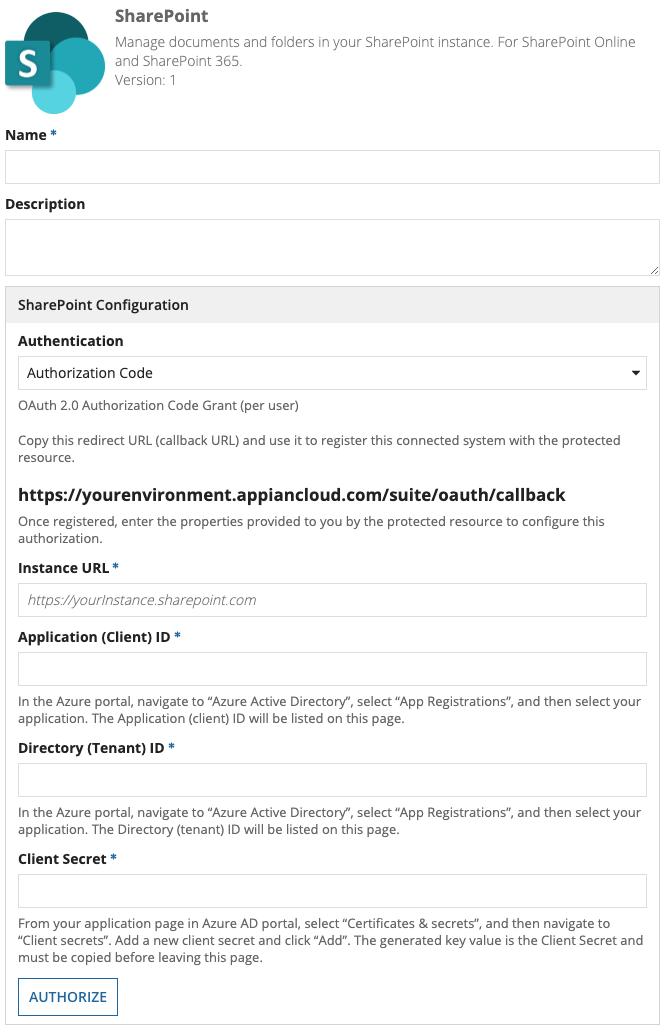
Authorization Code authenticationCopy link to clipboard
Each Appian user will be required to sign in to their SharePoint account to authenticate. You must provide users a way to authenticate using OAuth 2.0. See SharePoint OAuth 2.0 Code Grant Flow for more details.
The SharePoint Authorization Code authentication has the following properties:
| Field | Description |
|---|---|
| Name | Required. The name of the connected system. Use a name that will uniquely identify this connection to the external system. |
| Description | Supplemental information about the connected system that is displayed in the objects grid of some Designer views and when selecting the system in an integration object. |
| Redirect URL* | Each connected system provides a callback URL that must be added to your SharePoint environment. In the SharePoint Setup portal, navigate to App Manager, and then find your App and select Edit. Add the callback URL in the field Callback URL. See SharePoint set up documentation for more details. |
| Instance URL* | Required. Instance URL will be used for authorization. This URL is used to configure your integration object and when executing your operations. e.g. https://yourinstance.sharepoint.com |
| Application (Client) ID* | Required. In the Azure portal, navigate to Azure Active Directory, select App Registrations, and then select your application. The Application (client) ID will be listed on this page. |
| Directory (Tenant) ID* | Required. In the Azure portal, navigate to Azure Active Directory, select App Registrations, and then select your application. The Directory (tenant) ID will be listed on this page. |
| Client Secret* | Required/Sensitive. From your application page in Azure portal, select Certificates & secrets, and then navigate to Client secrets. Add a new client secret and click Add. The generated key value is the Client Secret and must be copied before leaving this page. |
* This value is included in an import customization file so that you can specify a different value for each environment. Sensitive values will not be exported in the import customization file and must be added manually. Required fields must have a value upon import or else import will fail. For more information on import/export behavior, see the Connected Systems Object page.
Click AUTHORIZE to use the provided configuration information to authorize the designer in a new window. See OAuth 2.0: Authorization Code Grant for more details.
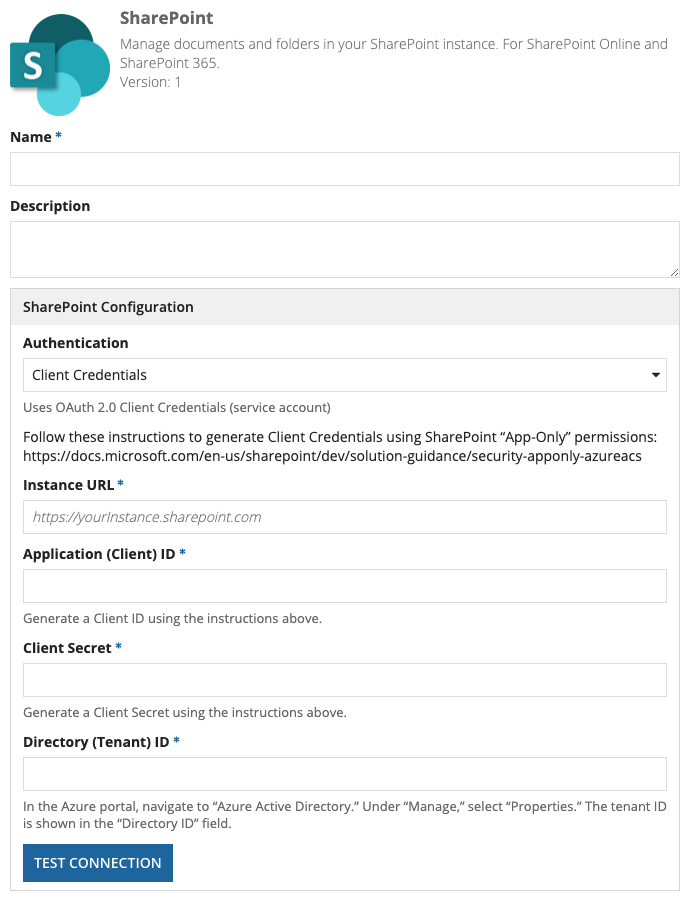
Client Credentials authenticationCopy link to clipboard
Provide a single SharePoint user's credentials to authenticate. All integrations will use a shared SharePoint service account. Individual Appian users do not need their own SharePoint accounts.
To generate Client Credentials, see Granting access using SharePoint App-Only in the Microsoft docs.
A few notes on the process:
- If you only need access to a particular SharePoint site, go to that site's URL to generate your Client ID and Client Secret. For example:
<siteName>.sharepoint.com/sites/<subsite>/_layouts/15/appinv.aspx -
If you do not have tenant administrator permissions, you may need to use a different permission XML. For example:
1 2 3
<AppPermissionRequests AllowAppOnlyPolicy="true"> <AppPermissionRequest Scope="http://sharepoint/content/sitecollection" Right="FullControl" /> </AppPermissionRequests>Copy
The SharePoint Client Credentials authentication has the following properties:
| Field | Description |
|---|---|
| Instance URL* | Required Instance URL will be used for authorization. This URL is used to configure your integration object and when executing your operations. e.g. https://yourinstance.sharepoint.com |
| Application (Client) ID* | Required To generate the Application (Client) ID, see Granting access using SharePoint App-Only in the Microsoft docs. |
| Client Secret* | Required/Sensitive To generate the Client Secret, see Granting access using SharePoint App-Only in the Microsoft docs. |
| Directory (Tenant) ID* | Required In the Azure portal, navigate to Azure Active Directory. Under Manage, select Properties. The tenant ID is shown in the Directory ID field. |
* This value is included in an import customization file so that you can specify a different value for each environment. Sensitive values will not be exported in the import customization file and must be added manually. Required fields must have a value upon import or else import will fail. For more information on import/export behavior, see the Connected Systems Object page.
Automating property updatesCopy link to clipboard
This object's properties can also be updated programmatically using the Update Connected System endpoint. This lets you change passwords, API keys, and other values without needing to sign in to Appian.
The following properties can be included in the JSON request body of the PATCH /connected-system/<UUID> call.
instanceUrlapplicationIddirectoryIdclientSecret
OperationsCopy link to clipboard
| Name | Description | Type |
|---|---|---|
| Add Document | Upload files from Appian to SharePoint | WRITE |
| Download Document | Retrieves the document from SharePoint and places into an Appian | WRITE |
| Get Document Metadata | Retrieves metadata for a file | READ |
| Update Document Metadata | Updates metadata for the specified file | WRITE |
| Create Folder | Creates a new folder in SharePoint | WRITE |
| Get Folder Metadata | Updates metadata for the specified folder | READ |
| List Folder Contents | Lists a folder's contents | READ |
| Update Folder Metadata | Retrieves metadata for a folder | READ |
| Execute Read Request | Execute arbitrary read requests to SharePoint | READ |
| Execute Write Request | Execute arbitrary write requests to SharePoint | WRITE |
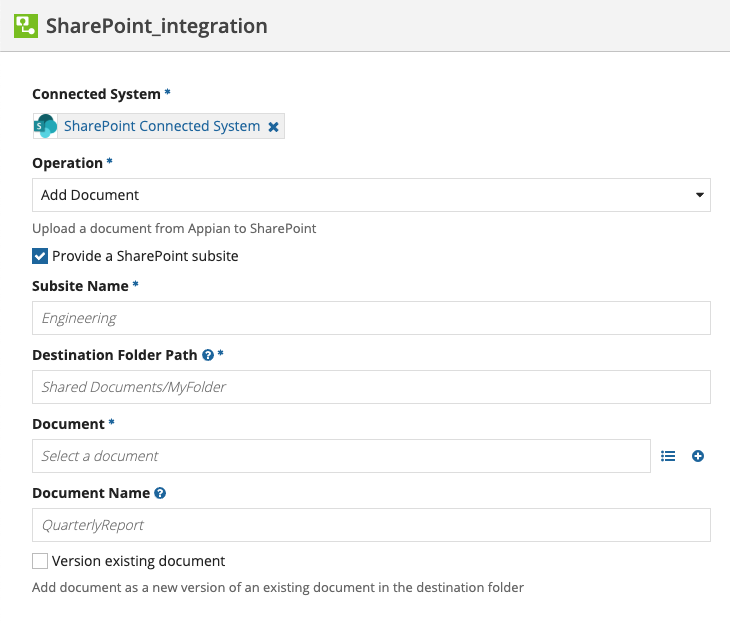
Add DocumentCopy link to clipboard
Upload a document from Appian to SharePoint.
The Add Document operation modifies data in SharePoint. To prevent the integration from making the same update twice, it can only be used in the saveInto parameter of an interface component or in a Web API. See Call an Integration for more information.
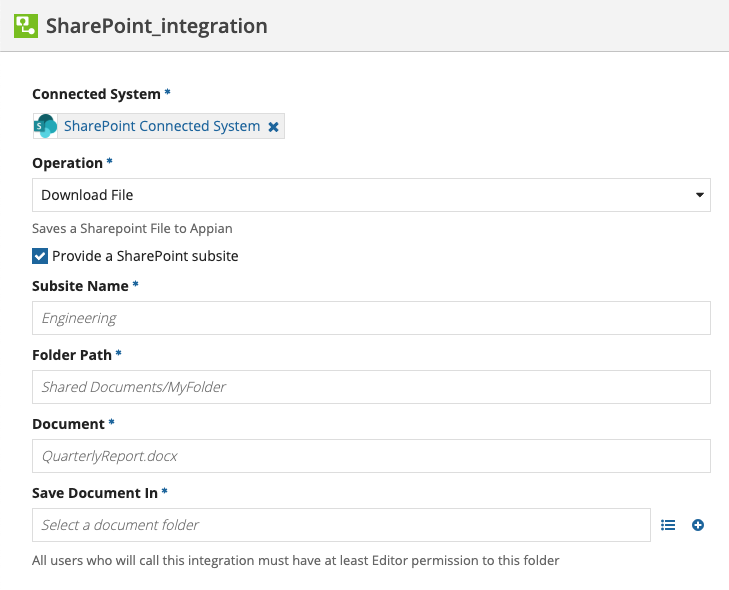
Download DocumentCopy link to clipboard
Retrieves the document from SharePoint and places into an Appian.
The Download Document operation downloads a file to Appian. To prevent the integration from making the same update twice, it can only be used in the saveInto parameter of an interface component or in a Web API. See Call an Integration for more information.
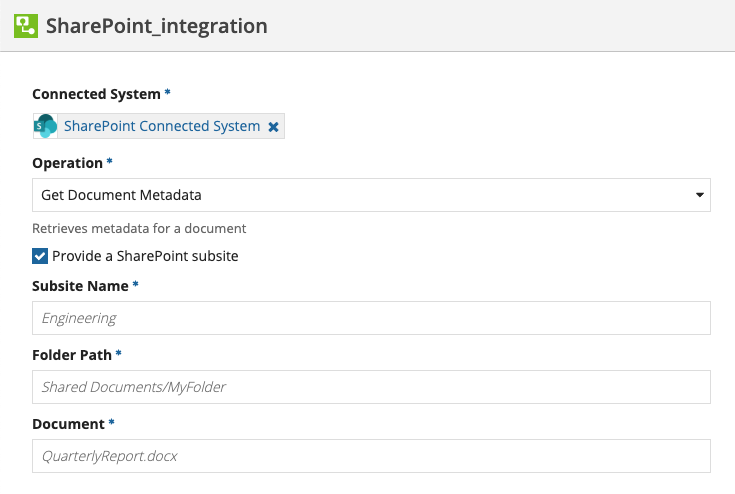
Get Document MetadataCopy link to clipboard
Retrieves metadata for a file.
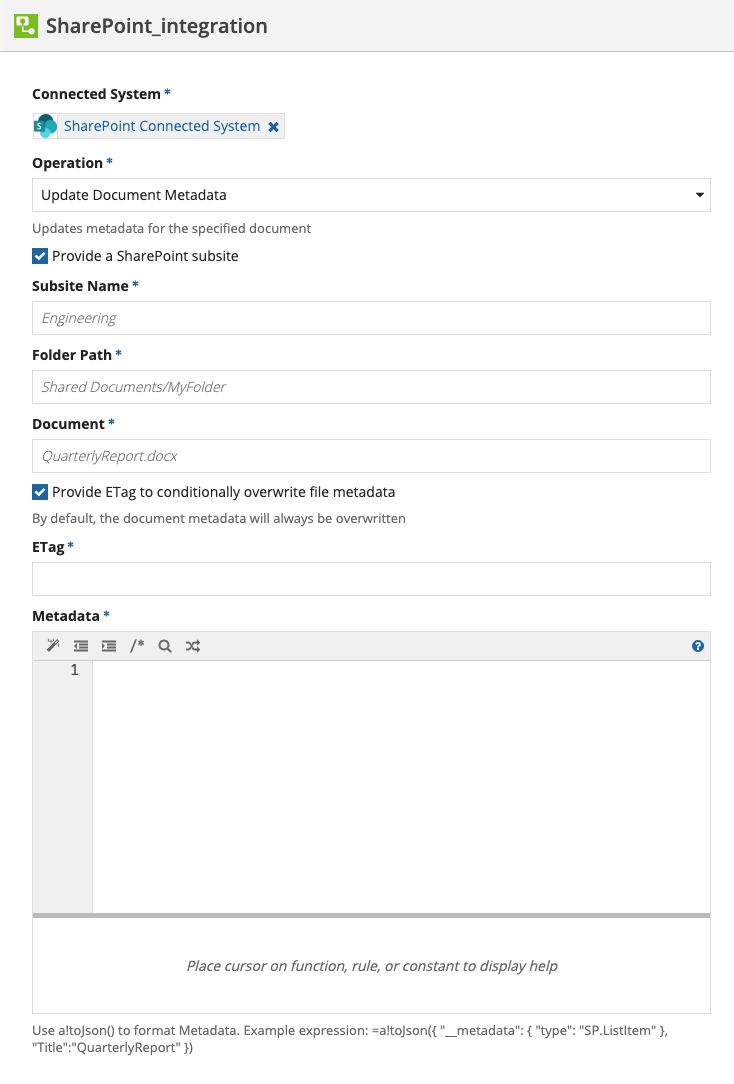
Update Document MetadataCopy link to clipboard
Updates metadata for the specified file. See Updating Metadata for information on how to get the metadata properties from a Get Document Metadata request.
The Update Document Metadata operation modifies data in SharePoint. To prevent the integration from making the same update twice, it can only be used in the saveInto parameter of an interface component or in a Web API. See Call an Integration for more information.
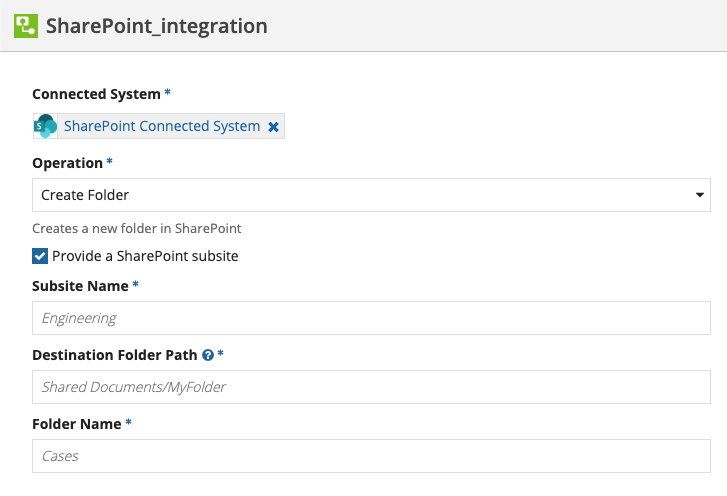
Create FolderCopy link to clipboard
Creates a new folder in SharePoint.
The Create Folder operation modifies data in SharePoint. To prevent the integration from making the same update twice, it can only be used in the saveInto parameter of an interface component or in a Web API. See Call an Integration for more information.
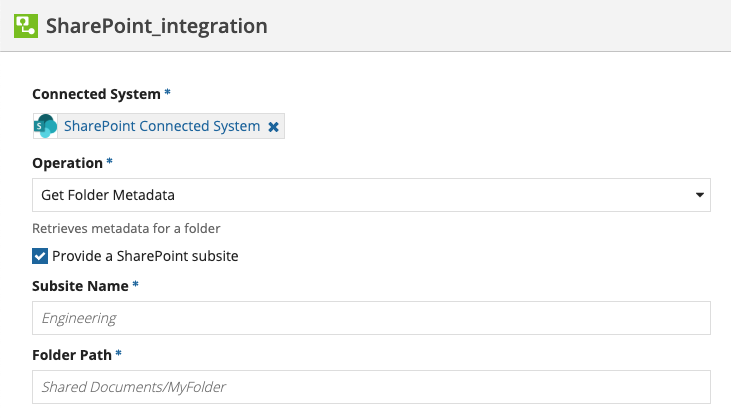
Get Folder MetadataCopy link to clipboard
Retrieves metadata for a folder.
List Folder ContentsCopy link to clipboard
Lists a folder's contents.

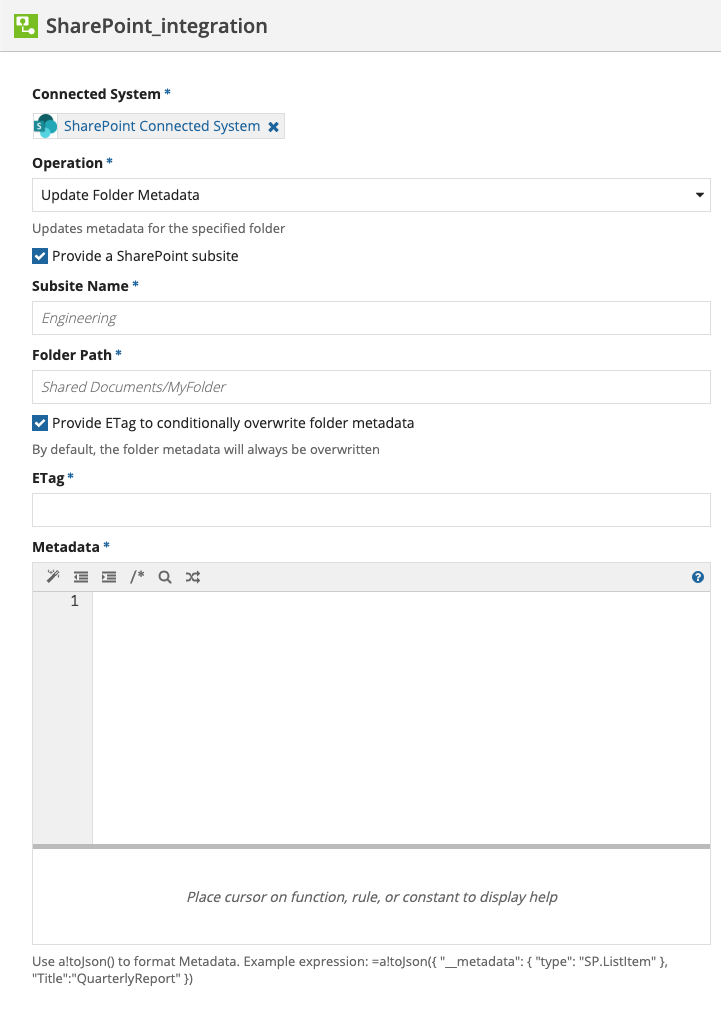
Update Folder MetadataCopy link to clipboard
Updates metadata for the specified folder. See Updating Metadata for information on how to get the metadata properties from a Get Folder Metadata request.
The Update Folder Metadata operation modifies data in SharePoint. To prevent the integration from making the same update twice, it can only be used in the saveInto parameter of an interface component or in a Web API. See Call an Integration for more information.
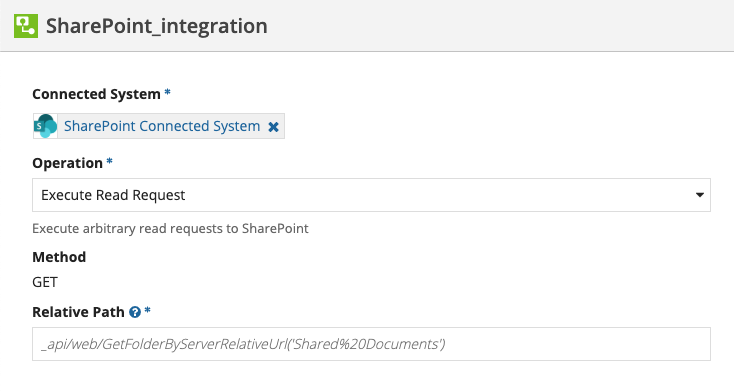
Execute Read RequestCopy link to clipboard
Execute read requests to SharePoint using a relative path.
Execute Write RequestCopy link to clipboard
Execute write requests to SharePoint using a relative path and body.
The Execute Write Request operation modifies data in SharePoint. To prevent the integration from making the same update twice, it can only be used in the saveInto parameter of an interface component or in a Web API. See Call an Integration for more information.

Updating Metadata: Identifying Metadata PropertiesCopy link to clipboard
In order to update metadata for documents or folders, you will need to send the OData type, the name of the metadata field, and the updated value of the field. To get this information, you can send a Get Document Metadata or Get Folder Metadata request.
Getting the OData typeCopy link to clipboard
The OData type is sent in the body as { "type": "<OData Type>" }
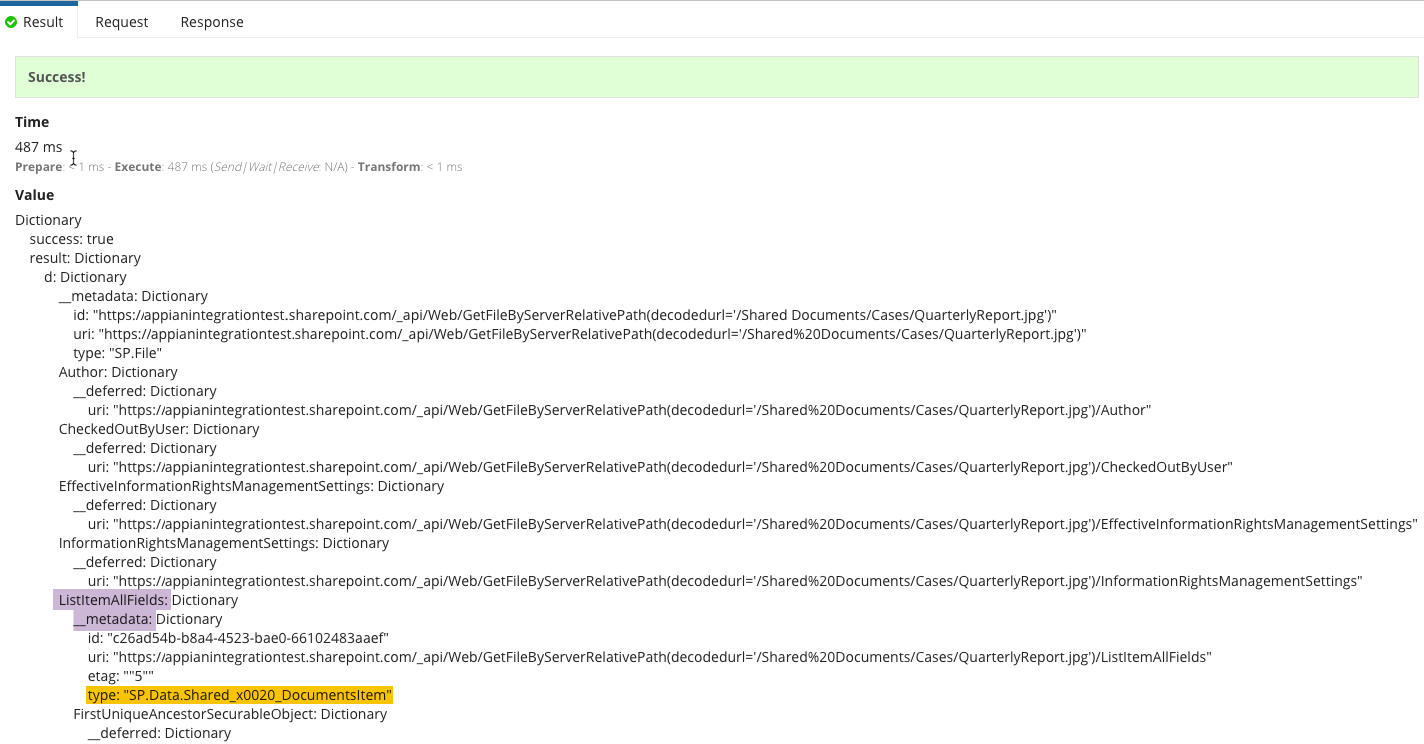
Sometimes, you can use SP.ListItem for the OData type. However, if that doesn't work, send a get metadata request. The OData type is listed under ListItemAllFields > __metadata in the response.
In our case, it is SP.Data.Shared_x0020_DocumentsItem.
Getting the metadata field nameCopy link to clipboard
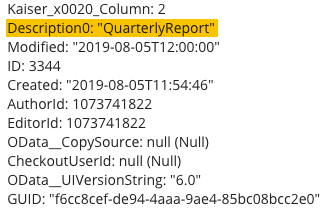
If you send a request to update data and it does not update, but the request says it was successful, send a get metadata request and look for the metadata field in the response. The name of the field might be different than its display name.
For example, in our SharePoint environment, we have a metadata field called "Description."
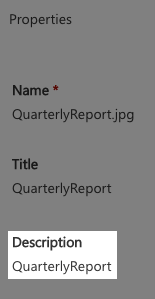
However, when we send a Get Document Metadata request, the name of the field is "Description0."
Creating the request bodyCopy link to clipboard
When we use the information we received from the get metadata request above, our request body looks like this:
1
2
3
4
5
6
=a!toJson(
  { "__metadata":
  { "type": `"SP.Data.Shared_x0020_DocumentsItem"` },
  `"Description0"`:"Quarterly report 2019-Q4"
  }
)
Copy
Providing the ETag valueCopy link to clipboard
If you need to prevent lost updates caused by multiple users making a request to update the same file, you should provide the ETag number. If you don't, when two or more requests are made at the same time, the last request to go through will overwrite the earlier requests. This could lead to one or more updates being lost because the last update won't include the information from the previous requests.
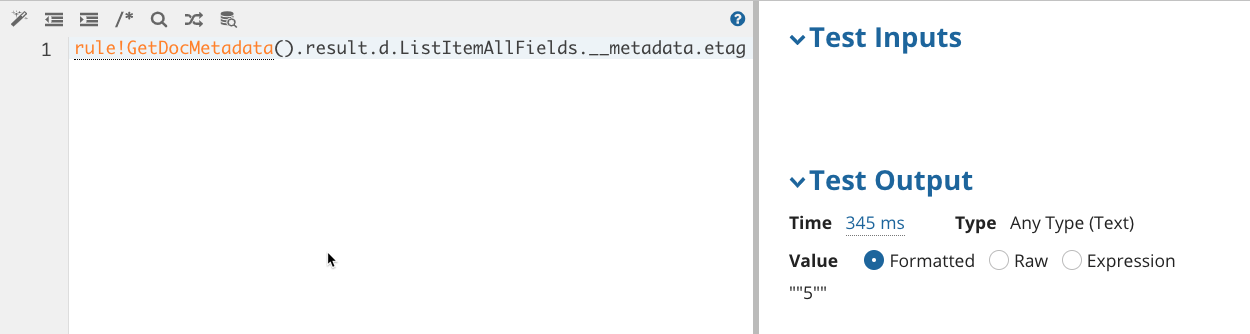
To get the ETag value, send a Get Document Metadata request. The body of the response contains the ETag number.
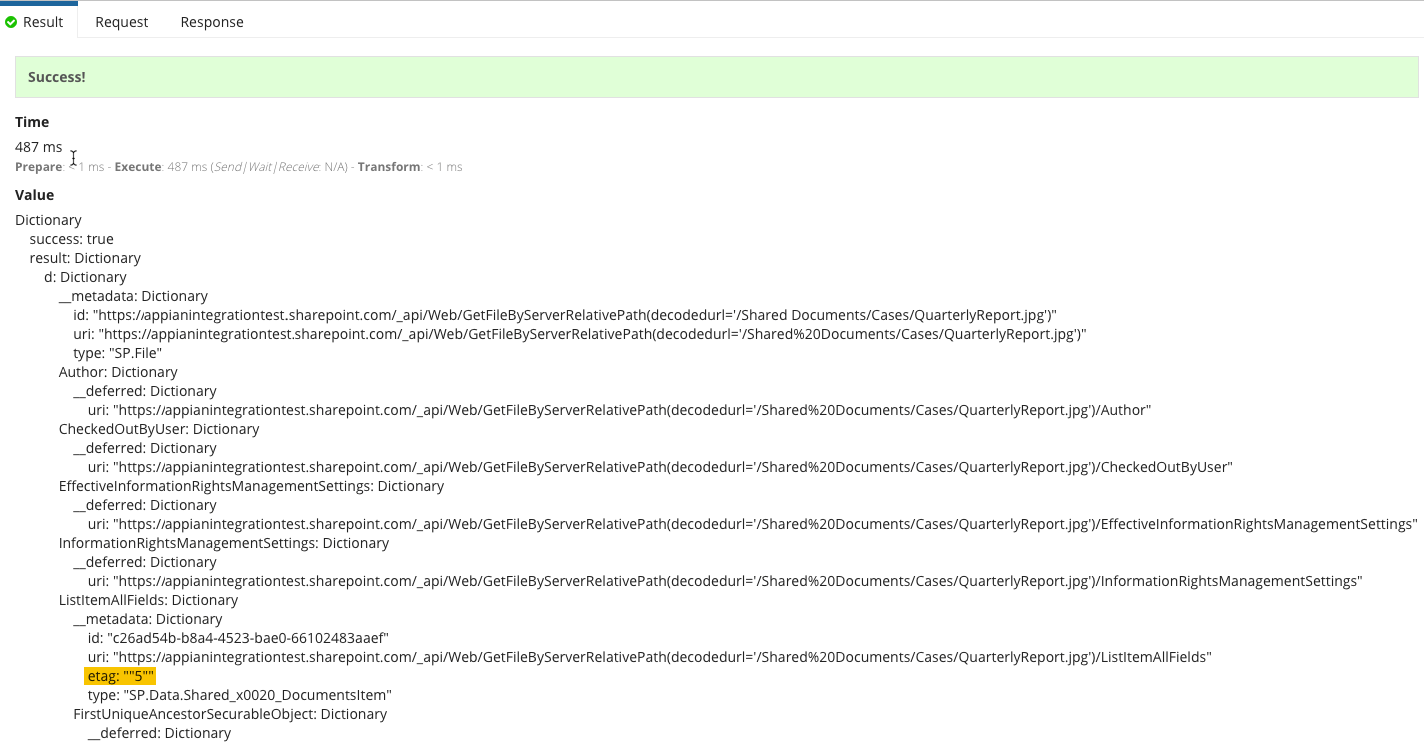
The dot notation we would use to get the ETag in the above response is .result.d.ListItemAllFields.__metadata.etag.