
| This content applies solely to Connected Servicing, which must be purchased separately from the Appian base platform. This content was written for Appian 23.3 and may not reflect the interfaces or functionality of other Appian versions. |
IntroductionCopy link to clipboard
Appian's Connected Servicing solution provides the ability to integrate with the following applications:
This page walks you through the steps for setting up each integration. After setting up the integrations you need for your Connected Servicing solution, you can manage them through the Connected Servicing System Administration Center.
Accessing the System Administration CenterCopy link to clipboard
The System Administration Center is a separate site in the Connected Servicing solution that allows administrators:
- Turn on/off connected integrations.
- View and update properties for connected integrations.
- Test integration connections.
Only administrators with the appropriate group membership are able to access this site. This ensures that only a select few have access to sensitive processes and information.
To access the System Administration Center:
- Make sure you are in the
AS FS Appian Administratorssecurity group. See the Groups Reference Page for more information about security groups. - From the Connected Servicing site, select the navigation menu
 > System Administration Center.
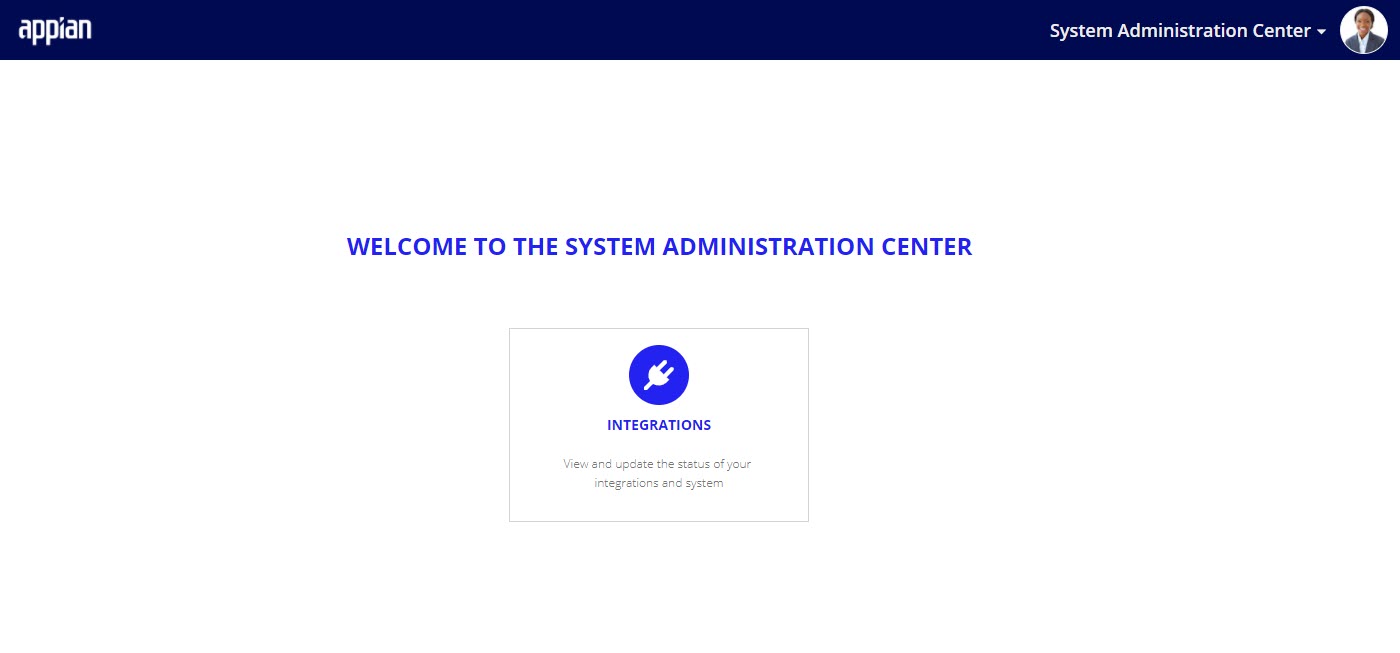
The Welcome to the System Administration Center page displays. You can click on the integrations card to view and update any connected integrations.
Integrating with Company HouseCopy link to clipboard
Appian's Connected Servicing application includes the ability to populate customer data from UK company registration service, Companies House. Connecting to Companies House helps users reduce data entry by pulling in any of the public registration information available from the Companies House service. Using Companies House is optional and requires some minimal configuration in the System Administration Center site after the Companies House prerequisites are completed.
PrerequisitesCopy link to clipboard
The Companies House is a public API, but your organization must still generate an authorization key before the service can be used.
To obtain an authorization key:
- From the Companies House website, create a Companies House account.
- Follow Companies House instructions to obtain an API key and save this key.
Once you have your Companies House API key:
- From Appian Designer, open
AS EI CHS CS Companies Houseconnected system. - Click Clear next to the Value field.
- Enter your authentication token in the Value field.
- Click SAVE.
Using the Companies House integrationCopy link to clipboard
Companies House provides registration information about a customer. Any Companies House information gathered is displayed on the Basic Info tab on customer profile.
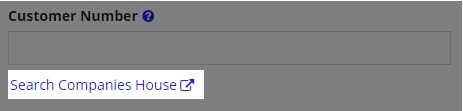
When creating or updating, you can provide a Customer Number. A Customer Number is the company registration / incorporation number a company was assigned upon registration. To find a Customer Number, you can search by name on the Companies House website by clicking Search Companies House link.
If the Companies House integration is connected and a Company Number is entered, Companies House will be called and any available information will be automatically populated.
The fields that can be pulled in for Companies House are:
- Customer Information:
- Class type: The class type of the customer. Possible values include LTD, PLC, LLP, etc.
- Class sub-type: The subtype of the company. Possible values are: community interest company and private fund limited partnership.
- Jurisdiction: The jurisdiction specifies the political body responsible for the company.
- Date of creation: The date a company was created.
- External registration number: The number given by an external registration body.
- Foreign company account information
- Foreign Account type: Legal form of the customer in the country of incorporation.
- Account from: Date account period starts under parent law.
- Account to: Date account period ends under parent law.
- Originating registry name: Identity of register in country of incorporation.
- Originating registry country: Country in which customer was incorporated.
- Credit/Finance Institution: Is it a financial or credit institution. Valid values: Yes or No.
- Must file within: Number of months within which to file disclosure of accounts under parent law.
- Governed by: Law governing the customer in country of incorporation.
- Registration number: Registration number in customer of incorporation.
- Terms of account publication: Describes how the publication date is derived.
- Company Type: Legal form of the company in the country of incorporation.
- Company status: The status of the customer. Valid values include: active, dissolved, liquidation, receivership, administration, voluntary arrangement, converted closed, and insolvency proceedings.
- Company status details: Extra details about the status of the company. Valid values include: transferred from UK, active proposal to strike off, petition to restore dissolved, transformed to SE, converted to PLC, converted to UK SOCIETAS, converted to UKEIG.
- Business Activity: Type of business undertaken by the UK establishment.
- Previous customer names: The previous names of this customer.
- Effective from:The date from which the customer name was effective.
- Ceased on: The date on which the customer name ceased.
- Customer links: A set of URLs related to the resource.
- Registered office address: The address of the customer's registered office.
If Companies House is disconnected or a Company Number is not provided, you can enter these fields manually.
Refreshing Companies House informationCopy link to clipboard
A user can manually check for changes to the information from Companies House from the customer record by clicking REFRESH COMPANIES HOUSE on the BASIC INFO tab of the customer profile.
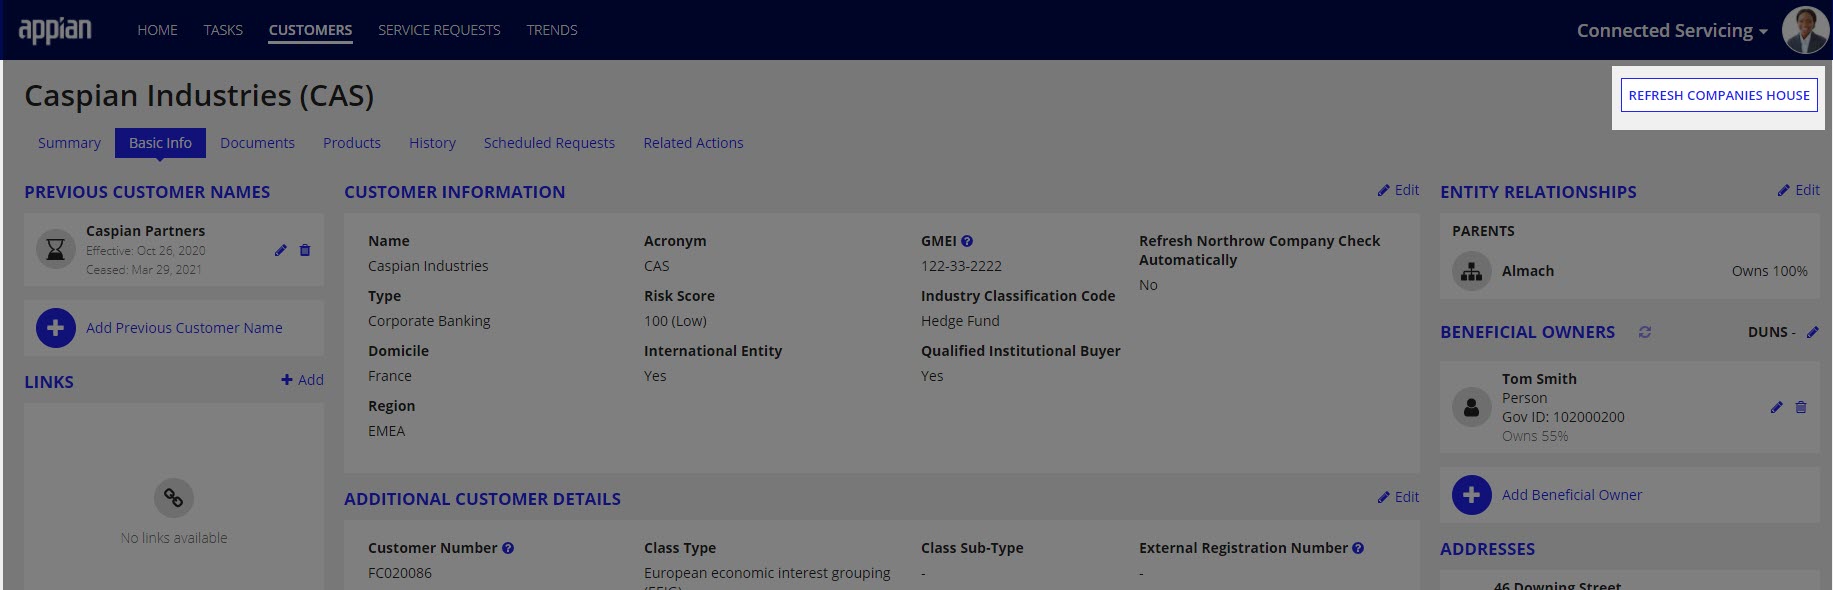
The refresh button is not available if the Companies House integration is disconnected.
Updating Companies House propertiesCopy link to clipboard
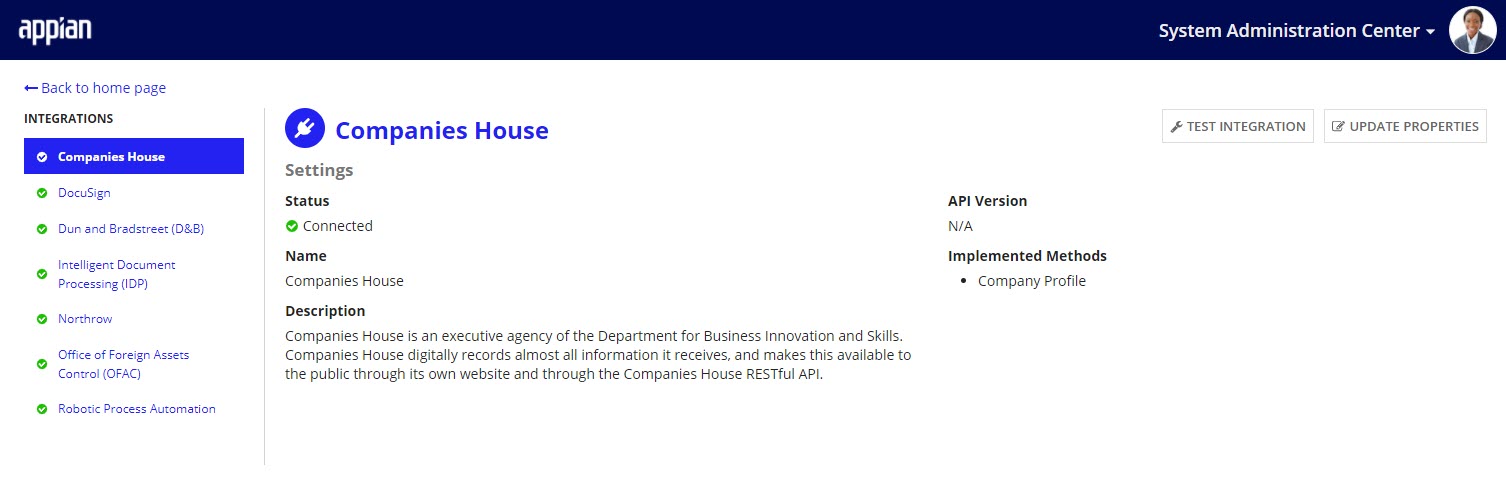
From the System Administration Center, you can determine whether or not the Companies House integration is connected. When Companies House is disconnected you will need to manually enter a customer's registration information.
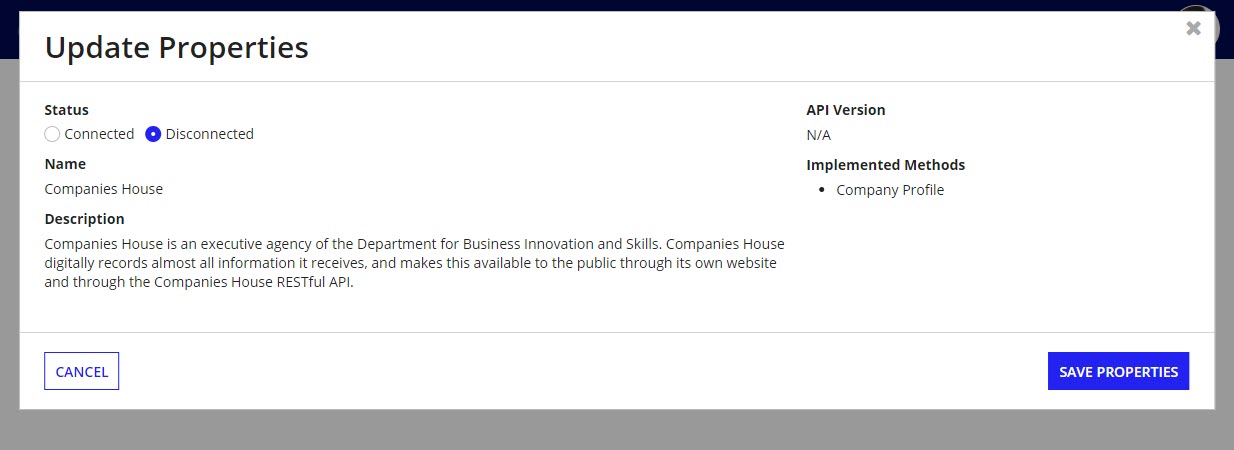
To update the Companies House properties:
- After accessing the System Administration Center, click Integrations.
- On the left, select Companies House.
- Click UPDATE PROPERTIES.
- Update Status.
- Click SAVE PROPERTIES.
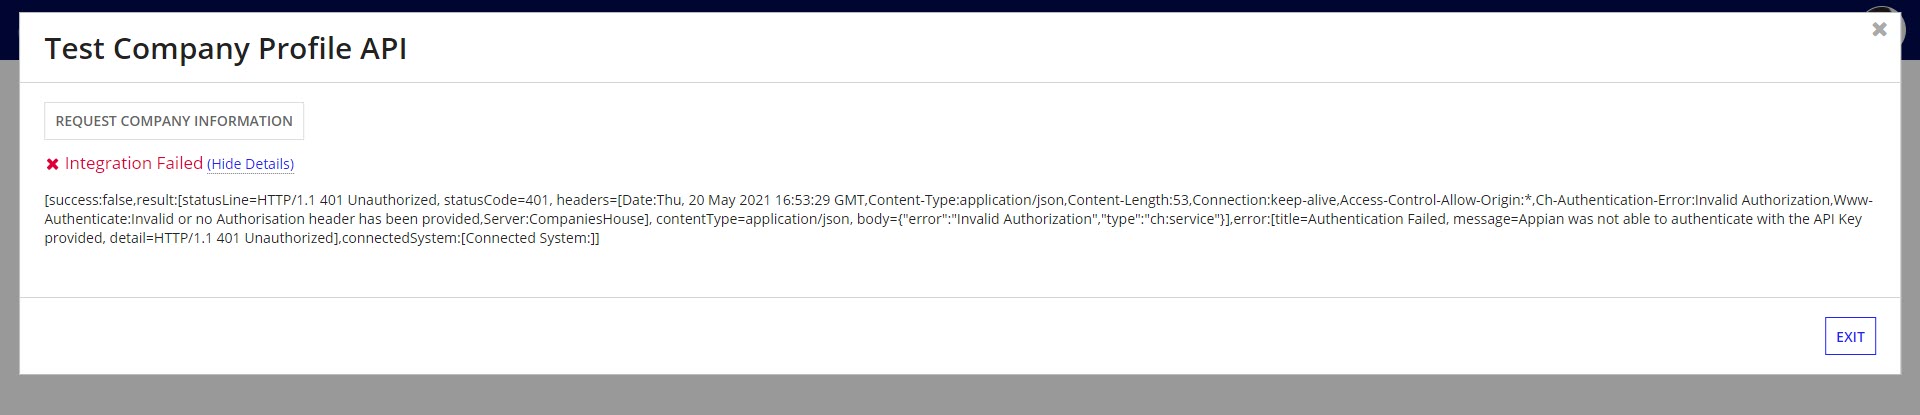
Testing Companies House integrationCopy link to clipboard
If you suspect that the Companies House integration is not working, you can test to see if this integration is working from the System Administration Center.
To test the Companies House connection:
- After accessing the System Administration Center, click Integrations.
- On the left, select Companies House.
- Click TEST INTEGRATION.
- Click REQUEST COMPANY INFORMATION.
- You are able to see what is returned, either Integration Successful or Integration Error.
- You are also able to see the Companies House service response details.
Integrating with DocuSignCopy link to clipboard
Appian's Connected Servicing solution includes electronic signature capture powered by a DocuSign integration. With DocuSign, users can sign documents and attach them directly to the Service Request and customer records. DocuSign is optional integration and requires some minimal configuration in both the Connected FS Settings and System Administration Center sites after the DocuSign prerequisite configuration is set up.
PrerequisitesCopy link to clipboard
If you would like to use the DocuSign tasks during your Service Request, you must have a DocuSign account and be able to retrieve your organization's credentials.
To generate or find your DocuSign authentication information:
- Follow these instructions to generate the proper credentials for JWT authentication for DocuSign.
Once you have your DocuSign authentication information:
- From Appian Designer, open the
AS EI Docusign Connected System. - Enter the Instance URL, API Account ID, API Username, Integration Key, and Private RSA Key.
- Click SAVE.
- Open the
AS_IO_DOCUSIGN_generateDocusignTaskEnvelopeexpression rule. - Update the JSON structures, if applicable.
Creating a DocuSign TaskCopy link to clipboard
The DocuSign integration sends documents to internal and external users to collect a signature. In order to have a document signed via DocuSign within Connected Servicing, a user must receive a DocuSign task.
If the DocuSign integration is not connected in the DocuSign properties of the System Administration Center, this task type is not accessible.
DocuSign tasks can be created and added to Service Request process templates in the Connected Servicing settings page or can be sent ad-hoc during an active Service Request.
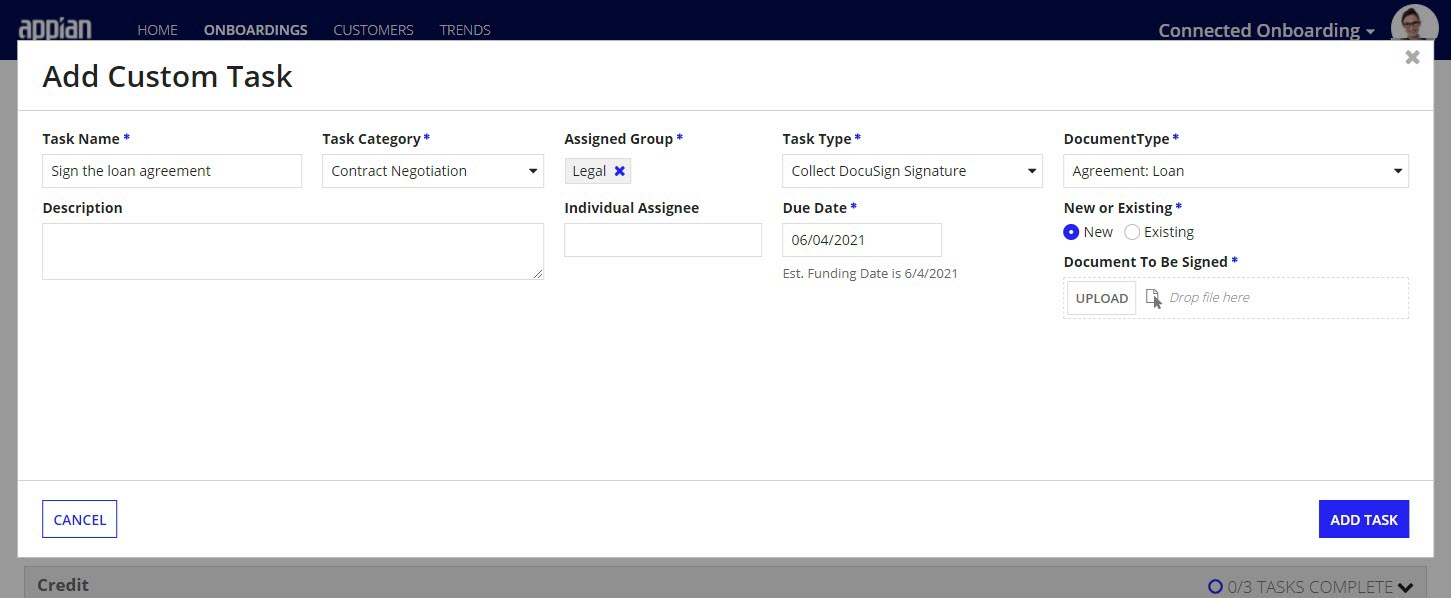
Sending an ad-hoc DocuSign taskCopy link to clipboard
To send an ad-hoc DocuSign Task:
- Open the Service Request and go to the Tasks tab.
- Click New Task.
- Enter Task Name, Task Category, Assigned Group, and Due Date.
- To assign the DocuSign task to an external customer, in the Assigned Group dropdown, select the customer name.
- For Task Type, select Collect DocuSign Signature.
- Enter the additional required fields:
- Document Type: The document type of document to sign.
- New or Existing: Whether or not you would like to use a document template that has already been uploaded to the system or a upload a new template.
- Document to be Signed: The document template to be signed.
- Note: If New is selected, this will be a document upload field. If Existing is selected, this will be a dropdown list.
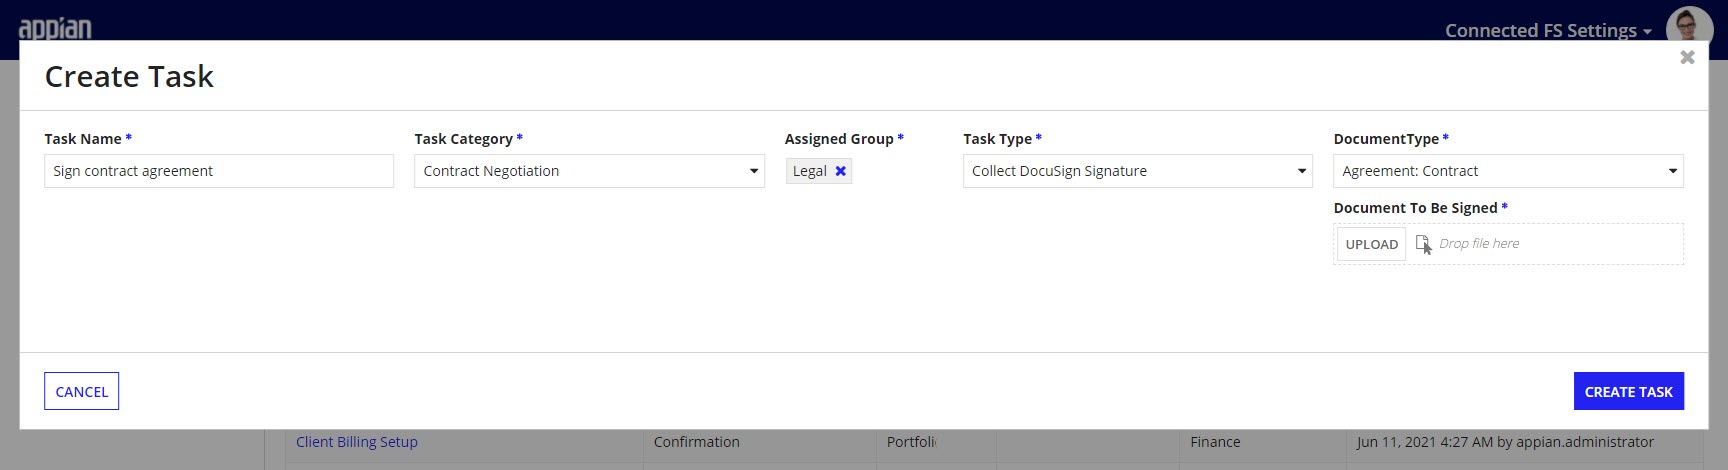
Creating a DocuSign task for Service Request process templatesCopy link to clipboard
To create a DocuSign task to use in Service Request process templates:
- From the Connected FS Settings site, click PROCESS.
- On the left navigation pane, select Tasks.
- Click NEW TASK.
- Enter the Task Name, Task Category, and Assigned Group.
- Note: To assign the DocuSign task to an external customer, in the Assigned Group dropdown, select the Customers group. When the task is generated, the Assigned Group will automatically be updated to the customer that is being onboarded.
- For Task Type, select Collect DocuSign Signature.
- Enter the additional required fields:
- Document Type: The type of document to be signed.
- Document to be Signed: The document template that the user will be sign via DocuSign.
- Click CREATE TASK.
When a user goes to edit or update process templates, this task will now be available for use.
Completing a DocuSign TaskCopy link to clipboard
When a user receives a DocuSign task, it will appear on their task list with a task type Collect DocuSign Signature.
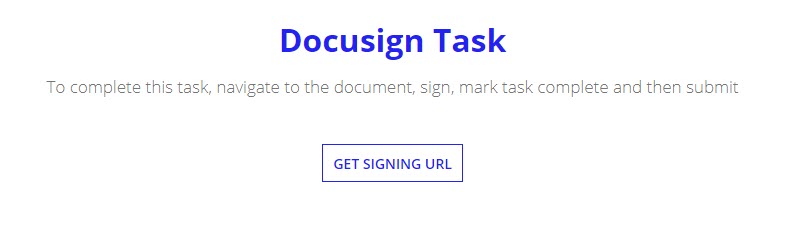
To complete a DocuSign Task:
- From the task list, click on the task name.
-
Click GET SIGNING URL.
- Click Sign Document.
- Note: Clicking Sign Document opens a new tab that contains the document for the user to sign.
- Use DocuSign to provide an e-signature.
- Note: Once you click FINISH in DocuSign this tab will navigate to your home page.
- Once signed, return to the task tab.
- Check the DOCUMENT SIGNED box.
- Note: A preview of the signed document will appear.
- Click Submit.
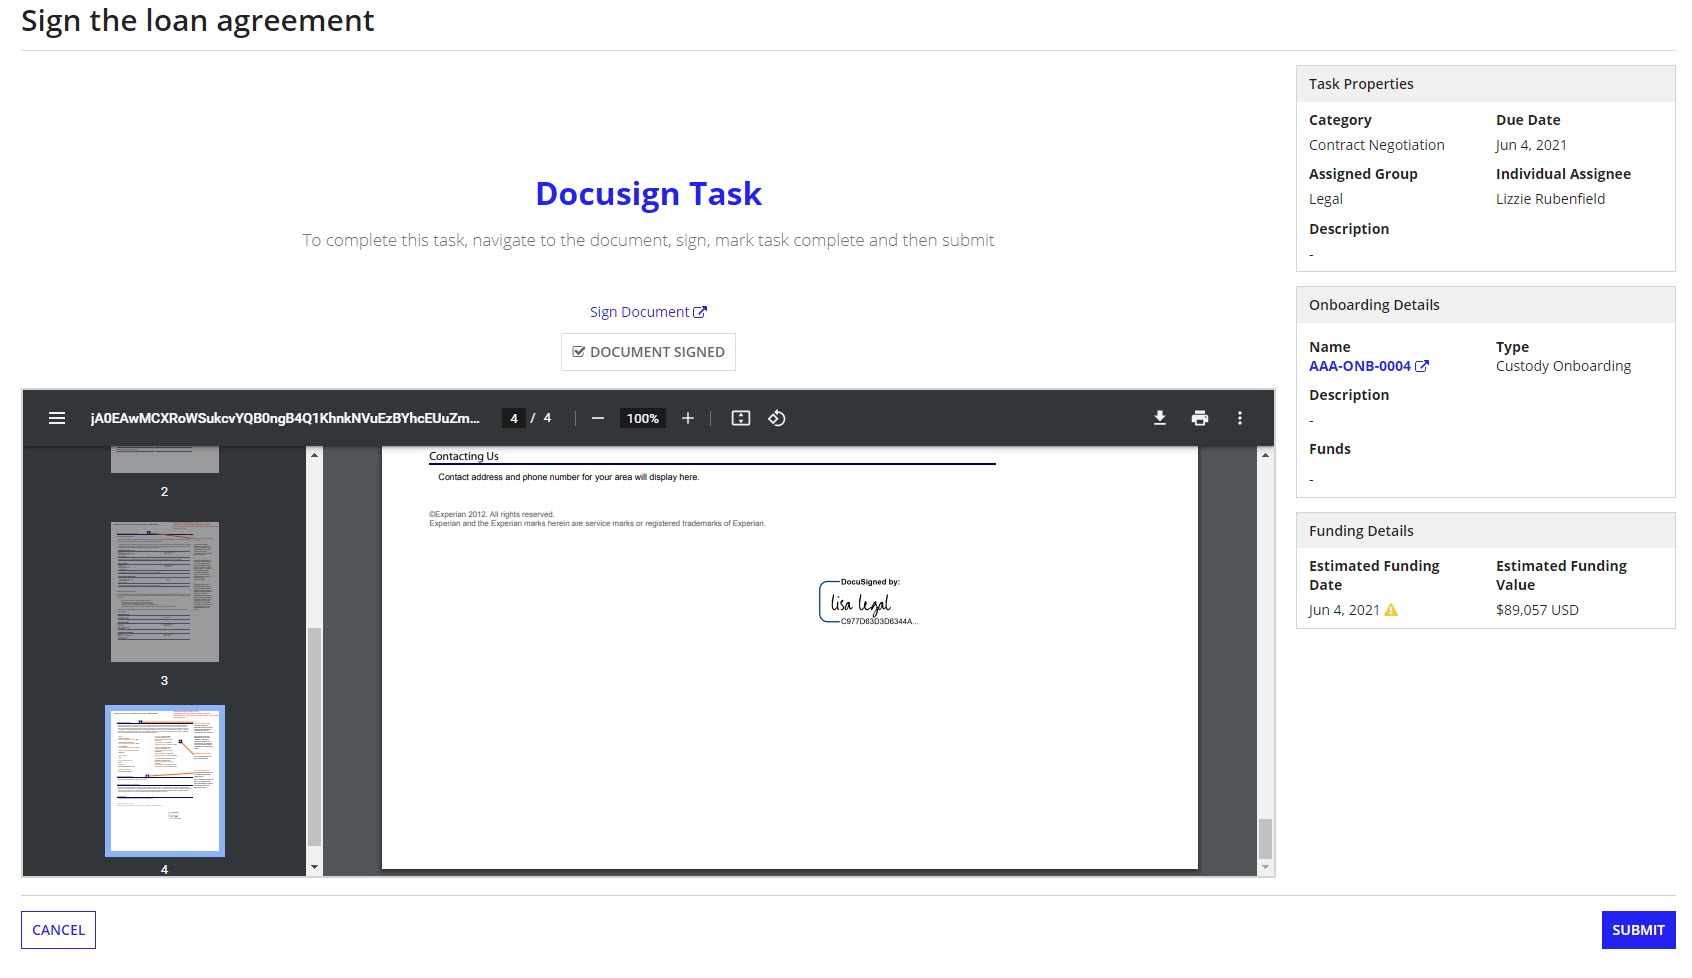
The signed document will also be available on the DOCUMENTS tab of the Service Request and customer records.
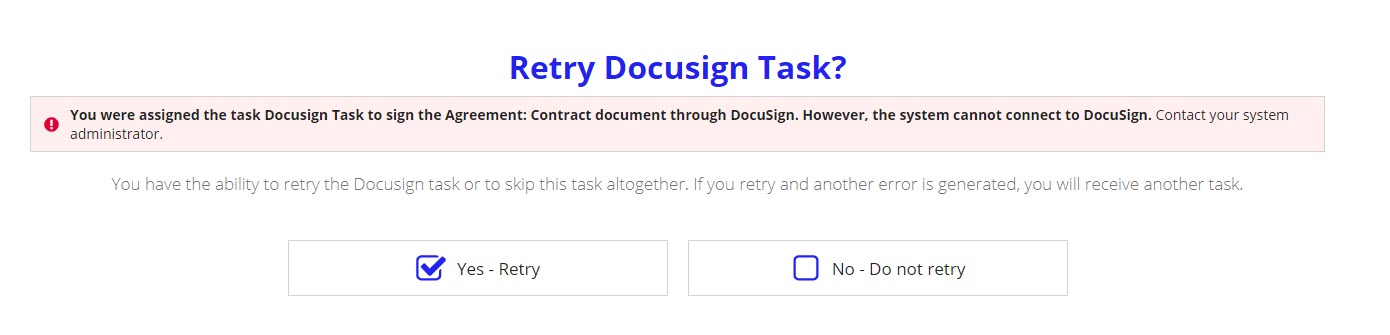
Completing a DocuSign Error TaskCopy link to clipboard
If there is an issue with the DocuSign integration while a task is opened or assigned and the system will generate a DocuSign task and assign it to the user who the original DocuSign task was assigned to.
To complete a DocuSign Error Task:
- From the task list, click on the task name.
- Choose an option, either Yes - Retry or No - Do not retry.
- If you choose Yes - Retry and the connection issue has been resolved, the original DocuSign task will be opened. If it has not, a subsequent error task will be generated.
- If you choose No - Do not retry, the error task will be closed and any tasks dependent on the original DocuSign task will be kicked off.
- Click SUBMIT.
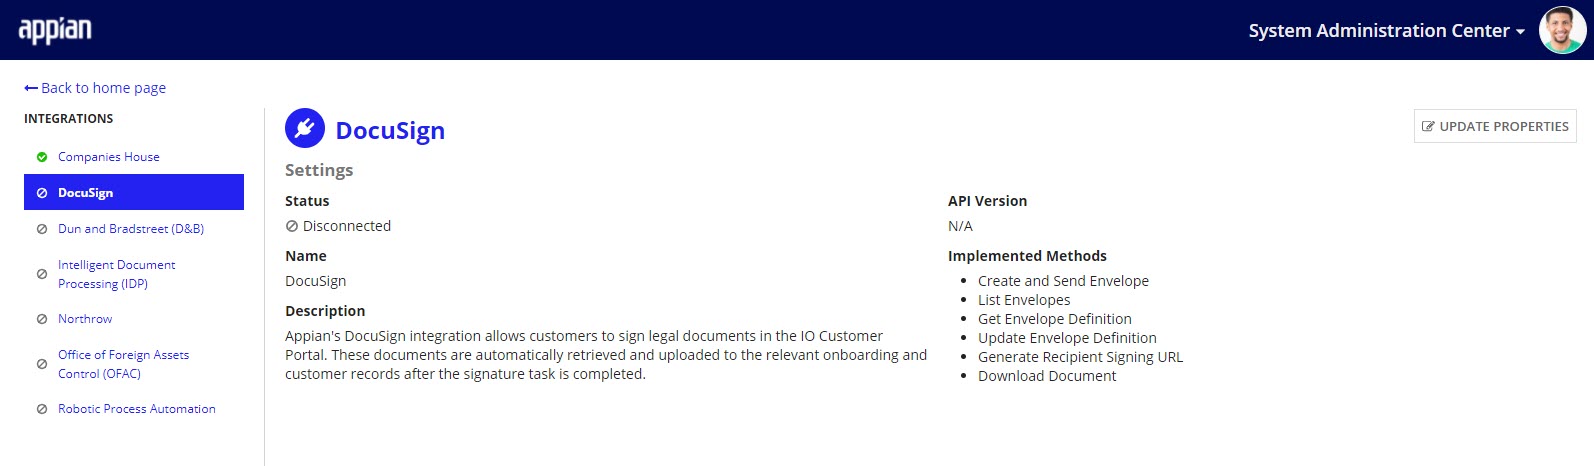
Updating DocuSign propertiesCopy link to clipboard
From the System Administration Center, a user can determine whether or not the DocuSign integration is connected. When DocuSign is disconnected a user will not be able to use DocuSign tasks to gather signatures on documents during the Service Request process.
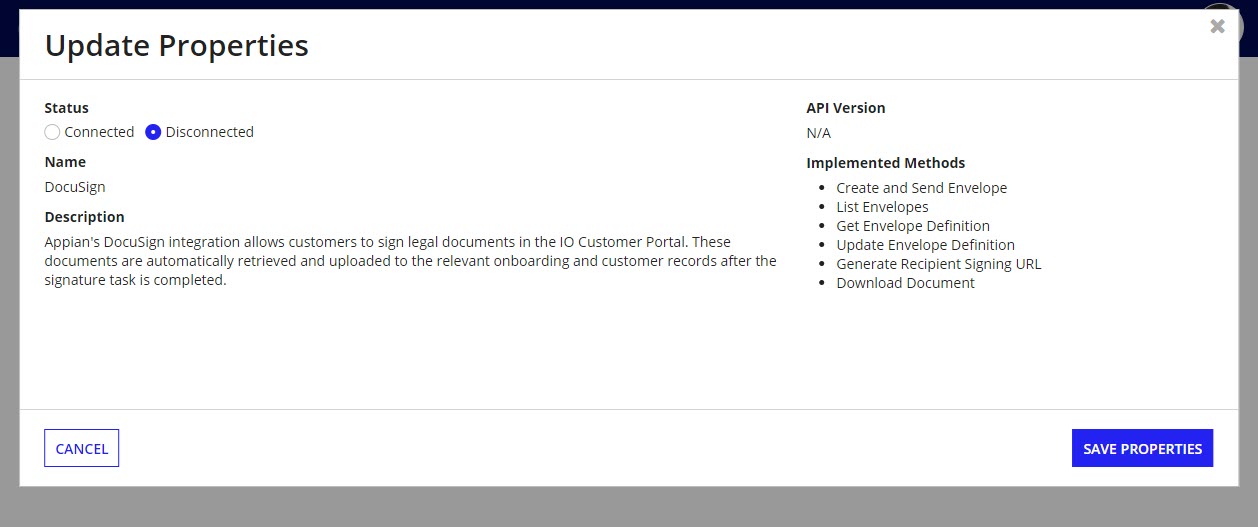
To update the DocuSign properties:
- From the System Administration Center, click Integrations.
- On the left, select DocuSign.
- Click UPDATE PROPERTIES.
- Update Status.
- Click SAVE PROPERTIES.
Integrating with OFACCopy link to clipboard
Verifying a customer's identity to comply with Know Your Customer (KYC) requirements is an important part of every financial institution's processes. Connected Servicing helps to automate part of this process by integrating with the OFAC Consolidated Screening List API from Trade.gov. This integration searches customer names against eleven export screening lists of the Departments of Commerce, State, and Treasury to help institutions screen potential parties to regulated transactions.
Using OFAC is optional and requires some minimal configuration in both the Connected FS Settings and System Administration Center sites after the OFAC prerequisites are completed.
If you would like to change the OFAC integration further, see the Modifying OFAC Integration page for additional customization options.
PrerequisitesCopy link to clipboard
The OFAC Consolidated Screening API is a free, public API, but your organization must still generate access tokens before the service can be used.
To obtain an access token, subscribe to the Consolidated Screening List API.
Once you have your OFAC authentication information:
- From Appian Designer, open the
AS IO Trade.gov Consolidated Screeningconnected system. - In the Value field, enter the Primary Key value that was automatically generated for you in your ITA Developer account.
- Click SAVE.
Using the OFAC integrationCopy link to clipboard
The OFAC integration uses the customer's name to search against the OFAC consolidated screening list. An OFAC check is completed with a Consolidated Screening Check task during an Service Request.
If the OFAC integration is not connected in the OFAC properties of the System Administration Center, this task type is not accessible.
Caution: There can be a time lag of up to one hour between the time a Source has updated a screening list and when that update appears in the Consolidated Screening List API.
Creating an OFAC consolidated screening check taskCopy link to clipboard
OFAC tasks can be created for Service Request process templates in the Connected FS Settings page.
To create an OFAC task for Service Request process templates:
- From the Connected FS Settings site, click PROCESS.
- On the left, select Tasks.
- Click NEW TASK.
- Enter the Task Name, Task Category, and Assigned Group.
- For Task Type, select Consolidated Screening Check.
- Click CREATE TASK.
Completing an OFAC consolidated screening results taskCopy link to clipboard
An OFAC consolidated screening check task will run as an automated task and only require user action if the customer's name has been found on the consolidated screening list or if the connection to OFAC failed. In the scenarios where user action is required, a task will be opened for the Assigned Group designated during task creation.
When there are consolidated screening results or an error occurs, a Consolidated Screening Results OFAC task will appear on the task list.
Caution: The Consolidated Screening List API is not the system of record for these screening lists. Users are strongly encouraged to refer to the website of the source agency for further instructions when finding a potential match.
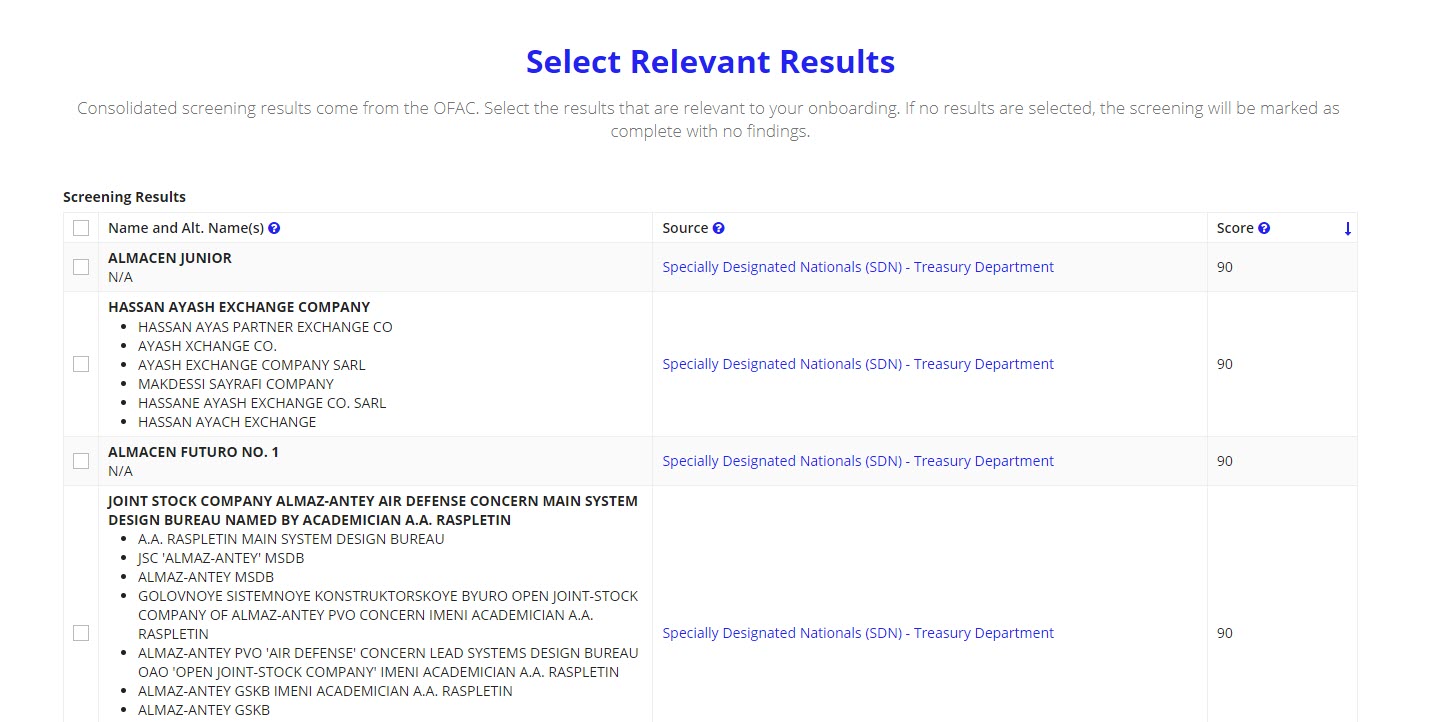
To complete a Consolidated Screening Results task with results:
- From the task list, click on the task name.
- Check the box next to any results in the list that are relevant to the Service Request or customer.
- Note: The selected relevant results will available on the OFAC Check Results tab of the customer and Service Request records, after the task is completed.
- Note: The OFAC APIs return a maximum of 100 results per request. Only the first 100 most relevant results of a search will display.
- Click SUBMIT.
Caution: If a party to a user's transaction matches the name of a party on the consolidated list, the user must check the official publication of restricted parties in the Federal Register or the official lists of restricted parties maintained on the websites of the Departments of Commerce, State and the Treasury to ensure full compliance with all of the terms and conditions of the restrictions placed on the parties on this list. Links to these websites are found in the "Source List URL" and "Source Information URL" fields that accompany each party returned in the API. These links connect users to the specific webpage that contain additional information about how to use each specific list.
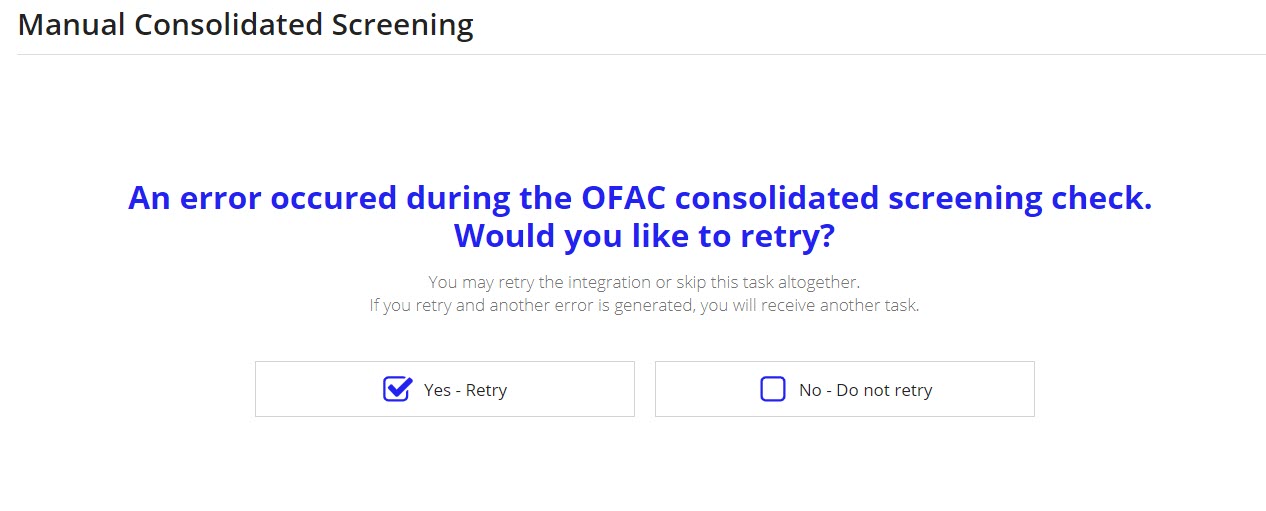
Completing an OFAC Error TaskCopy link to clipboard
If there is an issue with the OFAC integration while a task is opened or assigned, the system will generate a Review OFAC-Consolidated Screening Errors task and assign it to the user who the original Consolidated Screening Check task was assigned to.
To complete a Review OFAC-Consolidated Screening Errors task:
- From the task list, click on the task name.
- Choose an option, either Yes - Retry or No - Do not retry.
- If you choose Yes - Retry and the connection issue has been resolved, the original OFAC task will be completed and if necessary a Consolidated Screening Results task will be opened. If it has not, a subsequent error task will be generated.
- If you choose No - Do not retry, the error task will be closed and any tasks dependent on the original OFAC task will be kicked off.
- Click SUBMIT.
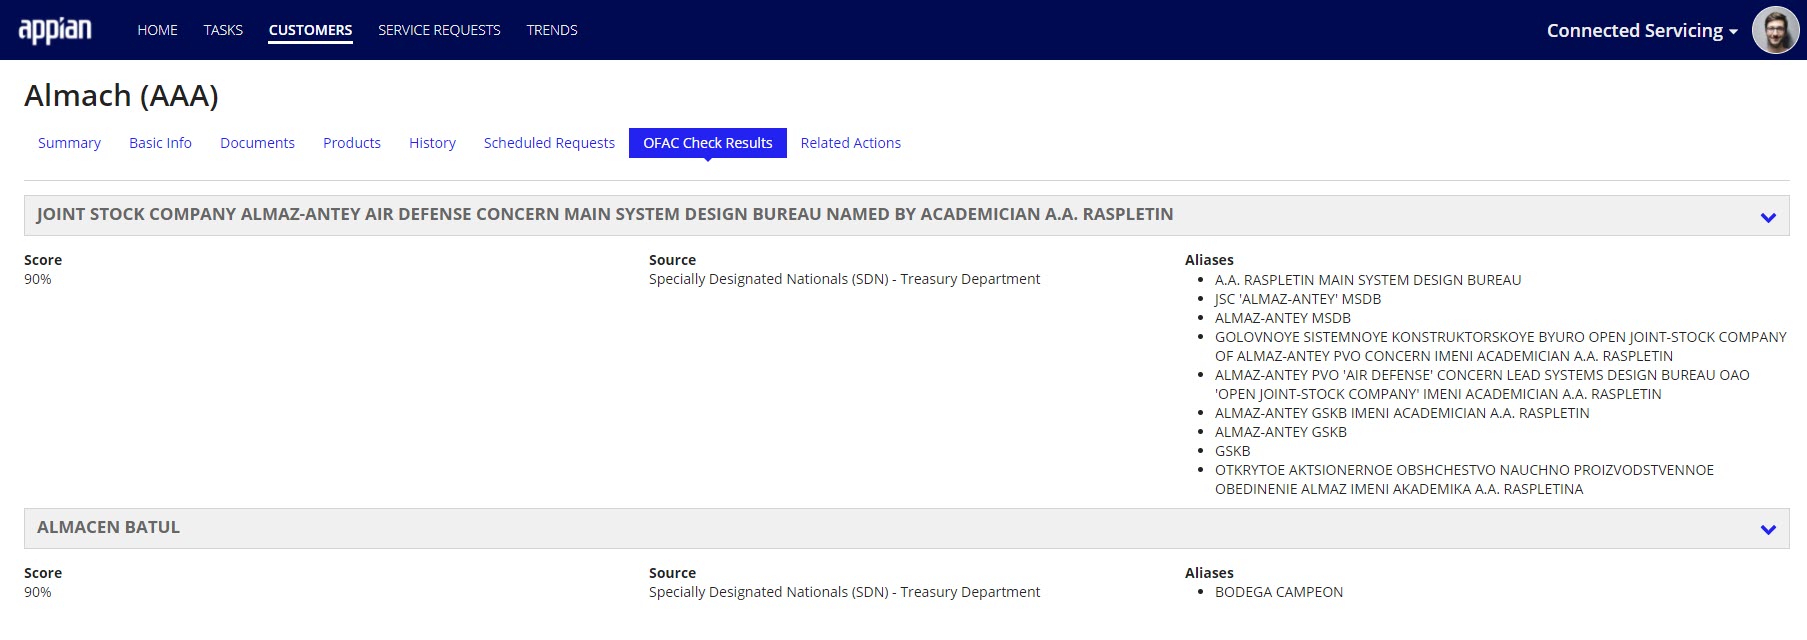
Viewing Relevant OFAC ResultsCopy link to clipboard
If while completing an OFAC task a user selects relevant results, these results will be available for all users to view on both the customer and Service Request records.
To view the relevant OFAC results from either the CUSTOMER or Service Request record, click the OFAC CHECK RESULTS tab. The selected results will be listed along with the details on this page.
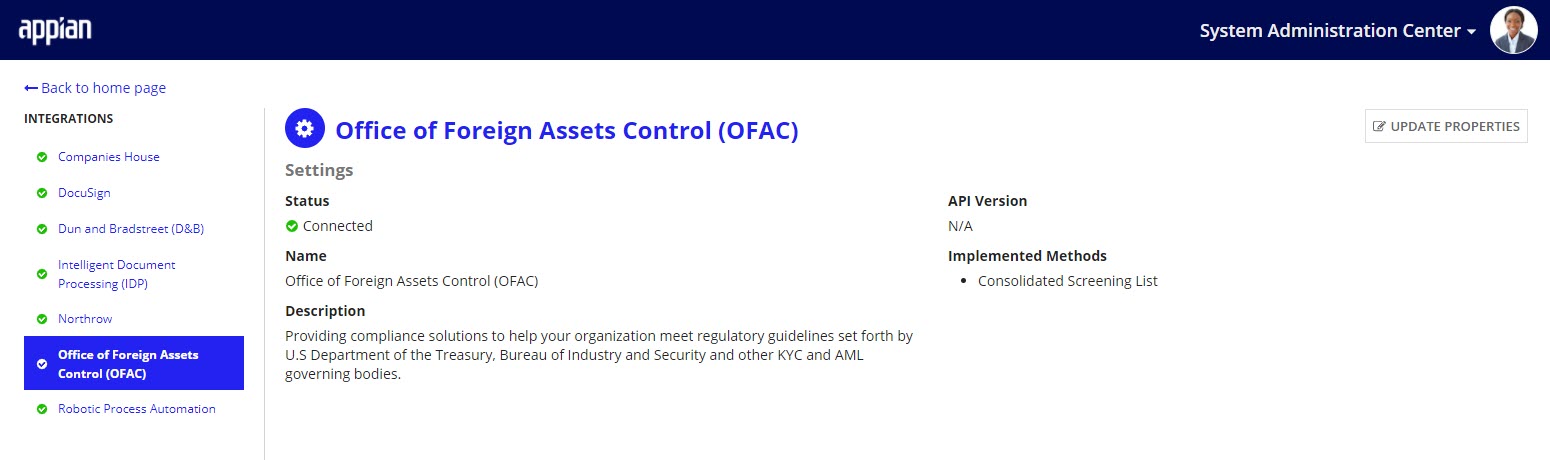
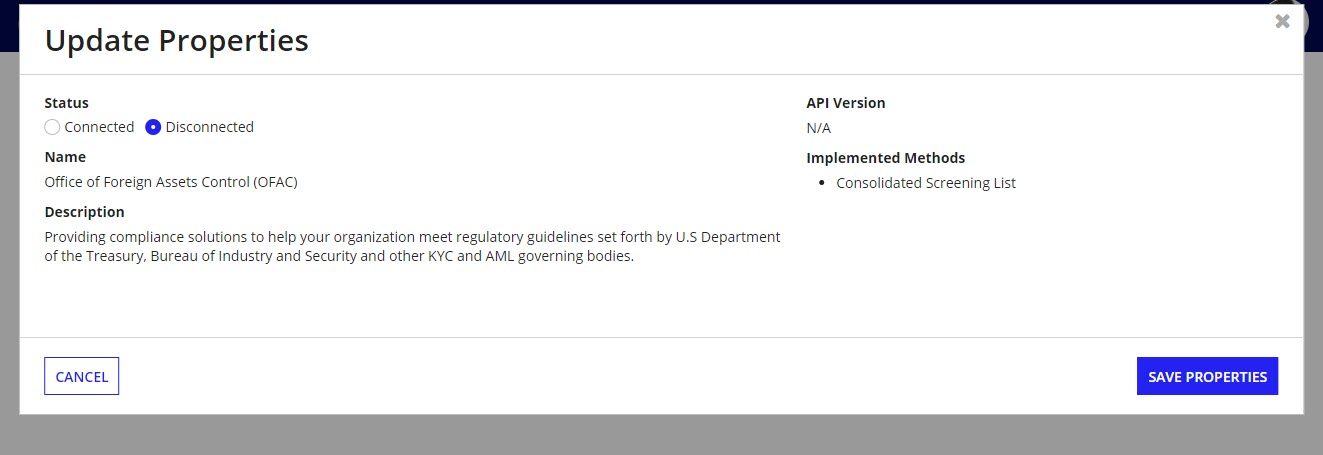
Updating OFAC propertiesCopy link to clipboard
From the OFAC, a user can determine whether or not the OFAC integration is connected. If OFAC is disconnected, a user will not be able to add consolidated screening report tasks to Service Request processes.
To update the OFAC properties:
- After accessing the System Administration Center, click Integrations.
- On the left select, OFAC.
- Click UPDATE PROPERTIES.
- Update Status.
- Click SAVE PROPERTIES.
Integrating with Dun & BradstreetCopy link to clipboard
Appian's Connected Servicing application includes gathering Ultimate Beneficial Owners (UBO) from a Dun & Bradstreet integration. Using Dun & Bradstreet allows users to see the most up to date information about a customer's UBOs. Using Dun & Bradstreet is optional and requires some minimal configuration in the System Administration Center site after the Dun & Bradstreet prerequisite configuration is set up.
PrerequisitesCopy link to clipboard
If you would like to use the Dun & Bradstreet functionality during your Service Request, you must have a Dun & Bradstreet account and be able to retrieve your organization's credentials.
Once you have your Dun & Bradstreet authentication information:
- From Appian Designer, open the
AS EI DNB Bearer Token Connected System. - Enter User and Password.
- Click SAVE.
Using the Dun & Bradstreet integrationCopy link to clipboard
When a customer is created, a user can enter search for a customer, which will then pull back and store a company's DUNS number. A DUNS number is a unique nine-digit identifier for businesses given by Dun & Bradstreet. If a DUNS number is available and the Dun & Bradstreet integration is connected, Connected Servicing will retrieve UBOs and display them on the customer profile.
A user can manually check for changes to the UBO in the customer profile by clicking the refresh button next to the BENEFICIAL OWNERS section.
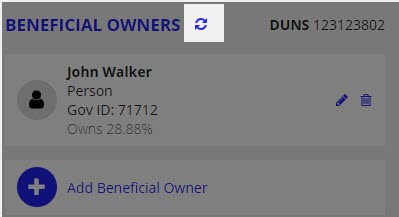
The refresh button is disabled if the Dun & Bradstreet integration is disconnected or a DUNS number is not saved, but a user can search for the DUNS number using the GET DUNS NUMBER button on the customer record.

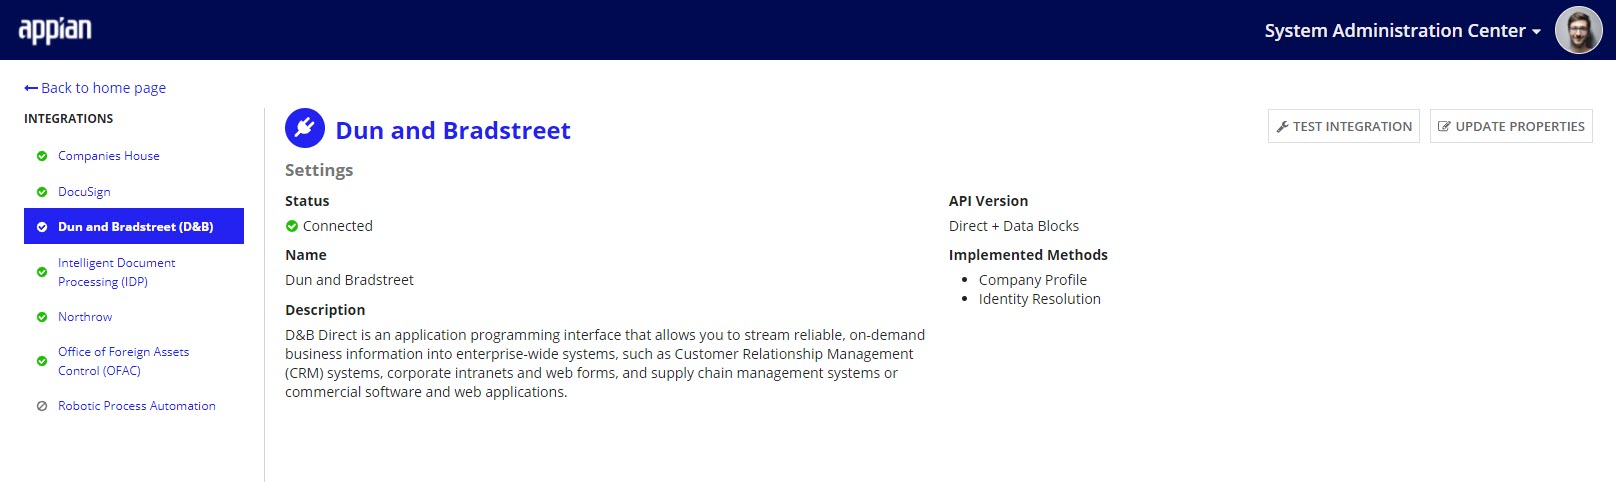
Updating Dun & Bradstreet propertiesCopy link to clipboard
From the System Administration Center, a user can determine whether or not the Dun & Bradstreet integration is connected. When Dun & Bradstreet is disconnected a user will not be able to use Dun & Bradstreet to gather or refresh the beneficial owners.
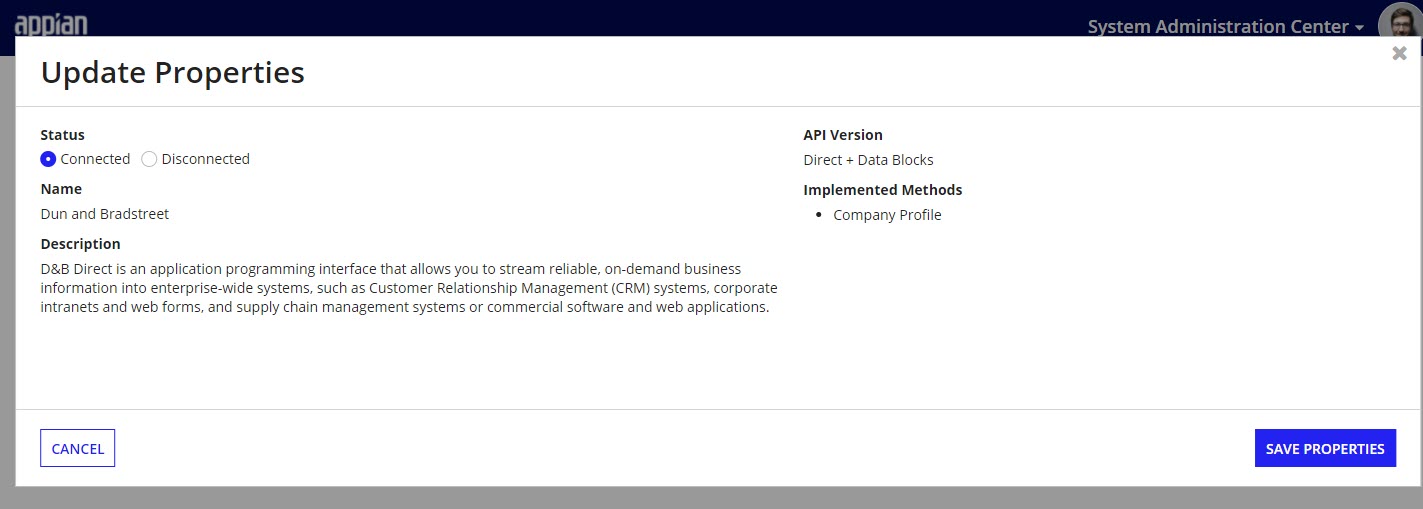
To update the Dun & Bradstreet properties:
- From the System Administration Center, click Integrations.
- Select Dun & Bradstreet on the left hand navigation pane.
- Click UPDATE PROPERTIES.
- Update Status.
- Click SAVE PROPERTIES.
Testing Dun & Bradstreet integrationCopy link to clipboard
If you suspect that the Dun & Bradstreet integration is not working, you can test to see from the System Administration Center.
To test the Dun & Bradstreet connection:
- From the System Administration Center, click Integrations.
- Select Dun & Bradstreet on the left hand navigation pane.
- Click TEST INTEGRATION.
- Click REQUEST ULTIMATE BENEFICIAL OWNERS.
- You are able to see what is returned, either Integration Successful or Integration Error.
- You are also able to see the Dun & Bradstreet service response details.
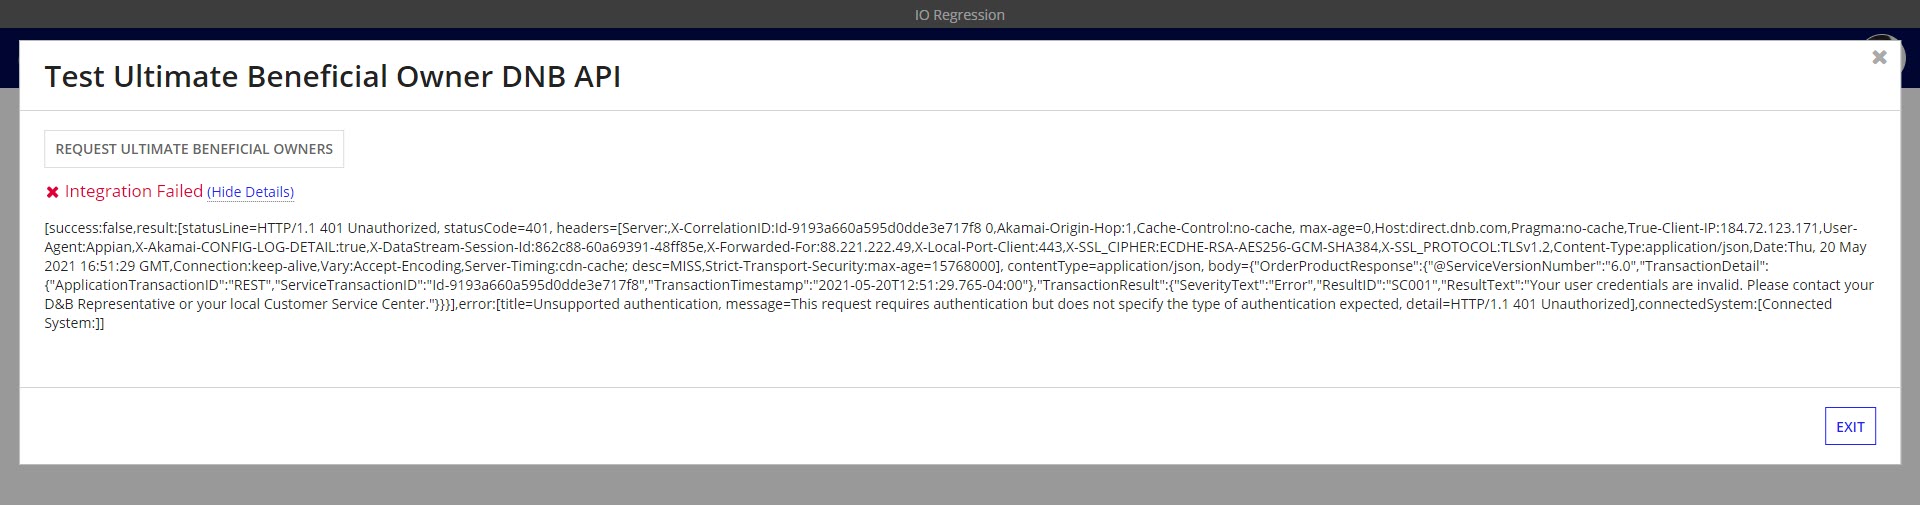
If both of these tests work, the service is up and connecting properly.
Integrating with IDPCopy link to clipboard
Appian's Connected Servicing application includes automated document classification powered by Appian's Intelligent Document Processing (IDP). This process is used to help save users time by automatically classifying the types of documents that are uploaded to Connected Servicing. Using IDP is optional and requires some minimal configuration in both the Connected Servicing Settings and System Administration Center sites after the prerequisites are complete.
PrerequisitesCopy link to clipboard
In order to use this functionality as shipped, make sure that Google Cloud is set up.
Google Cloud set up for Appian AI customersCopy link to clipboard
If you have opted in to being an Appian AI customer, contact your Appian technical contact administrator. The technical contact will have received the service account credentials, bucket names, and region information in the License Management site on Appian Community.
Your technical contact administrator is listed on the Accounts page on Community, under Administrators. Note that you must be registered with your company on Community to access this site.
Google Cloud set up for Non-Appian AI customersCopy link to clipboard
If you have purchased Google Cloud separately, follow these steps to set up AutoML Natural Language and create your Google Service Account and key.
Tip: AutoML Natural Language and Document AI can share Google service accounts (for authentication) and storage buckets (for prediction and extraction).
To set up Google Cloud AutoML Natural Language:
- Create or select project: As the Project Owner, log in to the Google Cloud console and select an existing project or create a new project.
- Enable billing: Ensure that billing is enabled for your project.
- Enable APIs: Enable the
Cloud AutoML API,Google Cloud Storage JSON API, andCloud Document AI API. - Create storage buckets: Create Cloud Storage buckets that follow the bucket requirements to store the AutoML Natural Language files:
- For us-central1:
- Location type:
Region - Location:
us-central1 - Storage class:
Standard(sometimes displayed in the Cloud Storage browser as Regional)
- Location type:
- For eu:
- Location type:
Multi-region - Location:
eu - Storage class:
Standard(sometimes displayed in the Cloud Storage browser as Multi-Regional)
- Location type:
- For us-central1:
Note: You may choose to have two buckets: one for the training documents and one for the prediction documents. Or, you can use the same storage bucket for both. If you use two buckets, then they must be in the same regional location.
To create your Google Service Account and key:
- Create a Google Service Account in the Google Cloud Console with AutoML Admin and Storage Admin permissions
- Create the service account key and save the file as a JSON document.
Updating IDP specific constantsCopy link to clipboard
You will need update the constants to match your configuration from your Google Cloud set up.
Constants to update from Appian Designer are:
AS_FS_IDP_CLOUD_REGION- value should be your Google Cloud region.AS_FS_IDP_CLOUD_PROJECT_ID- value should be your Google Cloud project ID.AS_FS_IDP_AUTOML_CLOUD_BUCKET- value should be your Google Cloud Auto ML bucket.AS_FS_IDP_STORAGE_CLOUD_BUCKET- value should be your Google Cloud storage bucket.
Updating the connected system (only EU storage buckets)Copy link to clipboard
If your storage bucket is in the eu multi-region, you will need to update the compute region for two of the connected systems.
To update the connected systems:
- From Appian Designer, open the
AS FS IDP Google Cloud AutoMLconnected system. - Update the Compute Region to
eu. - Open the
AS FS IDP Google Cloud Storageconnected system. - Update the Compute Region to one of the Europe regions. These region options start with
europe-.
Document classification with IDP process overviewCopy link to clipboard
When a user uploads a document in Connected Servicing, the system:
- Checks if IDP is turned on.
- Determines if the document uploaded matches an uploaded example document.
- Assigns matching example document type to the uploaded document and determines TYPE CONFIDENCE level.
- If a TYPE CONFIDENCE level is below the CONFIDENCE THRESHOLD, a document reconciliation task is assigned to a user.
- Note: the CONFIDENCE THRESHOLD can be changed.
If IDP is not turned on, users will need to manually select DOCUMENT TYPE for an uploaded document.
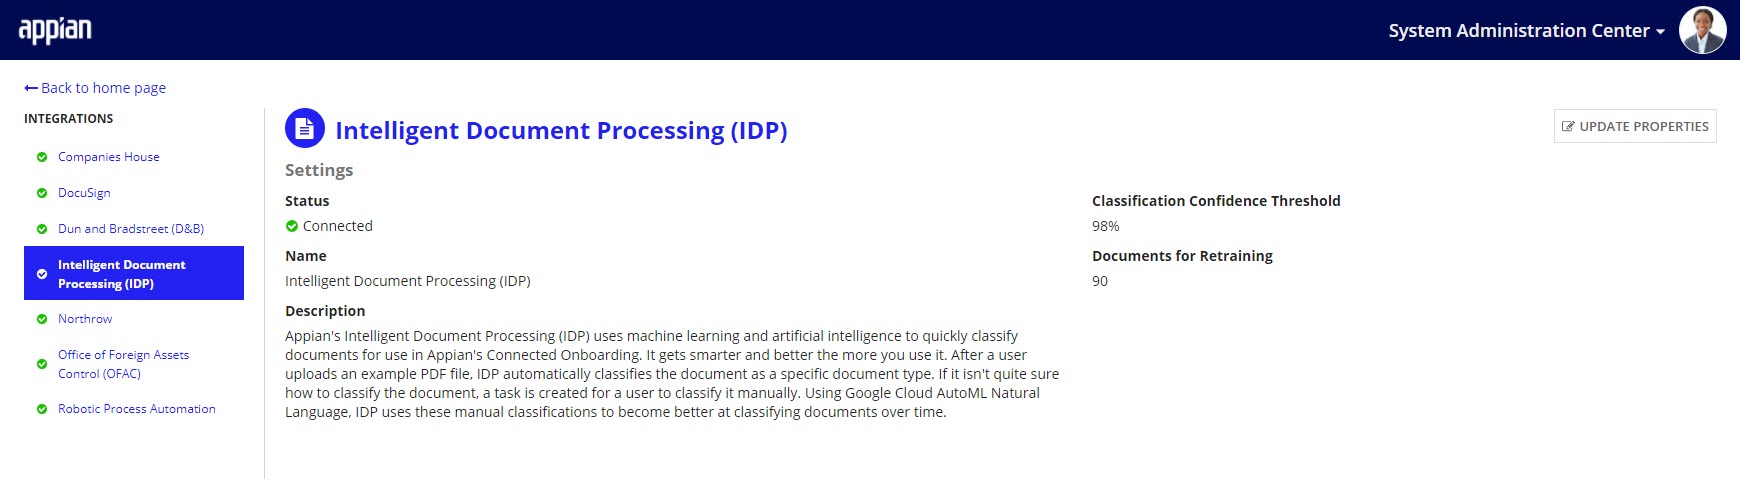
Updating IDP PropertiesCopy link to clipboard
There are several IDP properties users can update from the System Administration Center including:
- Status: Whether or not IDP is connected.
- Note: When IDP is disconnected a user will not be able to add classification files for document types.
- Classification Confidence Threshold: The percentage of confidence that the data must meet when it is extracted from a document. If it doesn't meet this threshold, the value will not be automatically populated. During the reconciliation task, a user will need to provide the value.
- Tip: As with the classification threshold, a higher confidence percentage will increase auto-extraction accuracy, but it will also increase the number of fields that need to be populated by the user.
- Note: This will only show when IDP is connected.
- Documents for Retraining: The number of documents that will need to be classified before triggering the retraining of the AI classification machine learning model. This enables the AI classification model to improve over time. A lower number allows the model to learn more quickly, but also increases the Google Cloud Platform costs. This could cause you to hit your Appian AI or Google account limits more quickly.
- Note: This will only show when IDP is connected.
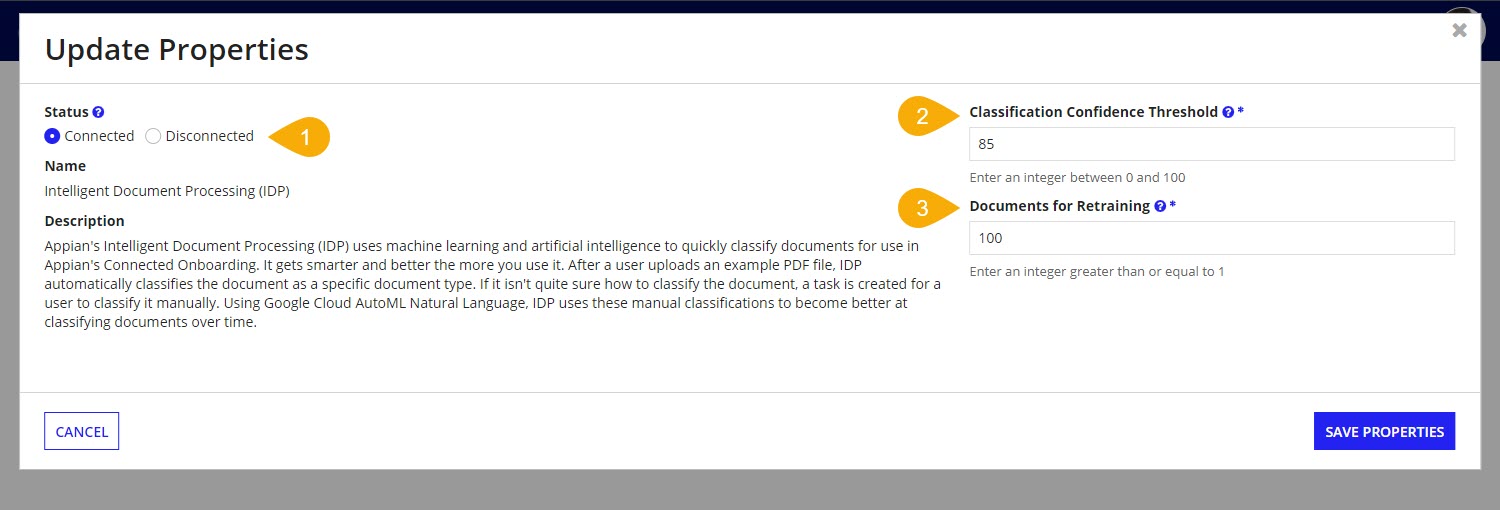
To update the IDP properties:
- From the System Administration Center, click Integrations.
- Select Intelligent Document Processing (IDP) on the left hand navigation pane.
- Click UPDATE PROPERTIES
- Update either Status, Classification Confidence Threshold:, or Documents for Retraining.
- Click SAVE PROPERTIES.
Once your IDP properties are set, be sure to add classification files in the Connected Servicing Settings site. If no classification files are updated, a Document Reconciliation task will be assigned for a user to manually select the Document Type.
Integrating with NorthrowCopy link to clipboard
Appian's Connected Servicing application includes the ability to display a customer risk score and show alerts generated by Northrow's customer profiles. Using Northrow is optional and requires some minimal configuration in both the Connected Servicing Settings and System Administration Center sites after the Northrow prerequisite configuration is set up.

PrerequisitesCopy link to clipboard
If you would like to use the Northrow functionality during your Service Request, you must have a Northrow account and be able to retrieve your organization's credentials and profile unique IDs (UIDs).
Once you have your Northrow authentication information:
- From Appian Designer, open the
AS EI NORTHROW Bearer Token Connected System. - Enter Organisation UID and Access Key.
- Click SAVE.
- Open the
AS_EI_NORTHROW_TXT_PROFILE_UID_COMPANY_CHECK_INTERNATIONALconstant. - Update the Value to your organizations international profile unique ID.
- Click SAVE.
- Open the
AS_EI_NORTHROW_TXT_PROFILE_UID_COMPANY_CHECK_UKconstant. - Update the Value to your organizations UK profile unique ID.
- Click SAVE.
Using the Northrow integrationCopy link to clipboard
When a customer is created, the Northrow integration is called using the company name and domicile to retrieve a company's risk score and any alerts about the customer. The risk score and alerts are displayed on the customer record.
When the Northrow company check is called, Northrow also provides a detailed risk score report. Once generated, the report is available for download from the DOCUMENTS tab of the customer record.
Using Northrow tasksCopy link to clipboard
Northrow's company check can also be included as a task in Service Request process configuration.
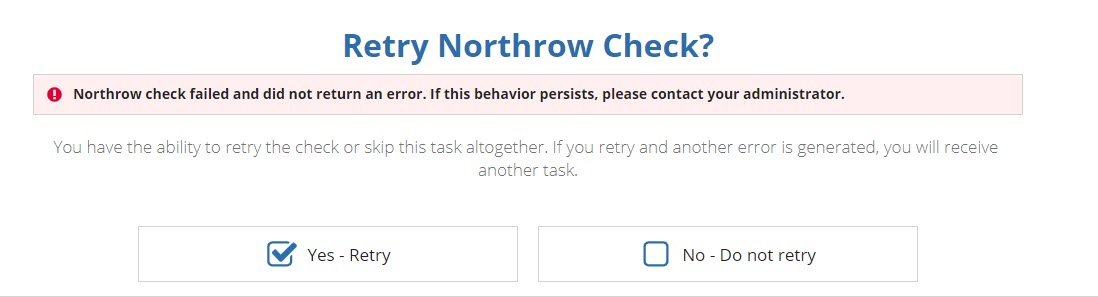
The task type is called Northrow Risk Score Check. When the task is triggered, Connected Servicing will make an integration call to Northrow and update the customer record automatically. If there is an error connecting to or retrieving the results from Northrow, a follow up task will be opened. The Northrow error tasks are by default assigned to the Client Service Request group.
To complete the Northrow Risk Score Error tasks, the user can choose to either retry the Northrow check or to skip the risk score check entirely.
To complete the Northrow Risk Score Error task:
- Select either Yes - Retry or No - Do not retry.
- Selecting Yes - Retry will attempt to retrieve the risk score data from Northrow again. If the integration fails again, another Northrow Risk Score Error task will be opened.
- Click SUBMIT.
Refreshing Northrow company checkCopy link to clipboard
Each customer can have their risk score refreshed automatically on a regular schedule or manually.
After a customer is created, a user can select whether or not to automatically refresh the Northrow company check.
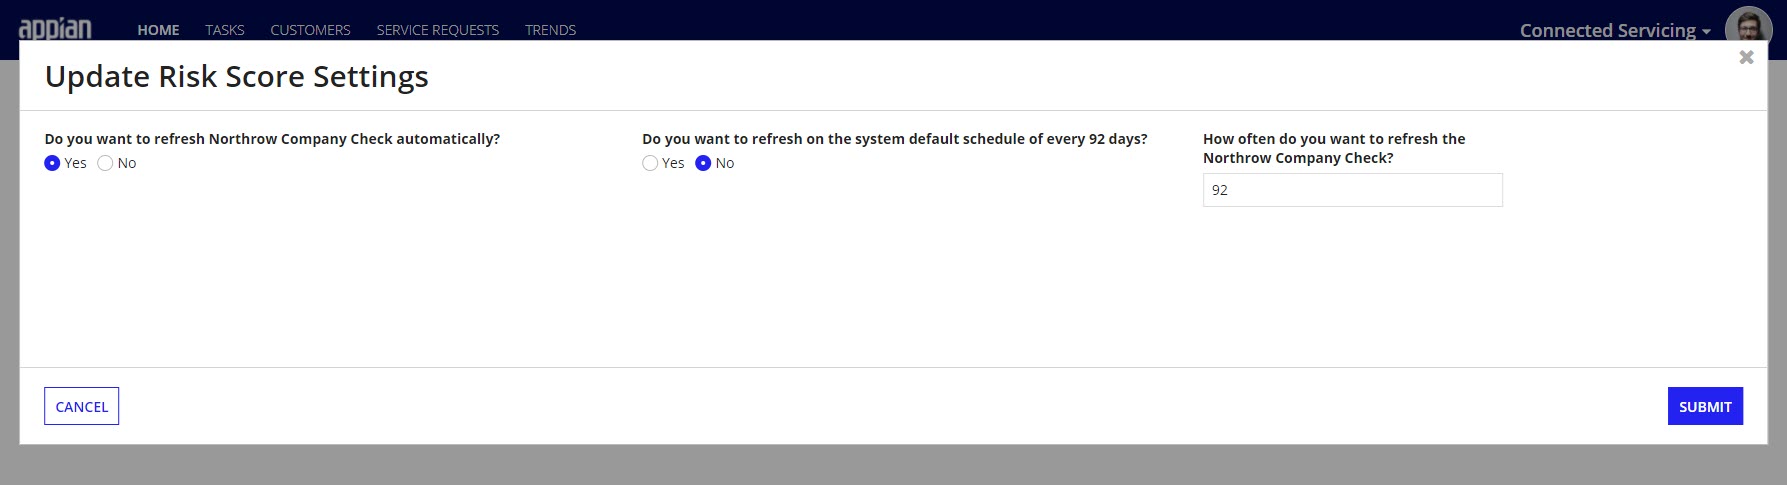
To update the automatic Northrow check settings:
- From the Related Actions tab on the Service Request record, Click Update Risk Score Settings.

- Determine if you want the Northrow company check to refresh automatically.
- If the answer to the previous question is YES, decide if the refresh should be the default refresh scheduled for this customer.
- If the answer to the previous question is NO, determine the frequency of days that the refresh should take place on.
A user can manually check for changes to the risk score or alerts from the customer record by clicking the refresh button. The refresh button is not available if the Northrow integration is disconnected..
Updating Northrow propertiesCopy link to clipboard
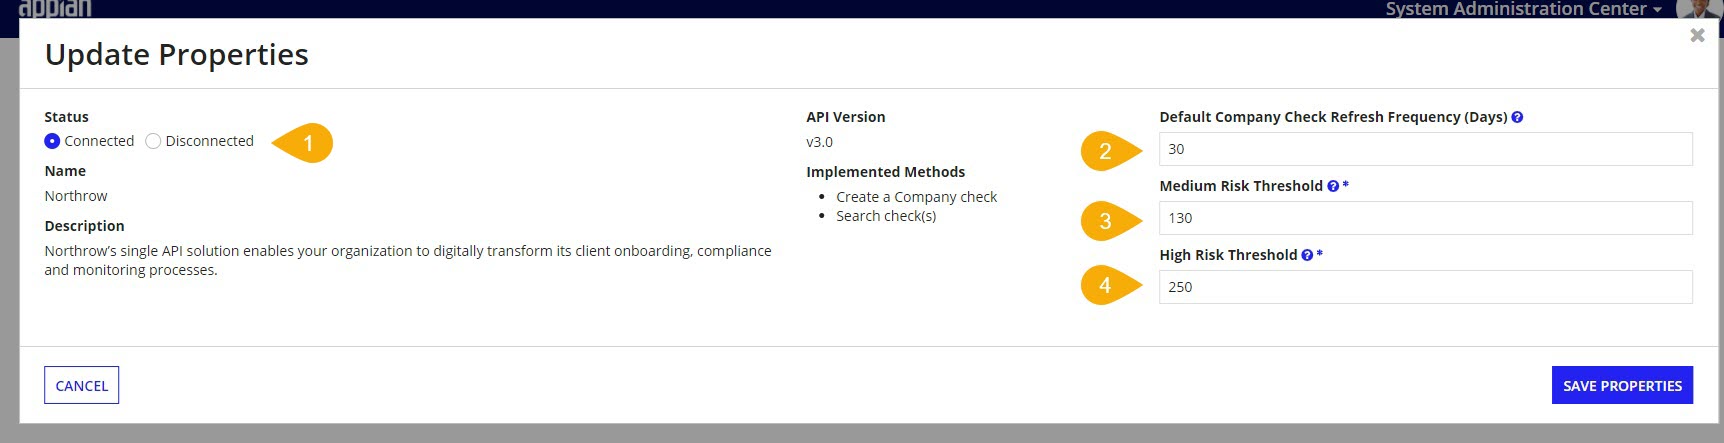
There are several Northrow properties users can update from the System Administration Center including:
- Status: Whether or not Northrow is connected.
- Note: When Northrow is disconnected a user will not be able to use Northrow tasks in the Service Request process, have flags triggered by Northrow, or refresh the risk score.
- Default Company Check Refresh Frequency (Days): Determines the frequency at which a Northrow company check will be executed when the frequency is not set explicitly for an individual customer. When blank, no default checks will be initiated.
- Medium Risk Threshold: The minimum risk score numerical value that will qualify a customer to be medium risk.
- High Risk Threshold: The minimum risk score numerical value that will qualify a customer to be high risk.
To update the Northrow properties:
- From the System Administration Center, click Integrations.
- On the left, select Northrow.
- Click UPDATE PROPERTIES.
- Update either Status, Default Company Check Refresh Frequency (Days), Medium Risk Threshold, or High Risk Threshold available.
- Click SAVE PROPERTIES.
Testing the Northrow integrationCopy link to clipboard
If you suspect that the Northrow integration is not working, you can test to see if this integration is working from the System Administration Center.
To test the Northrow connection:
- After accessing the System Administration Center, click Integrations.
- On the left, Select Northrow.
- Click TEST INTEGRATION.
- To check the connection to Northrow, click CLICK TO REQUEST CHECK.
- You are able to see what is returned either Integration Successful or Integration Error.
- You are also able to see the Northrow service response details.
- To check that the data retrieval is working, click CLICK TO RETRIEVE CHECK.
- You are able to see what is returned either Integration Successful or Integration Error.
- You are also able to see the Northrow service response details.
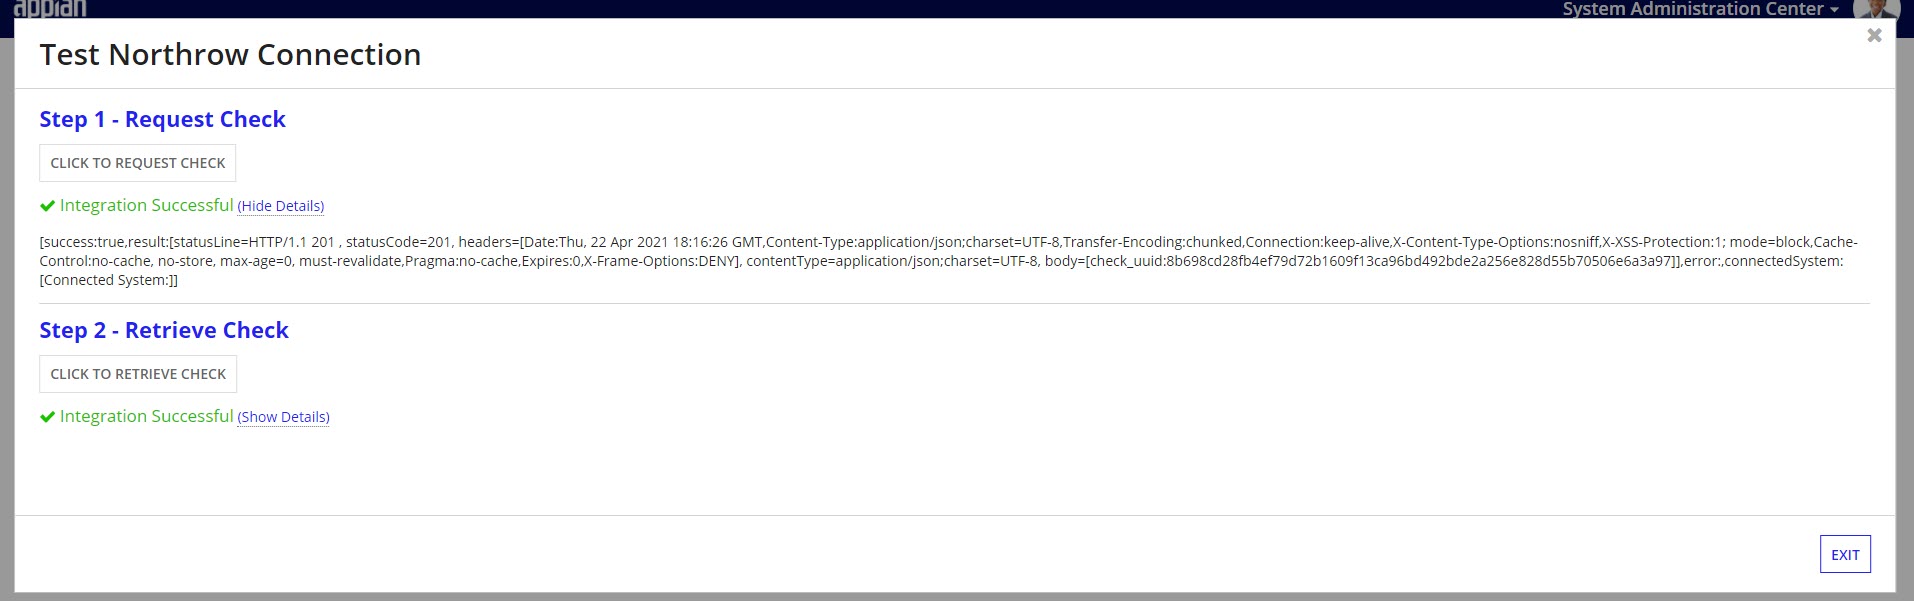
If both of these tests work, the service is up and connecting properly.