
| This content applies solely to Connected Servicing, which must be purchased separately from the Appian base platform. This content was written for Appian 23.3 and may not reflect the interfaces or functionality of other Appian versions. |
IntroductionCopy link to clipboard
Client servicing is the process of fulfilling customer requests. This can include updating customer data or providing an ad-hoc report for a customer. The Connected Servicing solution provides a guided experience for collecting and updating this information. Enabled by Appian Records, end users can view and update this information from simple, informative record interfaces after creating a service request.
This page provides instructions for creating a new service request.
Creating a new service requestCopy link to clipboard
Creating a new service request walks you through the process of entering the information needed to start the service request process. The information entered here will populate the Service Request record, as well as determine which service request process template will be used to complete the request.
The guided experience for creating a new service request walks you through the process of entering the information you need to start the service request process. It consists of the following guided steps:
- Choose a customer.
- Provide service request details.
- Select required documents.
- Review service request.
You can customize these steps and the fields that display in each form. See How to Configure Connected Servicing for more details on how to customize the solution.
Beginning a service requestCopy link to clipboard
Starting a new service request will start the data collection process. In order to start a new service request, you must be a member of the AS SRQ Create Service Request security group. By default, the Client Servicing and Client Servicing Department Heads groups belong to this security group.
To start a new service request:
- From either the HOME or SERVICE REQUEST page, click + NEW SERVICE REQUEST.
The top of the screen contains the various data collection steps required to create a new service request. You can click NEXT at the bottom of the form to go to the next step.
Choose a customerCopy link to clipboard
When creating a new service request, the first step is to identify the customer you're creating the request for. In order to locate the customer, they must already be created in the system.
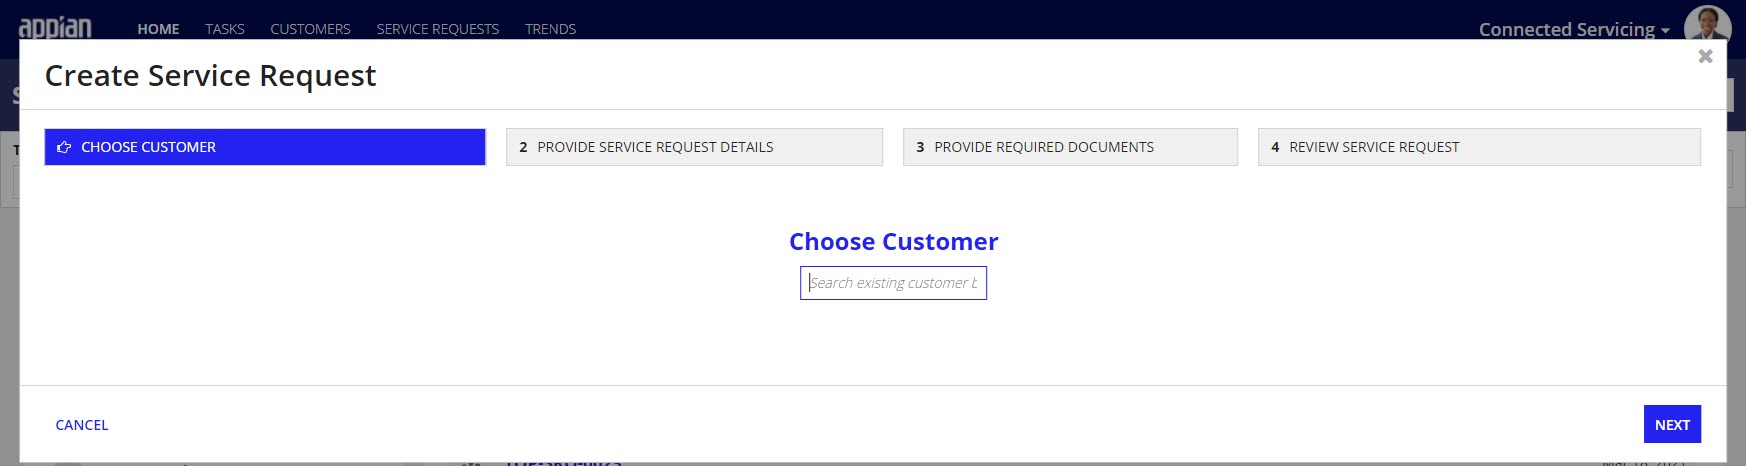
To choose a customer:
- In the Choose a Customer field, search for the existing customer by name or acronym.
- Select the customer that you want to create the request for.
The customer is a required field and you will not be able to move forward through the form without selecting one. The information for the selected customer will auto populate in the remaining steps.
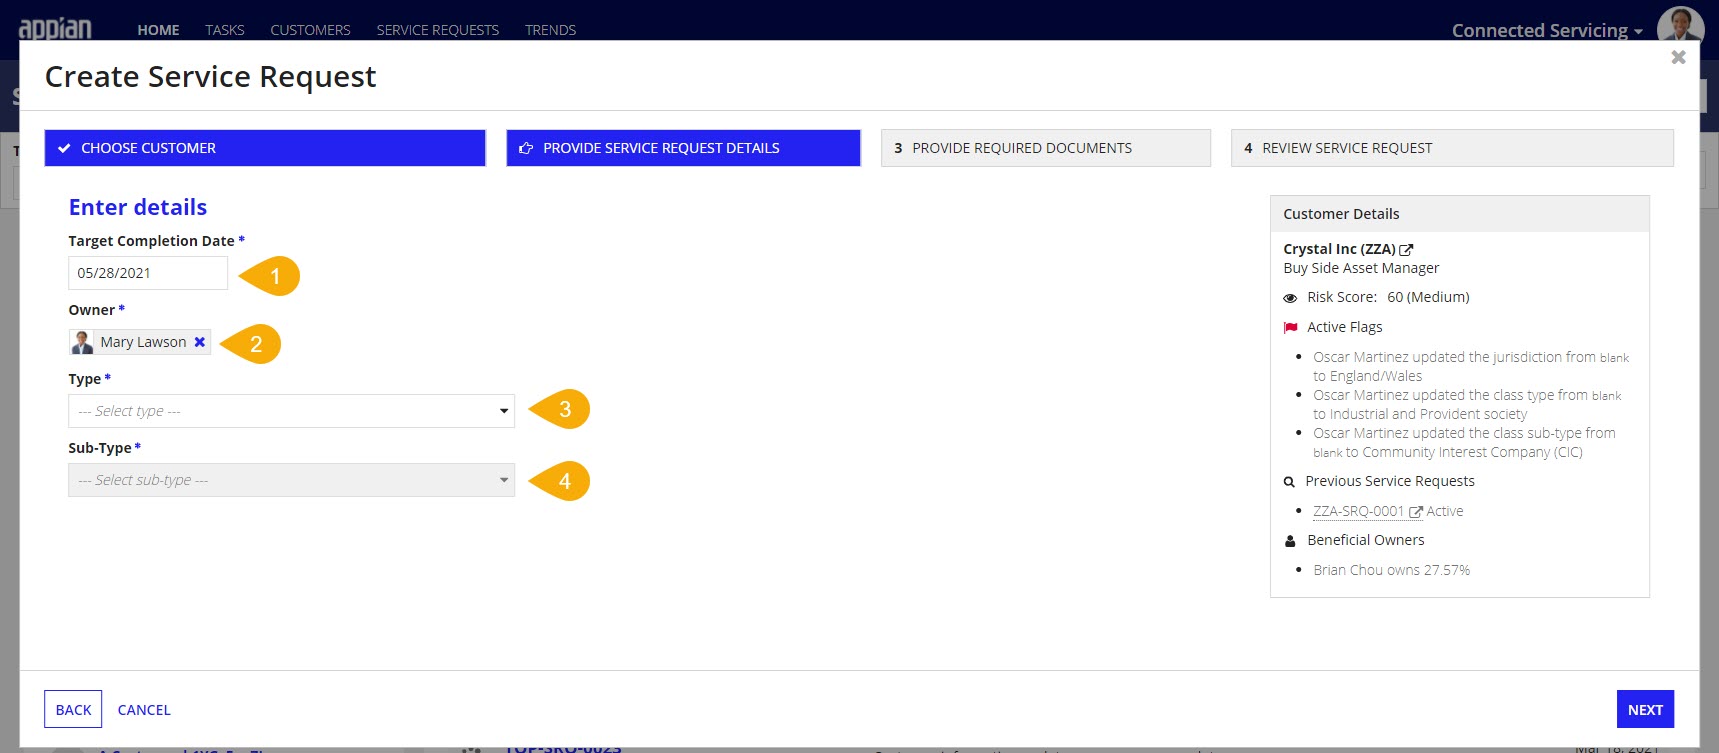
Provide service request detailsCopy link to clipboard
From the Provide Service Request Details page, you can specify what information is relevant to the request. The solution will pre-populate specific fields. During the service request, you can change the data in these fields based on the service request type and subtype assigned. You can also manually update these fields in the Connected FS Settings site.
To provide service request details:
- Enter a Target Completion Date for the request.
- Note: The target completion date will be used to determine task due dates.
- Select an Owner for the request.
- This user will become the primary owner of the service request.
- Select a Type.
- Select a corresponding Subtype.
- Depending on the Type and Subtype, enter any additional information needed for the request.
- Example: If the type selected is Customer information update and the sub-type is Contact update, you will need to enter the updated contact information. - Note: The type and subtype selected are used to determine which process template is selected for the request. See Modifying Service Request Process Selection Attributes for information on how to update these values.
Select required documentsCopy link to clipboard
The Select Required Documents step is used to keep track of the documents needed to complete the request. Required documents will be pre-populated based on the type and subtype of the request. Documents required by default for each subtype can be updated in the Connected FS Settings site.
To add additional required documents:
- Click Add Required Document.
- Select the Document Requirement Type.
- (Optional) Provide a Document Requirement Name.
- Click ADD.
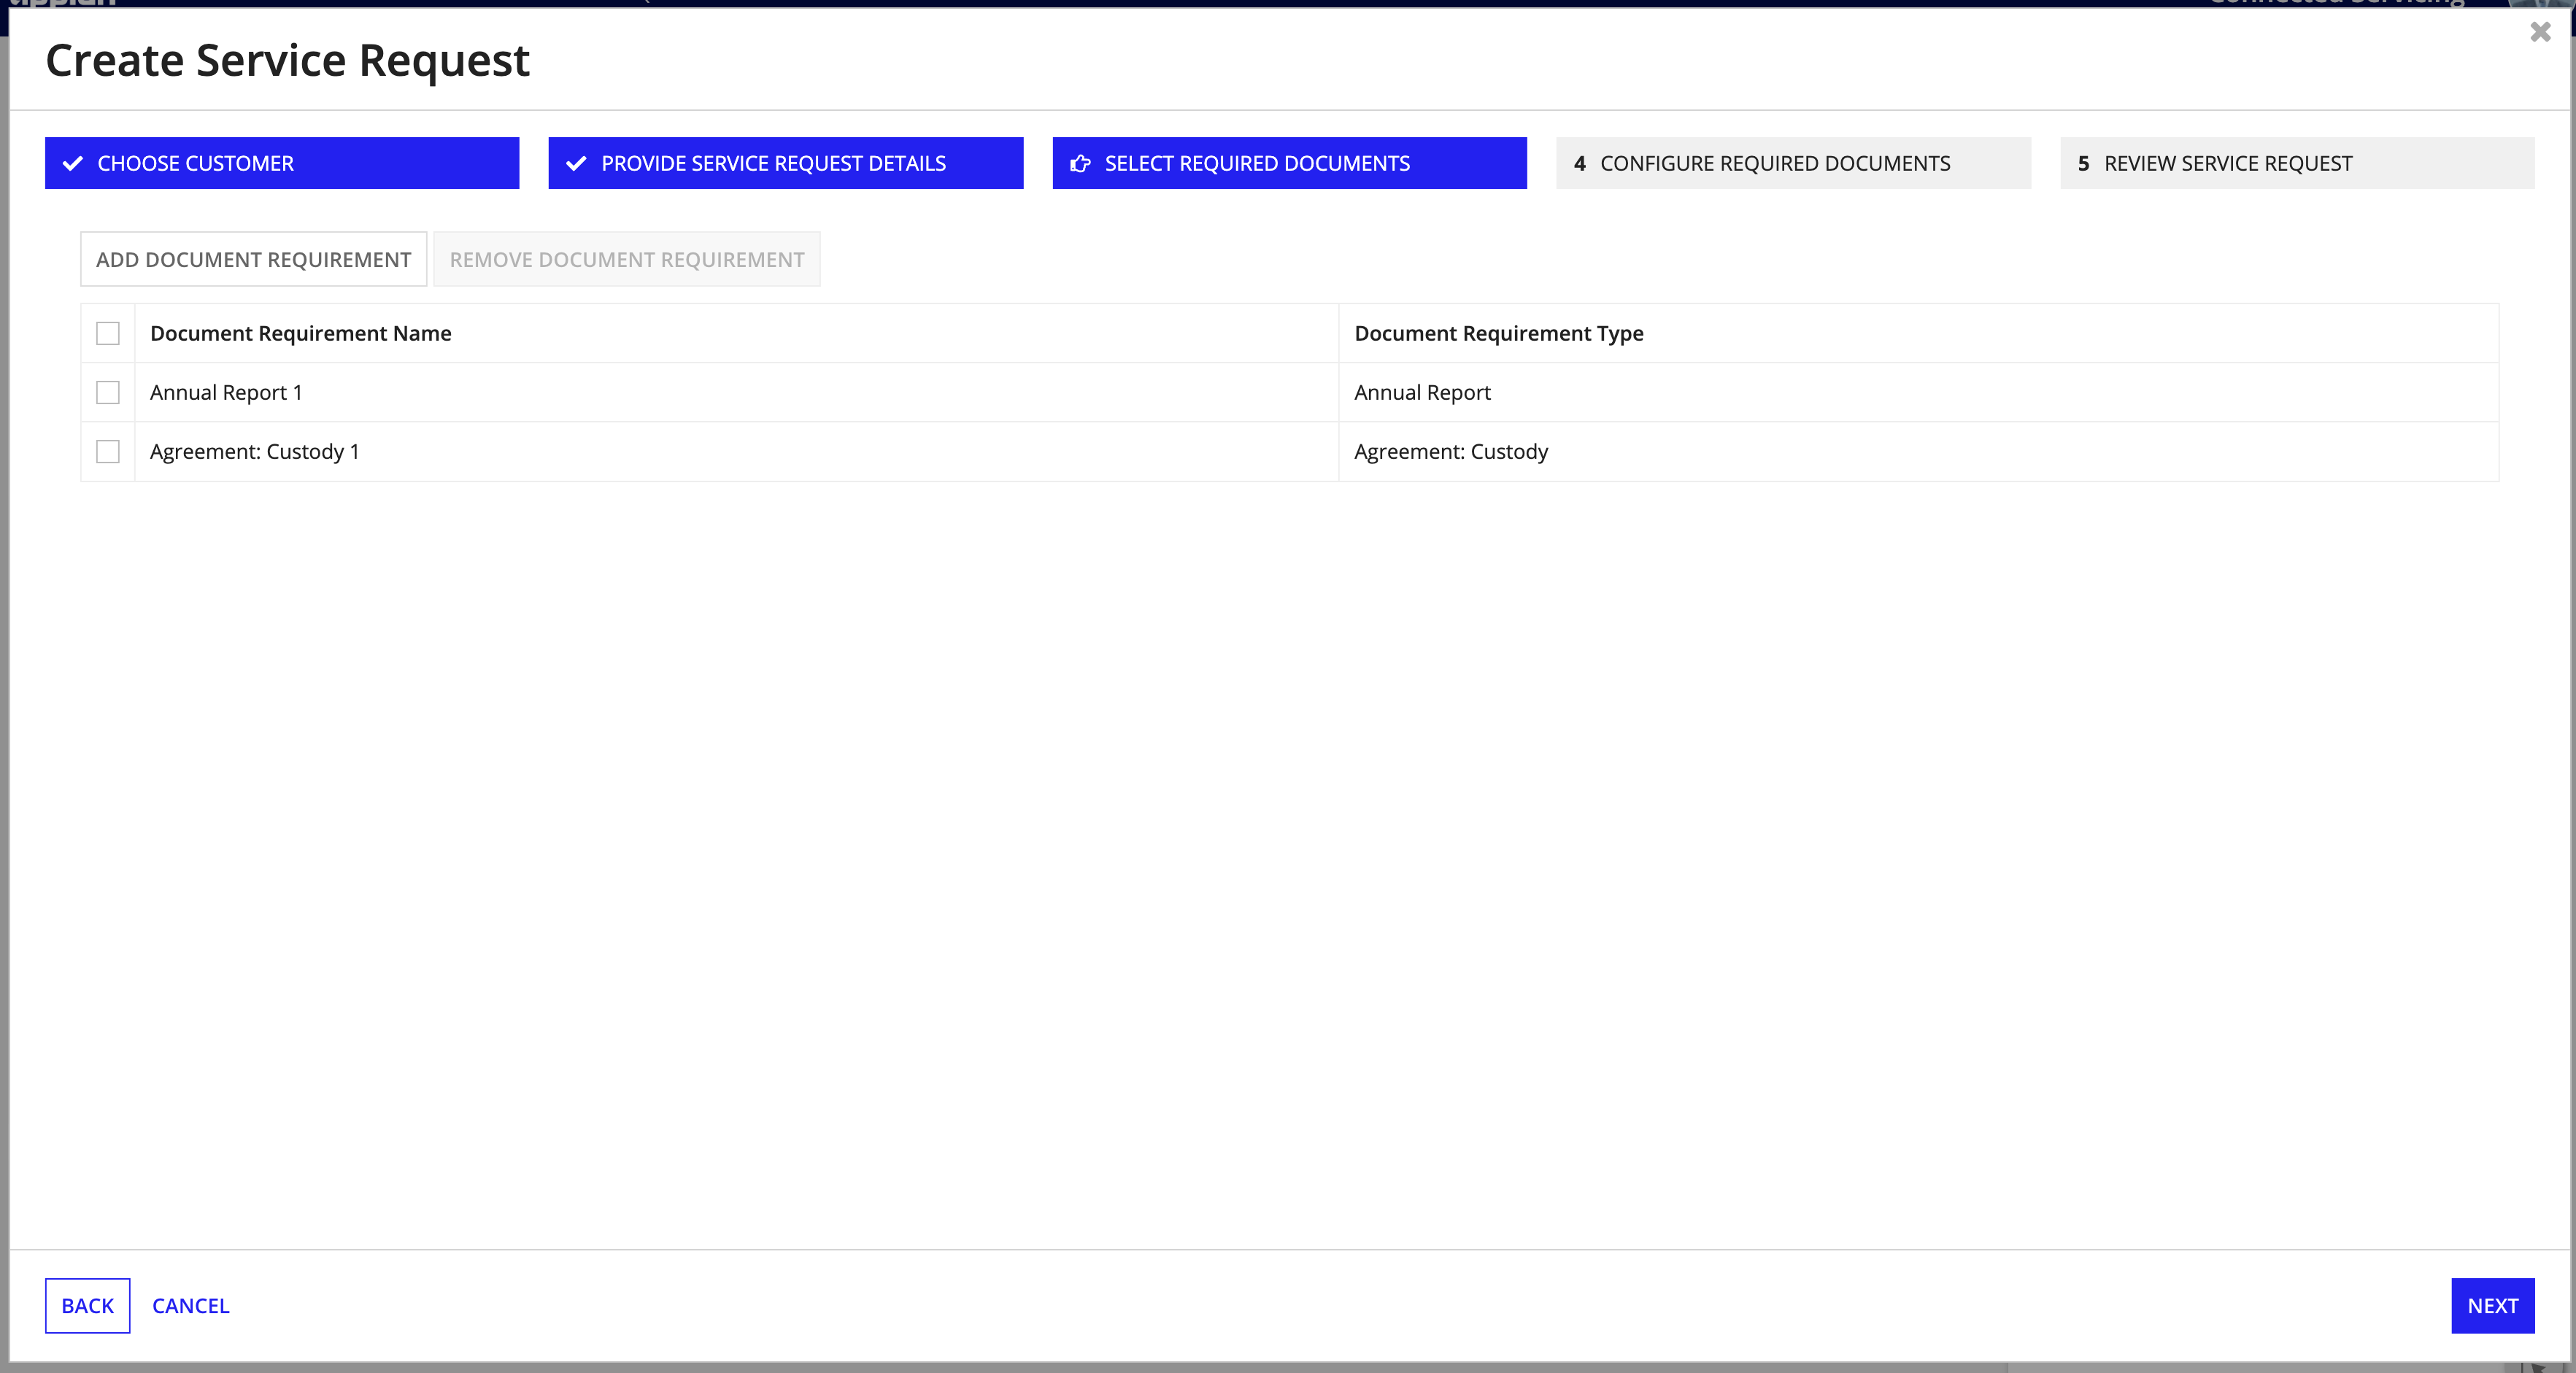
If a required document is not needed, select the checkbox next to the document requirement name then click REMOVE DOCUMENT REQUIREMENT.
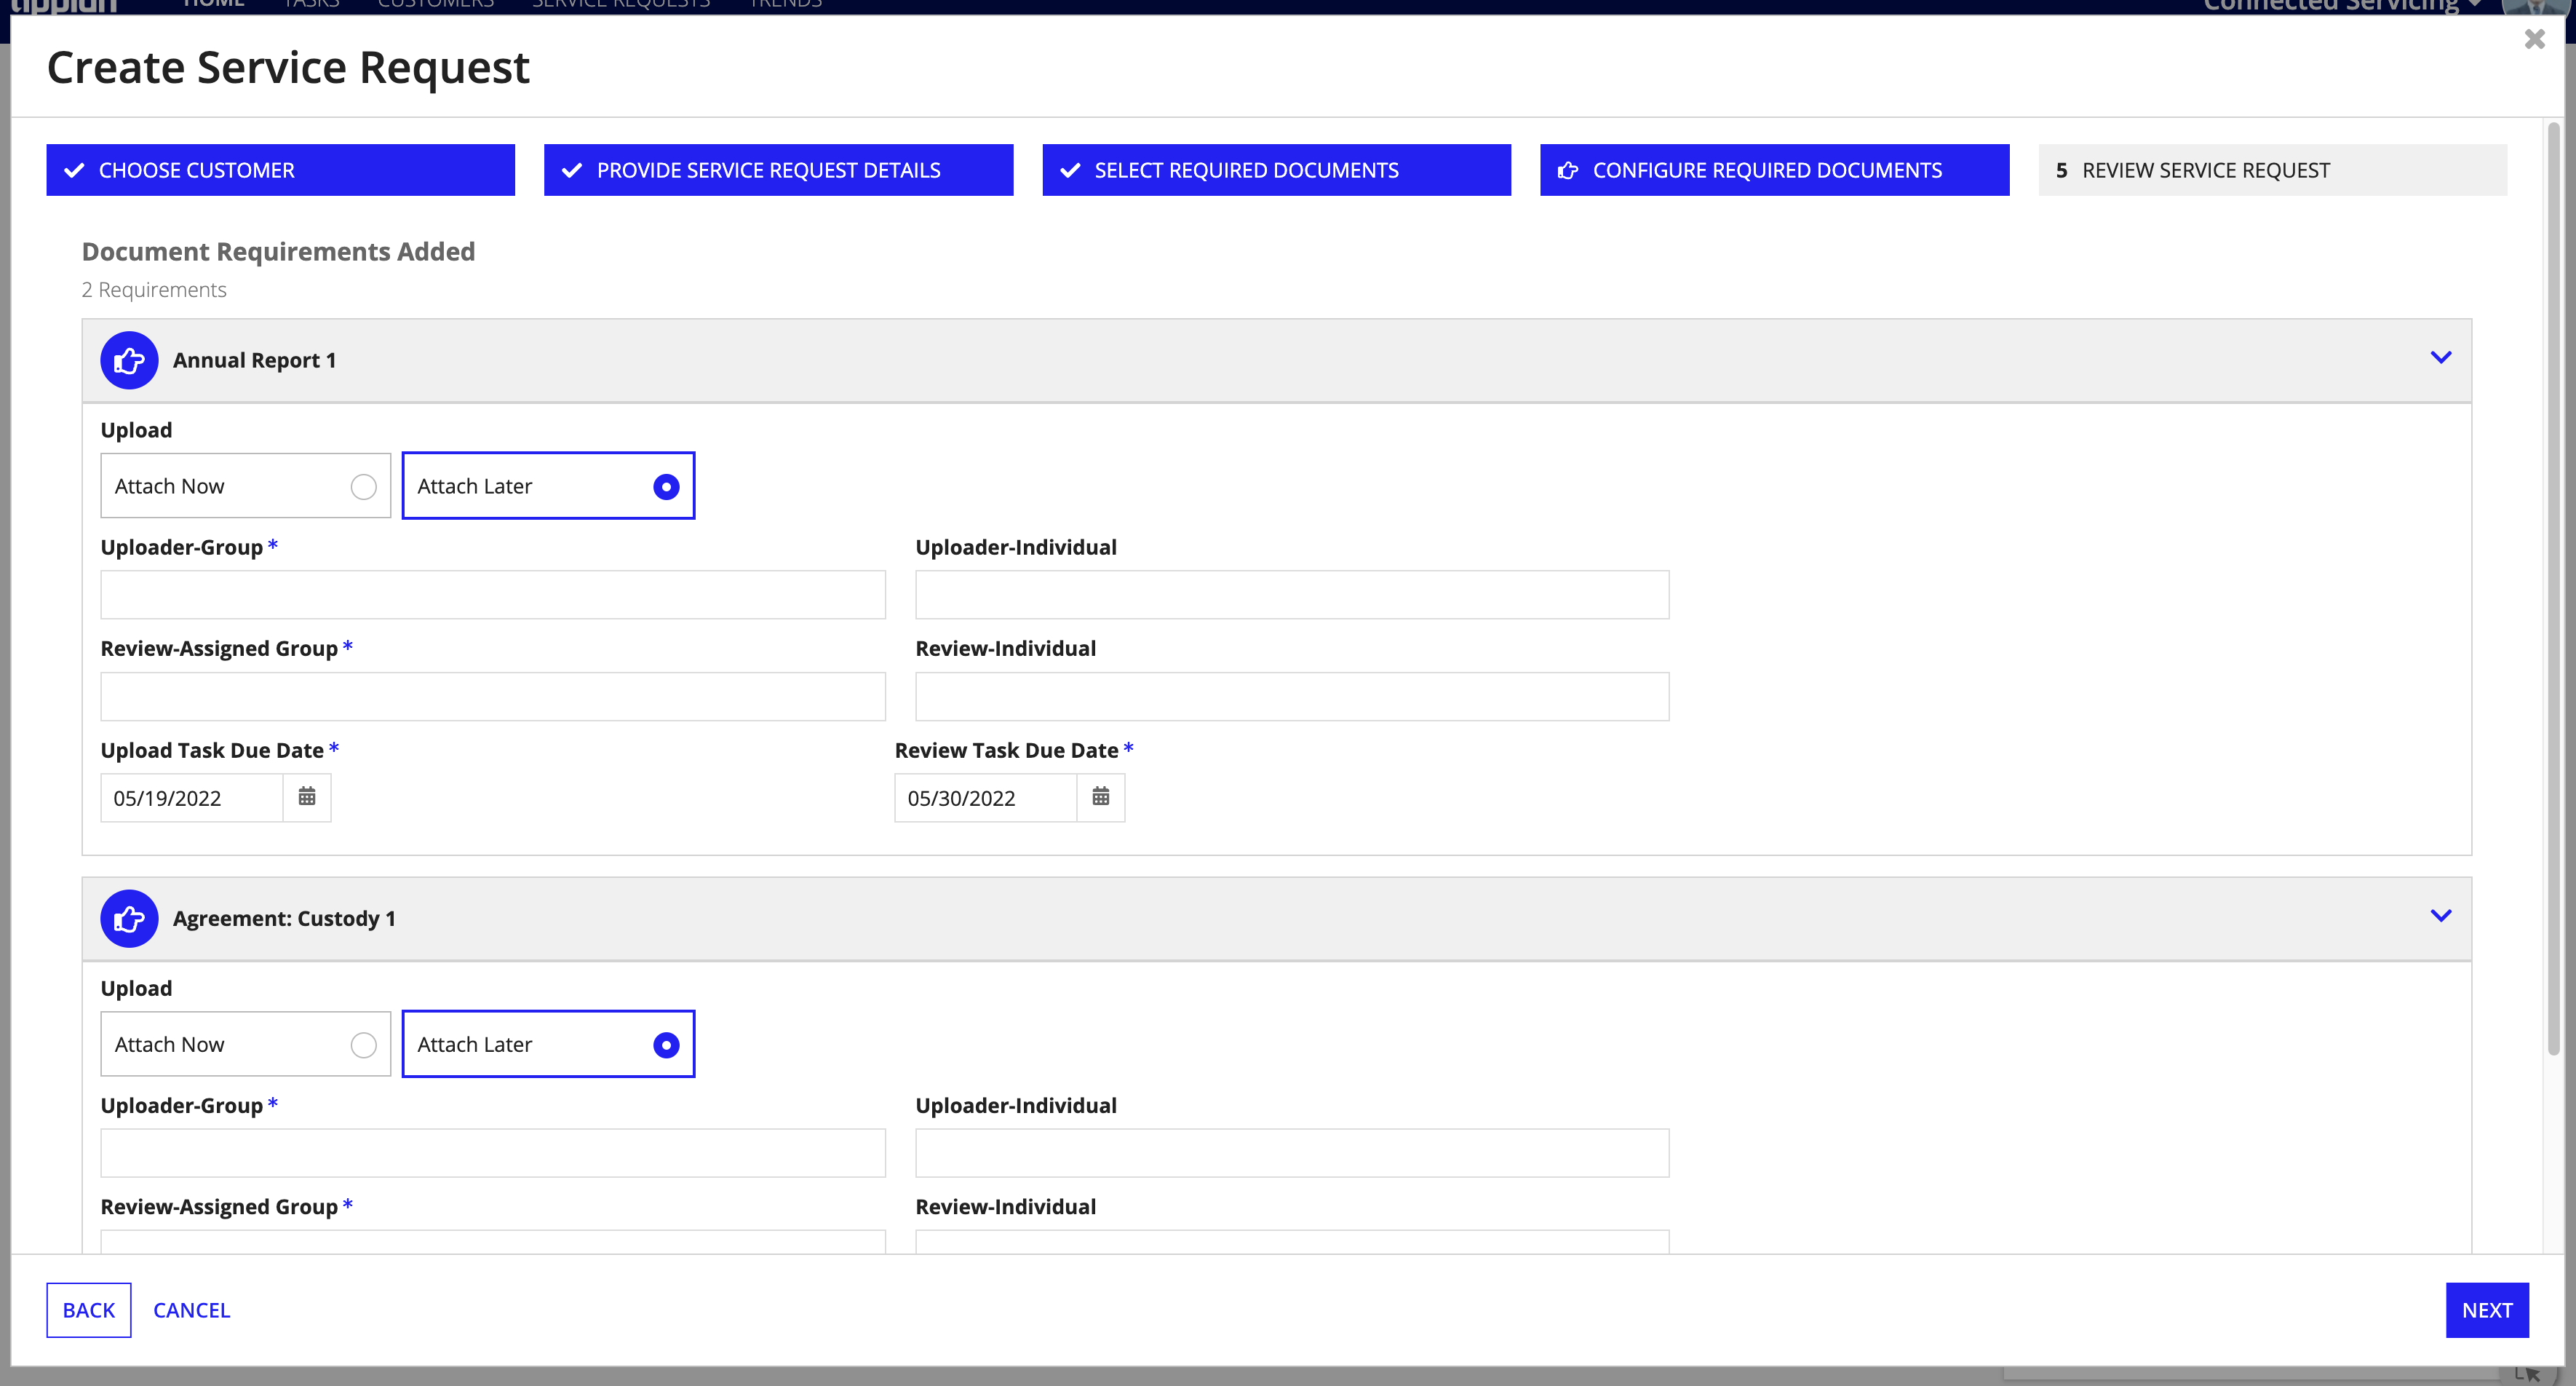
Configure required documentsCopy link to clipboard
The Configure Required Documents step is used to add details about the required documents for the service request such as the assignee for the upload and review tasks and the due dates for them. If the user chooses to, they are also able to upload the document directly at this time.
Review and submit service requestCopy link to clipboard
On the final REVIEW step of the process, a summary of all of the information entered for the service request displays.
- Review the information for accuracy.
- When you are ready, click CREATE SERVICE REQUEST to finish creating the new service request.
If you need to change any information, click BACK button or click on any of the blue milestone steps at the top.
Each individual page is configured with validations, so you will be unable to move forward to the next page without completing the errors on that page.
Confirm service requestCopy link to clipboard
Once you have created a service request, a confirmation displays with a link to the newly created service request record link.
From here, you can immediately go to the new service request or close out to monitor the request another time.