
This page describes how to configure record actions on a record type.
OverviewCopy link to clipboard
You can enable users to take action directly from your data by configuring record actions. Record actions allow you to integrate your enterprise processes so users can create, update, or delete data in the context of a record list, record view, or interface.
There are two types of record actions:
- Record list action: Allows users to start a process from the record list, usually to add a new record.
- Related action: Allows users to start a process from a single record, usually to update or delete that record.
Once you configure record actions in the record type, you can reference these actions in interfaces when you use a record type to power a read-only grid or use the record action component.
Record list actionsCopy link to clipboard
Record list actions are links to process models the user can start directly from the record list.
You can choose to open a record list action in a dialog, the same tab, or a new tab. After completing a record list action, users return to the record list. When actions are configured to open in a dialog, any user filter values are remembered when returning to the record list.
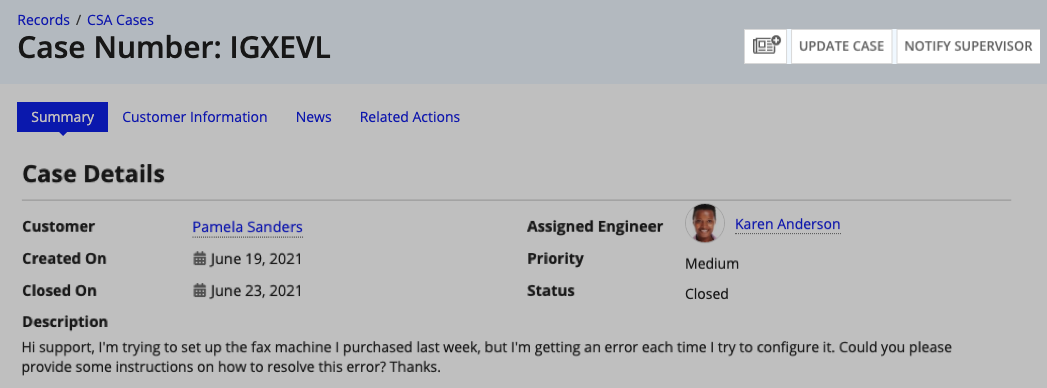
A common use case is to add an action to create a new record. For example, in a Support Case record type, support engineers may need to add new support cases.


By default, record list actions display on the record list. Optionally, you can also configure record list actions to display in interfaces.
Related actionsCopy link to clipboard
Related actions are links to process models the user can start directly from a record using information from that record. We call that information the context for the related action. For example, within a support case record, there might be related actions to update the case information or notify the supervisor about case.
Related action process models are the same as any other process model, except for a start-form restriction; if the process model has a start form, that form must be a SAIL form. Since record types that use a process model as their source derive related actions from the process model's quick tasks, this restriction doesn't apply to quick tasks.
By default, related actions display in the Related Actions view. Optionally, you can configure related actions to display in other record views or in an interface.
Record action propertiesCopy link to clipboard
You can configure the following properties for record actions:
Property |
Description |
|---|---|
Display Name |
Specify a display name using one of the following options:
This name is displayed on the button or link that initiates the action. Follow the recommended naming standard when creating a display name for the action. |
Key |
Verify the value. Appian auto-generates this value from the Display Name. This key is used to reference record actions within SAIL components. |
Description |
Enter a description of the record action.
|
Icon |
Select the icon you want to display with the action in either the record list or the Related Actions view. The default "plus" is a good choice when adding a new record. |
Dialog Box Size |
Choose which size dialog to open your action in. For manually configured actions, Large is selected by default. For generated actions, Large is selected for Create and Update actions, and Small is selected for Delete actions. This setting is only applied if you configure the action to open in a Dialog Box. Configure how record list actions are opened in the Open Actions In property. Configure how related actions are opened in each record view or in a record action component. Configure the rounding of dialogs in the site object. |
Process Model |
Select the process model you want to use as a record action. The security for the process model determines who can perform the action. |
Context |
(Related actions only) Configure the parameter process variables for your selected process model. By default, parameter values are set to You do not need to include all parameters from the process model; only include the parameters you need for the related action, and remove the rest. If you make changes to the process parameters later, you'll need to manually update this field. |
Security |
To further control when the record action displays to users, configure a Security Expression. The action will only be visible when the expression evaluates to true for the user. Learn more about record action security. |
Required supporting objectsCopy link to clipboard
Regardless of record type configuration, record actions require the creation and configuration of at least the following design objects:
- A process model that represents the workflow of the action.
- An interface that users will use to change the record data.
- An expression rule that returns individual records based on record ID.
If data sync is enabled and the data source is a database, you can use the Write Records Smart Service in your process model to create and update records. You can do this when manually creating a record action or when generating a record action.
If data sync is not enabled or the data source is not a database, you must create the following additional objects:
- A custom data type (CDT) that stores the changed record data.
- A data store that communicates the changed record data from the CDT to the data source.
- A constant to reference the data store in expression rules.
In addition, design best practices recommend using the following supporting objects:
- A group for application administrators, which will be used to configure permissions for the administrators of the required objects.
- A group for application users, which will be used to configure permissions for users of the process model.
- Application-specific folders to store the required objects.
- An expression rule that customizes the name of running instances of the process model.
Add a record actionCopy link to clipboard
If you have a database-backed record type with data sync enabled, Appian can generate common record actions for that record type using basic information you provide.
Common record actions include creating a record, updating a record, and deleting a record. The generated actions use existing objects or creates new objects to meet the object requirements.
You can quickly generate your record actions using default values for your action names, objects, and security. Alternatively, you can customize the generated action names, objects, or security to fit your business needs.
However, you'll need to create the required objects, then configure the action manually in the record type if any of the following is true:
- Your record type uses a source other than a database table.
- You do not have data sync enabled on your database-backed record type.
- You want to add more than the common actions listed above.
Note: You can generate record actions for legacy records types, but the generated rules will not automatically pass data for related record types. We recommend updating the record type before generating any record actions.
Generate record actions with default valuesCopy link to clipboard
For the fastest configuration, you can generate your record actions using the default values provided for the action names, objects, and security. These values follow Appian's recommended naming standards and security best practices.
To generate record actions with default values:
- In your record type, go to Actions.
- Click GENERATE RECORD ACTIONS.
- Select one or more tiles representing the actions you want to add. By default, all actions are selected.
- CREATE: Allows users to create a record as a record list action.
- UPDATE: Allows users to update a record as a related action.
- DELETE: Allows users to update a record as a related action.
Tip: Appian recommends generating the CREATE and UPDATE actions at the same time so you can reuse the same start form and process model for both actions.
- Click GENERATE.
Appian generates the actions, creating and configuring the objects you need in your current application. The next sections of this page describe these generated objects.
Generated process modelsCopy link to clipboard
The generated process models are automatically configured in the following ways:
- The Process Display Name:
- For Create or Update actions, the display name is configured with an expression that dynamically displays the appropriate verb ("Create" or "Update") and the record type (for example, "Customer"), followed by the newly created or updated record.
- For Delete actions, the display name is configured with an expression that displays "Delete" and the record type (for example, "Customer").
- The Process Priority is set to
Normal. -
The following process variables are configured:
Actions Process Variable Type Parameter? All cancelBoolean Yes All recordRecord type that the action is generated from Yes Create and Update actions only isUpdateBoolean Yes Create and Update actions only countOf<RelatedRecordType>RecordsDeletedOne-to-many related record type Yes Create and Update actions only deleted<RelatedRecordType>RecordsOne-to-many related record type Yes Delete actions only countOfRecordsDeletedNumber (Integer) No - The generated interface is configured as the process start form.
-
The following nodes are present in the process model:
Node Description Start Node Initiates the process, using the interface selected during action generation. XOR Gateway Handles the use case where the user chooses to cancel out of the start form. This node evaluates the incoming cancelprocess variable to determine whether to proceed to the next node (false) or the End Event (true).Write Records Smart Service (Create and Update actions only) Allows you to easily insert or update data in a database table and automatically sync those change in Appian.
If you configured record events and you chose to Include Common Event Types, this node will also write the user or automation type that completed the event and when. As a result, "Created record" events are written when a new record is created, and "Updated record" events are written when a record is updated.Delete Records Smart Service Allows you to easily delete data in a database table and automatically sync those changes in Appian. This node is used in Delete actions.
It also appears in Create and Update actions if the record type has a one-to-many relationship set to Write or delete related records. This allows users to delete related data when updating a base record (for example, deleting line items from an order).End Node Terminates the process. - The Alert Recipients property for the process model is set to the application administrators group selected during action generation.
- The Automatic Process Clean-Up property is set to delete processes seven days after completion or cancellation.
Appian assigns security for the generated process models as follows:
| Group | Permission Level |
|---|---|
| Application administrators group you selected | Process Administrator |
| Application users group you selected | Viewer |
Generated interfacesCopy link to clipboard
The generated Create or Update interface includes the following components:
- A header content layout with a heading component set to a combination of an appropriate verb ("Create" or "Update") and the record type name (for example, "Customer".)
-
The following rule inputs:
Rule Input Type Description cancelBoolean Determines if the form is cancelled. recordRecord type that the action is generated from Stores record data from the selected record type. isUpdateBoolean Determines whether the form is used to create a new record or update an existing one. - An editable component for each field in the record type, with the Display Value and Save Input To properties set to the
recordrule input fields.- Some field types (for example
Time) do not have editable components in Appian. For these field types, no component is generated and you must manually add a component for that field.
- Some field types (for example
- A section layout containing an editable grid for each related record type where the one-to-many relationship configuration is set to Write or delete. Event record types are not added to the interface.
- A Cancel button with the Save Value To property set to the
cancelrule input. - A button that displays Save or Create, depending on the action. Most properties for this button are set to the default values. However, if the record type for which you're generating an action contains
createdBy,createdOn,modifiedBy, andmodifiedOnfields, the Save Value To property is automatically configured to update those fields.
The generated Delete interface includes the following components:
- A header content layout with a heading component set to "Delete" and the record type name followed by a question mark (for example, "Delete Customer?").
- A rich text display component containing the default text, "The record will be permanently deleted and cannot be recovered," where "record" is replaced with the name of the record type.
- A Boolean
cancelrule input. - A Cancel button with the Save Value To property set to the
cancelrule input. - A Delete button with the properties set to the default values.
The generated interfaces inherit security from the folders where they're stored. If your interfaces are stored in a folder Appian generated for you, the inherited security is as follows:
| Group | Permission Level |
|---|---|
| Application administrators group you selected | Administrator |
| Application users group you selected | Viewer |
Generate record actions with custom valuesCopy link to clipboard
You can generate record actions with custom values, instead of default values. In a single page of the guided experience, you can rename your actions, rename or use existing objects, or select different security configurations.
To generate record actions with custom values:
- In your record type, go to Actions.
- Click GENERATE RECORD ACTIONS.
- Select one or more tiles representing the actions you want to add. By default, all actions are selected.
- CREATE: Allows users to create a record as a record list action.
- UPDATE: Allows users to update a record as a related action.
- DELETE: Allows users to update a record as a related action.
Tip: Appian recommends generating the CREATE and UPDATE actions at the same time so you can reuse the same start form and process model for both actions.
- Click CUSTOMIZE. The customization options display.
- For Application, specify where you want Appian to search for existing objects or create new objects to support your actions. This option only appears if your record type is associated with more than one application in your Appian environment.
-
For each action, review the suggested values for the following properties, and change as needed:
Property Description Display Name Specifies a name for the action. This name is displayed on the button or link that initiates the action. Follow the recommended naming standard when creating this name. Icon Specifies the icon you want to display with the button or link that initiates the action. Description Specifies a brief description of the action. For record list actions, this text displays in a tooltip when hovering on the record list action button. For related actions, this text displays with the Display Name in the Related Actions view. - Click NEXT: REVIEW OBJECTS.
-
Review the objects that Appian will use for your new action, and make any necessary changes:
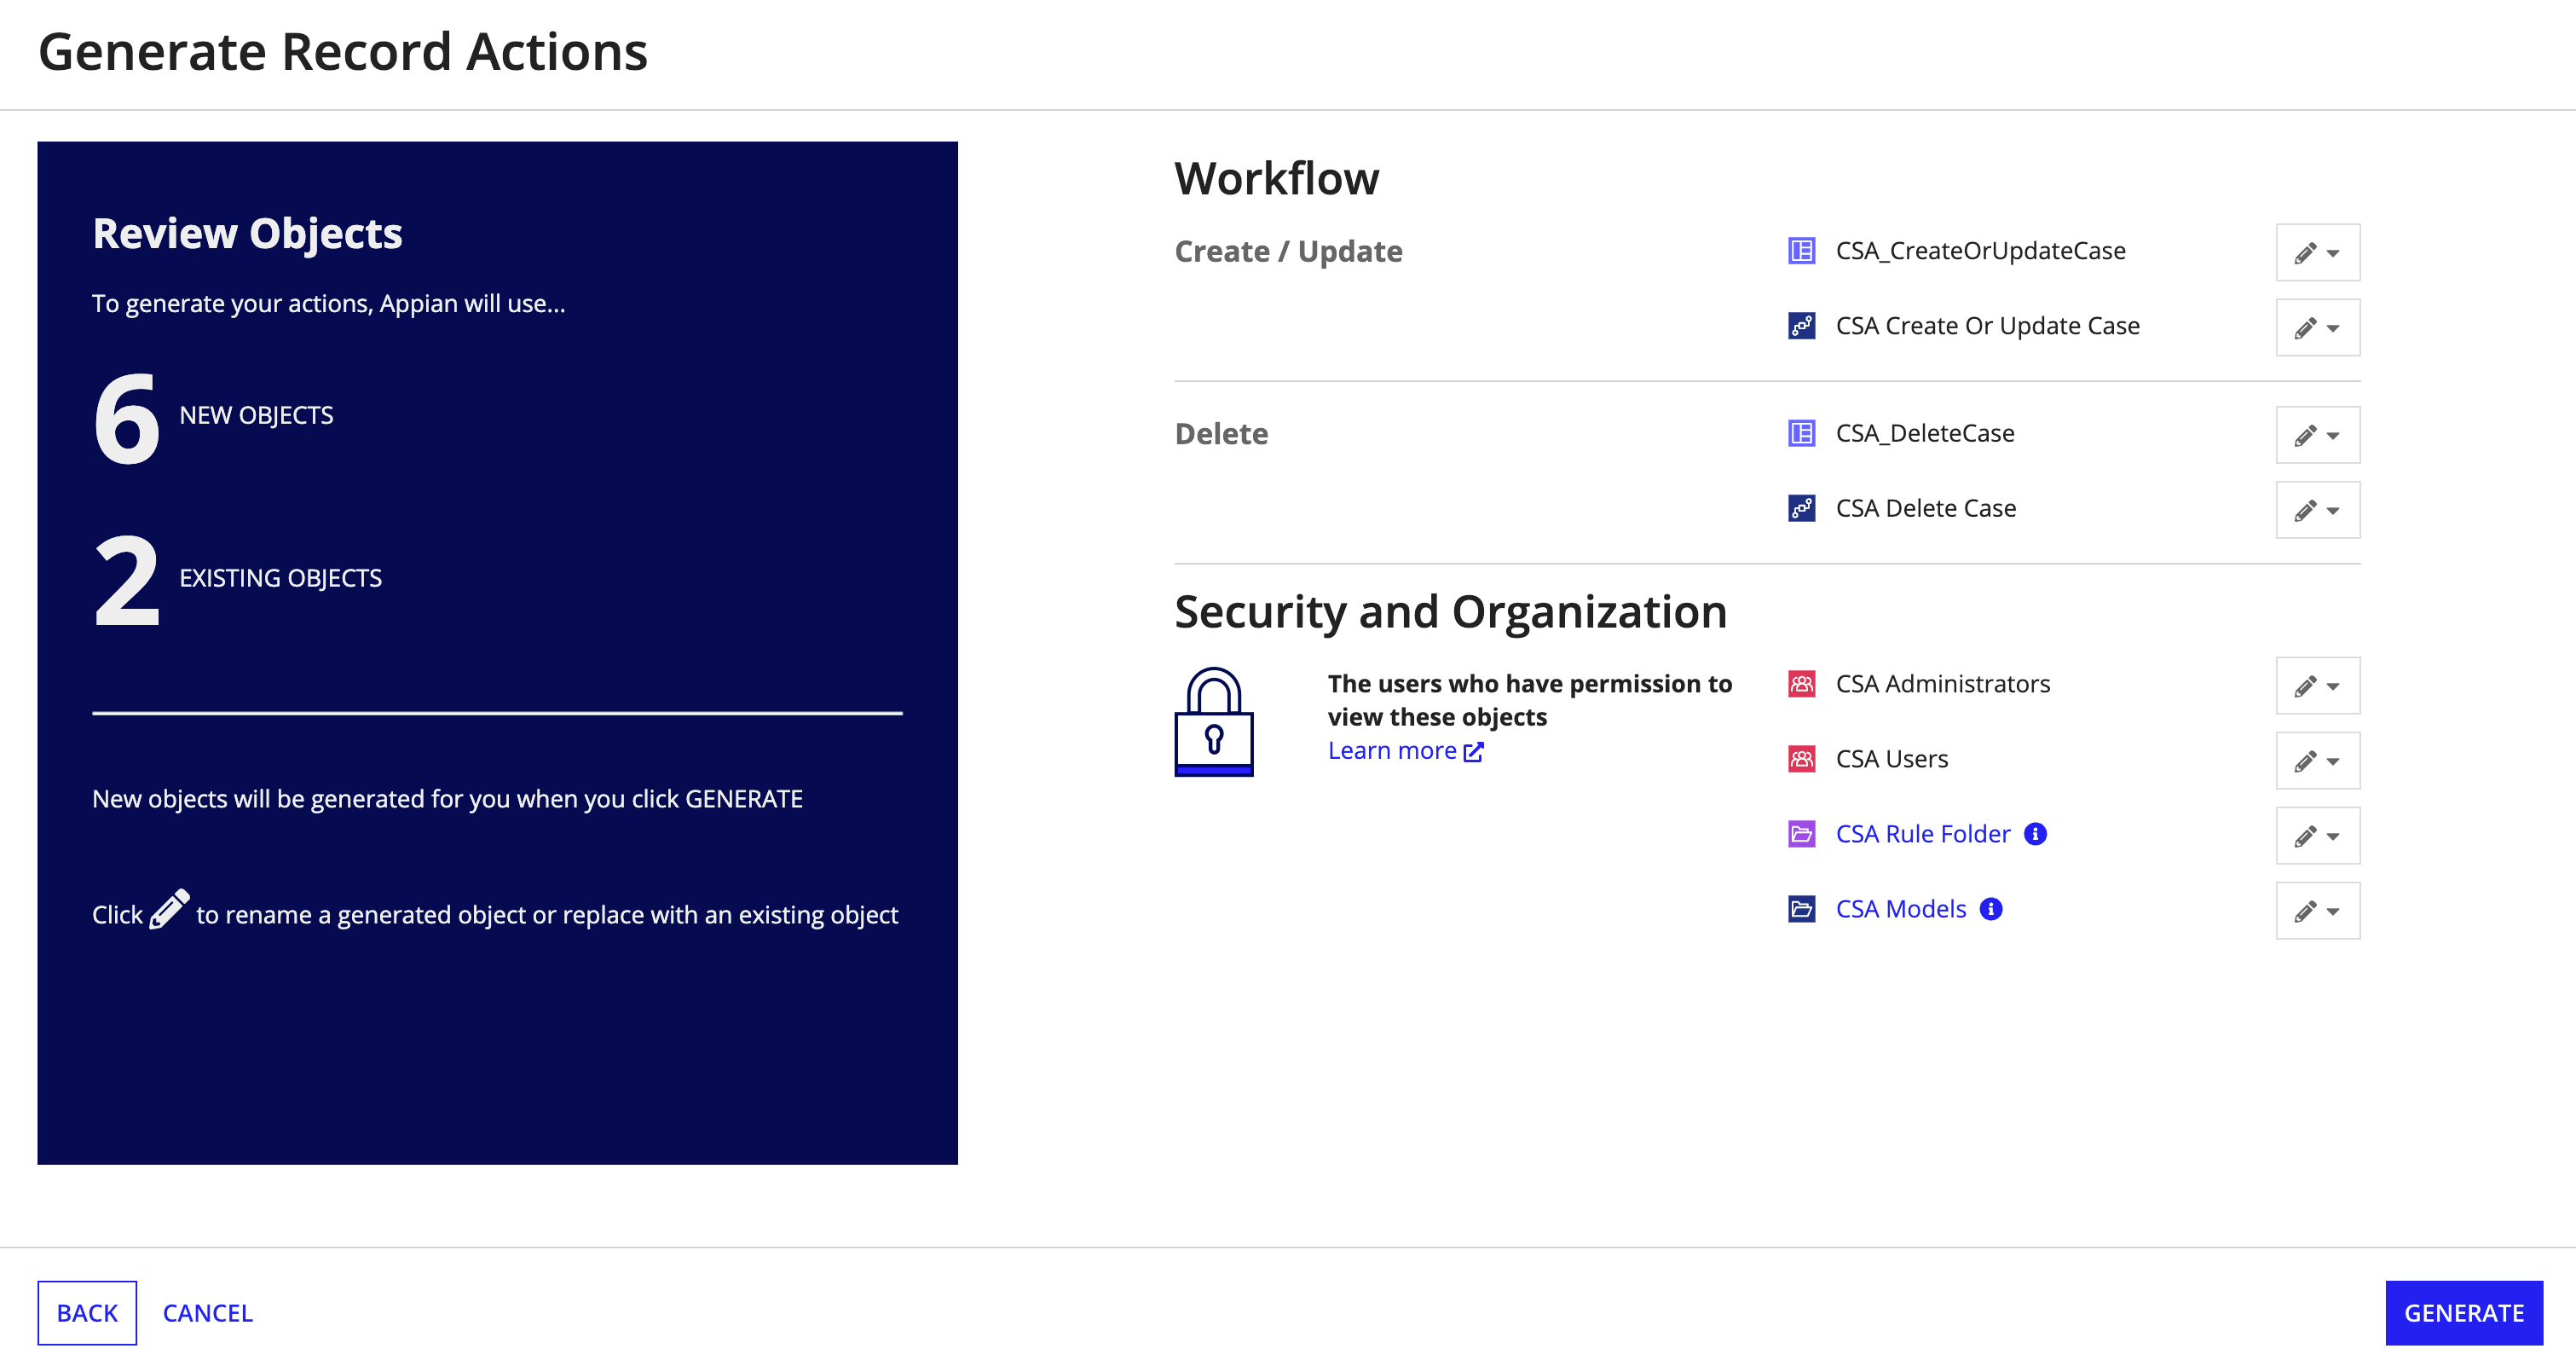
Object
Can
Rename
?Can
Replace
?Workflow
Interface
Yes
No
Process model
Yes
No
Security and Organization
Group (application administrators)
Yes
Yes
Group (application users)
Yes
Yes
Folders
Yes
Yes
Note: Existing objects are marked with the
 icon.
icon.To change an object:
- Click next to the object.
- Continue as appropriate:
Change Action Rename a generated object.
- Click Rename from the dropdown menu. The object name becomes an editable text box.
- Enter a new name in the text box.
Replace a generated object with an existing object.
- Click Replace with existing object. The object name becomes a dropdown list.
- In the object dropdown list, select an existing object.
Replace an existing object with a generated object.
- Click Replace with generated object. The object name becomes an editable text box.
- Enter a name for the generated object.
- Click GENERATE. Appian generates the action, creating and configuring the objects you reviewed. For details about these objects, see Generated process models and Generated interfaces.
- (Record list actions only) Under Open Actions In, specify how the record list action should open. By default, Dialog Box is selected.
Note: The related Dialog Box Size property is set based on the type of generated action. Large is selected for Create and Update actions, and Small is selected for Delete actions.
- Click SAVE CHANGES.
Learn more about the process models and interfaces Appian generates for this action.
Configure a new record action manuallyCopy link to clipboard
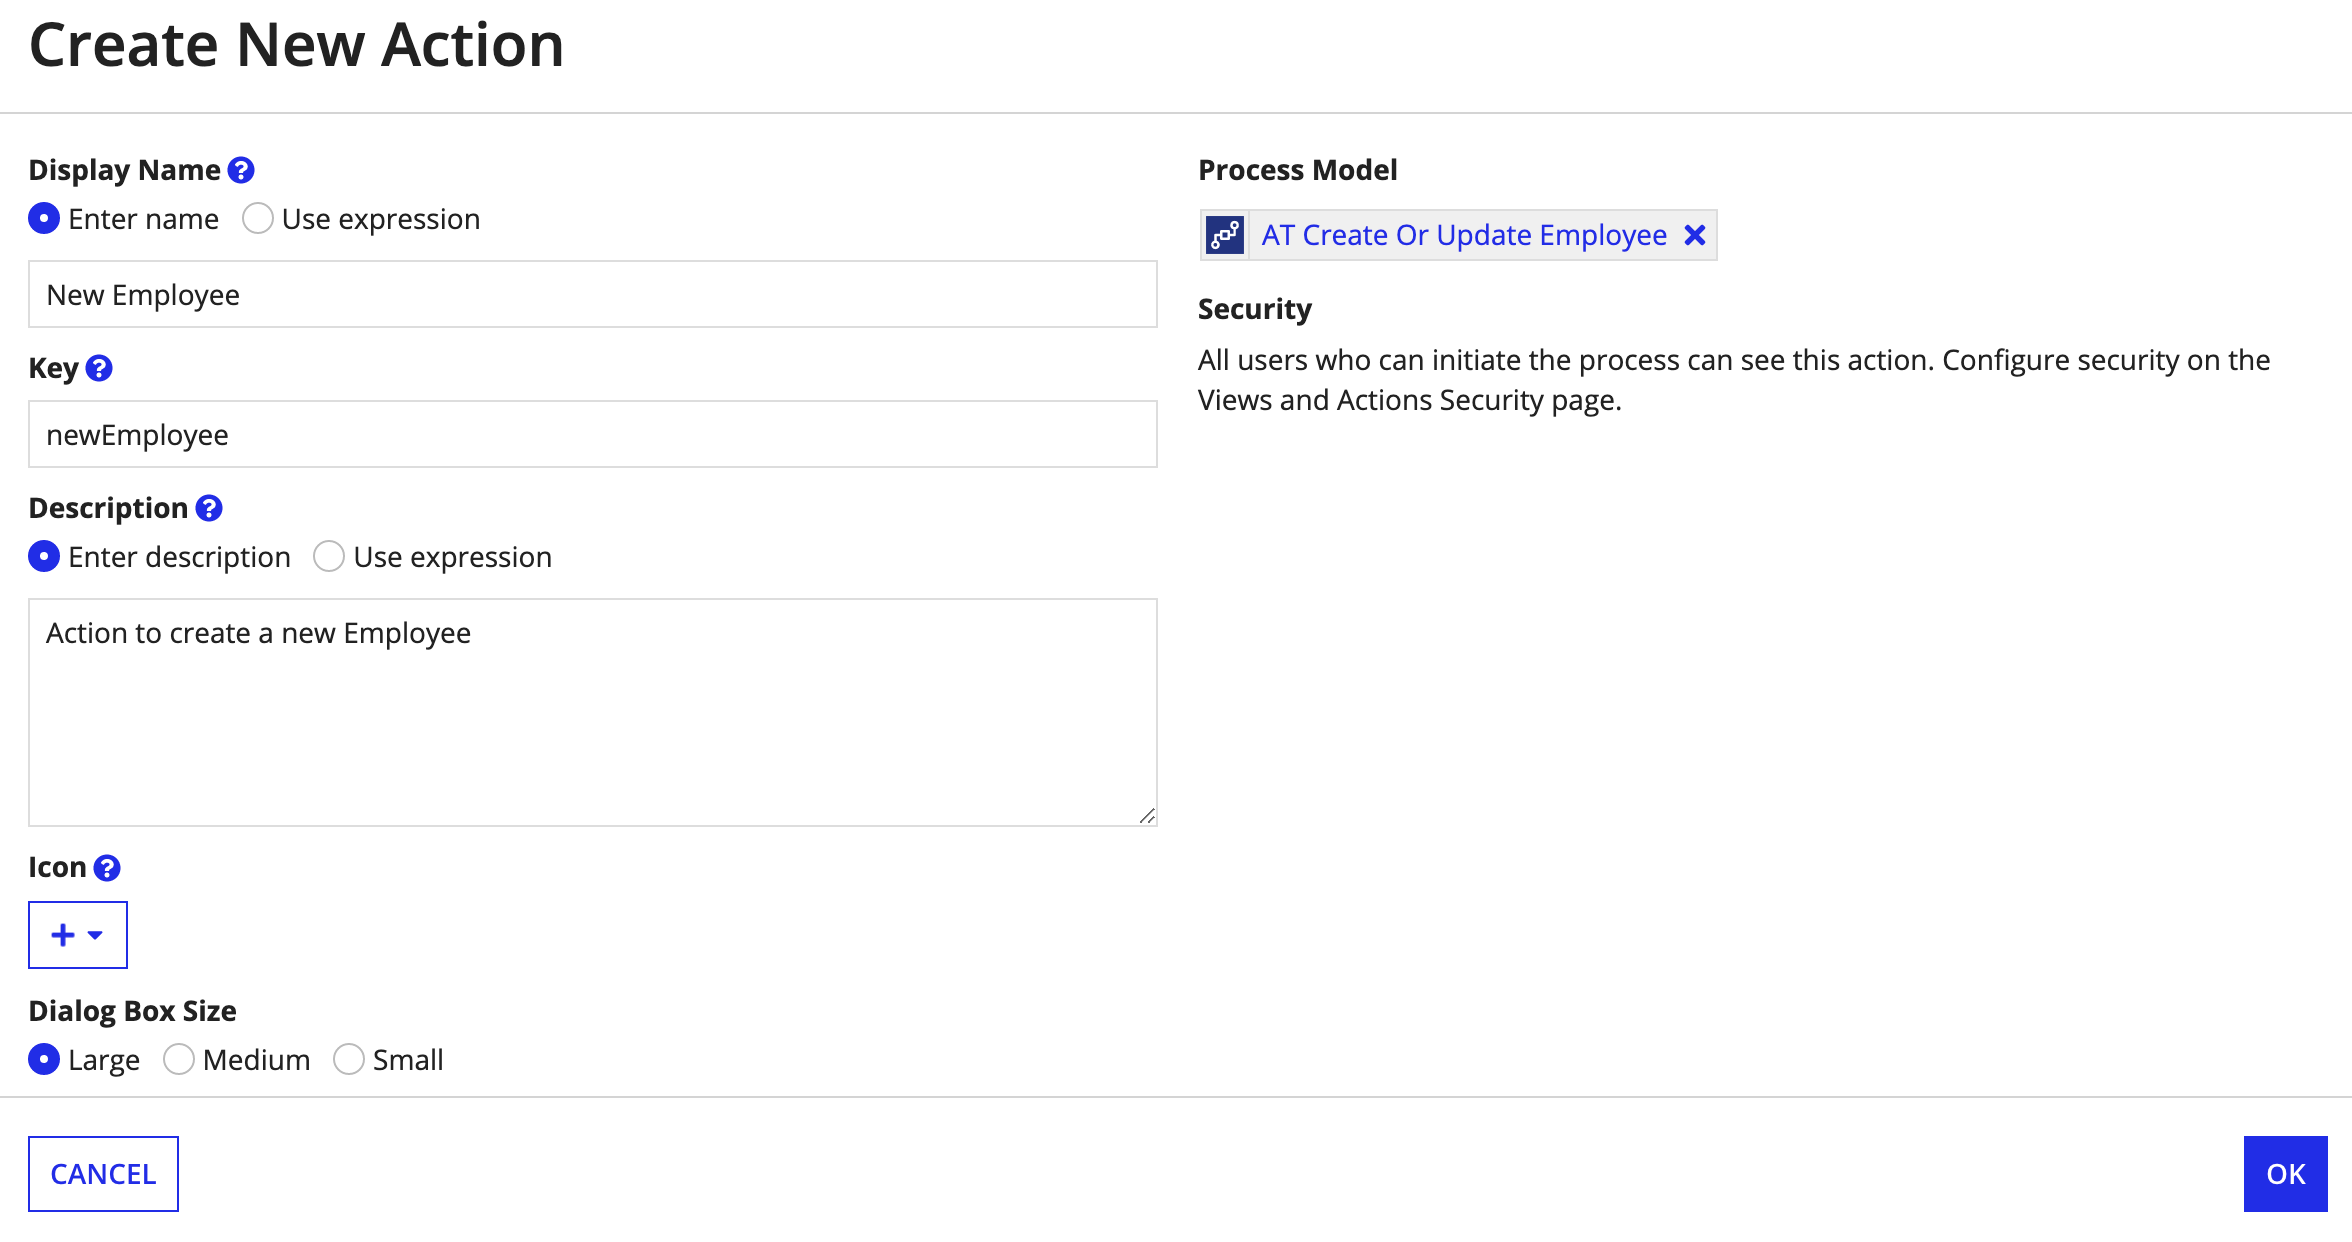
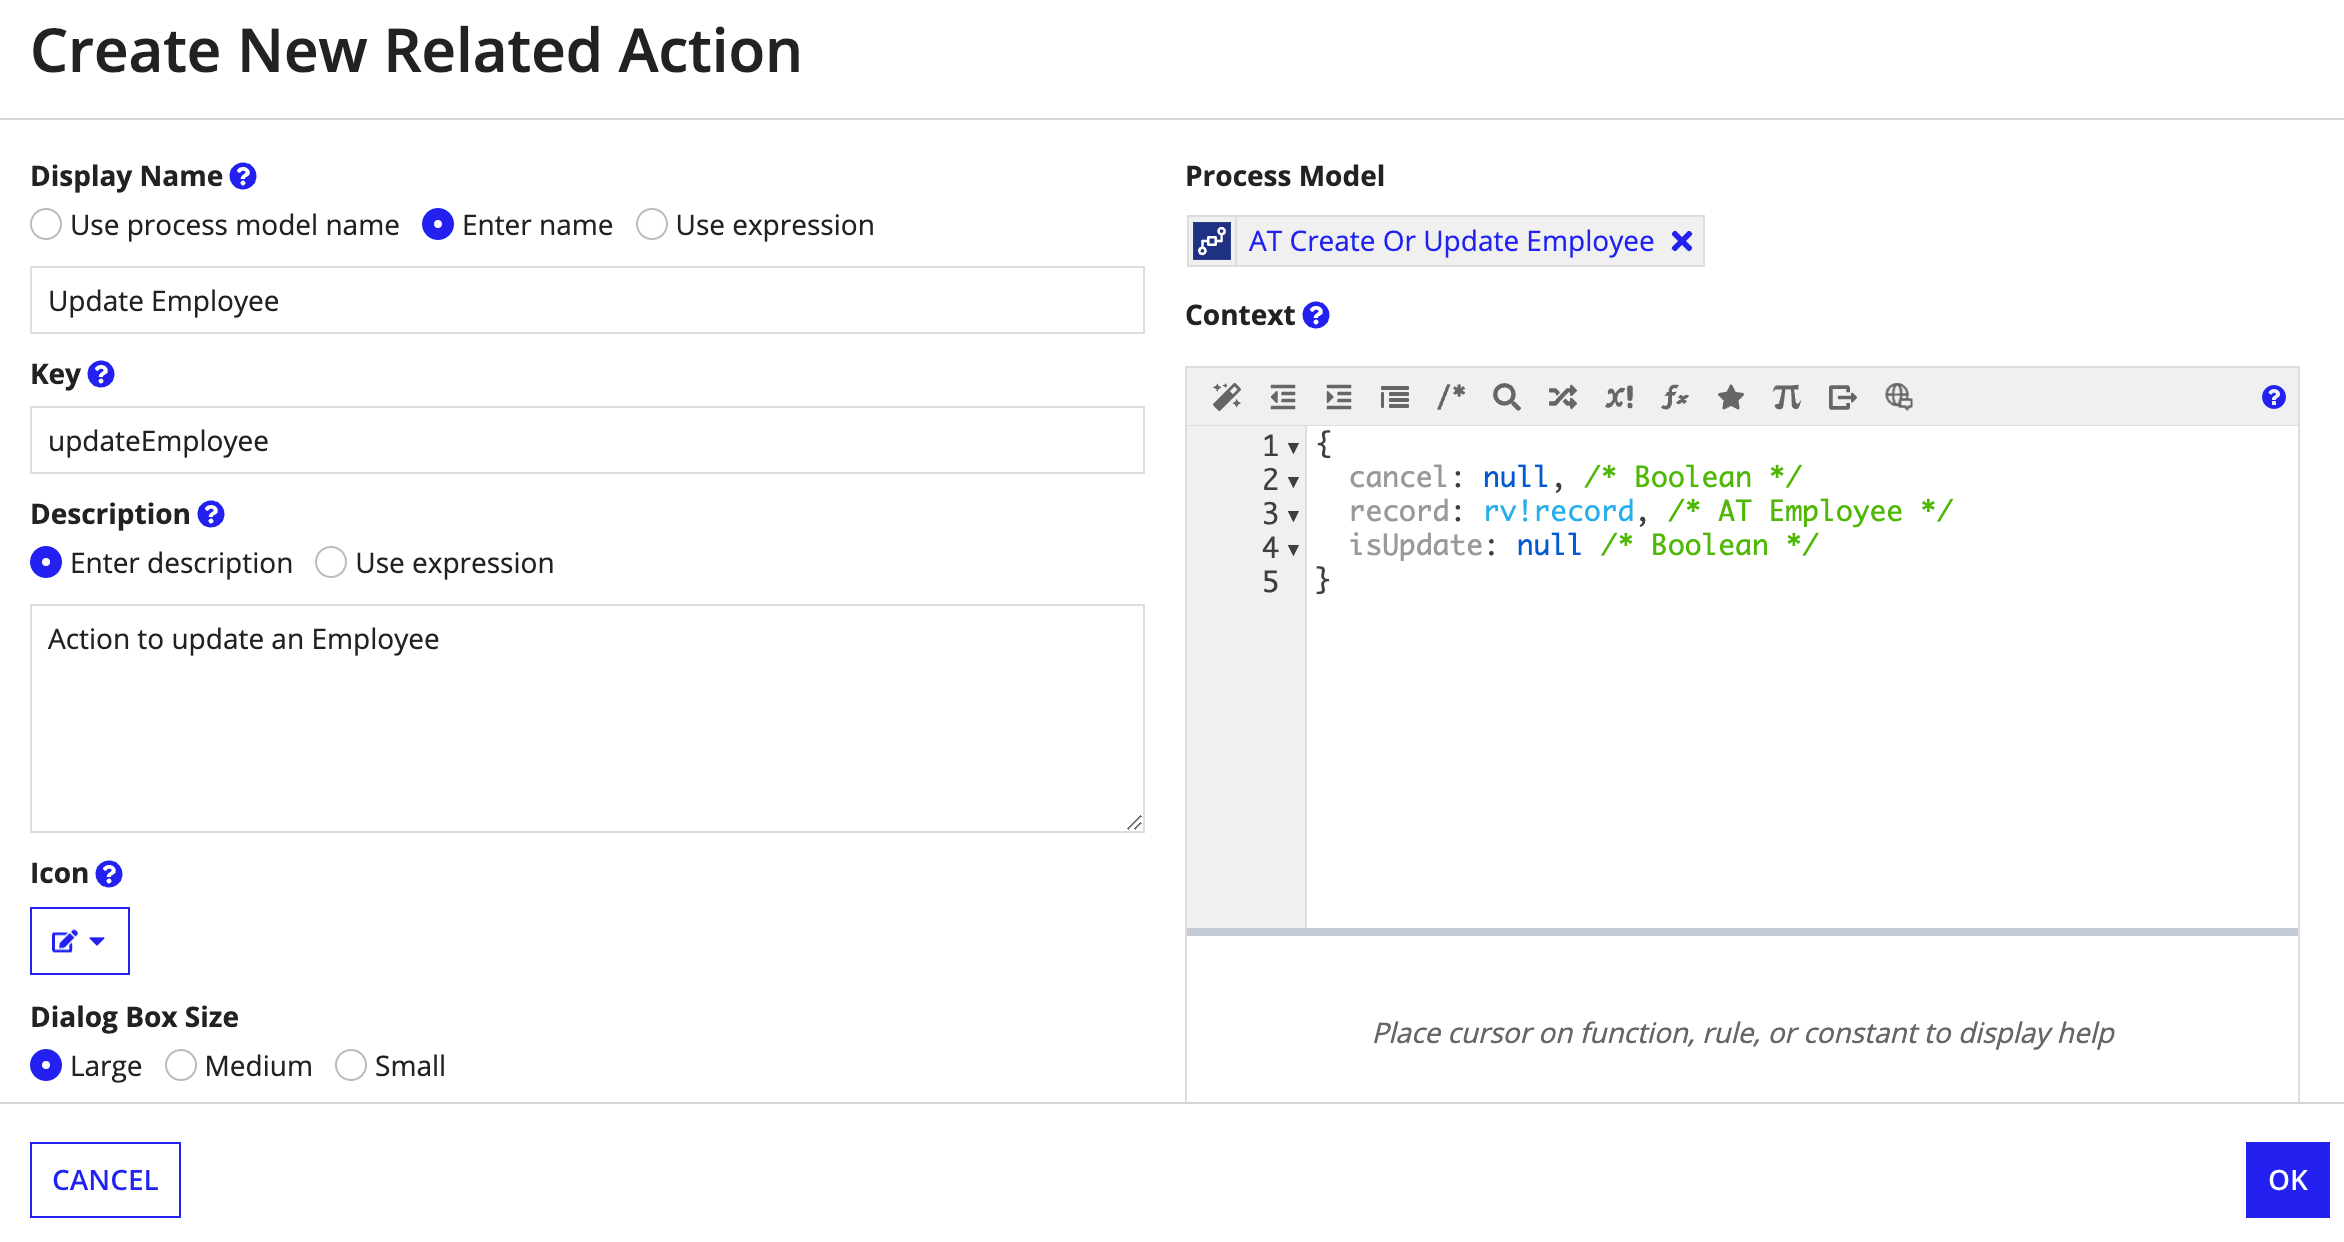
To configure a record action manually:
- In your record type, go to Actions.
- Under Record List Actions or Related Actions, click Configure a Record Action Manually.
-
Configure the record action properties.
For example, the following is the manual configuration of a record list action:
The following is the manual configuration of a related action:
- Click OK. Your new action displays in the Record List Actions or Related Actions section as appropriate.
- (Record list actions only) Under Open Actions In, specify how the action should open. By default, DIALOG BOX is selected, and the Dialog Box Size property configured for the action will be applied.
- Click SAVE CHANGES.
Display a record actionCopy link to clipboard
After you create an action in the record type, you can determine where the action appears as described in the following table:
| Location | Description | Record List Action | Related Action |
|---|---|---|---|
| Record list | By default, record list actions display as buttons on the record list. When viewing your application on mobile, only the first record list action will be available on the record list. | Yes | No |
| Related Actions view | By default, all related actions configured for a record type are available in a record's Related Actions view. This record view is configured out-of-the-box in the record type, so you cannot modify it; however, you can hide the Related Actions view, if needed. | No | Yes |
| Record views | Related actions can display to end users as buttons on any record view, using related action shortcuts. | No | Yes |
| Interfaces | Record actions can display anywhere in your interfaces, using the record action component or the recordActions parameter of records-powered grids. | Yes | Yes |
Note: When viewing your application on mobile, if you're using a record type as the source of a read-only grid in an interface, you can see and use all actions configured in the recordActions parameter of your grid.
Display a related action on a record viewCopy link to clipboard
To display related actions on a record view, you will use related action shortcuts, which are configured on the record view.
To display a related action as a button on a record view:
- In your record type, go to Views.
- Open the desired record view.
- Under Related Action Shortcuts, a list of available related actions appear.
-
Select the checkbox next to the related actions you want to display on the view.
Note: Related actions from Quick Tasks won't show up in this list.
-
Under Open Shortcuts In, choose how the related action should open. By default, Dialog Box is selected and the Dialog Box Size configured on the related action will be applied.
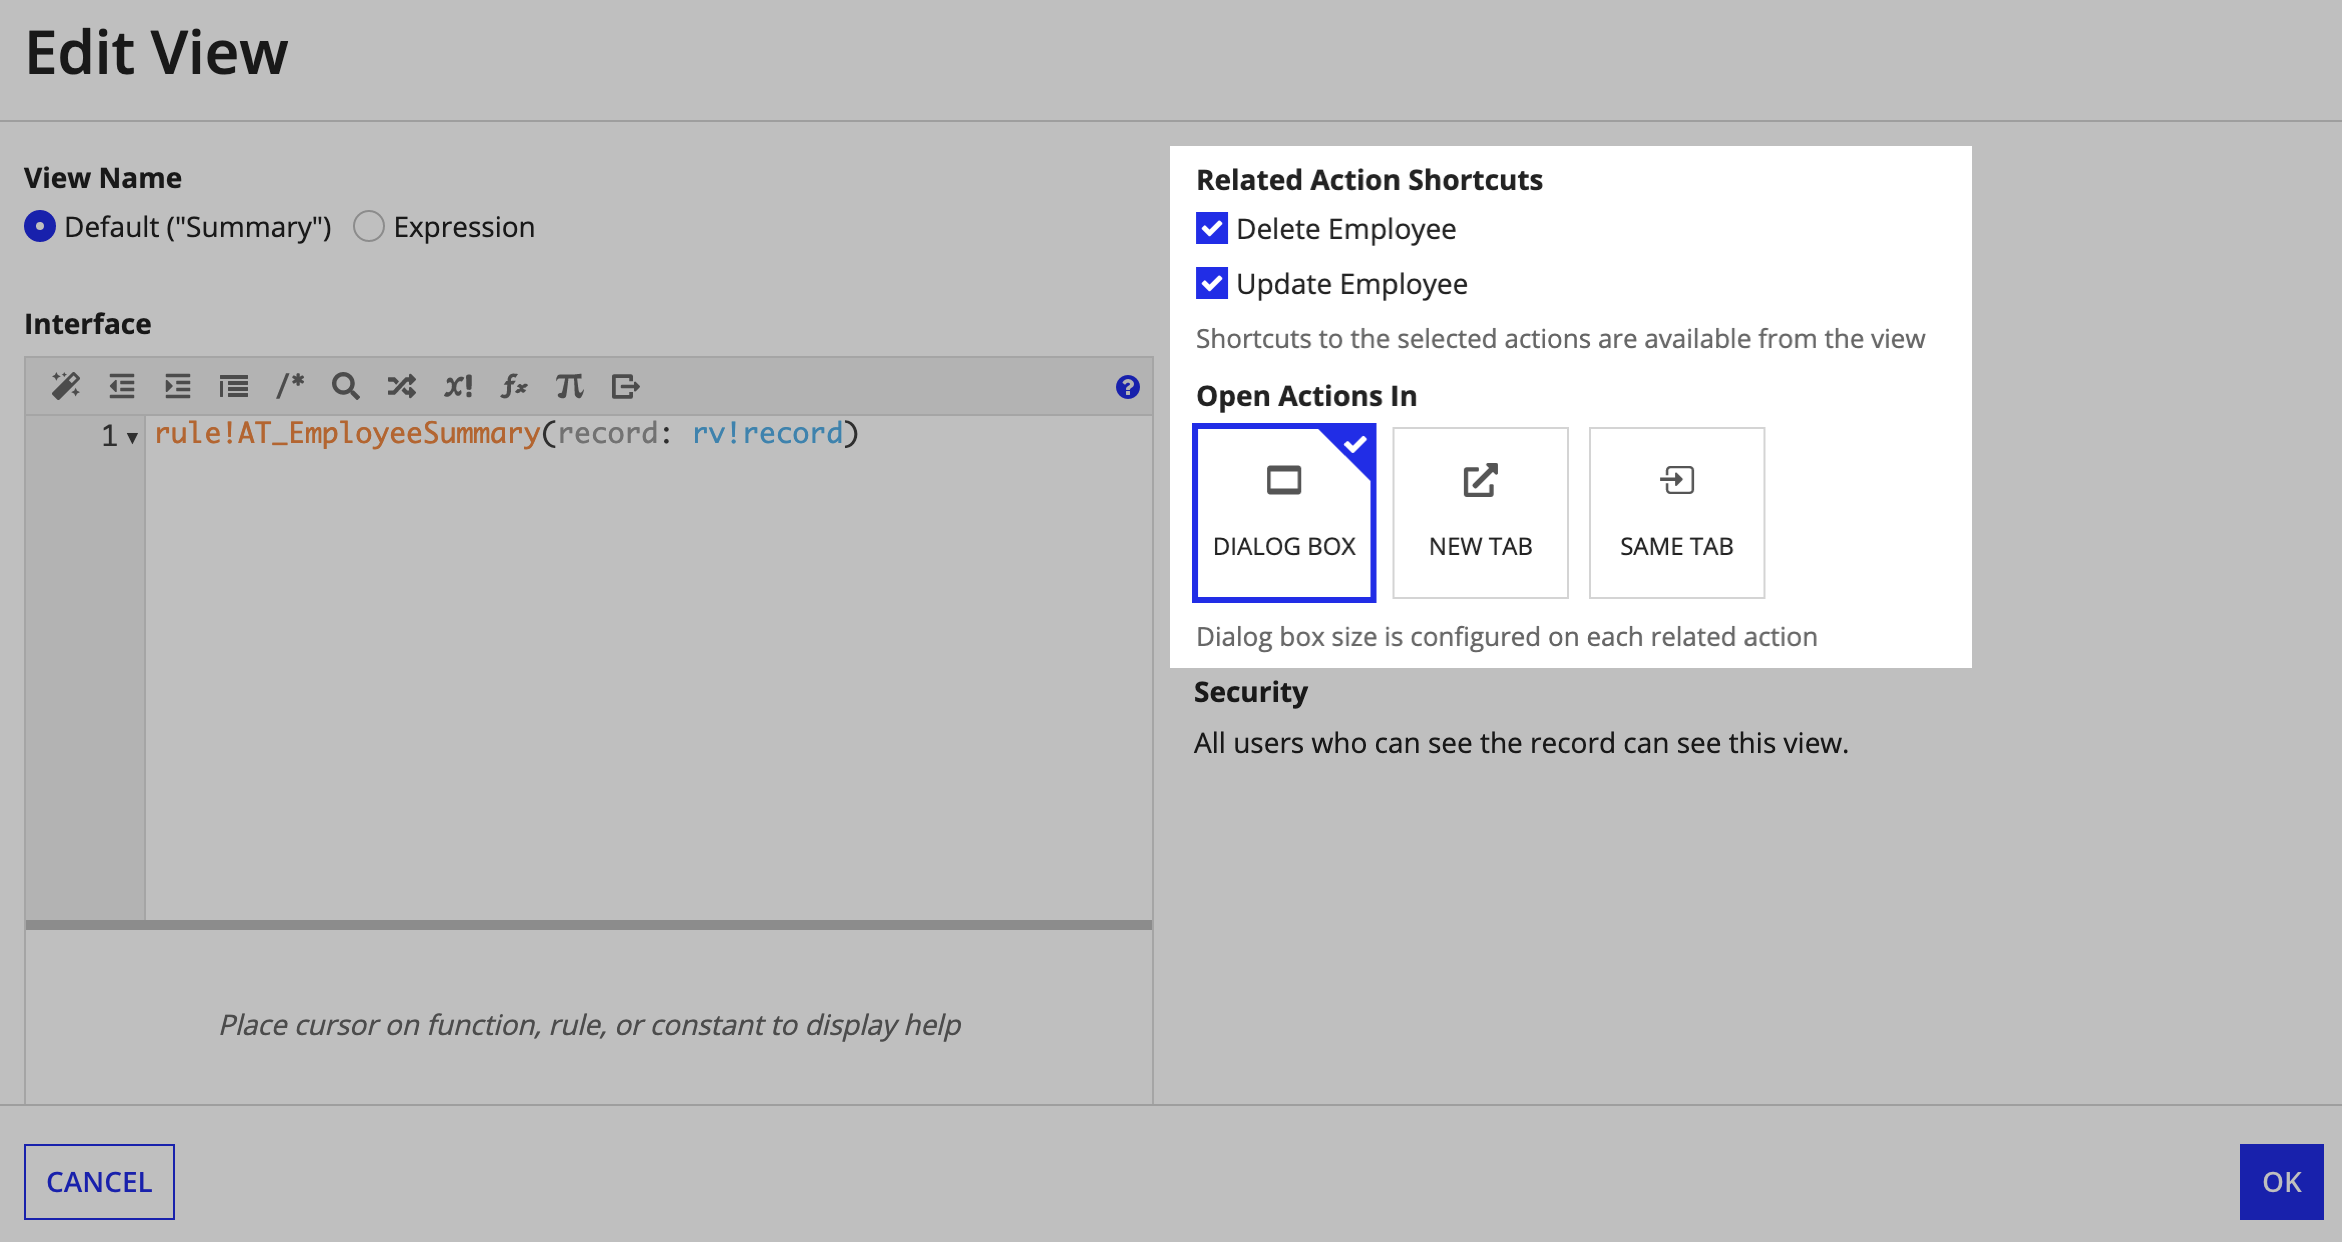
- Click OK.
- Click SAVE CHANGES.
Users will see the selected related actions as buttons when they are on that particular record view.
Update a record actionCopy link to clipboard
To update a record action:
- In your record type, go to Actions.
- Under Record List Actions or Related Actions, click
 next to the action you want to update.
 - In the Edit Action window, configure the record action properties.
- Click OK.
- Click SAVE CHANGES.
Delete a record actionCopy link to clipboard
Deleting a record action does not delete the objects supporting the record action.
To delete a record action:
- In your record type, go to Actions.
- Under Record List Actions or Related Actions, click
 next to the action you want to delete.
 - Click Delete to confirm the deletion.
- Click SAVE CHANGES.
Record action securityCopy link to clipboard
To determine if a user can see a record action, Appian checks the following:
- Whether the action's security rule includes the user, or its security expression evaluates to true for the user.
- Whether the user has Initiator permission to the underlying process model.
- For related actions, whether the user has access to the record.
- If your record type has data sync enabled, record access is determined by the record-level security.
- If your record type does not have data sync enabled, record access is determined by default filters.
The same applies for quick tasks that appear as related actions for record types that use a process model as their source. If the user does not have the permissions to complete the quick task, the link to the related action will not display under Related Actions.