This page applies to business users. It describes how to perform an investigation and uncover insights about a process.
OverviewCopy link to clipboard
An investigation is a systematic, detailed, and guided examination of the aspects of a process that are contributing to slowness or inefficiency.
Process HQ supports the following types of investigation:
- Duration: Focus on how long a case or process part takes, so you can speed up slow processes.
- Occurrence: Focus on how often an unwanted outcome occurs, so you can reduce or even eliminate that outcome from your process. An unwanted outcome can be either a case with a specific attribute or a specific process part, depending on the KPI you're using.
As you investigate, Process HQ intelligently recommends attributes that are likely contributors to process slowness or high numbers of unwanted outcomes.
Process HQ provides you with a finding, a one-sentence summary of its analysis of each attribute value in the process.
You can evaluate these findings and combine them into an actionable conclusion, known as an insight. A single investigation can result in multiple insights, providing you with centralized access to individual conclusions as you focus on different aspects of the same filtered data.
By combining attributes in an insight, you'll be able to understand better where problems are occurring in the process and how to resolve them.
Process HQ also estimates the potential improvement that could result from implementing the insight into your business process. Depending on the investigation type, this potential is displayed as either potential savings (the days of work you can save each year) or potential reduction (the number of unwanted outcomes you can eliminate to bring these cases in line with the average).
You can create multiple investigations in a single view to build insights about specific aspects of the cases in that view.
What to look forCopy link to clipboard
A business process consists of a series of activities, and each activity corresponds to a real-world task.
A duration investigation involves looking closely at:
- Case duration: How long do cases with a specific characteristic take on average?
- Sequence duration: How long do individual sequences take on average?
- Activity duration: How long do individual activities take on average?
An occurrence investigation involves looking closely at:
- Sequences of activities:
- Did Activity A follow Activity B, when B should follow A?
- Did the process continue through Activity A, B, and C, but then loop back to Activity B again?
- Repetitions of activities: Did Activity A happen twice in a row?
- Unwanted outcomes: What are the characteristics of cases with unwanted Activity A that might help you to target improvement?
As you investigate, follow the guidelines described below.
Look for the unexpected and meaningfulCopy link to clipboard
Pay the most attention to findings that reveal something unexpected and meaningful about your process.
For example, in a Financial Onboarding process, a finding might reveal that cases with a Country attribute of Spain take far longer than cases in other countries. Or a different finding might reveal that the sequence Financial Review to Financial Review, a repetition of a single activity, is unexpectedly happening in a high percentage of the slowest cases.
Ignore the expected and unchangeableCopy link to clipboard
Ignore findings that you'd expect based on the business context, and ignore findings about attributes, activities, or sequences that your organization doesn't have the power to change.
For example, your case data might include an attribute value that indicates the case must undergo review and approval by an external agency (for example, a case attribute like Customer Type with a value of Federal). In this scenario, your organization is not likely to be able to improve the slowness of steps associated with that external review.
On the other hand, your case data might include an attribute value that indicates a third-party vendor completes certain steps (for example, an event attribute like User with a value of Wickham Outsourcing Unlimited). In this scenario, you might have service-level agreements with that vendor that you can leverage for change.
Before you beginCopy link to clipboard
- Explore your business process.
- (Optional) To investigate a specific part of the process, create a KPI that either tracks the duration of that process part or counts the occurrence of that process part.
Step 1: Start a new investigationCopy link to clipboard
Every investigation takes place in a process view with a set date range. These initial filters help to focus the data you'll be investigating.
In a process view, you can start an investigation in a number of ways:
- Start with intelligent recommendations.
- Start with a KPI.
- Start with the process diagram.
- Start with a case attribute.
How you start depends on what you want to investigate:
Investigation Focus |
Start With |
|---|---|
Average duration of all cases in the current view |
|
Average duration of cases with a specific attribute |
|
Average duration of a sequence |
|
Average duration of an activity |
|
Occurrence of an attribute |
Tip: When you start an investigation, the header of the investigation page displays a system-generated name for your investigation. This name reflects what you're investigating: Reduce Duration if you're investigating average durations, or Reduce Occurrence if you're investigating how often an attribute, sequence, or activity occurs. You can rename your investigation when you save your first insight.
Start with intelligent recommendationsCopy link to clipboard
-
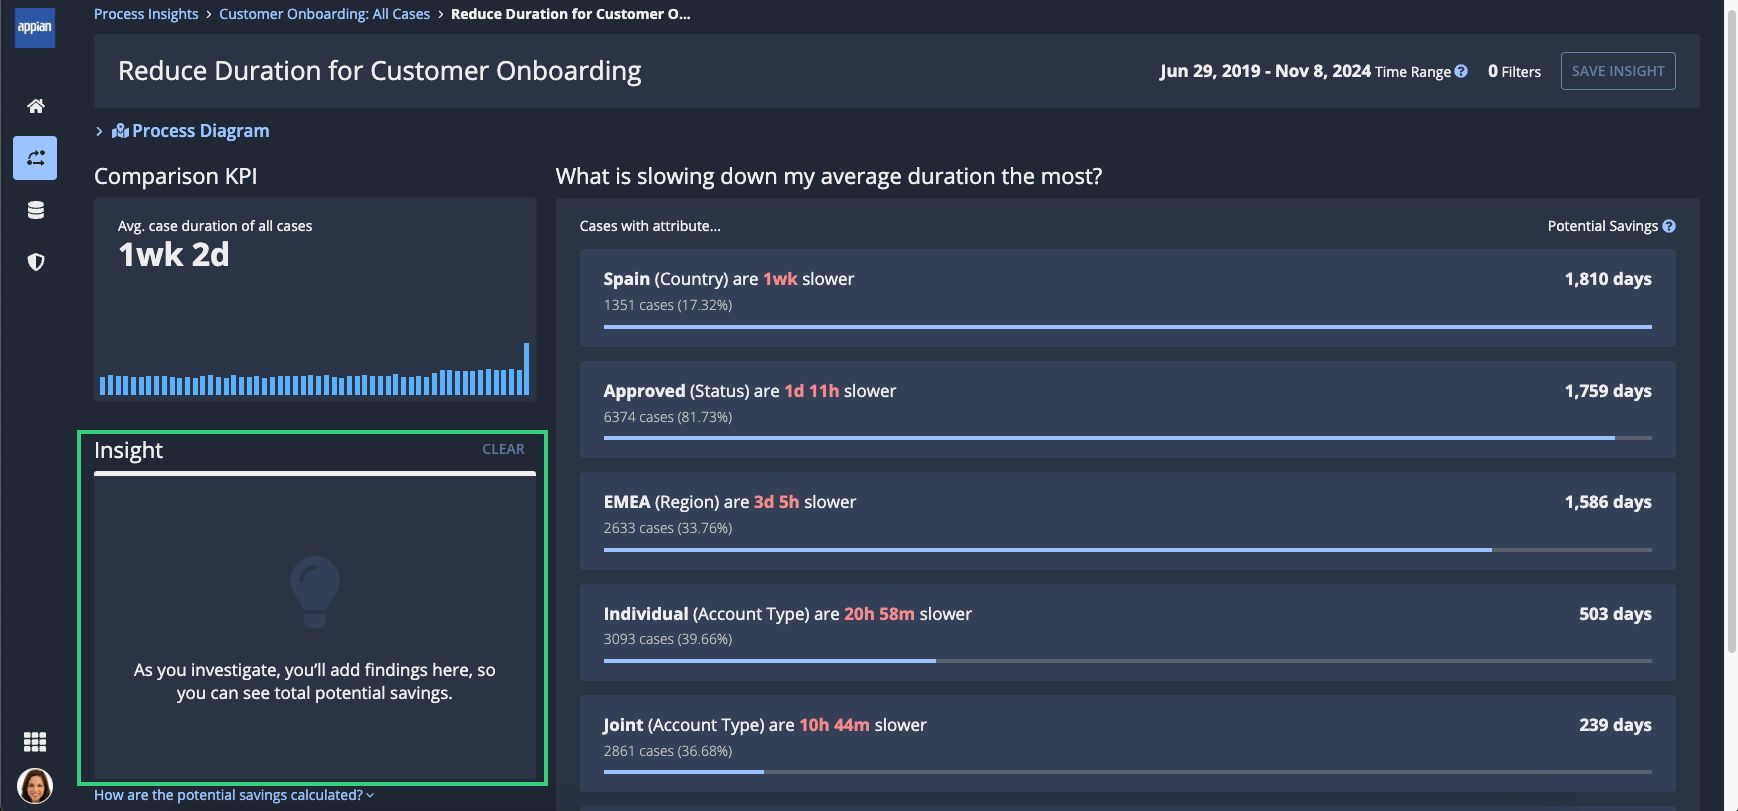
In the header of a process view, click START INVESTIGATION.
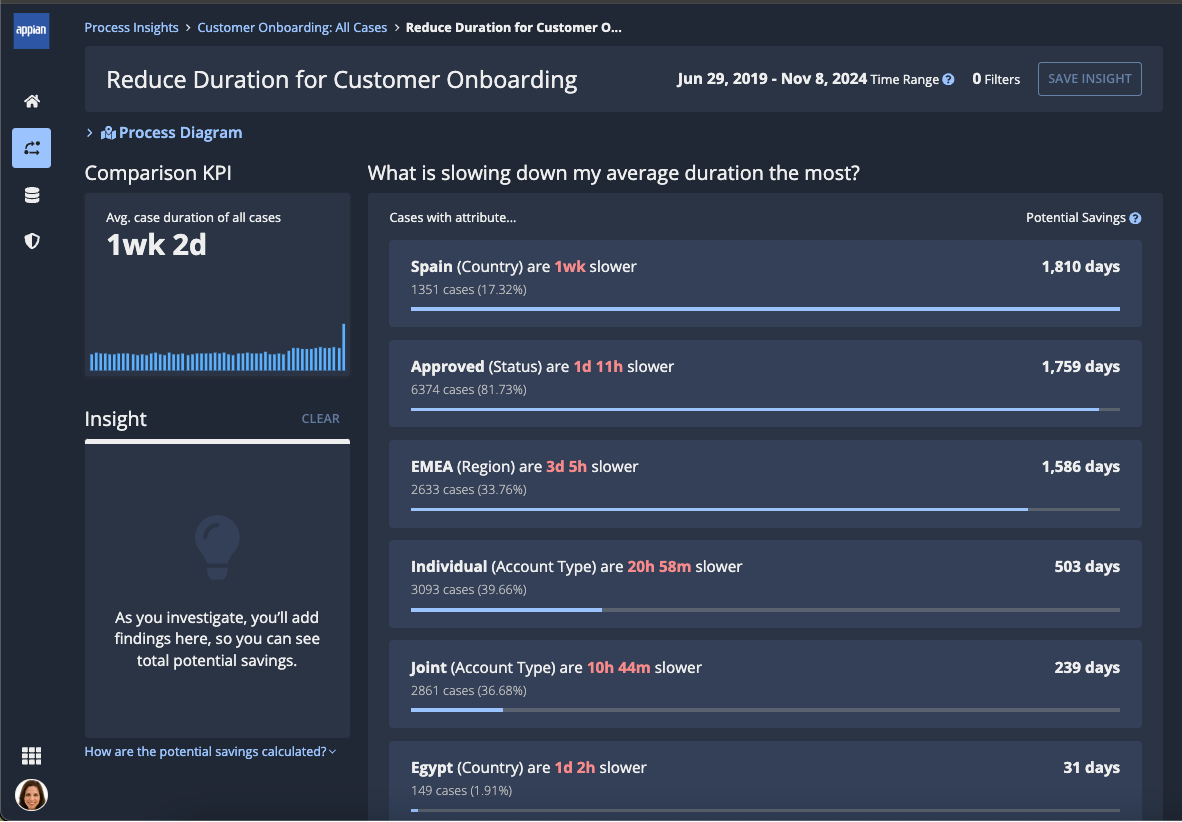
The active investigation page displays.
For example:
The Insight pane starts out blank, ready for you to start adding findings as you evaluate them.
Start with a KPICopy link to clipboard
You can start an investigation from any count KPI or average duration KPI, including the system-created Average Case Duration KPI. Learn more about KPIs.
To start an investigation from a KPI:
- Go to the Summary or KPIs tab of a view.
- Click the three-dot menu in the KPI.
-
Click Investigate KPI:
The active investigation page displays.
Start with the process diagramCopy link to clipboard
To start an investigation from the process diagram in the Summary tab of a process view:
-
In the process diagram, click on a connector or a node.
Note: You can only start an investigation from a node if your event data includes a start timestamp and an end timestamp.
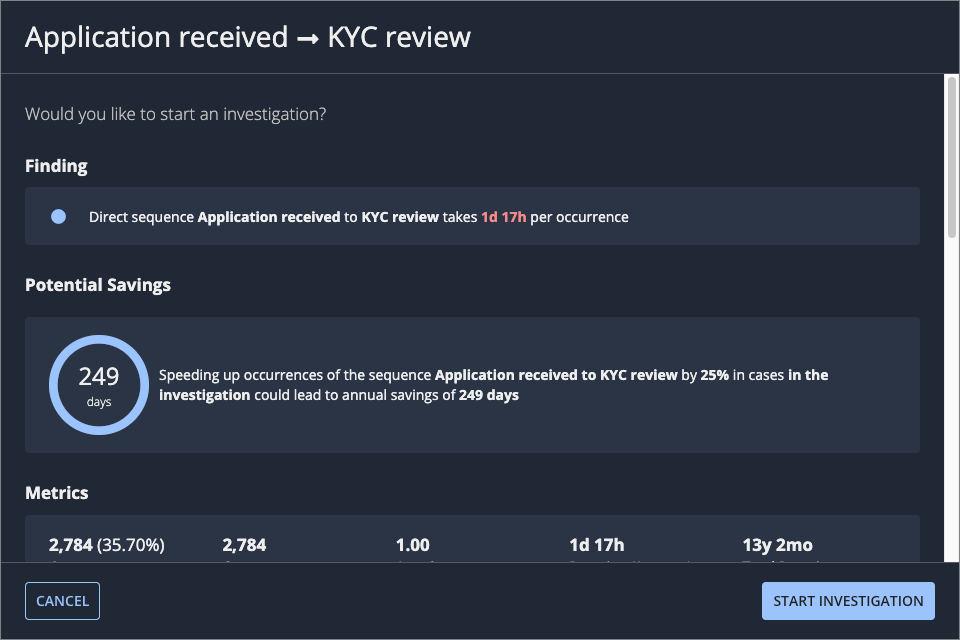
The sequence or activity details display.
For example:
-
Review the finding, potential savings, and visualizations. Your goal is to determine whether the finding for this sequence or activity is meaningful based on your business context.
-
Click START INVESTIGATION. The active investigation page displays.
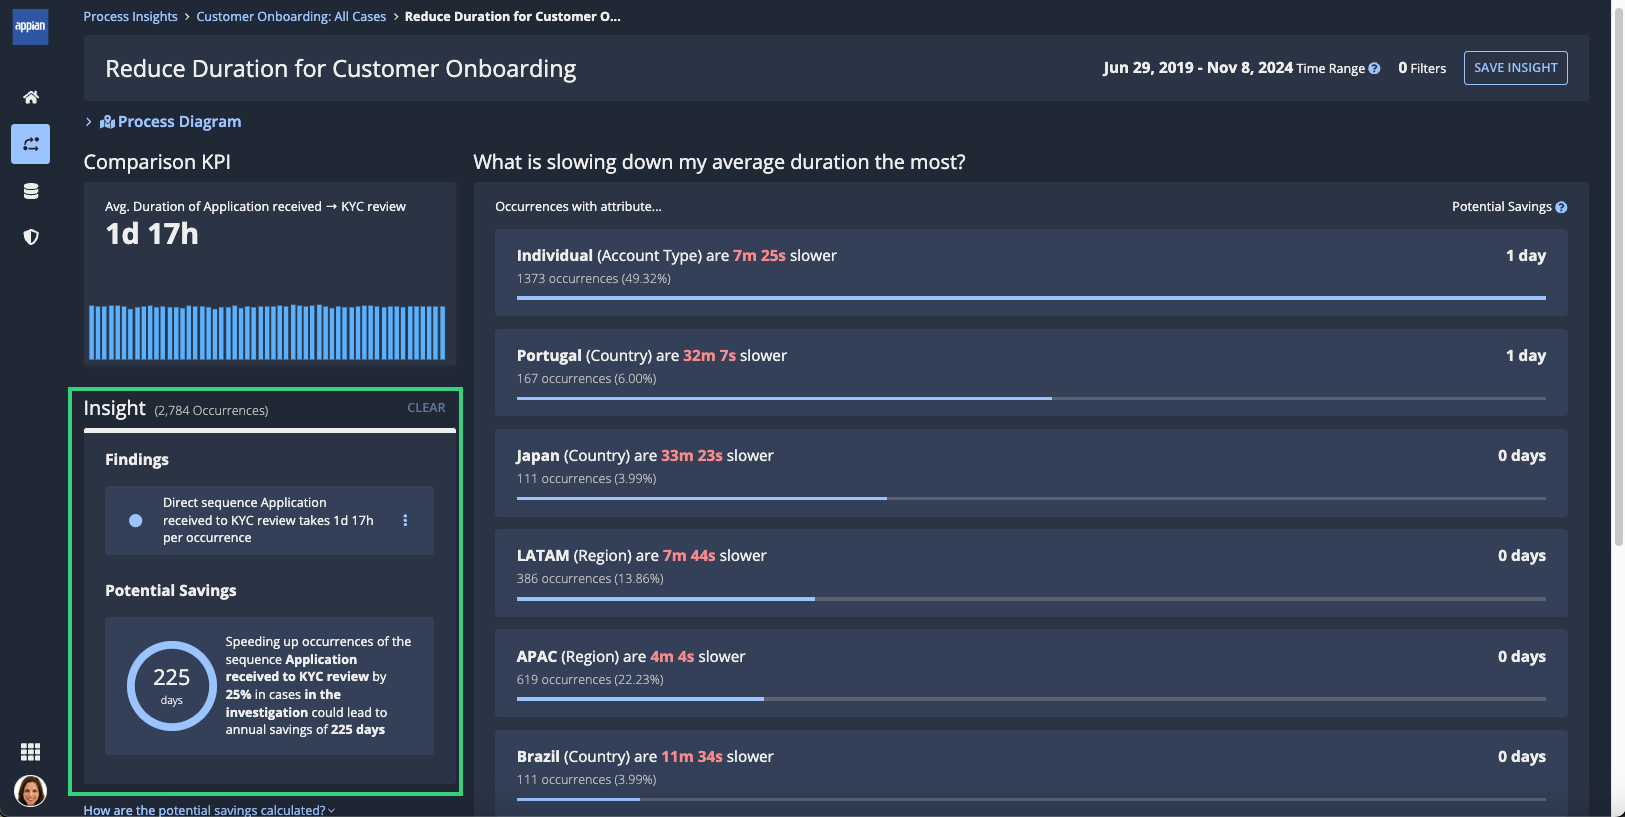
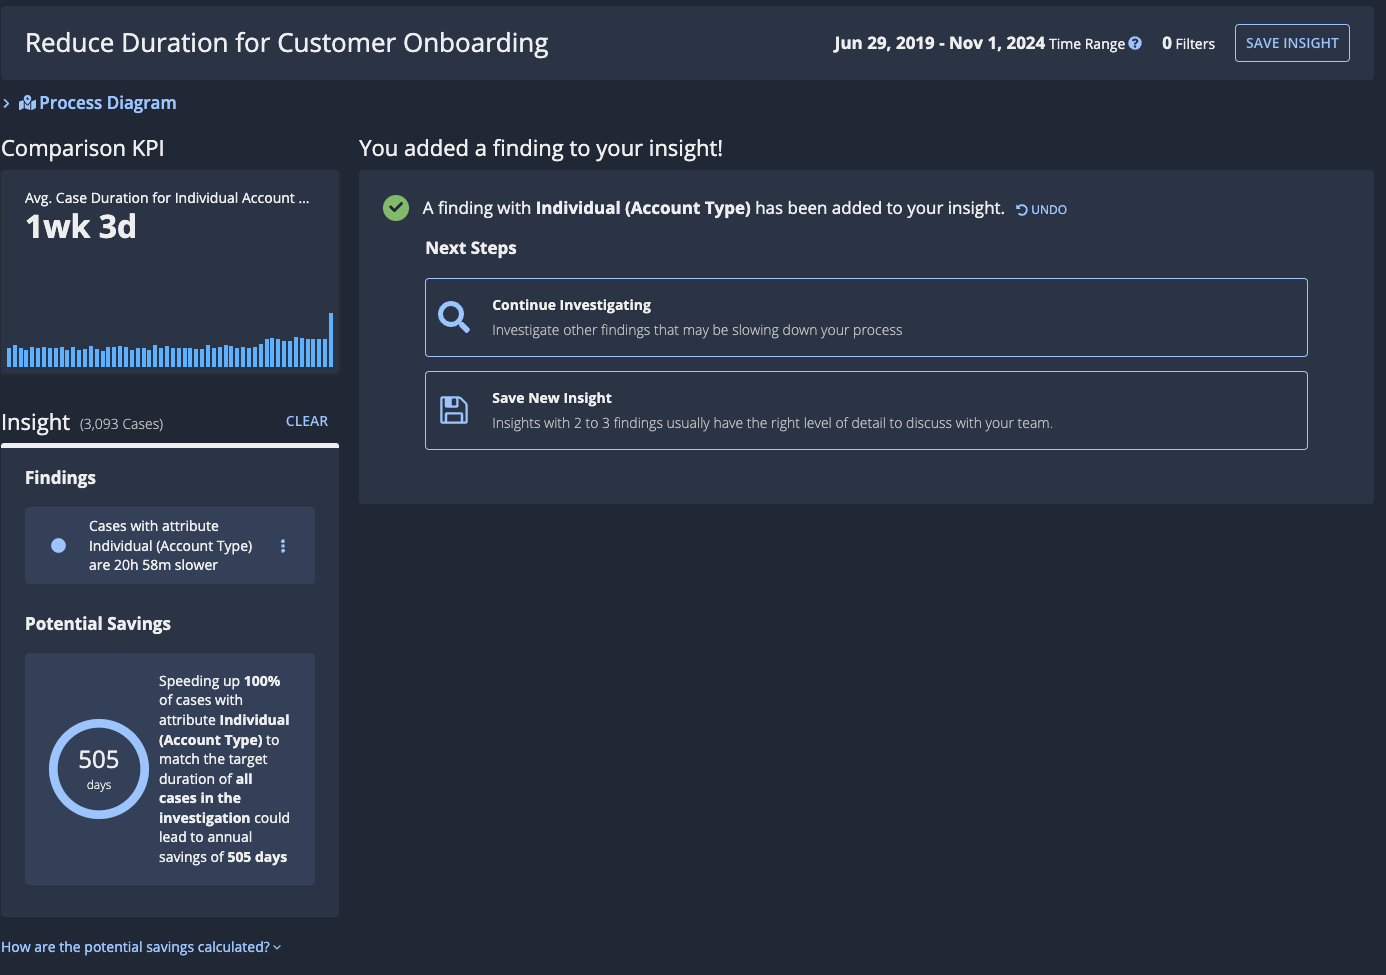
The sequence or activity you selected as the starting point for your investigation has been automatically added to the Insight pane, and the investigation pane lists next steps you can take in the investigation.
For example:
You're ready to add a finding to your insight.
Start with a case attributeCopy link to clipboard
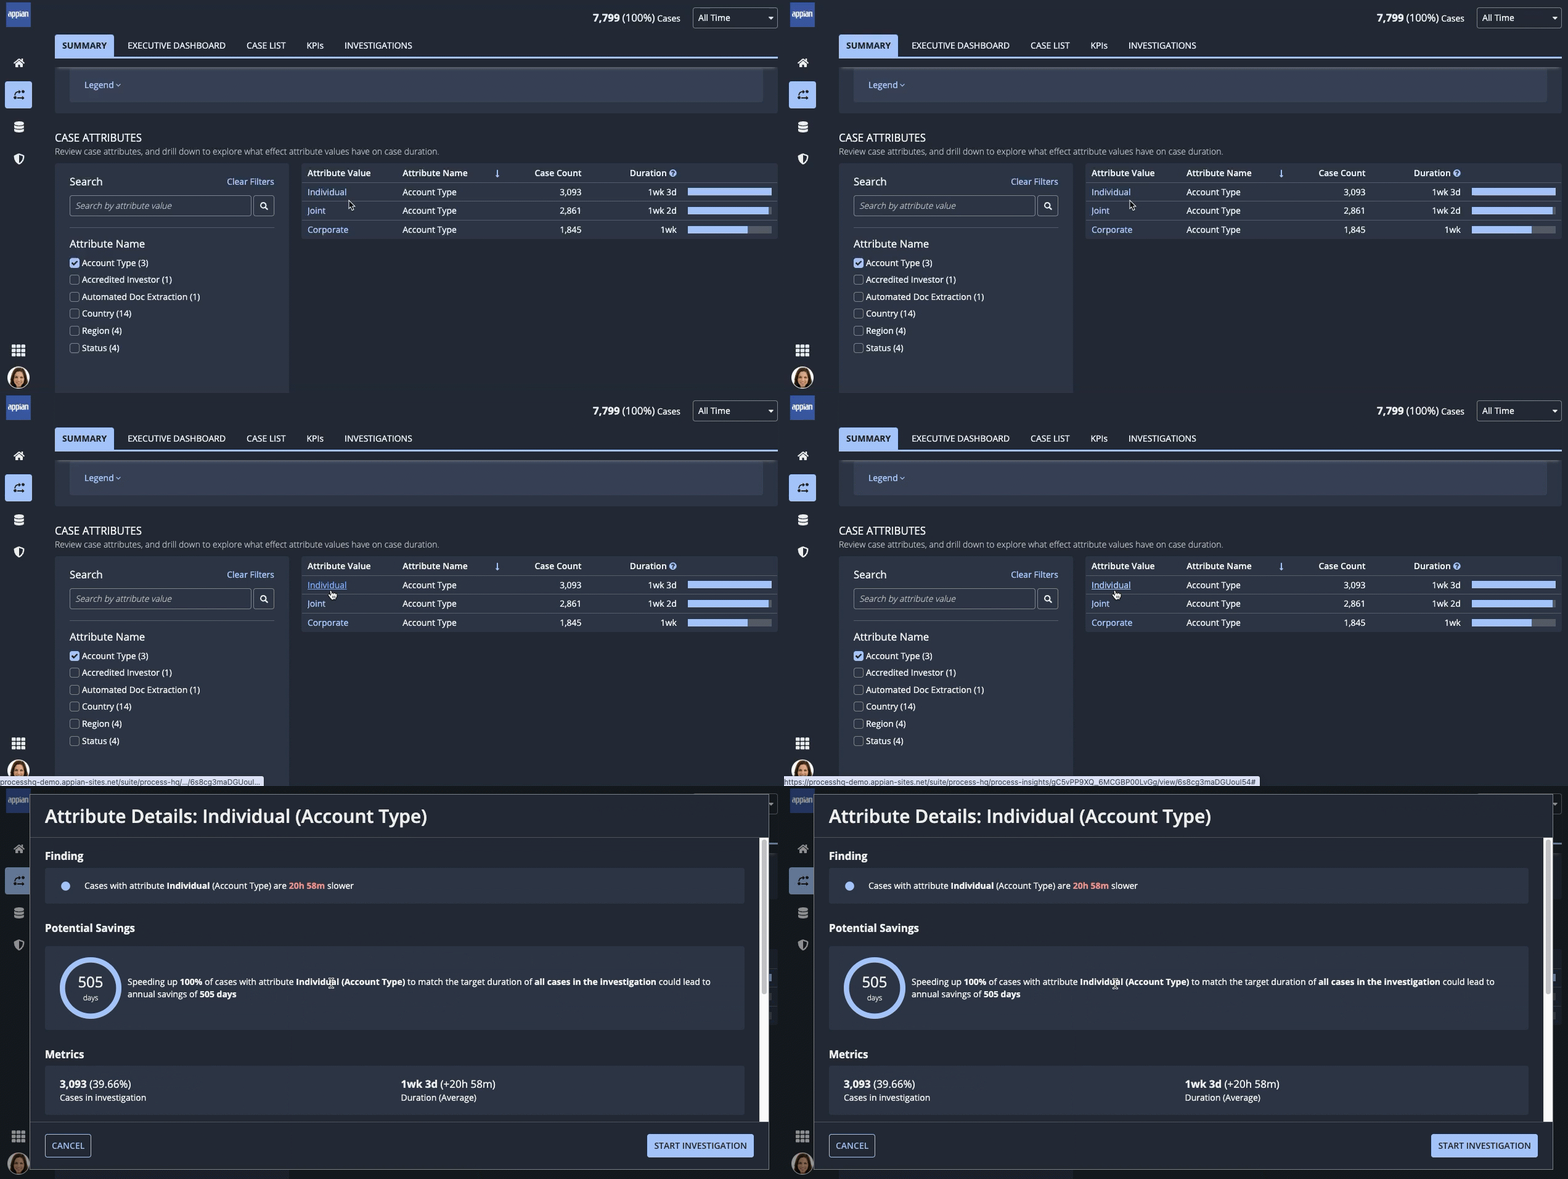
To start an investigation from a case attribute in the Summary tab of a process view:
-
Click an attribute name to see the attribute's details. The attribute details give you the key insights like potential savings, metrics, and visualizations that you need to understand how the selected attribute affects the process.
-
Review the finding and potential savings. Your goal is to determine whether this finding is unexpected and meaningful in your business context.
-
Click START INVESTIGATION. The active investigation page displays.
The case attribute you selected as the starting point for your investigation has been automatically added to the Insight pane, and the investigation pane lists next steps you can take in the investigation.
For example:
You're ready to add a finding to your insight.
Step 2: Review findingsCopy link to clipboard
Note: If you started the investigation from a process diagram or case attribute, you've already reviewed your first finding and it's been automatically added to your insight, so you can skip to adding more findings to your insight.
If you started with intelligent recommendations or a KPI, you're currently looking at the attribute values list in the active investigation page.
For example:
Decide what you want to do next:
Tip: At this point, your investigation is in a temporary state. You can save your investigation when you save the first insight for the investigation.
Follow Process HQ's recommendationsCopy link to clipboard
Continue your investigation as follows:
-
Click the first attribute value in the attribute values list. The attribute value details display.
-
In the attribute value details, review the finding, potential savings, visualizations, and list of cases with the selected attribute value. Your goal is to determine whether this finding is unexpected and meaningful in your business context.
Review an already-known attributeCopy link to clipboard
You may already know the process well enough that you have a specific attribute you want to use as a starting point.
To investigate an already-known attribute:
-
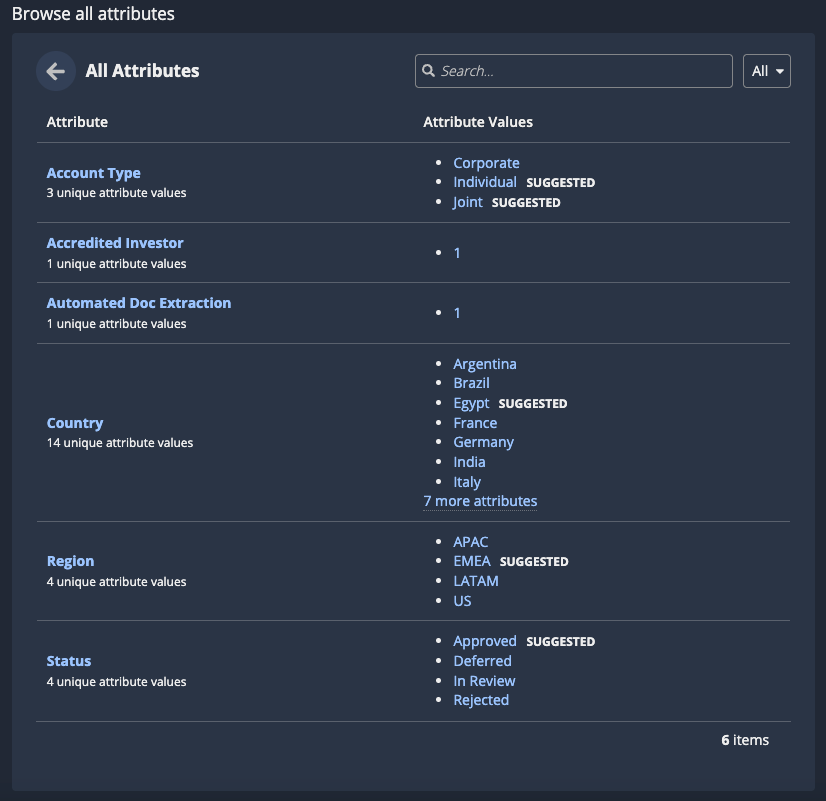
At the end of the attribute values list, click Browse All. The All Attributes list displays. This list contains all attributes and attribute values associated with the process.
For example:
Tip: As you review all attributes, you'll continue to see intelligent recommendations via the SUGGESTED tag. This tag appears next to attributes associated with long durations or frequent occurrences depending on the investigation type.
- (Optional) In the Attribute column, click on an attribute name to view a comparison of that attribute's values. To return to the list, click the arrow next to the pane title.
- In the Attribute Values column, click on a value to view the attribute value details.
- In the attribute value details, review the finding, potential savings, visualizations, and list of cases with the selected attribute value. Your goal is to determine whether this finding is unexpected and meaningful in your business context.
Step 3: Add a finding to your insightCopy link to clipboard
Based on your review of the finding, you'll determine whether you want to look at additional analysis of the cases affected by that finding.
To view additional analysis of those cases, click ADD TO INSIGHT in the attribute value details.
The finding displays in the Insight pane, and a list of next steps you can take displays in the investigation pane.
When you add a finding to an insight, you're essentially applying a filter to the cases you're investigating. The investigation focus narrows to the context of cases affected by the finding you added.
For example, let's say all cases in your investigation originally included the following:
| Case ID | Country | Account Type | Status |
|---|---|---|---|
| 100 | Spain | Corporate | Rejected |
| 101 | Spain | Corporate | Approved |
| 103 | Germany | Individual | Deferred |
If you add a finding for Spain (Country) to an insight, the new attribute values you can investigate now include the following:
| Case ID | Country | Account Type | Status |
|---|---|---|---|
| 100 | Spain | Corporate | Rejected |
| 101 | Spain | Corporate | Approved |
You'd see Corporate, Rejected, and Approved as possible attribute values to investigate, and if you investigate sequences, you'd only see the sequences associated with Case 100 and Case 101.
Step 4: Review and add more findingsCopy link to clipboard
Typically, a single finding doesn't give enough information to identify concrete actions you can take to improve the process. Expect an iterative process as you review more findings and add them to your insight. You'll evaluate one aspect of your process, then evaluate the next aspect in the context of that first aspect, until you reach an actionable conclusion. Each step of the way, the investigation pane suggests next steps you can take in the investigation.
As you're evaluating findings, you might want to refine the findings included in the insight. For example, you might determine that a specific finding relates to a condition your organization does not have power to change. To support this refinement flow, you can remove the most recent finding from an insight or clear all findings from the insight to start your evaluation over.
Remove the most recent findingCopy link to clipboard
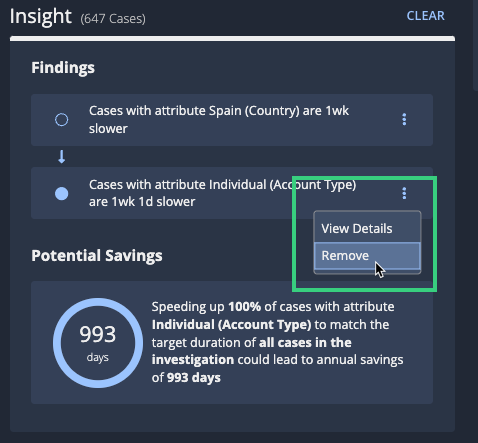
To remove the most recent finding, click the three-dot menu in the finding, then select Remove.
Process HQ removes that finding from the insight and displays next steps you can take.
Clear the insightCopy link to clipboard
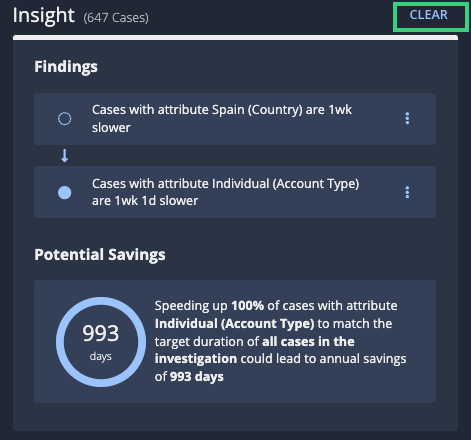
To clear all findings from the insight, select CLEAR in the insight header.
Then, click CLEAR INSIGHT to confirm. The active investigation page displays, and you can start reviewing findings from scratch.
Step 5: Save the insightCopy link to clipboard
Once you've built a sufficiently actionable insight, you can save it to share with colleagues and collaborate together.
To save a new insight:
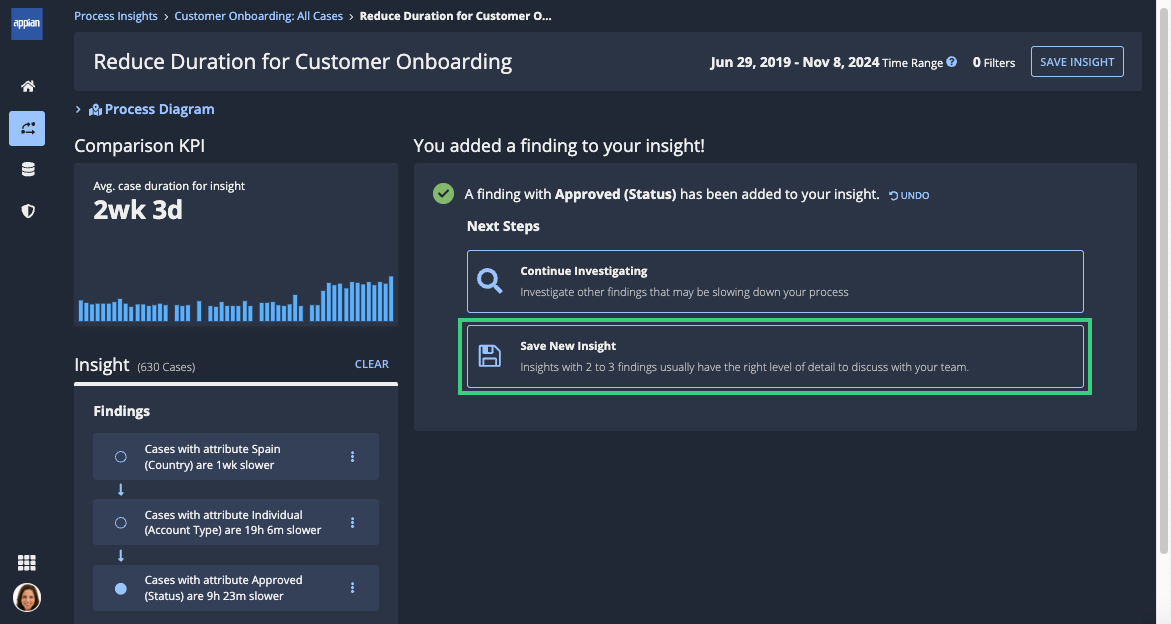
-
Click Save New Insight.
The Save New Insight dialog displays.
-
Configure the following properties:
Property
Action
Insight Name
Enter a short, meaningful name for the insight. For example,
Investigating Customer Onboarding Slowness.Investigation Name
Enter a short, meaningful name for the investigation. For example,
Country Impacts on Customer Onboarding.Tip: Once you create an investigation as part of saving an insight, you can return to add more insights to that investigation as you collaborate with colleagues.
Tip: Once you've saved an insight in a duration investigation, you can take advantage of AI-generated summaries in select regions.
-
Continue as appropriate:
- Stop investigating: To stop investigating, click SAVE AND EXIT. The insight details page displays, where you can review the insight you created and even start collaborating on the insight with colleagues.
- Continue investigating: To continue investigating, click SAVE AND CONTINUE. The active investigation page continues displaying, with the page title in the header showing the investigation name you configured. The investigation pane lists next steps you can take to keep building your insight.


