| This content applies solely to Connected Onboarding, which must be purchased separately from the Appian base platform. This content was written for Appian 23.1 and may not reflect the interfaces or functionality of other Appian versions. |
After you have created a new onboarding, you will need to manage your onboarding by viewing, maintaining, and updating that information.
There are two main pages that show a list of onboardings, the HOME page and the ONBOARDINGS page.
On the HOME page, the Active Onboardings section displays a list of open onboardings assigned to the user by default but can be filtered to show all onboardings. See Home Page Overview for more information about the information available on the Connected Onboarding Home page.
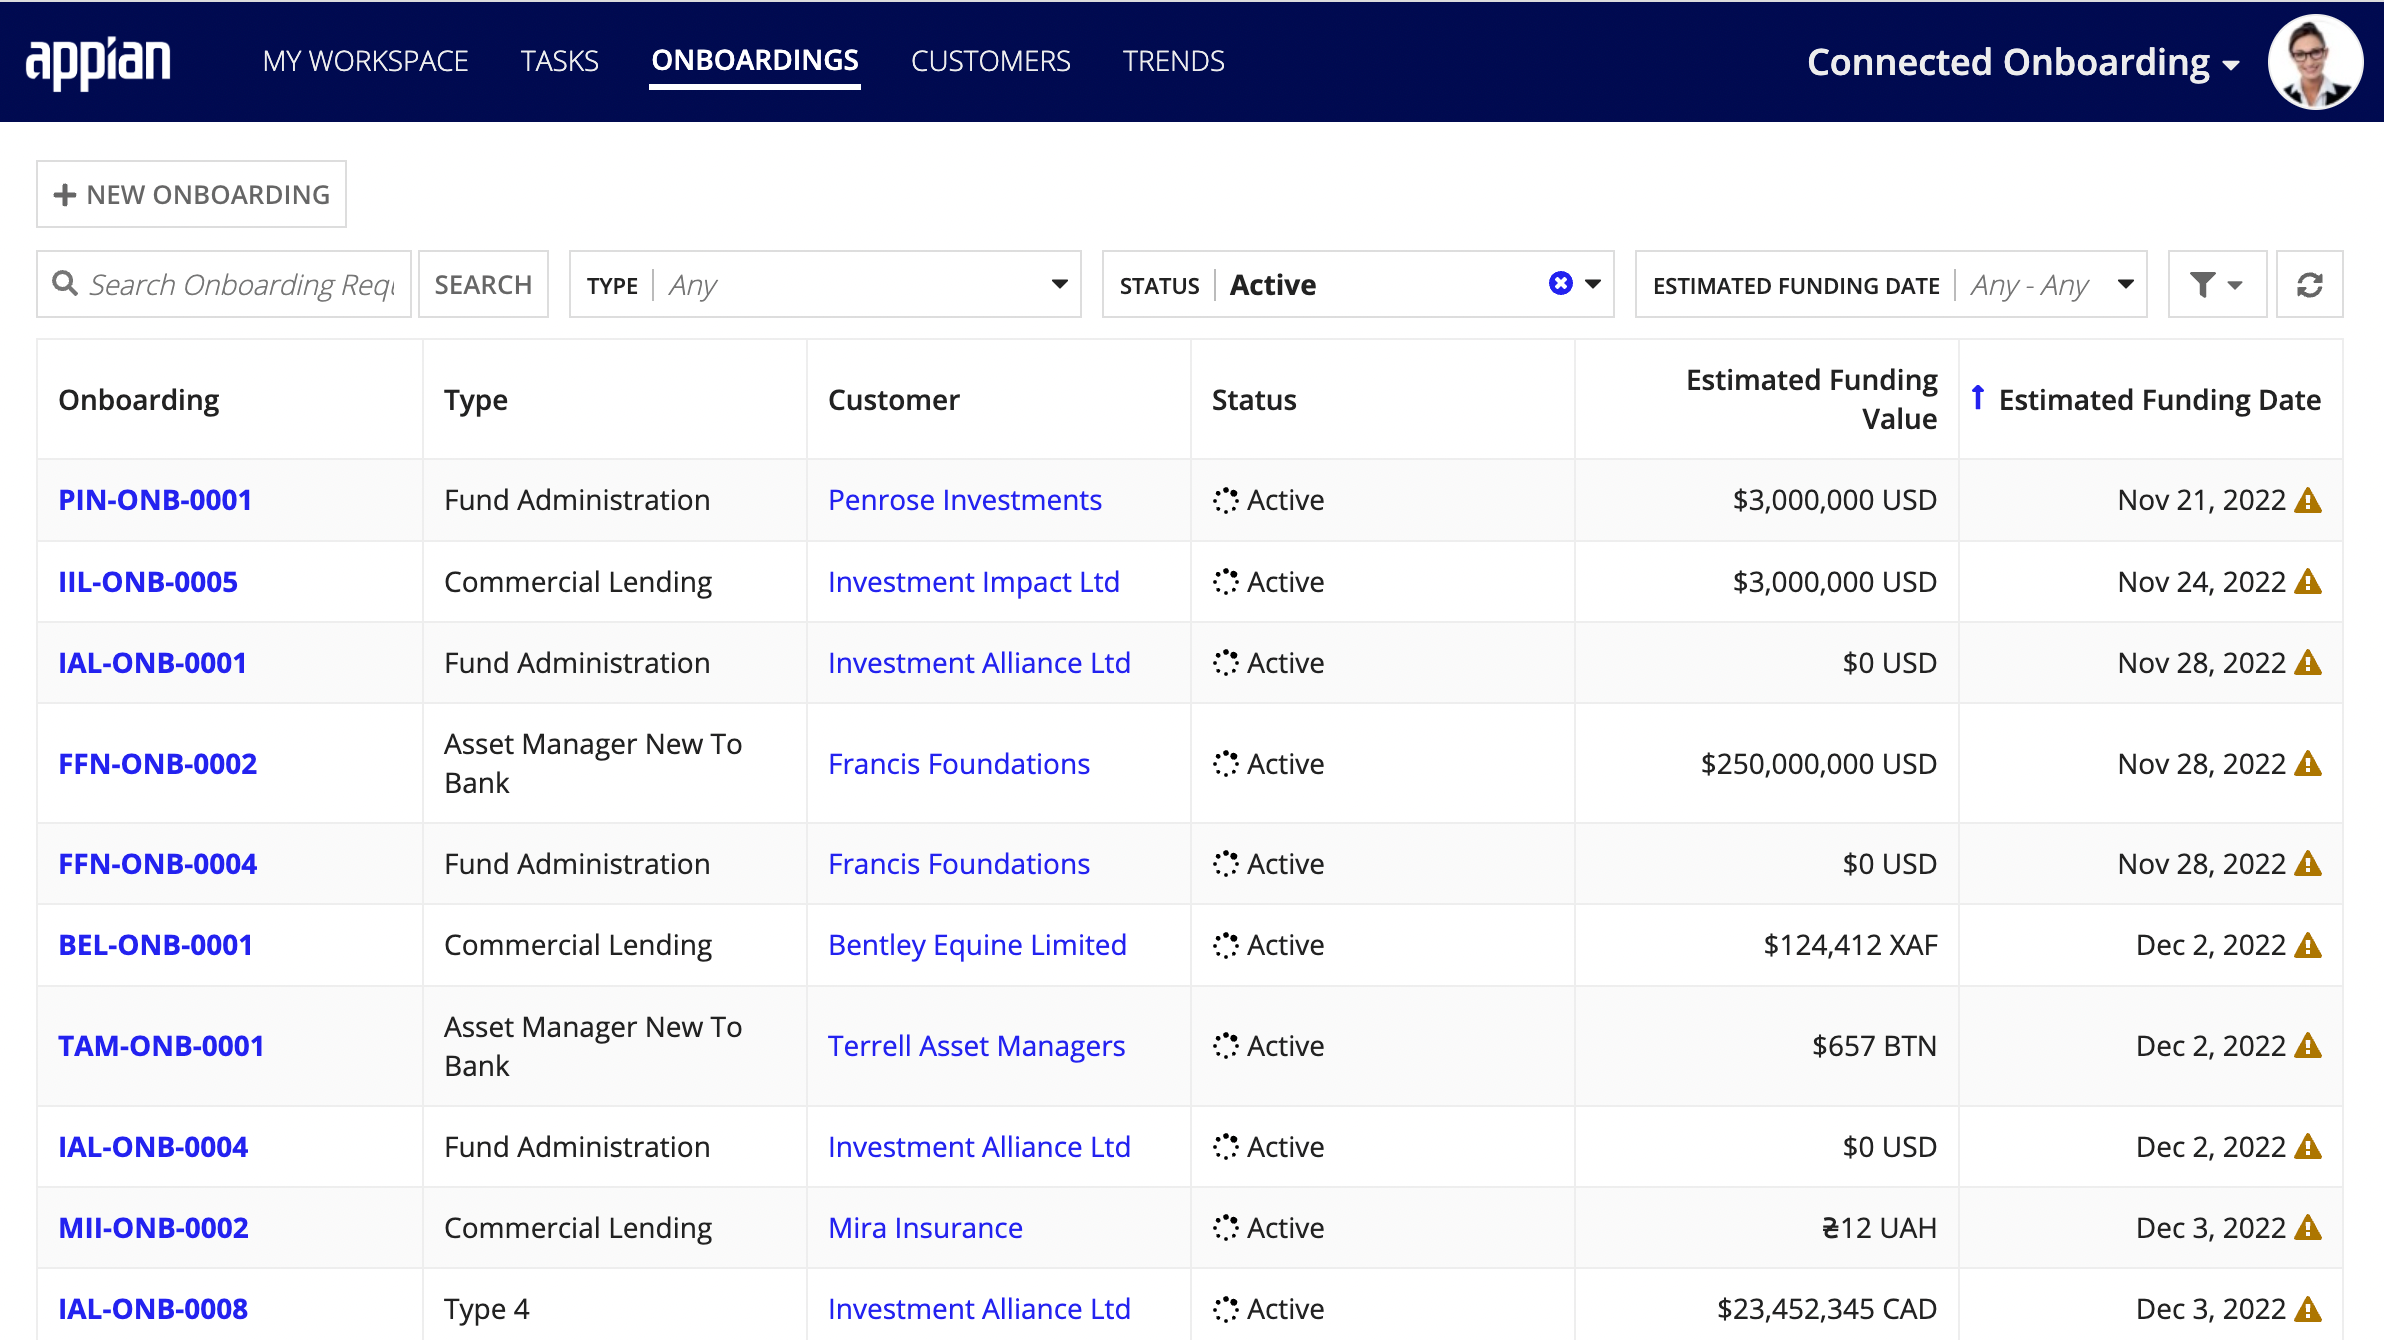
Clicking ONBOARDINGS displays a list of onboarding records. This view is intended to show all onboardings. You can search the list, as well as filter it by Status, Type, and Estimated Funding Date.
On both lists, clicking an Onboarding name displays the record for that onboarding. The record displays all of the pertinent information for a particular onboarding. This information is split into several different tabs, which are outlined in the following sections.
The Summary tab lists the important information about an onboarding.
The following onboarding information is listed on this page:
The Documents tab lists all of the documents related to an onboarding. You can see the status of your attached documents.
The possible statuses for a document are:
IDP specific statuses:
You can learn more about updating a document's status on the Managing Documents page.
On this page you can:
When you click a document's name in the document list, a preview of that document displays and shows:
You can also download the document from this page.
Additionally, you can update the document's details, including the Document Type, Status, Expiration Date, and Description. You can learn more about updating a document's details on the Managing Documents page. Updated document details will display in the document list or the document details page.

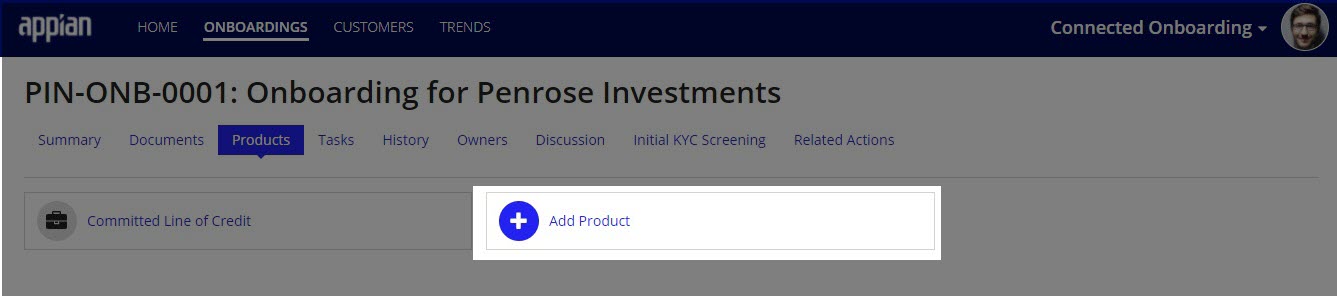
The Products tab shows all of the products that are part of the onboarding. The onboarders can view and update the products and associated product information.
To add a new product select Add Product and fill in the associated required product information. To view product details, click the product card. Once the product card is opened the user can view the following information:
The Tasks tab lists all of the tasks for an onboarding.
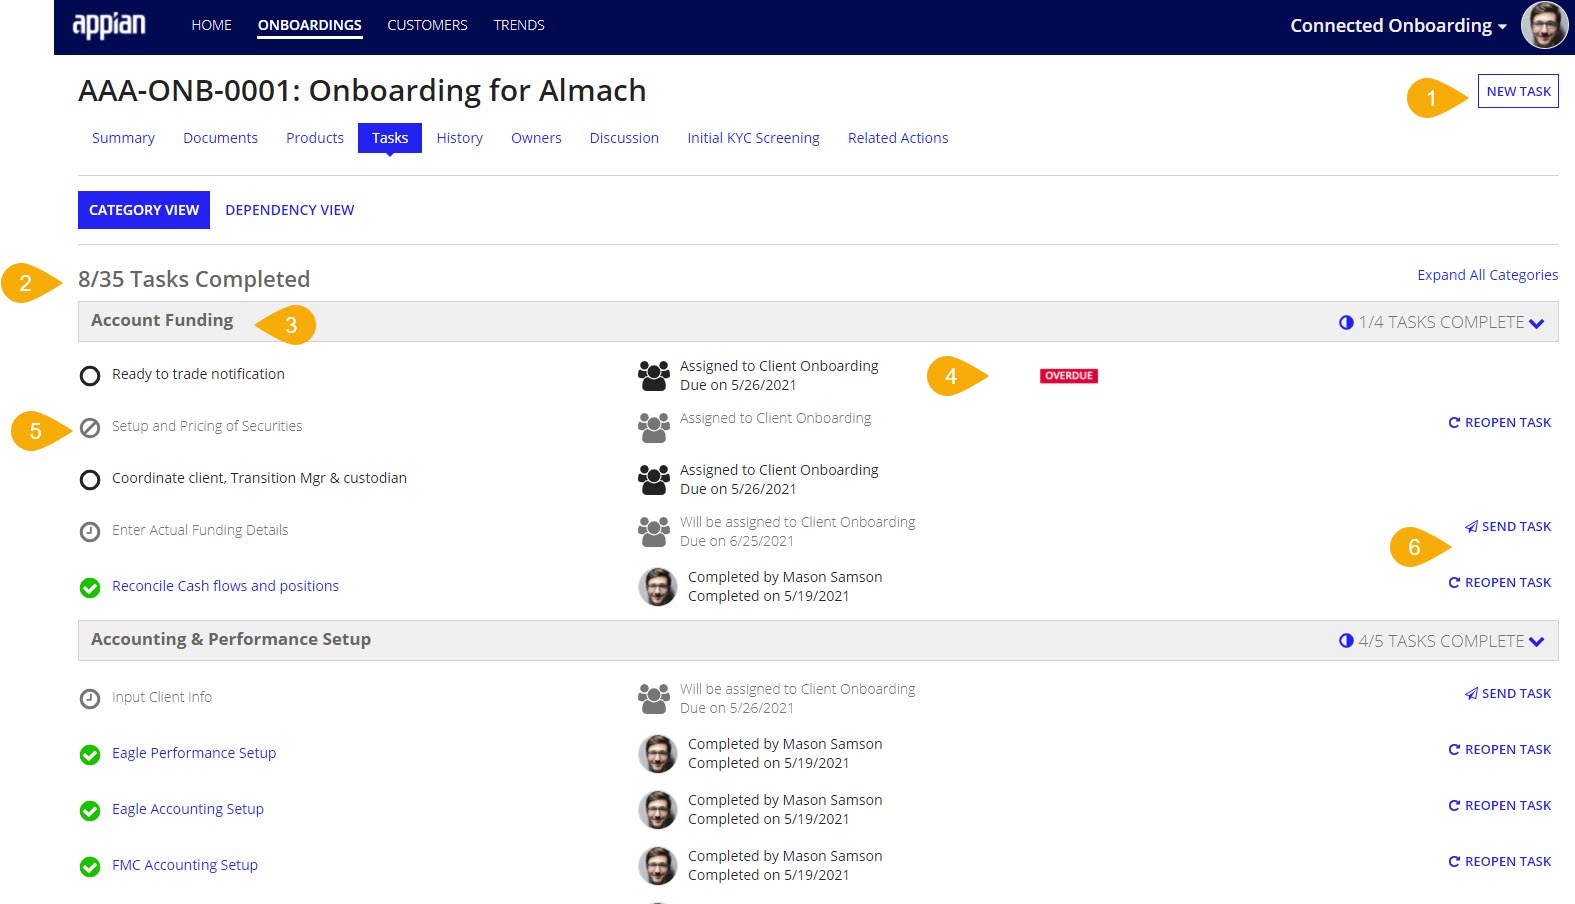

On this page you can:
For tasks that are queued, you can kick them off without completing their precedent tasks by clicking the blue paper plane send task icon ![]() . This will bypass any precedents and assign the task to the default group.
. This will bypass any precedents and assign the task to the default group.
You can resend Completed and Not Needed tasks by clicking the blue reopen task icon ![]() .
.
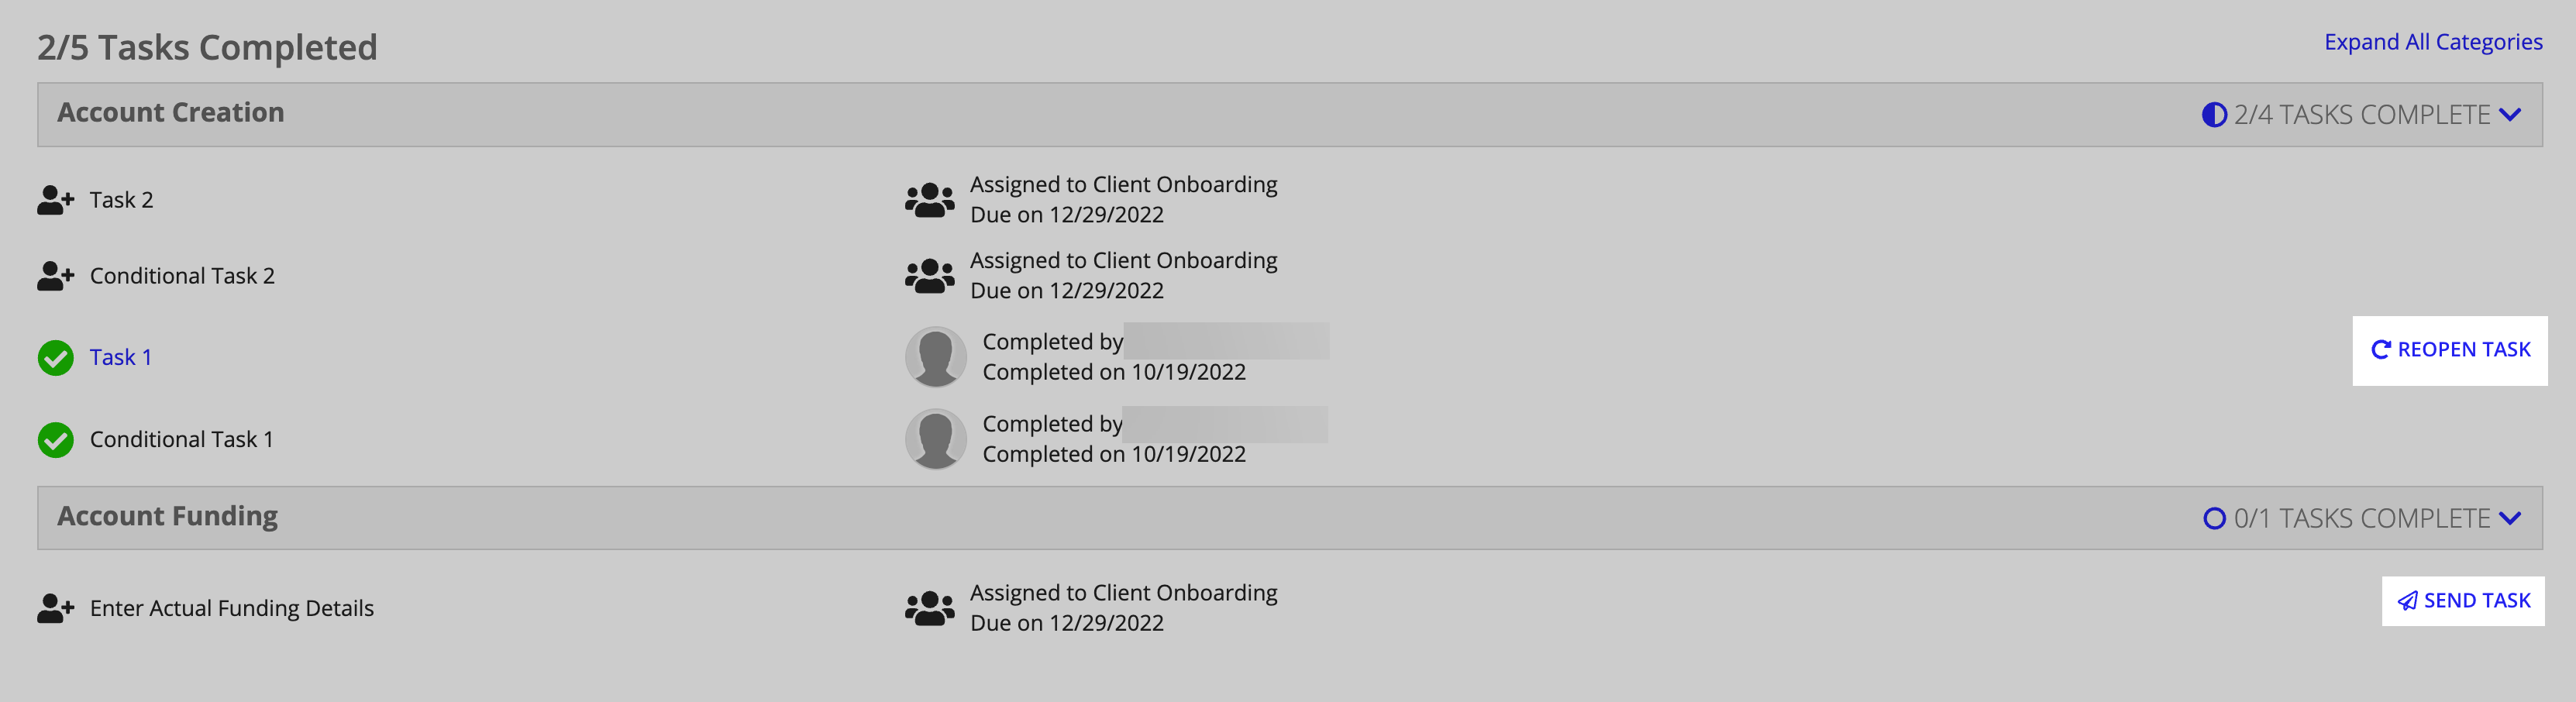
See the following table for information on the icon that displays for each task status.
| Status | Icon |
|---|---|
| Assigned | |
| Queued | |
| Completed | |
| Not Needed |
The History tab shows the actions that have been taken on the tasks for an onboarding. This information acts as an audit trail for tasks.
On this page you can:
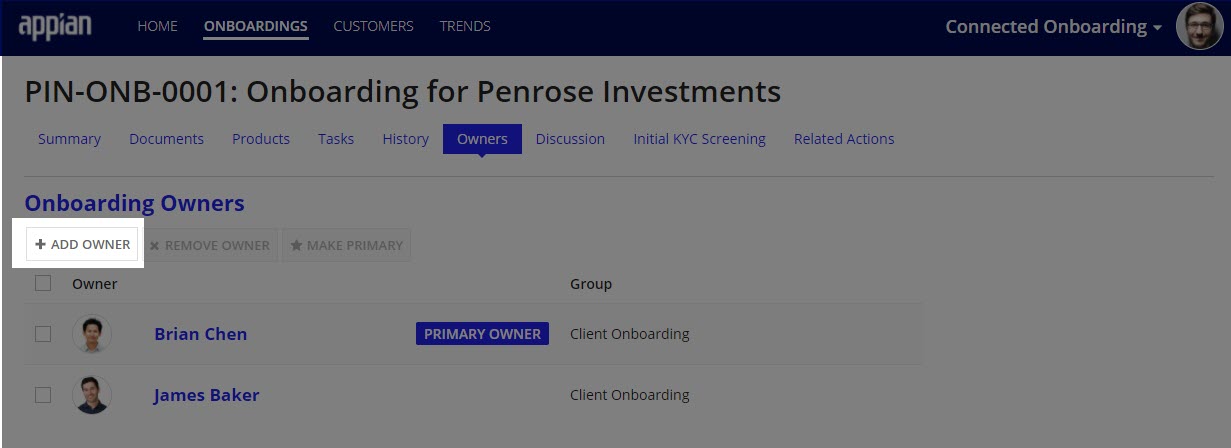
The Owners tab displays the owners of an onboarding. See Update onboarding owner for instructions on how to edit this information.
On this page you can:
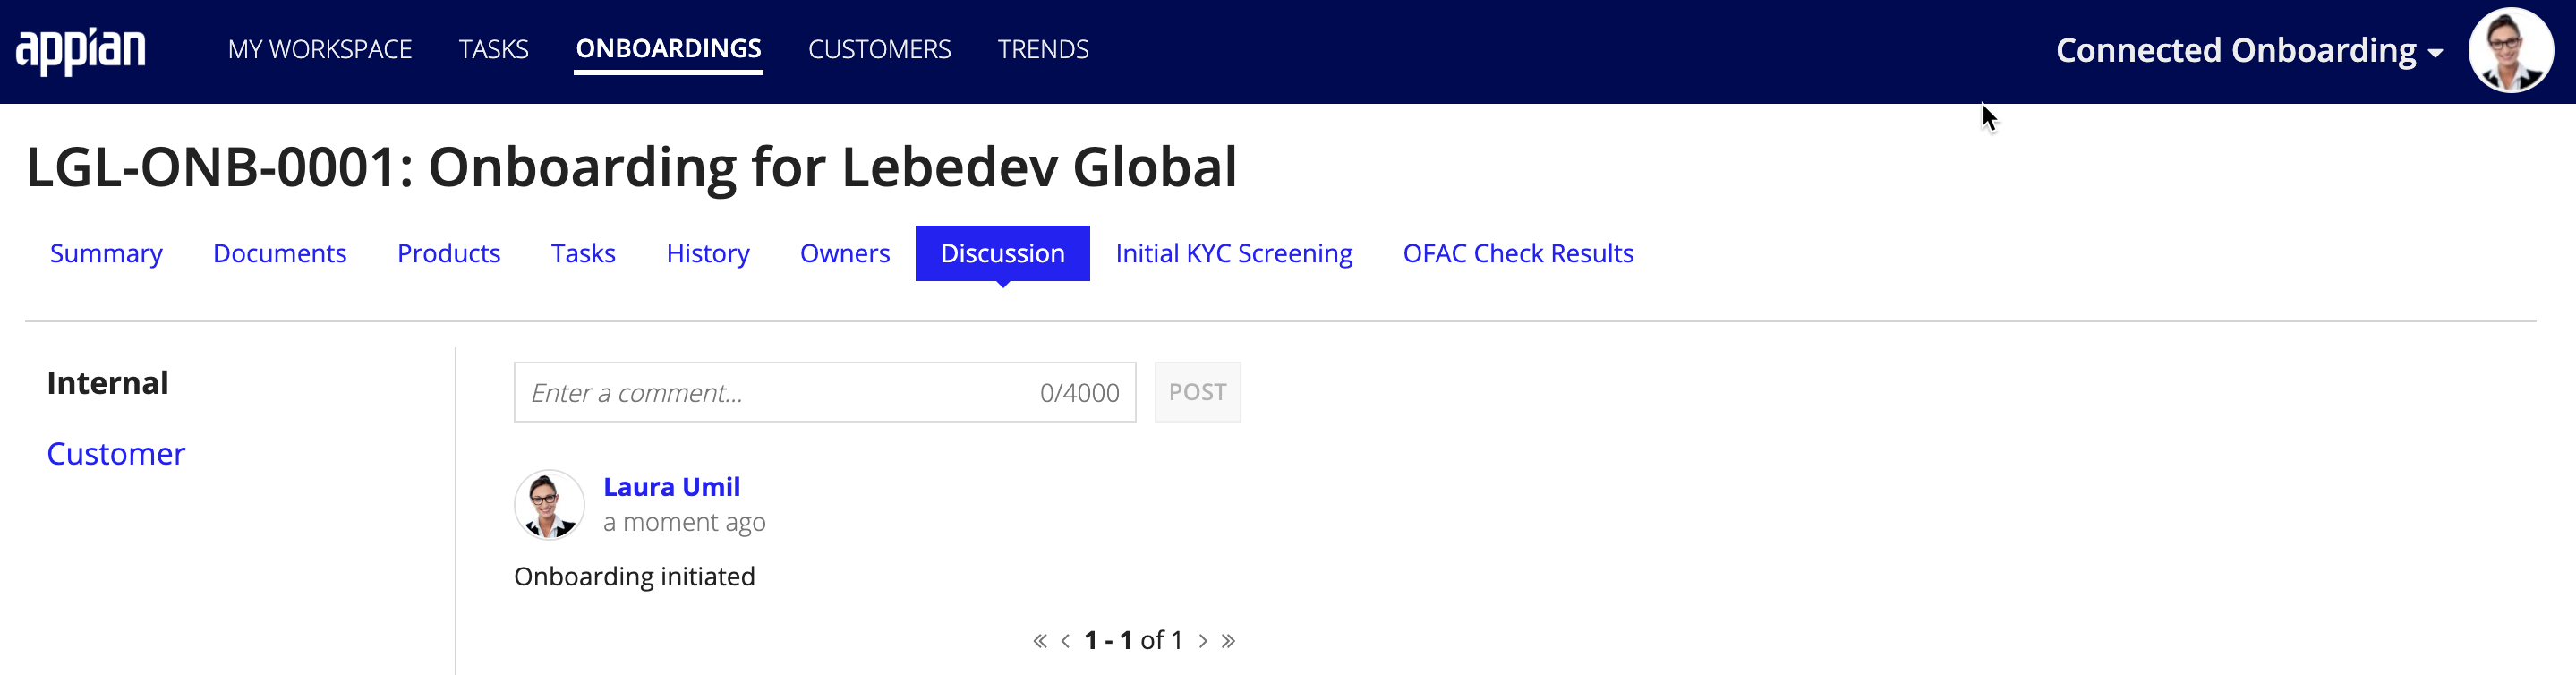
For Pending Process Setup and Active onboardings, you can add a comment to an onboarding on the DISCUSSION tab.
There are two types of discussion threads: internal and external. Internal discussion will not be visible on the customer portal and therefore, not able to be viewed by customers. Customer discussion will be available on the customer portal and able to viewed and responded to by customers.
To add a discussion post:
Click POST.

The Initial KYC screening tab shows the questions and answers to the KYC questionnaire if a questionnaire task was assigned during process setup.
The questionnaire tab shows:
When an Initial KYC screening questionnaire task was not assigned during process setup, users will see a message letting them know that KYC screening is not included for the onboarding.

Onboardings are updated throughout the onboarding process by users completing tasks. These updates can usually be made through the task itself. However, there are also various ways to update an onboarding from the onboarding record. These include:
You can also add custom tasks and update documents.
The actions related to updating an onboarding are controlled by business and security groups. Because of this, not all users will see the same related actions. See Actions users can perform based on their group membership on the Groups Reference Page for an explanation of which groups control access to these actions.
An onboarding goes through several statuses throughout its lifecycle, defined by certain events.
The events and statuses are:
For Pending Process Setup, Active, and Funded onboardings, the information that was entered when the onboarding was created can be updated at any time.
To update the onboarding details:
After selecting the action, the onboarding details display. All of the same validations for creating an onboarding apply when updating an onboarding. You will not be able to change the type of onboarding upon clicking update.
To cancel the update, click CANCEL.
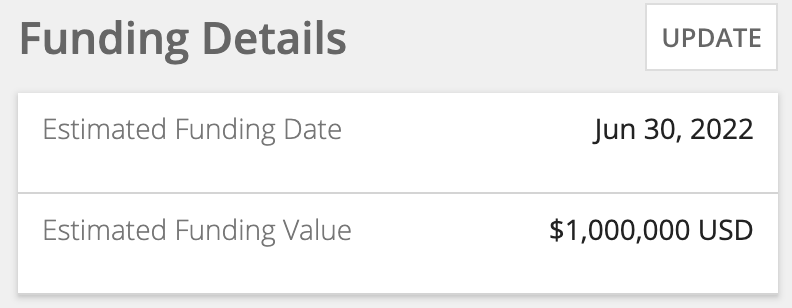
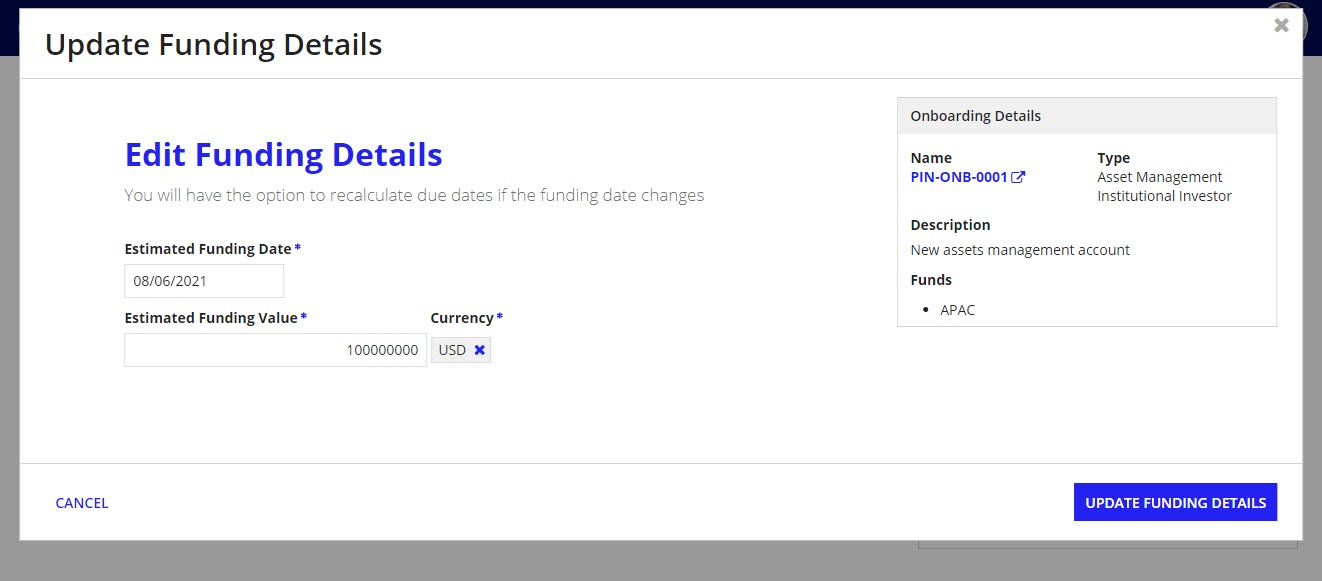
For open onboardings, you can adjust the funding details to ensure the accuracy of the onboarding as it changes.
If an onboarding is open, changes made affect the onboarding's estimated funding details. If the onboarding is already funded, changes made affect the onboarding's actual funding details. If any non-completed tasks have due dates with SLAs that rely on either the actual or estimated funding date, the due dates will recalculate based on the new date.
You can keep track of these details by looking at the Funding Details section of the onboarding summary page.
To update the funding details of an onboarding:
Click UPDATE FUNDING DETAILS.
For Active onboardings, you can add, remove, and make product changes in the Products tab.
For Active onboardings, you can add, remove, and make primary onboarding owners in the Owners tab.
To add a new owner:
In the Owners tab, click Add Owner.
(Optional) Designate the user as a primary owner.
To remove an owner:
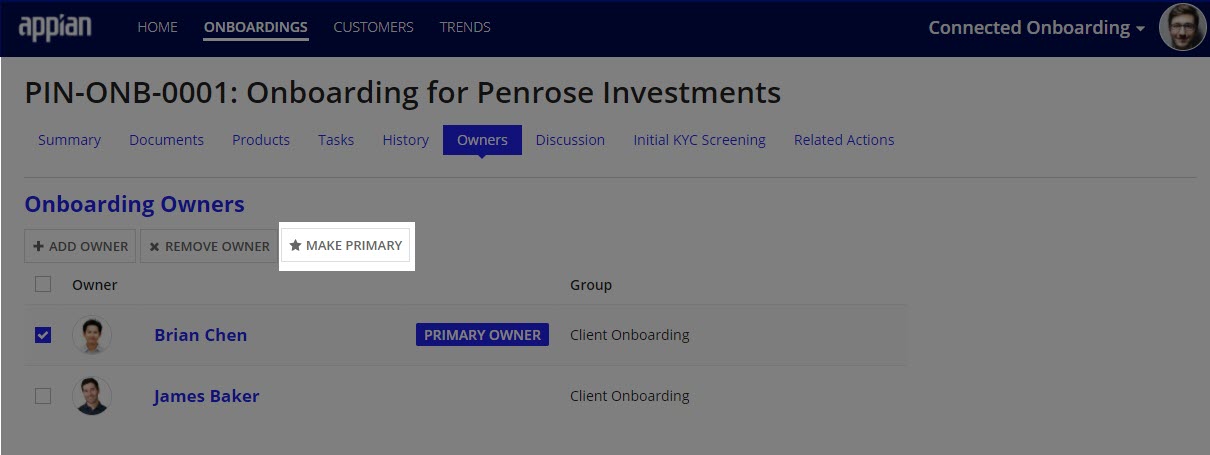
A primary owner oversees all tasks associated with that onboarding. You can make an owner a primary owner in two ways. If there is already a primary owner for an onboarding, they will be replaced by the new primary owner.
If the owner is already added:
Click MAKE PRIMARY.
If the primary owner is new:
For Active onboardings, you can add a comment to an onboarding on the DISCUSSION tab.
There are two types of discussion threads: internal and external. Internal discussion will not be visible on the customer portal and therefore, not able to be viewed by customers. Customer discussion will be available on the customer portal and able to viewed and responded to by customers.
To add a discussion post:
Click POST.
For Active onboardings, you can cancel an onboarding from the Summary tab.
To cancel an onboarding:
All outstanding tasks will be canceled. A canceled onboarding cannot be reopened, but all of the data will remain in the solution.
For Active onboardings, after you are ready complete an onboarding, you can do so from the Summary tab.
To complete an onboarding:
If there are any outstanding tasks, they will be canceled. A completed onboarding cannot be reopened, but all of the data will remain in the solution.
Managing Onboardings
