| This content applies solely to Connected Onboarding, which must be purchased separately from the Appian base platform. This content was written for Appian 23.1 and may not reflect the interfaces or functionality of other Appian versions. |
Connected onboarding is the process that a financial services company uses to set up an institution with the correct accounts and products that allow the institution to begin doing business with the company. This process involves collecting and maintaining customer onboarding information and documents, as well as the accounts and products that are being set up.
Appian Connected Onboarding, enabled by Appian's powerful records, provides a guided experience for collecting this information. After an onboarding is created, end users can view and update this information from simple, informative interfaces.
This page provides instructions for creating and managing your onboardings.
Creating a new onboarding walks you through the process of entering the information needed to start the onboarding process. The information entered here will populate the Onboarding and Customer records, as well as determine which onboarding process template will be used to onboard the customer.
Creating a new onboarding request out of the box consists of the following main steps, which you will be guided through:
These steps and the fields that display in each form can be customized. See How to Customize Connected Onboarding for more details on how to customize the solution.
Onboardings can be started via the Create Onboarding web API which connects the Connected Onboarding solution to third-party systems. The below instructions detail how to create a new onboarding manually.
In order to start a new onboarding, you must be a member of the AS IO Create Onboarding security group. By default, the Client Onboarding, Sales and Client Onboarding Department Heads groups belong to this security group.
To start a new onboarding:
Creating a new onboarding starts by asking you which customer is being onboarded. The customer must already have been created in the system in order to be found on the first page of the create onboarding flow.
To choose a customer:
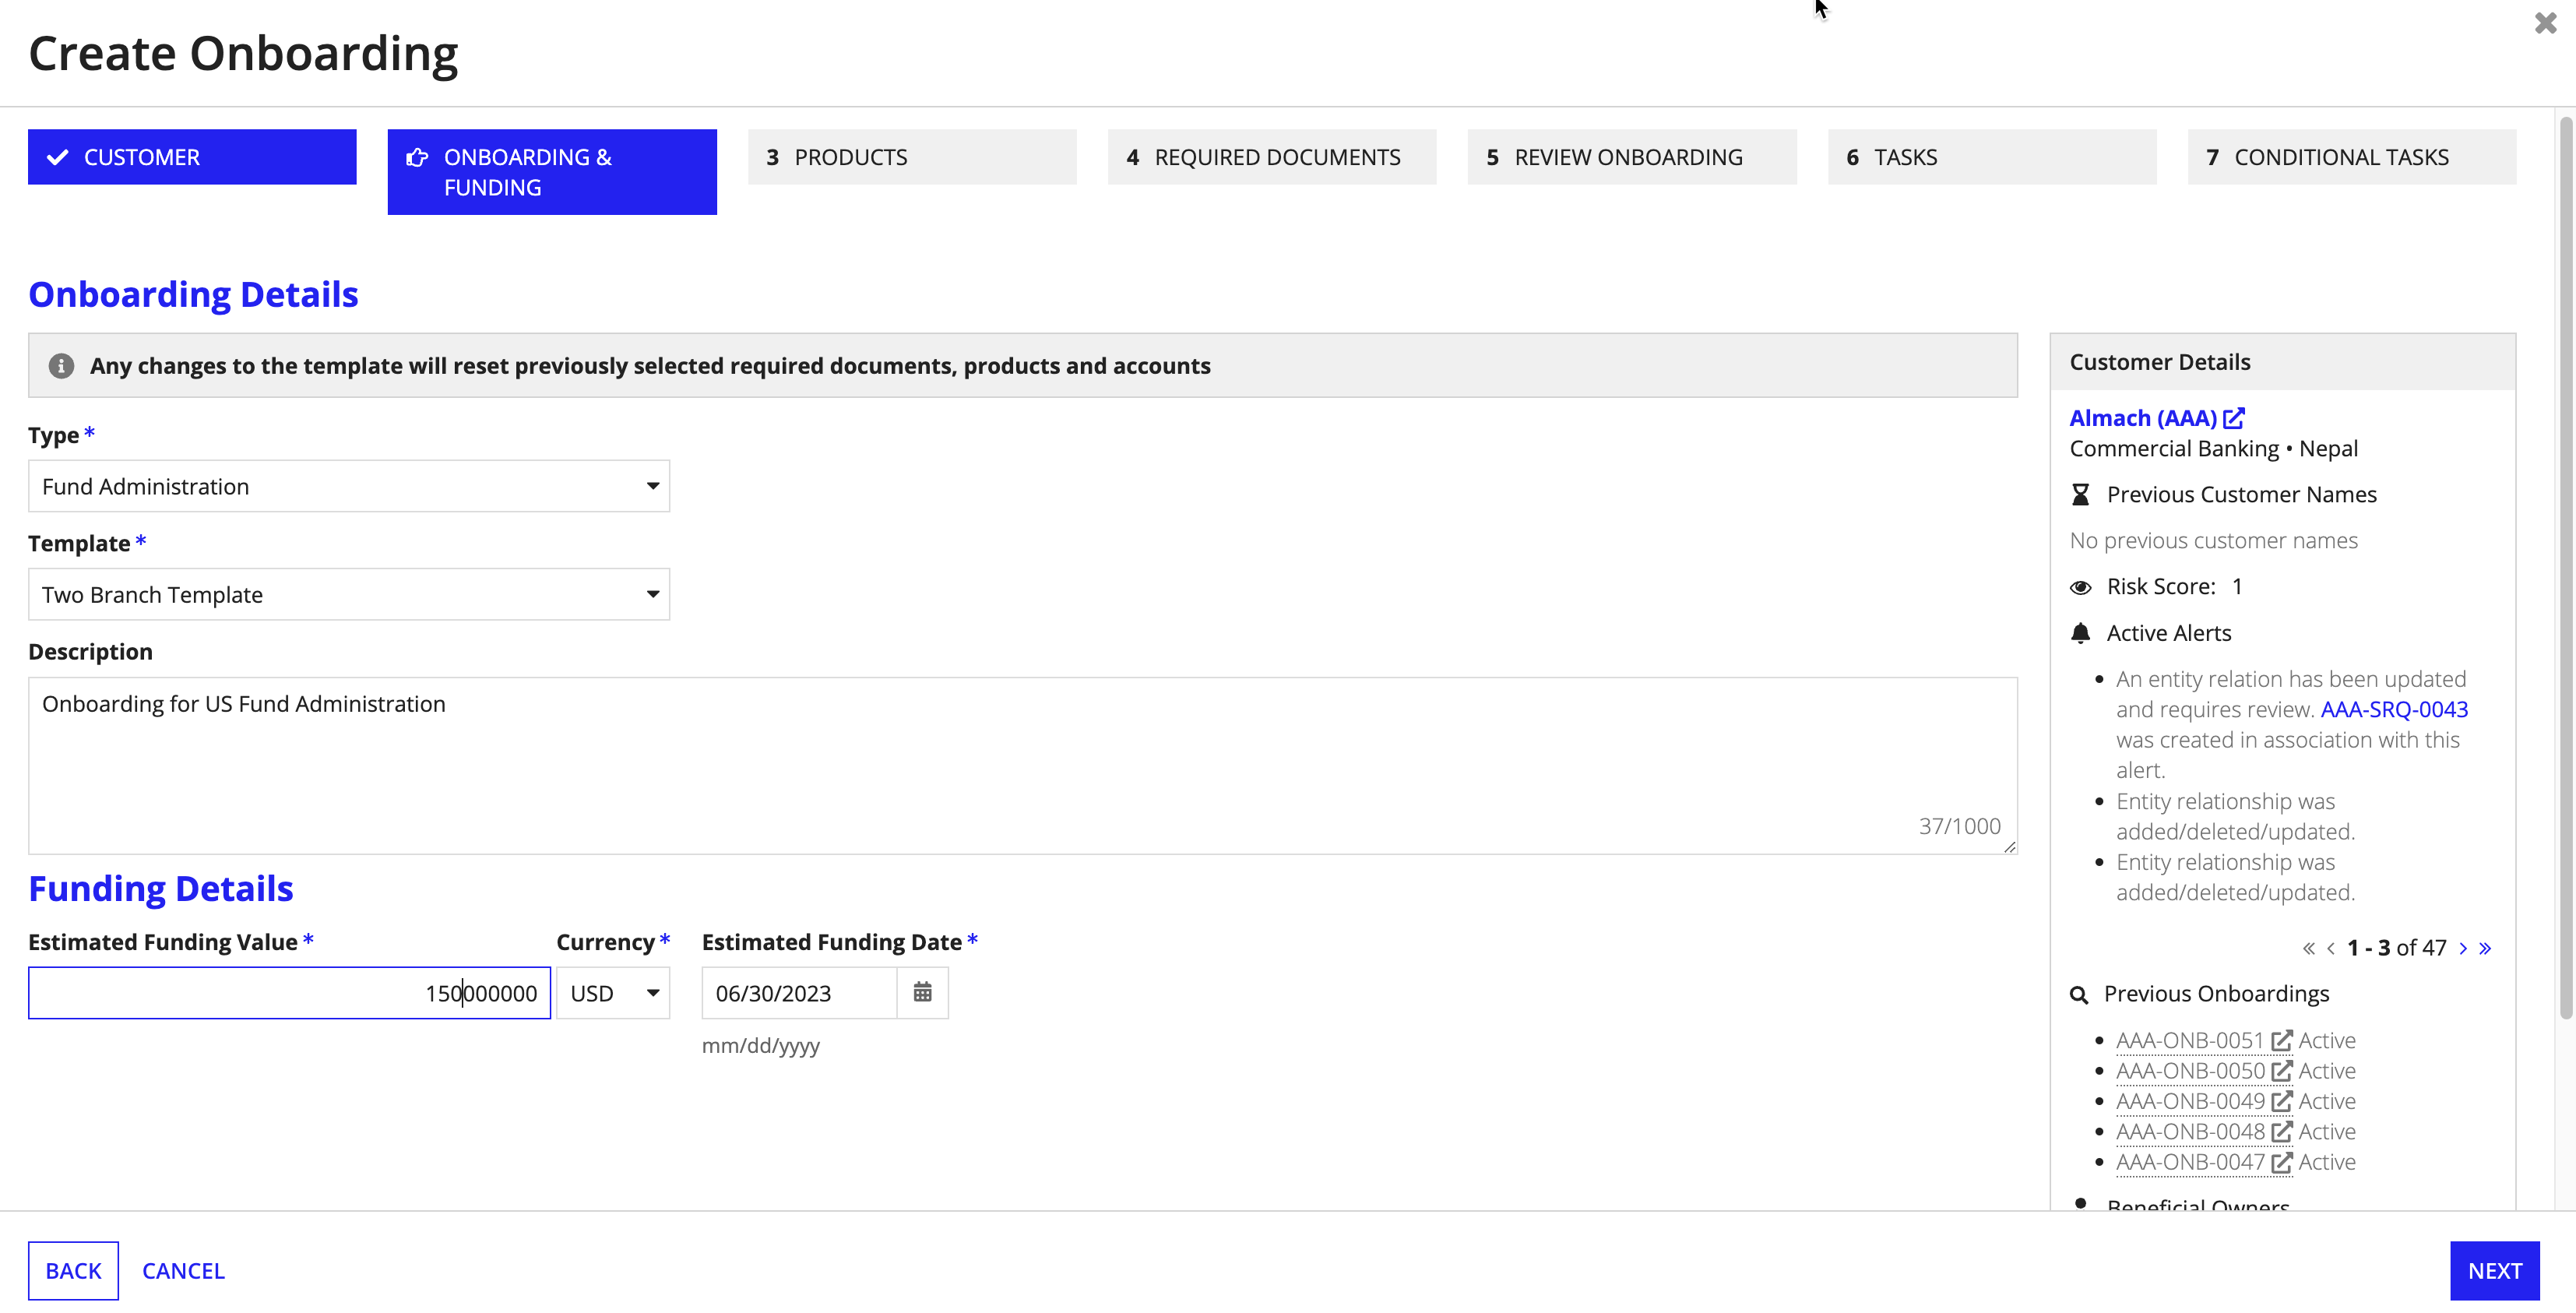
The Onboarding & Funding page is where you specify information relevant to the onboarding, such as the type of onboarding.
To provide onboarding details:
Note: The estimated funding date will be used to determine task due dates.
The Products page is where you will set up products for this specific onboarding. If configured based on the onboarding type selection, products will be pre-populated when you arrive on this screen.
To add a product:
After adding a new product, it's time to enter the product details. Follow the steps in the next section.
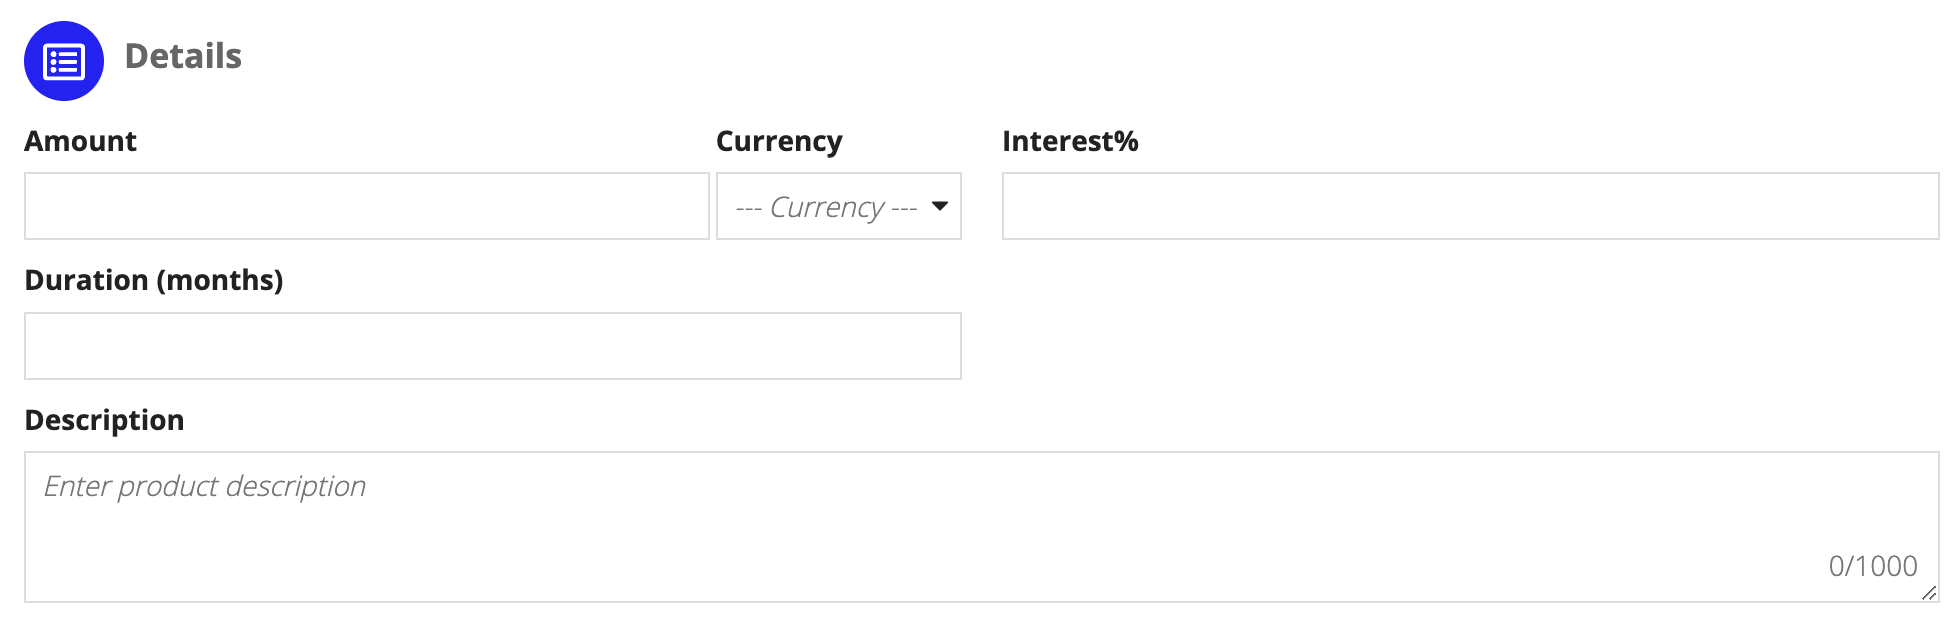
Each product type can capture and require unique data fields that are specific to a product. Depending on the product you select, there are up to six categories of product fields designed to help you capture the onboarding data you need, including:
Product Details
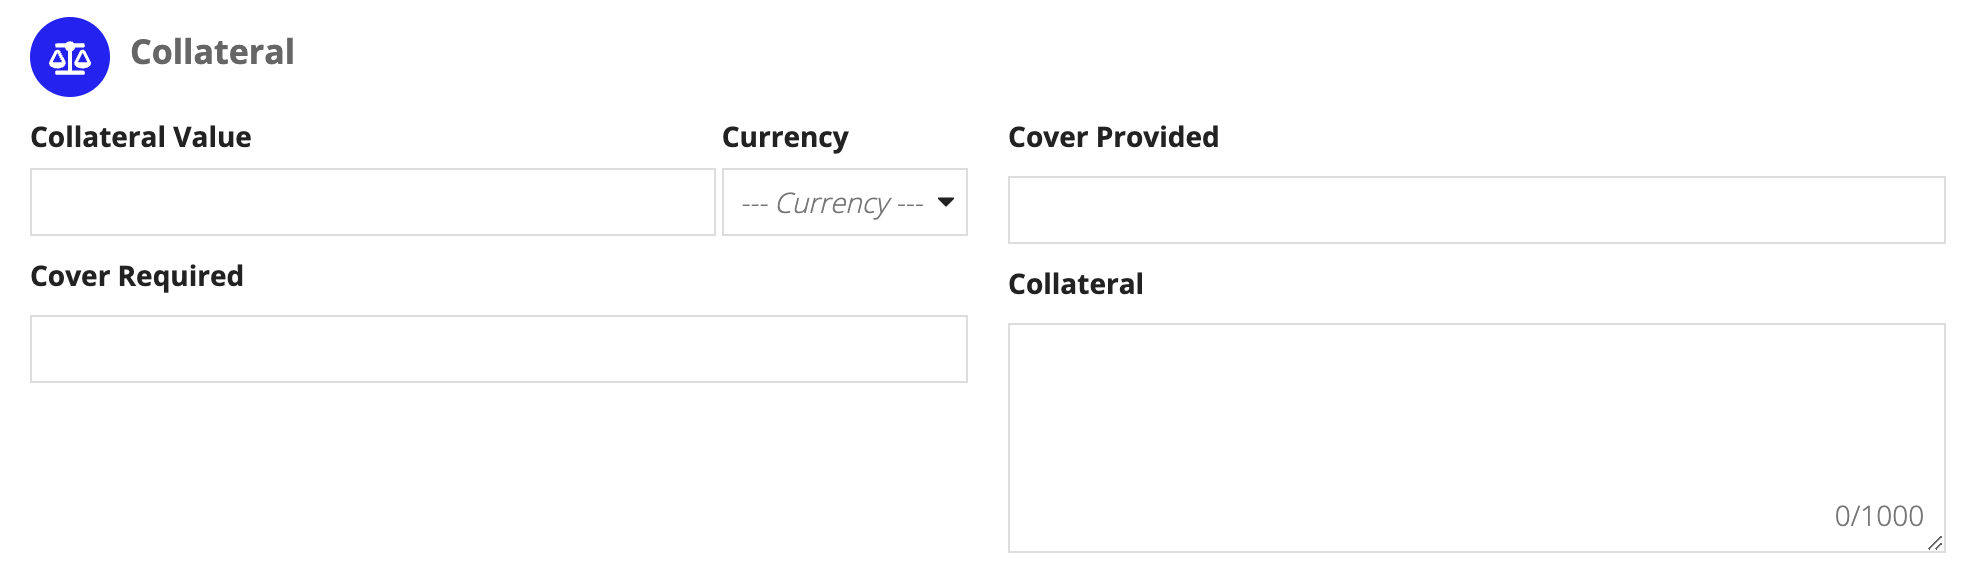
Collateral Information
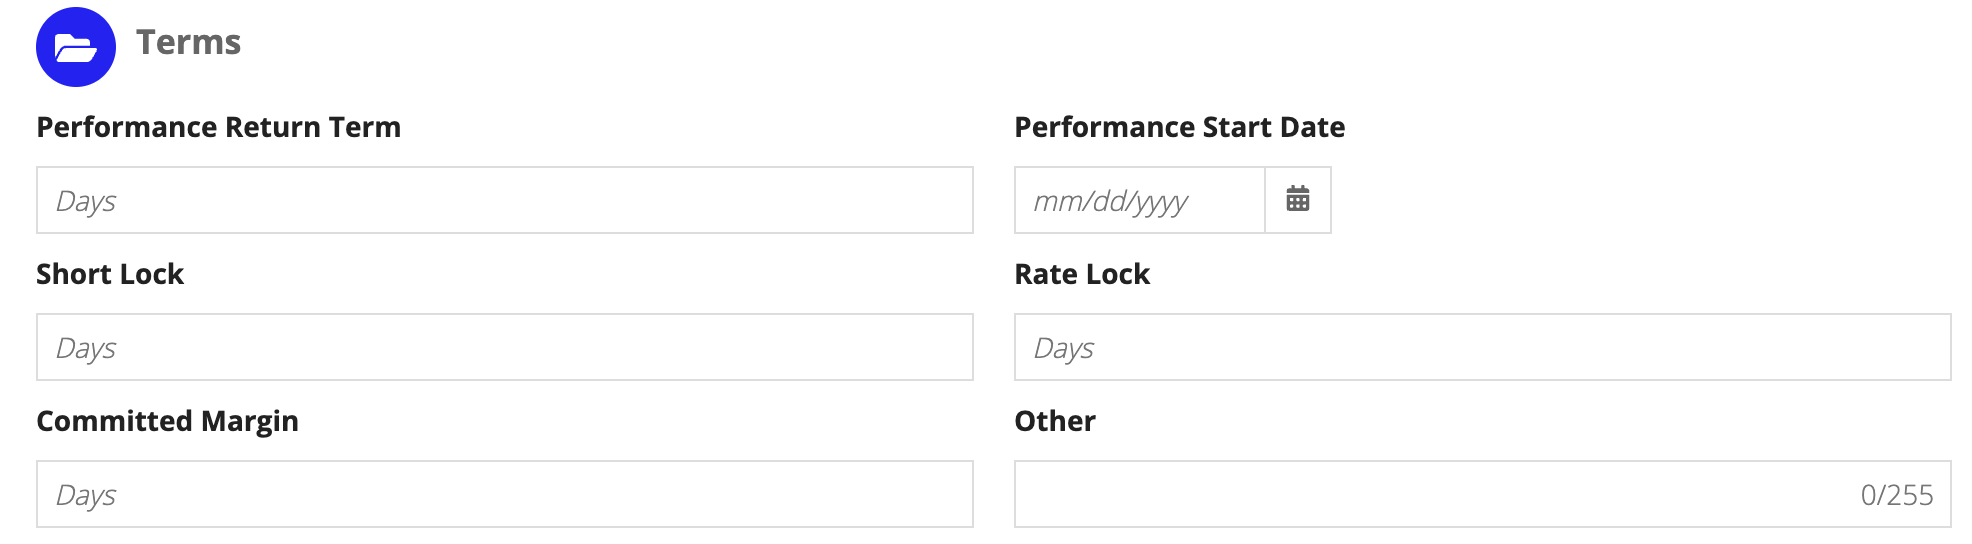
Product Terms
Accounts
If configured, accounts will be auto populated based on the product type.
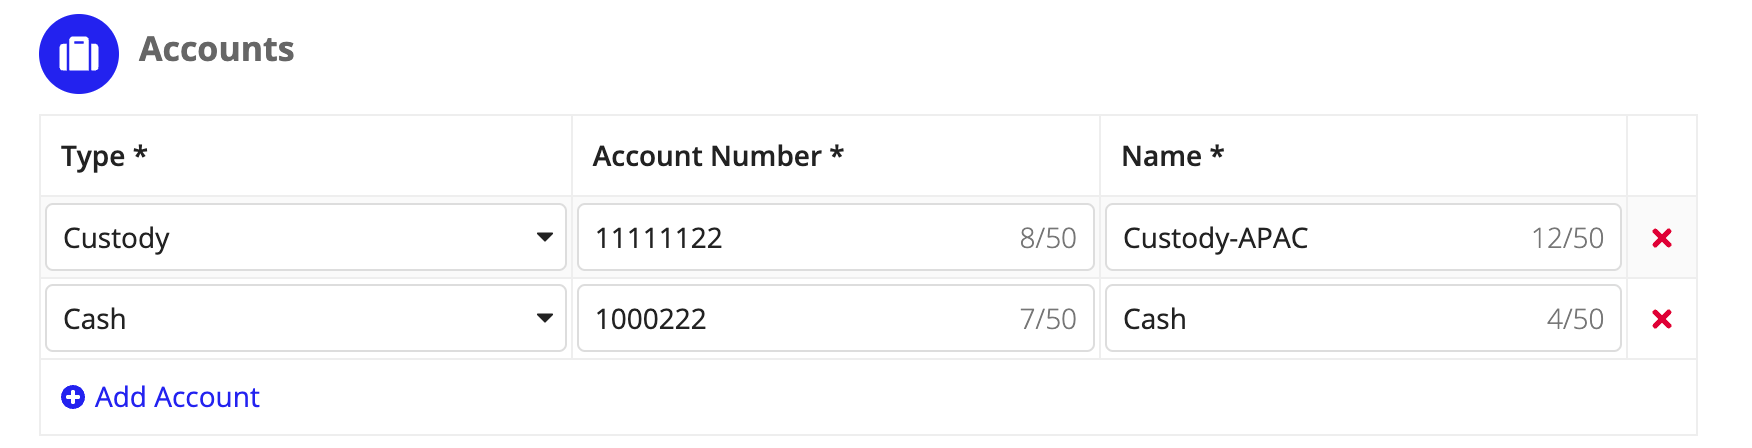
To add additional accounts:
Product Fees
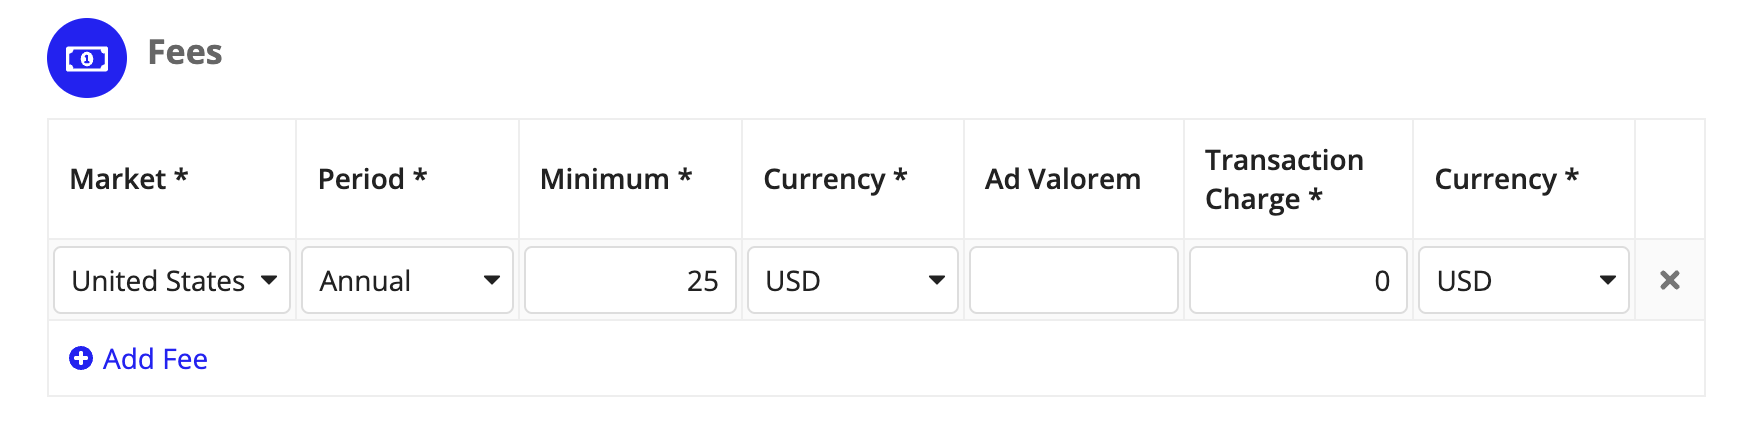
To add additional fees:
Product Thresholds
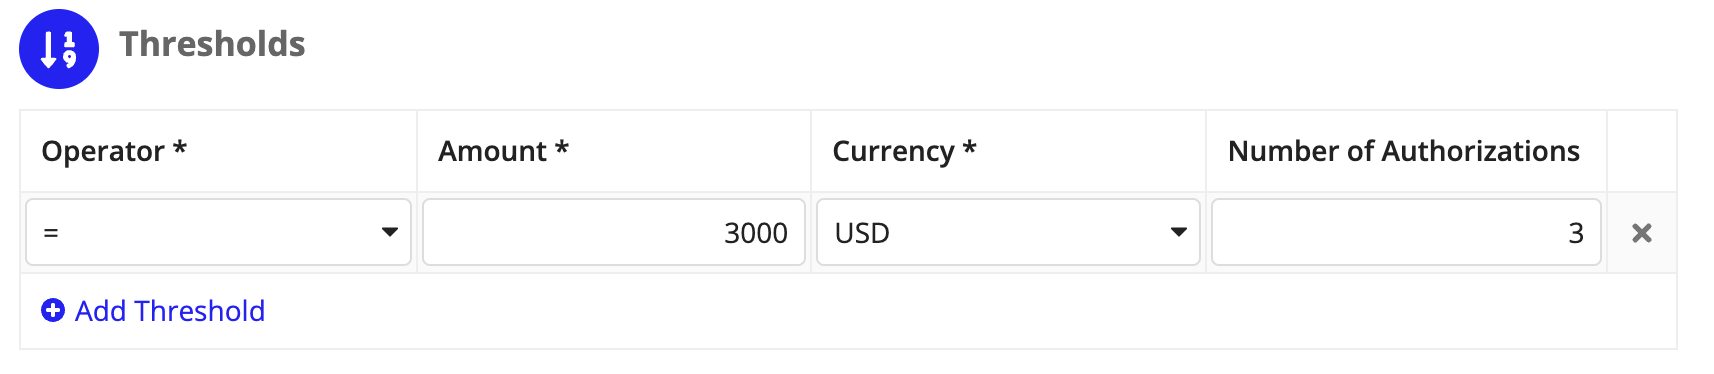
To add a threshold:
The Required Documents page is where you set up what documents are required for this onboarding. If required documents were defined in the selected onboarding template, those selection documents will be pre-populated when you arrive on this screen.

The user has the ability to modify the pre-populated document requirements and add additional documents that are needed for this onboarding.
If you attach a document, its Status is automatically set to Awaiting Classification. To learn how you can manually update this status, see Managing Documents.
If a required document is not needed, select it in the grid then click REMOVE DOCUMENT REQUIREMENT to remove it from the list.
A summary of all of the information entered for the onboarding displays.
If you need to change any information, click BACK button or click on any of the blue milestone steps at the top.
Each individual page is configured with validations, so you will be unable to move forward to the next page without completing the errors on that page. As you complete the missing information, the error list updates. See Modifying Validations for more information on these validations.
The Tasks page shows all of the tasks that will be generated for this onboarding. Tasks can be added or removed at this point, additionally any task can be updated for due date, assigned group and dependents. Review the tasks for accuracy then click SUBMIT.
If Conditional Tasks are present on a template, you will see a NEXT button, and the Conditional Tasks page will require configuration.
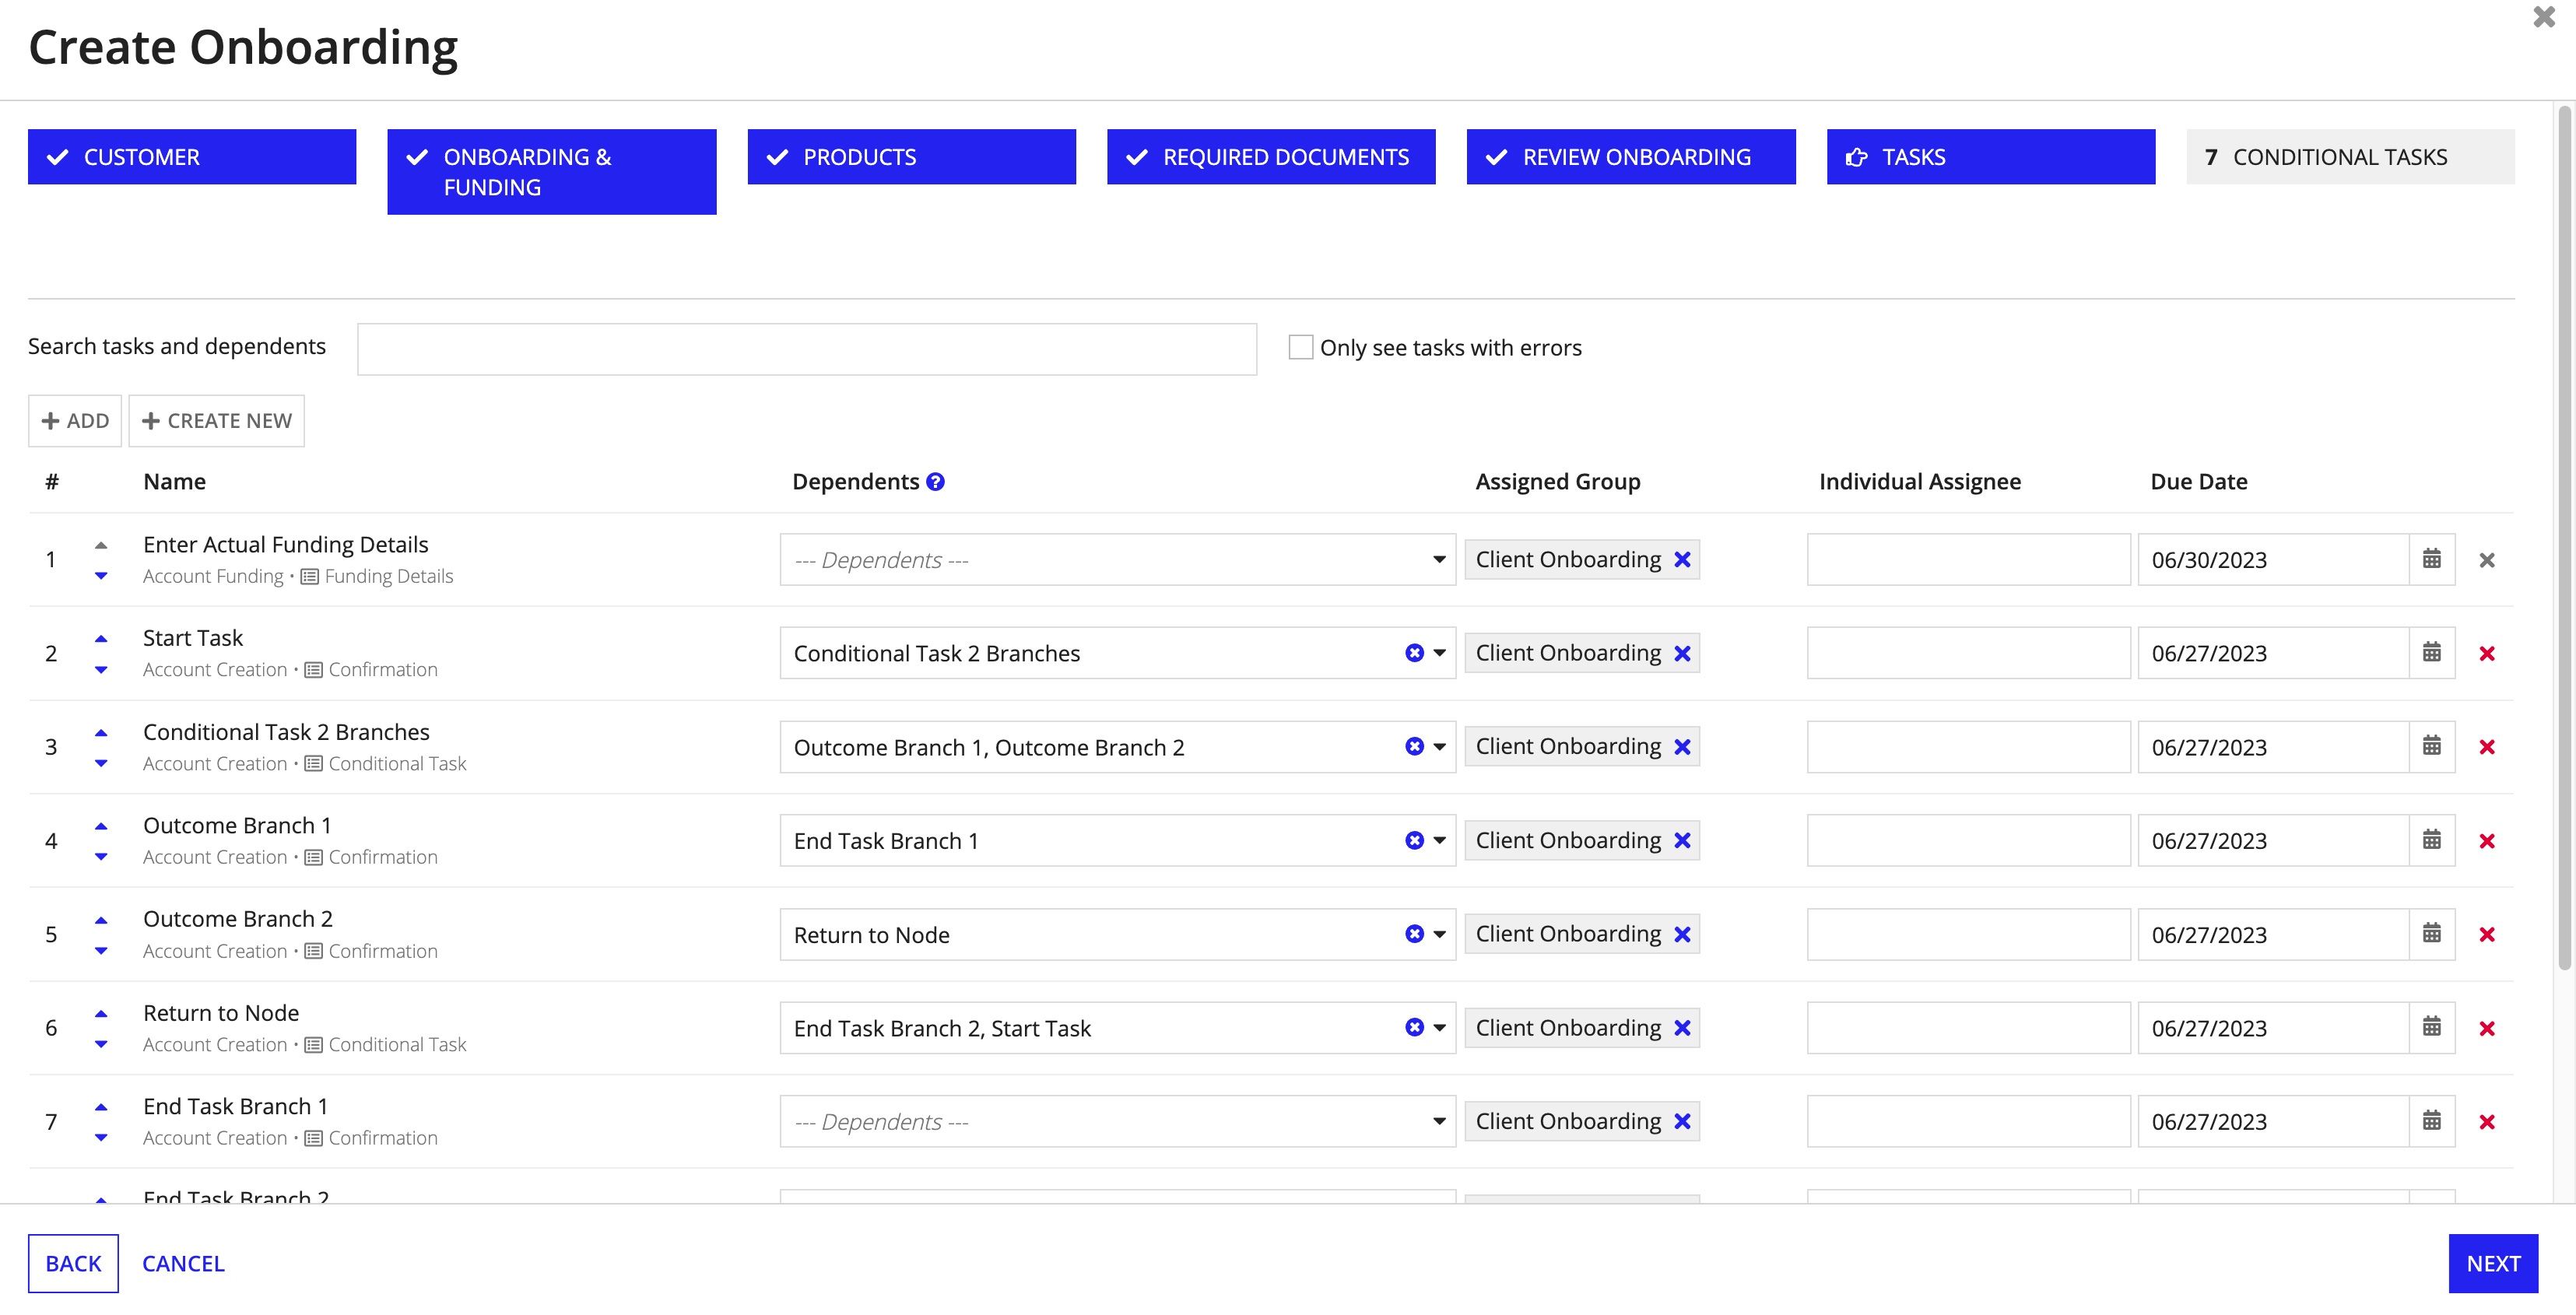
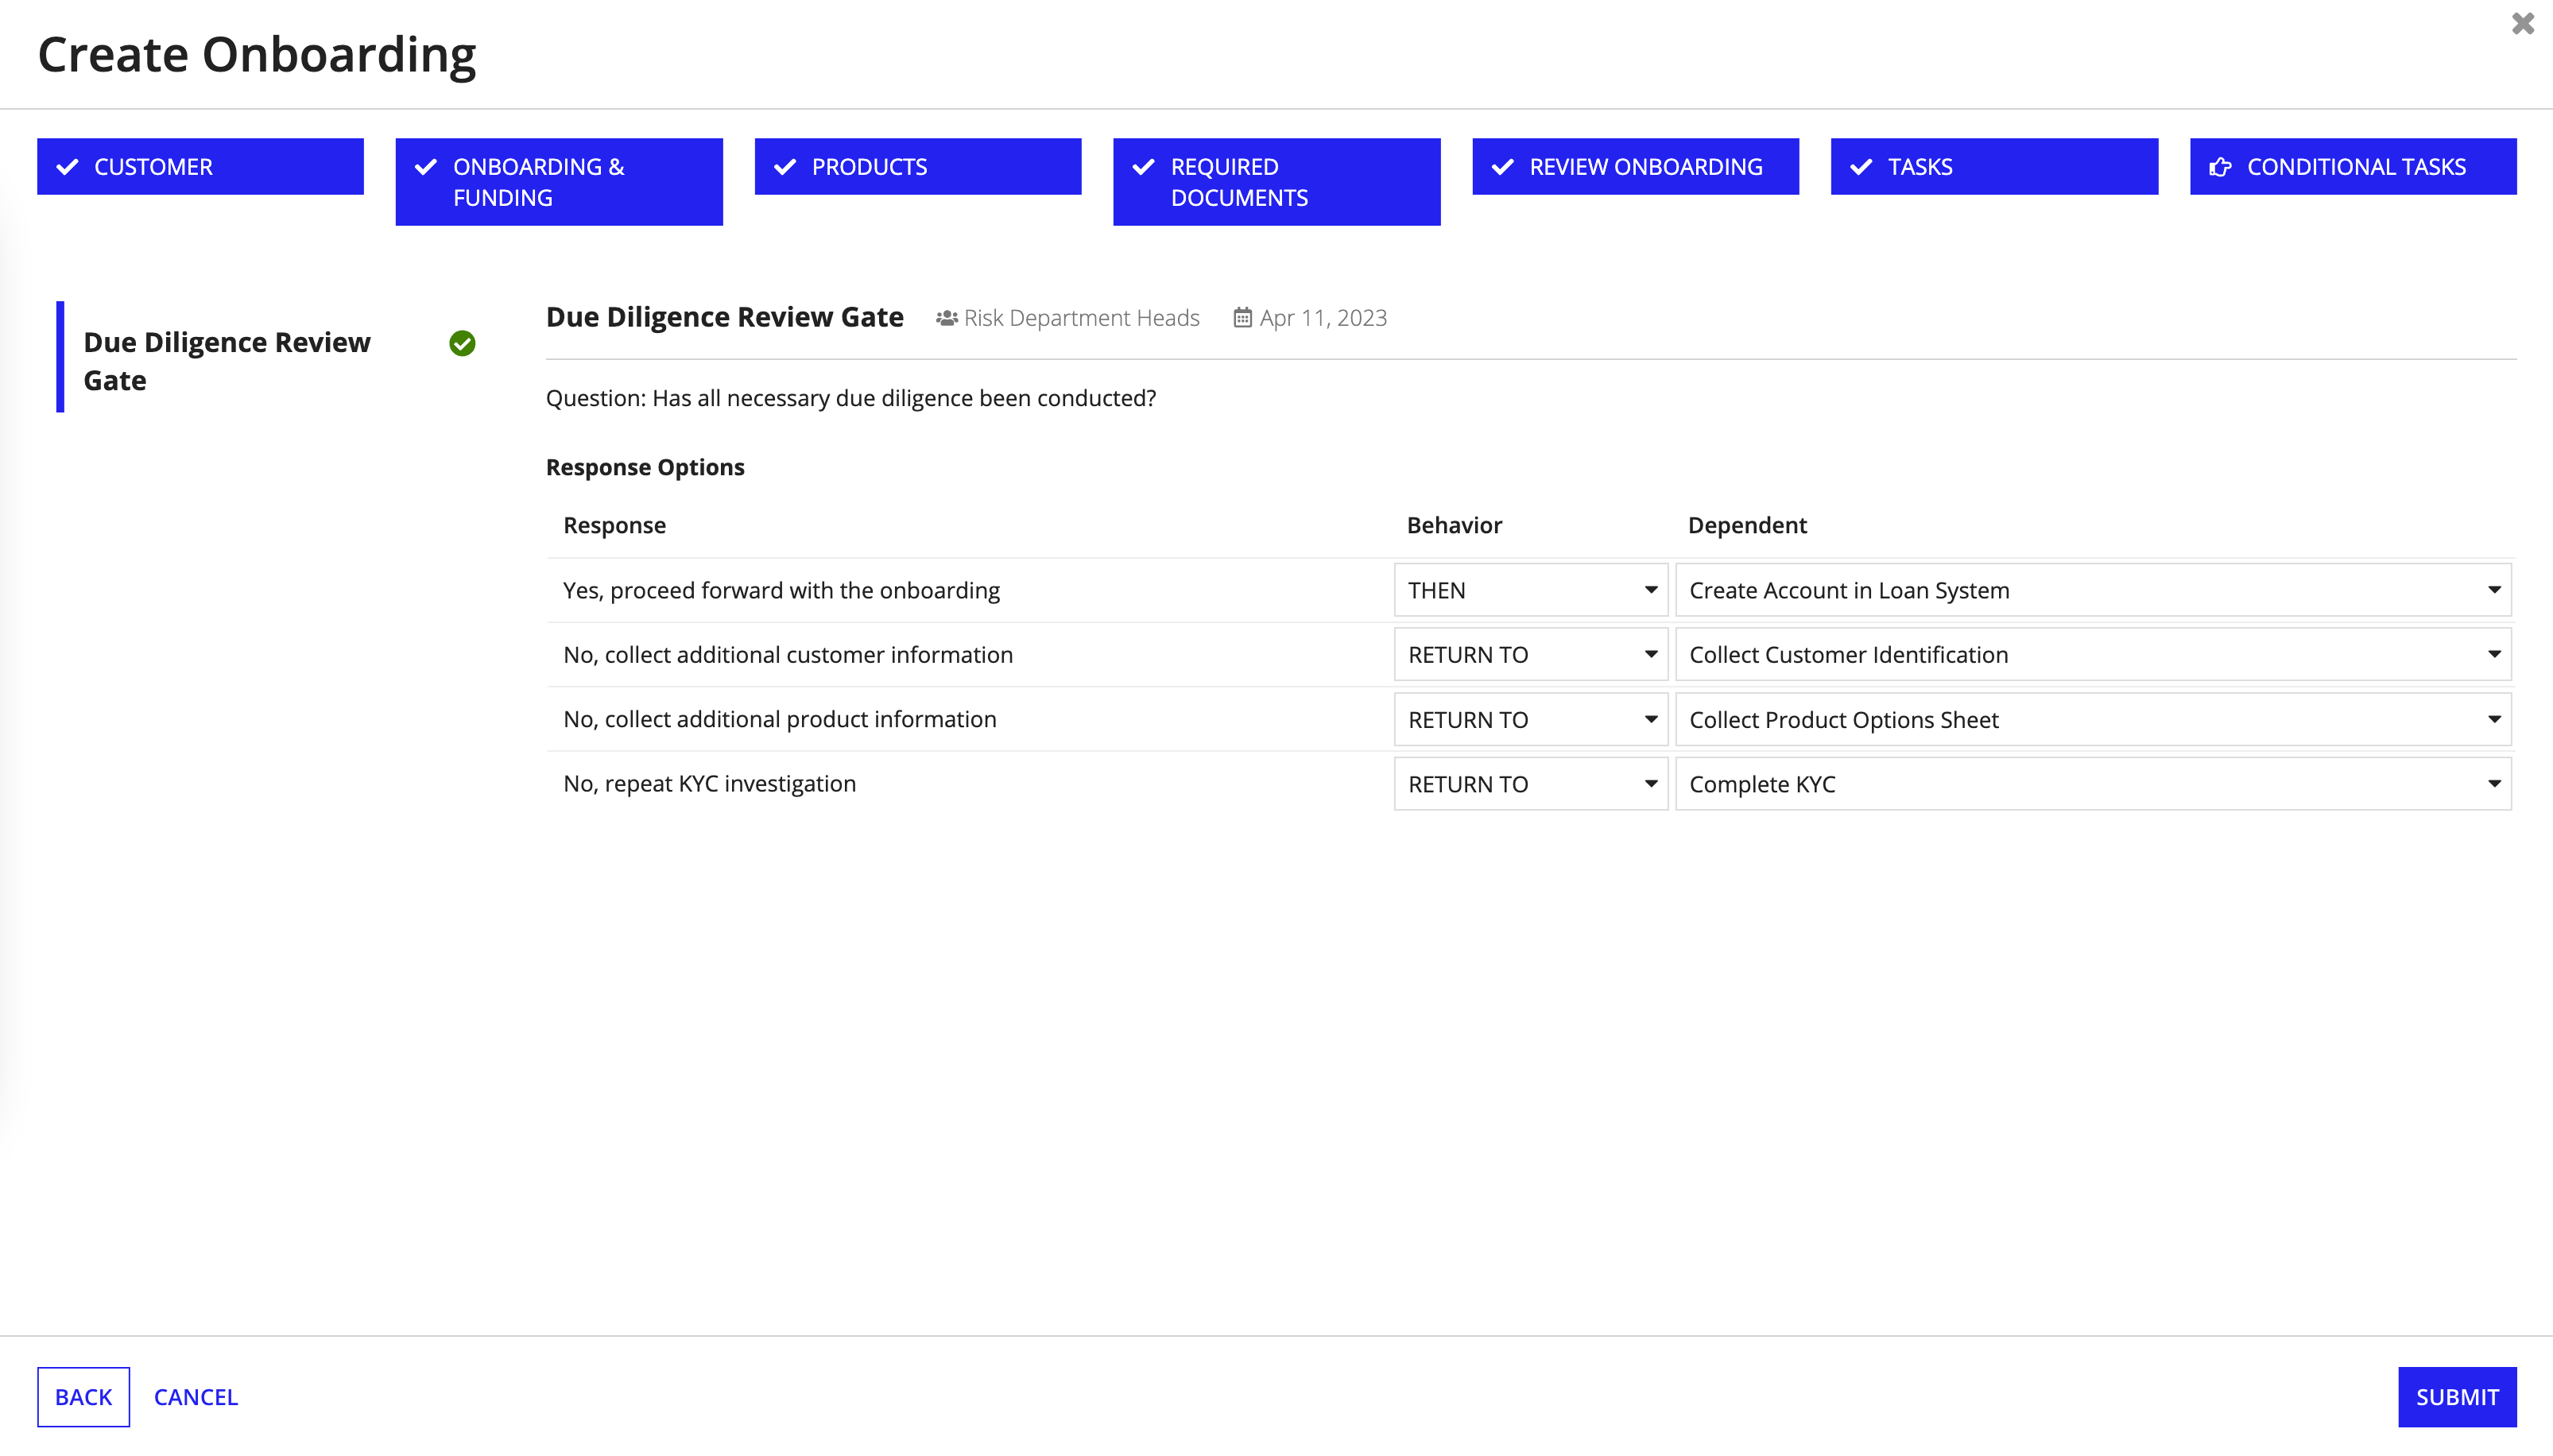
So far, each conditional task in your template was pre-configured with a question and response options. In addition, dependents were identified for each conditional tasks. The Conditional Tasks page links each response option defined when creating the conditional task to a dependent task defined in the Tasks page.
Conditional Tasks connect to existing tasks in the workflow and allow for additional customization to direct users to the most appropriate task.
Each response option requires a Behavior and its dependent task to be defined. The Behavior options are:
Create New Onboarding
