| The capabilities described on this page are included in Appian's standard capability tier. Usage limits may apply. |
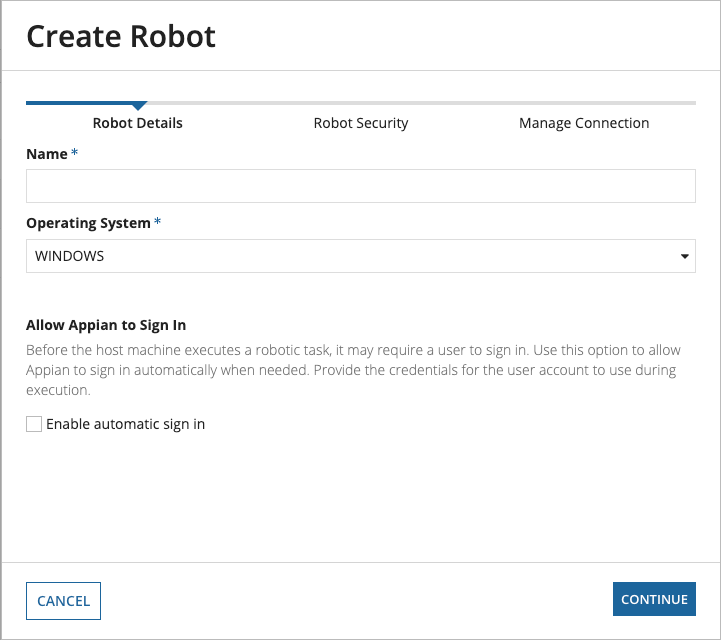
A robot is a digital worker that's made up of two parts: a host machine and an agent. A robot needs a workspace, just like a human worker does. The host machine is the environment in which the digital worker completes robotic tasks. The host machine can be a physical machine, such as a separate computer, or a virtual machine on a cloud server. Multiple robots can map to the same host machine.
Create a robot for each physical or virtual machine (VM) to run robotic tasks. Every robot has a corresponding agent, which can only be used on one host machine. The agent is a software component you install on the host machine so it can communicate with Appian. The agent must be running on the host machine so that the robot has access to the data it needs to execute robotic tasks.
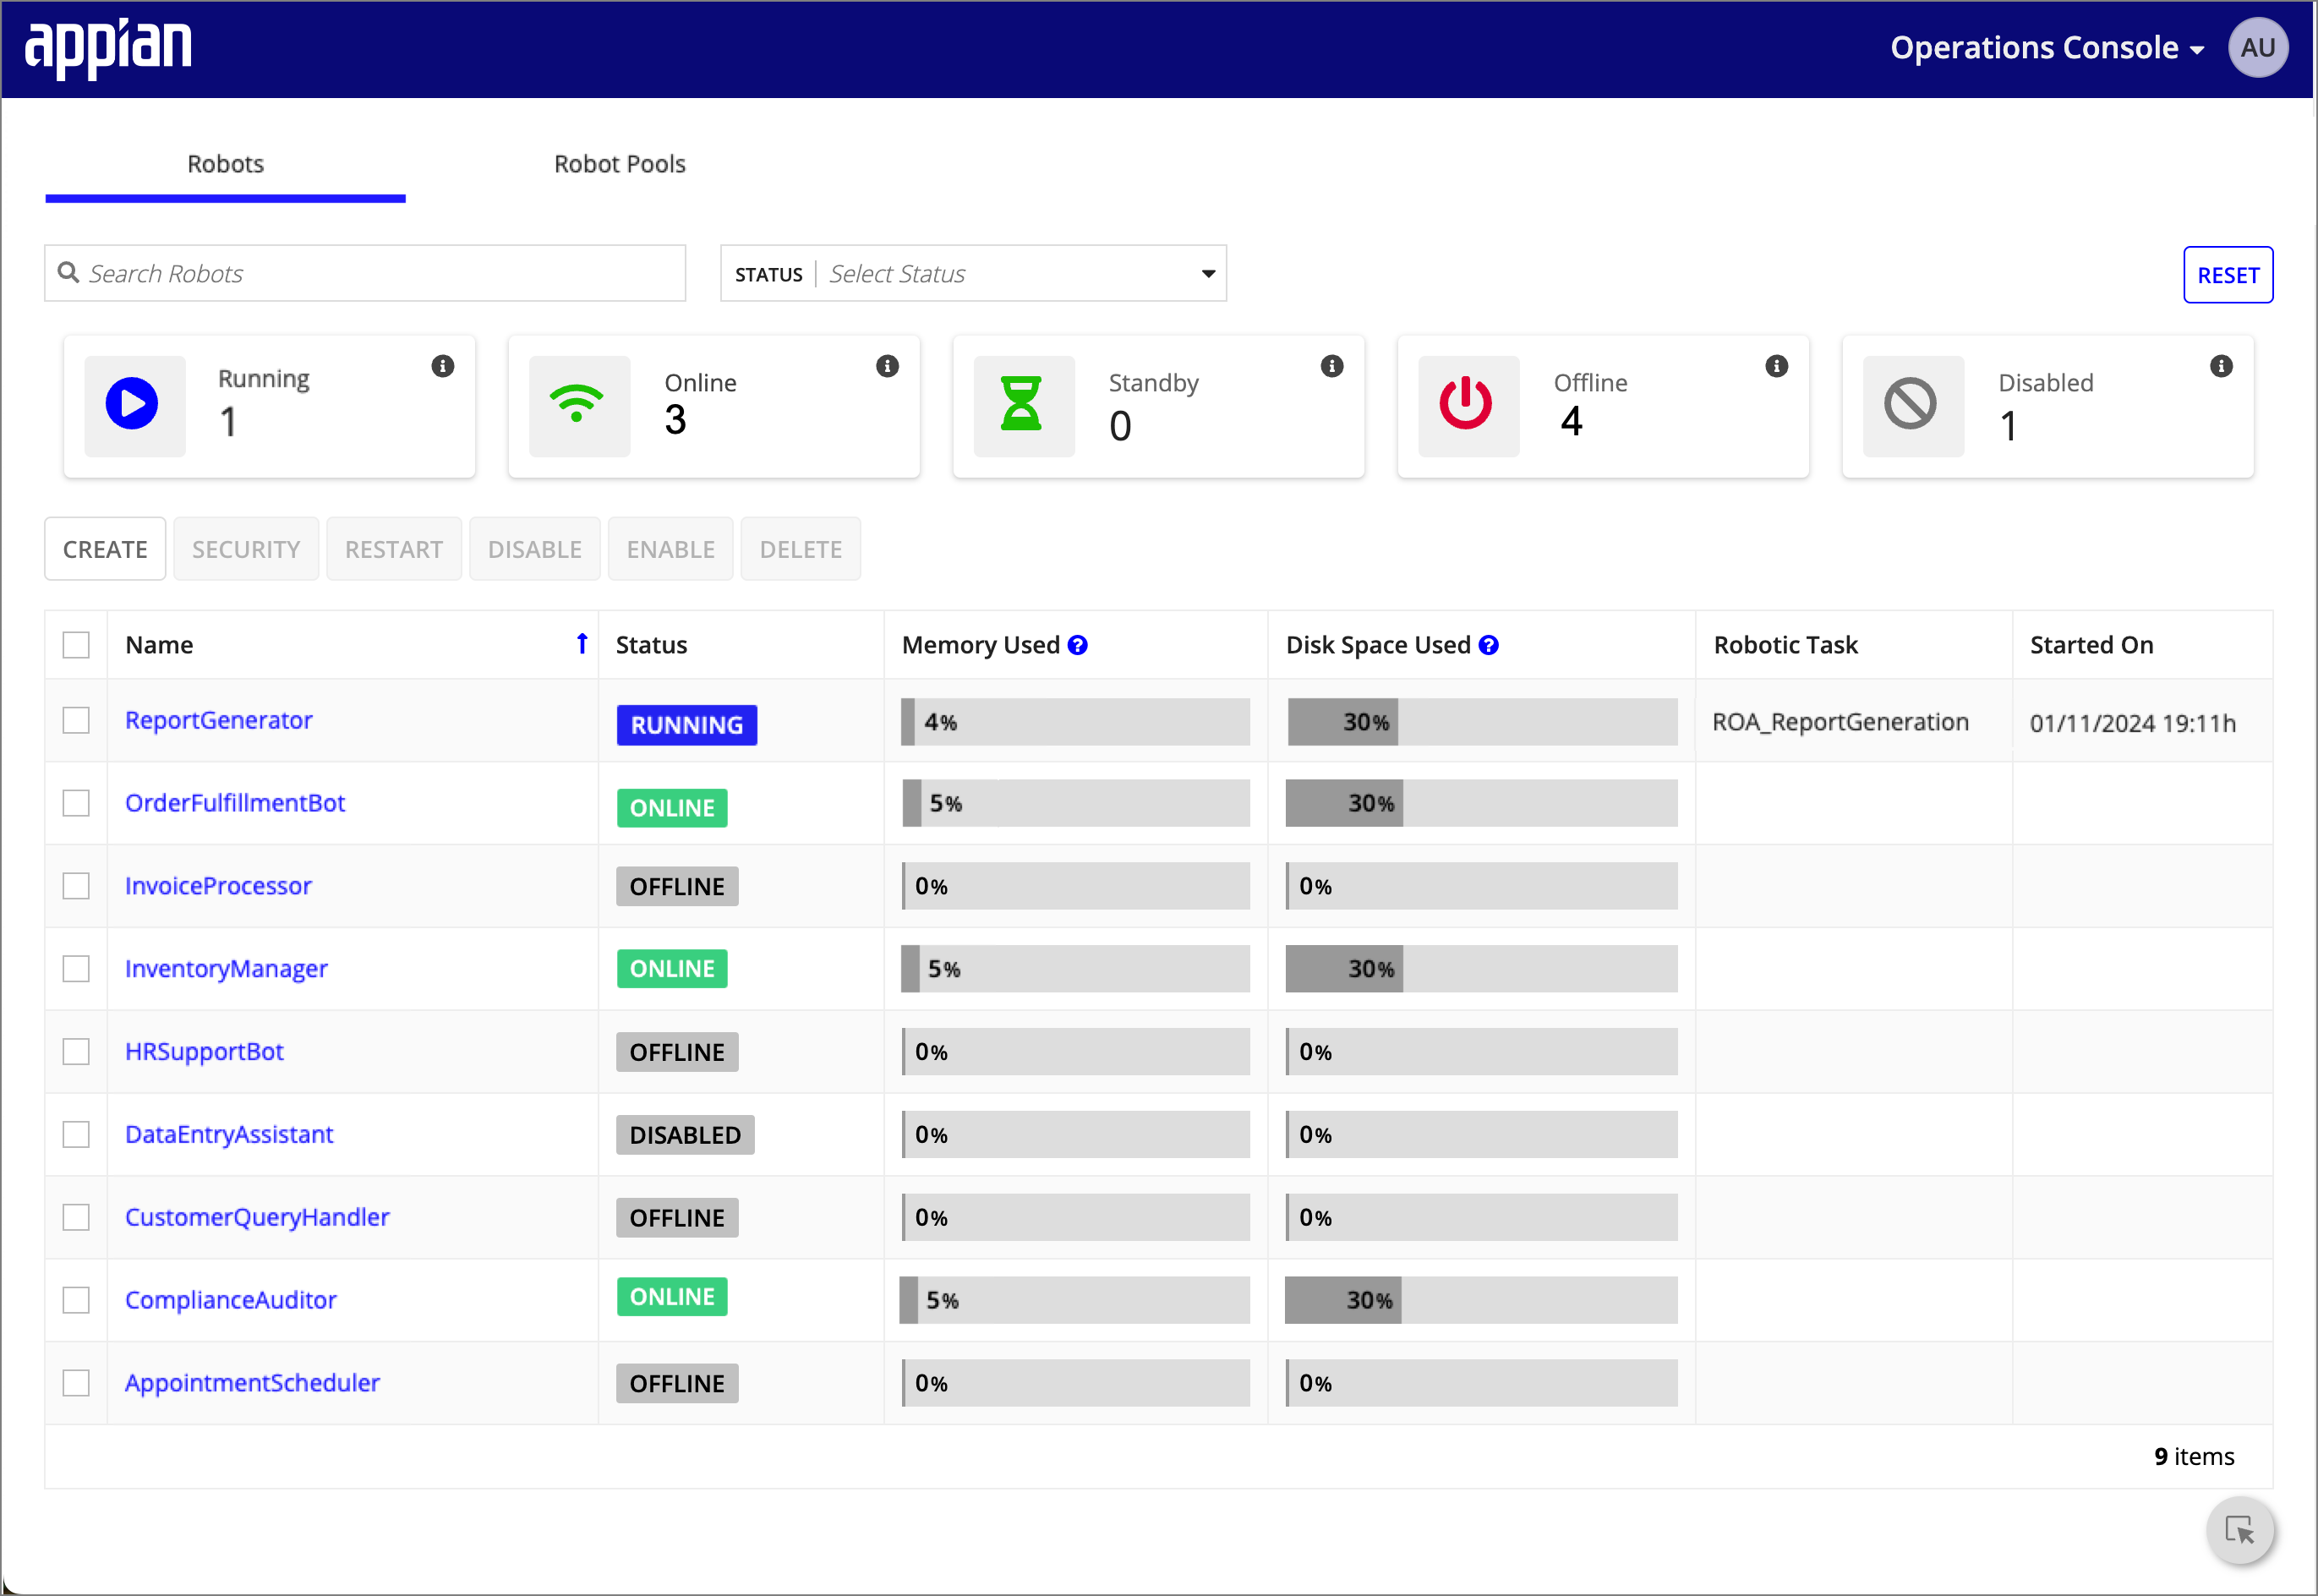
Use the Operations console to create robots and install agents on host machines.
Before you begin, carefully review this checklist for creating new robots. It covers critical steps from launch decisions to final checks, ensuring your agents are optimally configured for effective robotic task execution. Completing each step is crucial for maintaining smooth and reliable operations within Appian RPA.
Note: Review the Agents page for complete information about setting up and monitoring agents.
Note: Next steps
To enable a new robot to execute robotic tasks, ensure you install the agent on the host machine. The agent facilitates communication between Appian and the host machine, including relaying the robot's status. Before installation, make certain the host machine is properly configured.
You can use a VM to run robotic tasks. By default, VMs may timeout and become unavailable after a period of inactivity.
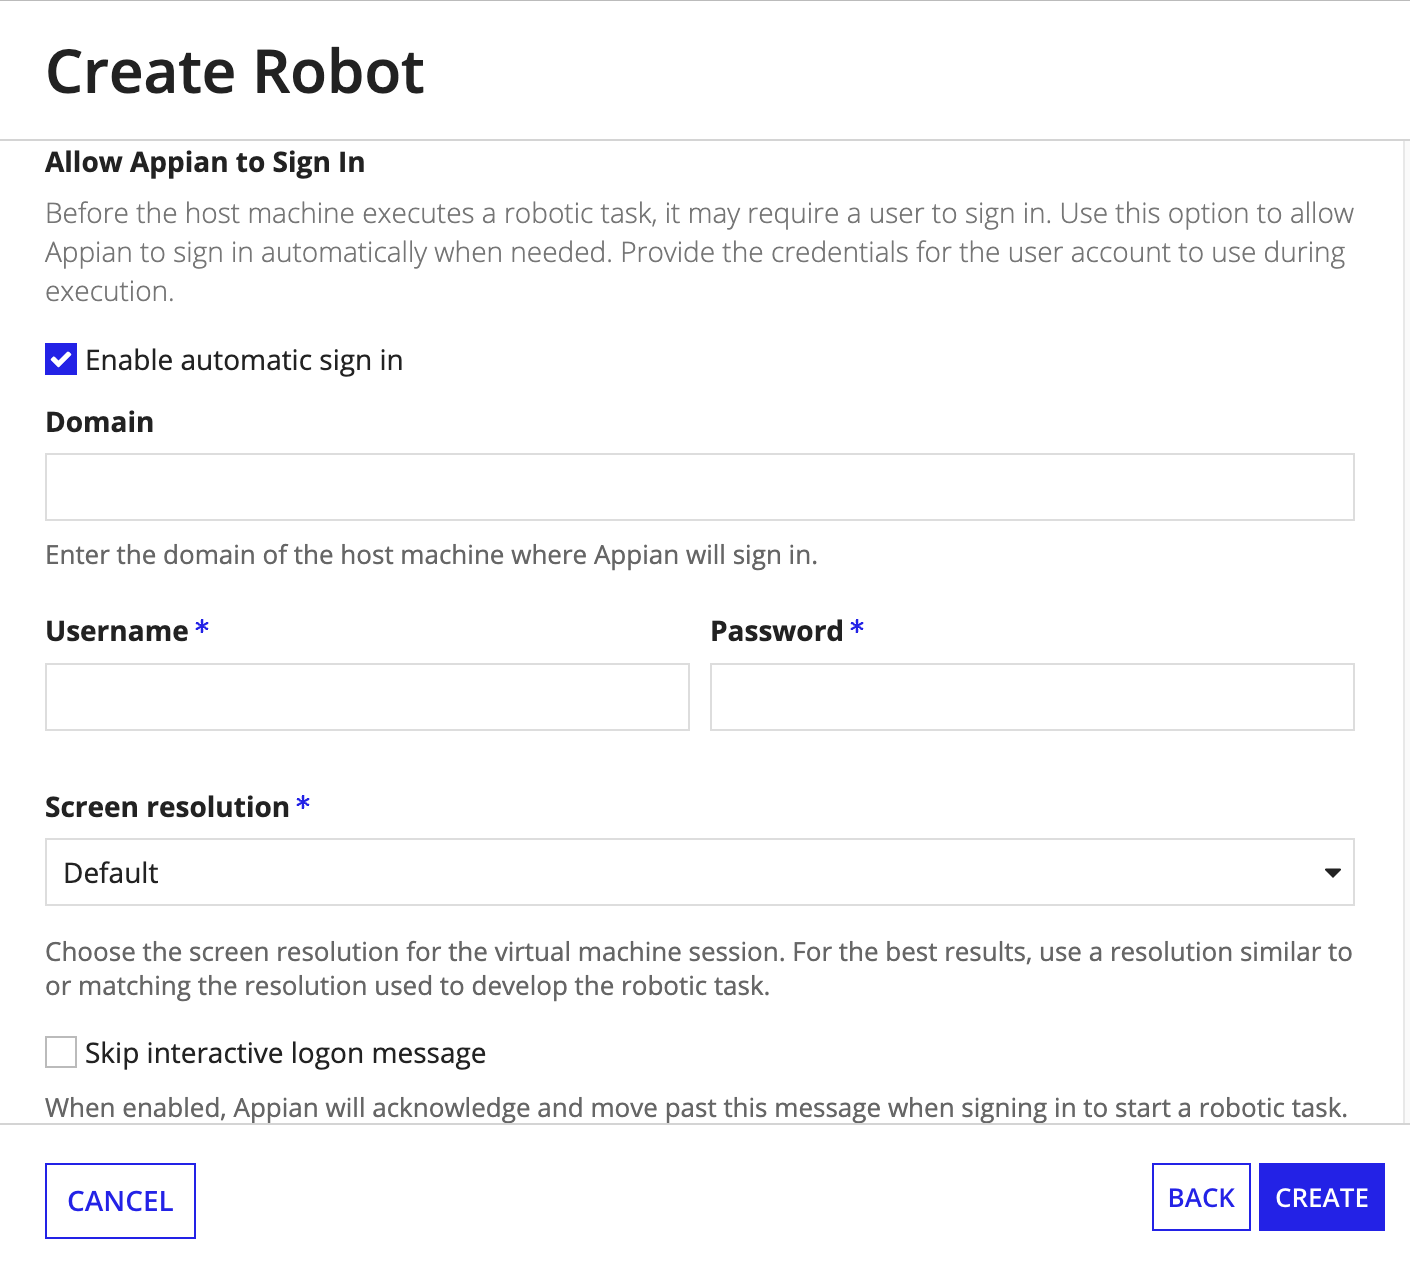
To ensure the VM remains available, you can allow Appian to sign in to the host machine to start an execution. You can also complete additional configurations on the VM. Microsoft Remote Desktop users can configure the following to prevent VM host machines from timing out:
Additionally, ensure that the agent you have downloaded on the host machine has administrator privileges to allow them to unblock sessions as needed.
Before a robotic task starts, it may need to access your host machine and start a user session if one isn't already active. On top of that, your business may restrict the privileges available to this user session.
You can configure your robot to allow Appian to automatically sign into a virtual machine as any designated user (basic or administrator) in order to start a robotic task. This means that you won't need to keep user sessions active on virtual machines in case a robotic task needs to start. Instead of keeping user sessions active, Appian can start a session as needed for robots with Standby status.
Appian can also automatically sign out of the host machine if there are no more robotic tasks to run after the last execution. Configure this option to build more flexibility into your unattended automations.
Note: Appian only supports Enable automatic sign in on Windows host machines.
You can find these configuration options when you create a robot or edit a robot's details.
To allow Appian to sign in:
Existing robots only: If you're allowing Appian to sign in for a robot you already set up, you need to replace the agent on the host machine by downloading the installer again:
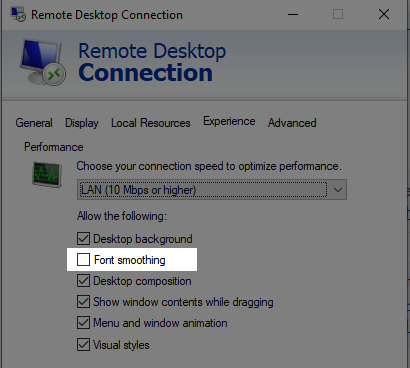
To improve image recognition for automatic sign in, try disabling font smoothing before taking screenshots. If you're having trouble with the image recognition, this could help.
Required role: Administrator
Automating the installation of agents and the auto-login service on your host machines, especially on virtual machines that frequently terminate, can be a tedious process. Robot keys streamline this process. Robot keys encapsulate a robot's unique identity in a single credential that can be incorporated into your custom scripts. This not only facilitates the seamless automation of agent installations but also enables auto-login services on Windows OS.
You can store robot keys in your own secure credentials manager. Appian RPA ensures your security by automatically rotating your robot keys each time an agent connects and authenticates. This seamless process keeps your interactions secure without any extra effort on your part. However, for added flexibility, Appian RPA lets you manually update your robot keys at your convenience, offering you tailored control to meet specific security needs or preferences.
Setting up your robot key script is an essential step for preparing your system. You need to place a script in the same directory where your configuration file is located. When needed, the RPA agent or the auto-login service executes your script. The robot key should be the last line in the output of the script. An agent or auto-login service can then use this key to authenticate itself with Appian RPA.
| If the OS is… | Then name the file… | Location |
|---|---|---|
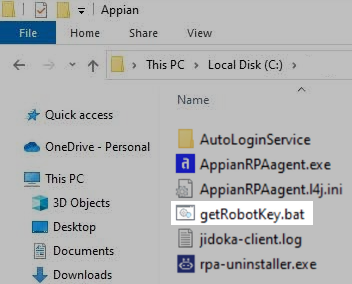
| Windows | getRobotKey.bat |
During the installation process, the software is automatically installed in a folder named "Appian RPA," located in the user's Local App Data folder. If you need to locate this folder, you can open a command prompt window in the user's session and enter the command echo %LOCALAPPDATA%. |
| Mac or Linux | getRobotKey.sh |
You created this folder on the host machine to store the AppianRPAagent.run file when you set up the robot. |
Example
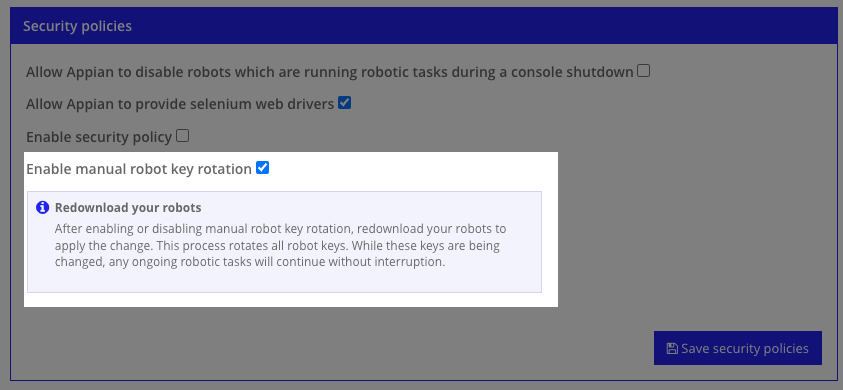
Appian RPA automatically keeps your robot keys up-to-date for your security. If you need a more hands-on approach, follow these steps to enable manual robot key rotation.
If you have manual robot key rotation enabled, you need to periodically refresh your robot keys to you ensure that the security and integrity of your robots and systems are maintained.
Here are some considerations you should keep in mind when rotating robot keys:
To rotate a robot key:
Caution: This step is essential. The old key is immediately deactivated once a new key is generated. Any robots using the old key will fail to connect as intended.
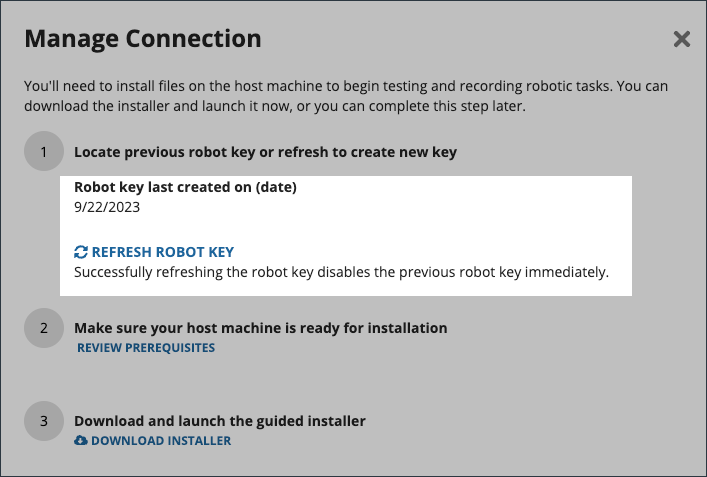
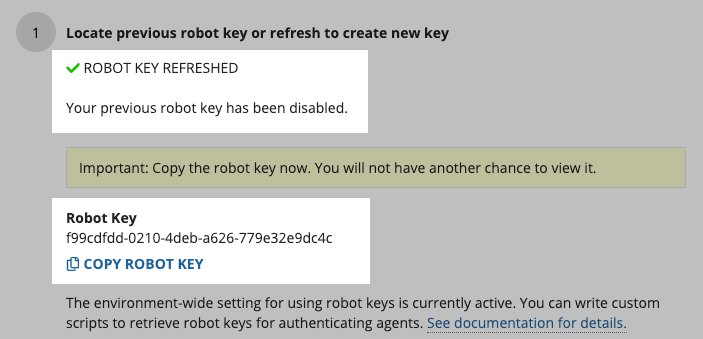
Tip: Be sure to copy the robot key now. You will not have another chance to view it.
getRobotKey.bat or getRobotKey.sh script is dynamic enough to retrieve the updated key.Security for robots consists of the following:
| Action | RPA Operations Manager | Designer |
|---|---|---|
| Access the Operations Console and view the Robot Management page | Yes | Yes |
| Create a new robot | Yes | No |
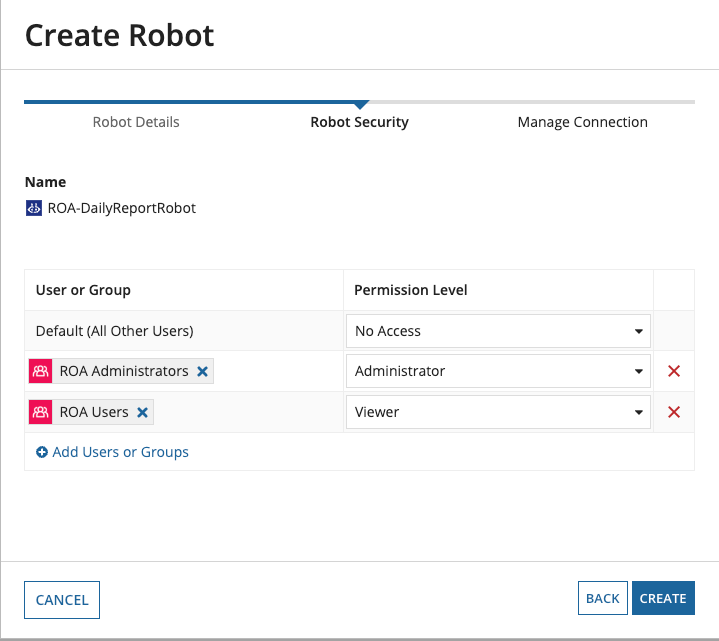
Starting from the Appian 23.4 release, newly created robots can only be secured using role maps. The security role map of a robot controls whether users can view or modify it and its properties. Unlike some other objects, Robots never inherit security.
The following table outlines the actions that can be completed for each permission level in a robot's security role map:
| Robot Actions | Administrator | Editor | Viewer | Deny |
|---|---|---|---|---|
| Monitor executions (Also requires Viewer, Editor, or Admin permission on the robotic task) |
Yes | Yes | Yes | No |
| View list of robots | Yes | Yes | Yes | No |
| View robot dashboard (robot details) | Yes | Yes | Yes | No |
| Edit properties | Yes | Yes | No | No |
| View security | Yes | Yes | No | No |
| Edit/Enable/Disable auto login | Yes | Yes | No | No |
| Update security | Yes | No | No | No |
| Download and install agents | Yes | No | No | No |
| Download and install auto-login | Yes | No | No | No |
| View live robots | Yes | No | No | No |
| Enable / Disable robot | Yes | No | No | No |
| Lock / Unlock robot input | Yes | No | No | No |
| Restart robot | Yes | No | No | No |
| Delete robot | Yes | No | No | No |
If you are using Appian 23.4 or later, you can permanently switch your robots from using permission tags to role maps. Follow these steps in the Operations Console to transition a robot to security role maps and remove permission tags.
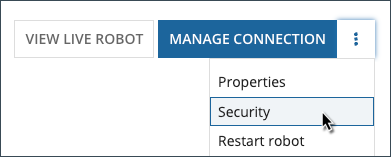
Use one of the following methods to navigate to the robot Robot Security screen from the Robot Management screen.
| Method | Example |
| Select the checkbox next to the robot then click SECURITY. | 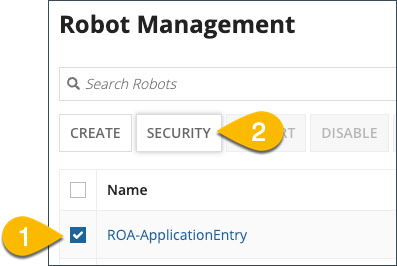 |
| Select the robot you want to change. Result: The Robot Detail page displays. Select Security from the action menu. |
 |
 button. Click Create when you are done creating the group.
For automating robot installation on Windows, refer to the Automate Robot Installation on Windows topic.
