| This content applies solely to Requirements Management, which must be purchased separately from the Appian base platform. |
IntroductionCopy link to clipboard
After you access the Requirement Management Settings site, you can view the Tasks (Checklist items) page. Checklist items are the individual tasks within a checklist. To add items to a requirement checklist, you must create a library of checklist items.
We have provided some checklist items (tasks) out-of-the-box that are completely configurable to meet the needs of your organization's requirement process.
The out-of-the-box checklist items are:
508 DeterminationComplete Capabilities DocumentComplete Line ItemsCoordinate Acquisition Strategy MeetingCoordinate Procurement Planning ConferenceData Requirements ListDefine CapabilitiesDetermine Enhance, Build, or BuyDevelop Acquisition StrategyDivision ApprovalDraft Requirements DocumentHold initial coordination meetingInitial coordination with competition advocateInitial coordination with small businessLegal ReviewProvide IGCEReview latest updates to requirements documentsSecurity ClassificationSubmit Evaluation Criteria
This page describes how to configure items needed to create your organization's checklists.
Task typesCopy link to clipboard
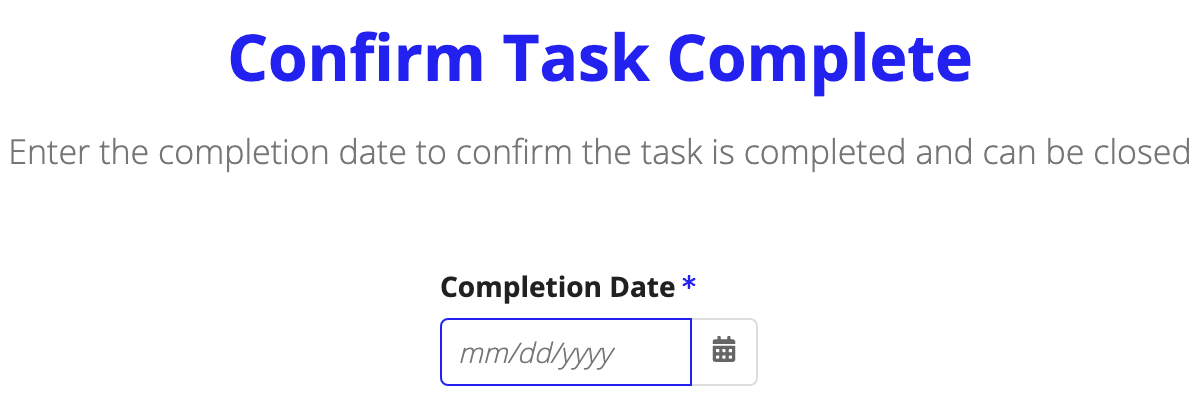
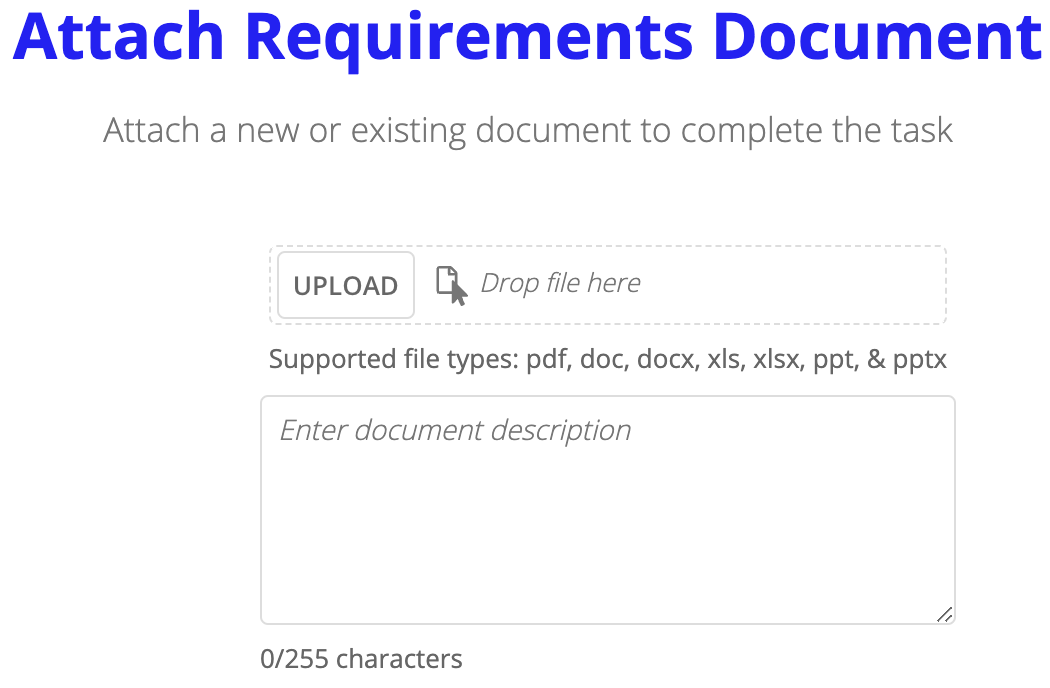
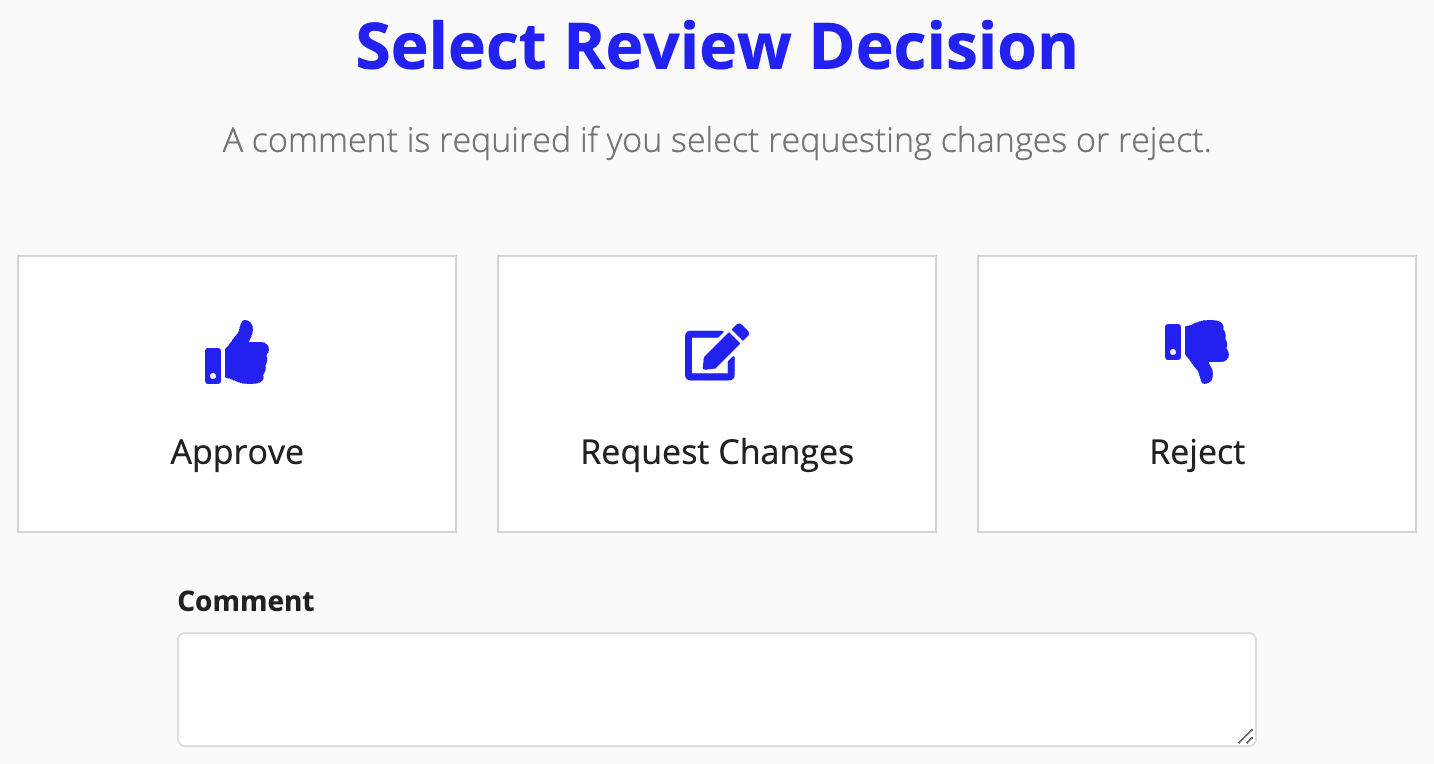
Checklist items (also known as tasks) are of four types:
-
Confirmation: Requires a user to enter a date to confirm the checklist item has been completed.
-
Attach Document: Requires a user to upload a specific document.
-
Review: Requires a user to approve, reject, or request changes on a checklist item.
-
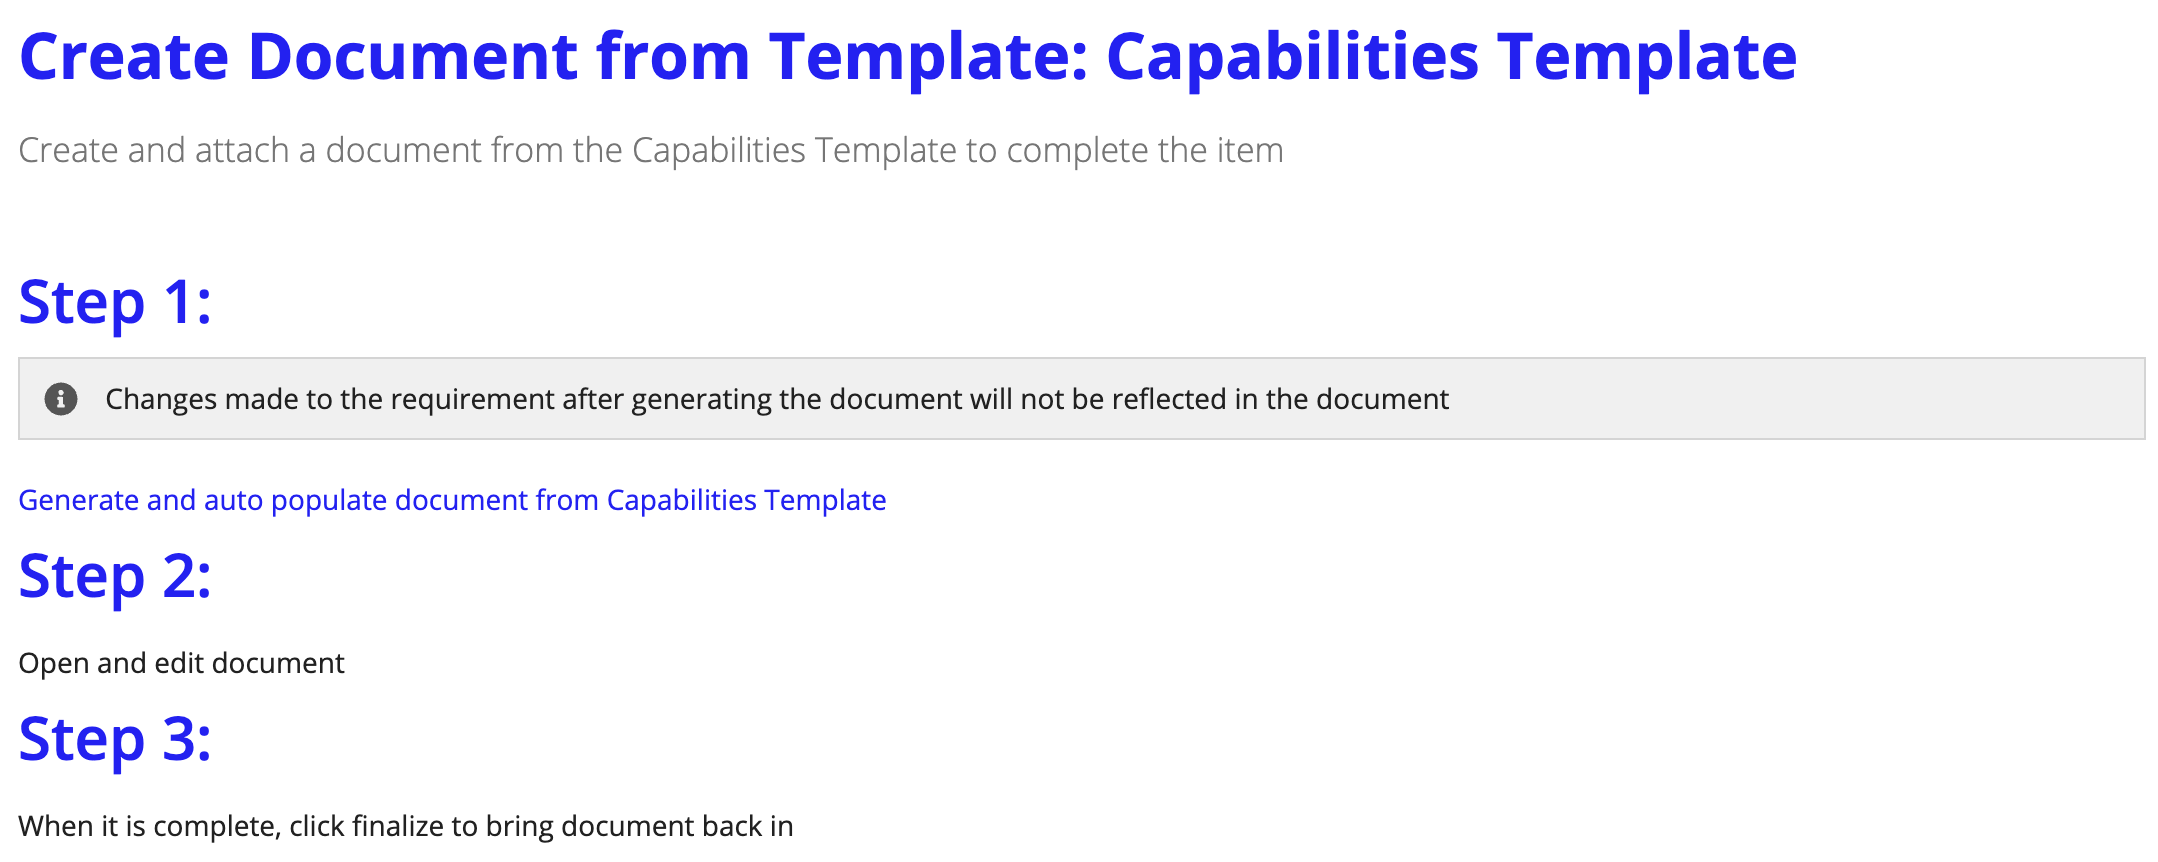
Create Document from Template: Requires a user to create a specific document from the provided document template.
-
Address Review Comments: This is an automated task that asks users to confirm they have addressed comments from the review.
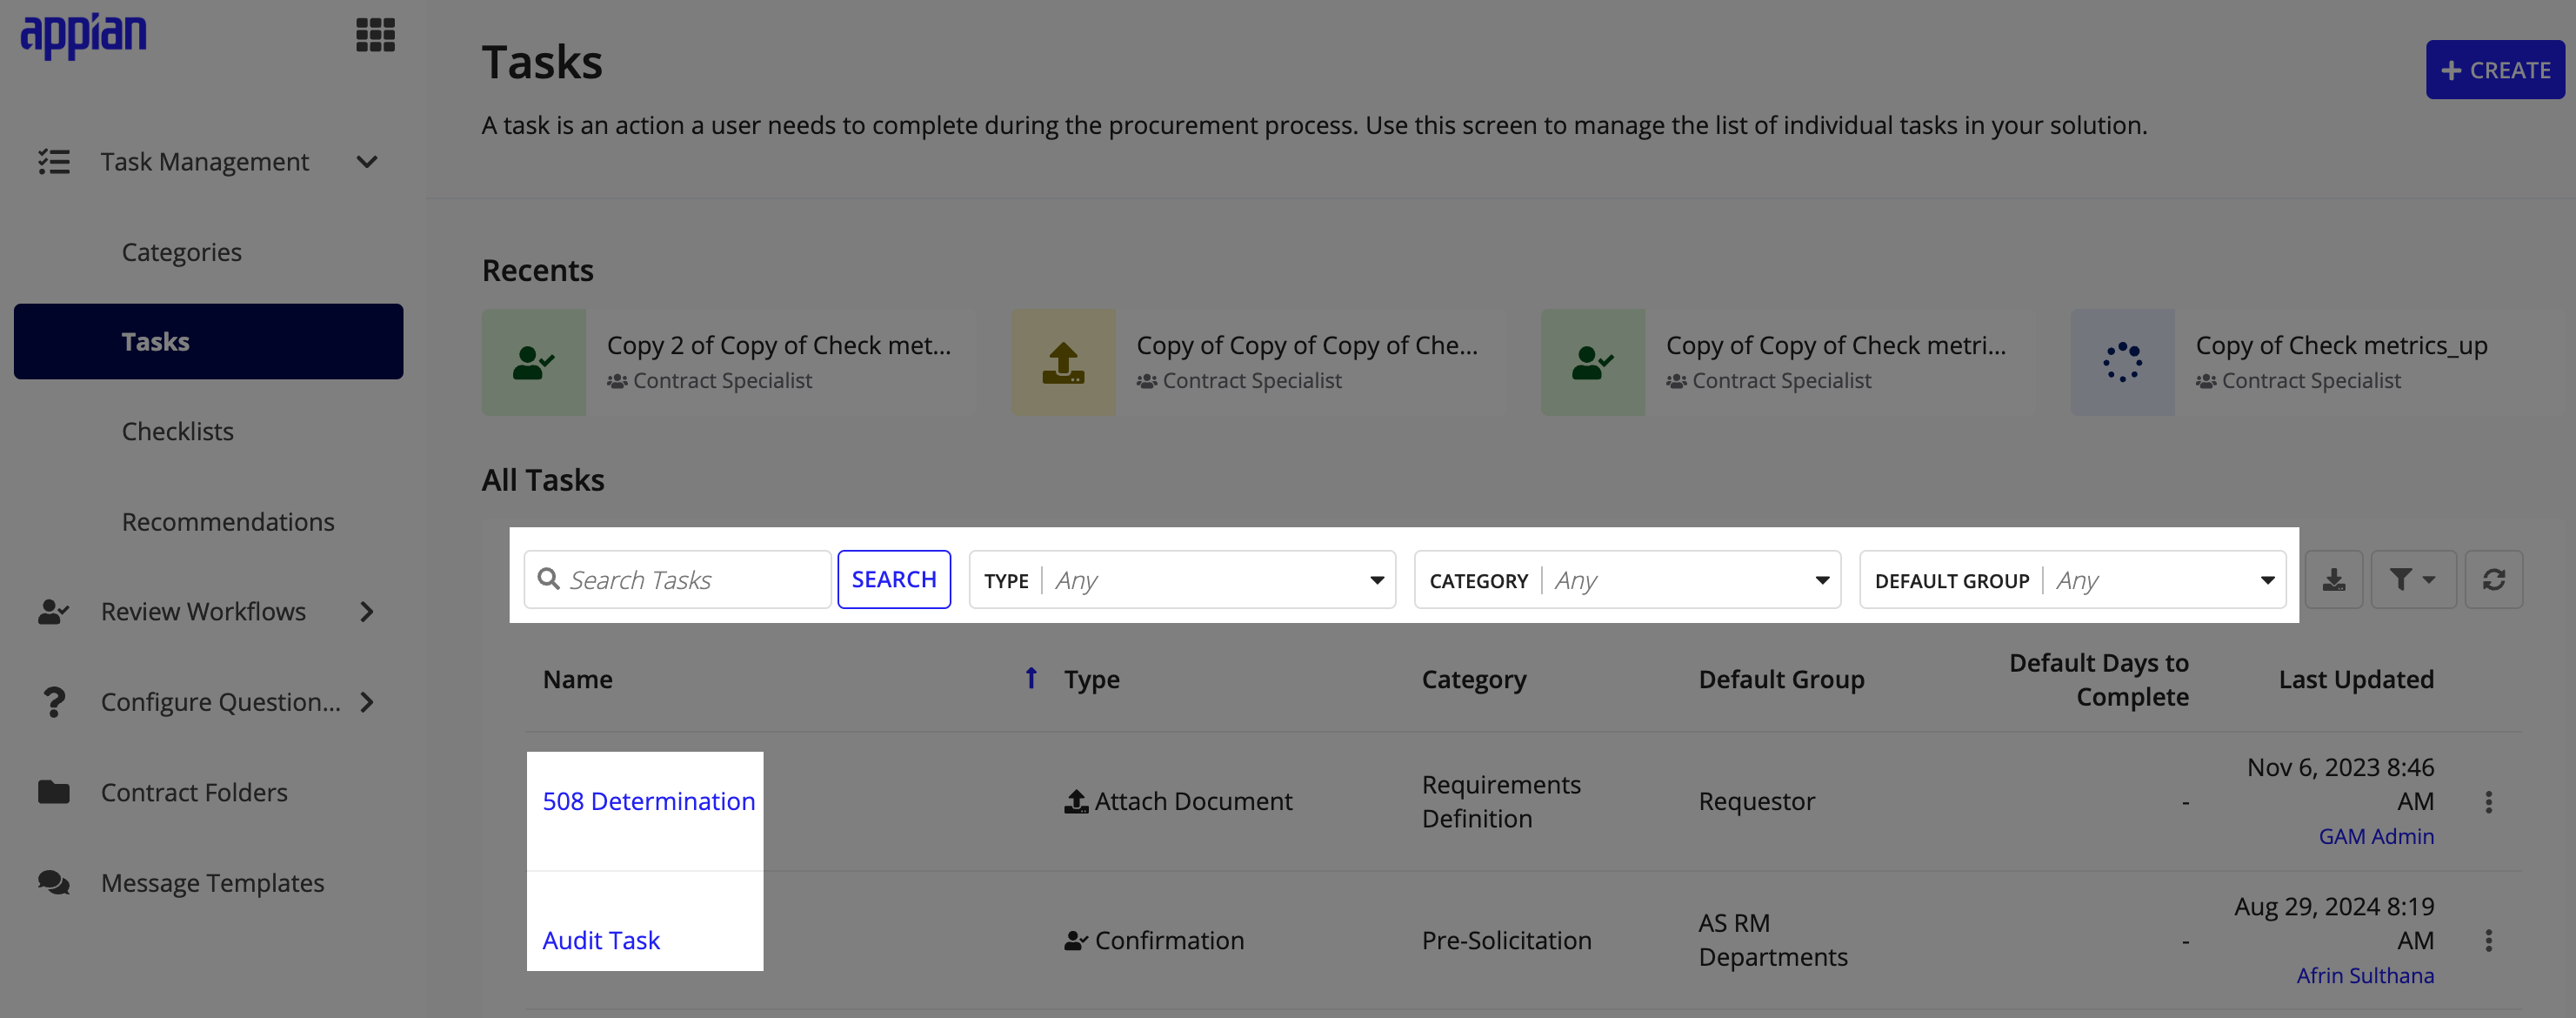
View tasksCopy link to clipboard
To view tasks:
- Navigate to the Requirement Management Settings site.
- Expand Task Management and select the Tasks option to navigate to the Tasks page.
- Enter task keywords in the search field and click SEARCH to filter the tasks list.
- Filter the tasks by TYPE, CATEGORY, and DEFAULT GROUP using the dropdowns.
- Click on a task Name to navigate to its Summary page and view related checklists.
- Click History to view the task modification history.
When you are assigned a new checklist item, you receive an email notification in response to the event. You also receive an email notification when a checklist item is due, overdue, reassigned to another user, or when the checklist item's due date changes.
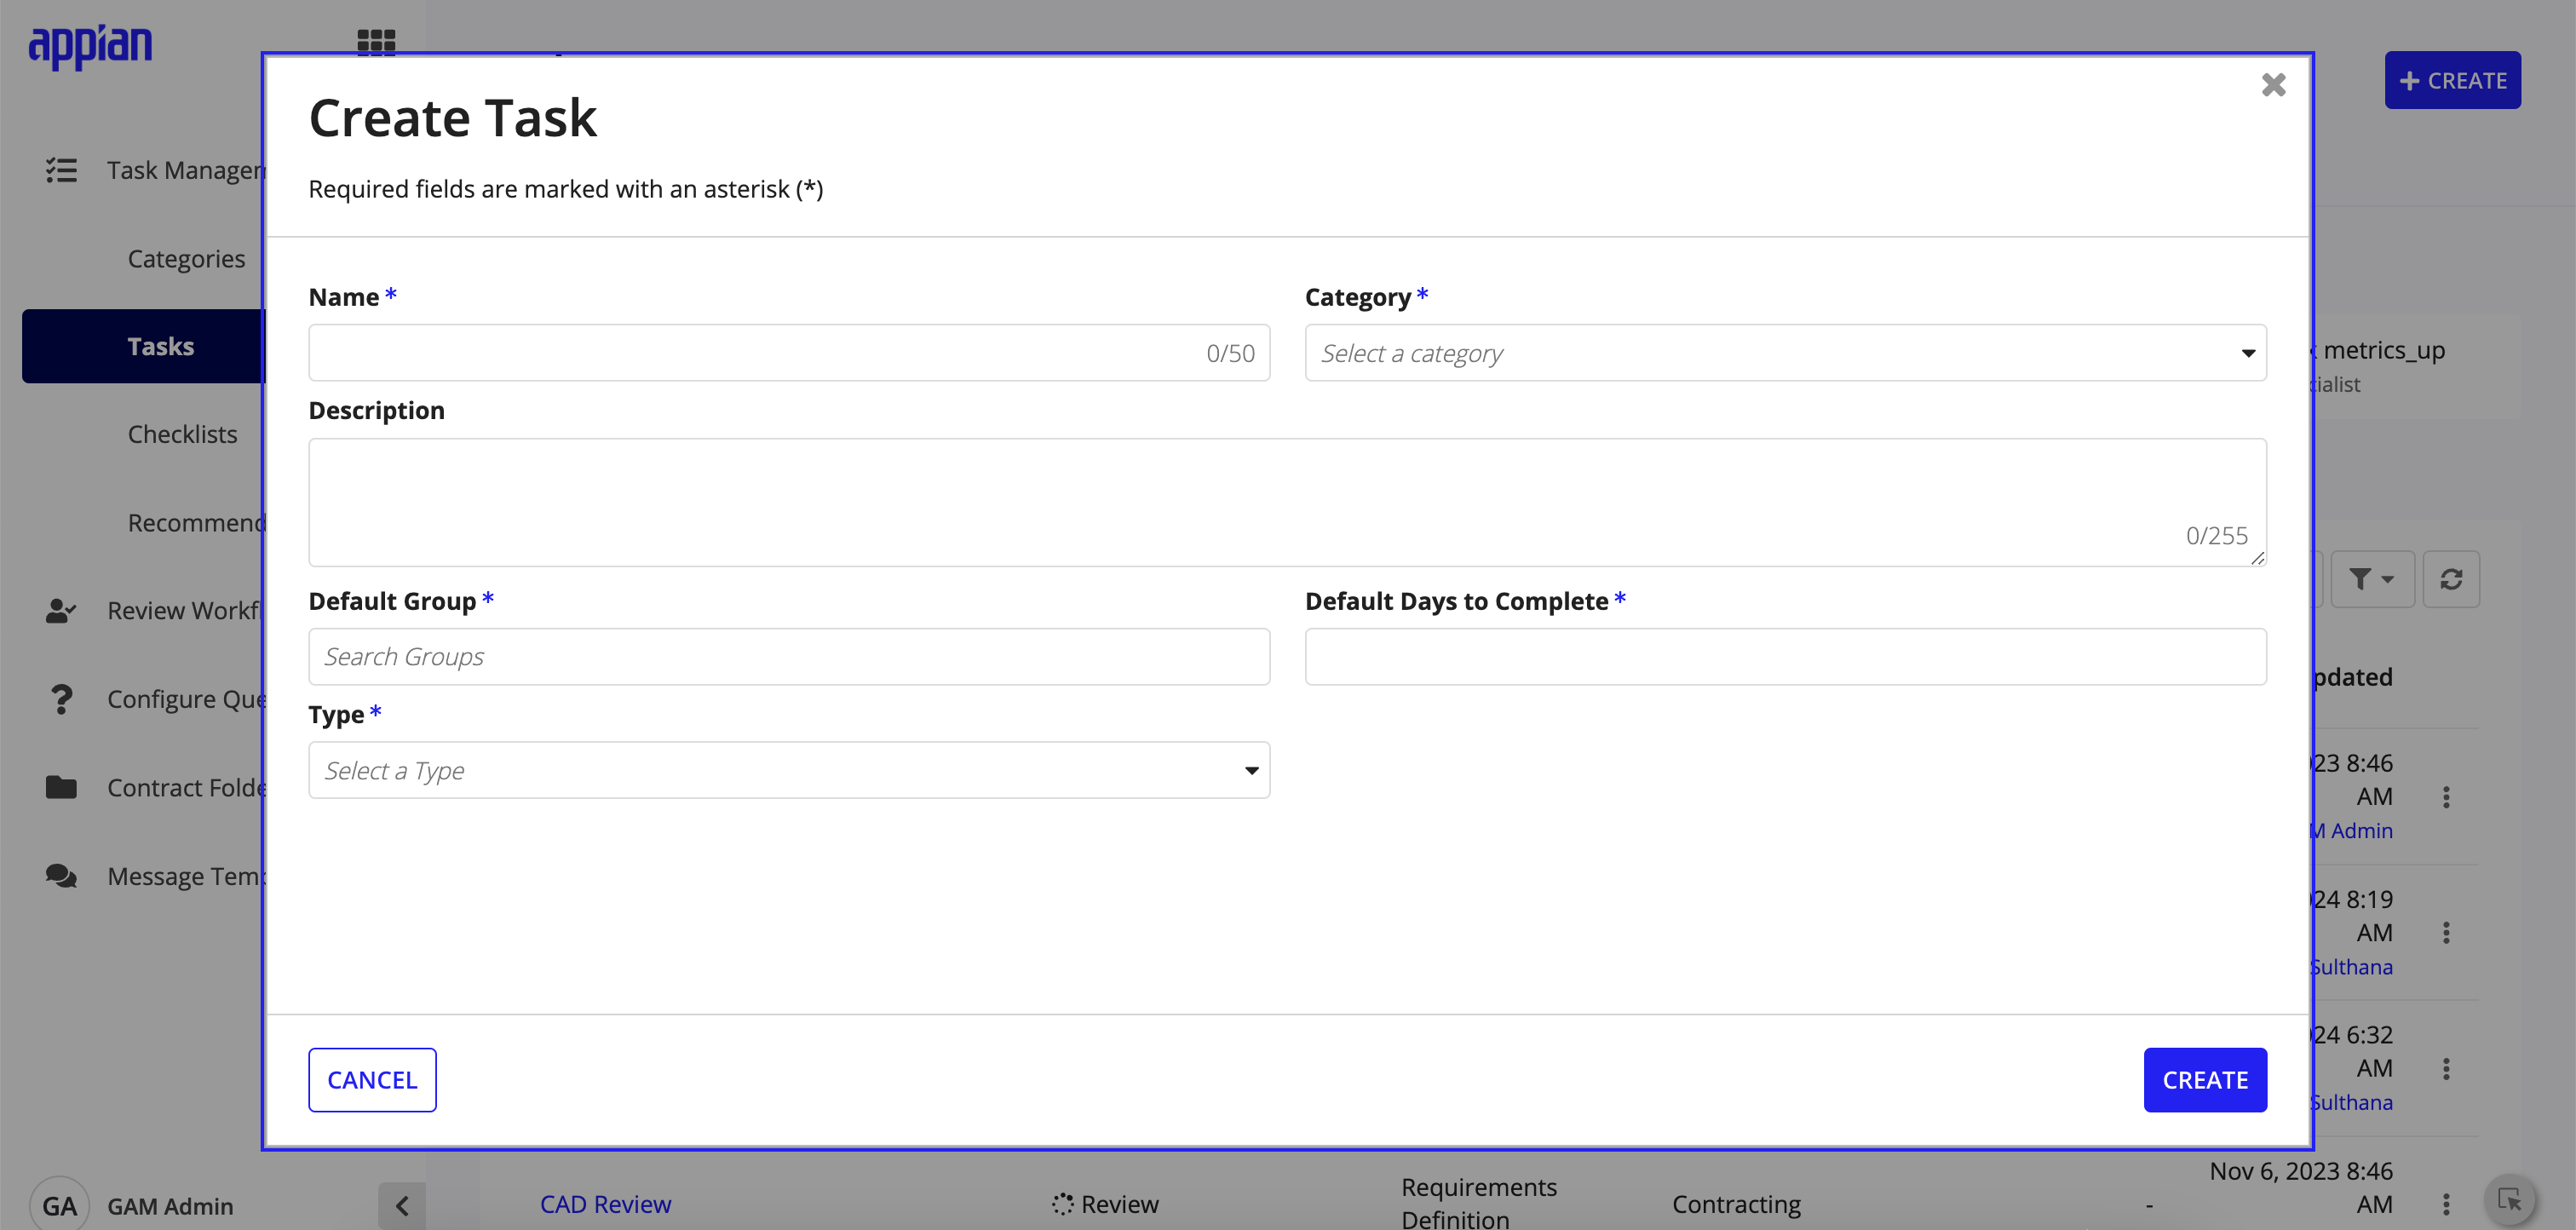
Create tasksCopy link to clipboard
If you only need to add a few items, you can create them one at a time.
To create an individual task:
- Expand Task Management and select the Tasks option to navigate to the Tasks page.
- Click +Create to bring up the Create Task wizard.
- Enter a task Name.
- Select a task Category using the dropdown.
- Enter a task Description.
- Select the Default Group(s) using the auto-suggest fields. The created task is assigned to the selected group(s).
- Enter the Default Date To Complete the task.
- Select the task Type using the dropdown.
- If the task Type is Attach Document, select a Document Type.
- If the task Type is Create Document from Template, select a Document Type and a Document Template.
- Click CREATE to create the task.
The new checklist item is available in all new requirements' checklist setup items, as well as new and existing requirement checklists.
Import tasksCopy link to clipboard
If you need to create many tasks at once, you can import tasks from an Excel spreadsheet.
To import and create multiple tasks:
- Expand Task Management and select the Tasks option to navigate to the Tasks page.
- Click IMPORT to bring up the Import Task wizard.
- Click DOWNLOAD TEMPLATE to download the
AS TMG Sample Task Import.xlxsspreadsheet file. - Fill in the following fields in the downloaded spreadsheet:
- Name: The display name for the task. It must be unique and must not exceed 255 characters.
- Category: The category in which the task must be grouped. The valid values are any category listed on the categories page.
- Description: Enter a brief description of the task. It must not exceed 255 characters.
- Default Group: The group that is automatically assigned to the task. The valid values are all business groups that are in the RM application. For example, requestor or requestor manager. See the Groups Reference Page for a list of the out-of-the-box groups.
- Default Days to Complete: The number of days to complete the task. The value must be a number greater than zero.
- Task Type: The type of task. Out-of-the-box, the valid values are:
ConfirmationAttach DocumentReviewCreate Document from Template
- Document Type: Only required if the Task Type is Document Upload or Create Document from Template. If the Task Type is something else and a value is entered in this field, it is ignored. Out-of-the-box, the valid values are:
Requirement DocumentMemoJustification DocumentDeterminationWaiverResearchChecklistEvaluationBriefingNotificationAppointmentOther
- Document Template: Only required if the Task Type is Create Document from Template. If the Item Type is something else and a value is entered in this field, it will be ignored. Out-of-the-box, the valid value is
Capabilities Template.
- Click UPLOAD in the Upload File section to bring up the file picker.
- Select the modified
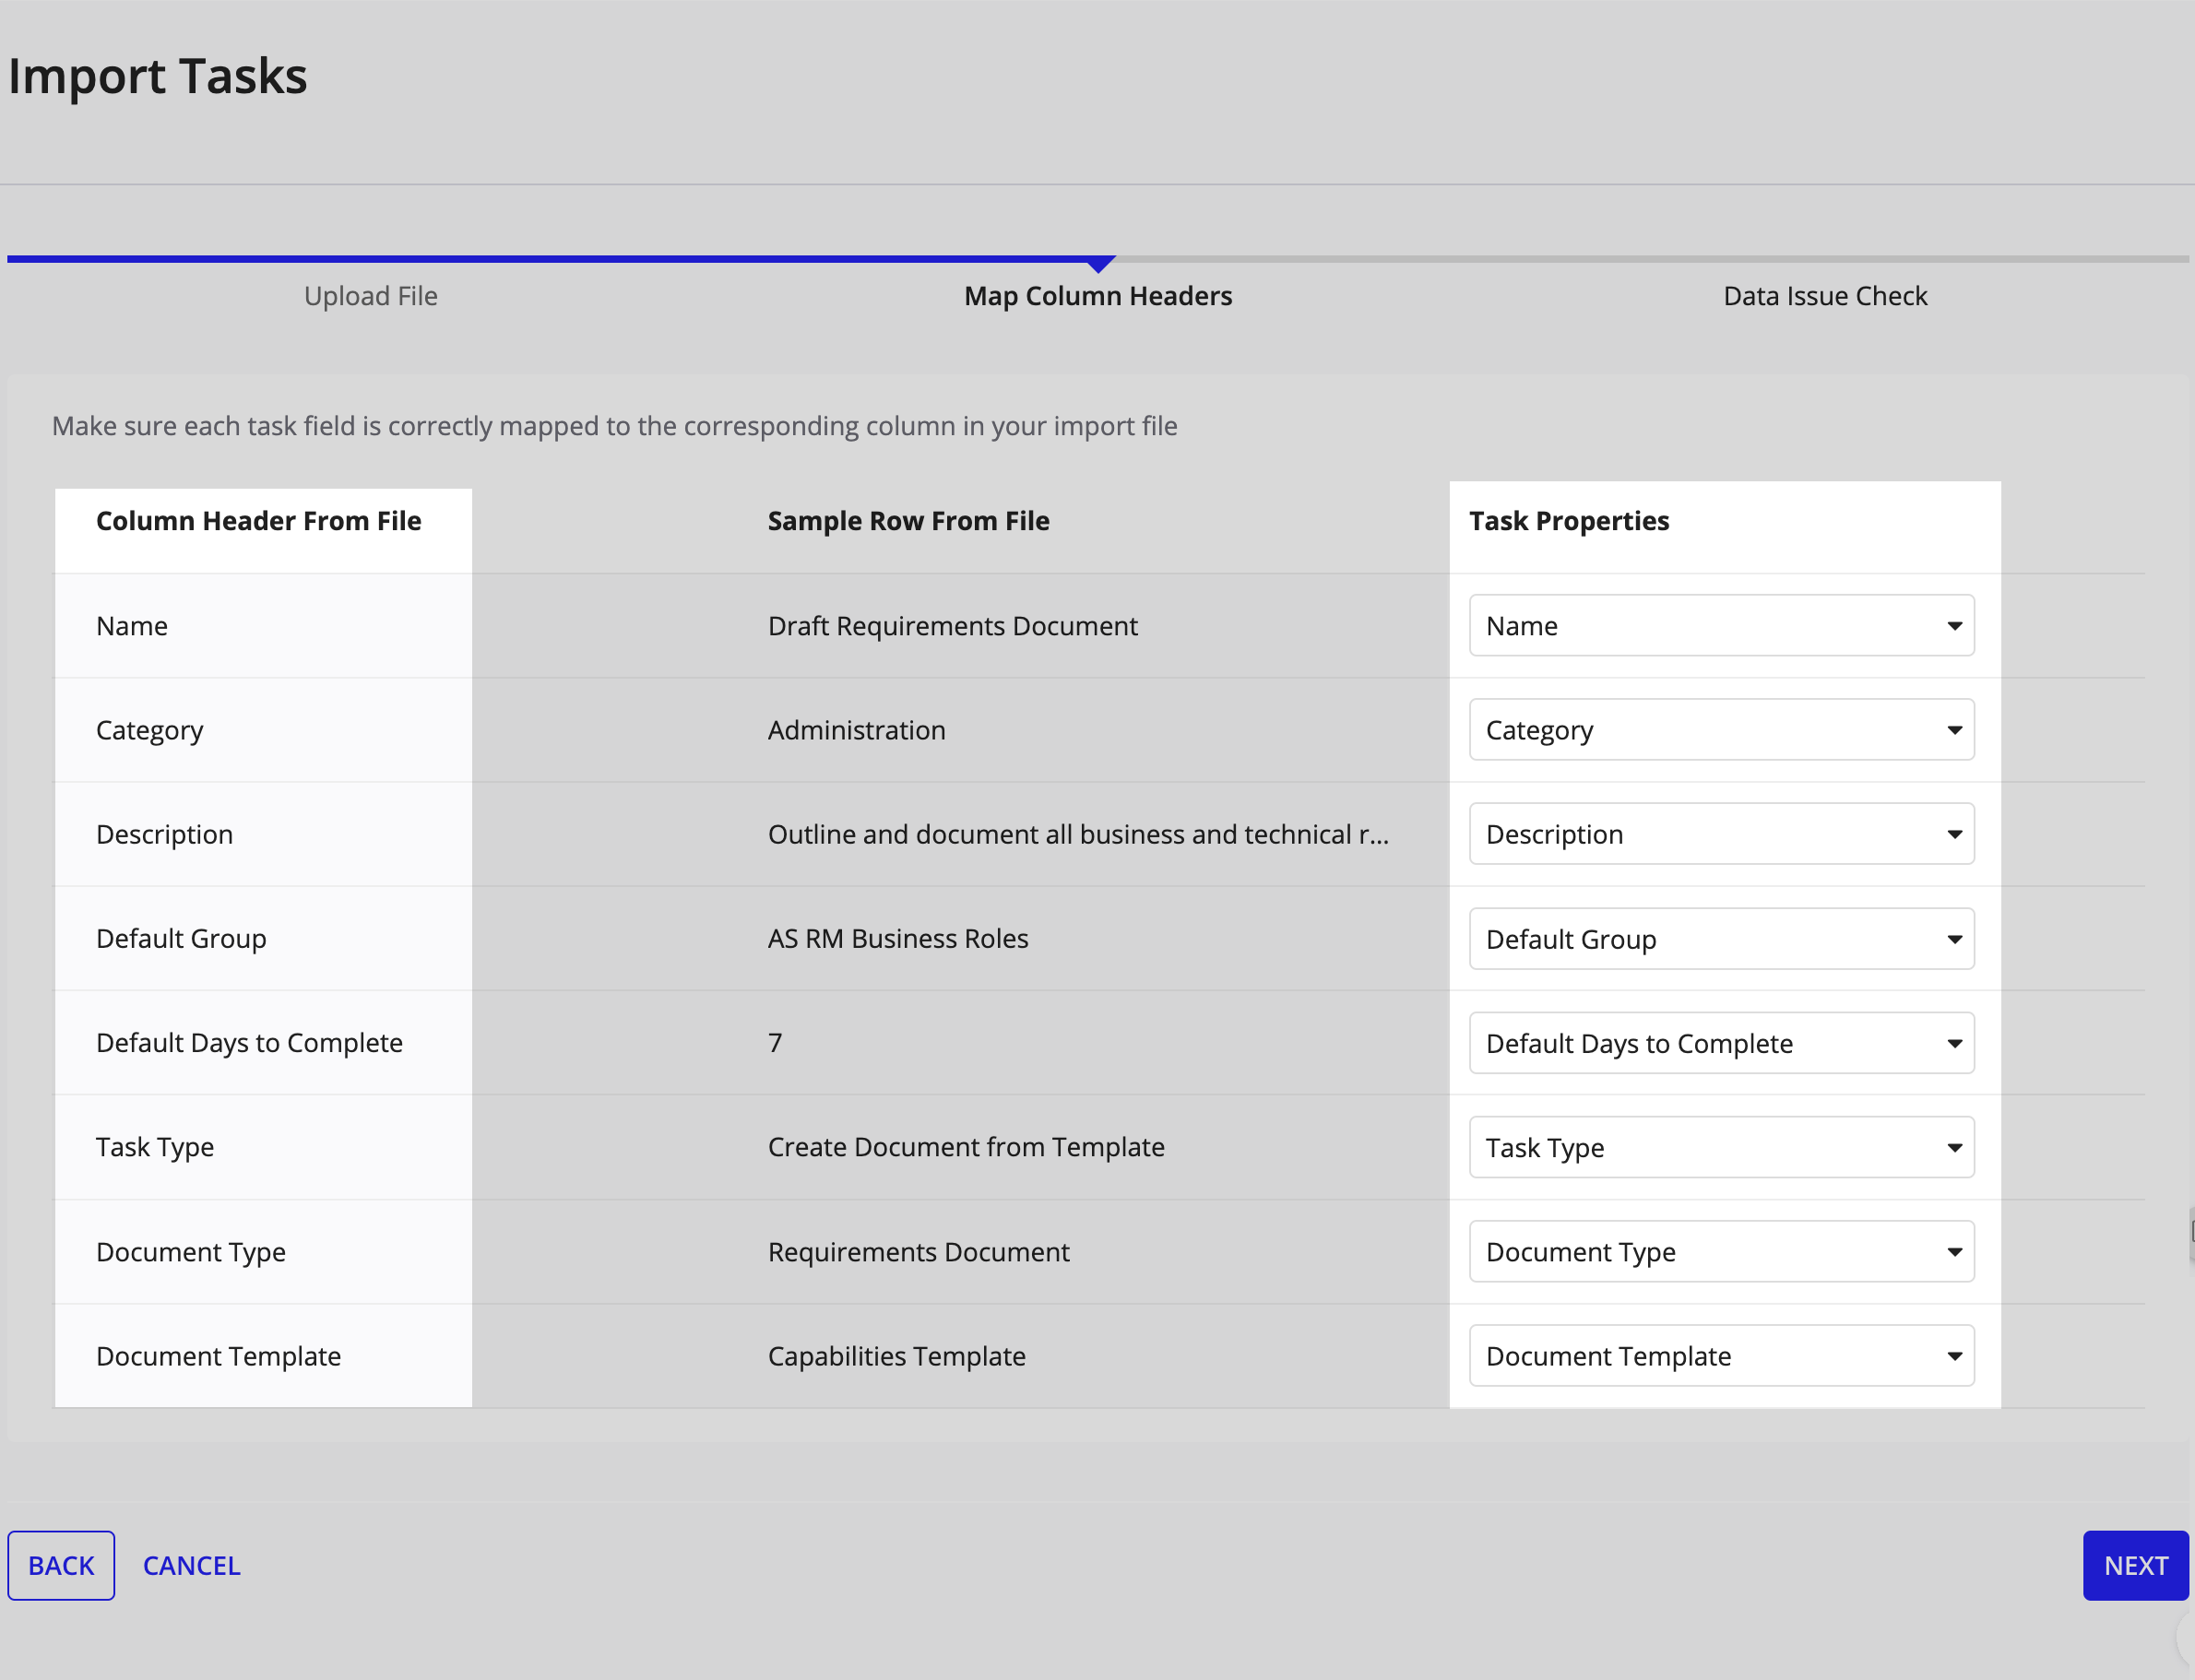
AS TMG Sample Task Import.xlxsspreadsheet. - Click NEXT to navigate to the Map Column Headers section. A list of the columns from the uploaded spreadsheet is displayed.
-
Map the Column Header From File (from the uploaded spreadsheet) and Task Properties columns. If the template is used without modifying the column headers, these columns match up automatically.
- Click NEXT to navigate to the Data Issue Check section.
The Data Issue Check section displays the number of tasks that are:
- Valid and ready to be imported.
- Skipped since they already exist.
- Invalid and need valid inputs.
- Verify all of the fields are correct and there are no validation errors.
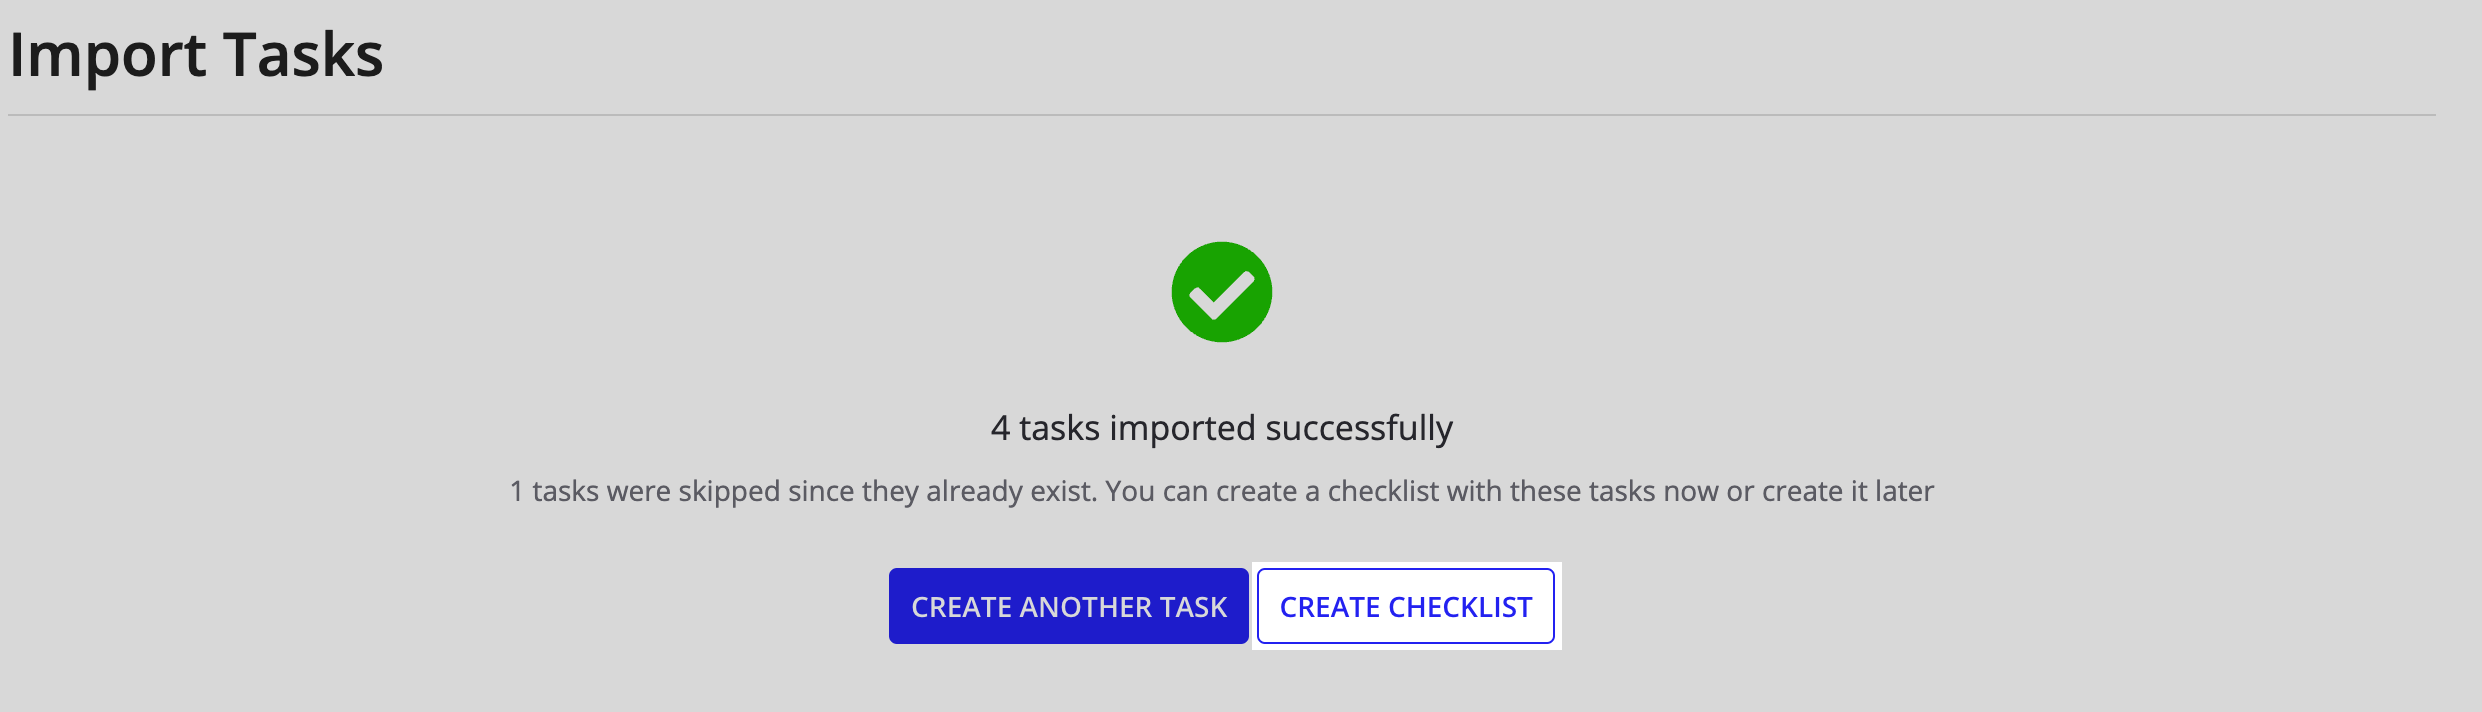
- Click IMPORT to import the tasks.
Tip: Click CREATE CHECKLIST to add the imported tasks to a checklist.
Update tasksCopy link to clipboard
To update a task:
- Expand Task Management and select the Tasks option to navigate to the Tasks page.
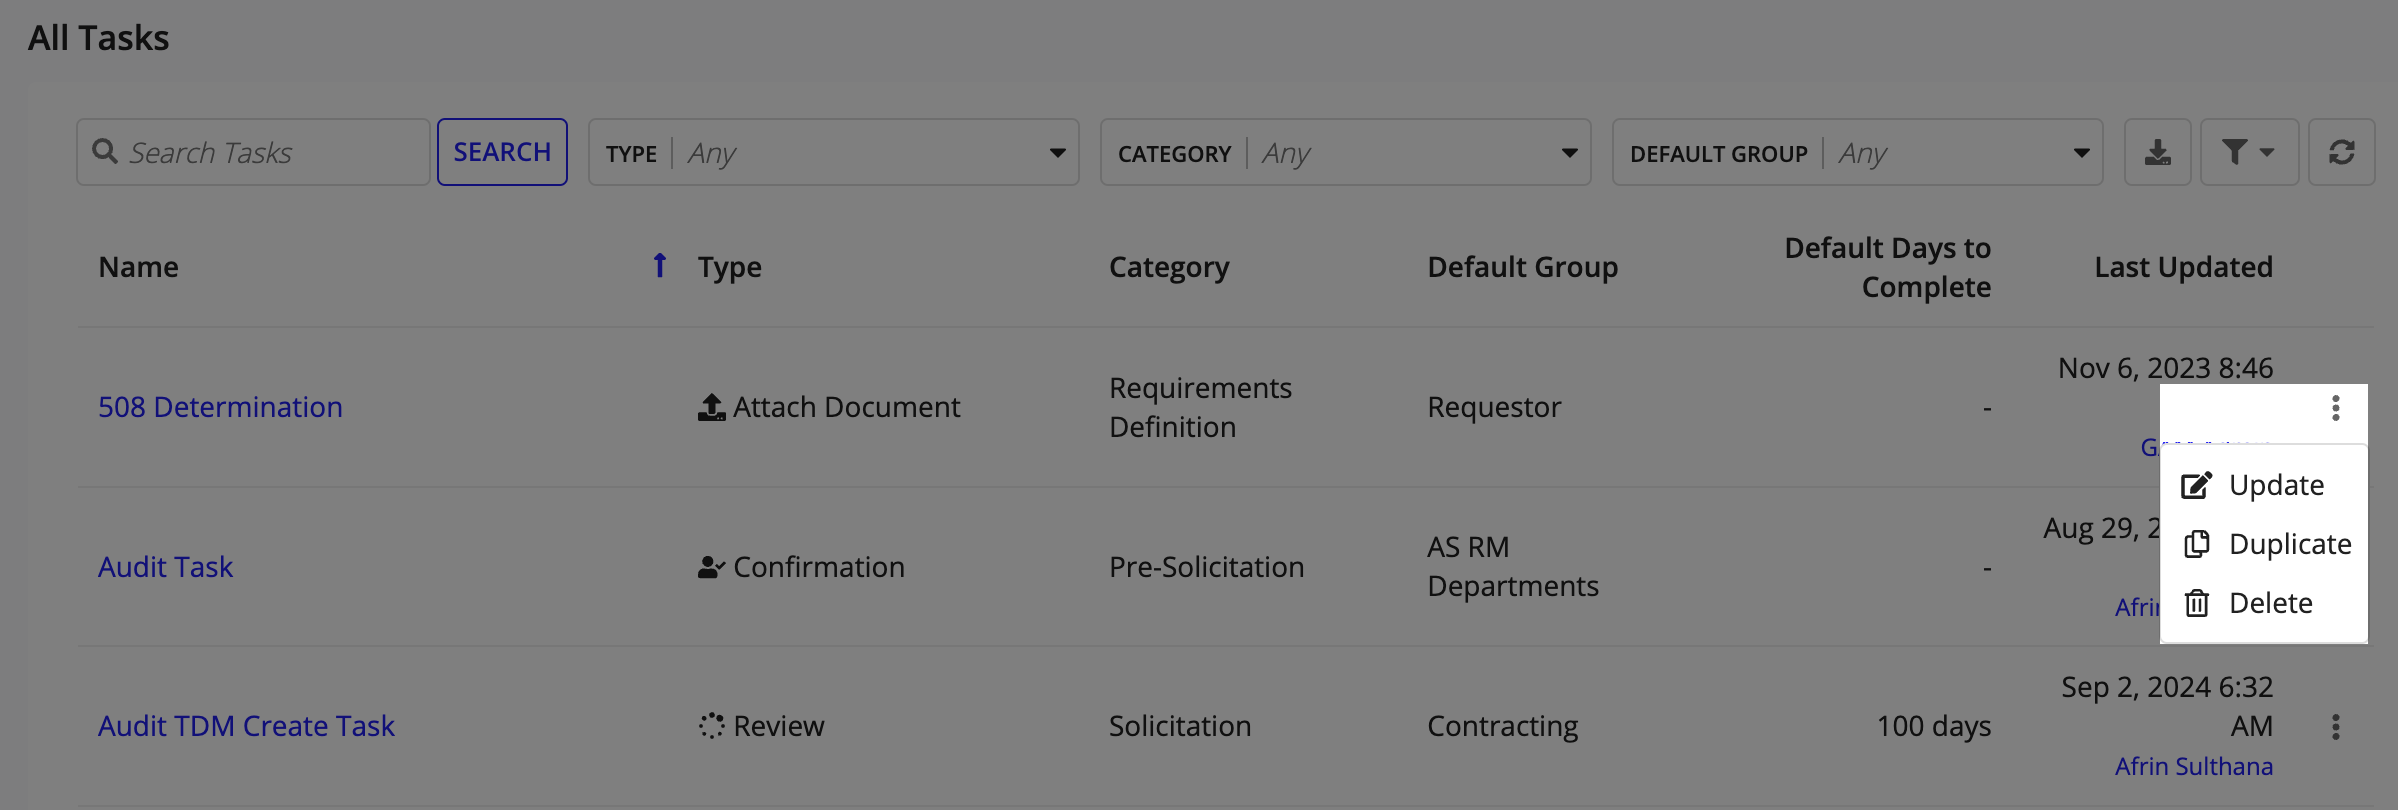
-
Click corresponding to a task and select Update to bring up the Update Task wizard.
- Update the task fields. Task Type is non-editable.
- Click UPDATE to update the task.
All requirement checklists that reference the task are updated. Requirements that are in progress are not affected.
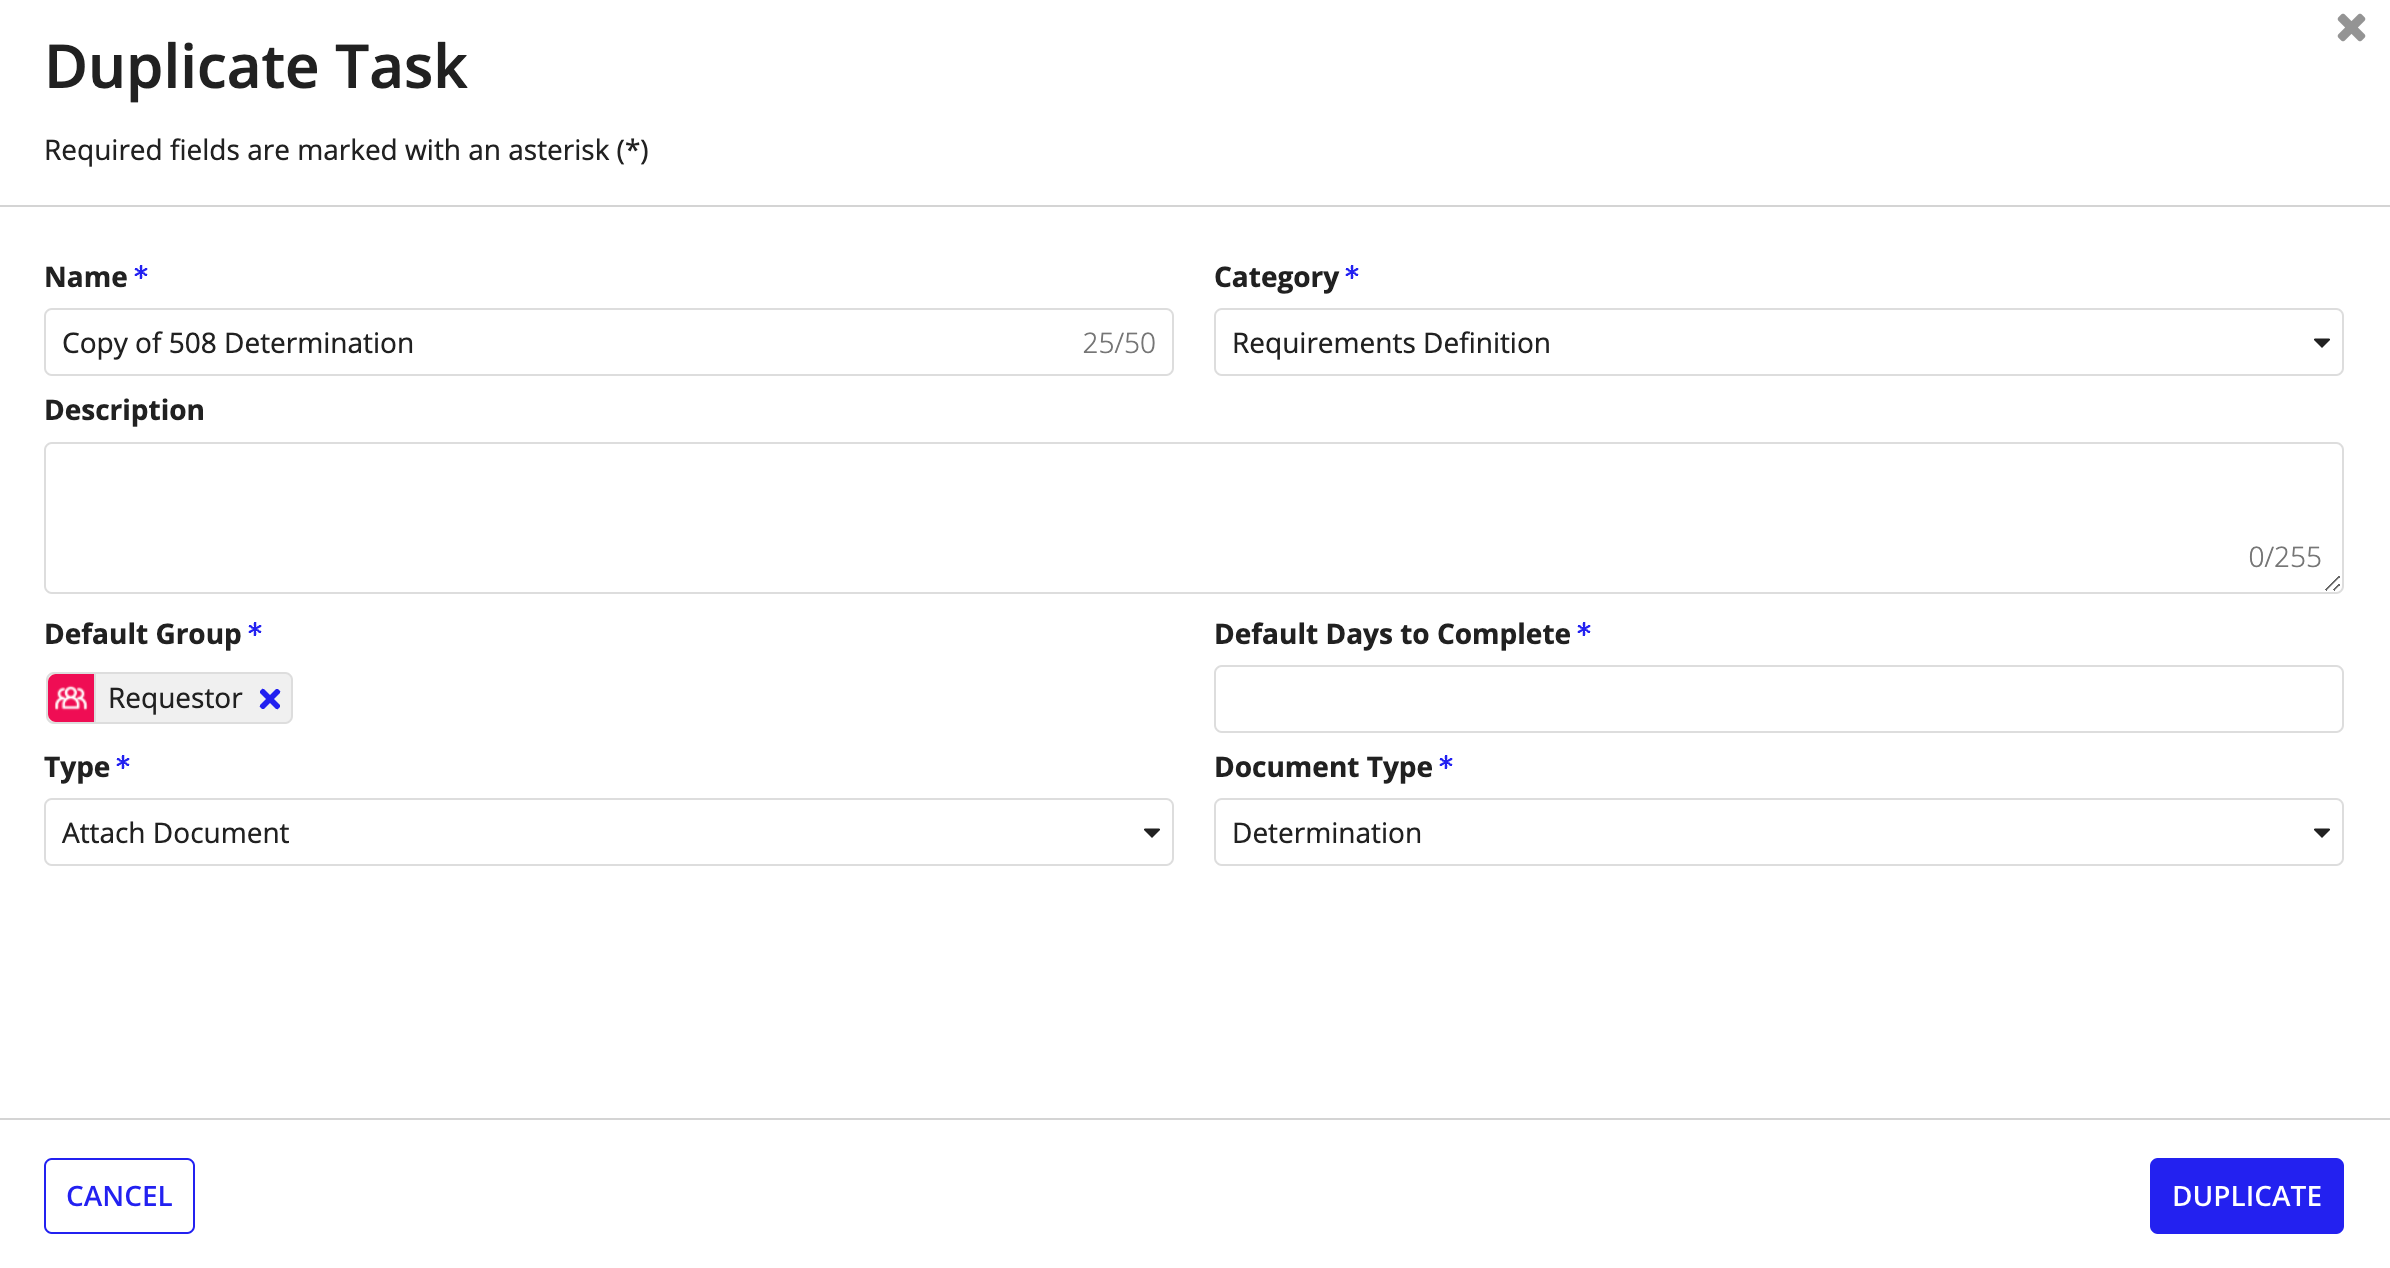
Duplicate tasksCopy link to clipboard
To duplicate a task:
- Expand Task Management and select the Tasks option to navigate to the Tasks page.
- Click corresponding to a task and select Duplicate to bring up the Duplicate Task wizard.
- Edit the task fields.
- Click DUPLICATE to duplicate the task.
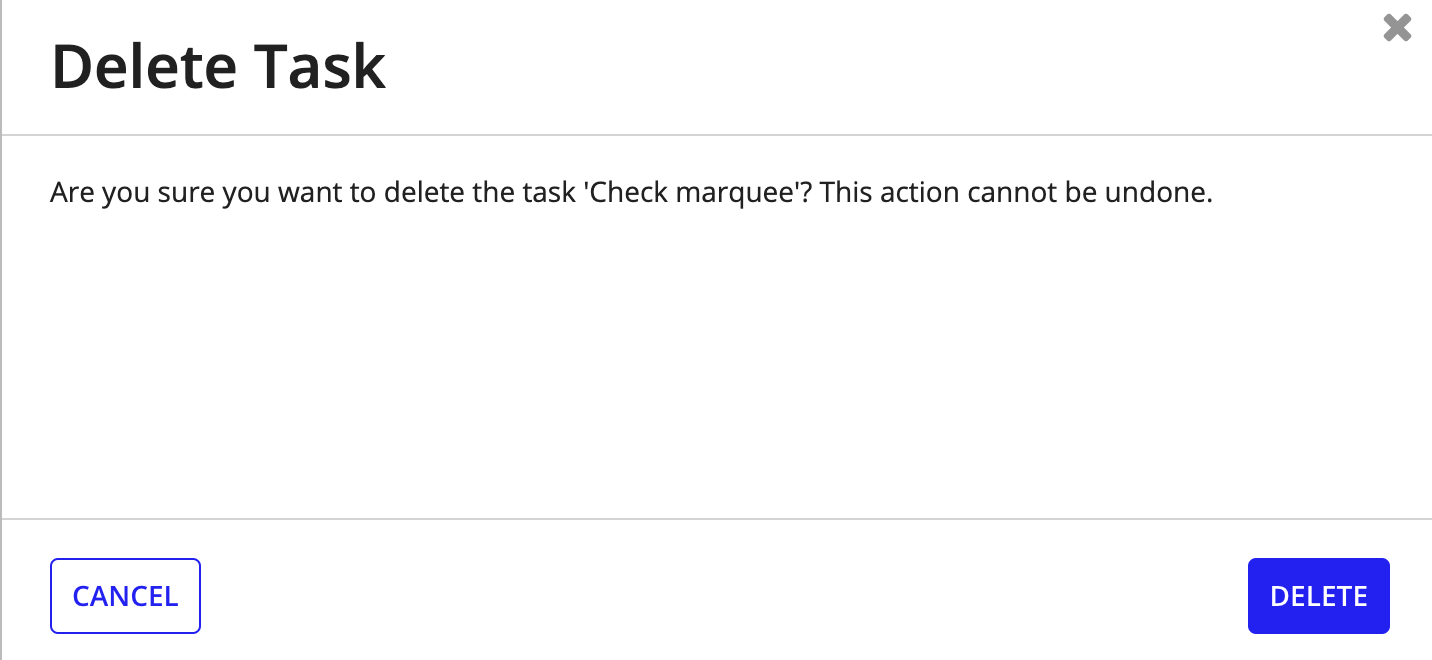
Delete tasksCopy link to clipboard
Note: To delete a task, it must be first removed from all referenced checklists.
To delete a task:
- Expand Task Management and select the Tasks option to navigate to the Tasks page.
- Click corresponding to a task and select Delete to bring up the Delete Task wizard.
- Click DELETE to delete the task.
Caution: Deleting tasks is permanent and irreversible.