
| Beginning with Appian 25.4, all new versions of Appian will require containers managed by Kubernetes to run in a self-managed environment. Review the 24.4 release notes and frequently asked questions to learn more. |
This guide walks you through installing Appian on a single machine with MySQL database for use in a local, non-production environment. While this guide uses the Windows operating system and MySQL database as examples, similar steps apply for Linux installations and other databases.
This guide does not cover the steps necessary to complete an enterprise installation. See the Windows Installation Guide or Linux Installation Guide for enterprise installation instructions.
RequirementsCopy link to clipboard
Download and install the following using the linked instructions:
| Software | Download | Instructions |
|---|---|---|
| JDK | Download not required. The Appian installation includes OpenJDK 17. | |
| MySQL | Download MySQL MSI Installer (Supported version) | Install and Setup MySQL Server |
| MySQL Workbench | Download MySQL WorkBench | Install and Setup MySQL Workbench |
Download the following before you begin your Appian installation:
| Software | Download |
|---|---|
| Appian Installer | Download the Appian Installer |
| MySQL Connector/J Driver | Download MySQL Connector/J Driver (Supported version) |
| Appian License Files | Follow Requesting and Installing a License |
Refer to the Prerequisites page and the System Requirements page for information on which version to download.
Note: Download the MySQL Connector/J Driver files as ZIP files.
Install and setup MySQL workbenchCopy link to clipboard
- Download MySQL (Windows x86, 64-bit MSI Installer). Download the Community version, not the Web Community version. The version number refers to the MySQL version, not the MySQL Workbench version.
- Run the installer and continue until the Choosing A Setup Type page.
- On the page Choosing A Setup Type, select Custom.
- Click Next >.
- Expand the folder of options and select MySQL Server and Connector/J.
- Continue through with default settings and complete installation.
- Download MySQL WorkBench (Windows x86, 64-bit MSI Installer). The version number refers to the MySQL Workbench version, not the MySQL version.
- Run the installer and complete installation.
- To set up MySQL Workbench for Appian:
- Open MySQL Workbench, create a new connection with any name, setting hostname:
localhostand port:3306. - Set a username of
rootand password ofpassword. Any values can be used, and they do not need to be unique to the local installation. - Right-click the newly created connection and select Open Connection to open the connection.
-
Create a database schema by clicking the cylindrical schema symbol on the top left of the MySQL Workbench window as shown in the screenshot below.
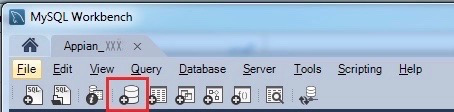
- Name this schema which will serve as the primary datasource based on the version. This will be referred to as APPIAN_SCHEMA.
- Apply the database schema and click Finish.
- Repeat the previous three steps to create another database schema to serve as the business datasource. This will be referred to as BUSINESS_SCHEMA.
- Note: The two schemas need to be unique to this Appian installation since each serves as datasources for the installation.
- Open MySQL Workbench, create a new connection with any name, setting hostname:
Refer to the System Requirements page for more information.
InstallationCopy link to clipboard
During the installation and configuration process, you will install Appian and then use the configuration script to configure it.
The following placeholders are used throughout this document to keep the installation directories easy to read. Replace XXX in the example location with the version number, such as 161 or 171 for Appian 16.1 and 17.1 respectively.
| Directory | Description | Example Location |
|---|---|---|
| APPIAN_HOME | Directory where Appian is installed | C:\appianXXX\appian |
| REPO_HOME | Directory of the configuration repository | C:\appianXXX\repo\appian |
Tip: Note: Many variables throughout this guide, including these directories, will be encapsulated with angle brackets <> such as in <VARIABLE>. Any text or variables entered during installation should not include these angle brackets.
Part One: run the Appian installerCopy link to clipboard
Appian is installed using a graphical installer. The installer automatically installs Appian in C:\appian unless you specify another directory. Do not install Appian in a directory where another version of Appian is already installed. Do not use the following characters in the name of your installation directory: & ^ = ( ) <space>
To install Appian:
- Temporarily disable any antivirus software or search indexing utilities running on the server.
- Run the installer.
- Tip: If you are using Windows 7, right-click the installer and select Run as administrator.
- Click Next in the window and again on the following window to proceed to the window which allows the user to set the Destination Folder.
- Under the section Destination Folder, click Browse, and then specify the desired location for the APPIAN_HOME directory. To create this target directory:
- click Make New Folder.
- Place the folder in
C:\and name the folderappianXXX, where XXX is the current version number of Appian to install. If you are installing a second instance of Appian, name itappianXXX_2. These directories allow you to have multiple local installations of Appian. - Create another folder named
appianand place it withinC:\appianXXX. This would result in a final target directory such asC:\appianXXX\appian\.
- Click OK to select the folder
C:\appianXXX\appian\. - Click Next on the window and again on the following window to proceed with the installation.
- Wait for the installation to complete. This may take several minutes.
- Click Finish to close the installer.
- Set JAVA_HOME and PATH Environment Variables
A Program Compatibility Assistant dialog may appear after the installer closes. This issue does not affect the Appian installation. If this happens, click This program installed correctly to dismiss the warning.
Part two: Run the configure scriptCopy link to clipboard
The configure script, configure.bat, is a command line utility that provides a menu-driven interface for executing configuration and deployment tasks. You will use the first three menu options during this part. Later, you will return to the configure script to complete the configuration and deployment.
| Menu Item | Comments |
|---|---|
| 1 - Create or select repository |
Creates the repository where your custom configurations will be stored. Important: This path must be different from the installation path. |
| 2 - Create initial backup of Appian installation | Creates a backup directory that does not include customizations. This backup can be used to restore the installation if you wish to undo custom configurations later. See Backing Up Appian for additional details. |
| 3 - Register an environment |
Allows you to create different environments with different configurations. You will only need to register one environment during this installation process. Note: Some names, such as xml and bat, are reserved and cannot be used as an environment name—see Registering an Environment for a complete list. |
To create a local configuration repository (REPO_HOME)
-
Open the command prompt, and then run the following command:
1
<APPIAN_HOME>\_admin\_scripts\configure\configure.batCopy - Choose 1 - Create or select repository.
- Tip: You just need to type the number and press Enter to specify which menu option you wish to run.
- Specify the path for the configuration repository.
- Tip: You do not need to create the directory prior to entering it in the configure script. This also applies for the initial backup below.
1
2
3
4
5
6
7
8
9
10
11
12
13
14
15
16
17
18
19
======================================================================
Configure Appian
This script assists with configuring Appian on various environments.
======================================================================
1 - Create or select repository
2 - Create initial backup of Appian installation
B - Back
Q - Quit
> 1
Enter path of repository directory
B - Back
Q - Quit
> C:\appianXXX\repo\appian
Copy
When you have finished, you will see something similar to the screenshot below (notice that more menu options are now available). The example in the screenshots uses C:\appianXXX\repo\appian as the path.
1
2
3
4
5
6
7
8
9
10
11
12
13
14
15
16
17
18
19
20
21
22
23
24
25
26
27
28
29
30
31
32
33
34
35
36
37
38
39
======================================================================
Configure Appian
This script assists with configuring Appian on various environments.
======================================================================
1 - Create or select repository
2 - Create initial backup of Appian installation
B - Back
Q - Quit
> 1
Enter path of repository directory
B - Back
Q - Quit
> C:\appianXXX\repo\appian
Repository updated to C:\appianXXX\repo\appian
======================================================================
Configure Appian
This script assists with configuring Appian on various environments.
======================================================================
Repository location: C:\appianXXX\repo\appian
1 - Change repository
2 - Create initial backup of Appian installation
3 - Register an environment
4 - Validate configurations
5 - Deploy configurations
6 - Tools
B - Back
Q - Quit
>
Copy
To create the initial backup
- With the command prompt still open, run 2 - Create initial backup of Appian installation.
- Specify the path for the local backup (for example C:\appianXXX\backup\appian.)
Note: Note: Creating the initial backup takes several minutes. Wait for this to complete before proceeding.
To register an environment
- With the command prompt still open, run 3 - Register an environment.
- Specify a name for the environment (for example, you may choose to use dev if you are creating a development environment). Leave the configure script command window open.
You will need to use the name of the registered environment when configuring MySQL in the next part. The environment is referred using the placeholder ENVIRONMENT throughout the remainder of this guide.
Tip: If any paths were incorrectly entered during this section, these values can be modified in the file: <APPIAN_HOME>\_admin\_scripts\configure\.configure.
Part three: Configure the Appian properties and MySQL filesCopy link to clipboard
Custom propertiesCopy link to clipboard
Make the following changes to the custom.properties.<ENVIRONMENT> file:
- Go to
<REPO_HOME>\conf. - Open custom.properties.<ENVIRONMENT> in a text editor.
- Tip: If your custom.properties file does not have the
.<ENVIRONMENT>extension, it may be due to your computer’s known extensions setting.
- Tip: If your custom.properties file does not have the
-
Set
conf.suite.SCHEMEto http by removing the lettersat the end and uncommenting the line by deleting the#sign:1
#conf.suite.SCHEME=https
Copywhich should now appear as
1
conf.suite.SCHEME=http
Copy- This configuration bypasses the need for a certificate to be installed. It is only supported for local installations and is not supported for production environments or any environment that is accessible over the internet. For production or internet-accessible installations, you must use https instead of http. For more information on configuring a web server to run over https, see Creating a Certificate.
-
Uncomment the following line, replacing <YOUR_VALUE> with your machine's fully qualified domain name (FQDN), which uses the pattern myhost.domain.com:
1
#conf.suite.SERVER_AND_PORT=<YOUR_VALUE>:8080Copywhich should now appear as:
1
conf.suite.SERVER_AND_PORT=<YOUR_VALUE>:8080Copy- Tip: You can find your computer's FQDN by clicking Start, right-clicking Computer, and then clicking Properties. The FQDN is listed in the Computer name, domain, and workgroup Settings section. Include any suffix such as
.company.comtag, and do not include the angle brackets<>around YOUR_VALUE. A hypothetical FQDN isMY355COMP86NAME.acme.com.
- Tip: You can find your computer's FQDN by clicking Start, right-clicking Computer, and then clicking Properties. The FQDN is listed in the Computer name, domain, and workgroup Settings section. Include any suffix such as
-
Uncomment the following lines, and set the values equal to the JNDI name,
jdbc/AppianDS, used in<REPO_HOME>\conf\tomcatResources.xml.<ENVIRONMENT>(do not use quotes around the JNDI names in this file):1
#conf.data.APPIAN_DATA_SOURCE=
Copywhich should now appear as
1
conf.data.APPIAN_DATA_SOURCE=jdbc/AppianDS
Copy- Note: JNDI names do not have to be unique across Appian local installations.
- Save the file.
Service manager passwordCopy link to clipboard
- Go to
<APPIAN_HOME>\services\bin\. - Run password script (
password.bat), using the-poption to specify a password. - Copy the resulting file from
<APPIAN_HOME>\services\conf\service_manager.confto<REPO_HOME>\services\conf\service_manager.conf.<ENVIRONMENT>. You will need to create the<REPO_HOME>\services\conf\directory if you have not previously completed this step.
MySQL filesCopy link to clipboard
Next, you will need to change the data source for your MySQL files from the default data source of MariaDB to a MySQL database.
To do this:
- Open
<REPO_HOME>\conf\tomcatResources.xml.<ENVIRONMENT>. -
In the line below, replace the JDBC URL subprotocol
mariadbwithmysqlandappian_primarywith your primary data source name, such asappianXXX_primary:1
url="jdbc:mariadb://localhost:3306/appian_primary?useOldAliasMetadataBehavior=true&useUnicode=true&characterEncoding=utf8"
CopyIf your datasource name is
appianXXX_primary, this line should now appear as:1
url="jdbc:mysql://localhost:3306/appianXXX_primary?useOldAliasMetadataBehavior=true&useUnicode=true&characterEncoding=utf8"
Copy - Update the
driverClassNameconfiguration value tocom.mysql.jdbc.Driver. - Save the file.
The final configuration should look something like this:
1
2
3
4
5
6
7
8
9
10
11
12
13
14
15
16
17
<Resource name="jdbc/AppianDS"
factory="com.appiancorp.tomcat.datasource.EncodedPasswordDataSourceFactory"
type="javax.sql.DataSource"
driverClassName="com.mysql.jdbc.Driver"
url="jdbc:mysql://localhost:3306/appianXXX_primary?useOldAliasMetadataBehavior=true&useUnicode=true&characterEncoding=utf8"
username=""
password=""
initialSize="5"
maxActive="100"
defaultTransactionIsolation="READ_COMMITTED"
maxWait="30000"
minIdle="5"
minEvictableIdleTimeMillis="90000"
timeBetweenEvictionRunsMillis="450000"
validationQuery="SELECT 1"
testOnBorrow="true"
/>
Copy
Part four: MySQL data source password setupCopy link to clipboard
We are now ready to return to the configure script to encode the MySQL data source password for use by Appian. This capability is available from the 6 - Tools menu option.
- If you have closed out of the configure script, use the following command to reopen it:
1
<APPIAN_HOME>\_admin\_scripts\configure\configure.bat
Copy - Type 6, and then press Enter.
- Type 1, and then press Enter.
- Provide the password, MYSQL_PASSWORD, for the user that will connect to the MySQL database.
- Copy the encoded password hash, referenced as MYSQL_PW_HASH, for use in the next procedure.
- Type Q to quit.
- Open
<REPO_HOME>\conf\tomcatResources.xml.<ENVIRONMENT>. - Locate the
<Resource>tag with a name ofjdbc/AppianDS - Update the
username=""line to include the username you previously configured for MySQL above,root - Update the
password=""line to include MYSQL_PW_HASH that you generated above
1
2
3
4
5
6
7
8
9
10
11
12
13
14
15
16
17
18
19
20
21
22
23
24
25
26
27
28
29
30
31
32
33
34
35
36
37
38
39
40
41
42
43
44
45
46
47
48
49
50
51
52
53
54
55
56
57
======================================================================
Configure Appian
This script assists with configuring Appian on various environments.
======================================================================
Repository location: C:\appianXXX\repo\appian
1 - Change repository
2 - Create initial backup of Appian installation
3 - Register an environment
4 - Validate configurations
5 - Deploy configurations
6 - Tools
B - Back
Q - Quit
> 6
======================================================================
Configure Appian
This script assists with configuring Appian on various environments.
======================================================================
Repository location: C:\appianXXX\repo\appian
Select a tool to execute
1 - Encode passwords for use in data source configuration
2 - Configure Tomcat clustering by specifying a node name
B - Back
Q - Quit
> 1
Enter the password to encode for use in datasource configuration
B - Back
Q - Quit
> mypassword
Encoded password: p5Ccm85AkVo1JGo3PBU7eg==
======================================================================
Configure Appian
This script assists with configuring Appian on various environments.
======================================================================
Repository location: C:\appianXXX\repo\appian
Select a tool to execute
1 - Encode passwords for use in data source configuration
2 - Configure Tomcat clustering by specifying a node name
B - Back
Q - Quit
>
Copy
Part five: Adding the MySQL driverCopy link to clipboard
Appian requires the MySQL Connector/J driver, downloaded in the Requirements section.
- In folder:
<REPO_HOME>\, create directory\tomcat\apache-tomcat\lib\. - Add the MySQL Connector/J driver, mysql-connector-java-X.X.XX-bin.jar, contained in the downloaded file mysql-connector-java.X.X.XX.zip to the
lib\folder.
Part six: Install the temporary product licenseCopy link to clipboard
Copy the temporary license files from the Requirements section.
- Place
k3.licinside the<REPO_HOME>\server\_bin\k\win64directory. - Place
k4.licinside the<REPO_HOME>\data-server\engine\bin\q\w64directory.
Caution: Warning: The license file names must exactly match "k3.lic" and "k4.lic" respectively. Any change to the file names will cause the Appian engines to not start properly.
Part seven: Deploy the configurationsCopy link to clipboard
Use the configure script to validate your environment's configuration and deploy Appian.
-
Open the command prompt, and then run the following command:
1
<APPIAN_HOME>\_admin\_scripts\configure\configure.bat
Copy - Choose 4 - Validate configurations.
- Choose 5 - Deploy configurations, select 1 - <ENVIRONMENT>, and then select 1 - Deploy configurations to Appian.
- Type Q to quit.
Note: If you need to modify configurations when troubleshooting a local installation that fails to start properly, you must rerun these 4 deployment steps.
Part eight: Start Appian and log InCopy link to clipboard
After you have completed the process above, you are ready to start Appian for the first time. Starting and stopping the system properly is very important for maintaining the highest levels of system availability. Improper shutdowns can cause system issues.
For your convenience, the instructions to start Appian are included below. See Starting and Stopping Appian for more information about stopping the system correctly.
Open the command prompt, and then run the following commands (wait for each to finish before starting the next):
<APPIAN_HOME>\services\bin\start.bat -p <password> -s all<APPIAN_HOME>\data-server\bin\start.bat<APPIAN_HOME>\search-server\bin\start.bat<APPIAN_HOME>\tomcat\apache-tomcat\bin\start-appserver.bat
Appian has started successfully when the command line displays a message similar to:
1
INFO [main] org.apache.catalina.startup.Catalina.start Server startup in 377928 ms
Copy
If any configurations are changed while troubleshooting, rerun Part Seven: Deploy the Configurations before starting Appian again.
Once started, you will be able to
- In a browser, navigate to http://<FQDN>:8080/suite/design/users.
- Tip: Include any suffix such as
.company.comtag in the FQDN name.
- Tip: Include any suffix such as
- Log in with the username
Administratorand temporary passwordadmin. - Change the system administrator's password when prompted.
- Click on the Create User button and create a new user of type System Administrator.
The default Administrator account cannot access the Admin Console, so a separate account is required to complete the following steps.
Part nine: Configure the business data sourceCopy link to clipboard
The first thing that you should do after logging into Appian for the first time is configure it to connect to a business data source.
To set up the Business Data Source:
- Log in as the newly created user.
- Navigate to http://<FQDN>:8080/suite/admin.
- Using the left side options, Go to the Data Sources page of the Admin Console.
- click on the New Data Source link.
- In the Name field, enter any name for the business data source JNDI name, starting with
"jdbc/".
- Note: the JNDI name does not need to be unique across Appian local installations.
- In the field Type, select MySQL.
- Enter in the MySQL Workbench username
rootand the passwordpassword(not the hash). -
Enter the following connection string:
1
jdbc:mysql://localhost:3306/<BUSINESS_SCHEMA>?useOldAliasMetadataBehavior=true
Copy
where BUSINESS_SCHEMA is the one noted in the Requirements section, such
appianXXX_businesswhere XXX is the Appian version number. Do not include quotations around the connection string and do not include the angle brackets<>around BUSINESS_SCHEMA. - Click Test Connection. If the connection fails, verify the settings above and whether they match the information entered in the Requirements section.
- Click Save.