| This content applies solely to Requirements Management, which must be purchased separately from the Appian base platform. This content was written for Appian 21.4 and may not reflect the interfaces or functionality of other Appian versions. |
Requirement Management is the process of creating, reviewing, and executing a requirement package for goods and services needed to conduct business. The Appian Requirement Management (RM) solution provides a guided experience for collecting and maintaining requirement information about the goods and services needed to be purchased and delivered. Enabled by Appian's powerful records, after a requirement is created, end users can view and update this information from simple, informative record interfaces.
Creating a new requirement consists of the following main steps, which you will be guided through on this page:
Starting a new requirement will start the data collection process. To start a new requirement, you must be a member of the AS RM Create or Update Requirement PM Access security group. By default, the Requestor, Requestor Manager, and Contracting groups belong to this security group.
To start a new requirement, click + ADD REQUIREMENT from the HOME or REQUIREMENTS page.
The Create a New Requirement workflow opens and walks you through the various data collection steps required to create a new requirement. You can click NEXT at the bottom of the form to go to the next step.
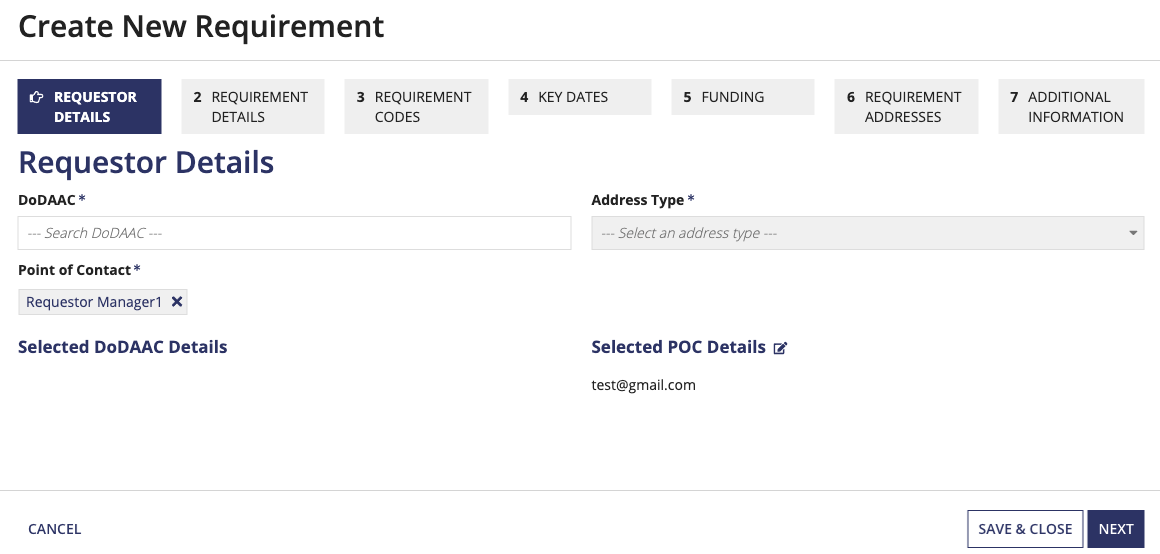
The workflow for creating a new requirement starts by asking you to specify details for the requestor responsible for completing the package, such as their name, activity address code (AAC) or Department of Defense activity address code (DoDAAC), and contact information.
The details associated with the user who is creating the requirement will auto-populate in the form. You can either click NEXT if these are the correct details, or you can select another AAC or DoDACC, or another user from the Requestor group.
To allow the requestor details to auto-populate, make sure users in the Requestor group update their record with their organization name by accessing it from PEOPLE > Contacts.

The Requirement Details page is where you specify information relevant to the requirement, such as the name, description, category, and priority value.
Facilities, IT Hardware, IT Services, IT Software, Telecom, and Other. See Modifying Dropdowns for information on how to update these values.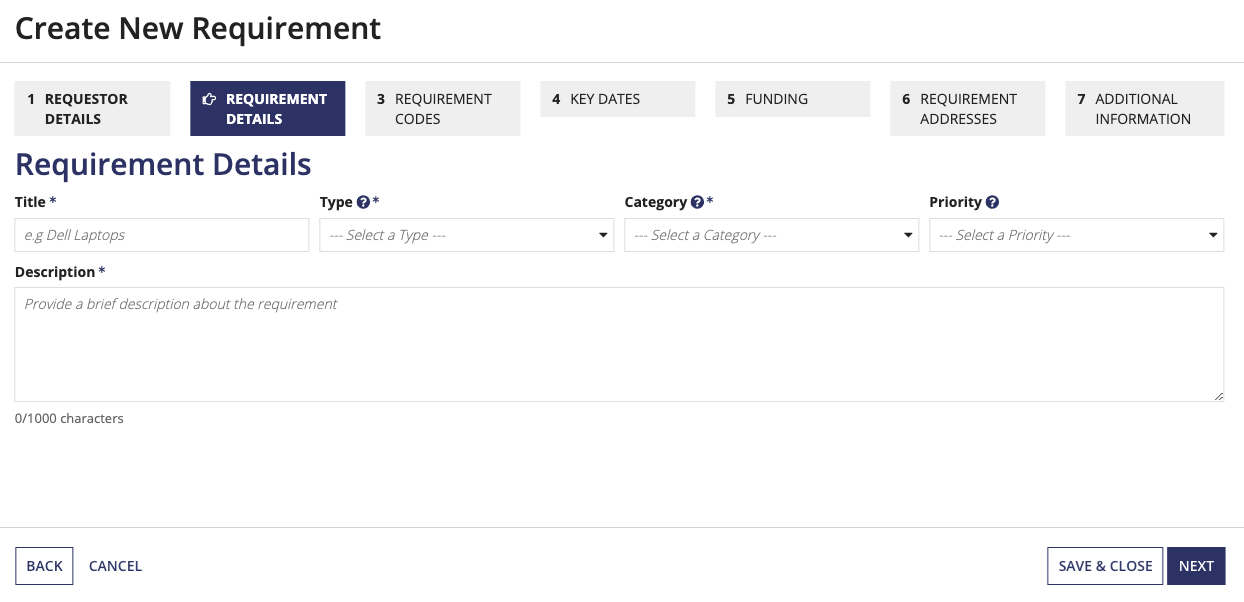
During the new requirement creation process, you can type a few keywords into the PSC search bar and click SEARCH and the solution will pull up a list of relevant PSC values.
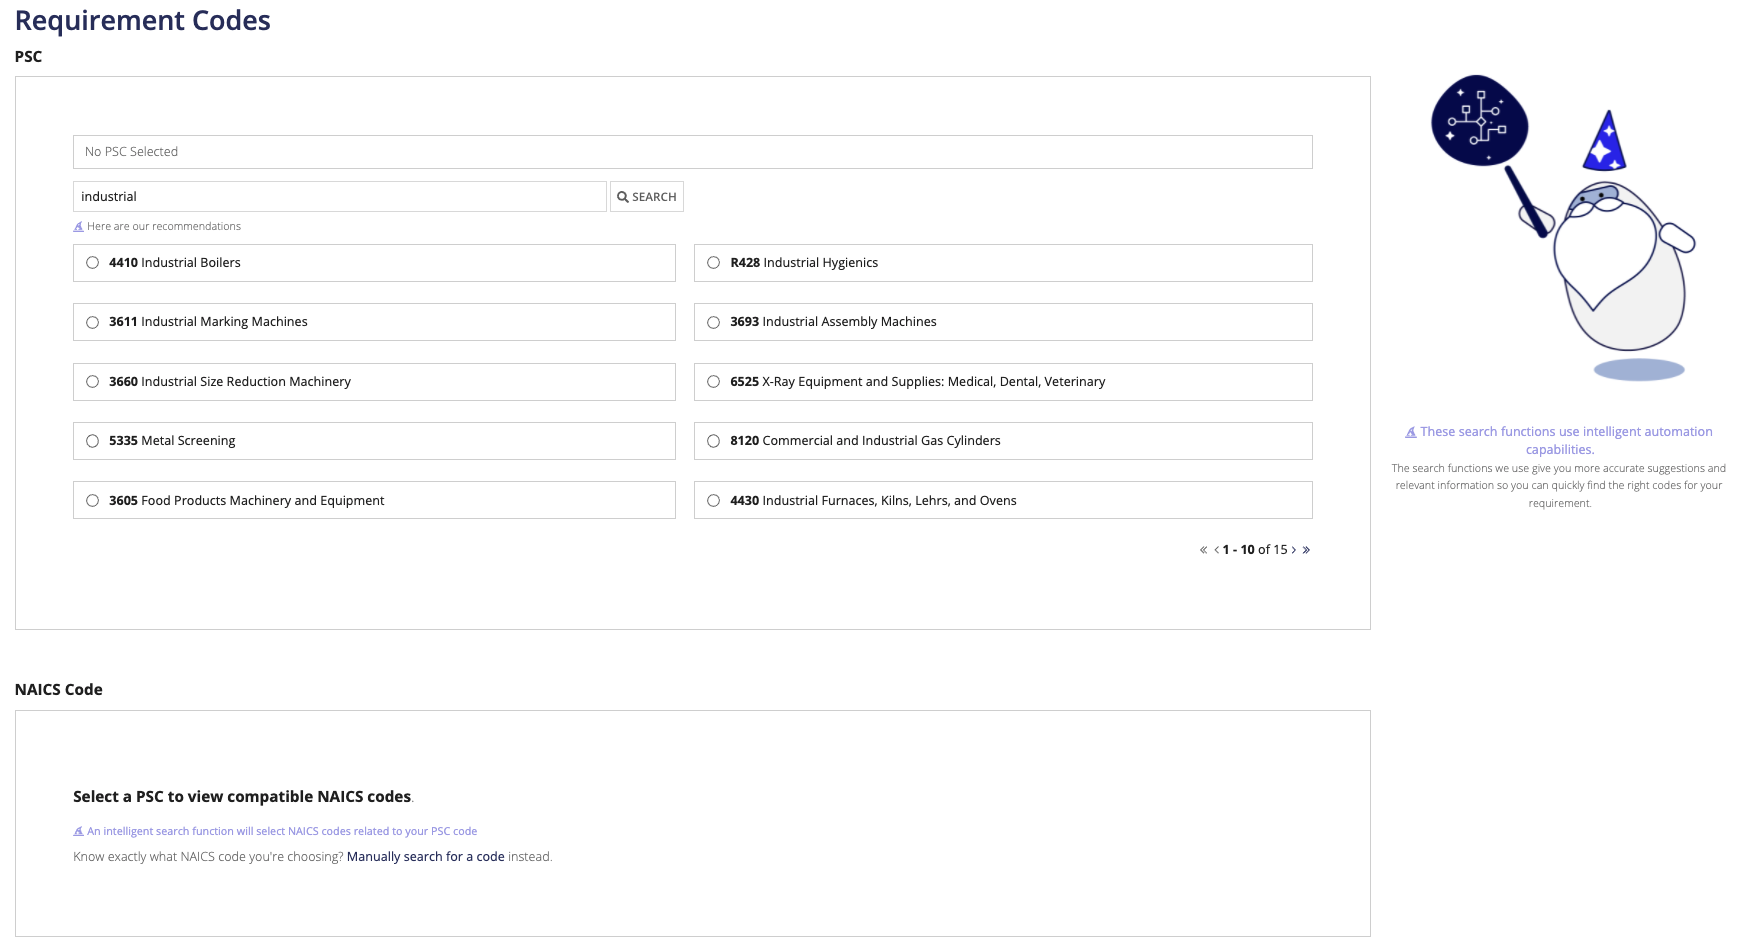
Alternatively, if you know exactly which PSC code you want to enter, you can type it directly into the search bar and click SEARCH to pull it up.
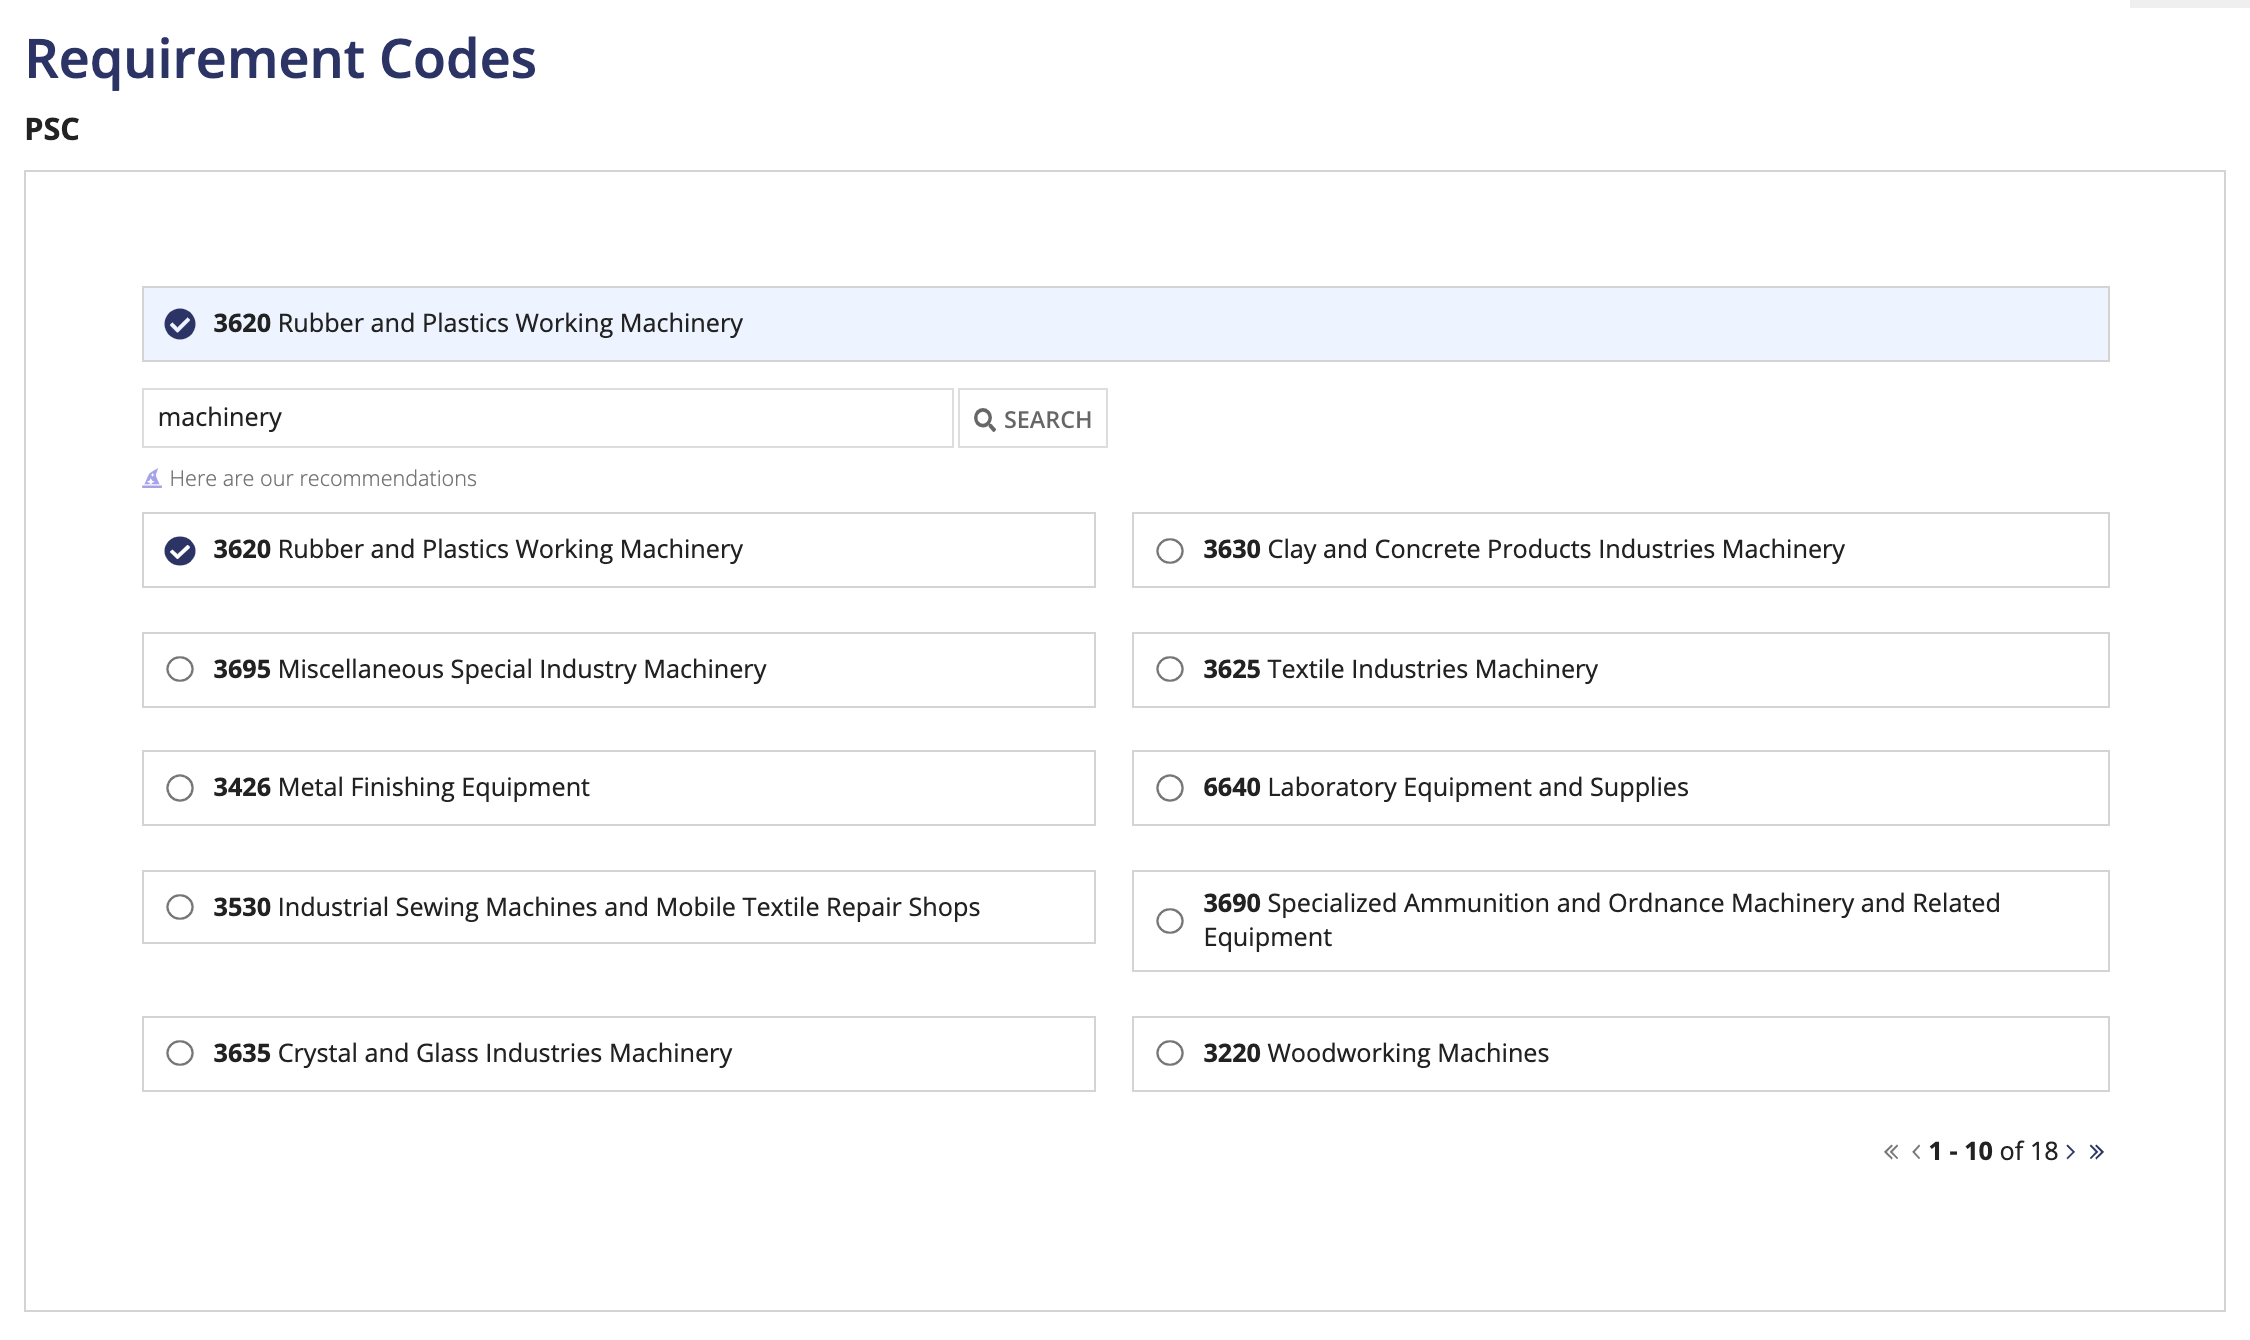
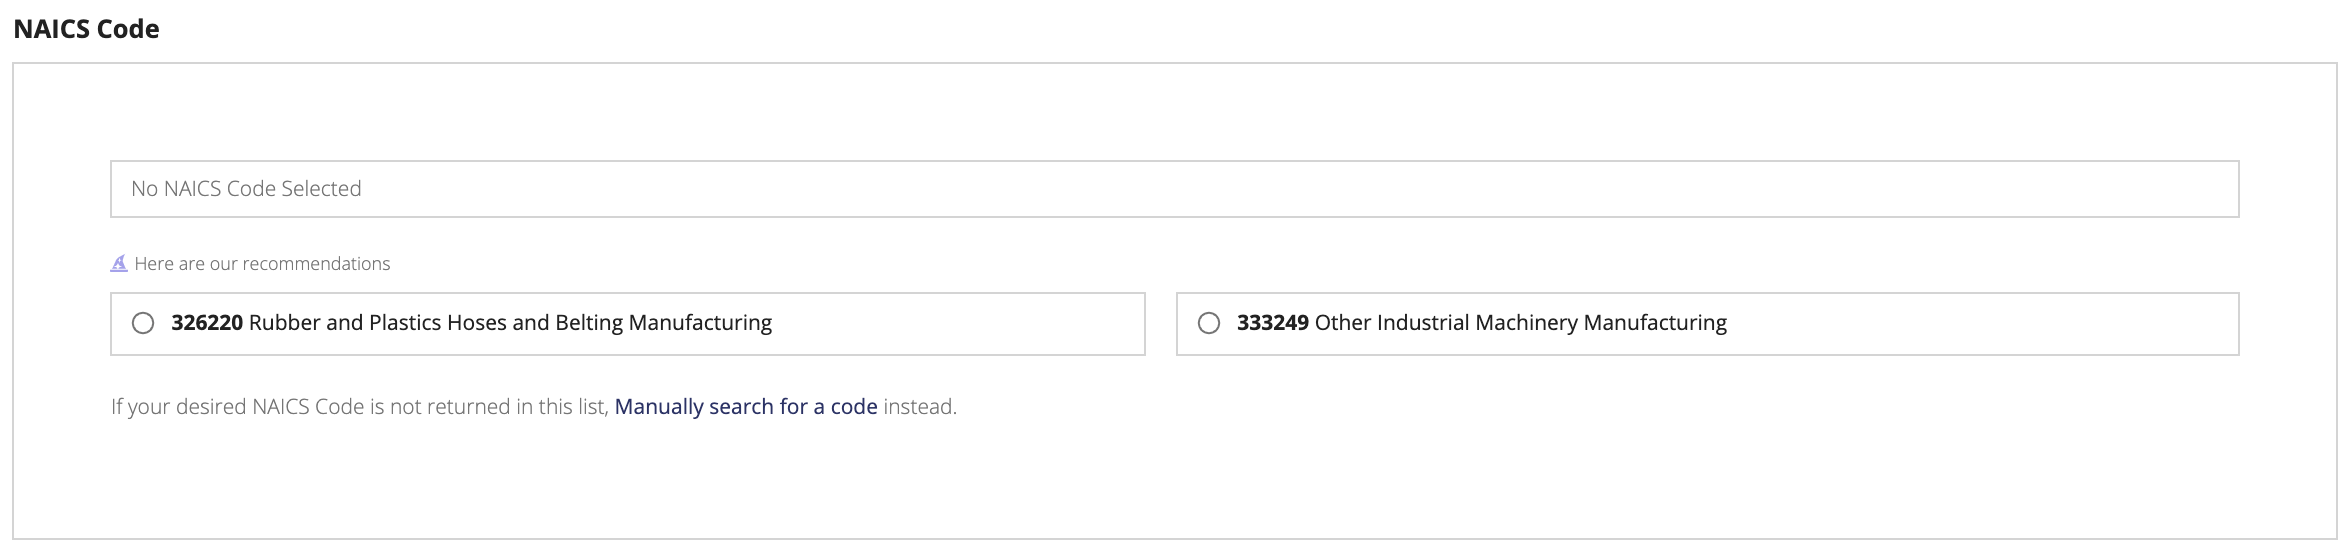
Based on the PSC code you select, your RM solution will also automatically display a list of relevant NAICS codes to save you time and effort. However, you can manually override these NAICS code recommendations by clicking Manually search for a code.
Similar to the PSC code search, the NAICS code search provides intelligent text searching capabilities. Additionally, you can search for a NAICS code using the exact code value.
View Configuring Intelligent Requirement Codes for configuration and other details regarding requirement codes.
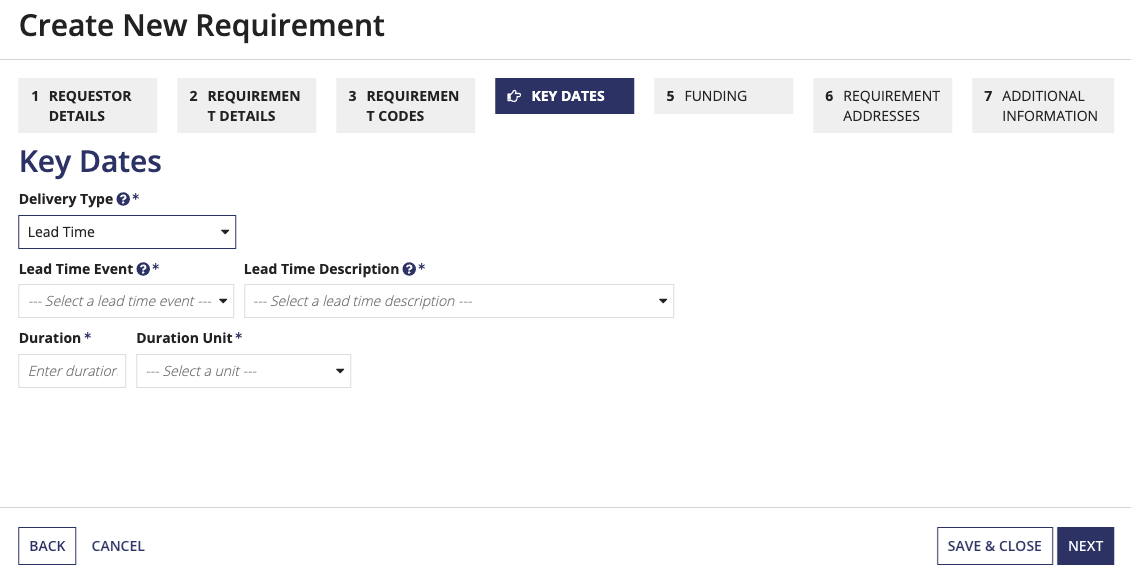
The Key Dates page is where you specify delivery dates for the requirement. The dates you select are based on the requirement's category.
For goods and other non-service items, organizations need to define the expected delivery definition. You can select one of two options: Date or Dates or Lead Time. Choose Date or Dates to schedule a delivery for a specific date. Choose Lead Time to indicate a time frame after a specific event in which you will need the goods. For example, after the award date, you need the item within two months.
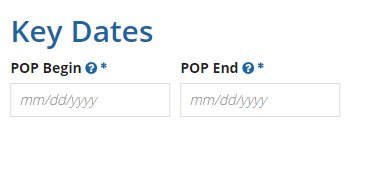
For service categories, organizations need to define the period of performance (POP) needed for the services they are buying. For example, consulting services are needed from a specific company for one year.
To add key dates for categories related to goods and other non-services items:

To add key dates for categories related to services:
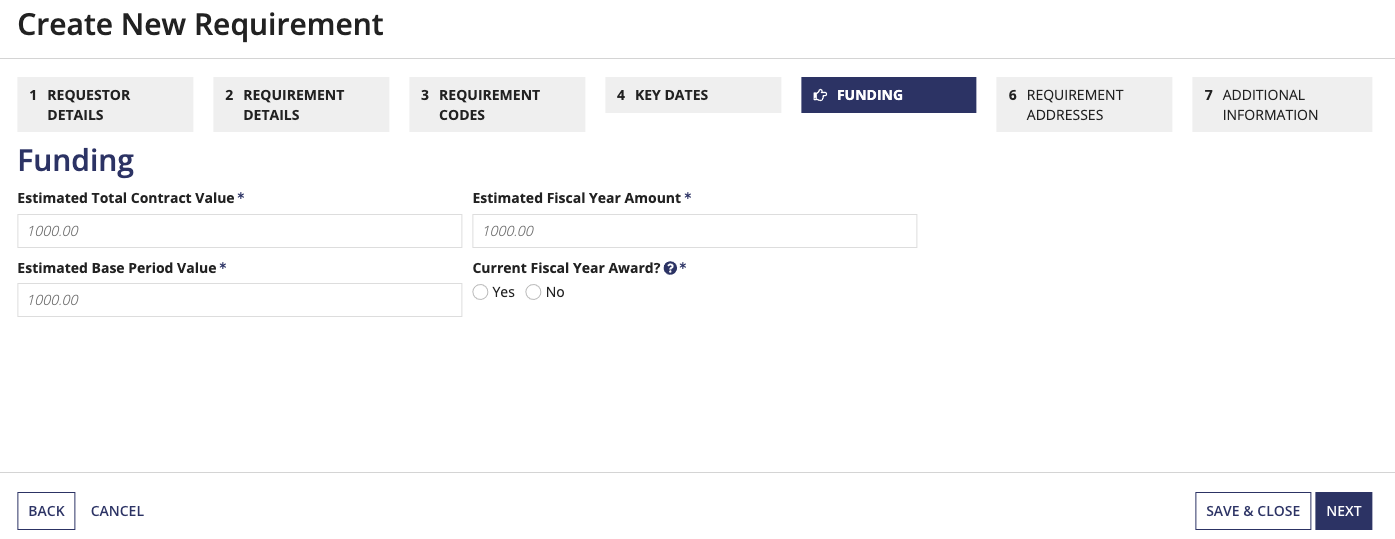
The Funding page allows you to specify funding details for your requirement.
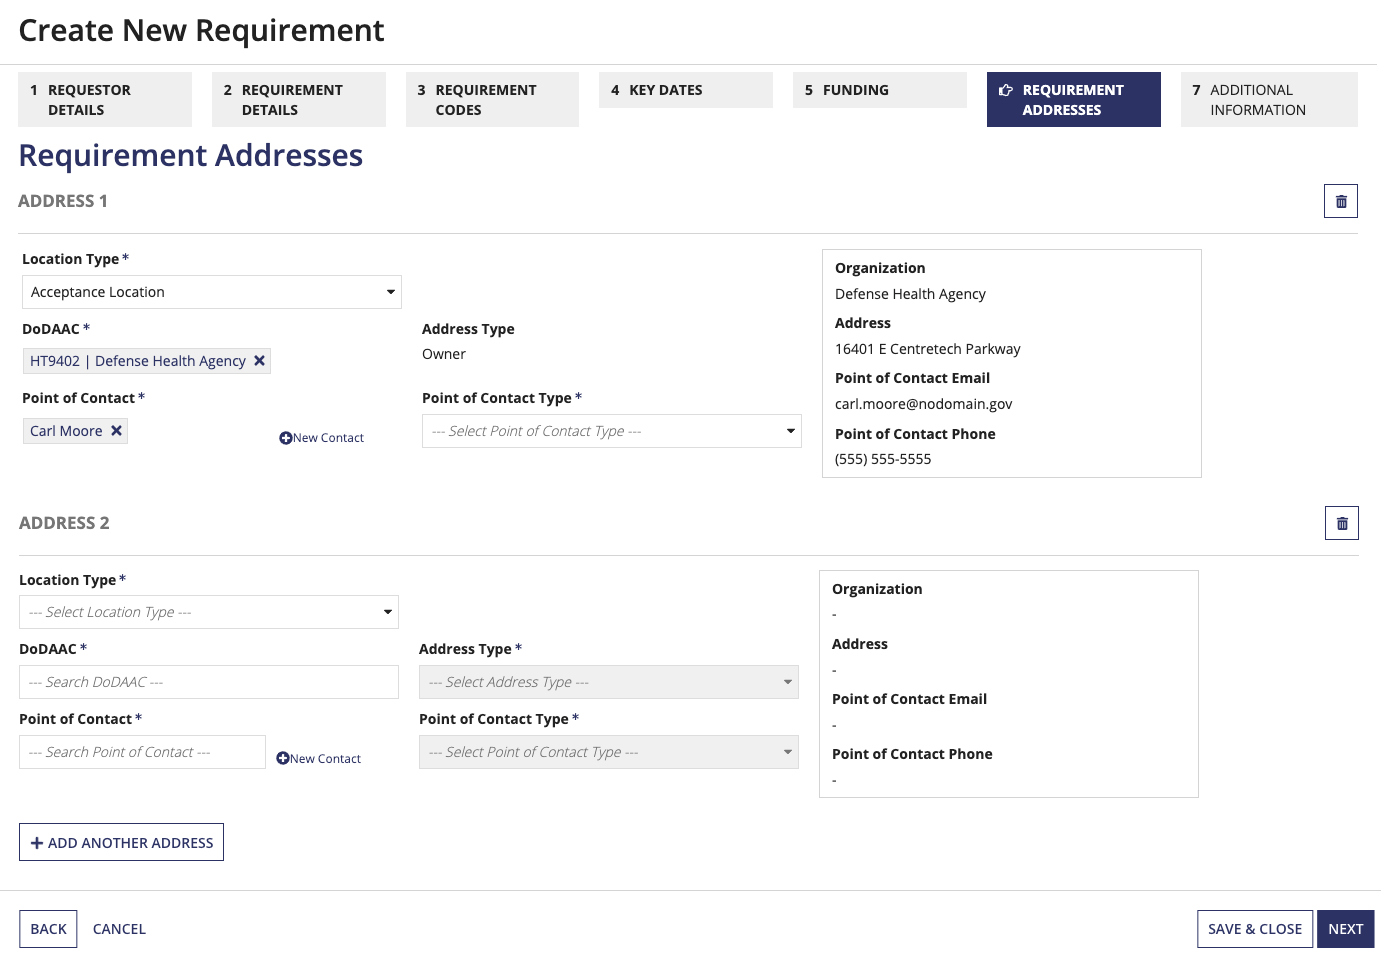
The Address Details page allows you to add addresses associated with your requirement.
Search for a Point of Contact for the address. If you can't find your point of contact, click + New Contact next to the Point of Contact search box to create a new contact. The newly created contact will appear in the search box after it is added.
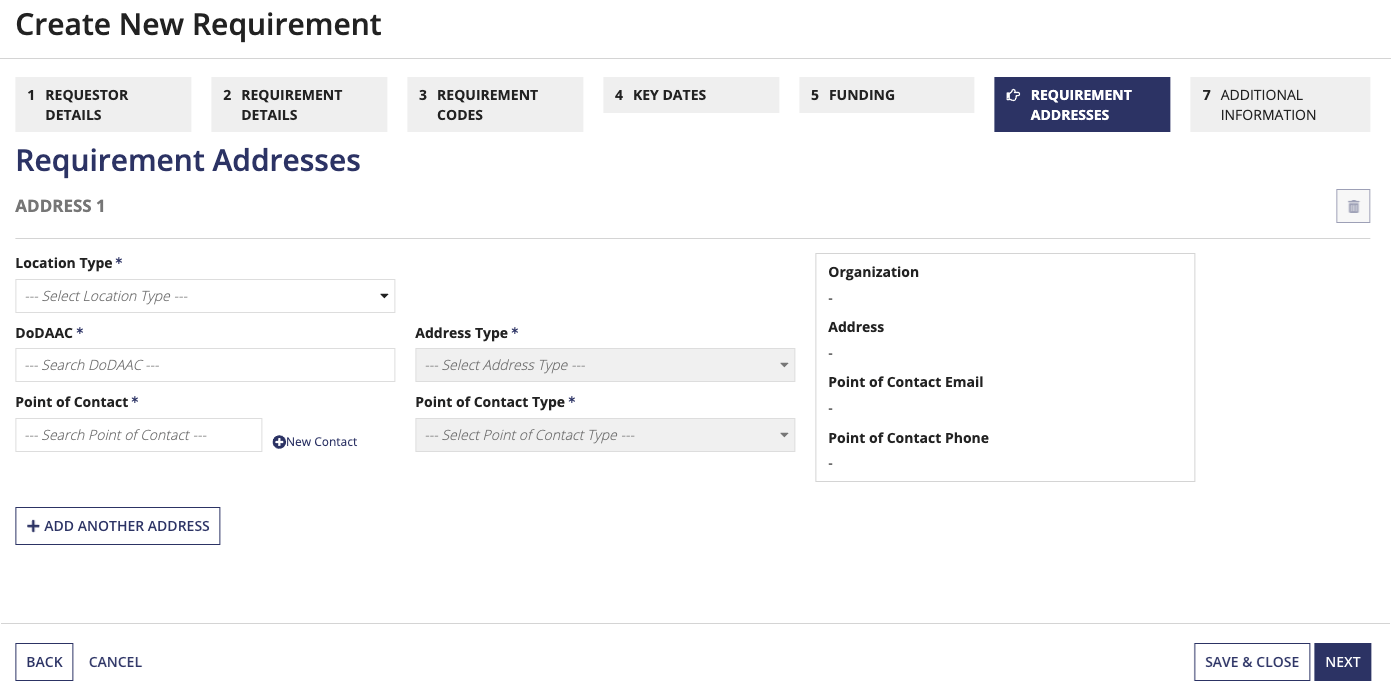
Click + ADD ANOTHER ADDRESS to continue adding addresses to the requirement. A new address section will appear under the first one.
In order to create the requirement:
Once you have created the requirement, a confirmation will display showing the requirement number.
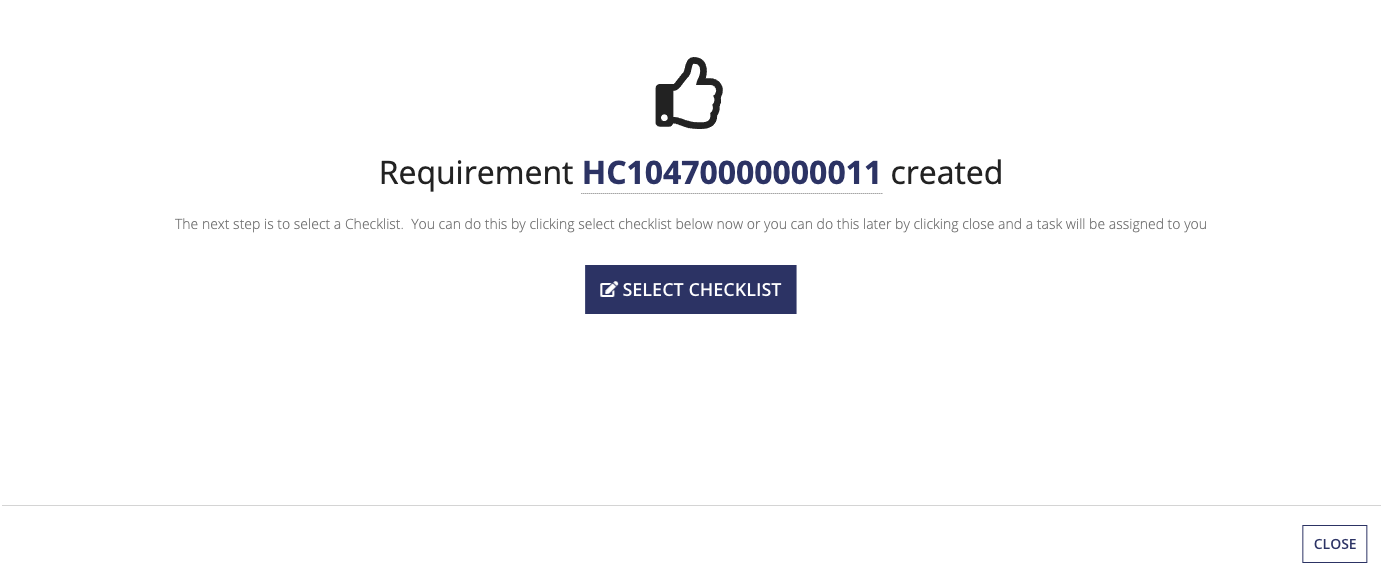
From here, you can immediately begin to select one or more checklists for the requirement. You can also close out and complete the select checklist process at a later time.
Creating a New Requirement
