Free cookie consent management tool by TermsFeed Configuring Checklist Items [Requirements Management v21.4.1.5]
Page not found in the selected version; redirected to the home page.
Configuring Checklist Items
This content applies solely to Requirements Management, which must be purchased separately from the Appian base platform. This content was written for Appian 21.4 and may not reflect the interfaces or functionality of other Appian versions.

Introduction

After you access the Requirement Management Settings site, you can view the Checklist Item page. Checklist items are the individual tasks within a checklist. To add items to a requirement checklist, you must create a library of checklist items.

We have provided some checklist items out-of-the-box that are completely configurable to meet the needs of your organization's requirement process.

The out-of-the-box checklist items are:

  • 508 Determination
  • Complete Capabilities Document
  • Complete Line Items
  • Coordinate Acquisition Strategy Meeting
  • Coordinate Procurement Planning Conference
  • Data Requirements List
  • Define Capabilities
  • Determine Enhance, Build, or Buy
  • Develop Acquisition Strategy
  • Division Approval
  • Draft Requirements Document
  • Hold initial coordination meeting
  • Initial coordination with competition advocate
  • Initial coordination with small business
  • Legal Review
  • Provide IGCE
  • Review latest updates to requirements documents
  • Security Classification
  • Submit Evaluation Criteria

This page describes how to configure items needed to create your organization's checklists.

Checklist item types

Checklist items can be one of four types:

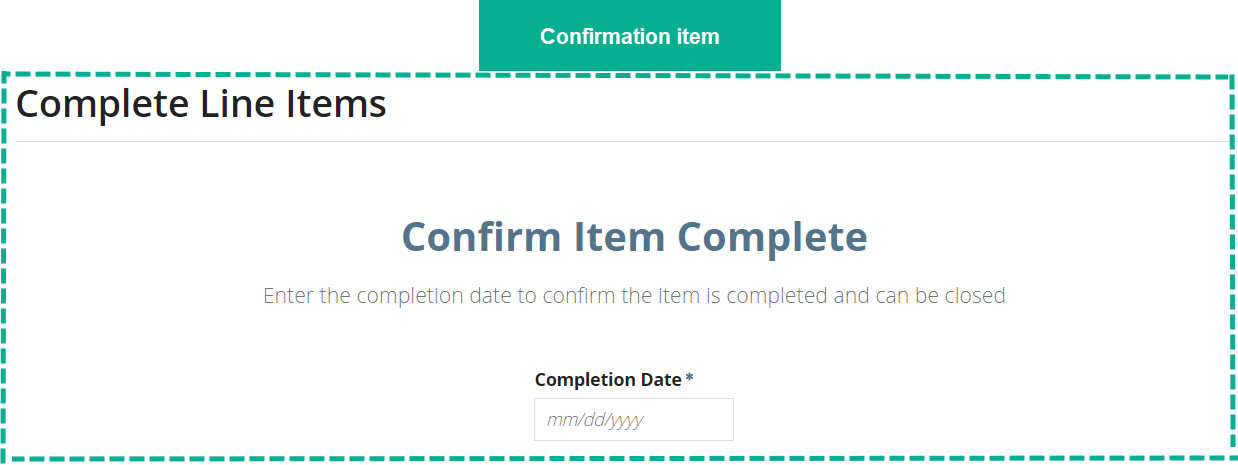
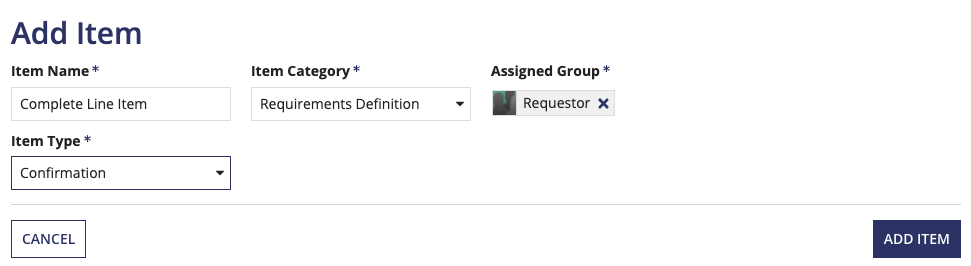
  • Confirmation: This type of item requires a user to enter a date to confirm the checklist item has been completed. RM_Confirmation_Item_final.png

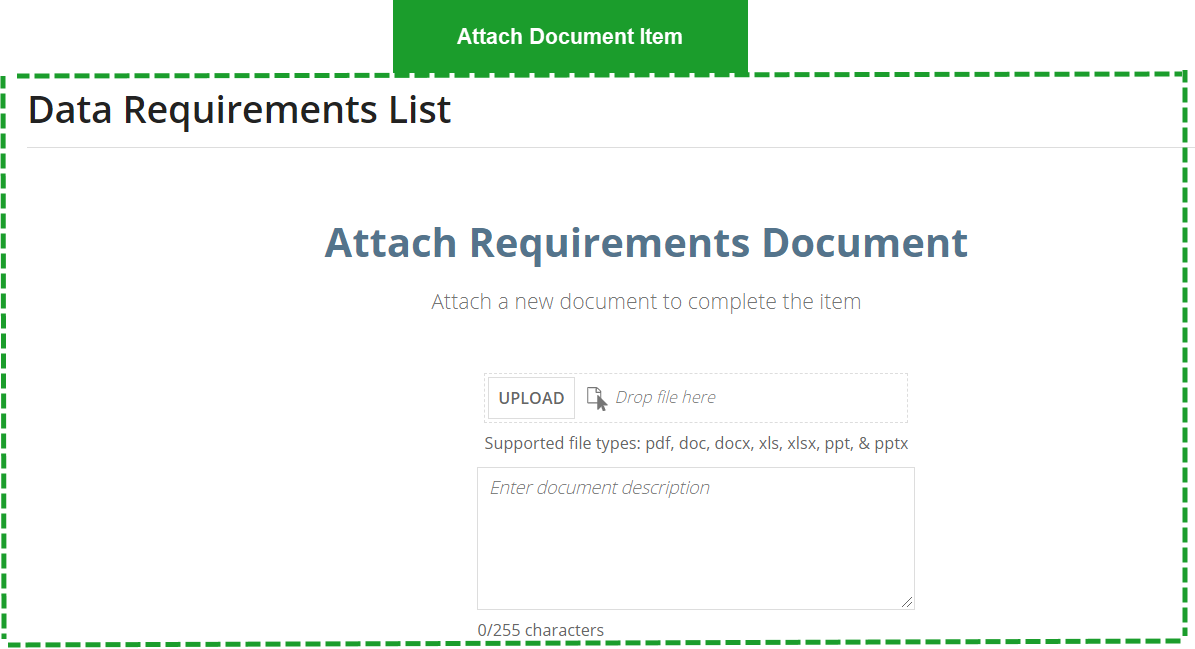
  • Attach Document: This type of item requires a user to upload a specific document.

    RM_Attach_Document_item_v1.png

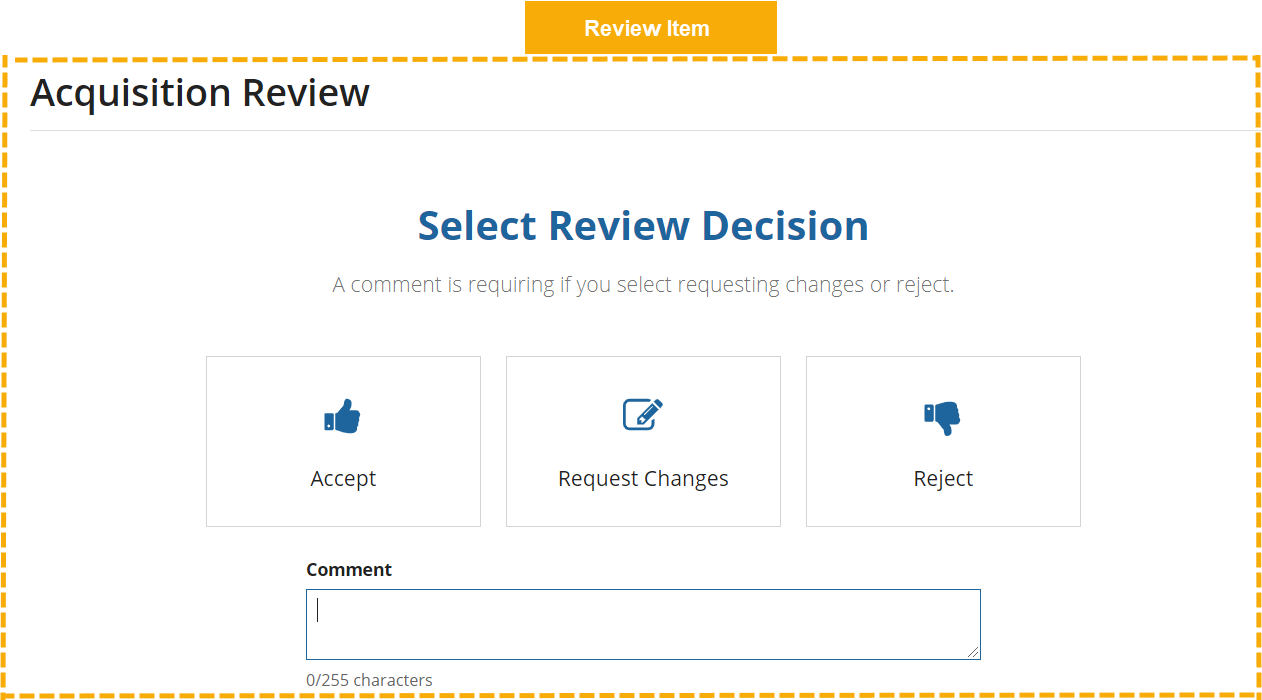
  • Review: This type of item requires a user to approve, reject, or request changes on a checklist item.

    RM_Review_Item.png

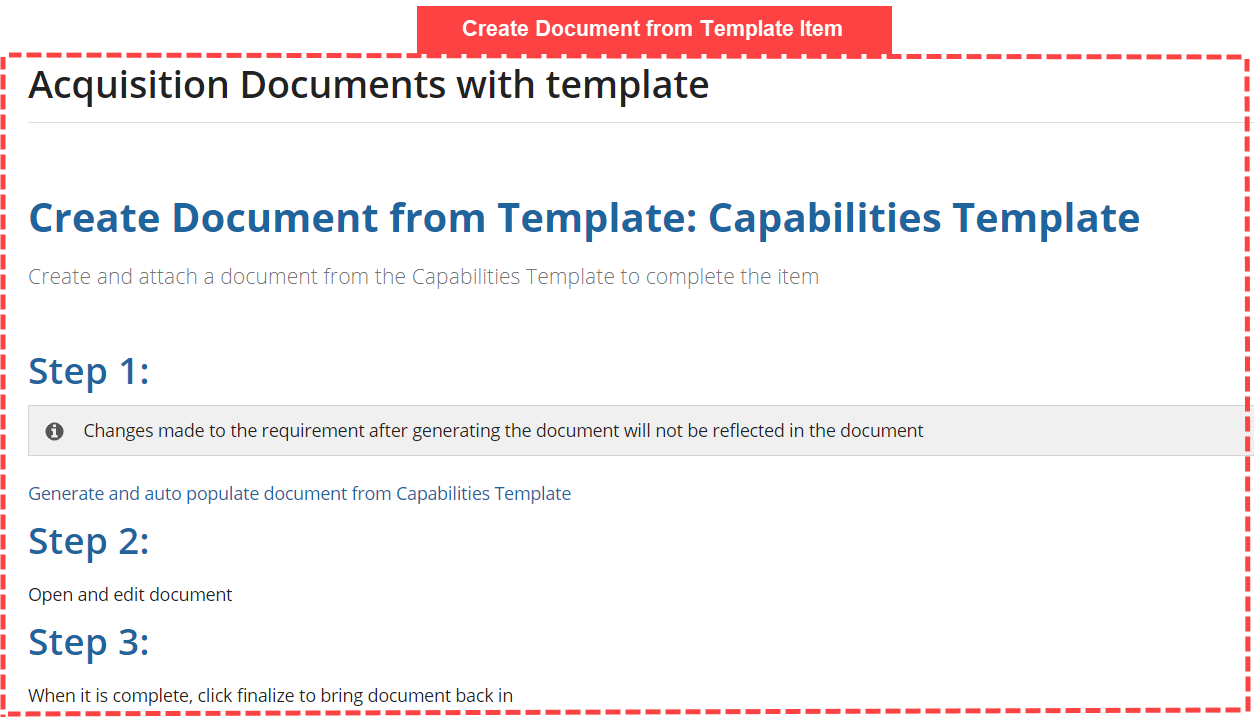
  • Create Document from Template: This type of item requires a user to create a specific document from the provided document template.

    RM_Create_Document_item.png

  • Address Review Comments: This is an automated task that asks users to confirm they have addressed comments from review.

Viewing Checklist Items

You can view the Checklist Items page in one of two ways:

  • From the Welcome page, click CHECKLIST ITEMS.
  • From the left navigation menu, click Checklist Items.

To filter the lists of items, select a category from the dropdown list or enter a search term in the Search Items field.

RM_Search_Items.png

See the Managing checklist items section for more details on changing or adding items.

When you're assigned a new checklist item, you'll receive an email notification in response to the event. You'll also receive an email notification when a checklist item is due, overdue, reassigned to another user, or when the checklist item due date changes.

Managing checklist items

In addition to the out-of-the-box checklist items, you have the ability to create and add new items or import multiple items from an Excel spreadsheet.

Add an individual task

If you only need to add a few items, you can add them one at a time.

To add an individual item:

  1. From the Checklist Items page, click ADD ITEM.
  2. Enter an Item Name.
  3. Select an Item Category.
  4. Use the Assigned Group picker to select the group that should be responsible for the checklist item.
  5. Select the Item Type.
  6. If the Item Type is Attach Document, select a Document Type.
  7. If the Item Type is Create Document from Template, select a Document Type and a Document Template.
  8. Click ADD ITEM.

    RM_Add_Item.png

The new checklist item will be available in all new Requirement Select checklist Setup items and new and existing requirement checklists.

Add multiple items by importing from Excel

If you want to add many items at once, you can import items from an Excel spreadsheet.

To add multiple items:

  1. From the Checklist Items page, click IMPORT ITEMS.
  2. Download the Sample Import Excel File.
  3. Add items to the spreadsheet by filling out the following fields:
    • Item Name: The display name for the item. There is a 50-character limit. Item names must be unique, or the item won't be imported.
    • Item Category: The category that the item should be grouped with. The valid values are any category listed on the Category page.
    • Assigned Group: The group that will automatically be assigned the task. The valid values are all business groups that are in the RM application. For example, Requestor or Requestor Manager. See the Groups Reference Page for a list of the out-of-the-box groups.
    • Item Type: The type of item. Out-of-the-box, the valid values are Confirmation, Attach Document, Review, and Create Document from Template.
    • Document Type: Only required if Item Type is Document Upload or Create Document from Template. If the Item Type is something else and a value is entered in this field, it will be ignored. Out of the box, the valid values are Requirement Document, Memo, Justification Document, Determination, Waiver, Research, Checklist, Evaluation, Briefing, Notification, Appointment, and Other.
    • Document Template: Only required if Item Type is Create Document from Template. If the Item Type is something else and a value is entered in this field, it will be ignored. Out-of-the-box, the valid value is Capabilities Template.
  4. Click UPLOAD and select the AS TMG Sample Task Import.xlxs file that you just modified.
  5. A list of the columns from the spreadsheet displays. Map the columns from the Excel sheet to the item fields. If you used the template without modifying the column headers, these should all match up automatically. Click NEXT.

    RM_mapping_v1.png

  6. The items fields that you entered display. Verify all of the fields are correct and there are no validation errors.
  7. To create a new checklist with the items you just imported, click ADD ITEMS TO CHECKLISTS.
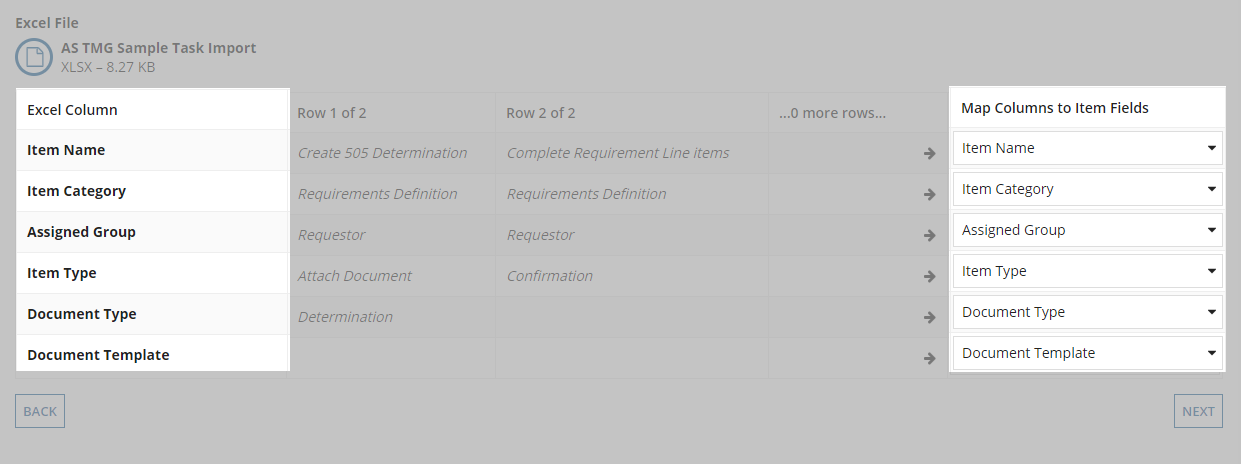
  8. To add the items to the library of items, click ADD ITEMS.

    RM_Add_Imported_to_checklist.png

Edit items

To edit an item:

  1. From the Items page, click the name of the checklist item you want to modify.
  2. Modify the Item Name, Item Category, Assigned Group, Item Type, and/or Document Type, or Document Template
  3. Click SAVE CHANGES.

RM_Edit_Item.png

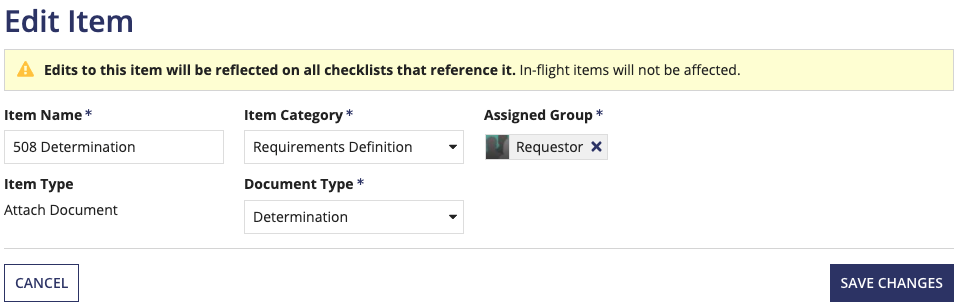
All requirement checklists that reference the item will be updated. Requirements that are in progress will not be affected.

Configuring Checklist Items

FEEDBACK