| This content applies solely to Requirements Management, which must be purchased separately from the Appian base platform. This content was written for Appian 21.4 and may not reflect the interfaces or functionality of other Appian versions. |
Purchasing goods over a certain amount would require a different set of checklist items than purchasing goods under that amount. This is where requirement checklists come into play. A requirement checklist is all the checklist items that need to be done to create a requirement package or process a requirement package for contracting personnel.
Through the Requirement Management Settings site, business users can view, add, and edit the requirement checklists that assign default checklist items for a type of requirement.
This page describes how to use the Requirement Management Settings site to configure requirement checklists.
On the Requirement Management Settings site, a grid lists all of the information that is pertinent to requirement checklists. Users can use this information to determine which checklists already exist and when they were last updated.
After you access the Requirement Management Settings site, you can view the Checklist page in one of two ways:
Clicking either of these options will allow you to see a complete list of all of your organization’s checklists. You can search this list for a particular checklist. Clicking
the history icon ![]() will take you to the Checklist History for that checklist with a list of all the changes that have been made to it.
will take you to the Checklist History for that checklist with a list of all the changes that have been made to it.
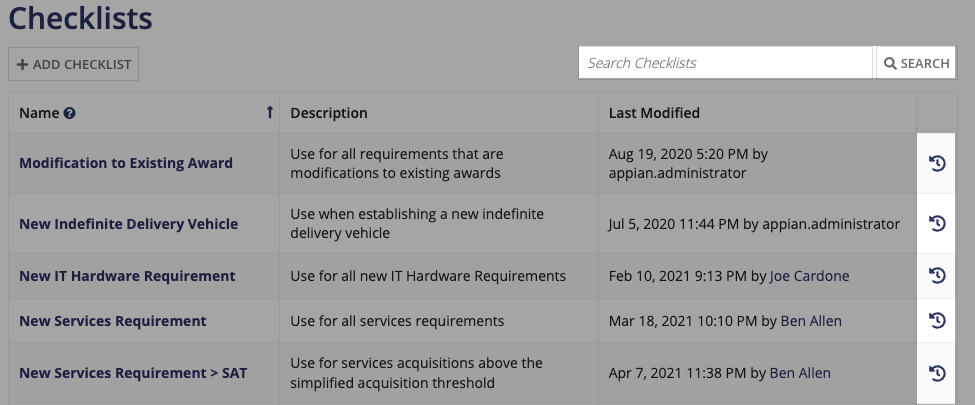
Clicking a checklist name displays the checklist items for that checklist and allows you to edit them.
See the Creating a new checklist section for more details on adding checklists.
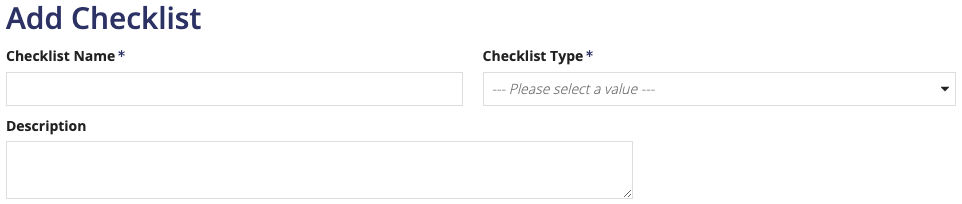
To create a new requirement checklist:
Select the Checklist Type for the checklist. Out-of-the-box, the checklist types are Requestor or Contracting. See Modifying Dropdown Lists for instructions on how to modify these values.
 .
.
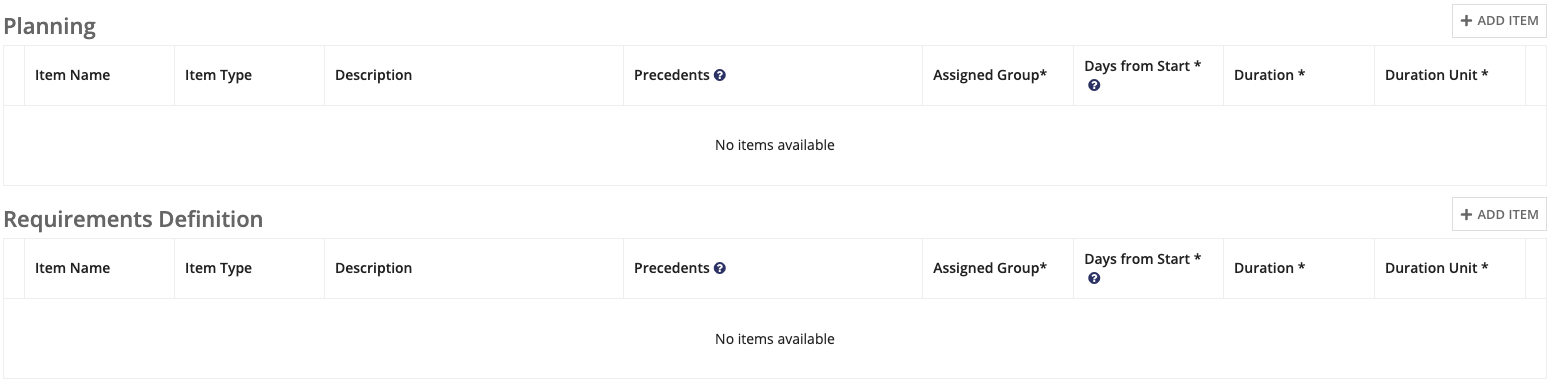
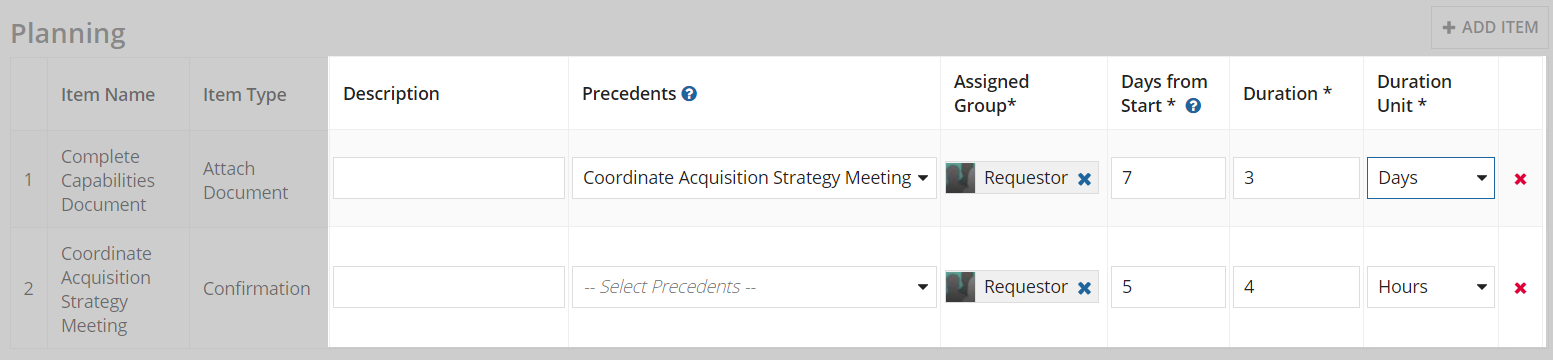
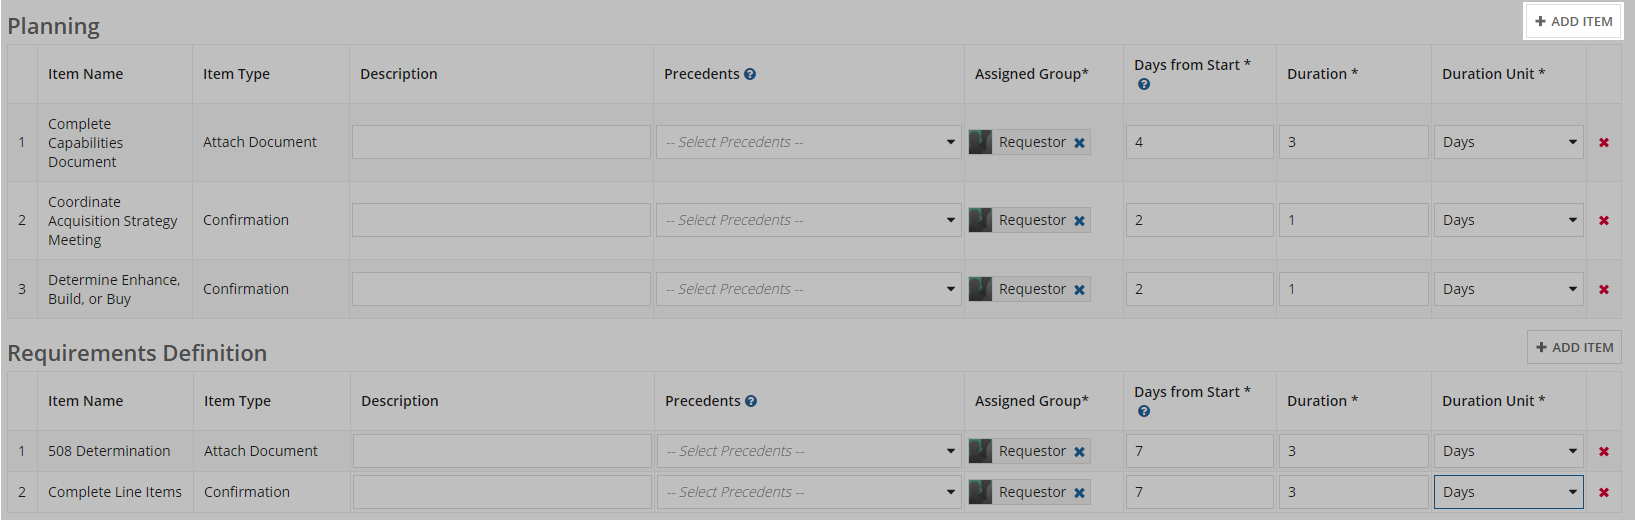
Click ADD ITEM for the desired category.
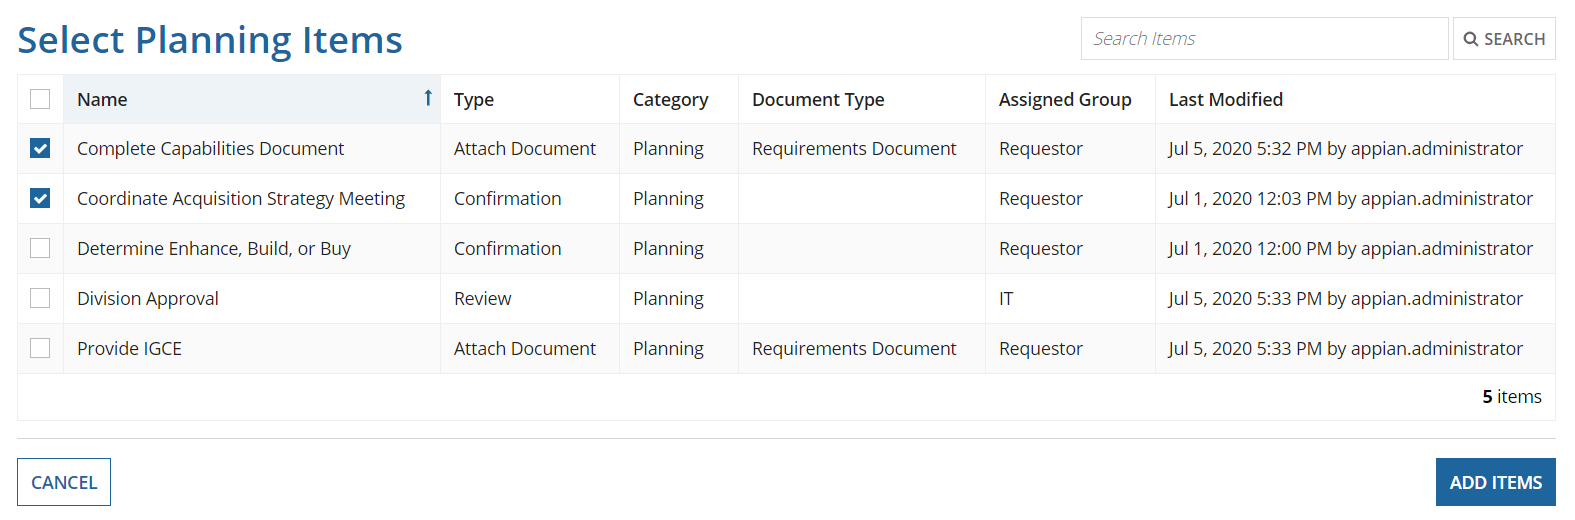
Click ADD ITEMS.
Hours, Days, or Weeks.Remove tasks by clicking the red X.
You can easily update a requirement checklist from the Requirement Management Settings site. Before updating a checklist, make sure any items you want to add are on the Checklist Items page.
To update a requirement checklist:
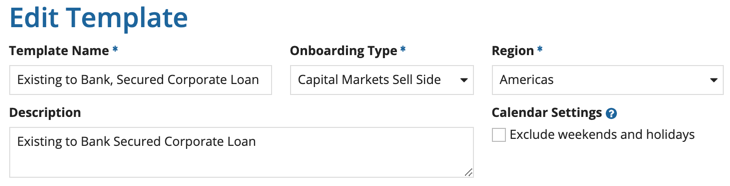
If desired, update the Checklist Name, Checklist Type, and/or Description.
Click ADD ITEM for the desired category.
Click ADD ITEMS.
Hours, Days, or Weeks.Remove tasks by clicking the red X
New requirements created after modifying any existing checklist recommendations, will use the modified checklists associated with them. Requirements that are already in process or completed will not be affected. You can configure automated checklist recommendations through the checklist recommendation configuration page.
Configuring Checklists
