This page describes how to update a database table at the same time that you update a record type.
Updating relational database tables usually involves specialized knowledge of SQL commands and best data practices. With codeless data modeling in Appian, however, it's not just database administrators who can configure database tables. In this streamlined process, any developer can update database tables while updating a record type.
You can use a guided experience to update a table in any MariaDB databases connected to your Appian environment. If you generated a source for your record type, you'll find this experience familiar.
Note: To take full advantage of codeless data modeling, you'll need permissions to update the table in your selected database. If you don't have those permissions, you can still use the guided experience to generate a database script, which you'll then need to run in the database yourself.
To update a database table from a record type:
To start the guided experience:
Click ADD SOURCE FIELDS. This option is only available if the latest full sync for the record type was successful.
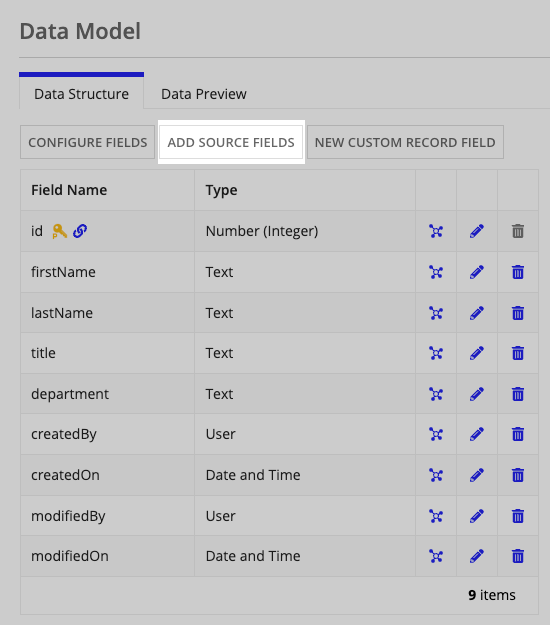
By default, the Fields tab is active. In this tab, you can modify the fields in your record type.
To add a single field to the data structure:
To add multiple fields:
For each field in the data structure, you can configure the following field properties:

| # | Description |
|---|---|
| 1 | In the first box, enter a name for the field. |
| 2 | In the dropdown list, select a primitive data type appropriate to the field. |
| 3 | If you selected the Text data type and anticipate that the field will need to contain data longer than 255 characters, select the Long Text checkbox. |
Note: To reduce the likelihood of exceeding limits that MariaDB enforces on row data, we recommend adding no more than two Long Text fields to a record type. If you configure more than two Long Text fields, a warning displays in the field configuration dialog. You'll see a "row size too large" error if you attempt to run the generated script in the database.
To reorder fields in the data structure:
To remove a field:
Click in the field row. The Remove <name> field? dialog displays
This dialog lists any objects that rely on that field. For example, the list could include:
Record type relationships allow you to reference related data from your record type, which makes development faster and easier.
You can modify relationships elsewhere in the data model configuration, but modifying a relationship here has many benefits. A relationship requires that your record type contains a common field that's used in both your record type and the related record type. If you modify a relationship at this point, Appian can update that common field in the source database, so the relationship is represented accurately in both the source and the record type. Also, if you're adding a relationship, Appian can automatically generate a common field for you based on the relationship type you select.
In the Relationships tab, you can add or remove record type relationships.
To add a record type relationship:
Click NEXT. The Add Relationship to <Record Type> dialog displays. For example:
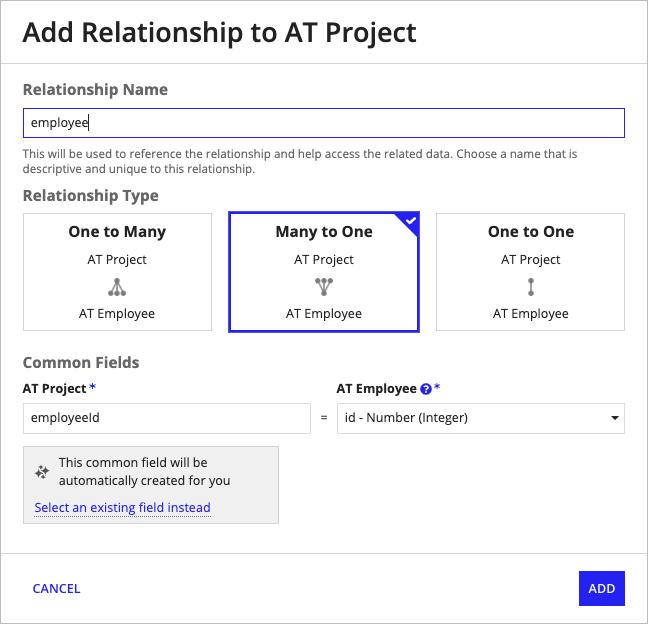
Under Common Fields, choose the fields to enforce the relationship type. The common fields can be of type Text, Number (Integer), User, or Group, and the common fields must be the same data type.
In this dialog, the common fields default to the following settings, based on the relationship type:
| Relationship Type | Common Field in Current Record Type | Common Field in Related Record Type |
|---|---|---|
| One-to-Many | The primary key field of the current record type. | No default setting. Select a field of the same data type as the primary key field of the current record type. |
| Many-to-One | An auto-generated field that matches the primary key field of the related record. For example, see employeeId in the example above. |
The primary key field of the related record type. |
| One-to-One | An auto-generated field that matches the primary key field of the related record. | The primary key field of the related record type. |
You can change the names of auto-generated fields and select different common fields for both the current and related record types. However, you can only select fields that meet the criteria for the relationship type. For example, the common field in the one-side record type of a one-to-many relationship must be the primary key field.
To remove a relationship:
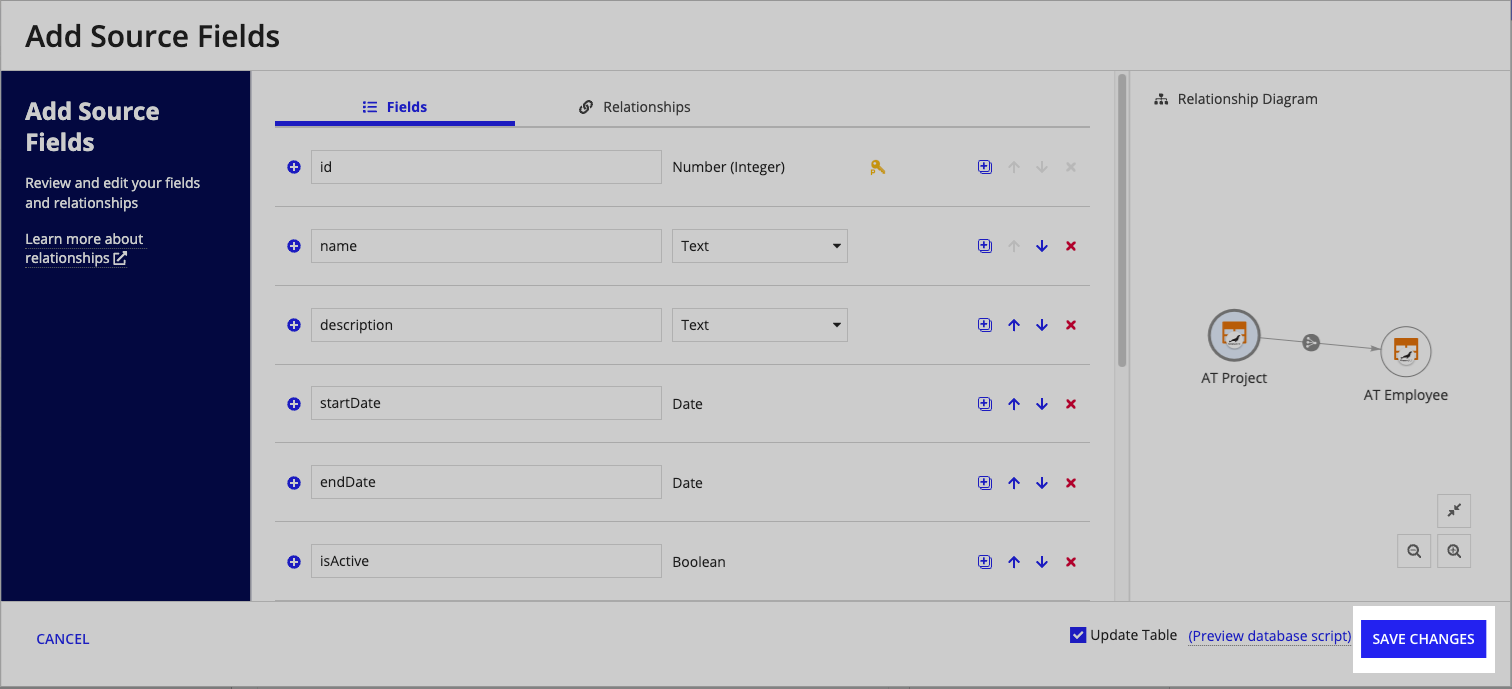
By default, the system will use the auto-generated database script to update the table in the source database. You'll just need to keep the Update Table option selected.


However, under certain conditions, you might want to prevent Appian from updating the table. For example, you might need to make modifications to the script like editing the field names to meet database administration requirements or adding foreign keys and constraints.
In that case, you can prevent the system from updating the table, while still taking advantage of the guided experience to generate the basic script.
To prevent the table update, unselect the Update Table checkbox.
Click SAVE CHANGES to save your changes to the record type.
If the Update Table checkbox is selected, Appian will save the data model for the record type and update the table in the database.
If the Update Table checkbox is unselected, Appian will save the data model for your record type, but makes no changes to the database itself. Because the fields you added to the record type do not yet exist in the database, the sync will fail for your record type. As a result, error indicators will display in the record type until you update the table in the database and trigger a full sync.
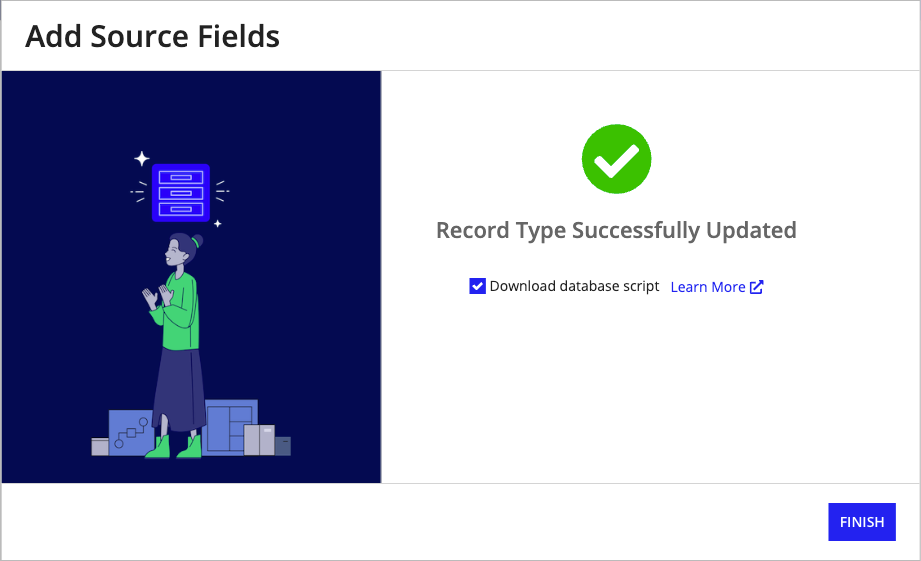
After Appian successfully saves the changes to your record type, you have only one step left: deciding whether to download the auto-generated database script.
You can use the database script to:
By default, the Download database script is selected, and the system will download the script when you click FINISH.
If you do not want to download the script, unselect the Download database script checkbox before clicking FINISH.
Caution: The auto-generated database script is not saved in Appian, so we strongly recommend downloading the script now and storing it locally.
Update a Source from Your Record Type
