| The capabilities described on this page are included in Appian's standard capability tier. Usage limits may apply. |
Introduction to selectorsCopy link to clipboard
A robotic task interacts with a computer screen the way a human being does. But a robot doesn't have eyes and a brain to let them know when they are in the right place on the screen. Instead, a robot uses selectors to navigate to the right part of the screen. If the selector matches the one you've configured in the action, the robot knows it's in the right place.
This page covers what a selector is, the different types of selectors, and how to pick the best selector for your robotic task if the task recorder picks a selector that doesn't suit your use case.
This information applies to robot browser actions, whether created with the task recorder or manually. These actions include:
- Get attribute
- Interact with element
- Is web element present?
- Select frame
- Is web attribute present?
What is a selector?Copy link to clipboard
Simply stated, a selector represents a part of a webpage's structure in the source code. In the context of automation, you'll use a selector to choose the element on the screen to interact with.
During a robotic task, the robot looks at the source code of the page and evaluates if any of the elements contain selectors that match the one you configured. If the robot finds a match, it proceeds to act on that element.
Outside of automation, selectors are used in cascading style sheets (CSS) to apply the same style to the same elements. For example, buttons and images can be tagged as a certain class, and the style associated with that class is applied to all of them automatically. Selectors are also used in HTML and XML to structure the information on the page.
Types of selectorsCopy link to clipboard
Robotic tasks can use different types of selectors, including:
- Class name: Identify an element tagged as belonging to a specific class. For example, a class can be
.imageor.banner. - CSS selector: Identify an element tagged as belonging to a specific CSS class. This selector is more general than using the class name. Refer to the W3schools for an example.
- ID: Identify an element with a specific id attribute. For example, if you configure
resultsas the ID the robot should look for,<div id="results">will match and the robot will act on the element with this attribute. - Link text: Identify elements that are hyperlinks on a webpage, using the display text. The display text must match exactly, including case. To match part of the link text, use the Partial link text selector.
- Name: Identify an element with a specific name attribute. For example, if you configure
emailas the name the robot should look for,<input type="email" name="email">will match and the robot will act on the element with this attribute. - Partial link text: Identify elements that are hyperlinks on a webpage, using the display text. The display text must include your specified text, but it doesn't have to match exactly. Like the Link text selector, this selector is case sensitive.
- Tag name: Identify an element that is tagged with the HTML tag you specify. For example, a tag can be
<span>or<div>. - XPath: Specify the exact path structure to identify the element. Refer to the W3schools for an example.
The best selector to use depends on your use case. Some selectors are more reliable than others. For example, the ID and name selector may not be present in all elements you want to match. Similarly, if you want to interact with only one element among many with common selectors, you may want to use the XPath selector to ensure the right one is chosen.
Selectors in the task recorderCopy link to clipboard
Use the task recorder to capture your interactions in the browser and automatically create a robotic task with those actions. By default, the task recorder picks the most specific selector it can to identify an element on the page. For example, if there are two elements on a page with the same id, the task recorder suggests another selector to identify the element you're interacting with. However, there are some cases where you might want to change the selector.
If the task recorder suggests a selector that's not right for your use case, you can edit the selector as you record. This could be the case if you're selecting amongst a list of elements or if you expect the structure of the page to change frequently. The task recorder highlights the element so you can confirm your updated selector points to the correct element on the page.
ExampleCopy link to clipboard
To demonstrate how the task recorder chooses a selector, we'll use an example of a hypothetical robotic task that opens docs.appian.com and checks to see if a new version was released. If it was, the robot clicks through to the release notes to look for updates about document extraction. The task recorder allows you to change the selector if you need to.
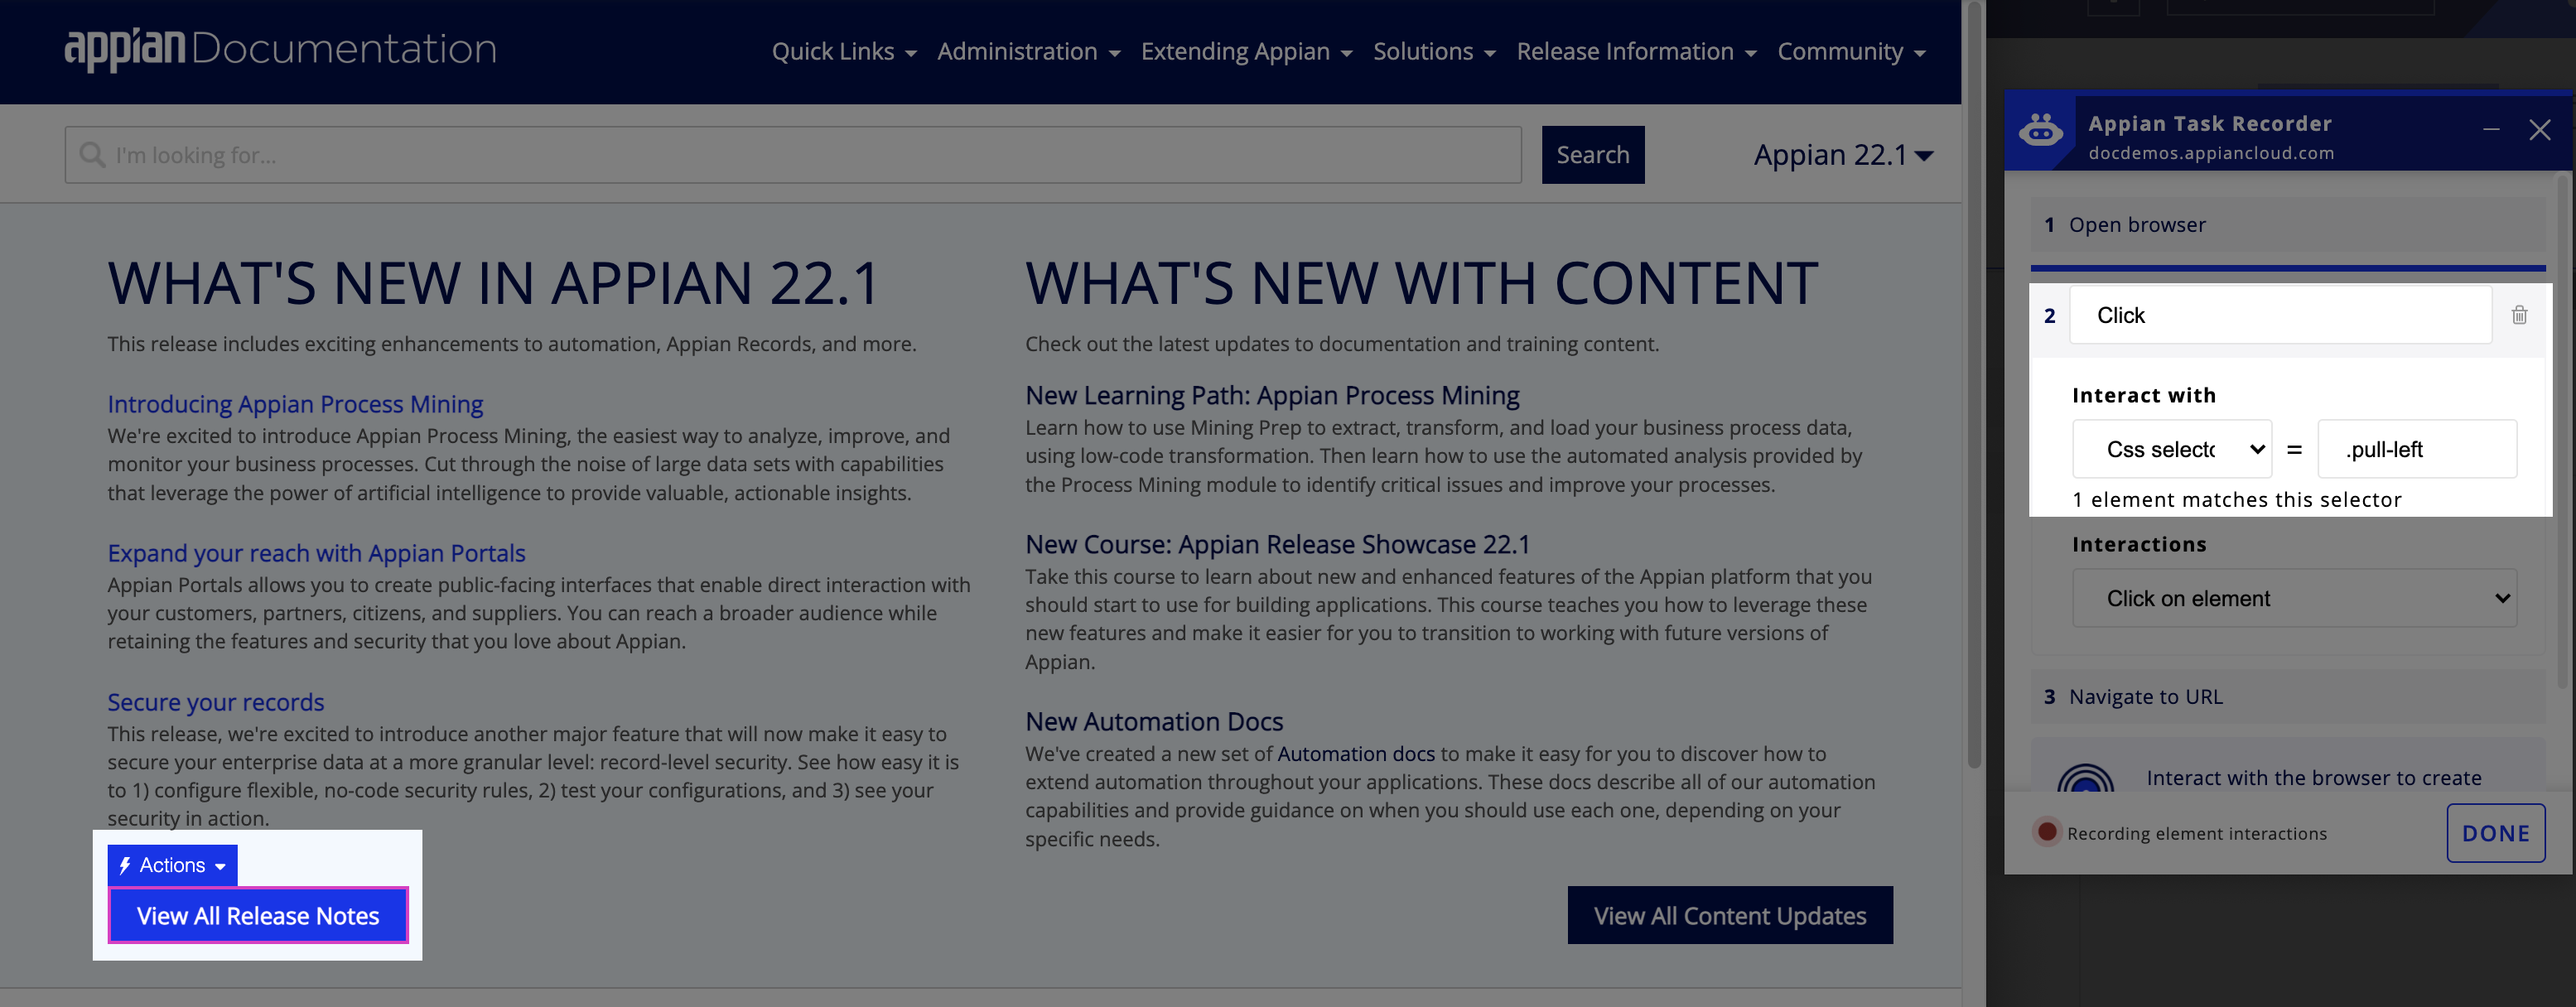
Launch the task recorder and navigate to docs.appian.com. Click the View All Release Notes button. The task recorder captures this action, and suggests Css selector = .pull-left as the selector type because it is the most specific selector for this button.
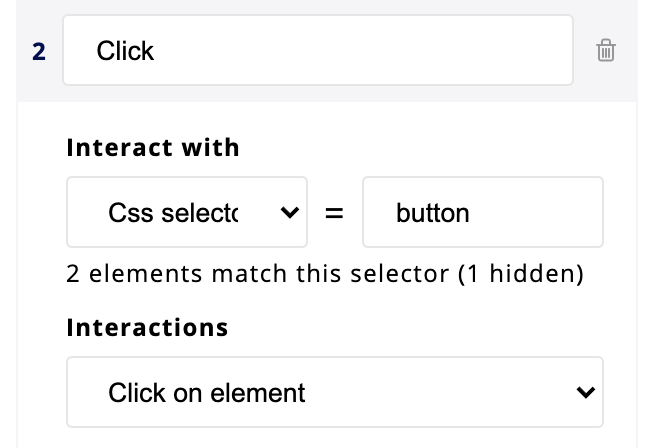
To see how selectors operate, you can edit the selector to use Css selector = button selector type. The task recorder shows a message saying 2 elements match this selector. If you save the action with the updated the selector, the robotic task throw an exception at this point in an execution because it wouldn't know which button to interact with. Edit the selector type once more to one that is more unique.

Configure a selector manuallyCopy link to clipboard
If you prefer to configure browser actions manually, you can configure the selector in the robotic task. Many browsers include developer tools to help you find the part of the source code associated with elements on a web page. You can use these tools to jump to the relevant code and identify the selector you might want to use.
ExampleCopy link to clipboard
To demonstrate the options for choosing a selector, we'll use an example of a hypothetical robotic task that opens docs.appian.com and checks to see if a new version was released. If it was, the robot clicks through to the release notes to look for updates about document extraction.
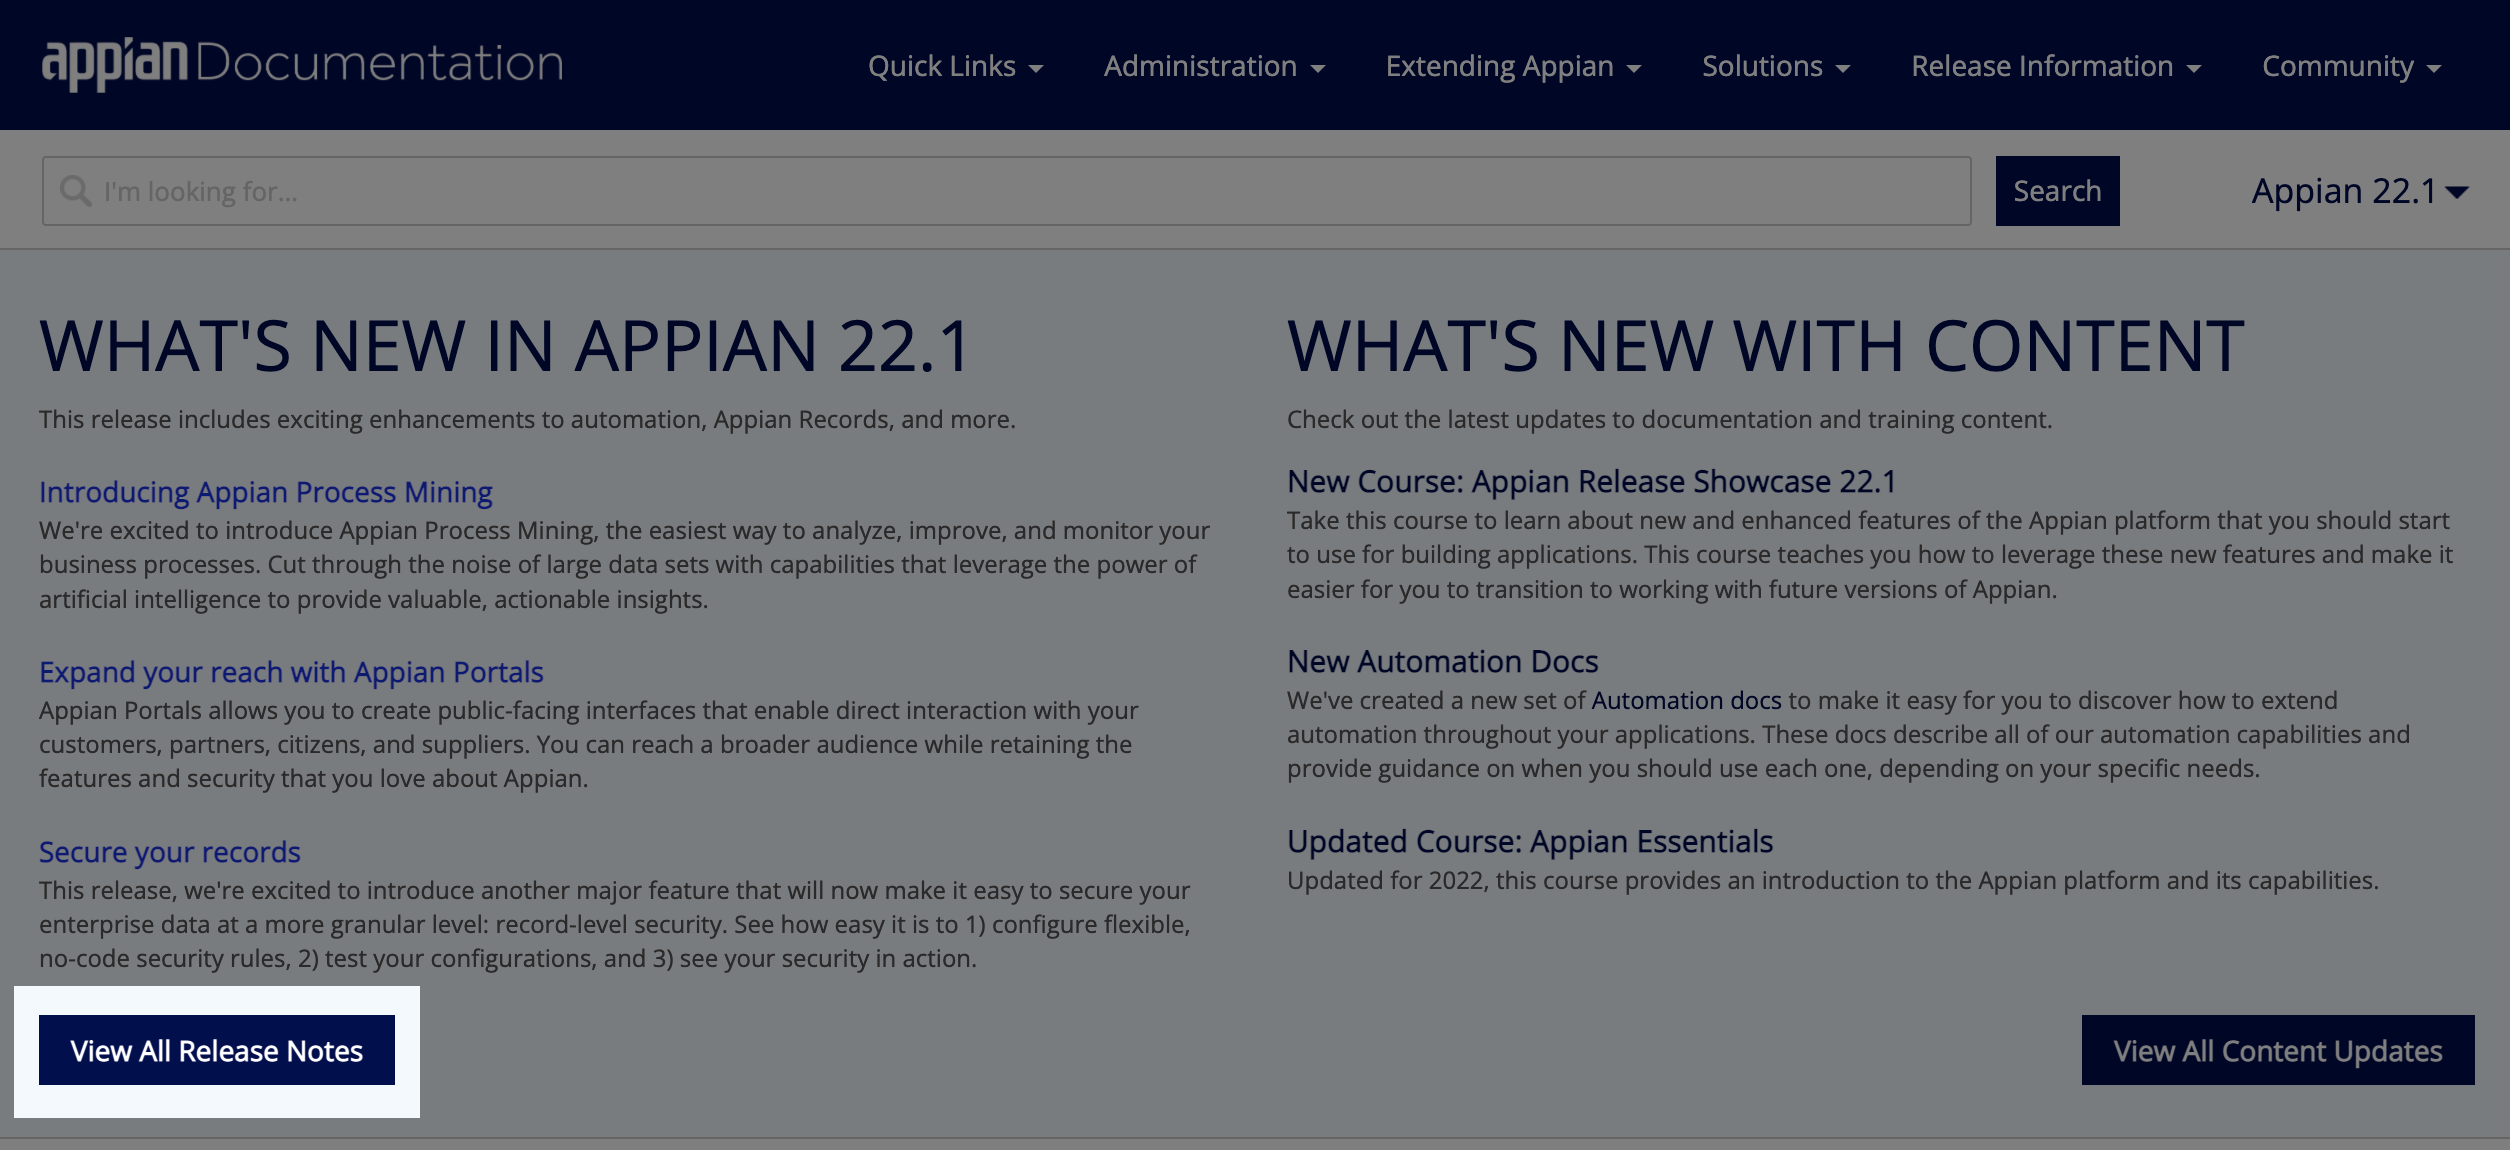
After the robot opens the browser, it evaluates if the current release version has been updated. Then, it looks for the View All Release Notes button.
Consider what attributes this button might have:
- Styling (button)
- Link
- Link Text
Each of these is a possible selector. So let's choose one to try.
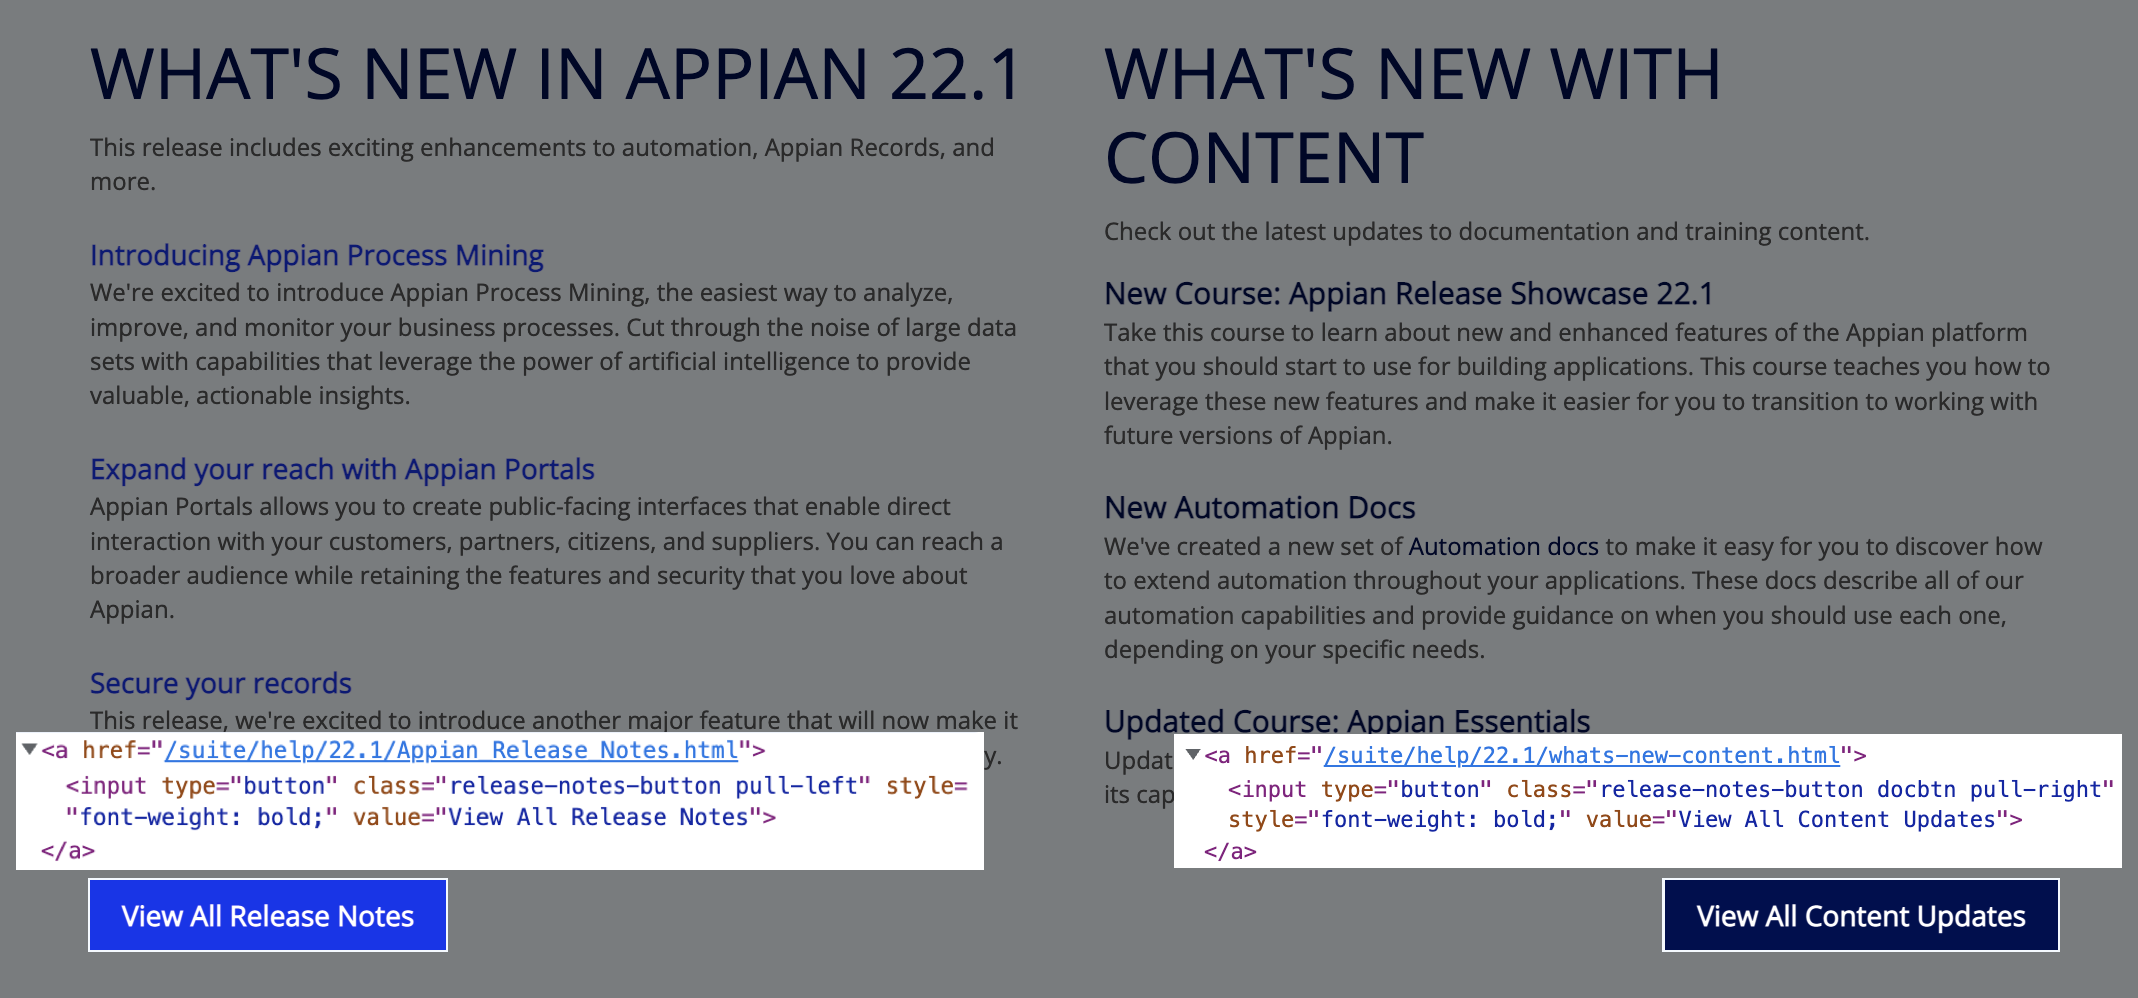
If you're configuring the Interact with element action manually, you'll choose the selector to identify this button. Using your browser's developer tools, take a look at the source code for the button:
1
2
3
<a href="/suite/help/22.1/Appian_Release_Notes.html">
<input type="button" class="release-notes-button pull-left"
style="font-weight: bold;" value="View All Release Notes"></a>
Copy
Great, we can configure the action to use Tag name selector and "button" as the value.
Oh but wait, there's another button on the page. What does that code say?
The View All Content Updates button is also a button type, which makes sense, but we don't want the robot to click that one. It's best to pick a different selector so the robot doesn't get confused and pick the wrong button to act on.
It looks like the class is different for each button, so let's pick that selector.
In the action, select Class name for the selector and input release-notes-button as the value. Alternatively, you could also use the Link text selector and View All Release Notes as the value. All that matters is that you choose a selector that's specific to this button and isn't used elsewhere on the page.
This example shows how selectors can be accurate, but might not be the best choice. When you pick a selector, consider how the robot will use it to choose where to act on the screen.


