The exclusive (XOR) gateway connects one incoming path with a single outgoing path. The outgoing path is chosen from a number of possible paths and determined by one or more conditions that you set.
Conditions are evaluated in bulk, without regard to the order in which you list them.
When multiple incoming flows are connected to the XOR gateway, it allows the first flow token through to an exclusive outgoing flow. Subsequent flow tokens wait for all incoming flows to arrive before executing the output flow decision.
Note: A looping flow should not be directed into an XOR gateway itself, but into another upstream activity. For example, place an empty Script Task node between the incoming flows and the XOR node when you are routing multiple flows into the XOR.
Path optionsCopy link to clipboard
This node can have multiple incoming and outgoing paths.
- The incoming paths are evaluated in the order they arrive.
- Each outgoing path is assigned a condition. The conditions are evaluated according to their top-to-bottom ranking.
- As soon as a True condition is discovered, the workflow takes the associated path.
- If all conditions evaluate to False, you can also specify a path to follow.
Note: Do not stack gateway conditions such that the first condition must execute before the second condition is evaluated. To avoid this, write the primary condition into the secondary one to ensure that the desired logic takes precedence.
- For example, given a primary condition of
bProcessVariableBoolean=true(), use an expression similar to the following for your secondary condition.
1
and(not(bProcessVariableBoolean=true()),bProcessVariableSecondaryBoolean=true())
Copy
Configuring an XOR nodeCopy link to clipboard
- In the Palette of the Process Modeler, select the Workflow folder to expand the node categories.
- Select the Gateways category.
- Select the XOR node, and drag it onto the canvas.
- In the Process Modeler, click Connect
 on the toolbar.
 - Drag the Connect tool from a connection point x on a prior node (or nodes) to a connection point on the XOR node.
- Drag the tool from a connection point x on the XOR node to connection points on the nodes that represent your optional paths. The XOR node requires that you have at least one incoming and one outgoing path.
- Open the XOR Properties dialog box.
- Right-click on an XOR node on the designer canvas. Select Properties. — or —
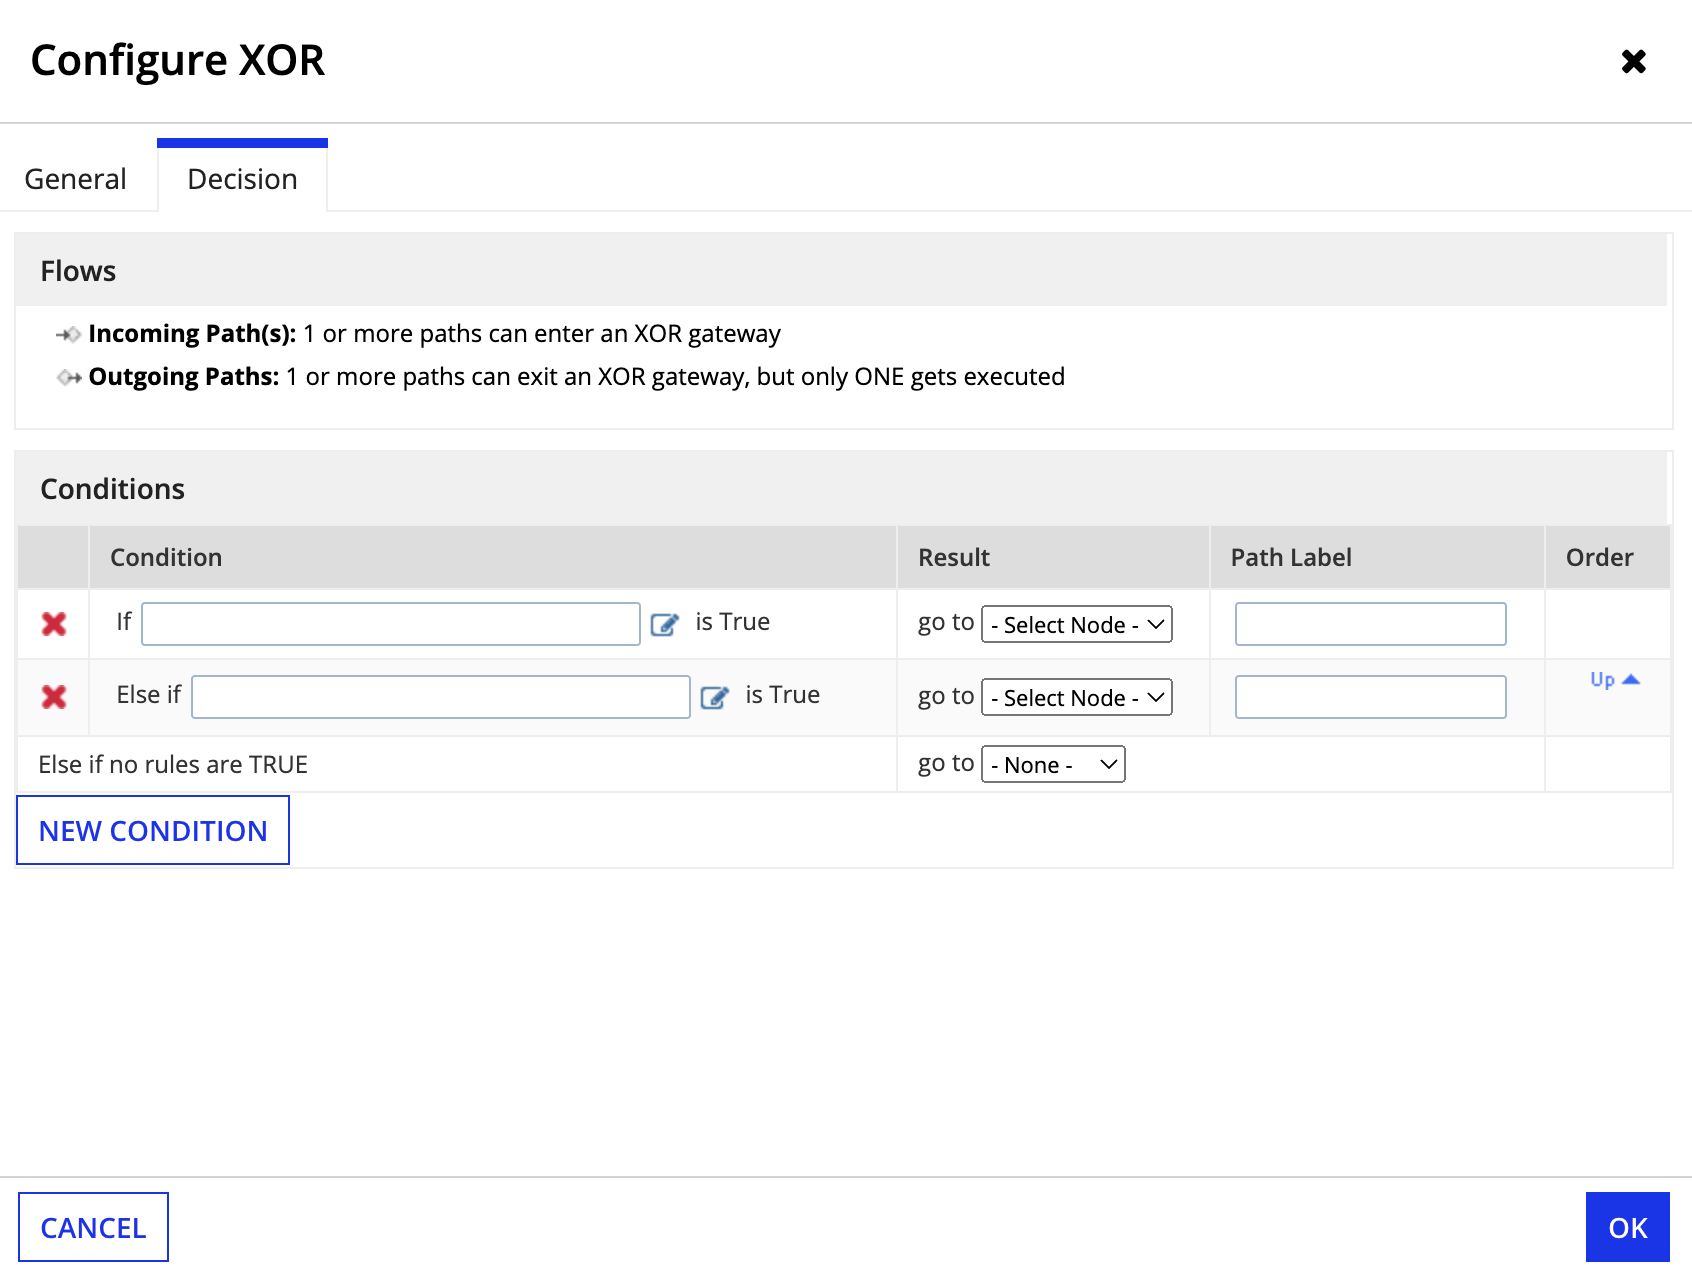
- Double-click an XOR node on the Canvas. The Configure XOR dialog box is displayed.
- Right-click on an XOR node on the designer canvas. Select Properties. — or —

- Click the General tab.
- Enter a descriptive name for the node, by typing it in the Name field. When additional languages are enabled, a tab for each language appears on the General tab. If so, the Name field must be populated for each language.
- Click the Decision tab.
- Click New Condition. A condition row is displayed.
- Create conditions for your Gateway decision using expressions:
- To perform a logical test of the value of a process variable, click Open the Expression Editor. Begin typing your expression in the Expression Editor. Process variables can be accessed by any node in your process. Begin typing
pv!to see a list of available process variables. - Select an operator to use for comparison, such as greater-than (>), less-than (<), or equals =).
- The Operator is appended to the Expression. For example:
pv!Credit_Score > - Append a value to use in your comparison by typing it after the operator. For example:
pv!Credit_Score > 100. - The comparison value can also be a process variable, expression logic, or a constant.
- Specifying an expression that does not evaluate to either True or False will pause the process.
- Click Save and Close. The Expression is displayed in the condition row.
- To perform a logical test of the value of a process variable, click Open the Expression Editor. Begin typing your expression in the Expression Editor. Process variables can be accessed by any node in your process. Begin typing
- Alternatively, type a comparison in the Condition field, using a known process variable, an operator (such as equals, less-than, or greater-than) and a Value. Use the following syntax:
pv!Name=Value - For each condition, select a destination node from the Result list.
- (Optional) Select a destination node from the Result list for the condition Else if no rules are TRUE.
- If you have more than one condition, reorder them so that they are evaluated in proper sequence. The first condition listed is the first to be evaluated. In the Order column, click the Down button
 and Up button
  to change the order in which the condition is evaluated.
