| This content applies solely to Vendor Management, which must be purchased separately from the Appian base platform. This content was written for Appian 23.2 and may not reflect the interfaces or functionality of other Appian versions. |
The Solutions Hub is a standalone site that offers a number of features that allow you to customize your solutions from a centralized dashboard. You can easily access the site from your solution's development environment. If the Solutions Hub is not installed on your development environment, you can follow the installation guide to install the suite.
The Solutions Hub User Guide is your quick reference guide to understanding of all of the features the Solutions Hub has to offer and how to use them to customize different components of your solutions.
When you open the Solutions Hub, you'll see all of the solutions installed on the environment that support customization through the Solutions Hub.
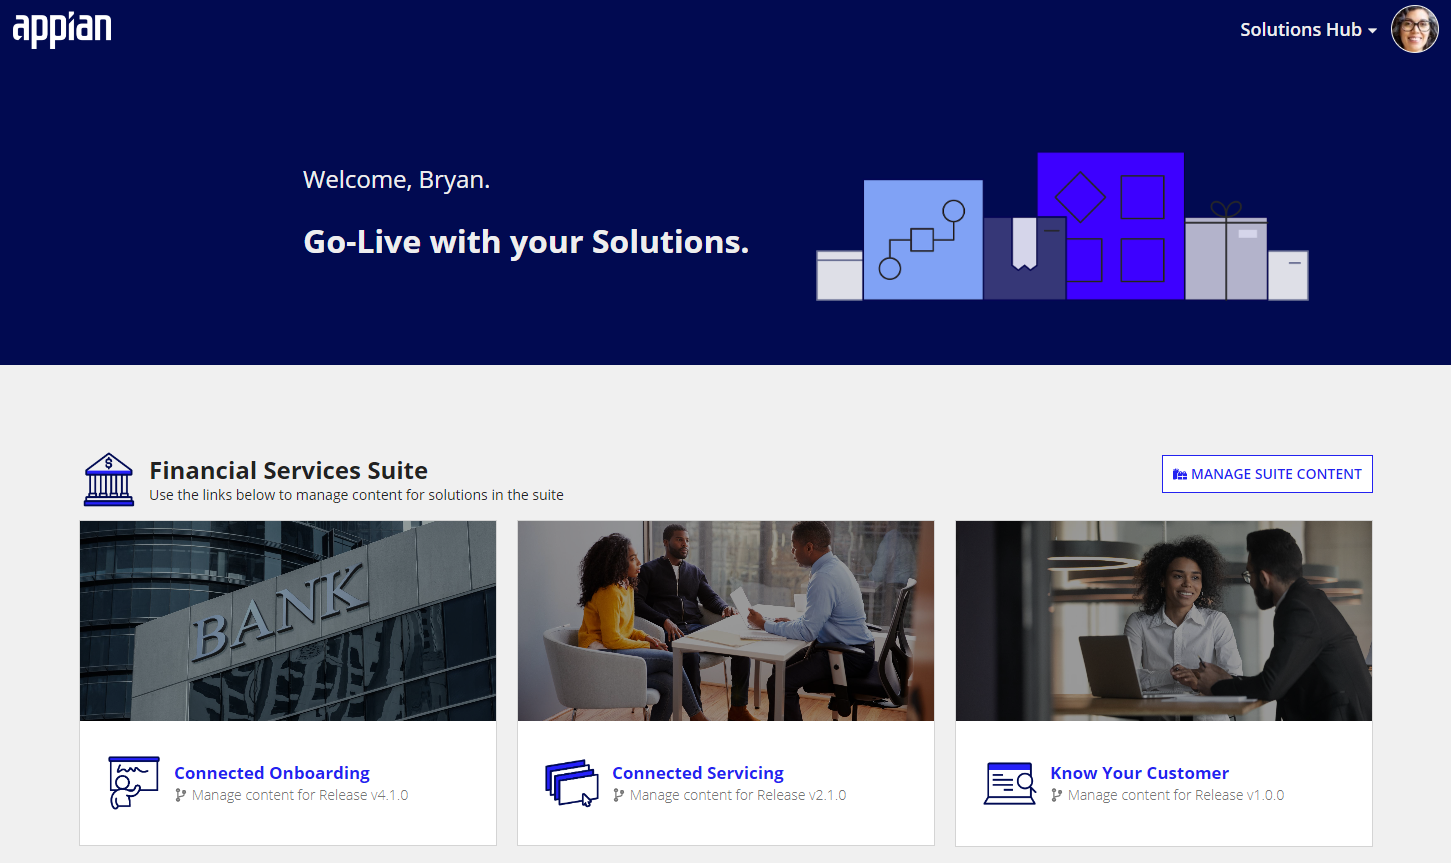
To access all of the available customizations for a given solution, click on the solution. If the solution is part of a solution "suite", then an additional MANAGE SUITE CONTENT button appears. For example, the Financial Services solution suite contains the Connected Onboarding, Connected Servicing, and Know Your Customer solutions. Any customizations common to all Financial Services solutions can be accessed by clicking the MANAGE SUITE CONTENT button.
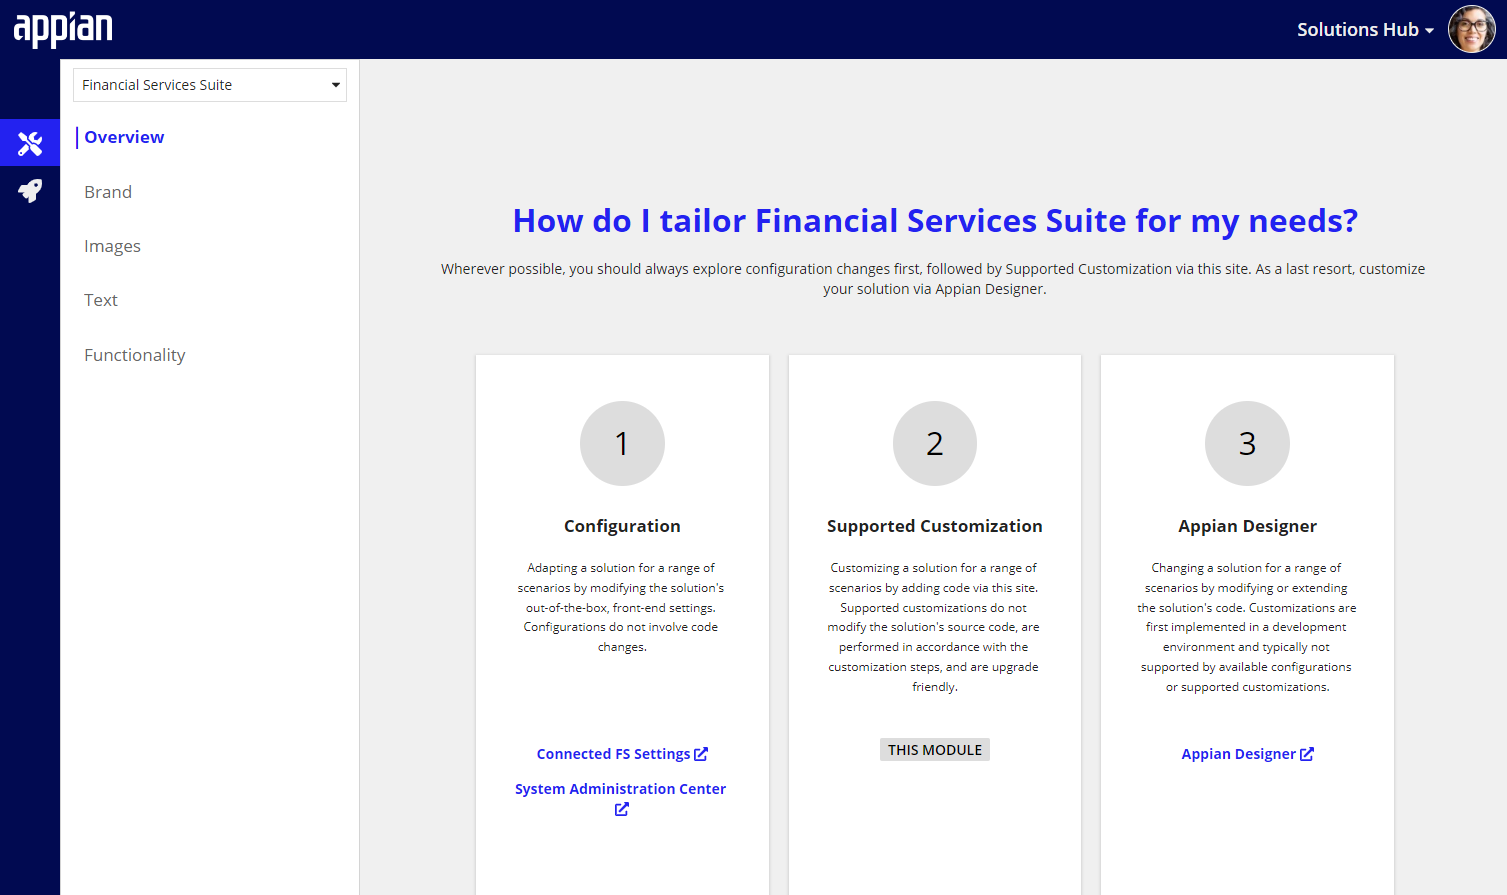
Once in the context of a particular solution, you will be greeted with an overview of configuration & customization opportunities available for your solution. From here, you'll have the tools you need to configure & customize your Appian solution! There are links to the solution's configuration site(s), navigation tabs to each type of supported customization, and lastly a direct link to Appian Designer.
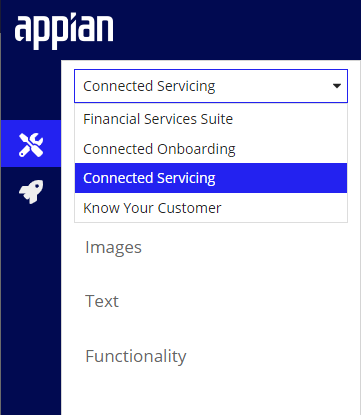
You can easily navigate context between solutions within the solution suite by selecting the desired solution from the dropdown.
Vendor Management 23.2.1.4 supports the following customization categories. Each solution offers a varying degree of supported customization templates within each category.
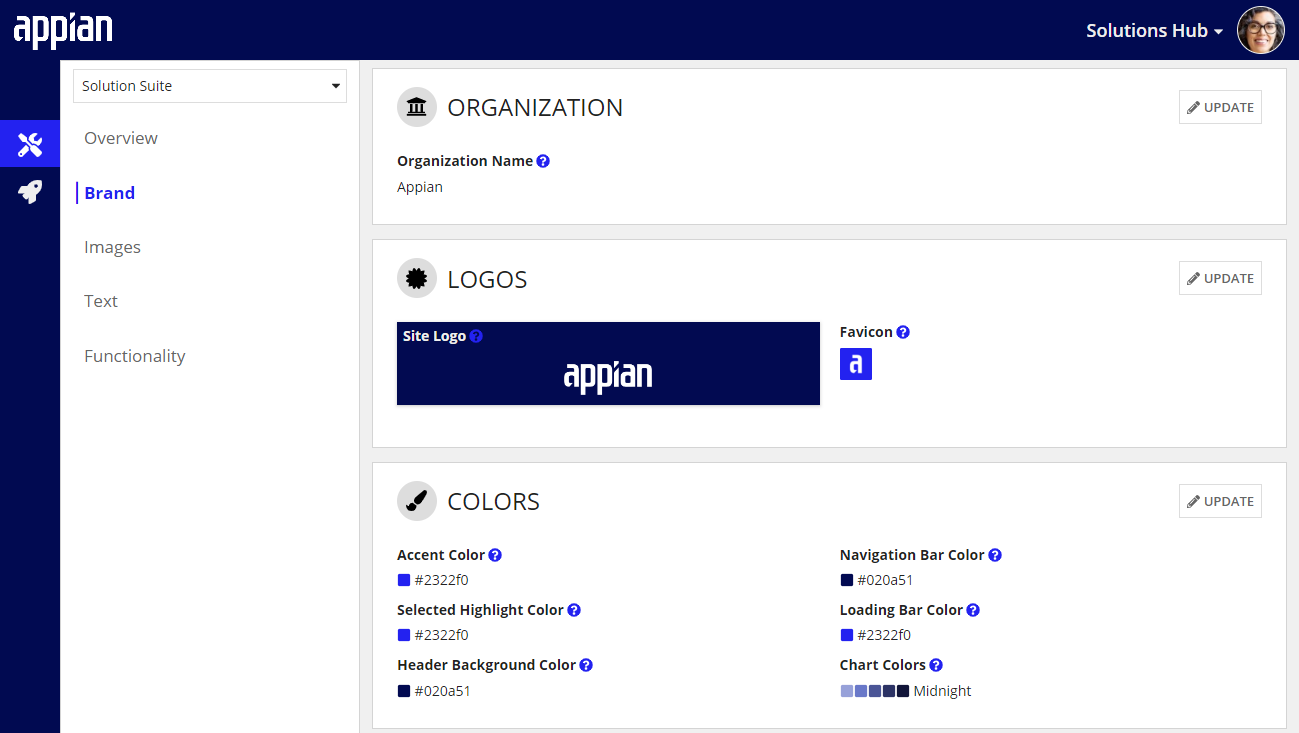
The branding section allows you to customize your solution to match your organization's name, logos, and colors.
You won't have to go into multiple site objects on the back-end to configure the branding across your solution. It's all taken care of via the Solutions Hub. The best part? When you use the suite to customize the branding for your solution, you won't have to reapply the customizations when you upgrade your solution to the latest version.
The BRAND section allows you to quickly and easily customize the following three brand elements for a selected solution:
Branding changes made here impact the selected solution only, they do not affect the Solutions Hub branding. It's important to navigate to each solution's sites to view any branding changes you made.
Note: the organization name is visible only if your solution supports it.
The organization name should be reflective of your organization or company name.
This value is used in instances where the solution needs to refer to your organization. If left blank, the default name (typically the solution name) will take effect.
To update your organization name, click UPDATE. The UPDATE ORGANIZATION dialog will open, which allows you to update your organization name and save the changes.

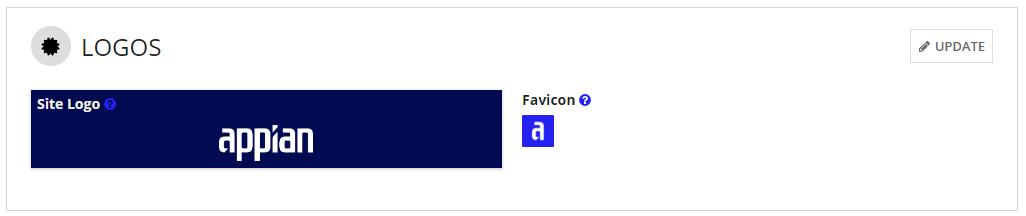
You can update logos to match your brand. Logos include the site logo that end users see within the solution's sites, as well as the favicon that appears in a user's active Web browser tab.
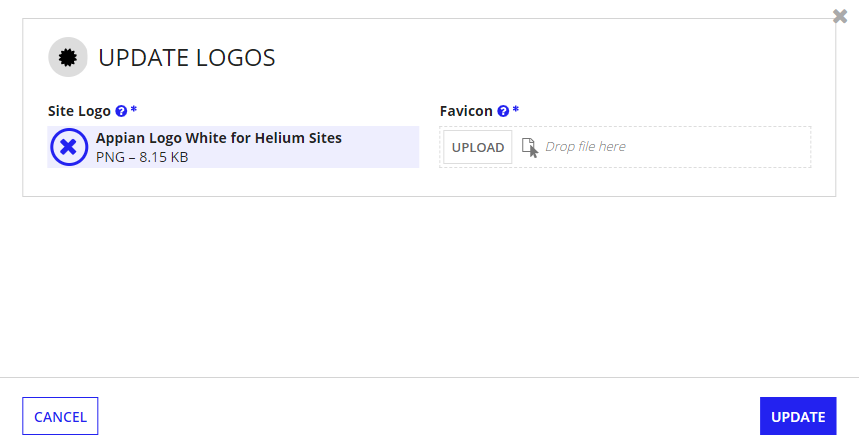
To update the logos in your solution, click UPDATE. The UPDATE LOGOS dialog displays with the current file for each image. Hover over the image you want to replace, and click X to remove the current file. Then, simply upload a new image. Site logo file types must be PNG. Favicon file types must be ICO. Be sure to save your changes when you are finished updating your logo or favicon file.
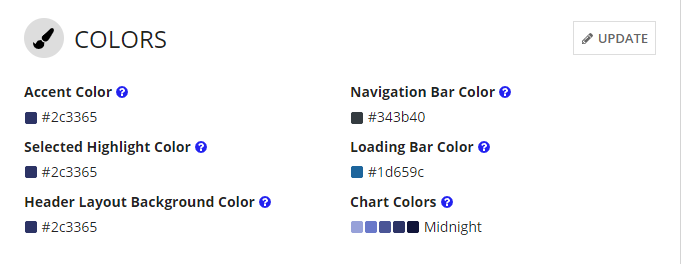
The branding section gives you control over the color palette that is used in the solution. Colors are used throughout your solution, from accenting selected items, to providing color to charts. This offers you the ability to set component colors for your solution, such as:
If a solution utilizes charts, you can even set the color palette that is used to render the charts. An extended range of colors beyond the base set listed above may be available for certain solutions.
To modify the colors in your solution, click UPDATE. The UPDATE COLORS dialog appears, which allows you to change the color of each presented field. Colors must be entered as valid hex codes.
Chart colors include pre-set color schemes, or you can enter your own set of hex codes by selecting CUSTOM
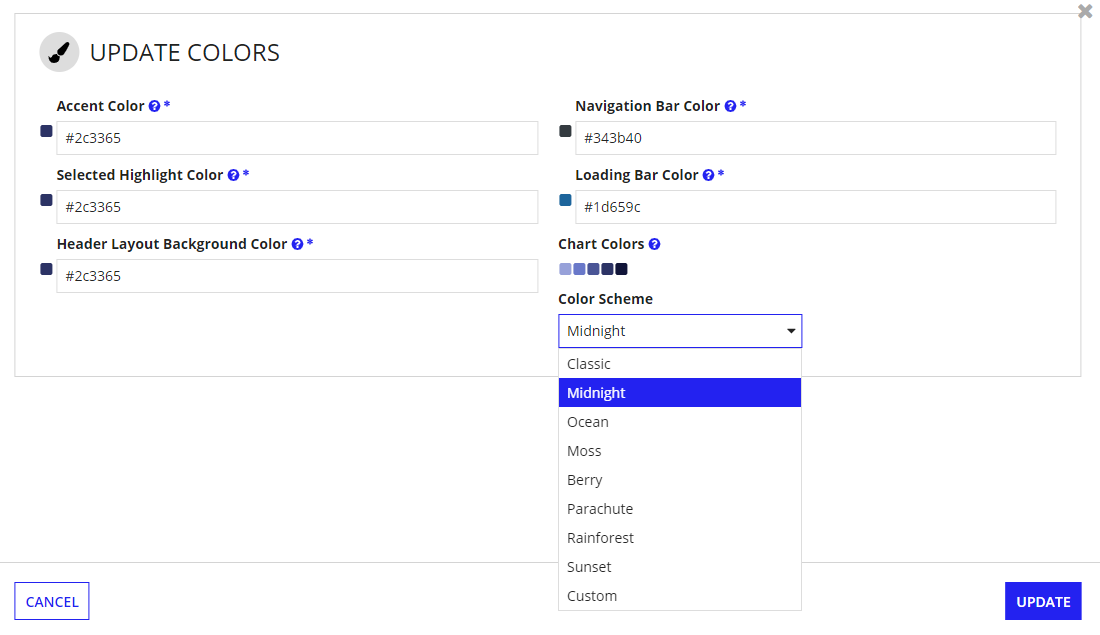
Once you have made your edits, click UPDATE to save your changes.
User Interface is a functional customization that includes any customization templates that have been exposed by the solution’s product engineers to allow you to:
See Functional Customizations for guidance on how to perform, edit, or revert a user interface customization.
Business logic is a functional customization that includes any customization templates that have been exposed by the solution’s product engineers to allow you to:
See Functional Customizations for guidance on how to perform, edit, or revert a business logic customization.
The Configure Dual Environment URLs customization allows you to configure the VM environment URL(s) based on whether you are running VM on single or dual environments.
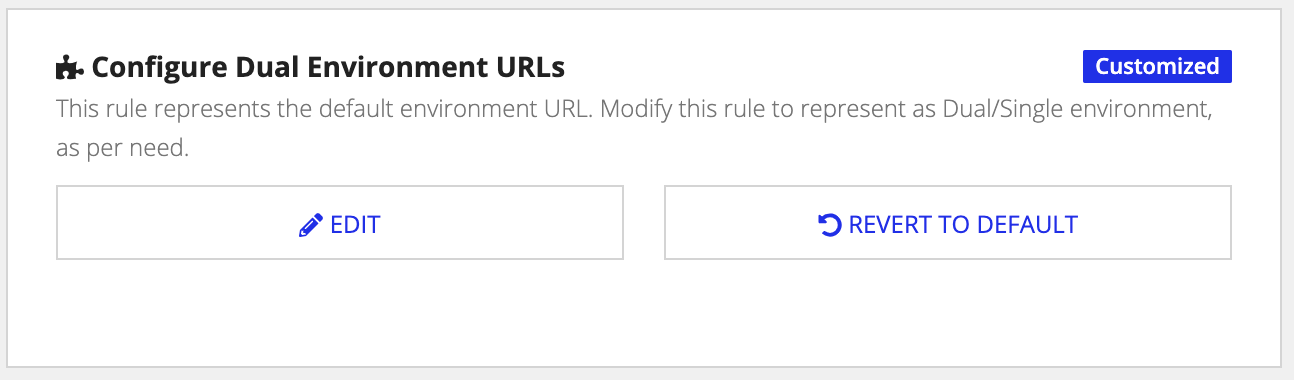
To view detailed how-to instructions for modifying this rule to to represent how you are running VM in your environment(s), click EDIT. If have previously modified this rule and want to revert the environment status back to its default state, click REVERT TO DEFAULT.
The List of Timezones customization allows you to add or remove the timezones used to set due dates for opportunities and question documents. Currently, the list contains all timezones in the United States.
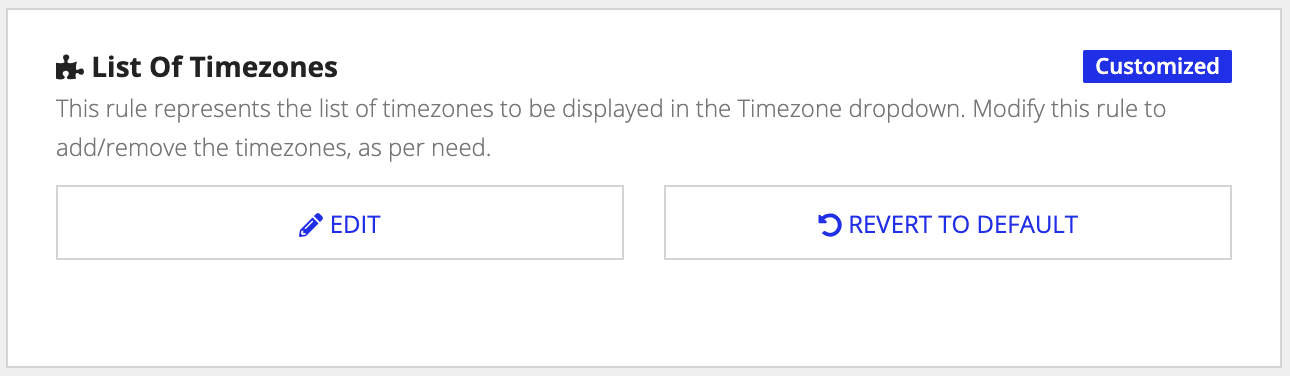
Click EDIT to view detailed instructions on how to add or remove timezones from the list and REVERT TO DEFAULT to revert back to the original list of timezones.
This section outlines the methodology for performing, editing, and reverting functional customizations.
To perform a customization, find the supported customization template that best matches your customization use case. Navigate to CONFIGURE & CUSTOMIZE –> FUNCTIONALITY within the context of the solution you want to customize.
The title and description of the supported customization template provide contextual clues as to where in the solution the customization occurs.
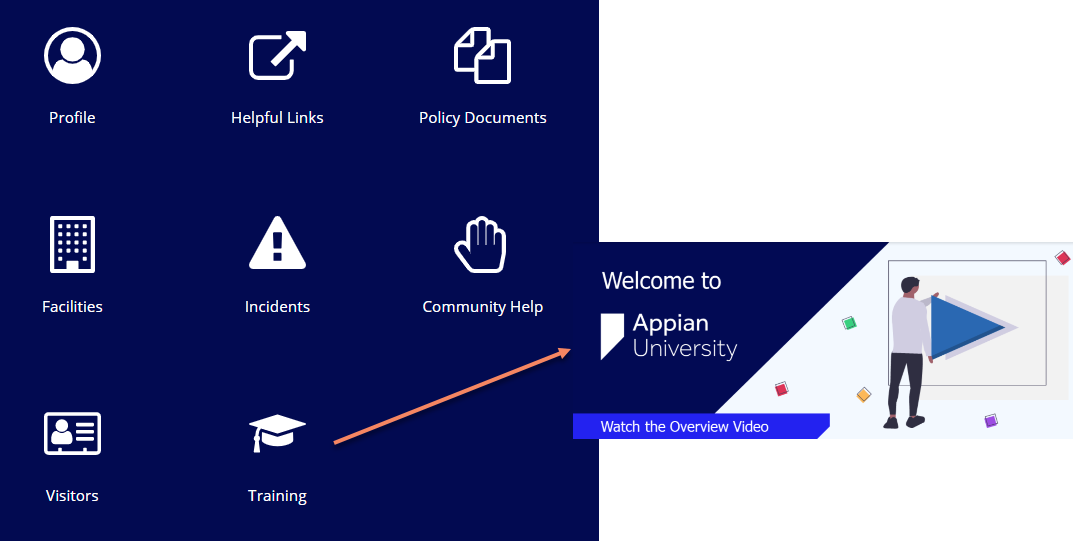
For example, let's say you want to customize your solution's landing page so that it includes a link to custom content. On the existing landing page, shown below, you want to add a new "Training" link.
After searching the available customization templates, and finding the template you want to customize, click CUSTOMIZE.
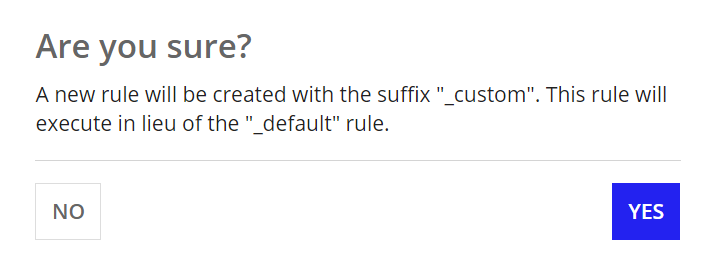
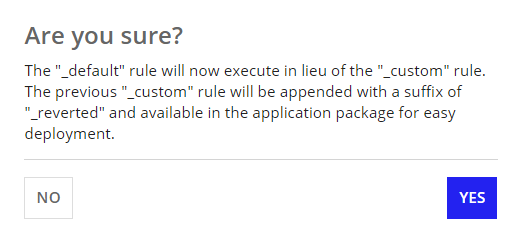
A confirmation dialog appears, indicating that a new object will be created on the backend. Click YES.
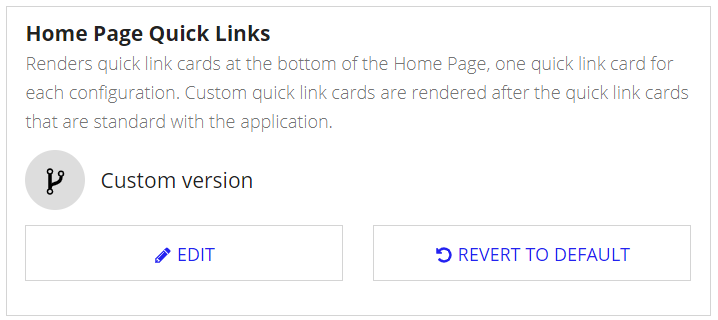
When the customization template state refreshes, as shown below, click EDIT to begin customizing.
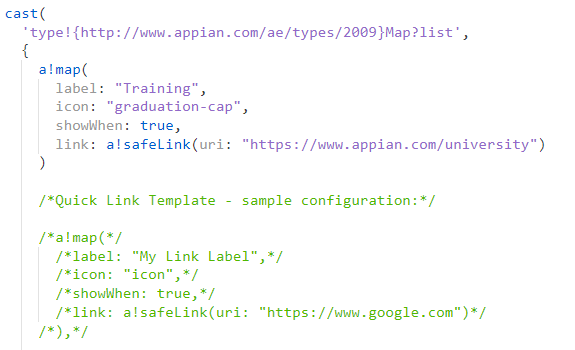
A new tab opens in Appian Designer that allows you to begin customizing the code. You'll see detailed how-to instructions on performing the customization within the commented code.
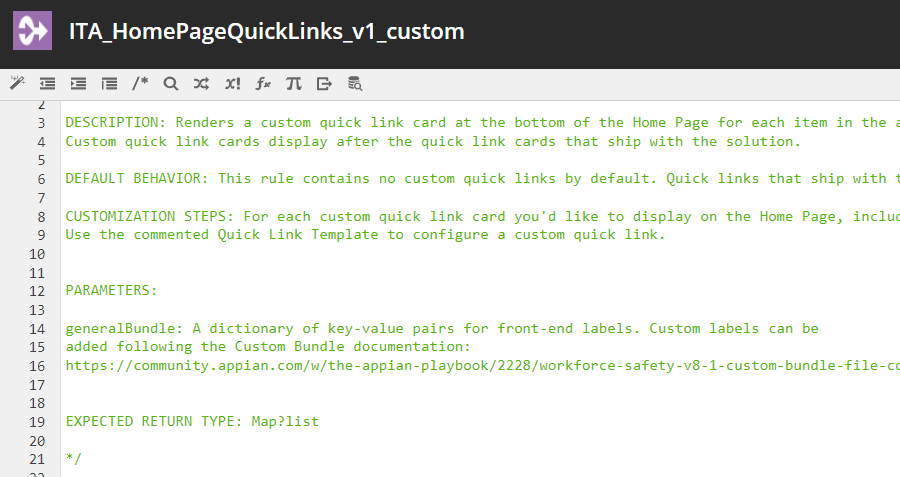
You'll see the modifiable code block with a defined example commented out.
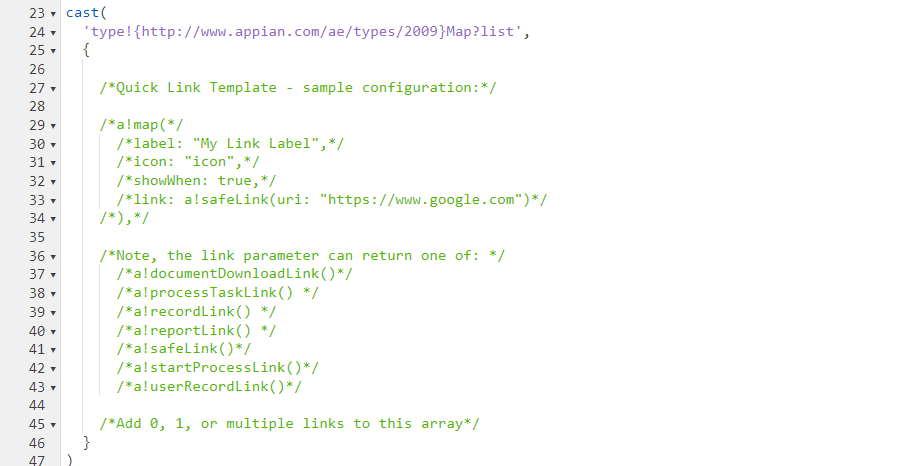
Use the detailed steps and example to perform your customization. When you are finished, save your changes.
View the example below to see how we customized a new “Training” link to the landing page.
Finally, navigate to the area in your solution where you expect the customization to appear and verify the results. In our example, we can see that the new “Training” link was successfully added to the landing page. When the user clicks the link, they are redirected to the URL we specified in the customization.
Congratulations, you have successfully customized your solution. Your changes will persist when you upgrade to a new solution version!
Maybe your business requirements have changed and you need to tweak the functionality of your supported customization. To edit a customization, simply navigate to the customization template, and click EDIT.
The template will open in a new tab in Appian Designer where you can view the latest saved version of your customization.
Make the required changes and save the modified objects. Verify the intended results are displayed in the frontend of your solution.
Don’t forget to deploy your customizations when finished!
If you find that the latest version of an out-of-the-box feature in the latest solution release addresses your customization use case, you may want to adopt the new feature and revert your customization back to the default behavior.
Navigate to the appropriate customization template and click REVERT TO DEFAULT.
After understanding the impacts of this type of customization change, click YES on the confirmation dialog. The default out-of-the-box solution behavior will overwrite your customization so that it is no longer present in the solution.
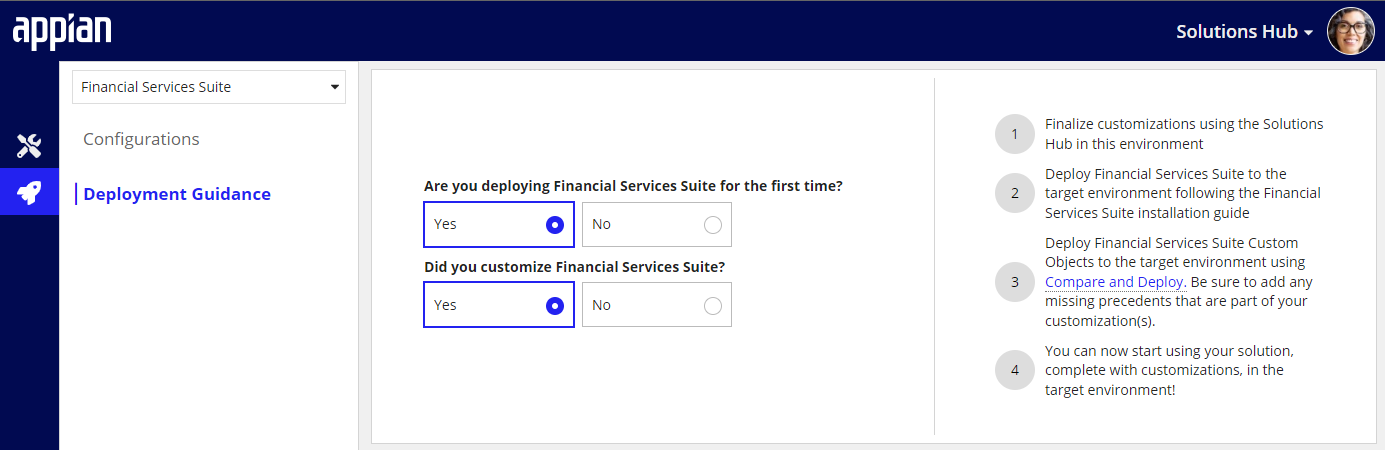
To deploy your customizations to a higher environment, click the DEPLOYMENT tab under the solution you want to deploy.
Answer the series of questions to dynamically generate the required deployment steps on-screen. Follow the steps shown to deploy your solution to a higher environment.
Below is an example of answering these questions and the rendered deployment steps:
Solutions Hub User Guide
