Free cookie consent management tool by TermsFeed Managing Vendors [Vendor Management v23.2.1.4]
Page not found in the selected version; redirected to the home page.
Managing Vendors
This content applies solely to Vendor Management, which must be purchased separately from the Appian base platform. This content was written for Appian 23.2 and may not reflect the interfaces or functionality of other Appian versions.

Introduction

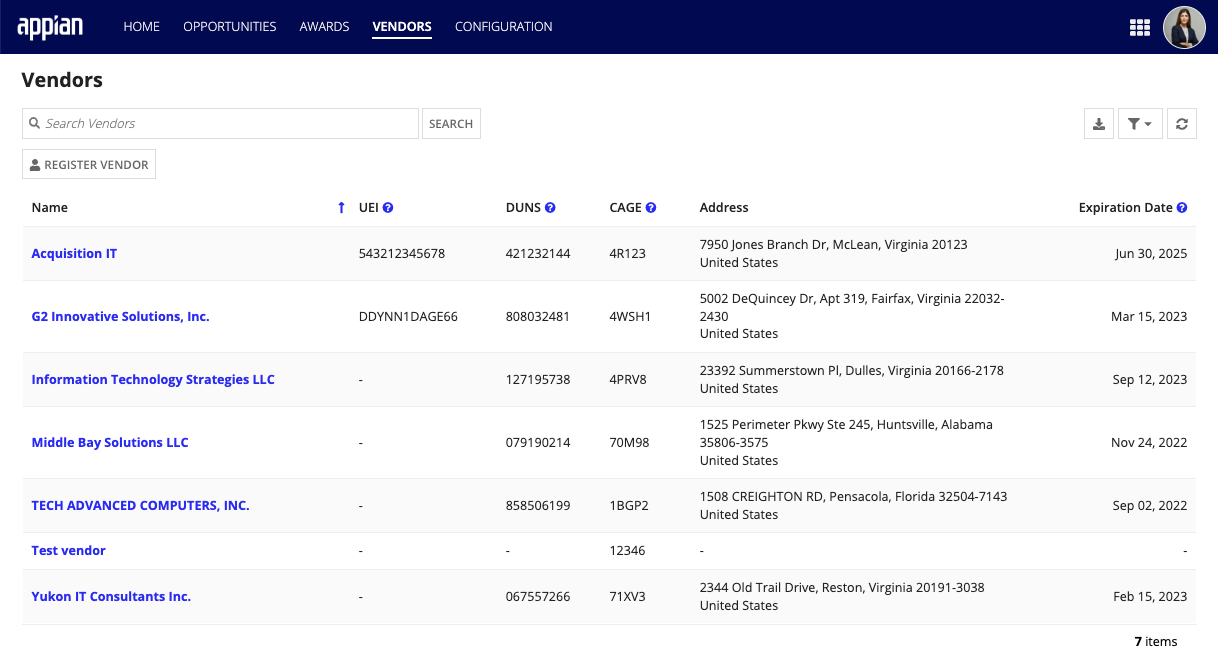
The Vendor Management solution provides an easy way to register, view, and manage vendors in the system. You can see a list of your vendors by going to the Vendors tab. Here, you can see and manage your registered vendors as well as register new vendors. This page will show how to view, manage, and register vendors directly from the VENDORS tab.

vendors_list.png

Registering vendors

In order to start viewing and applying to opportunities, a vendor must first be registered in the Vendor Management solution.

register_vendor.png

To register a vendor:

  1. Go to the Vendors tab and click Register a Vendor.
  2. Enter the following information:
    • Vendor Legal Name: The legal name of the vendor.
    • Contact First Name: The first name of the point of contact. Special characters are not allowed and will be removed if added.
    • Contact Last Name: The last name of the point of contact. Special characters are not allowed and will be removed if added.
    • Email: The email address of the admin user.
    • DUNS: The data universal numbering system number of the vendor.
    • CAGE: The Commercial And Government Entity, a five-character ID number used to identify vendors.
    • UEI: The Unique Entity ID, a 12-character alphanumeric ID assigned to an entity by SAM.gov.
    • Doing Business As (Optional): A trade or business name, if the vendor does not operate under their registered company name.
    • NAICS Codes (Optional): Any North American Industry Classification System codes associated with the vendor.
    • Address fields (Optional): The physical address of the vendor.
    • Expiration Date (Optional): The vendor's expiration date, based on their expiration date in SAM.gov.
    • Business Type (Optional): The vendor's business type.
    • PSC Codes (Optional): Any Product and Service Codes associated with the vendor.
  3. Click CREATE.

register_vendor_wizard.png

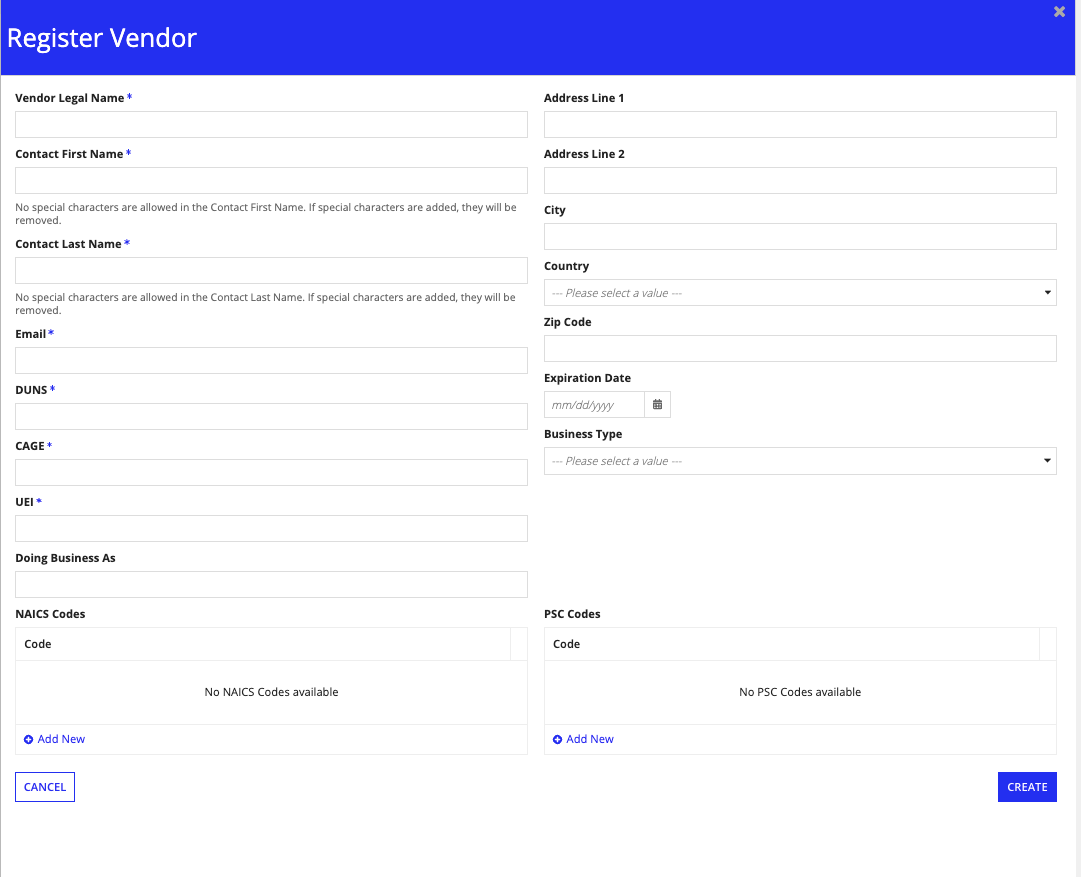
After submitting the registration form, the vendor will receive an access link to log in to Vendor Management and start viewing opportunities. After logging in, the vendor can create additional user accounts for each of their employees.

Viewing vendors

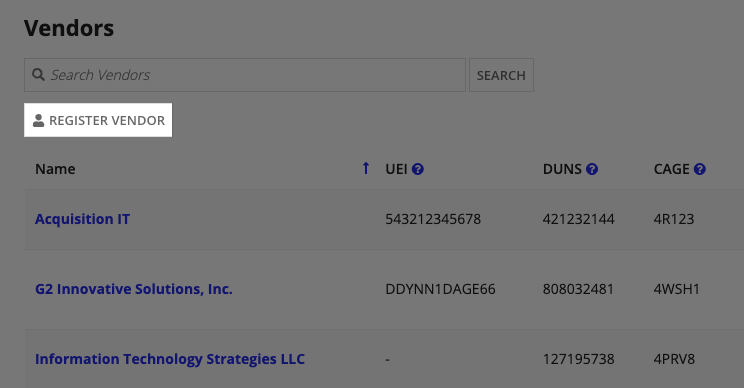
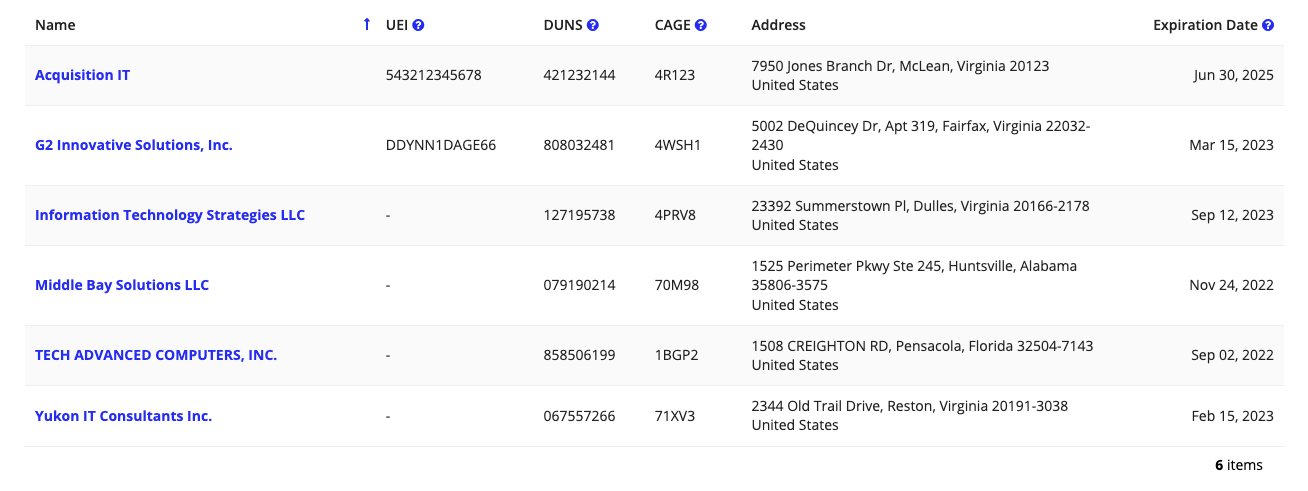
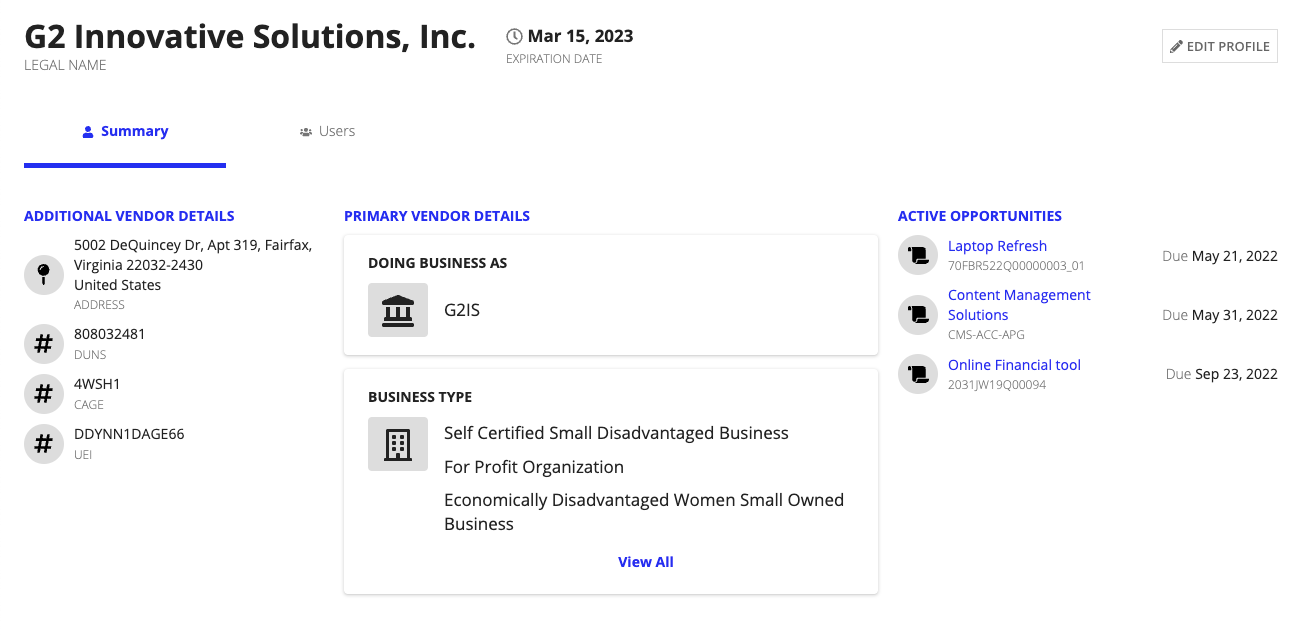
On the Vendors tab, you will see a list of all of your registered vendors, including their Name, UEI, DUNS, CAGE, Address, and Expiration Date. To see more details, click a vendor to drill down to the vendor profile summary view. The summary view will have two tabs: Summary and Users.

view_vendors.png

Summary

The Summary tab includes all of the information about the vendor that was added during registration.

  • Primary Vendor Details: Important information about the vendor such as their Doing Business As and Business Type information.
  • Additional Vendor Details: Other additional details about the vendor such as their physical address, UEI number, and DUNS number.
  • Active Opportunities: Ongoing opportunities associated with that vendor.

vendor_profile_summary_tab.png

Users

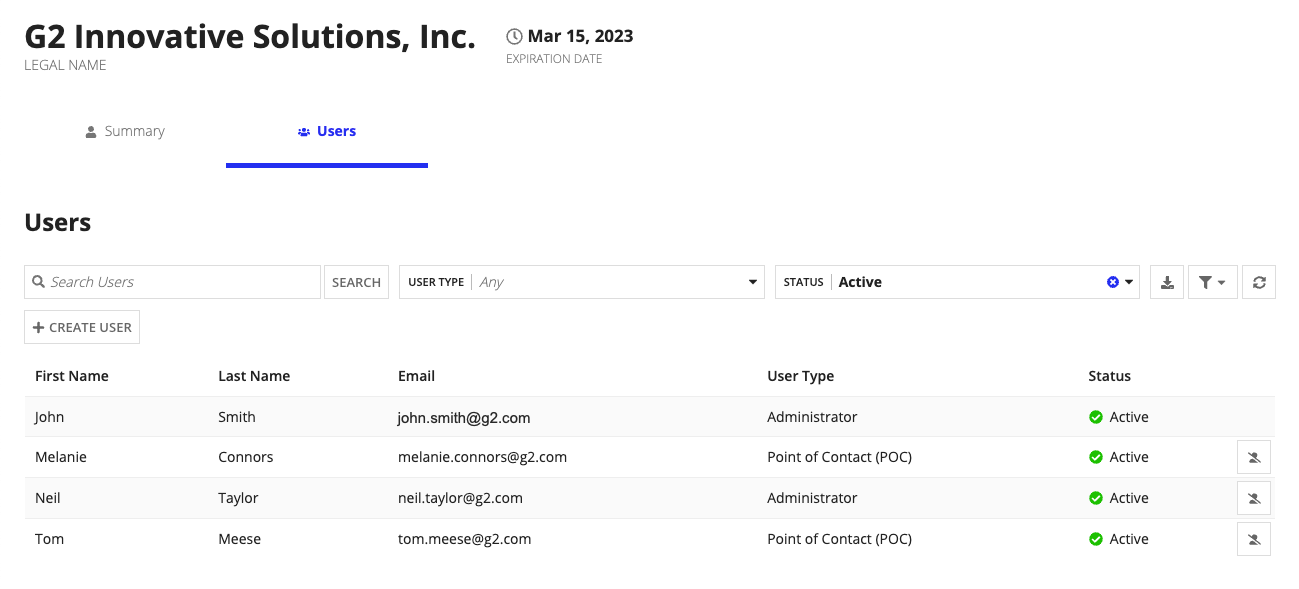
The Users tab displays a list of all users under the vendor. From here, you can search for users and filter by user type and status.

From the list you will see the following information for each user:

  • First and Last name
  • Email address
  • User type: The user type options are administrator or Point of Contact (POC) and is determined when the user is created.
  • Status: The options for status are active or inactive.

vendor_profile_user_tab.png

Adding additional users

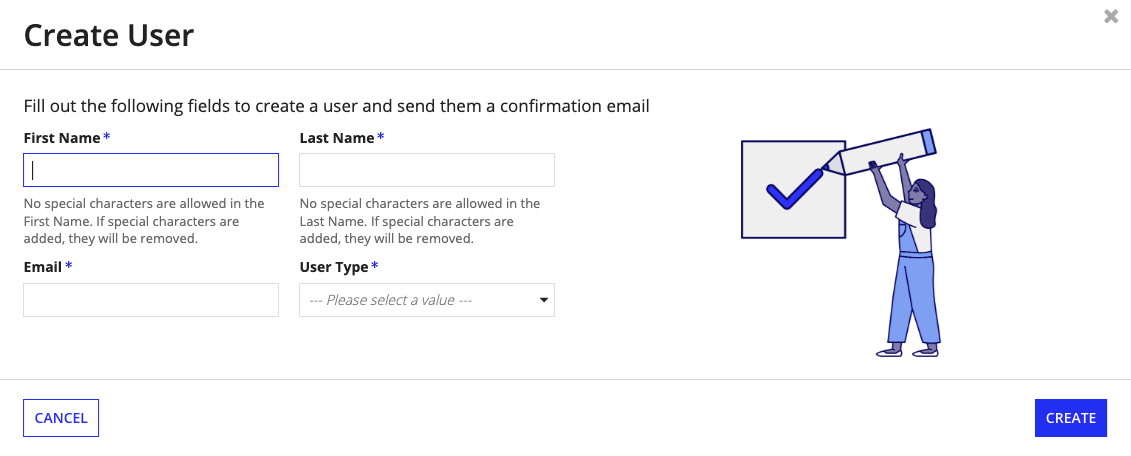
To add a new user to a vendor profile:

  1. Select the Users tab and click CREATE USER.
  2. Enter the following information:

    • First Name
    • Last Name
    • Email
    • User Type (Optional)
  3. Click CREATE.

The user will receive an email with sign in instructions.

vendor_profile_add_user.png

Editing vendors

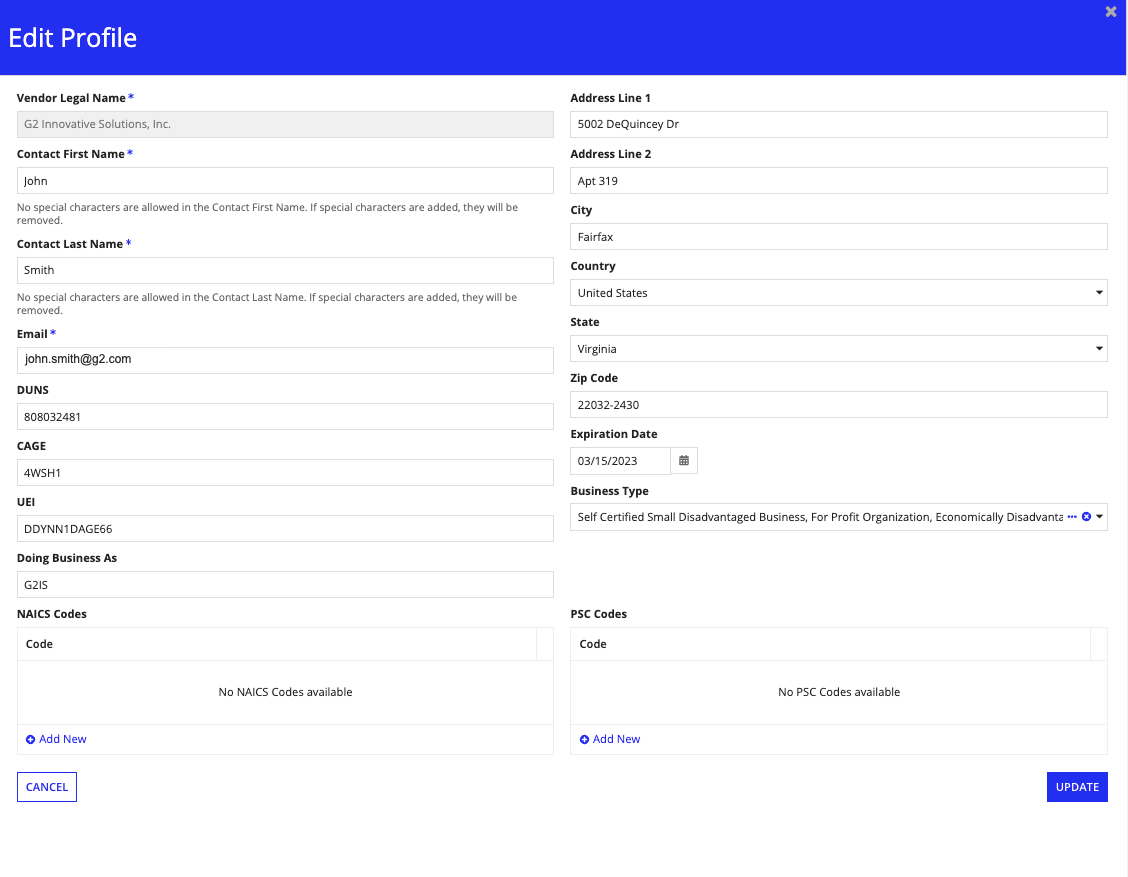
You can update a vendendor profile if any details change after registration. To edit a vendor profile, click Edit Profile, and update or add to any fields.

vendor_profile_edit_button.png

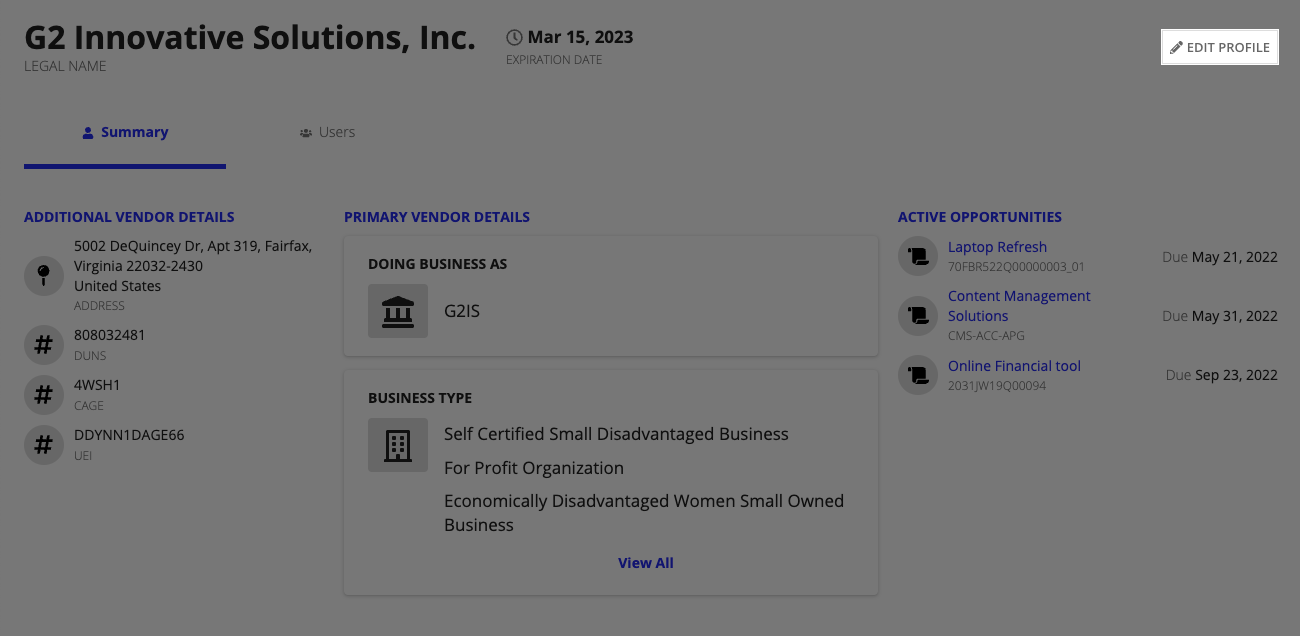
After registering a vendor, only the Vendor Legal Name field can no longer be edited. To confirm all edits and updates to a vendor record, click Update.

vendor_profile_edit.png

Managing Vendors

FEEDBACK