| This content applies solely to Vendor Management, which must be purchased separately from the Appian base platform. This content was written for Appian 23.2 and may not reflect the interfaces or functionality of other Appian versions. |
Vendor Management is the process of creating and updating an opportunity, as well as allowing vendors to submit proposals to be considered for an opportunity. This involves collecting and maintaining opportunity information and documents from both contracting professionals and vendors. The Vendor Management (VM) solution provides a guided, automated experience for collecting this information. After an opportunity is created, simple, informative record interfaces, enabled by Appian Records, allow end users to view and update this information.
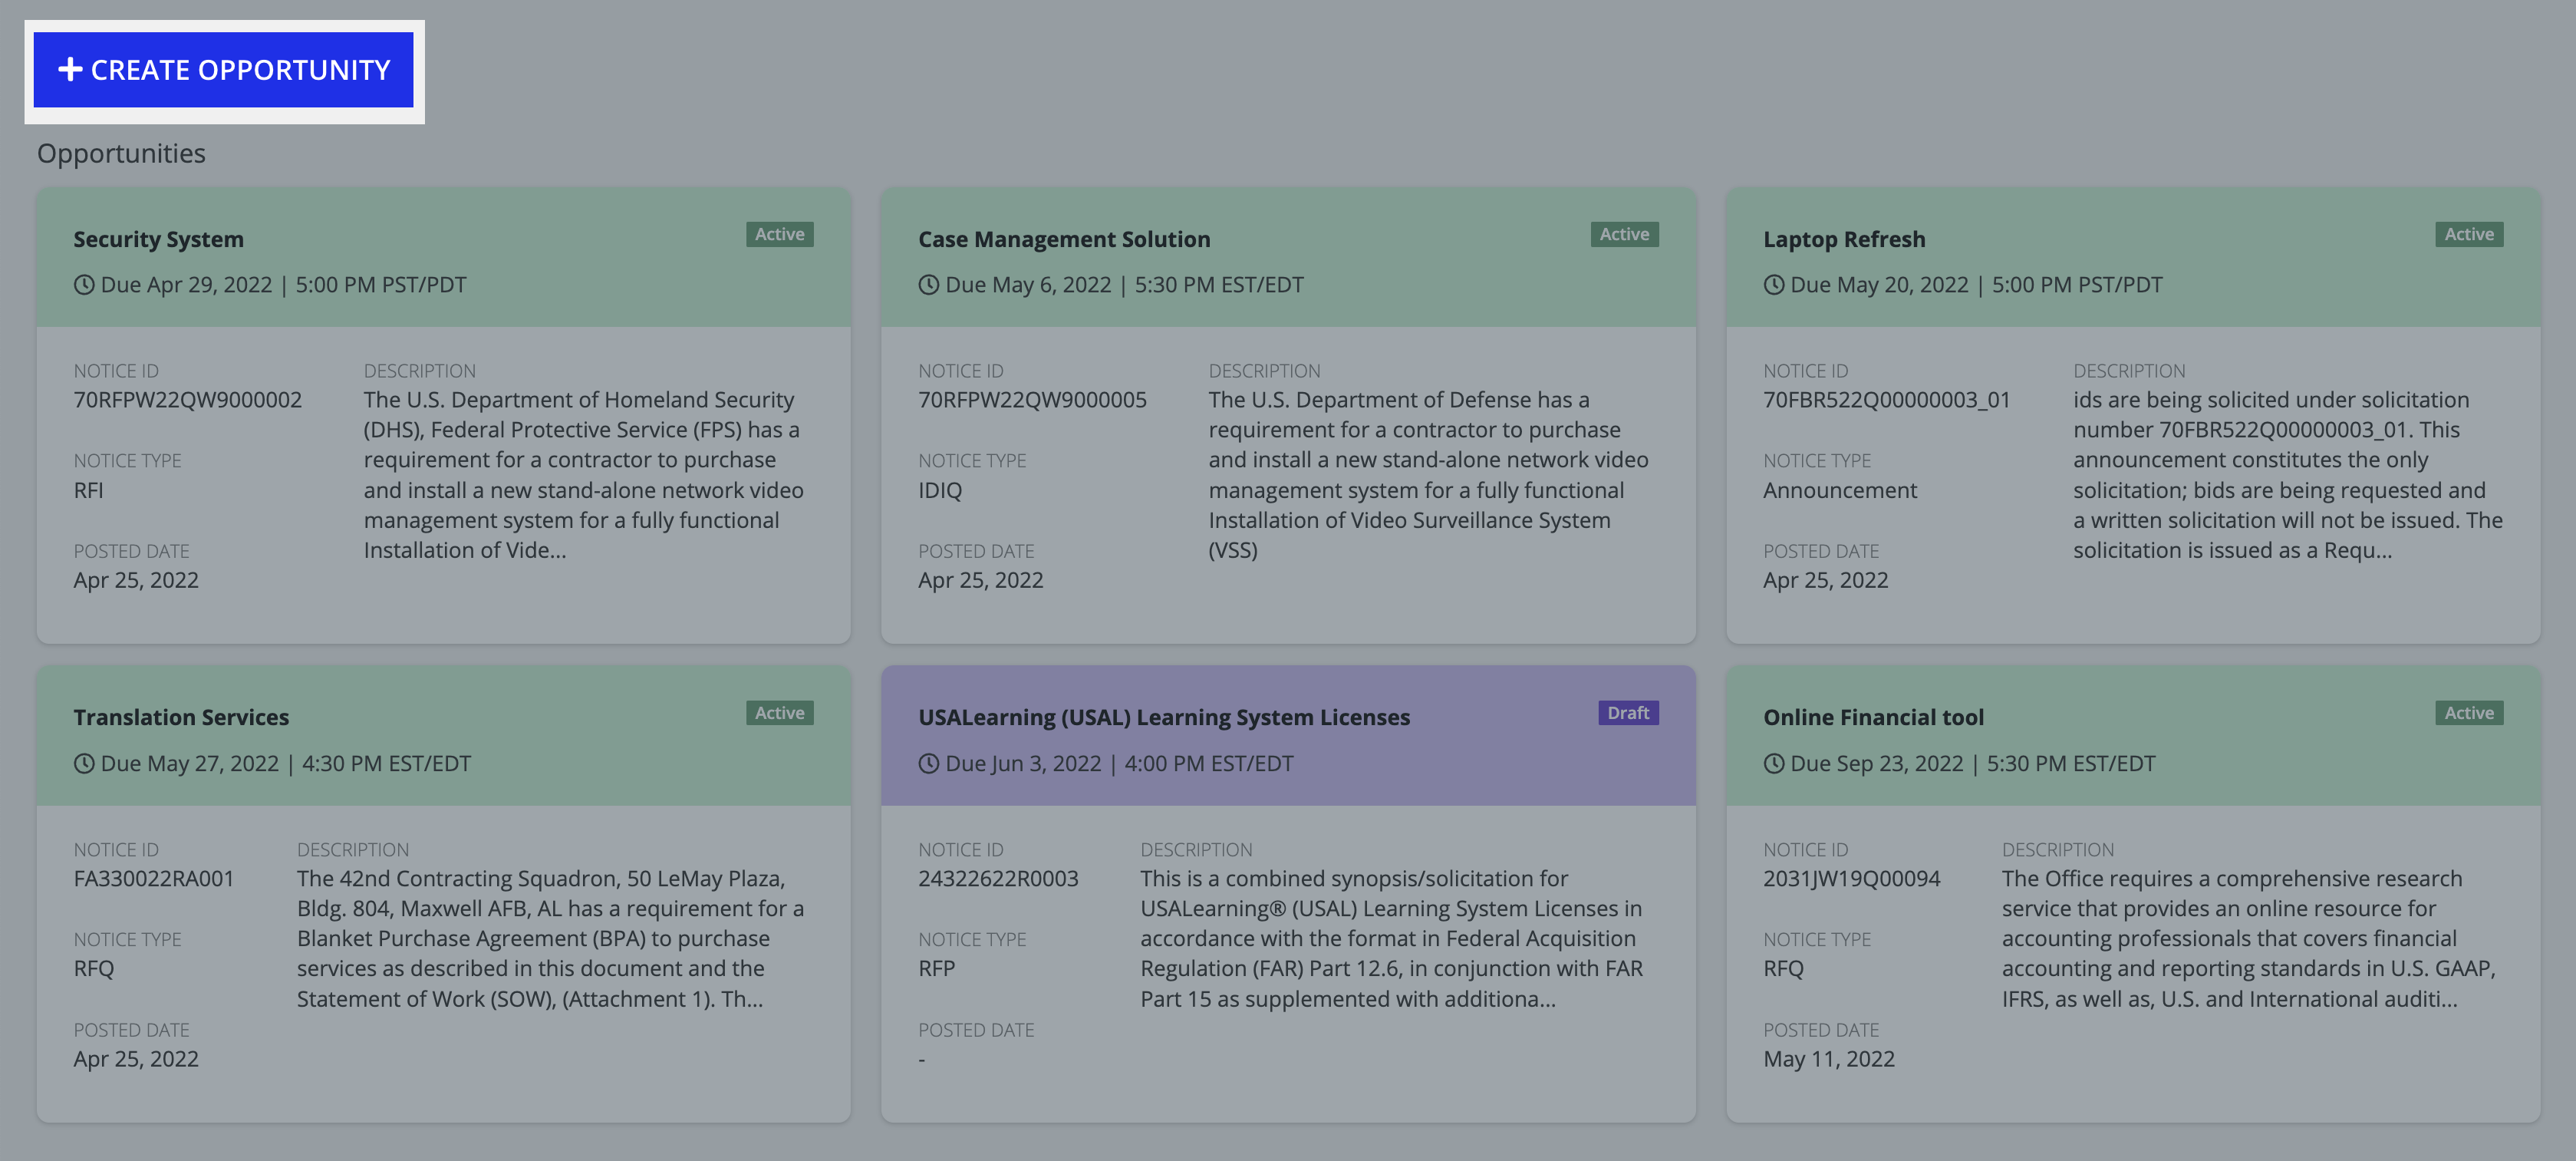
This page provides instructions for creating a new opportunity.
Creating a new opportunity is a guided experience that walks you through the process of entering the information you need to start the procurement process. Once initiated, you are guided through the following steps:
You must be a member of the AS VM Create or Update Opportunity PM Access security group to create a new evaluation. By default, the Contracting groups belong to this security group.
To start a new requirement, click + Create Opportunity from the Home or Opportunities page. The left side of the screen contains the various data collection steps required to create a new evaluation. You can click NEXT at the bottom of the form to go to the next step or SAVE & CLOSE to save a draft of the opportunity.
Note that after the information is entered, it will populate on the Opportunity record.
When creating an opportunity, you have the option to import an existing opportunity using SAM.gov and auto-populate your Create Opportunity wizard. Click Skip Step 1 to skip the import from SAM.gov and create your opportunity manually.
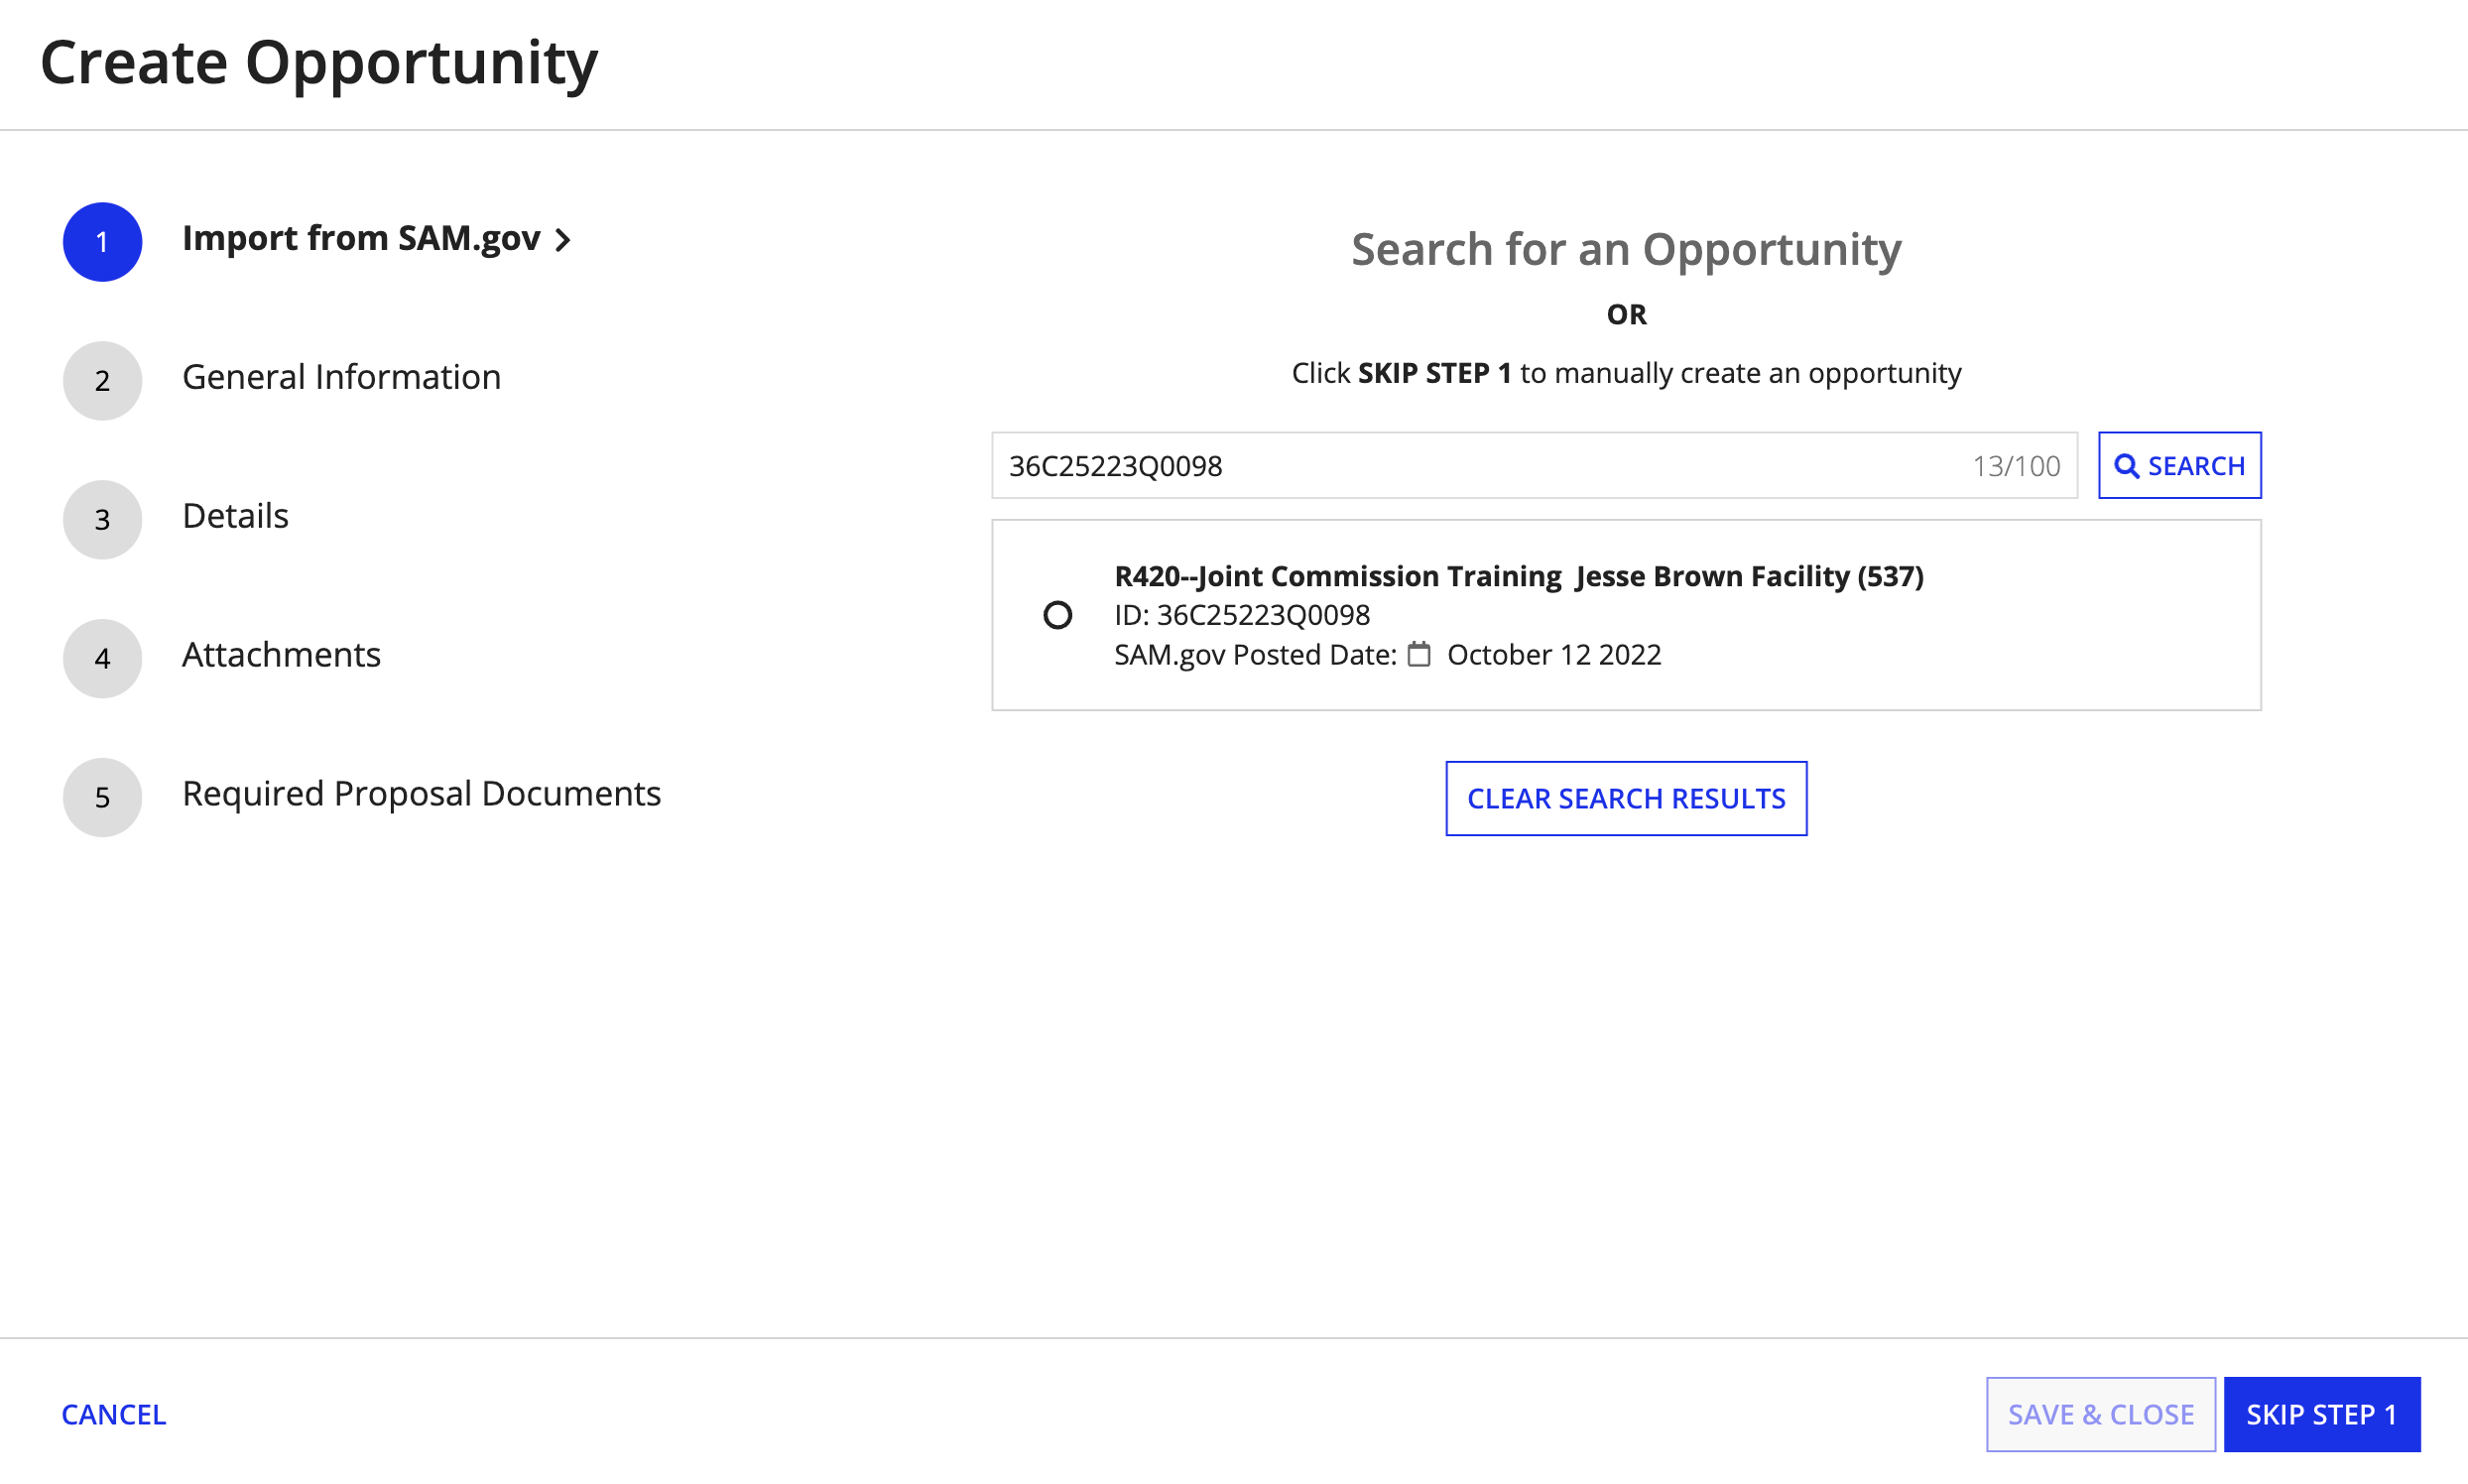
To pull in opportunity information from SAM.gov:
Next, enter details relevant to the new opportunity, such as the ID, opportunity title, description, and instructions. If you imported from SAM.gov, some fields will already be populated.
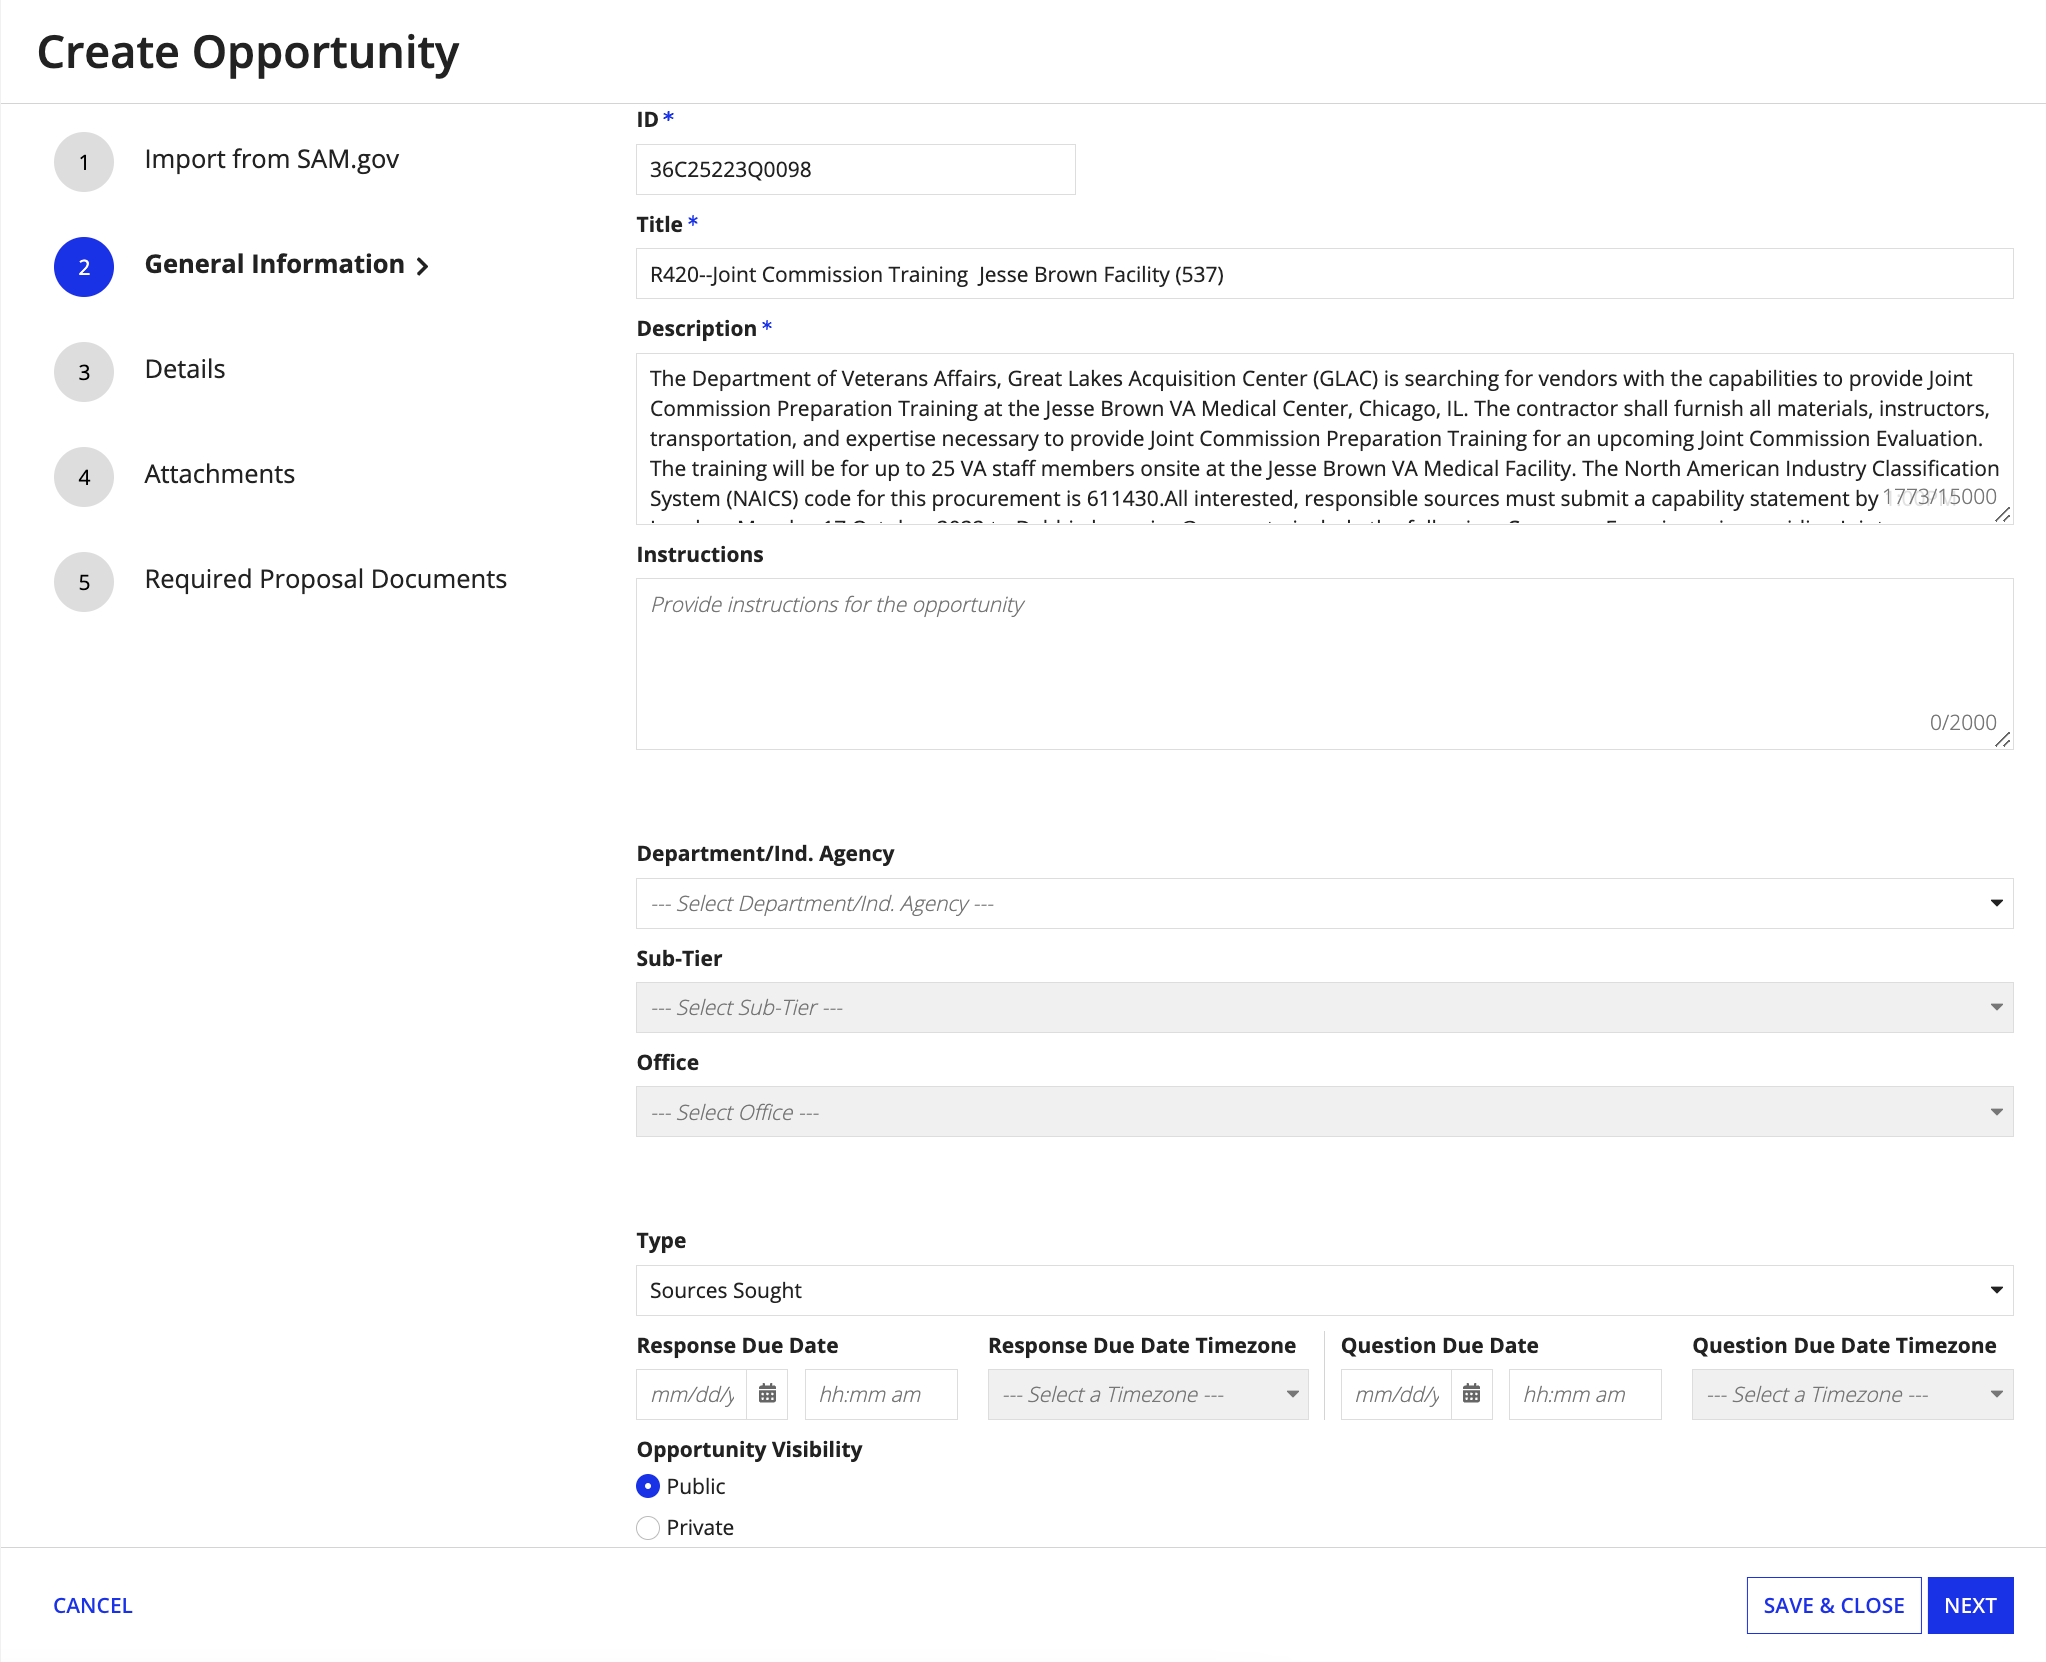
To enter general information about the opportunity:

The Details page is where you'll add details about the opportunity. You can provide an address for the Place of Performance, input NAICS and PSC codes, and select Set Aside Codes for the opportunity.
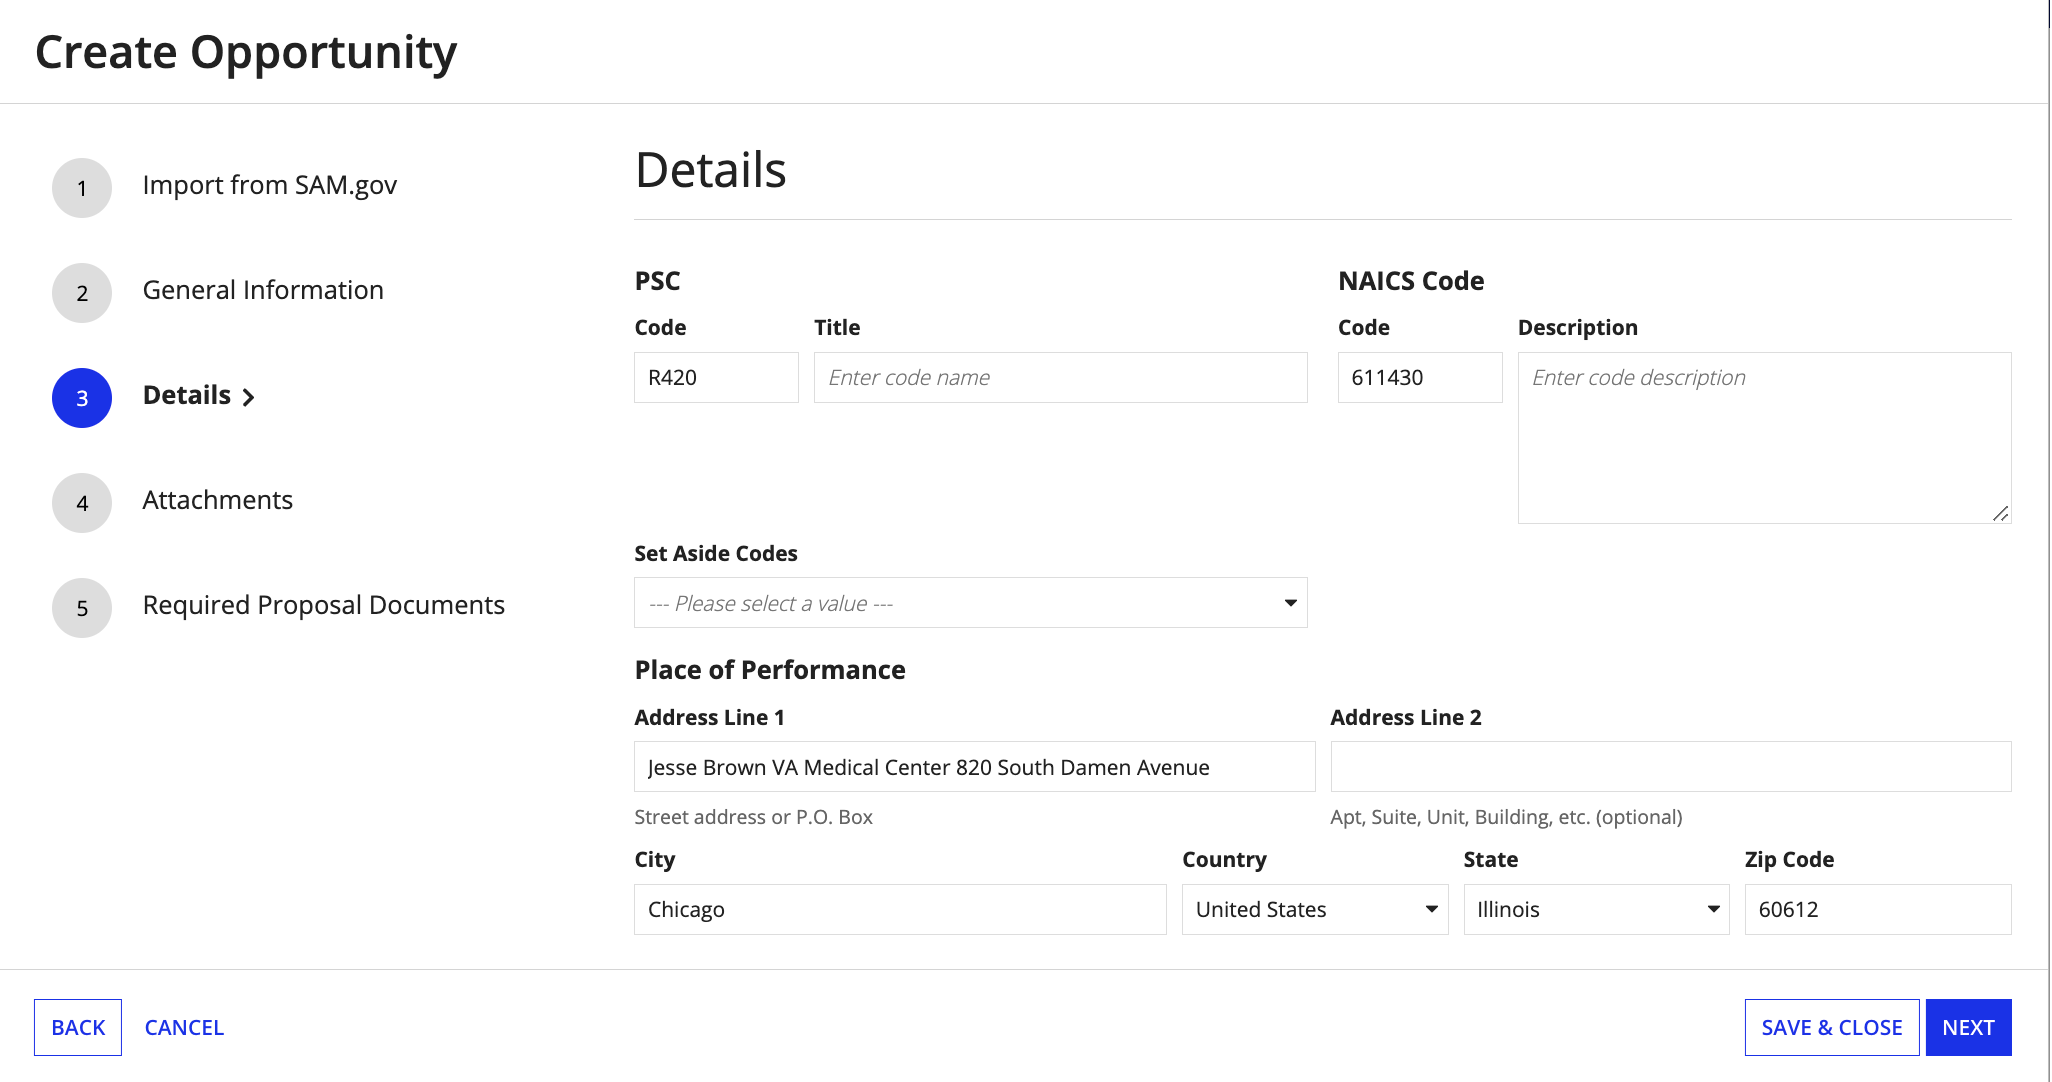
To provide additional details for the opportunity:
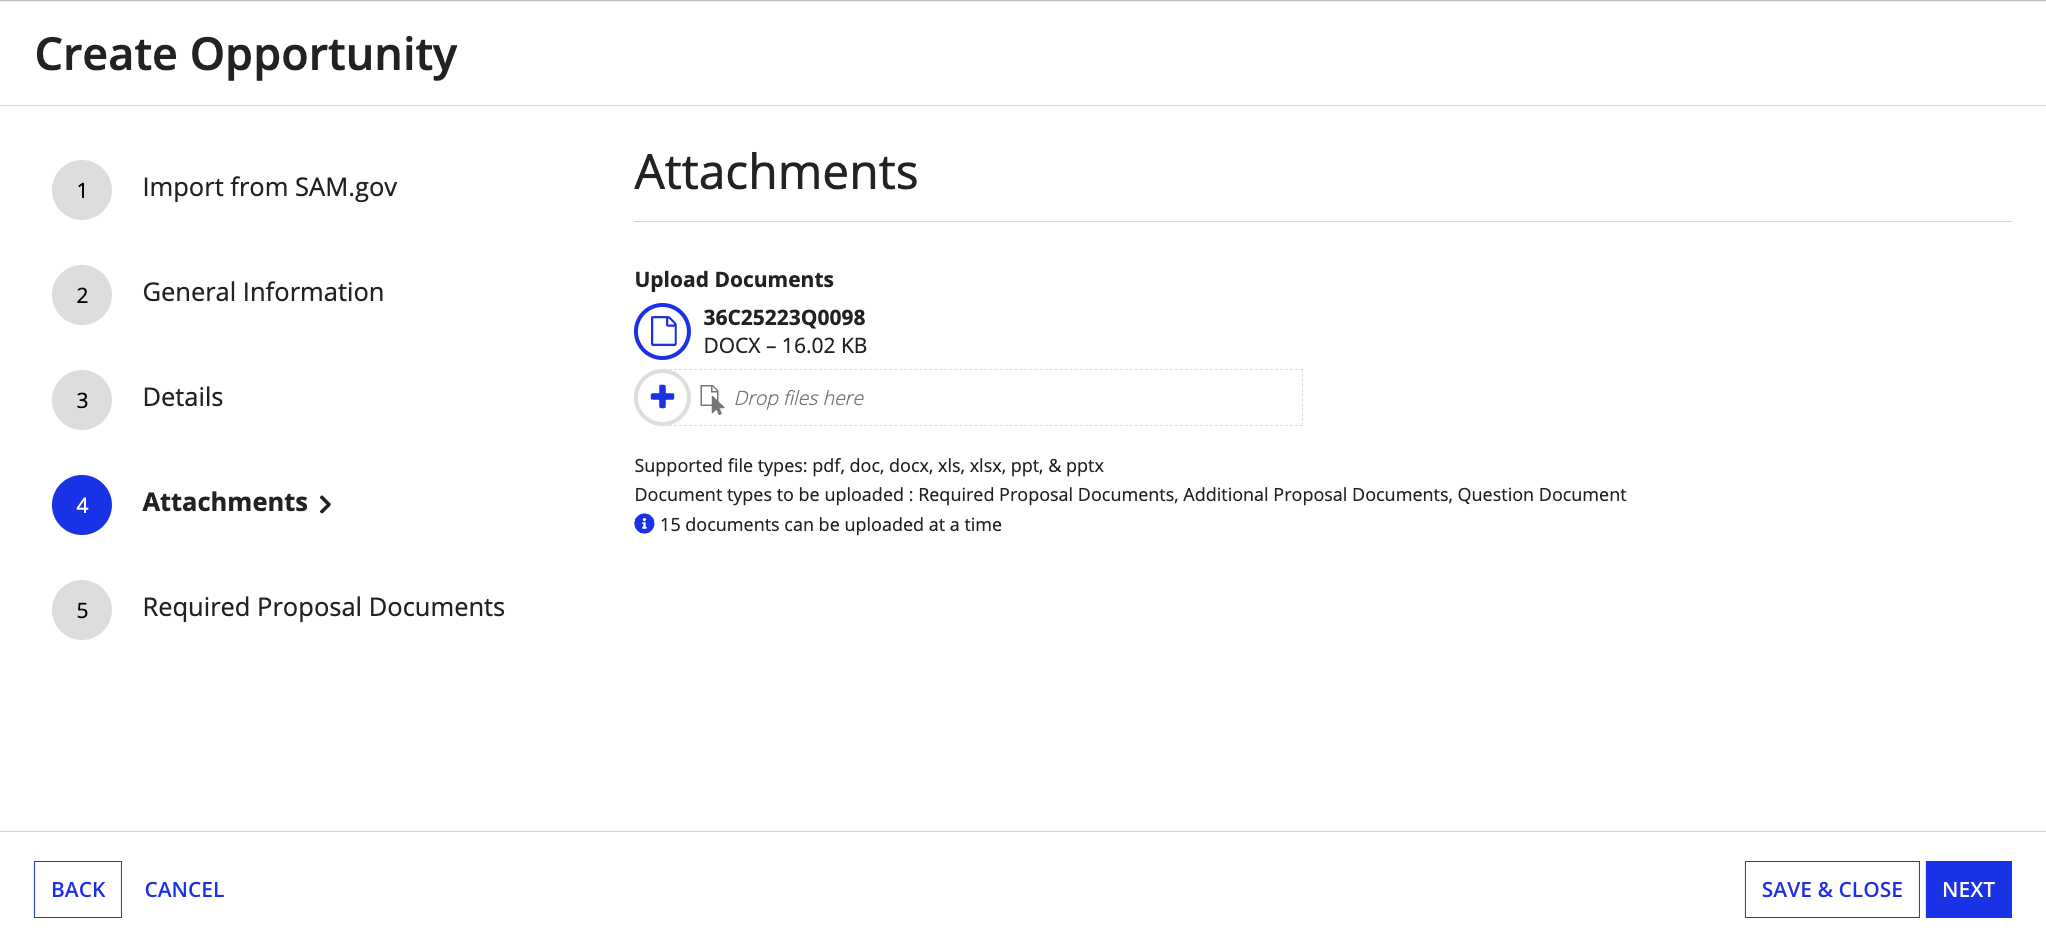
The Attachments page allows you to upload documents and forms to the opportunity for vendors to view and fill out.
To set up the factors for your vendor evaluation:
The Required Proposal Documents page allows you to add documents that vendors need to submit with their proposal and indicate whether there are forms that need to be completed.
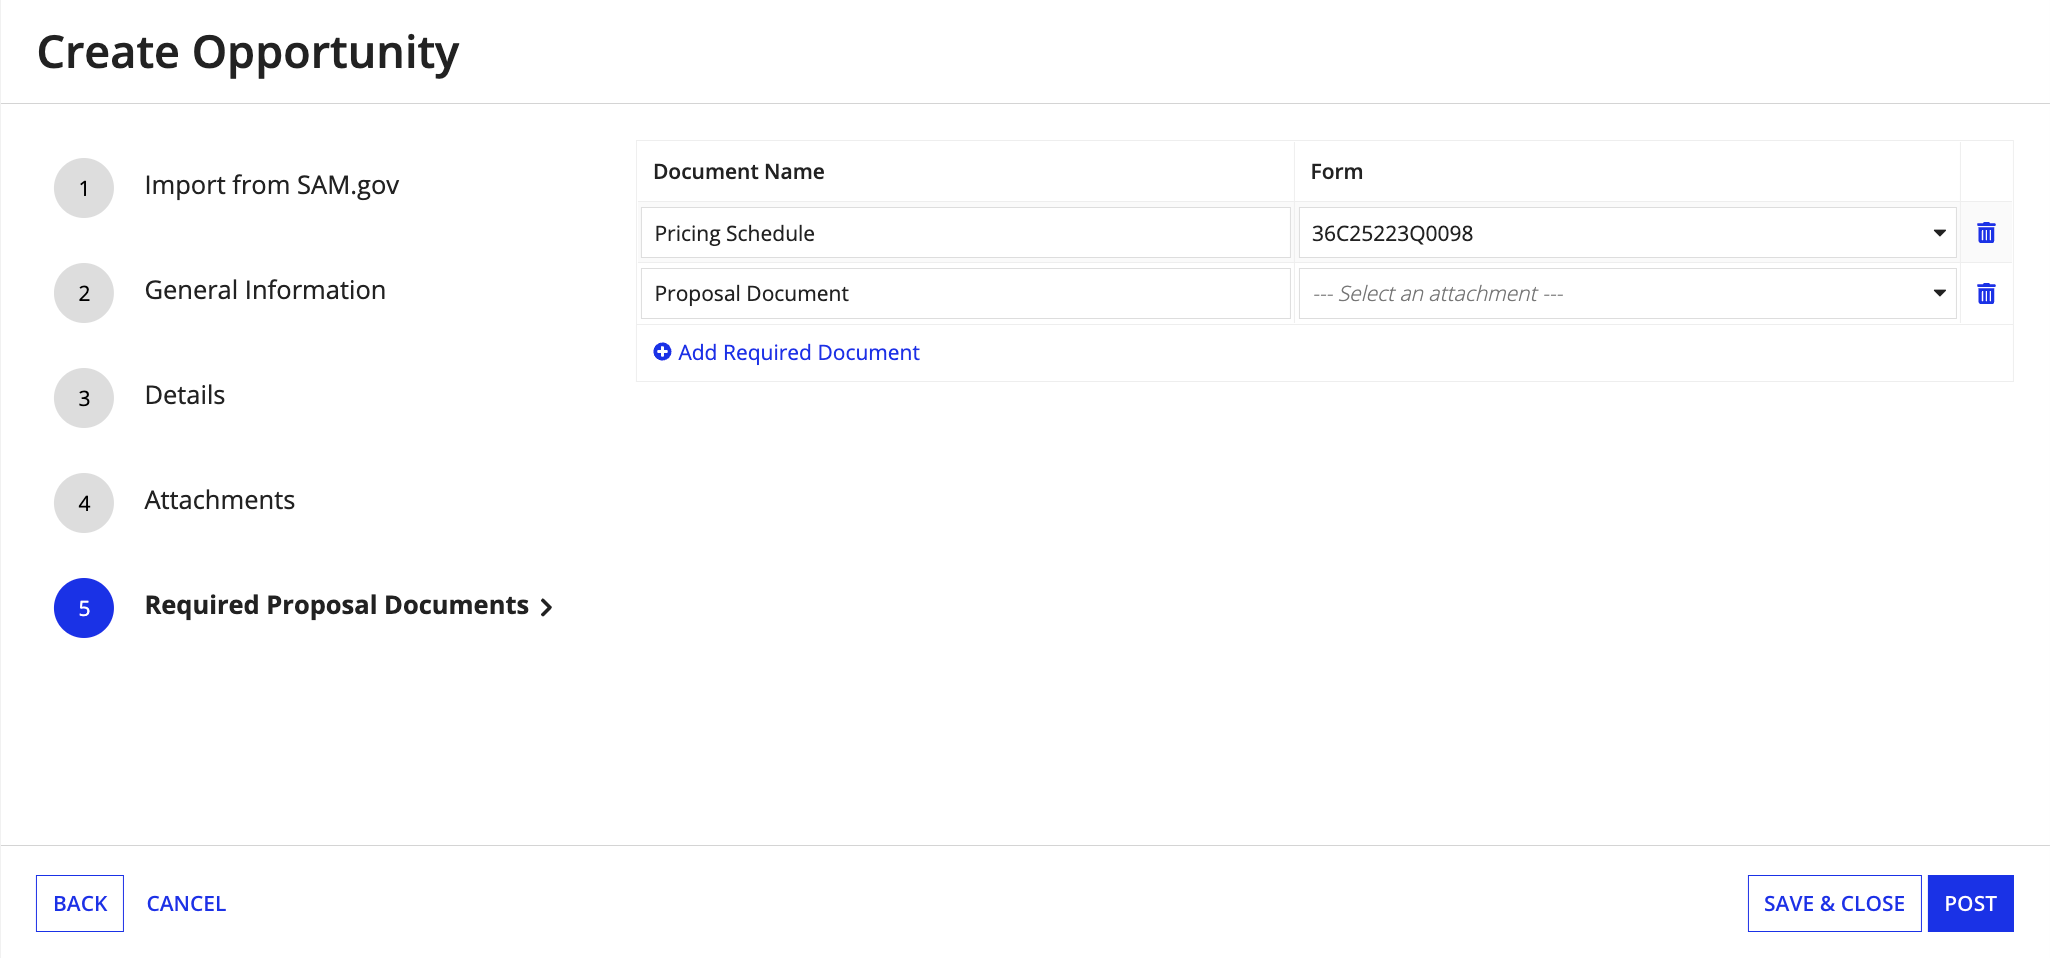
To add a required proposal document to your opportunity:
To post the evaluation:
Once you have posted the evaluation, a confirmation will display indicating that the opportunity has been started. From here, you can close out and track vendors' progress.
Creating Opportunities
