
IntroductionCopy link to clipboard
After installing the Report Builder module, you need to set it up before using it with Case Management Studio. This guide walks you through the recommended setup steps, which include:
- Importing record schemas.
- Configuring record types for reports .
- Incorporating the Report Builder page group in the Workspace site.
- Incorporating a quick action in the Reporting page group.
- Translating the application.
Step 1: Importing record schemasCopy link to clipboard
This is a required step. In order to build reports on data in other applications in the environment using Report Builder, you first need to import record schemas. The following steps need to be completed by a user with administrator access to the applications that will be set up for reporting with Report Builder.
To create and export a record package:
- In Appian Designer, navigate to your application.
- Click Build, then CREATE PACKAGE.
- Under All Objects, click the Record Types filter.
- Click the checkbox for each record type you want to enable reporting on in the Report Builder.
- Click ADD TO PACKAGE.
- Select the package you created, and click ADD.
- Once you add all record types to the package you want to report on, select your package and click EXPORT PACKAGE.
To import record schemas:
- In Report Builder as an SEUR Admin user, go to Admin Tools.
- Click UPLOAD RECORD SCHEMAS.
- Click UPLOAD and select the record package you exported.
- Click SUBMIT.
Step 2: Configuring record types for reportsCopy link to clipboard
This is a required step. Once you import record schemas in Step 1, you must configure each record so business users can create reports.
To configure a reporting record type:
- In Report Builder as an SEUR Admin user, go to the Admin Tools page.
- Click CONFIGURE REPORTING RECORD TYPES.
- Click Add Reporting Record.
- Select the base record for which you would like to enable business users to create reports.
-
Note: You only select the base record, like Cases, in this step. In subsequent steps, you will select the related records, like Statuses and Case Types, you included when you imported the record schema you want to include and enable in reports on the base record.
-
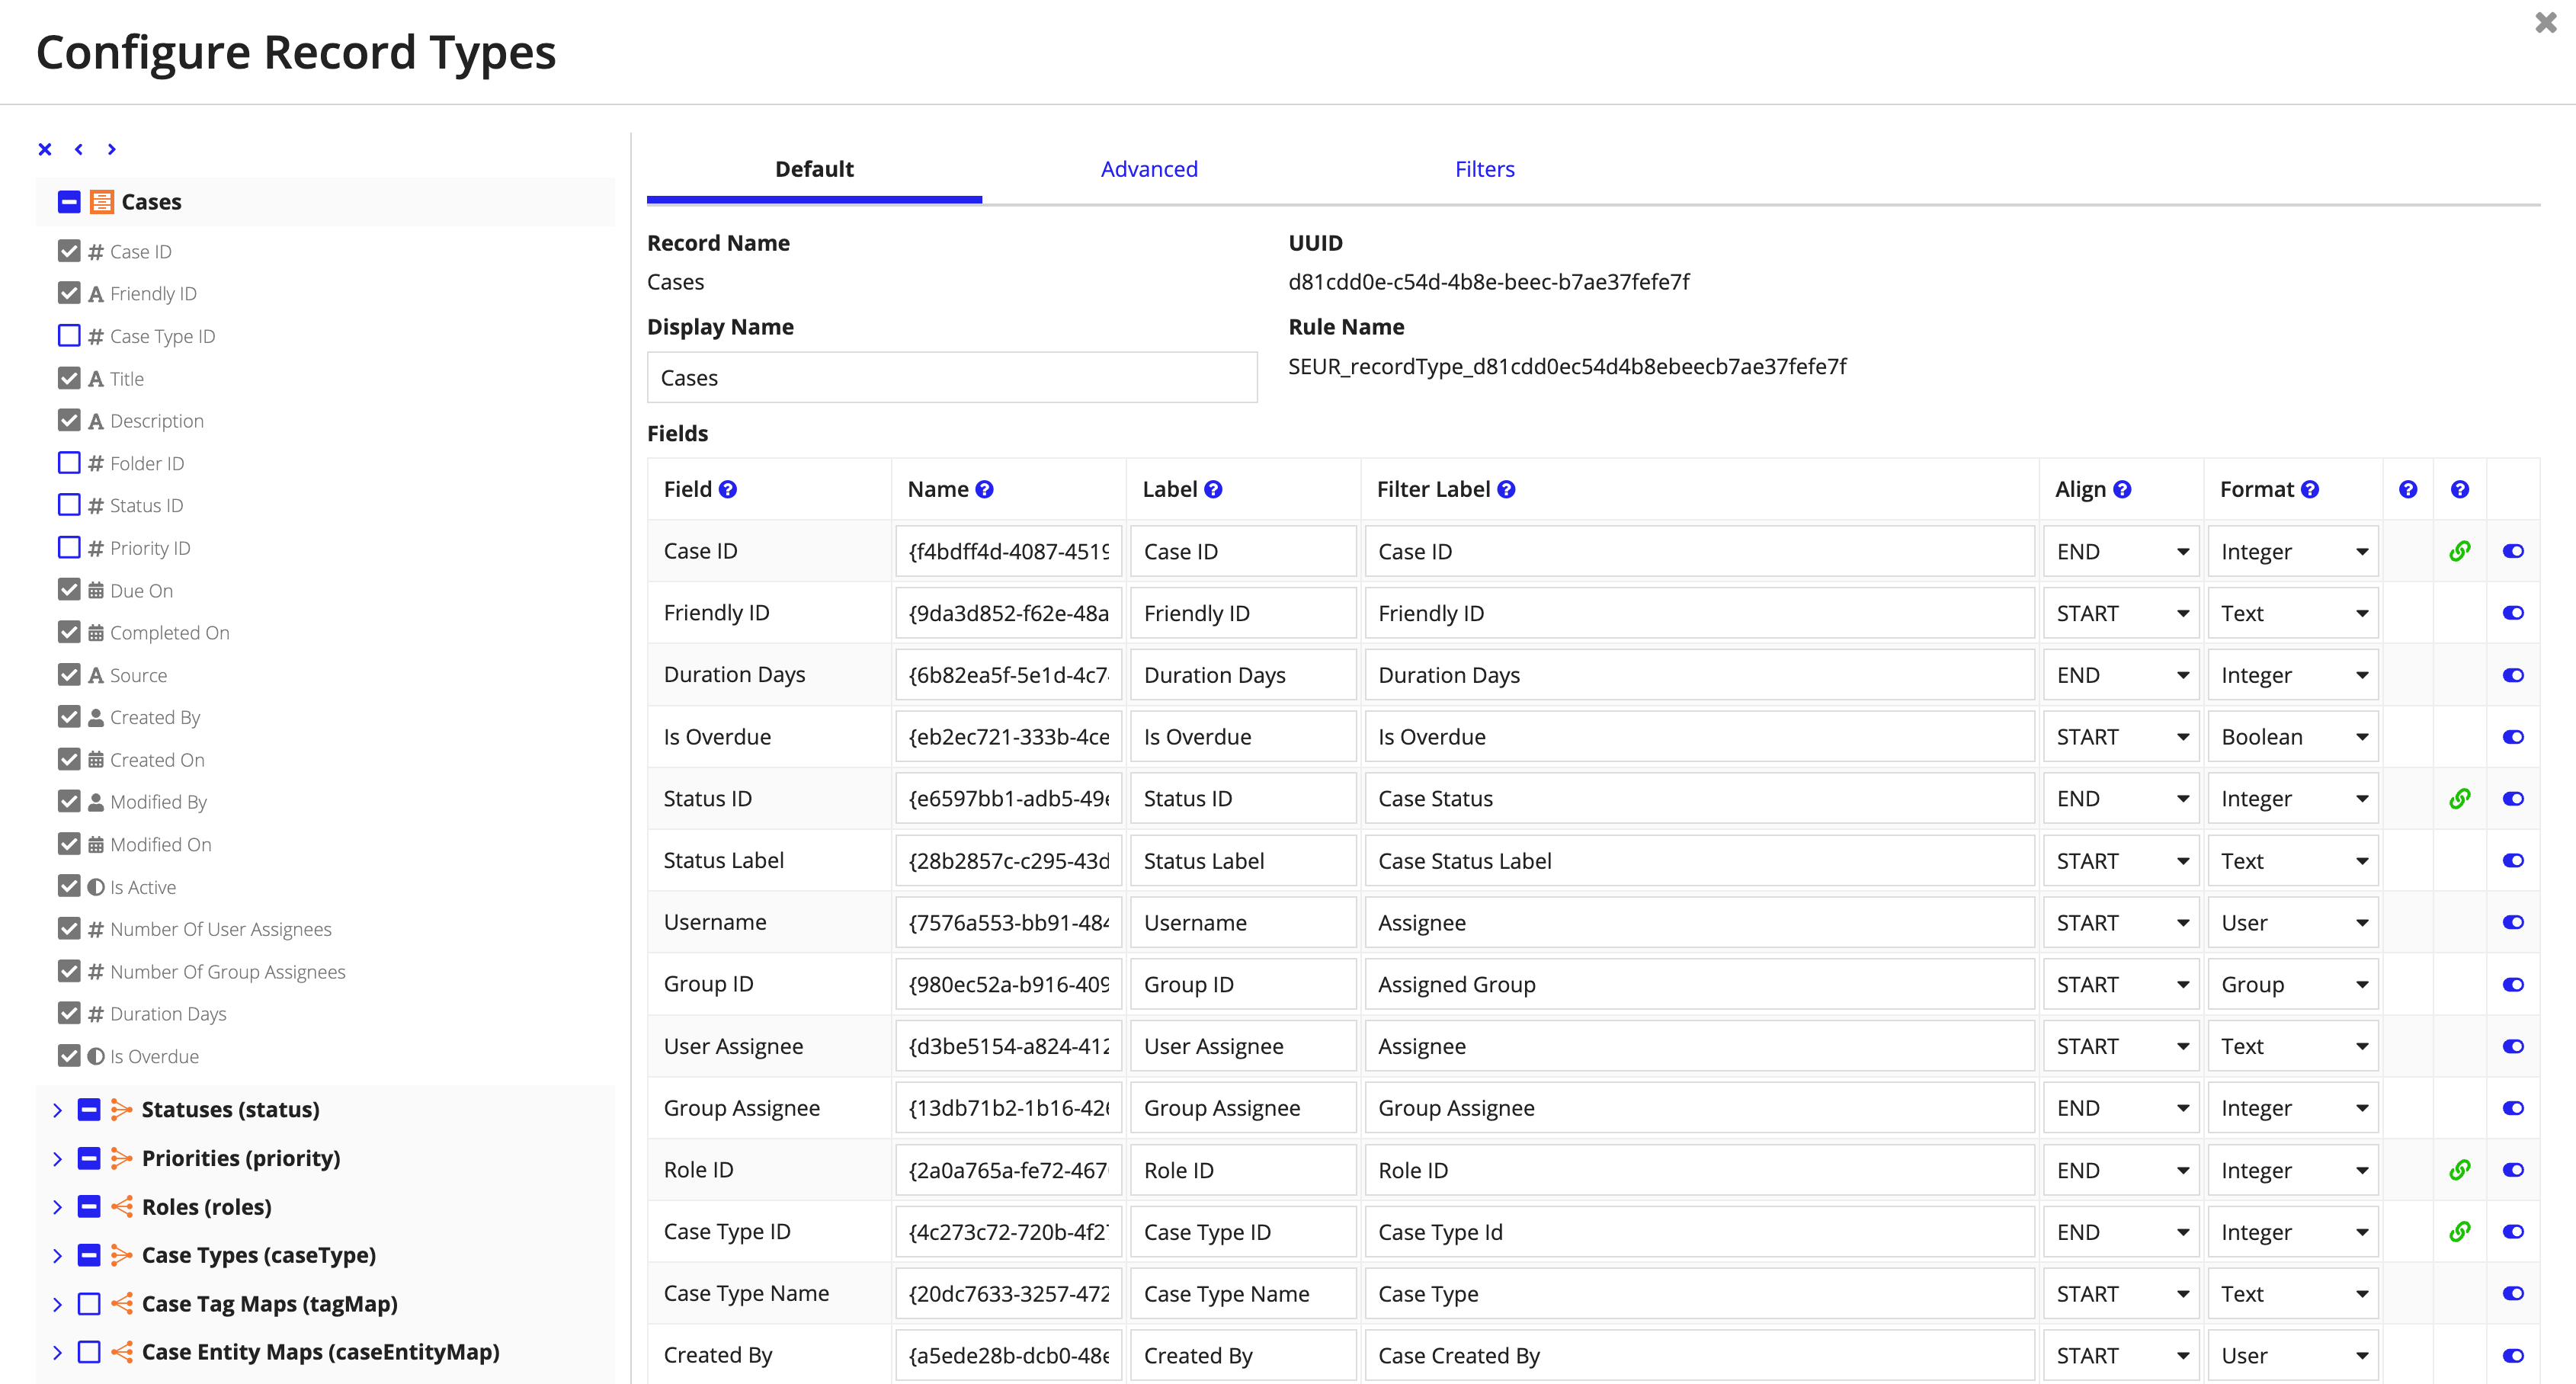
- Click the Edit icon for the selected record to configure it.
- Click the checkbox for each field and related record field you would like to enable users to include in the reports they build on the record type you are configuring.
- On the Default tab:
-
Configure the Label and Filter Label attributes for each field as desired.
- Select fields in Grid Report Filters to enable the fields to be added as user filters to grid reports created on the record type.
- Select record actions and related actions in Actions to enable the actions to be added to raw data grid reports and dashboards.
- Note: Record actions and related actions can be added to grid reports. Only record actions can be added to dashboards.
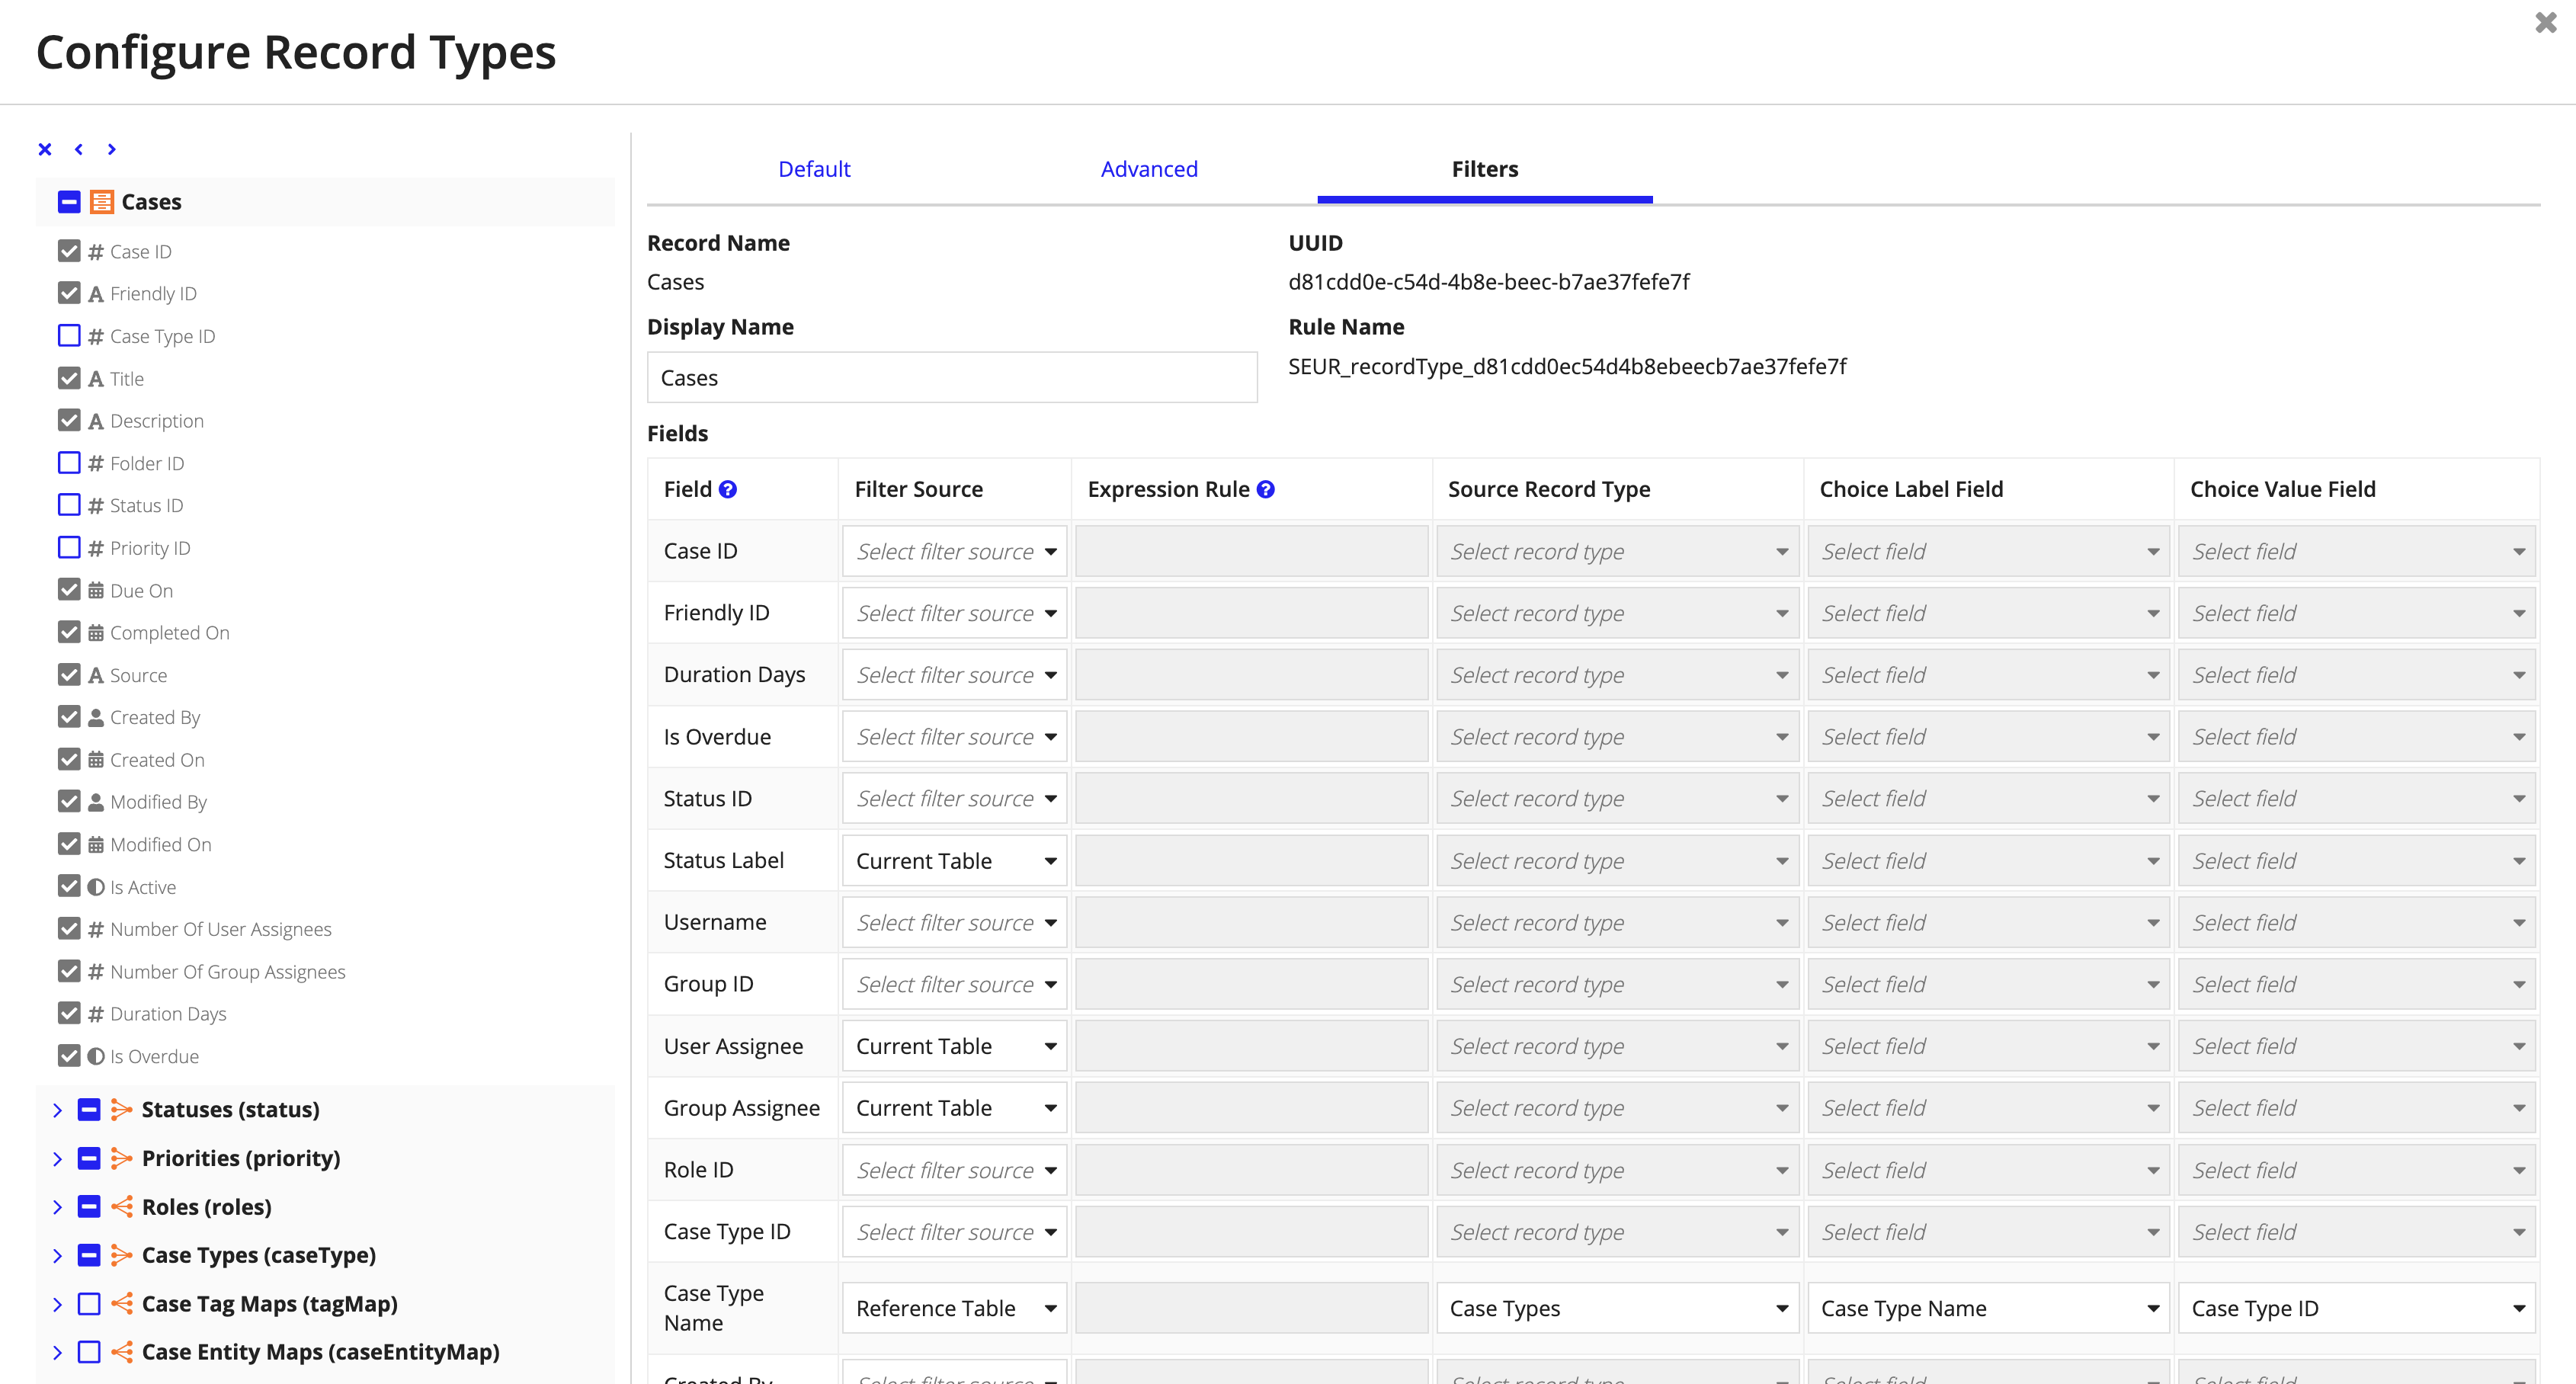
-
-
Navigate to the Filters tab and configure each field's data source for filtering. This step is crucial for text fields and reference data fields so that dropdown filters are provided to end users.
- After configuring the record fields, click SAVE.
- Click SAVE AND CLOSE.
Step 3: Incorporating the Report Builder page group in the Workspace siteCopy link to clipboard
This is an optional step. The following steps will add a REPORTING page group to the Workspace site with all Report Builder pages nested within.
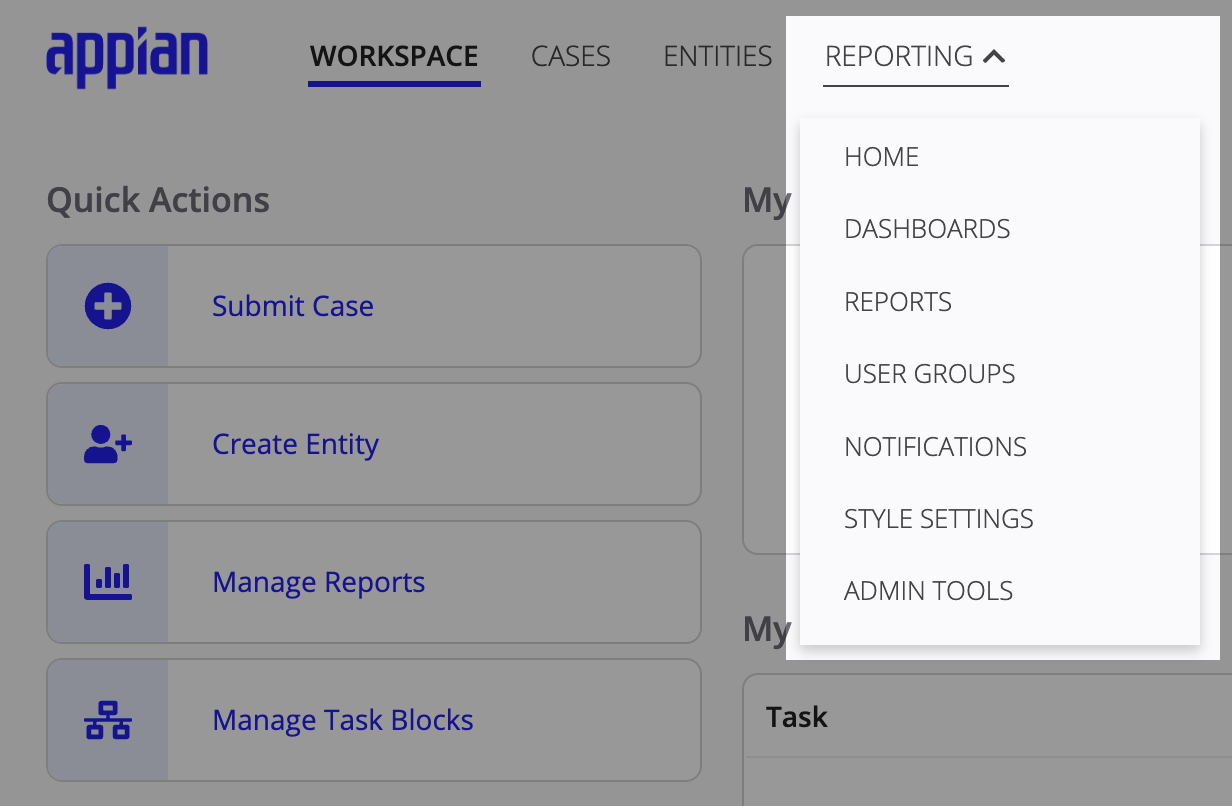
If you do not complete this optional step, users with access to Report Builder will still be able to access Report Builder from the site menu.
Add the Reporting page groupCopy link to clipboard
To add the Report Builder page group to the main Workspace site, complete the following steps:
- In Appian Designer, go to the CMGT Case Management Studio Base.
- Search for CMGT_WorkspaceSite.
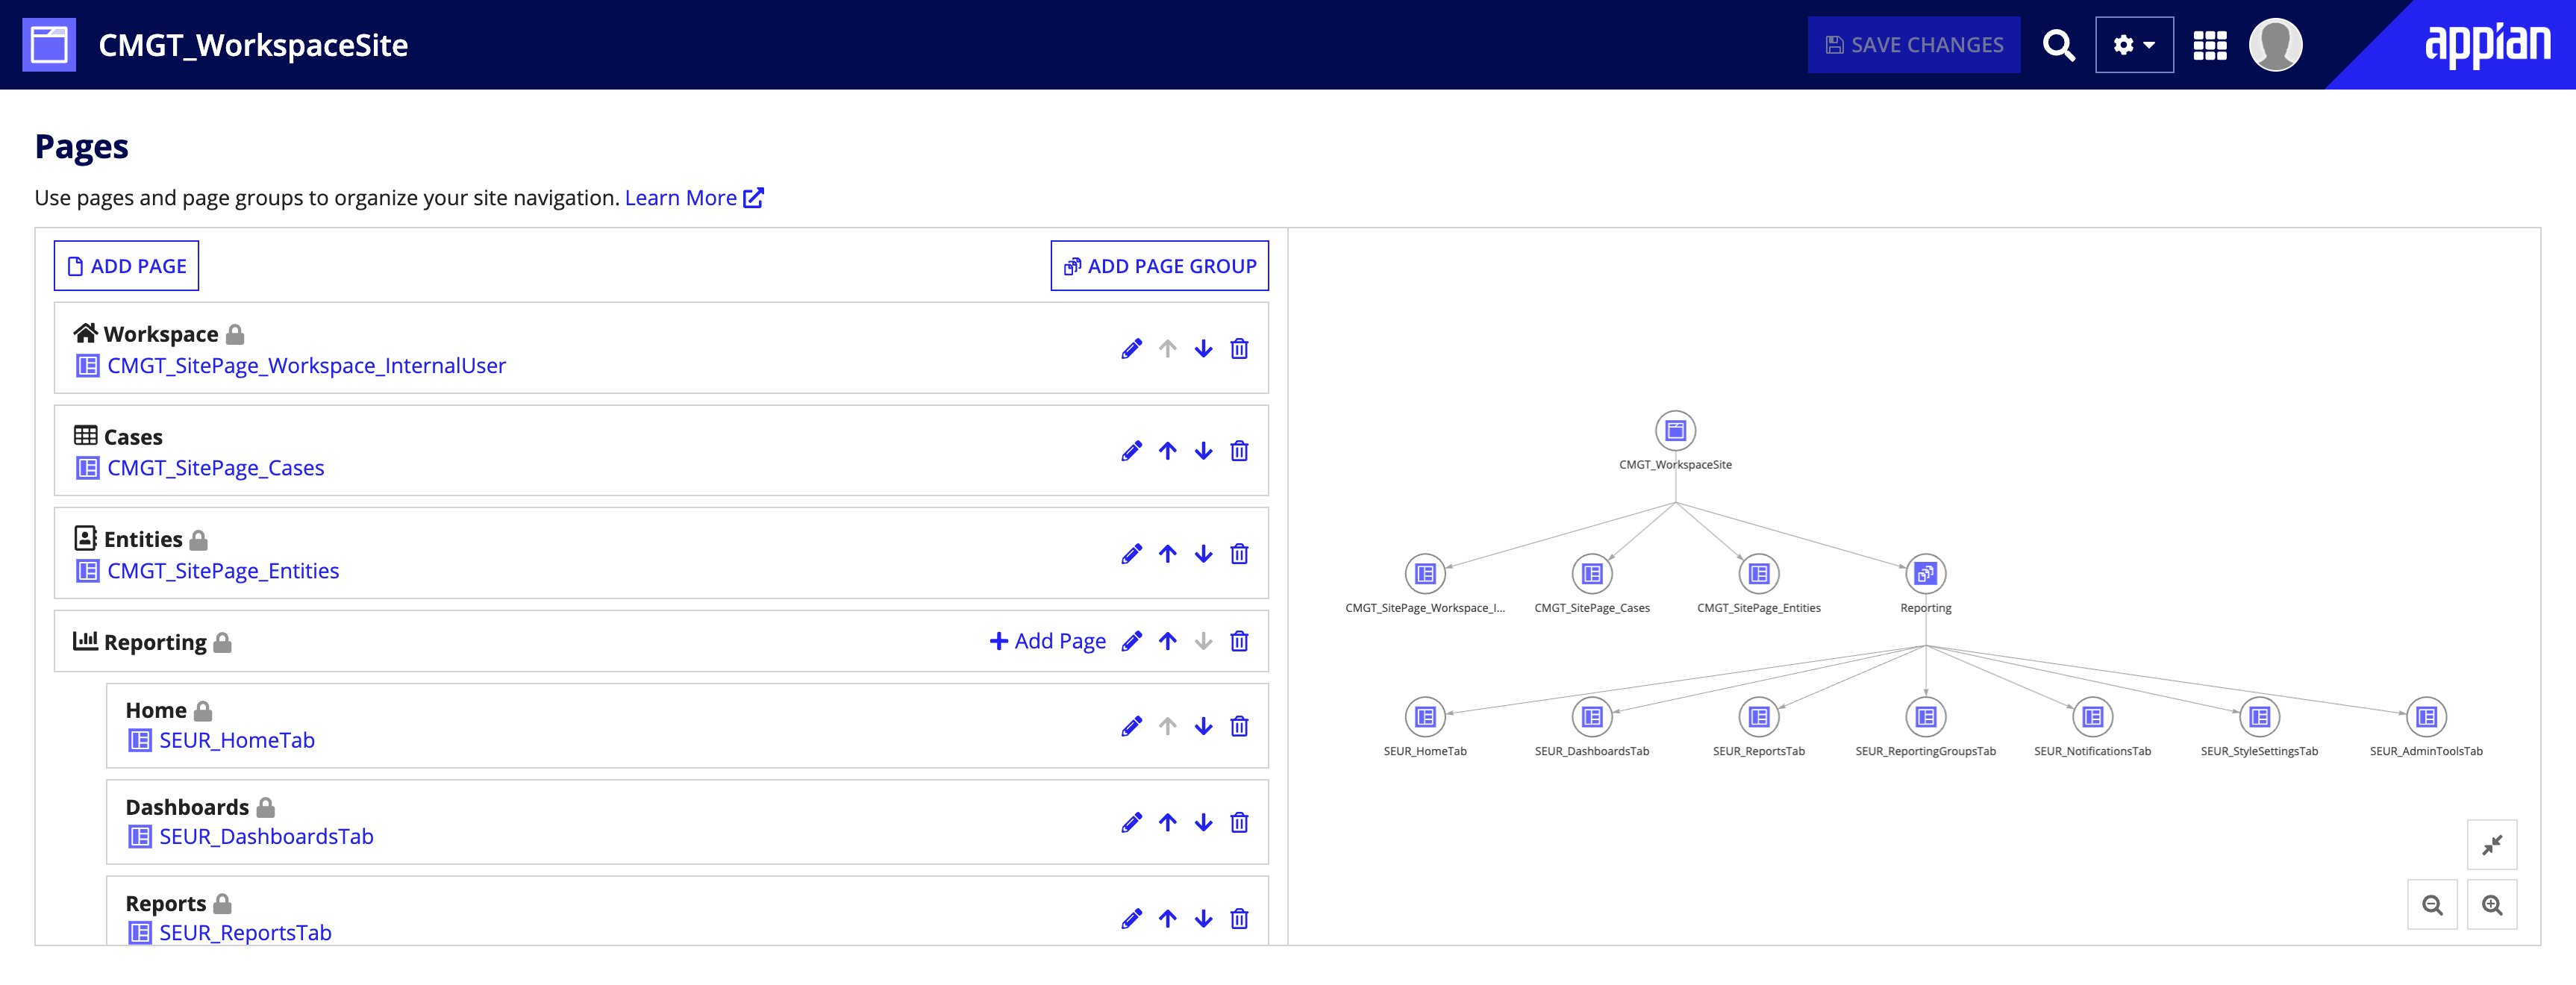
- Under Pages, click ADD PAGE GROUP.
- Complete the Add Page Group dialog. You may use the values suggested below or write your own.
- Title: Click Expression and enter
translation!Reporting. - Web Address Identifier:
reporting. - Icon:
bar-chart. - Visibility: Click Only show when… and copy and paste the following code block:
1
2
3
4
a!isUserMemberOfGroup(
   username: loggedInUser(),
   groups: cons!SEUR_GRP_ALL_USERS
)
Copy
- Title: Click Expression and enter
- Click ADD.
Add the Home pageCopy link to clipboard
The Home page is unique to each user and allows them to add up to five important dashboards to their work. In order to add the Home page to the Reporting page group, complete the following steps:
- Click + Add Page in the Reporting page group card
- Complete the Add Page dialog as follows.
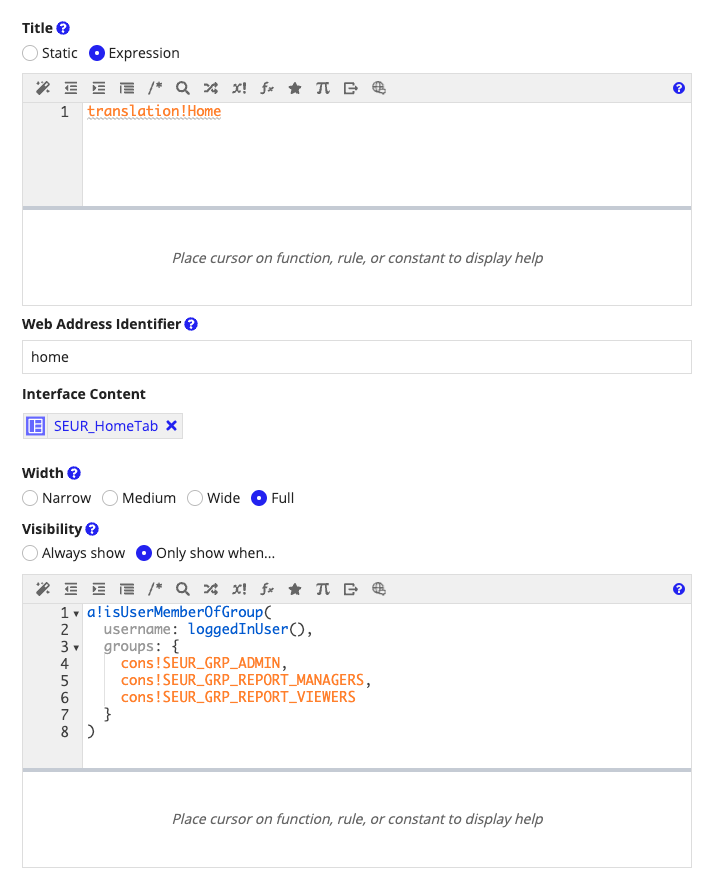
- Title: Click Expression and enter
translation!Home. - Web Address Identifier:
home. - Interface Content:
SEUR_HomeTab. - Width: Click Full.
-
Visibility: Click Only show when… and copy and paste the following code block:
1 2 3 4 5 6 7 8
a!isUserMemberOfGroup( username: loggedInUser(), groups: { cons!SEUR_GRP_ADMIN, cons!SEUR_GRP_REPORT_MANAGERS, cons!SEUR_GRP_REPORT_VIEWERS } )Copy
- Title: Click Expression and enter
-
Click ADD.
Add the Dashboards pageCopy link to clipboard
The Dashboards page provides a grid of all Dashboards created by Report Builder users. To add the Dashboards page to the Reporting page group, complete the following steps:
- Click + Add Page in the Reporting page group card
- Complete the Add Page dialog as follows.
- Title: Click Expression and enter
translation!Dashboards. - Web Address Identifier:
dashboards. - Interface Content:
SEUR_DashboardsTab. - Width: Click Full.
-
Visibility: Click Only show when… and copy and paste the following code block:
1 2 3 4 5 6 7 8
a!isUserMemberOfGroup( username: loggedInUser(), groups: { cons!SEUR_GRP_ADMIN, cons!SEUR_GRP_REPORT_MANAGERS, cons!SEUR_GRP_REPORT_VIEWERS } )Copy
- Title: Click Expression and enter
- Click ADD.
Add the Reports pageCopy link to clipboard
The Reports page provides a grid of all Reports created by Report Builder users. To add the Reports page to the Reporting page group, complete the following steps:
- Click + Add Page in the Reporting page group card
- Complete the Add Page dialog as follows.
- Title: Click Expression and enter
translation!Reports. - Web Address Identifier:
reports. - Interface Content:
SEUR_ReportsTab. - Width: Click Full.
-
Visibility: Click Only show when… and copy and paste the following code block:
1 2 3 4 5 6 7 8
a!isUserMemberOfGroup( username: loggedInUser(), groups: { cons!SEUR_GRP_ADMIN, cons!SEUR_GRP_REPORT_MANAGERS, cons!SEUR_GRP_REPORT_VIEWERS } )Copy
- Title: Click Expression and enter
- Click ADD.
Add the User Groups pageCopy link to clipboard
The User Groups page provides a grid of all User Groups created for sharing reports and dashboards created using Report Builder. To add the User Groups page to the Reporting page group, complete the following steps:
- Click + Add Page in the Reporting page group card
- Complete the Add Page dialog as follows.
- Title: Click Expression and enter
translation!User Groups. - Web Address Identifier:
user-groups. - Interface Content:
SEUR_ReportingGroupsTab. - Width: Click Full.
- Visibility: Click Only show when… and copy and paste the following code block:
1 2 3 4 5 6 7
a!isUserMemberOfGroup( username: loggedInUser(), groups: { cons!SEUR_GRP_REPORTING_GROUP_MANAGERS, cons!SEUR_GRP_ADMIN } )Copy - Title: Click Expression and enter
- Click ADD.
Add the Notifications pageCopy link to clipboard
The Notifications page provides a grid of all notifications scheduled that will email reminders to specified Report Builder users to view a specific report or dashboard. To add the Notifications page to the Reporting page group, complete the following steps:
- Click + Add Page in the Reporting page group card
- Complete the Add Page dialog as follows.
- Title: Click Expression and enter
translation!Notifications. - Web Address Identifier:
notifications. - Interface Content:
SEUR_Notifications. - Width: Click Full.
- Visibility: Click Only show when… and copy and paste the following code block:
1 2 3 4 5 6 7
a!isUserMemberOfGroup( username: loggedInUser(), groups: { cons!SEUR_GRP_ADMIN, cons!SEUR_GRP_REPORT_MANAGERS } )Copy
- Title: Click Expression and enter
- Click ADD.
Add the Style Settings pageCopy link to clipboard
The Style Settings page displays the styling configured in Solutions Hub for Report Builder. To add the Style Settings page to the Reporting page group, complete the following steps:
- Click + Add Page in the Reporting page group card
- Complete the Add Page dialog as follows.
- Title: Click Expression and enter
translation!Style Settings. - Web Address Identifier:
style-settings. - Interface Content:
SEUR_StyleSettings. - Width: Click Full.
- Visibility: Click Only show when… and copy and paste the following code block:
1 2 3 4 5 6 7
a!isUserMemberOfGroup( username: loggedInUser(), groups: { cons!SEUR_GRP_ADMIN, cons!SEUR_GRP_REPORT_MANAGERS } )Copy
- Title: Click Expression and enter
- Click ADD.
Add the Admin Tools pageCopy link to clipboard
The Admin Tools page allows SEUR Admin users to enable Report Builder to build reports on record types in the environment. To add the Admin Tools page to the Reporting page group, complete the following steps:
- Click + Add Page in the Reporting page group card
- Complete the Add Page dialog as follows.
- Title: Click Expression and enter
translation!Admin Tools. - Web Address Identifier:
admin-tools. - Interface Content:
SEUR_AdminTools. - Width: Click Full.
- Visibility: Click Only show when… and copy and paste the following code block:
1 2 3 4
a!isUserMemberOfGroup( username: loggedInUser(), groups: { cons!SEUR_GRP_ADMIN } )Copy
- Title: Click Expression and enter
- Click ADD.
Save the Workspace site objectCopy link to clipboard
-
Click SAVE CHANGES to save the Workspace site.
Step 4: Incorporating a quick action in the Reporting page groupCopy link to clipboard
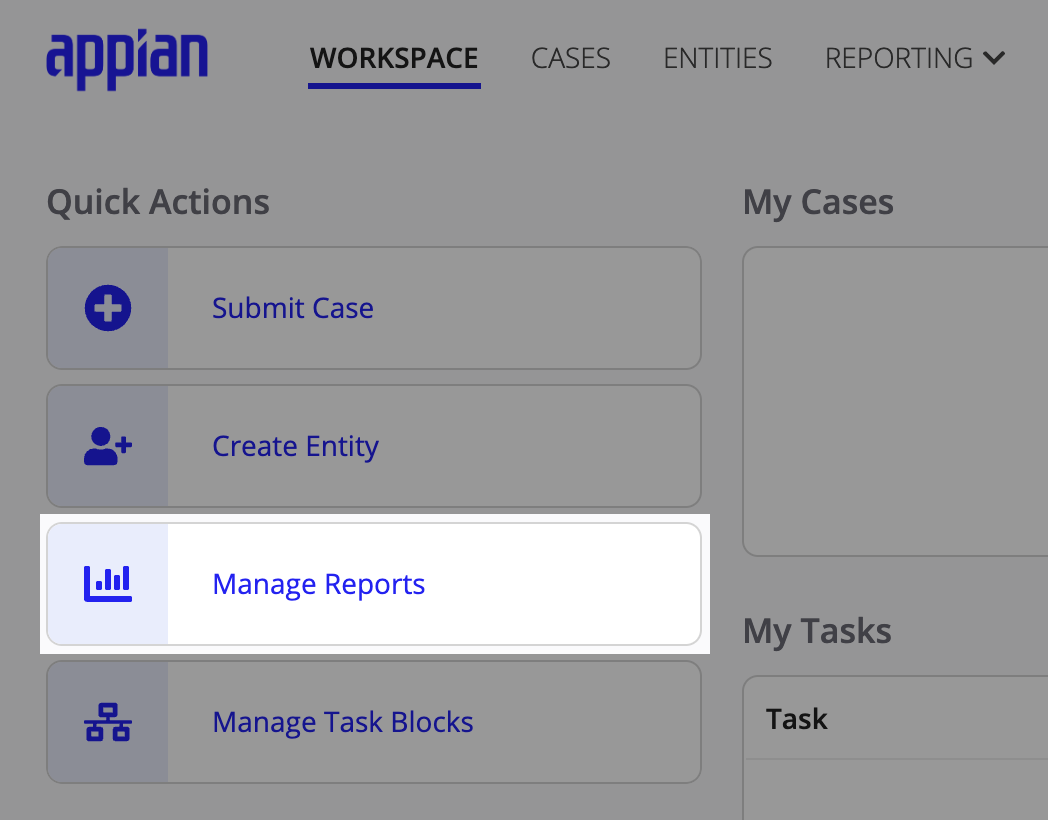
This is an optional step. In order to add a quick action on the Workspace Home page, which takes users to the Reporting page incorporated in Step 3, complete the following steps:
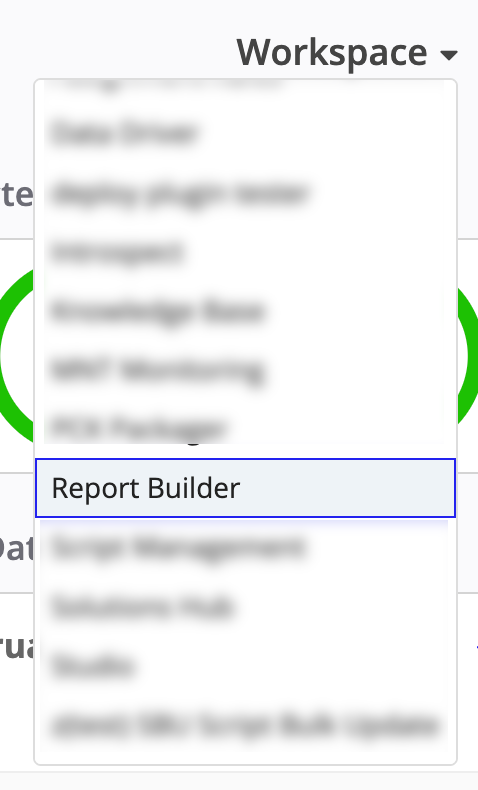
- In Appian Designer, go to the CMGT Case Management Studio Base.
- Create a new expression rule called
CMGT_SEUR_QuickLink_ItemMap. - Copy and paste the following code block.
-
Note: If you modified the Web Address Identifier value when configuring the Reporting page group, you must also modify the URI in the code block to match it.
1 2 3 4 5 6 7 8 9 10 11 12 13 14 15 16 17 18 19 20 21 22 23 24
a!map( icon: "bar-chart", showWhen: a!isUserMemberOfGroup(loggedInUser(), cons!SEUR_GRP_ALL_USERS), item: a!richTextDisplayField( labelPosition: "COLLAPSED", value: a!richTextItem( text: if( a!isUserMemberOfGroup(loggedInUser(), cons!SEUR_GRP_REPORT_MANAGERS), translation!Manage Reports, translation!View Reports, ), link: a!safeLink( uri: concat( rule!CMGT_UTIL_GetSiteUrl().authedPath, "/sites/", cons!CMGT_TXT_SITE_URL_ADDRESS_IDENTIFIER, "/group/reporting/page/home" ), openLinkIn: "NEW_TAB" ), linkStyle: "STANDALONE" ) ) )Copy
-
- Click SAVE CHANGES.
- Review the newly created expression rule.
- Verify the URL is generated as expected.
- Verify the visibility logic.
- Confirm the quick action is working as expected.
Step 5: Translating the applicationCopy link to clipboard
This is an optional step. Refer to Exporting translation strings for translation for information on translating the Report Builder module to other languages.