| Process Mining is deprecated with Appian 24.2 and will no longer be available in an upcoming release. Instead, we encourage customers to use Process HQ to explore and analyze business processes and data. |
Event logsCopy link to clipboard
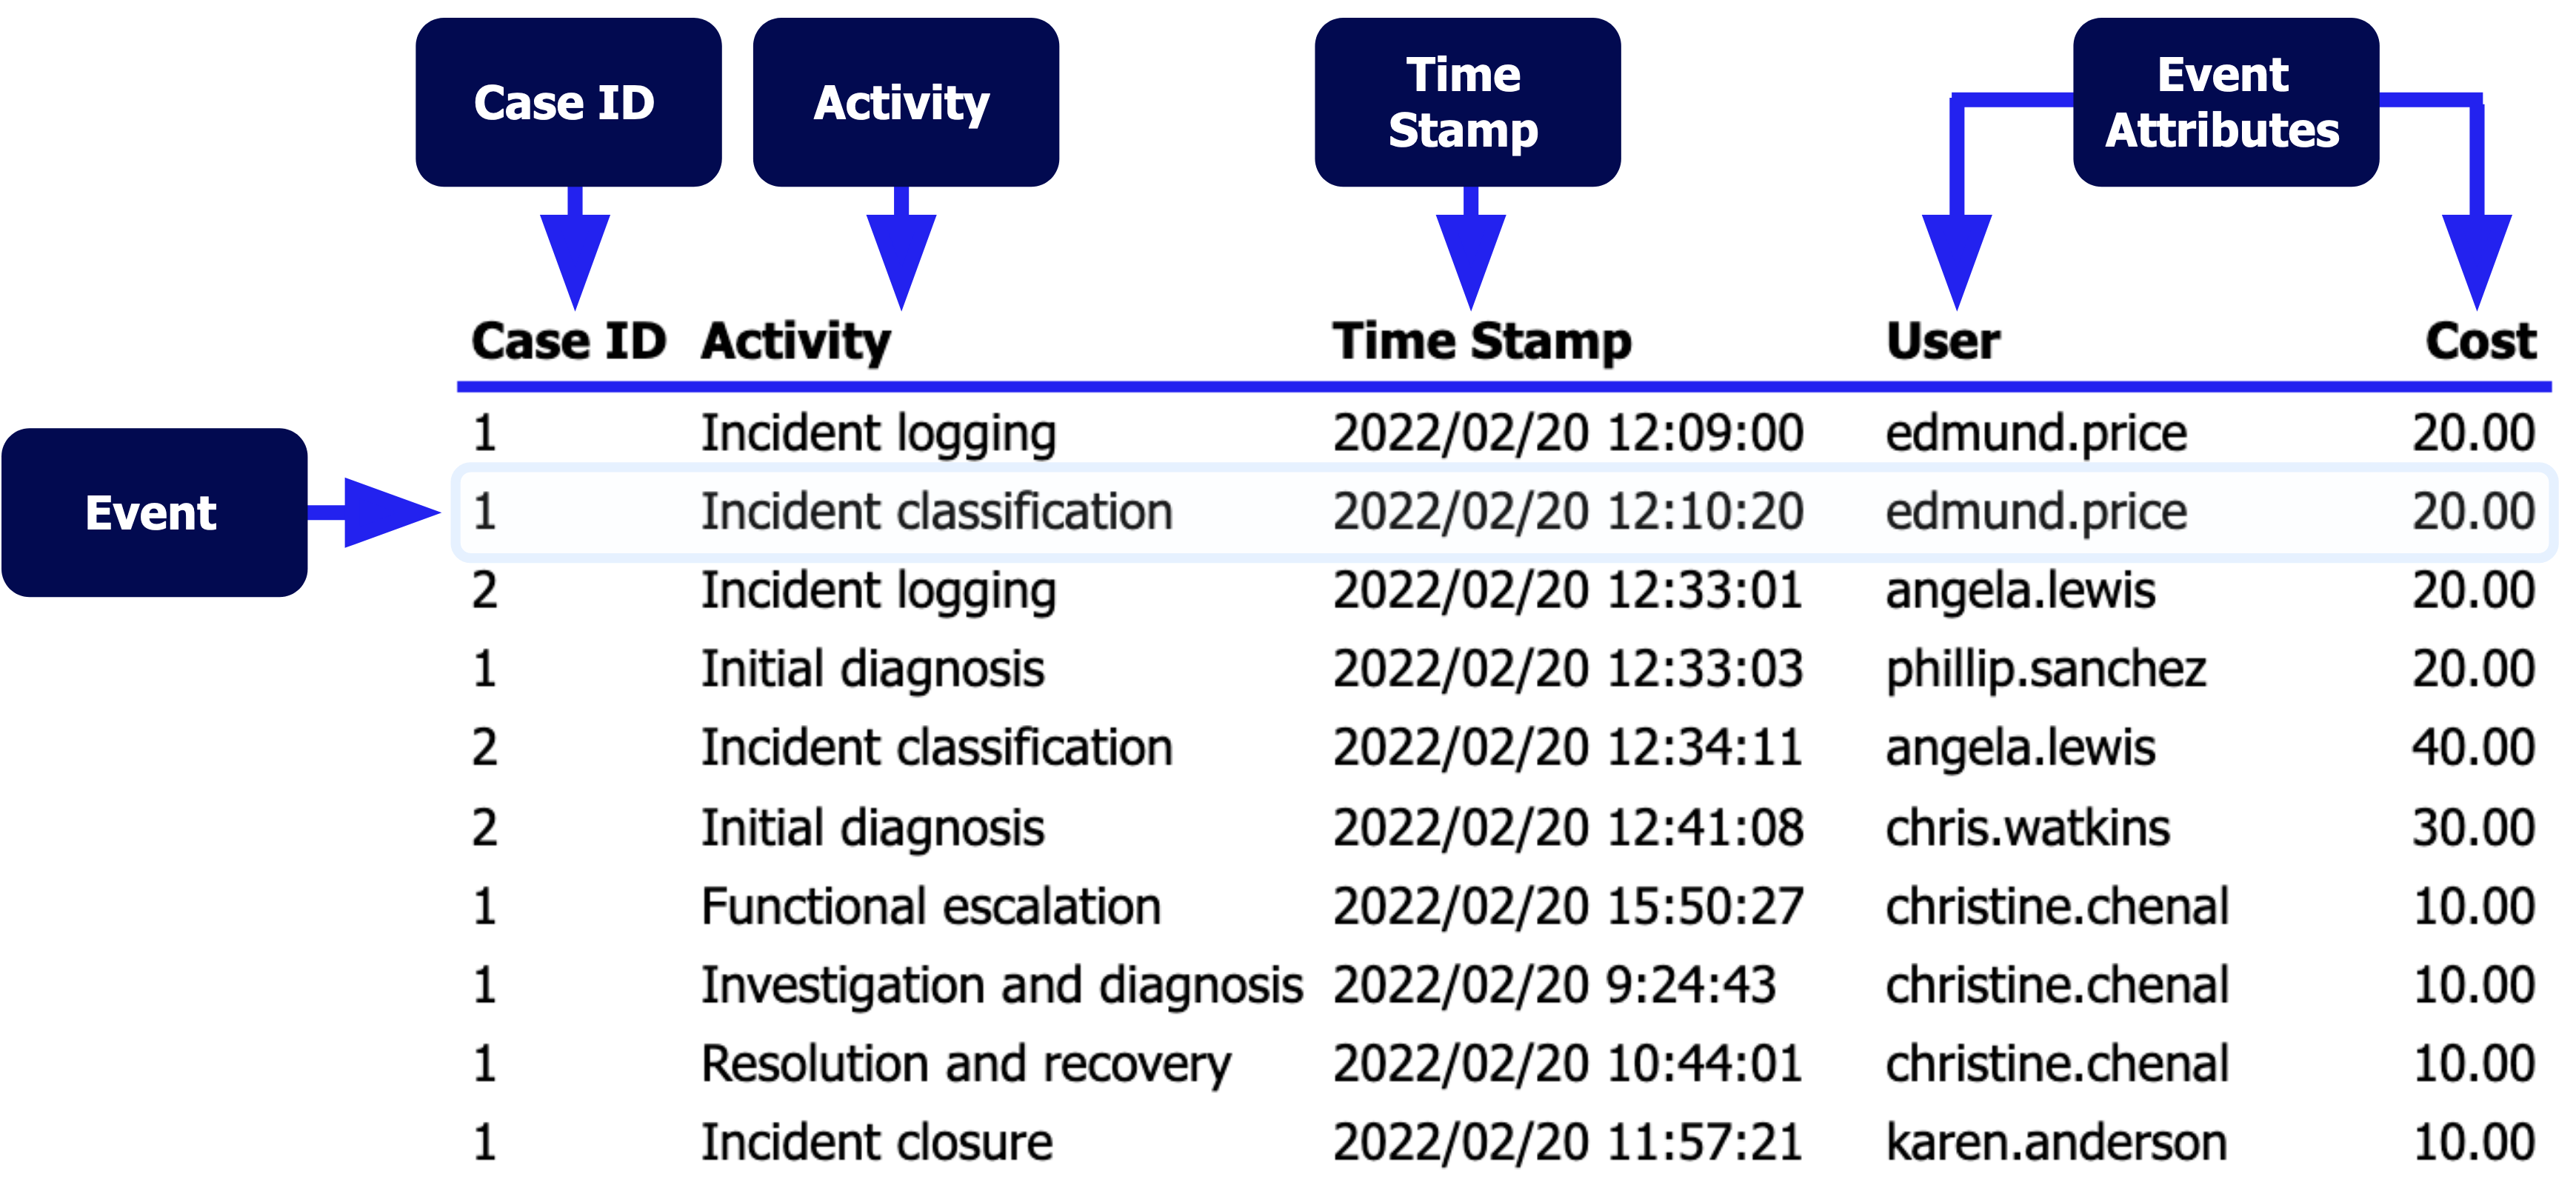
An event log, commonly referred to as a log, is a table of events and their associated event attributes. For example, event logs contain a list of events and their case ID, time stamp(s), and additional event attributes. Additional event attributes may include the the employee that performed the action or the system that was used. The log represents the cases of a business process. Process Mining performs analysis on event logs to create a discovered model.
A formatted event log looks something like this:
Choose an event logCopy link to clipboard
Before you do anything in Process Mining, you must first select an event log because this contains the data that Process Mining analyzes. When you first sign in, you can either choose to Analyze a process or Score processes.
To analyze a single process via its log:
- Sign in to Process Mining.
- Click Analyze a process.
- Select the radio button in the Is Active? column beside your processes corresponding log file.
If you haven't uploaded any event logs yet, see Upload a log and case attribute file.
To score multiple processes via their logs:
- Sign in to Process Mining.
- Click Score processes.
See Process Scorecards for more information.
Log managementCopy link to clipboard
The Log Management page displays all of the event logs that you've uploaded to Process Mining or that have been shared with you.
To access the Log Management page:
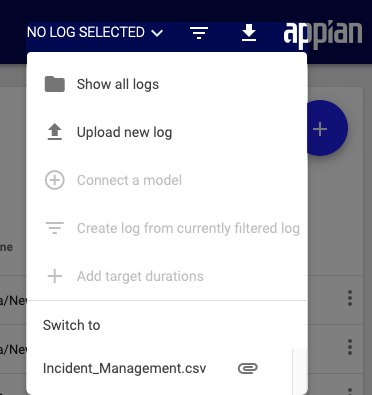
- Click the Log Menu icon in the header bar.
- Select Show all logs.
Alternatively, you can click Log Management from the side menu bar.

The Log Management page is split into two sections:
- Your event logs displays a list of event logs you've uploaded.
- Shared event logs displays a list of event logs that are shared with you.
Rows in Your event logs display the Context Menu icon. Click the Context Menu icon to select from the following options:
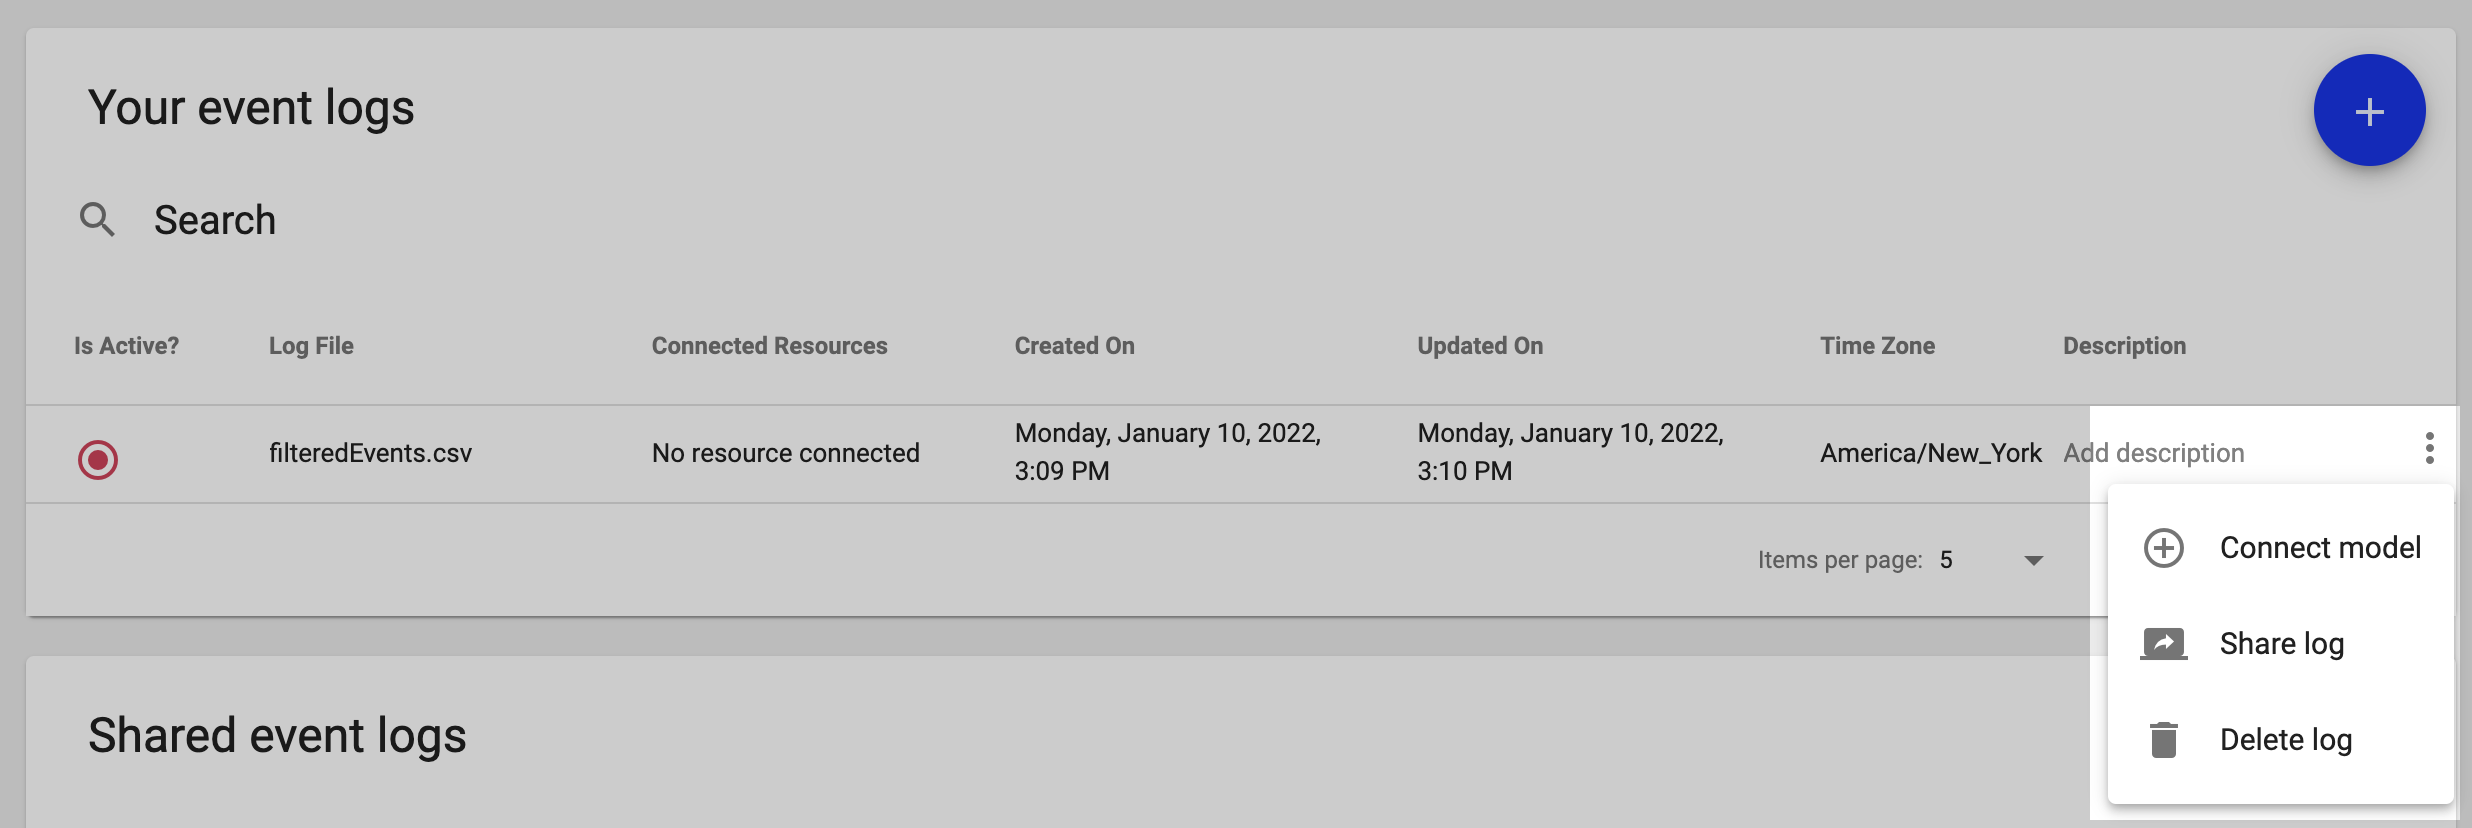
To quickly find a specific event log, use the Search field in either section.
Change the active event logCopy link to clipboard
The active event log is the basis for much of what you see in Process Mining.
On the Log Management page, the Is Active? column indicates the active event log with a filled in radio button. Only one event log can be active at a time.
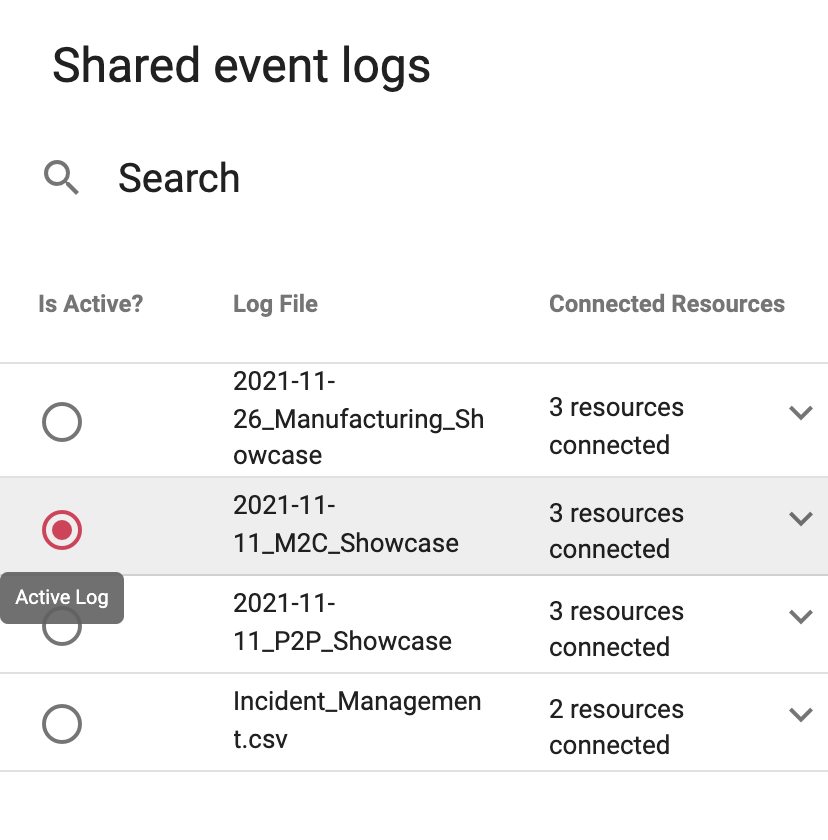
To switch to another event log, select the radio button in the Is Active? column. You can also click the name of the event log in the header bar and select another event log from the Switch to section. This is an easy way to change the active event log from anywhere in the system. If a target model is linked to an event log, the Link icon displays beside the name.
Upload a log and case attribute fileCopy link to clipboard
There are several ways to add an event log to Process Mining:
- Upload a log manually.
- Upload a log using Mining API and a transformation script.
- Schedule a transformation and upload from Mining Prep.
- Schedule an upload from Mining Prep with a transformation script.
You can also optionally upload a case attribute file to Process Mining. If you transform and load your data from Mining Prep, this happens automatically.
Note: If you upload a log file without a case attribute file, you cannot add the case attribute file later. While a case attribute file is optional, we recommend it so you can maximize the potential of your analysis.
Case attributes can be thought of as fixed characteristics of an overall case that do not change from event to event. Case attributes are important part of analysis to create graphs and aggregate data. For example, case attributes could help you determine the number of cases per customer.
In addition to the categorical, impact, and numerical attributes you can define in Mining Prep, you can also define descriptive attributes when you import a log. Descriptive attributes are similar to categorical attributes, but they are irrelevant for most calculations and analysis. For example, product descriptions or user notes are usually distinct for each row of data and therefore do not add value to your analysis.
To upload only an event log file directly to Process Mining:
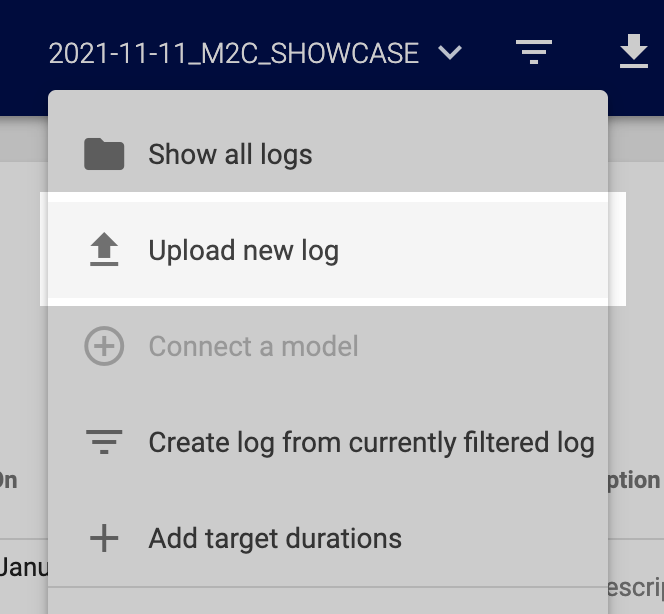
- Click the Log Menu icon in the header bar.
-
Select Upload new log.
- Find and select the log file on your computer.
- Click Next.
- Configure the event log. Process Mining automatically provides suggestions on what each column could be, which you can change with the drop-down field under each column name.
- Note: You must specify the action column, at least one time stamp column, and at least one case ID. If you identify more than one column as the case ID, the entries will be combined. See Identify data properties for more information.
- If you select a case attribute file, click Next.
- Configure the case attribute file. Process Mining automatically provides suggestions on what each column could be, which you can change with the drop-down field under each column name.
- Click Finish.
To upload an event log and case attribute file directly to Process Mining:
- Click the Log Menu icon in the header bar.
- Select Upload new log.
- Find and select the log file on your computer.
- Find and select the log attribute file on your computer.
- Click Next.
- Configure the log attributes for each column. Process Mining automatically provides suggestions, which you can change with the drop-down field under each column name.
- Note: You must specify the action column, at least one time stamp column, and at least one case ID. If you identify more than one column as the case ID, the entries will be combined. See Identify data properties for more information.
- Click Next.
- Configure the case attributes for each column. Process Mining automatically provides suggestions, which you can change with the drop-down field under each column name.
- Click Finish.
After you upload the file(s), Process Mining displays the discovered model for the newly uploaded event log.
Edit an event log nameCopy link to clipboard
You can edit the name of event logs shown in the Your event log section.
To edit an event log name:
- Click an event log name in the Log File column.
- Enter the new name into the text field.
- Click Save.
Add or edit an event log descriptionCopy link to clipboard
You can add or edit the description of event logs shown in the Your event log section.
Add descriptions to your event logs to provide context for you and other members of your organization. If an event log doesn't have a description, its row in the Description column displays Add description.
To add or edit an event log description:
- Click the existing description or Add description text in the Description column.
- Enter the new description into the text field.
- Click Save.

Connect a model to an event logCopy link to clipboard
Connect a model to your log when you want to analyze the conformance and deviations of your discovered process against the target. If you want to connect a model to your log, you can either upload a model, select an already uploaded model, or create a new model. See Models for instructions on how to upload or create a target model.
To connect an existing event log with a model:
- On the Log Management page, click the Context Menu icon in the event log's row.
- Select Connect model.
- Select an existing model.
- Click Continue.
- Verify that the model activities correctly match the event log events.
- Click Save Alignment.
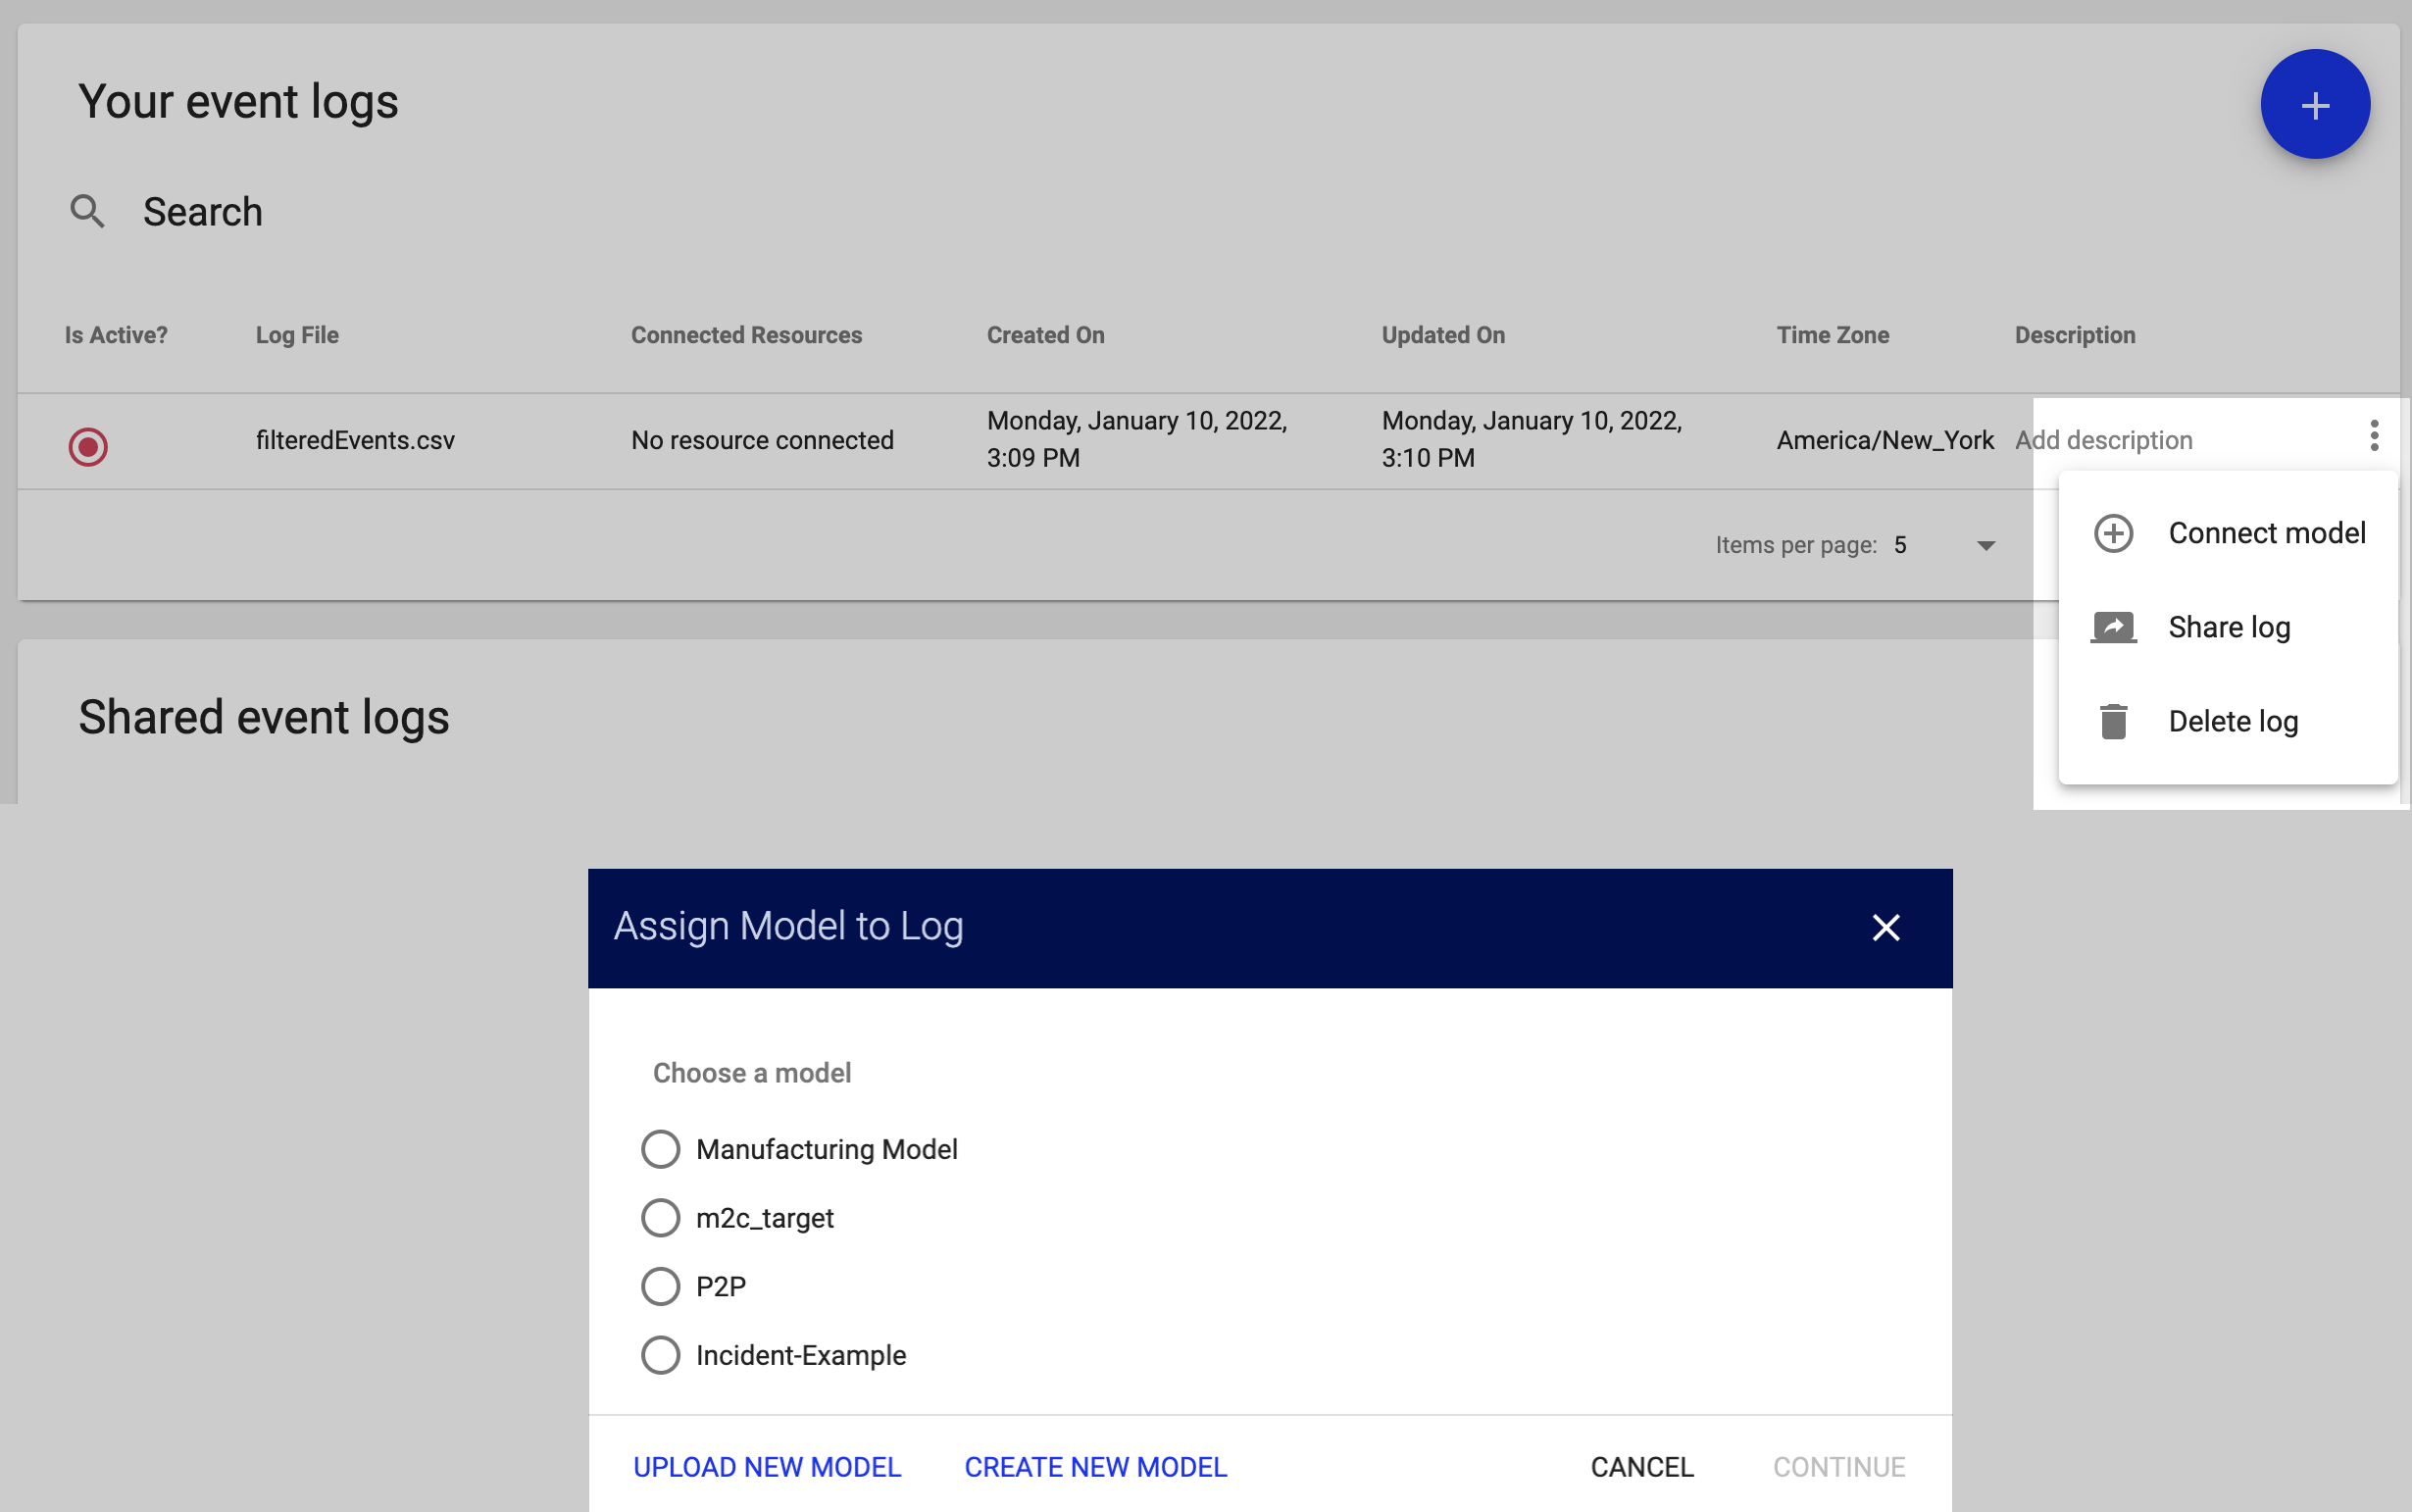
Note: Rather than select an existing model, you can also upload or create a new model during this process.
To disconnect an event log from a model:
- On the Log Management page, click the Context Menu icon in the event log's row.
- Select Disconnect model.
Change the modelCopy link to clipboard
The most common reason why you would want to connect a new model to an event log is when you have a new target model. You may create a new target model as the result of changes to target processes, laws, regulations, internal guidelines, or service-level agreements (SLAs).
To change the connected model:
- On the Log Management page, click the Context Menu icon in the event log's row.
- Select Update model.
- Select an existing model.
- Click Continue.
- Verify that the model activities correctly match the event log events.
- Click Save Alignment.
Note: You can also upload or create a new model during this process.
Share an event logCopy link to clipboard
You may wish to share an event log with your entire organization or with specific users. When you share an event log, the connected models, dashboards, and filters are also shared. However, you can also choose to share these items individually.
To share an event log:
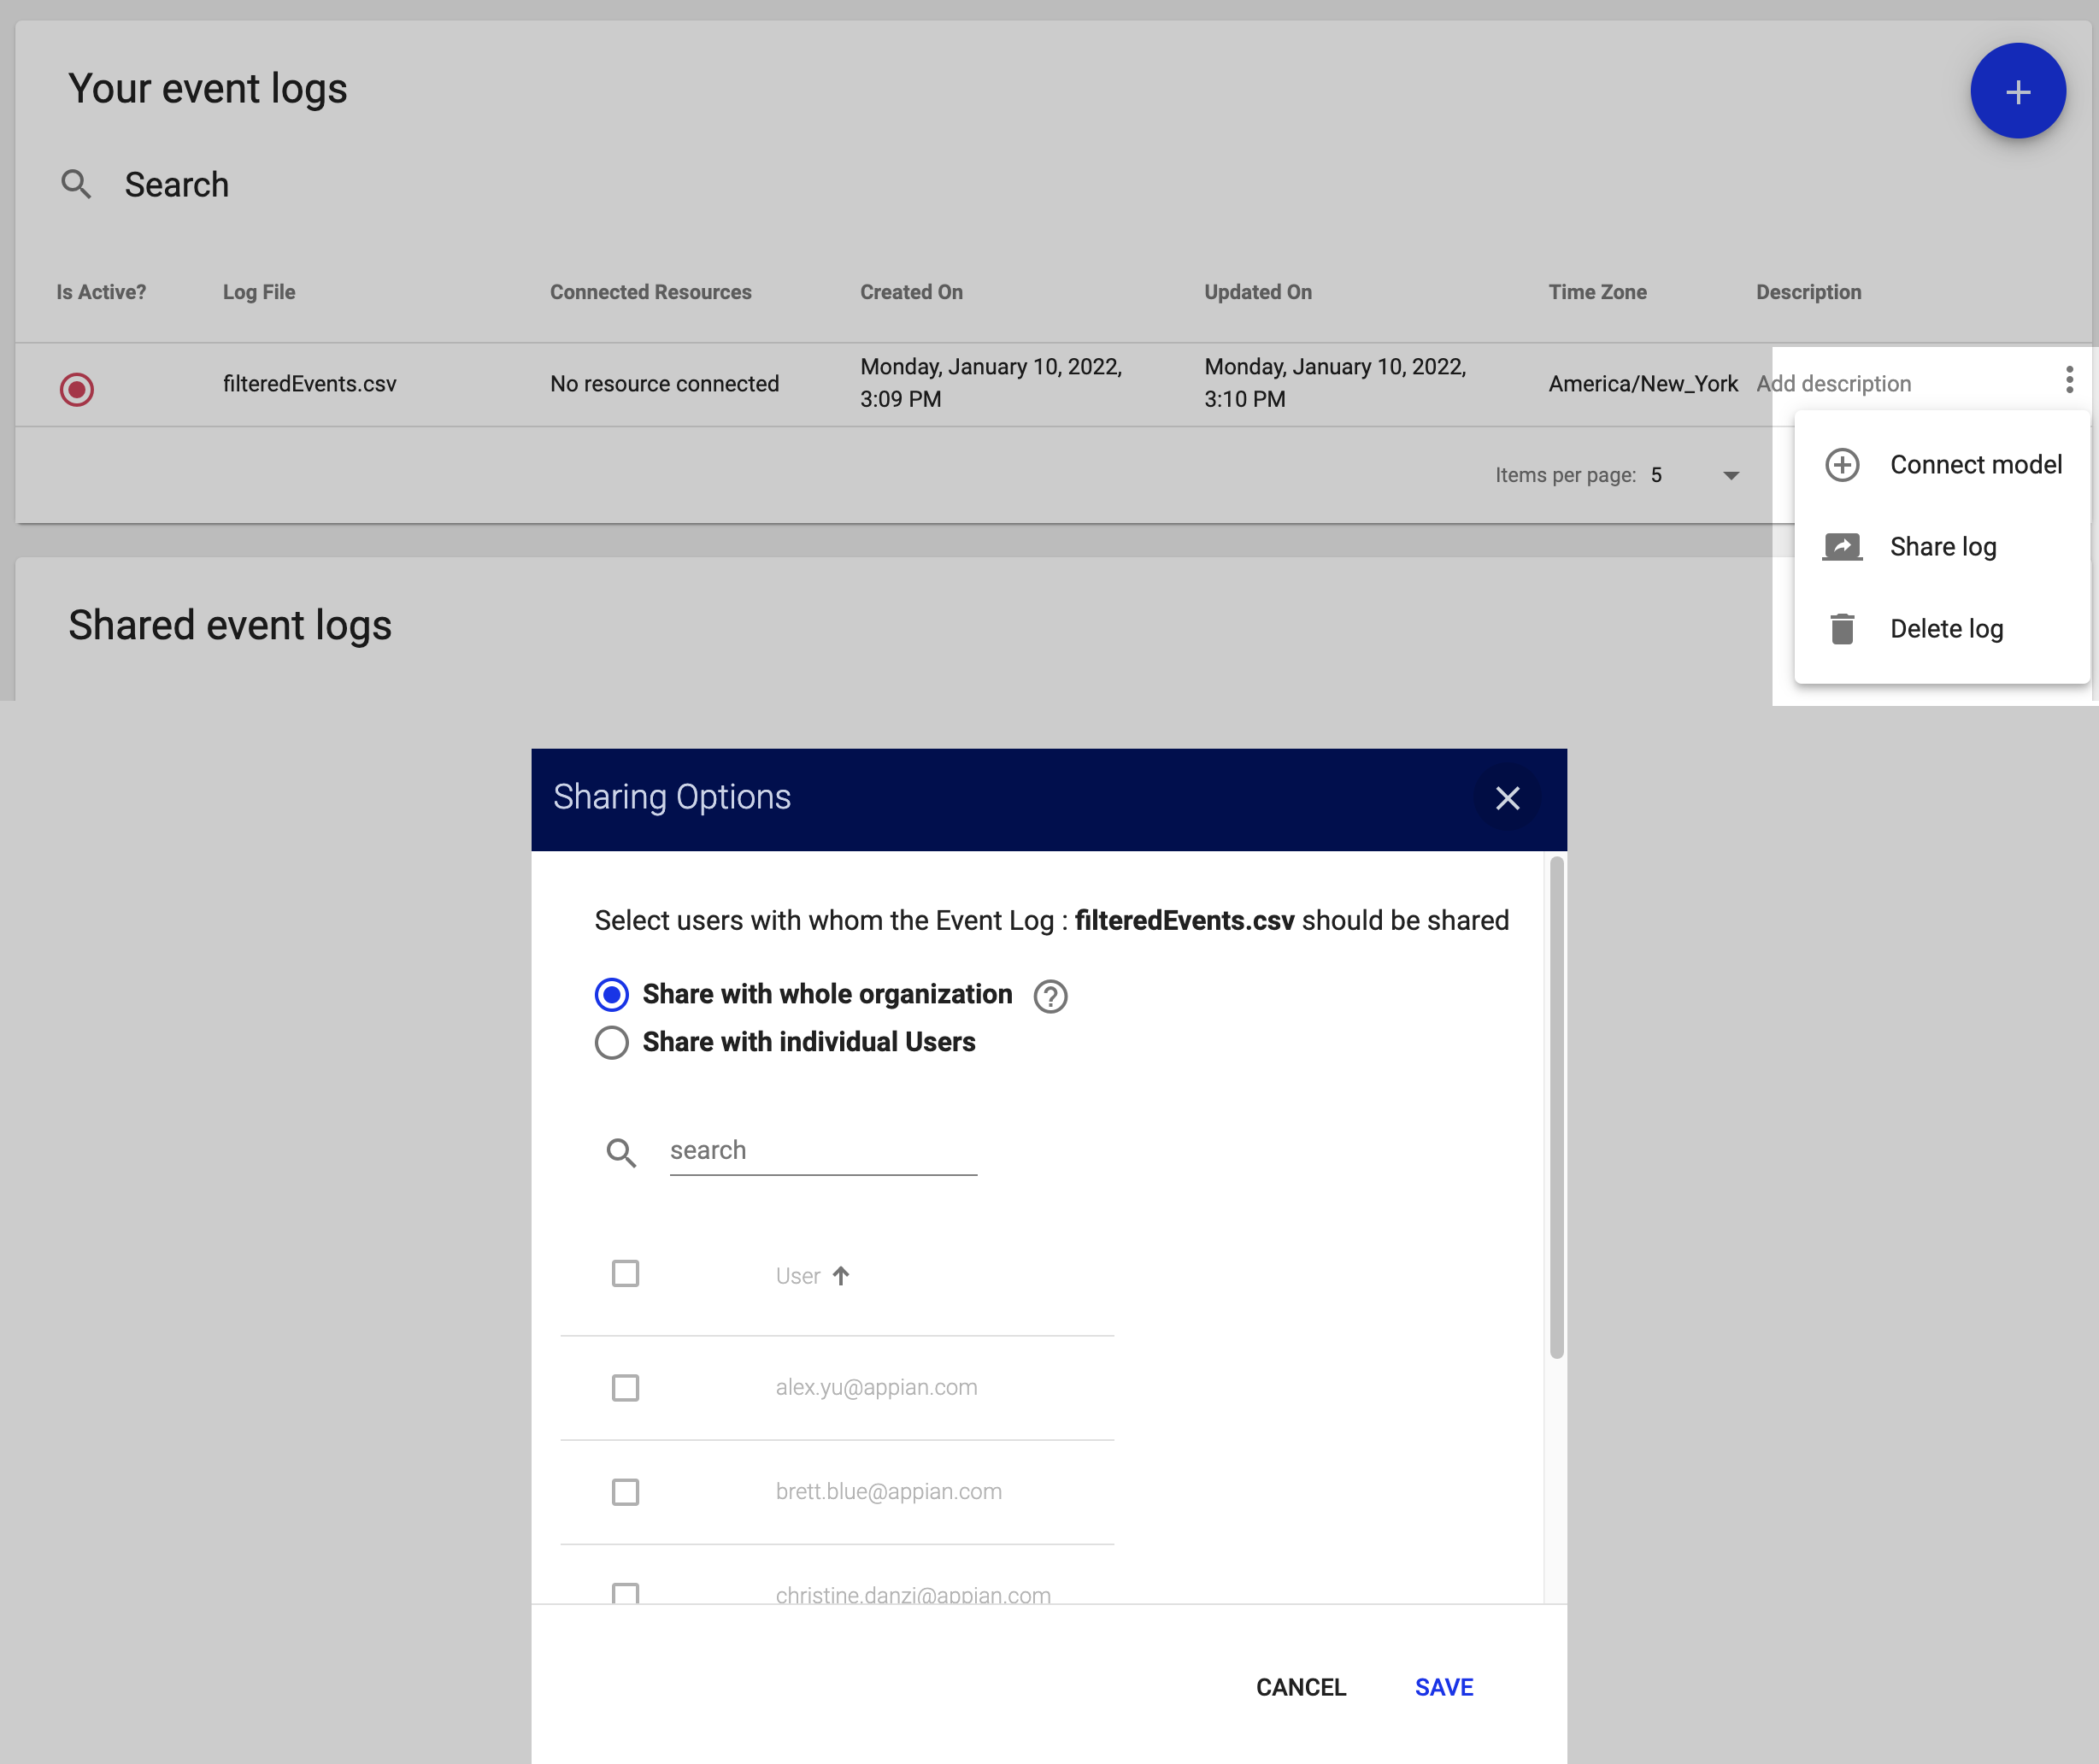
- On the Log Management page, click the Context Menu icon in the event log's row.
- Select Share log.
- Select the radio button to indicate whether you want to share the event log with your entire organization or with individual users.
- If you selected Share with individual users, select the checkboxes next to the users in the list.
- Click Save.
To stop sharing an event log:
- On the Log Management page, click the Context Menu icon in the event log's row.
- Select Unshare log.
Delete an event logCopy link to clipboard
To delete an event log:
- On the Log Management page, click the Context Menu icon in the event log's row.
- Select Delete log.
If you delete an event log, this action cannot be undone.

