OverviewCopy link to clipboard
Queries are powerful tools that help you access your data. The query editor is an intuitive interface that makes creating queries a lot simpler. This page explains how to use the query editor to create an a!queryRecordType() or a!queryEntity() expression.
For examples of queries, see Query Recipes.
Using the query editor with record typesCopy link to clipboard
To create an a!queryRecordType() expression using the query editor:
- Select the record type that you want to query.
- Select the fields to include in the query, or apply groupings and measures to aggregate your record data.
- Create or update rule inputs to pass information into the query.
- Create filters to constrain the results to the conditions you specify.
- Set up sorting and data limits to limit the number of records returned and order the results.
- Test the query to make sure it is returning the required information and configure the fields if necessary.
- Click Generate Query to create the
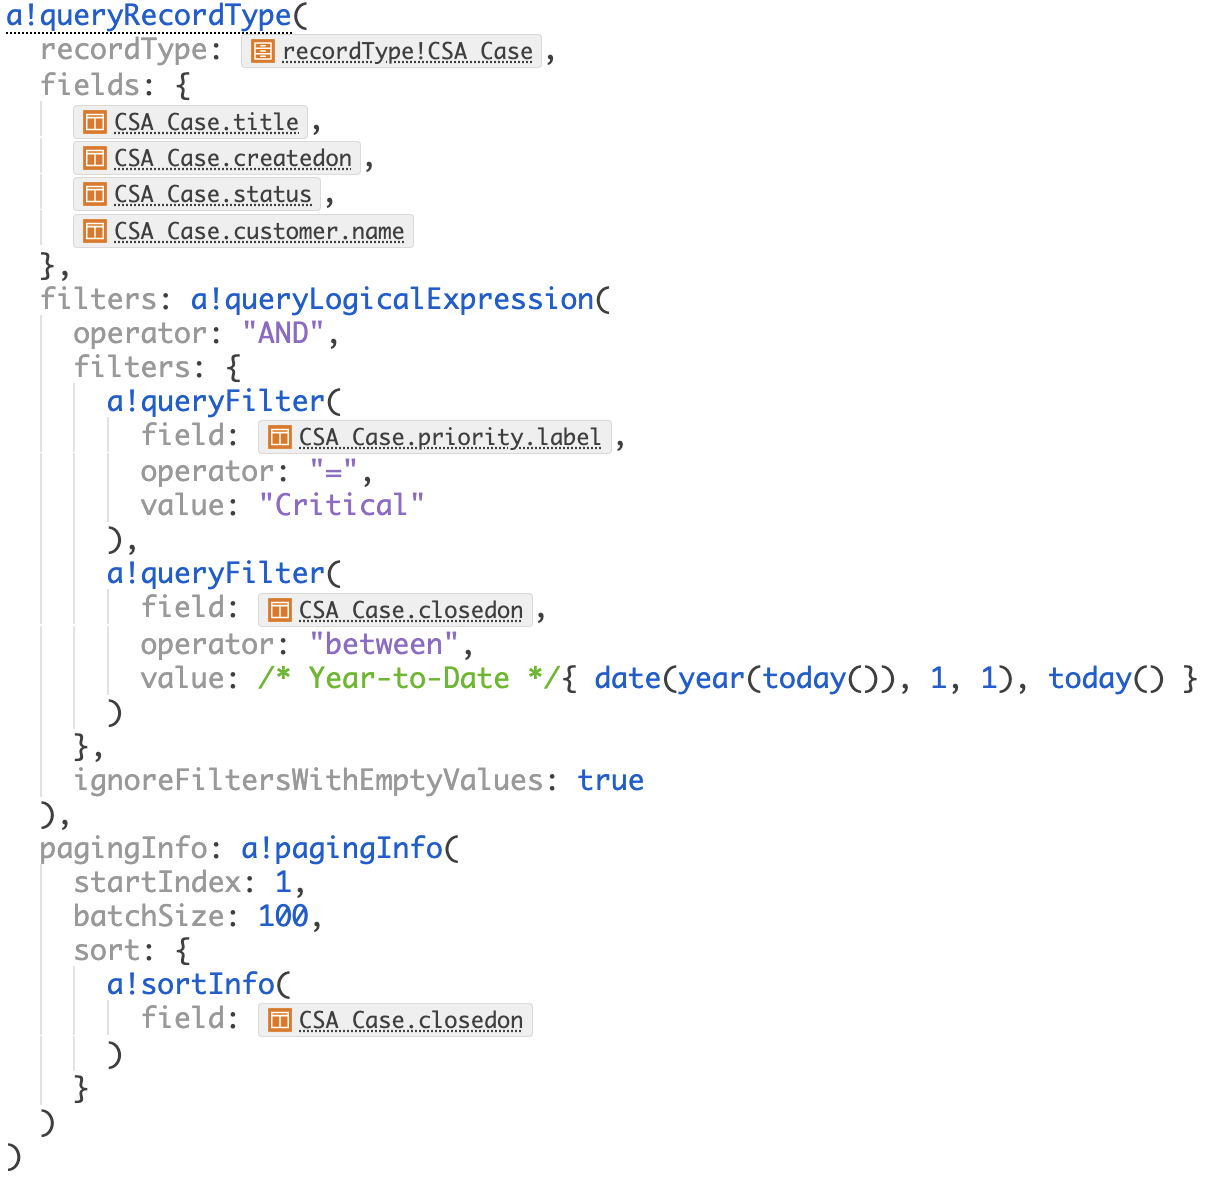
a!queryRecordType()expression.
Open the query editorCopy link to clipboard
To open the query editor:
- Create a new expression rule.
- Click
 Launch the Query Editor.
The query editor will open and let you select your data source.
Tip: You can also open the query editor in other ways as you are building an expression rule or interface.
Select a record typeCopy link to clipboard
To select a record type:
- For Select Data Source, leave the default selection of Record Type.
-
For Record Type, search for the name of your record type and select the one you want to query.
Note: You cannot select a record type that uses a process model as the source, or a record type that uses a web service as the source and does not have data sync enabled.
-
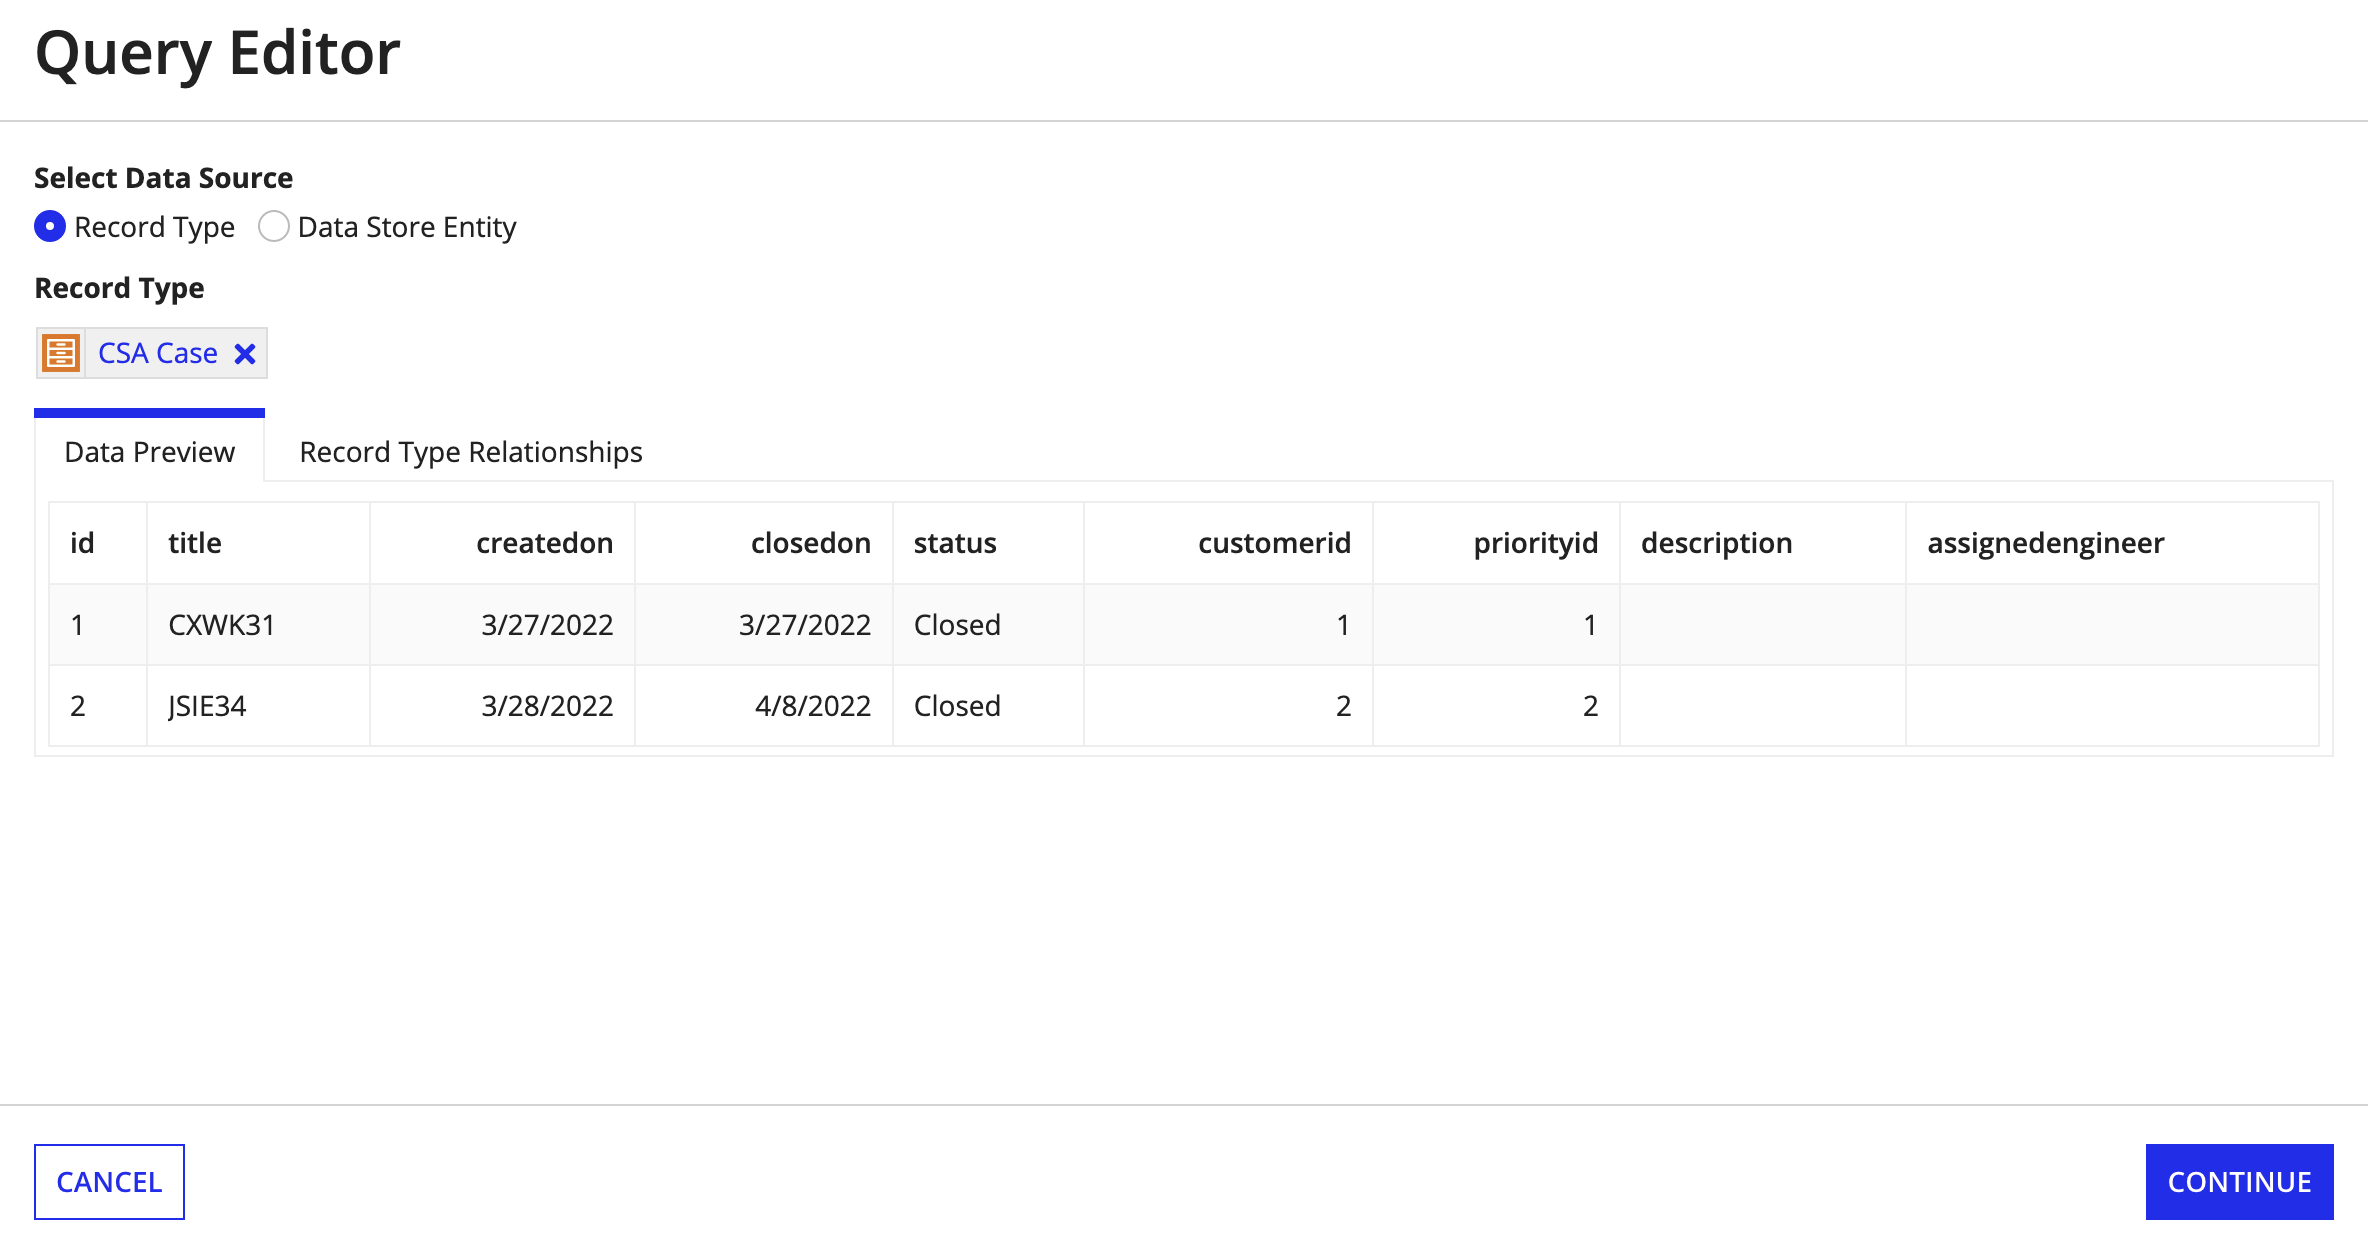
By default, the Data Preview displays a preview of the data available in the record type.
-
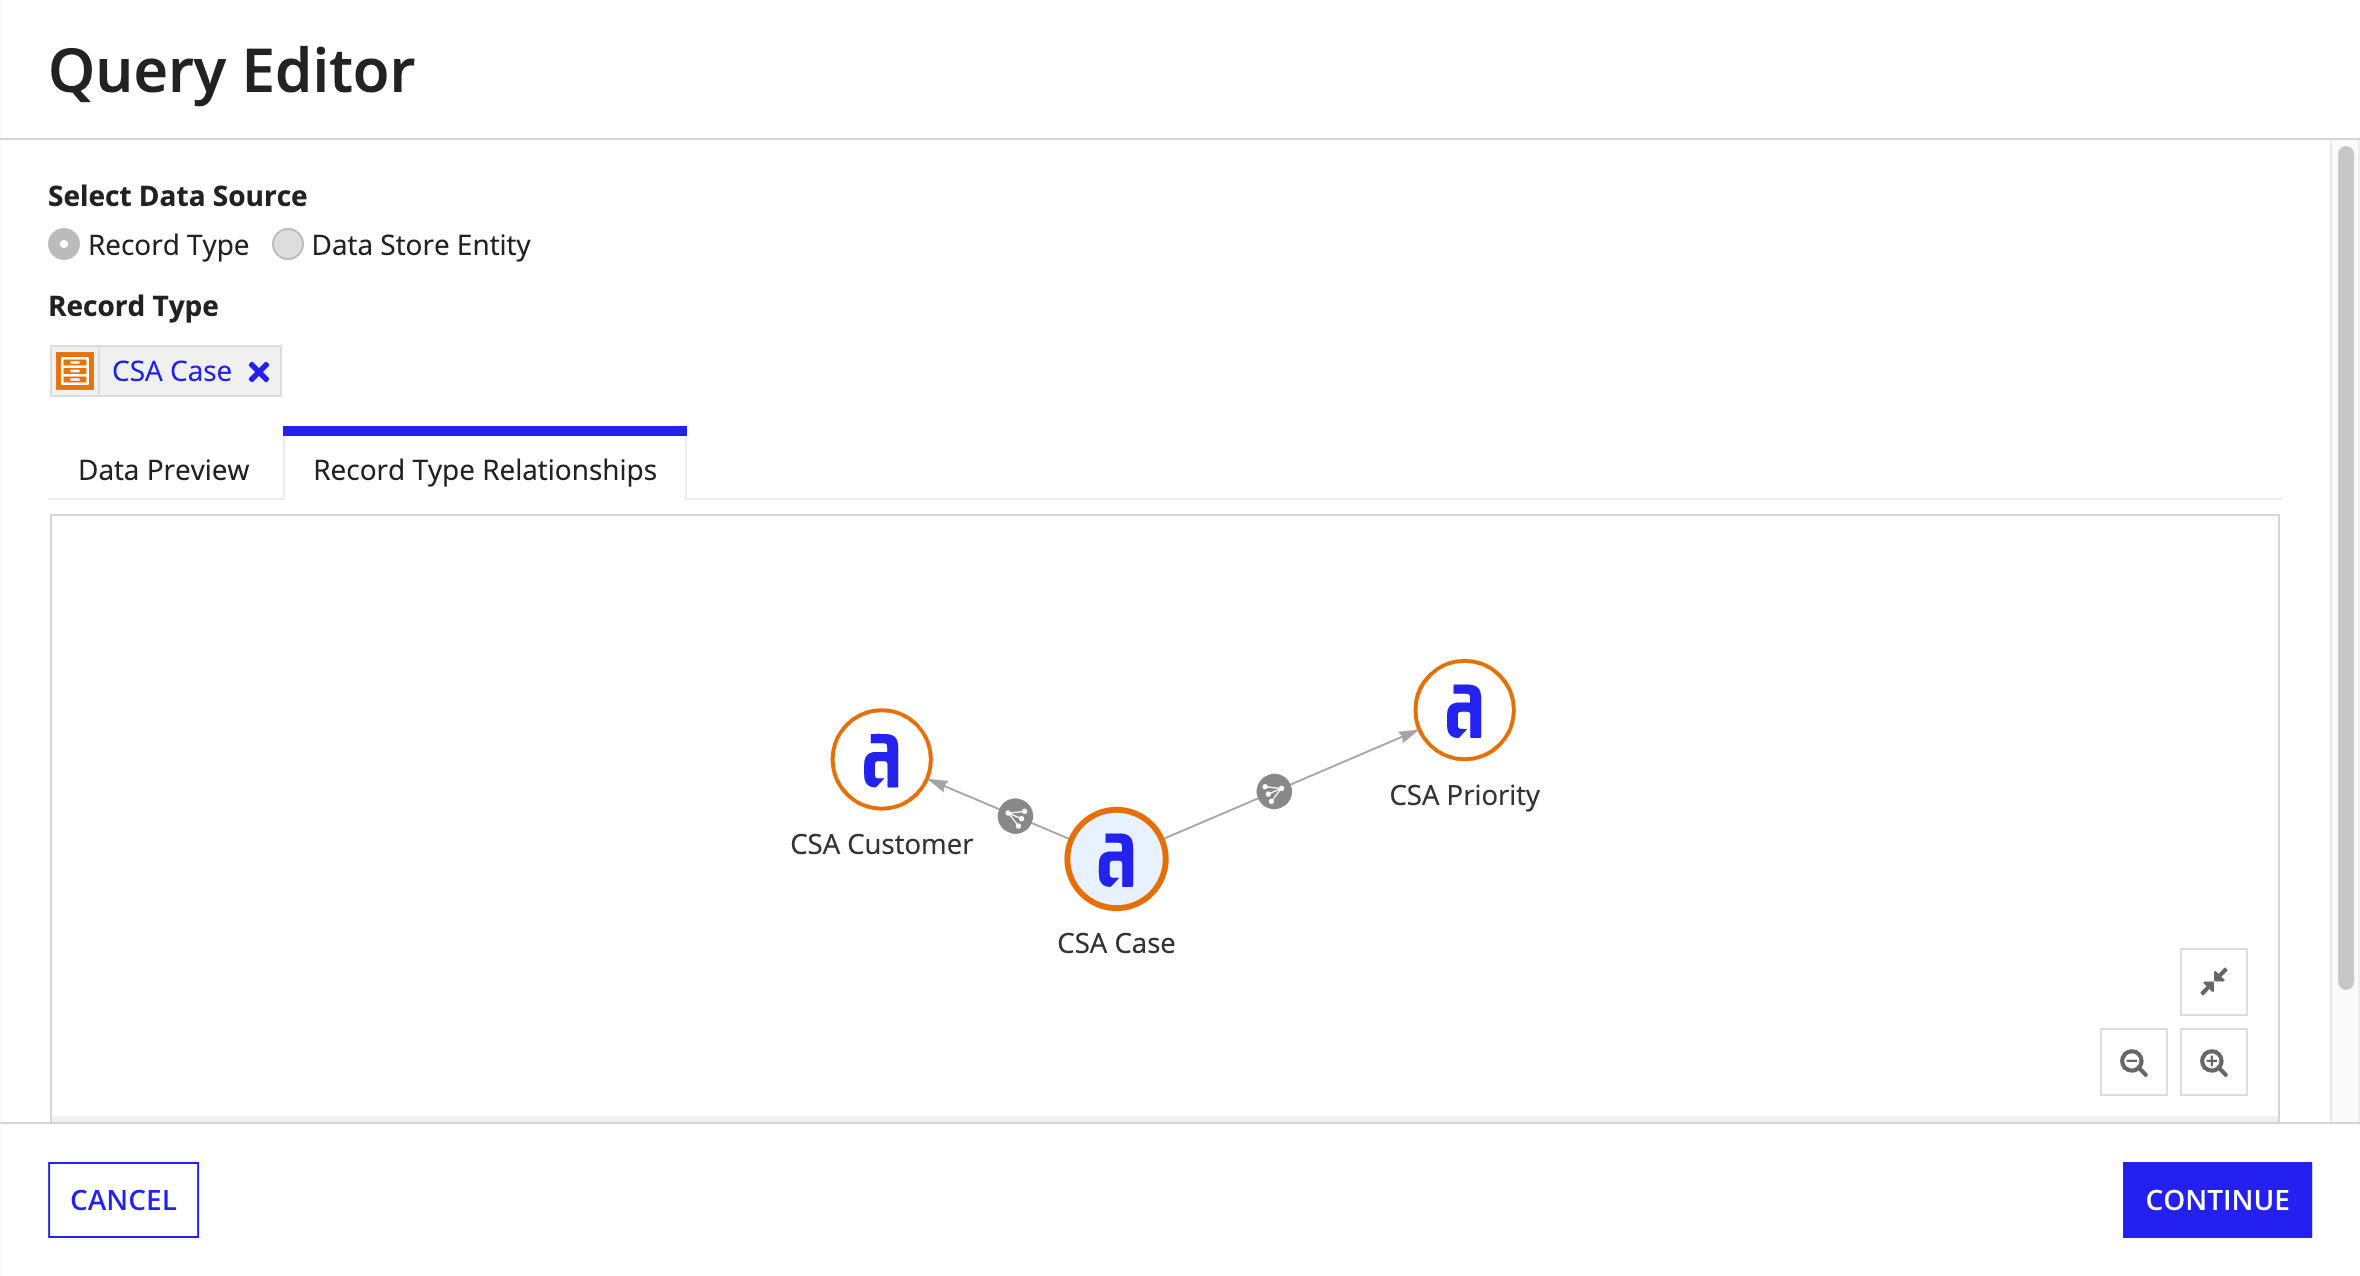
Click Record Type Relationships to see the relationships available in the record type.
- Click CONTINUE.
Select fieldsCopy link to clipboard
The fields section allows you to select which fields will be returned from your query.
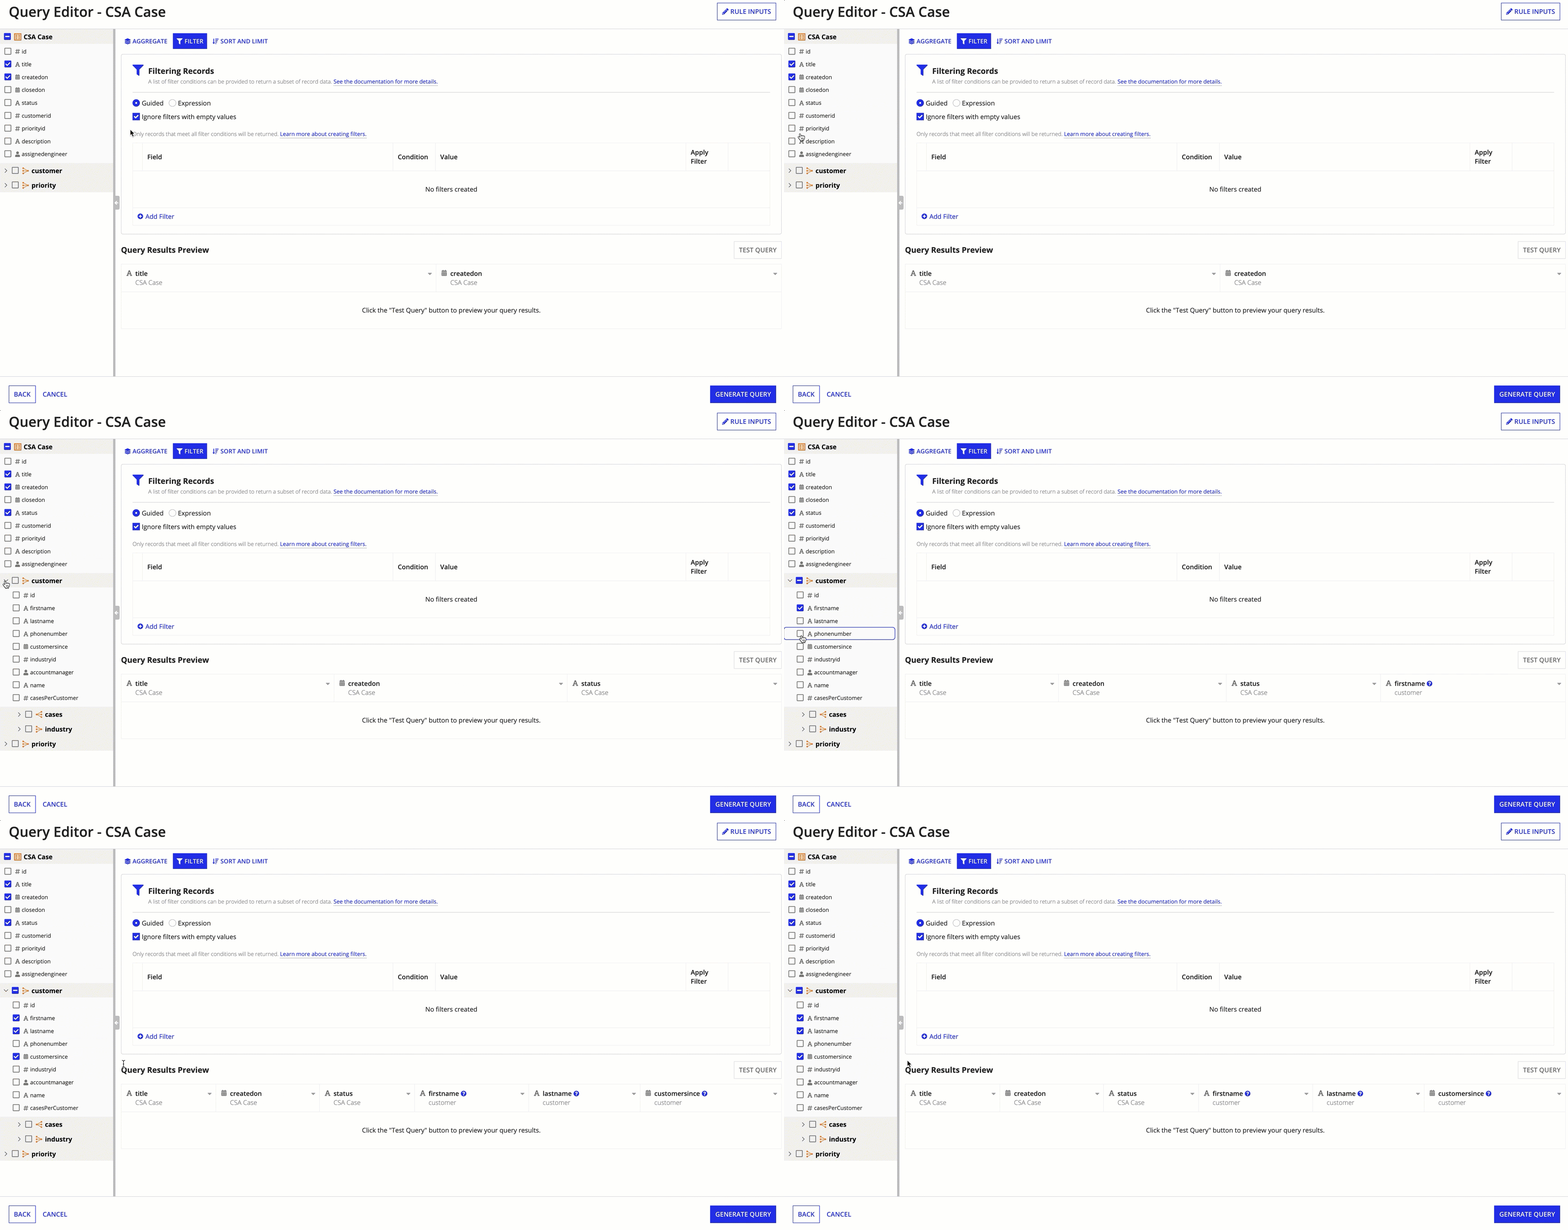
By default, the query editor fetches all record fields from the base record type. You can choose to remove certain fields or add related record fields from your record type relationships.
For performance reasons, you should only query the fields that you need. If you query all of the fields, it may take longer for your query to run.
Select the fields to query by doing one or more of the following in the fields section:
- To add a record field to the query, select the checkbox next to the field name.
- To add a related record, expand the relationship and select the checkbox next to the related record field name.
- To remove a field from the query, clear the checkbox next to the field name.
- You can use the checkbox next to the record type name or relationship name to add or remove all fields.
Aggregate dataCopy link to clipboard
The Aggregate section allows you to apply groupings and measures in your query.
Groupings allow you to group fields by a common value, while measures allow you to calculate the values in certain fields.
For example, you may want to show the number of orders that are in a given status like "Open" or "Shipped" using a grouping. If you want to know the total amount of sales for each status, you can add a measure to the aggregation. You can also add a measure filter to limit the results of that calculation.
To aggregate record data:
- In the query editor, go to the AGGREGATE tab.
-
From the Performing Aggregations pane, click AGGREGATE RECORDS.
- On the Aggregate Data? dialog, click AGGREGATE.
- To add a grouping, click Add Grouping.
- For Field, select a record field or a related record field to group by.
- If grouping a Date, Time, or Date and Time field, select an interval from the dropdown.
- For Alias, use the auto-generated value, or enter another short name of your choice. This alias is used to reference the results of the grouping when filtering and sorting.
- To add measures, click Add Measure.
- For Fields, select a record field or a related record field to aggregate by.
- For Function, choose the type of calculation to perform on the selected field.
- For Alias, use the auto-generated value, or enter another short name of your choice. This alias is used to reference the results of the measure when filtering and sorting.
- To add a filter, click Add filter conditions. See Create filters for steps to set up a filter for the measure.
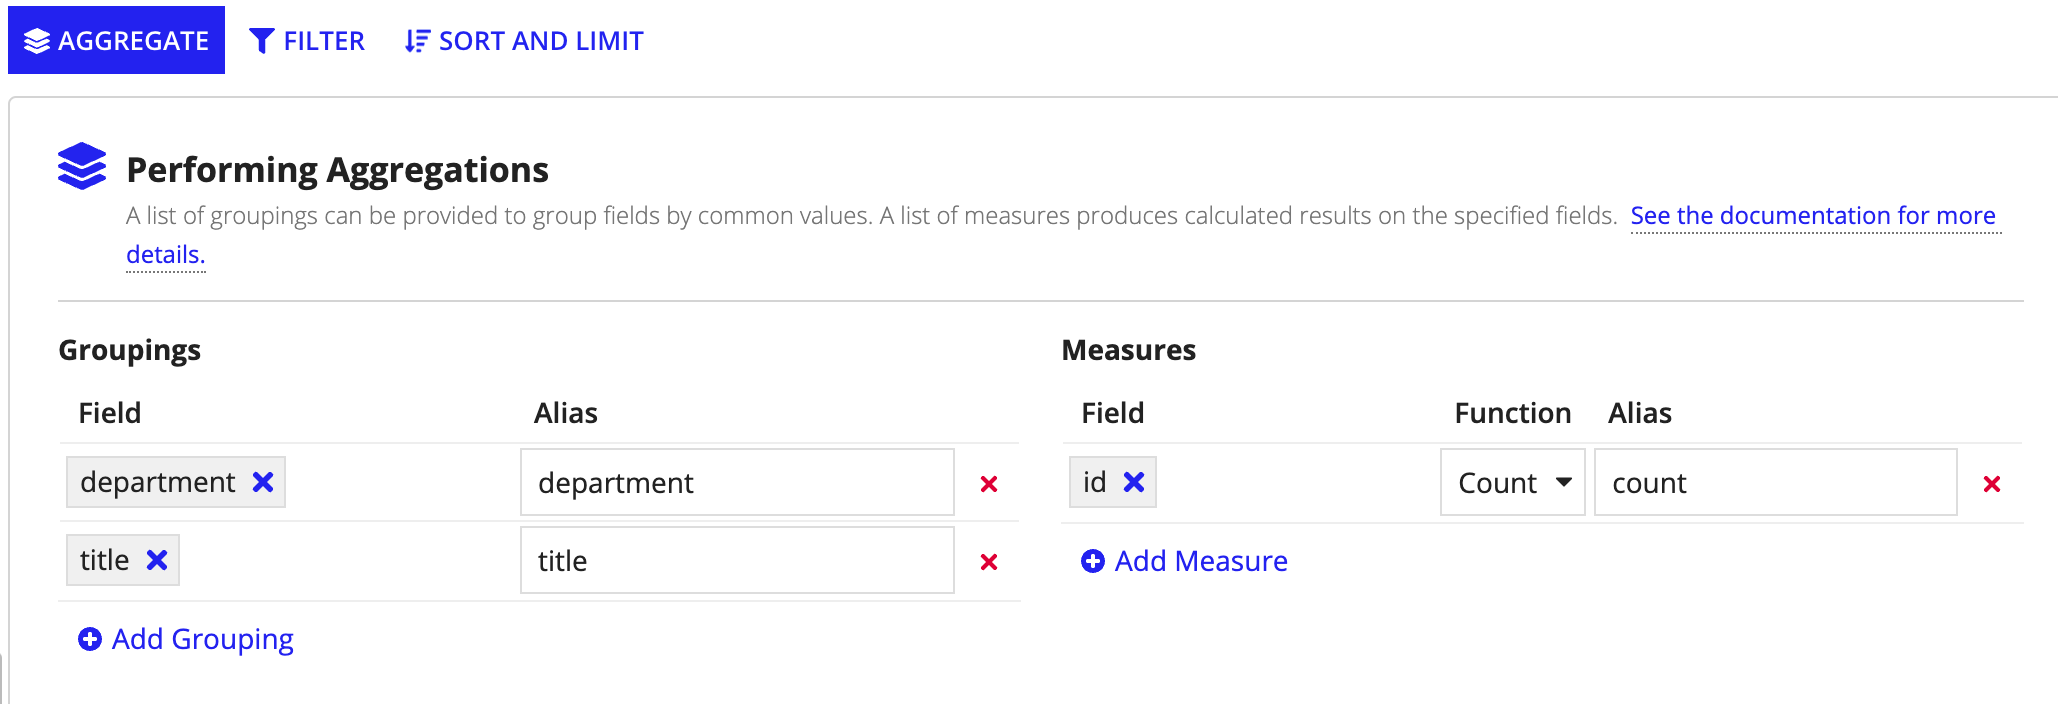
For example, the image below uses two groupings and a measure to return the count of employees with a certain title in each department.
Create rule inputsCopy link to clipboard
You can reference rule inputs and local variables when you configure a filter or a data limit in your query. You can create rule inputs directly from the query editor, but if you need to use local variables, you'll need to configure those before opening the query editor.
To create a rule input from the query editor:
- Click RULE INPUTS.
- Click Add New Rule Input.
-
Configure the following properties:
Property Description Name The name that is used when referencing the input within the rule definition, such as ri!input, or when passing arguments by keyword. Input names are case insensitive and must be unique within a given rule. Type The data type of your rule input. Array Whether the rule input should be a single value or an array of values. Expression Define the value of your rule input by providing an expression. Value Enter a static value to define your rule input. If you provided an expression, then this will populate with the results of the expression. - Click SAVE.
Once you configure a rule input, it will appear in a dropdown when you configure a filter or data limit using the Input/Variable option.

Create filtersCopy link to clipboard
The Filters section allows you to specify which results to return from your query based on conditions you specify.
The query editor allows you to easily set up filters using four criteria: Field, Condition, Value, and Apply Filter. Filters are evaluated in order starting with the first filter in the list. By default, the AND operator is used to combine the filters, but you can change this to OR in Expression mode.
If you want to skip filters that have an empty value, select the Ignore Filters with Empty Values checkbox. See a!queryLogicalExpression() page for more information on ignoring filters with empty values.
To create a filter:
- In the query editor, go to the FILTER tab.
-
From the Filtering Records pane, click Add filter.
- From Field, select the record field or related record field that you want to use to filter the data.
- From Condition, select the operator to apply to the filter.
- Use the context menu next to the Value field to select how you want to pass the value into the filter. The options in this menu change based on the data type of the selected field:
- Select Text to enter a static value.
- Select Input/Variable to choose a rule input or local variable.
- Select Expression to write an expression.
- Select Date Preset to choose from a list date ranges. (Only available for Date and Date and Time data types)
- In the Apply Filter column, click the condition link (shown as Always or When) to apply a filter only for specific conditions. By default, the filter is always applied.
Tip: Use Apply Filters in situations where you want to apply the filter only if a particular condition is met. For example, if the user belongs to a specific group.
- Use the and arrows to change the order in which the filters are applied.
- Click X to remove a filter.
For example, the image below filters a query so that it only returns cases that have a priority level of "Critical" and were closed in the last month.
If you need more advanced filters or want to change the evaluation operator, select Expression to specify your filters as an expression. For additional information on specifying filters as an expression, see a!queryLogicalExpression() and a!queryFilter().
Configure sorting and limitsCopy link to clipboard
The Sort and Limit section allows you to determine the order of the results with sorting and set a limit on the number of records you retrieve from the query.
By default, sorting and limiting is configured using a Guided experience. If you need more advanced sorting or data limits, click Expression to configure an expression. For additional information on specifying the sorting and data limit as an expression, see a!pagingInfo().
Sort dataCopy link to clipboard
To configure how the data is sorted:
- In the query editor, go to the SORT AND LIMIT tab.
- From Sort By, select a record field or related record field to sort by.
- Choose Ascending Order or Descending Order.
-
To add another field to sort by, click Add sorting field below.
Limit dataCopy link to clipboard
To configure a data limit:
- In the query editor, go to the SORT AND LIMIT tab.
-
In the Sorting and Limiting Data section, add a Data Limit by entering a number or using the context menu to choose a rule input, variable, or constant.
Tip: The default limit of the query is 100 records, but you can specify a limit from 1 to 5000. The default startIndex is
1, and this parameter can be changed in Expression mode.
Select propertiesCopy link to clipboard
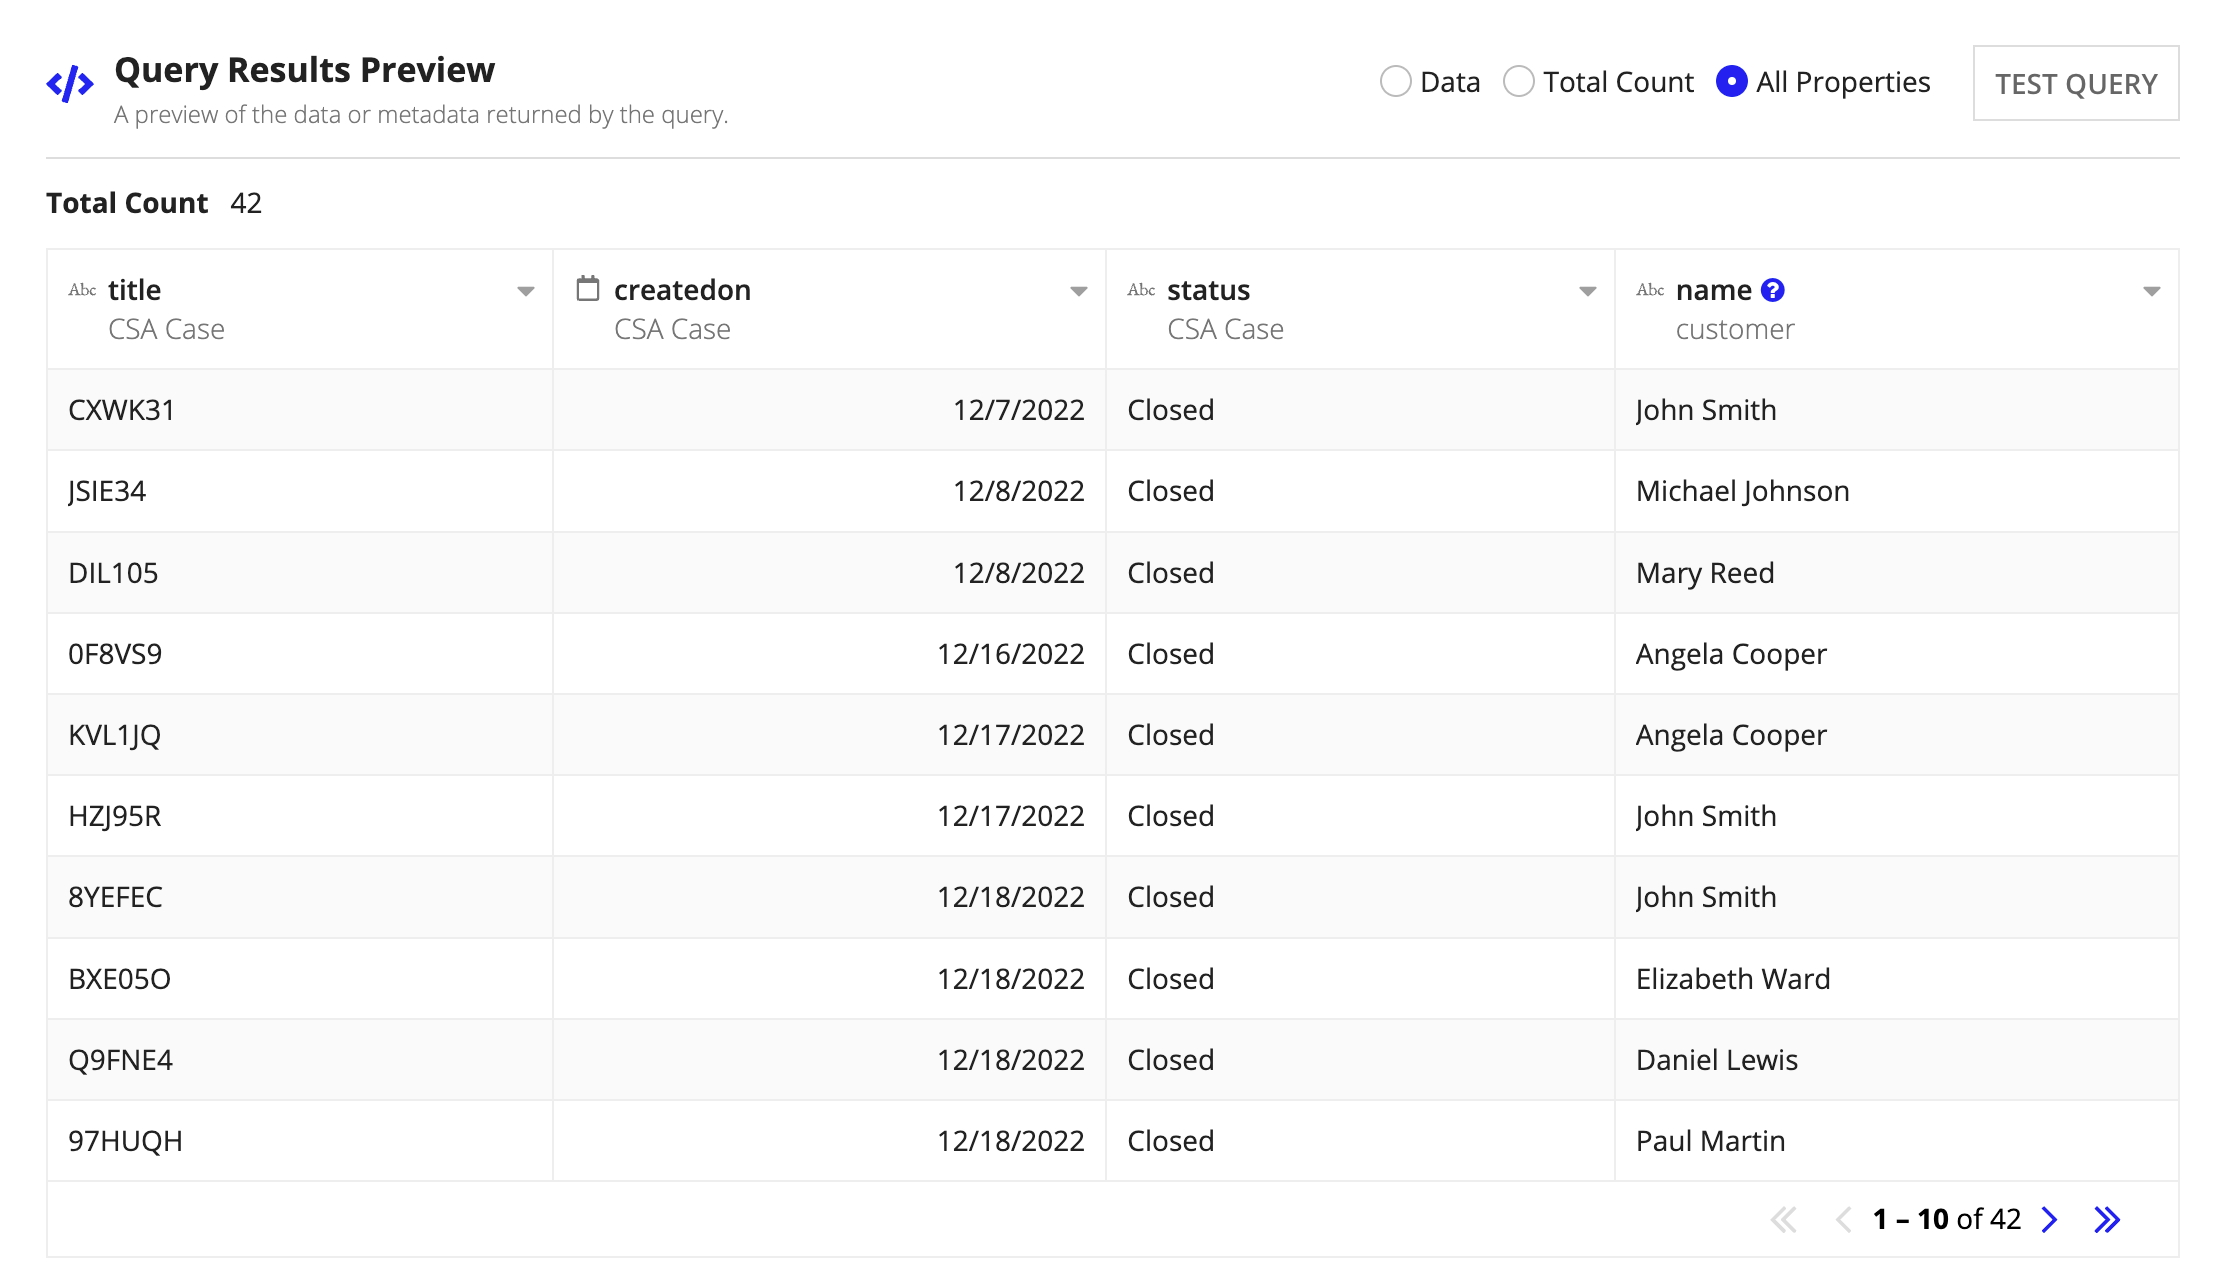
The Query Results Preview contains three options to select which properties will be returned by the generated query.
Select one of the following properties:
- Data: The default selection, this returns only the record data specified in the query.
- Total Count: This returns only the total count of records.
- All Properties: This returns the record data, total count, and additional properties like sort, batch size, identifiers, and error codes.
Organize fieldsCopy link to clipboard
After selecting your fields, you can arrange the order of the fields or remove any not needed for the result.
To organize the fields:
- From the Query Results Preview, click the context menu next to the field name.
- Click Move Right or Move Left to change the field's position.
-
Click Remove to remove the field from the query.

Preview the queryCopy link to clipboard
You can preview the results of your query by clicking TEST QUERY.
Tip: The preview only shows 10 records at a time. This may differ from the number of records per page in the Data Limit section as it is only intended to be a preview.
If the query filters out all data, Query returned no data appears in the preview grid.
If the result of the test query is correct, click GENERATE QUERY to generate the a!queryRecordType() expression.
Using the query editor with data store entitiesCopy link to clipboard
There are six basic steps to creating an a!queryEntity() using the query editor:
- Select the data store entity that you want to query.
- Create or update rule inputs and test values to pass information into the query.
- Set up the paging and sorting to limit the amount of rows returned and order them.
- Create filters to limit the results to the conditions you specify.
- Select the fields to include in the query or group the data.
- Test the query to make sure it is returning the desired information and configure the fields if necessary.
Open the query editorCopy link to clipboard
To open the query editor:
- Create a new expression rule.
- Click
 Launch the Query Editor.
The query editor will open and let you select your data source.
Tip: You can also open the query editor in other ways as you are building an expression rule or interface.
Select a data store entityCopy link to clipboard
In order to query a data store entity, you must first create a constant of type Data Store Entity that points to it. See Constants for additional information.
To select a data store entity:
- For Select Data Source, select Data Store Entity.
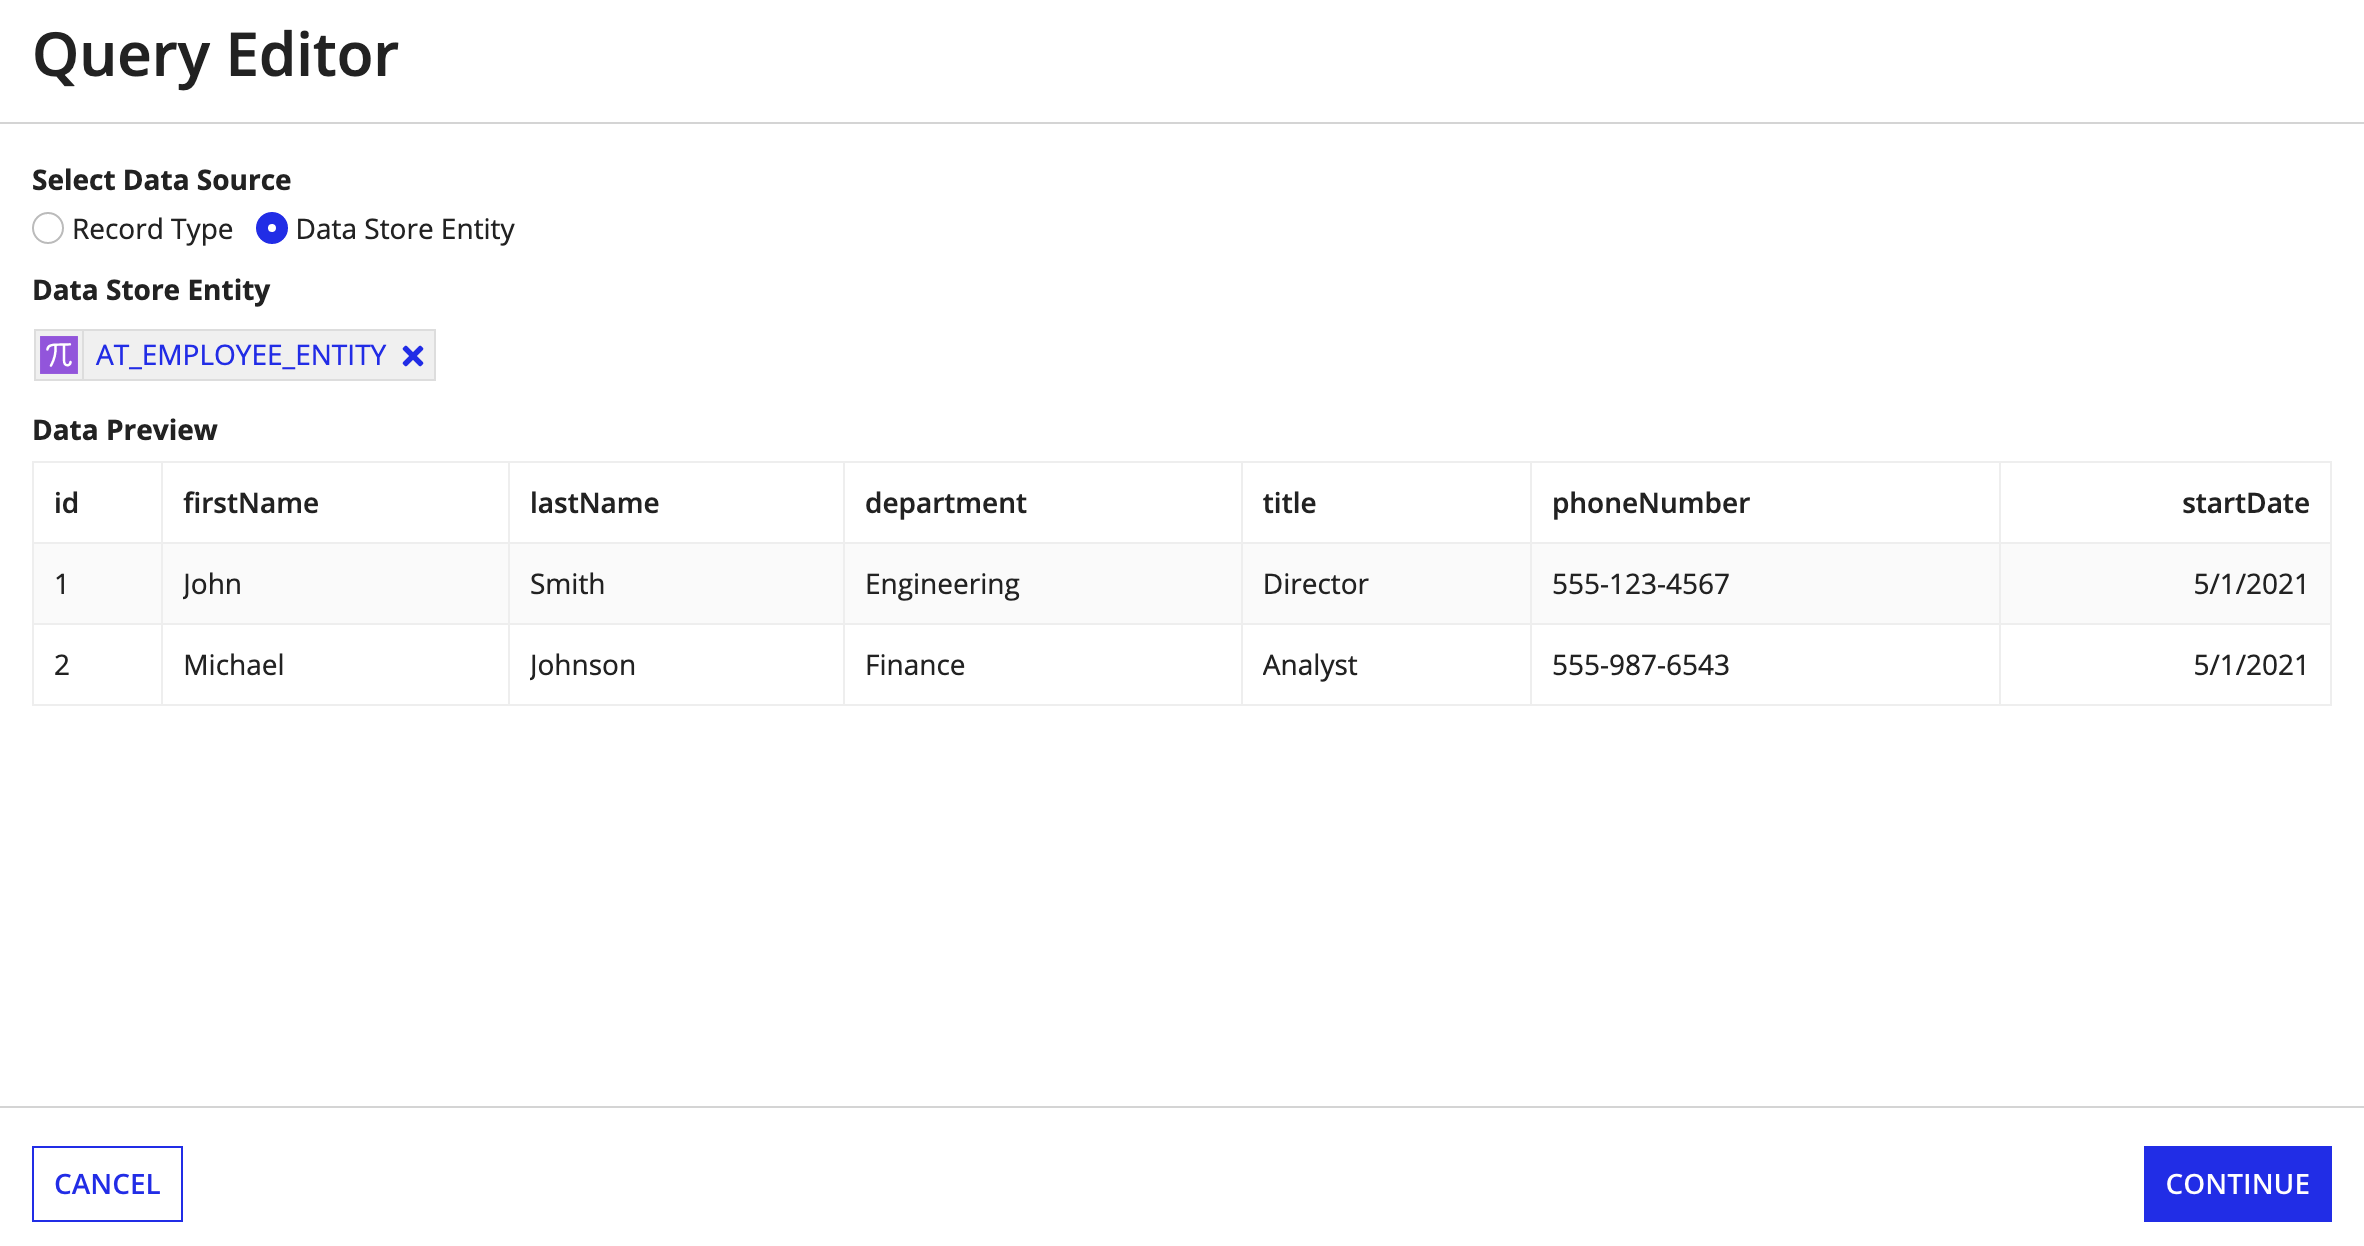
- For Data Store Entity, search for the name of the constant referencing your data store entity and select the one you want to query.
-
By default, the Data Preview displays a preview of the data available in the data store entity.
- Click CONTINUE.
Create rule inputsCopy link to clipboard
If you want to use rule inputs for any of the settings in the query editor, you can create new rule inputs or edit existing ones directly from the query editor. You can use the query editor to change the test values of your rule inputs to test and troubleshoot your query.
To create a rule input from the query editor:
- Click RULE INPUTS.
- Click Add New Rule Input.
-
Configure the following properties:
Property Description Name The name that is used when referencing the input within the rule definition, such as ri!input, or when passing arguments by keyword. Input names are case insensitive and must be unique within a given rule. Type The data type of your rule input. Array Whether the rule input should be a single value or an array of values. Expression Define the value of your rule input by providing an expression. Value Enter a static value to define your rule input. If you provided an expression, then this will populate with the results of the expression. - Click SAVE.
Modify variable test valuesCopy link to clipboard
Interfaces typically have many local variables whose state can change as you interact with them. With the query editor you can configure test values for these local variables and function variables. This gives you the flexibility to test your queries at any point in time.
These test values will only apply the values while in the query editor; after you click GENERATE QUERY, any changes you make will be reset.
To update a test value for a variable:
-
At the top of the query editor, click VARIABLES.
Note: This button only appears when you have existing local variables configured in your expression rule or interface.
-
Edit the Test Value for the local or function variable.
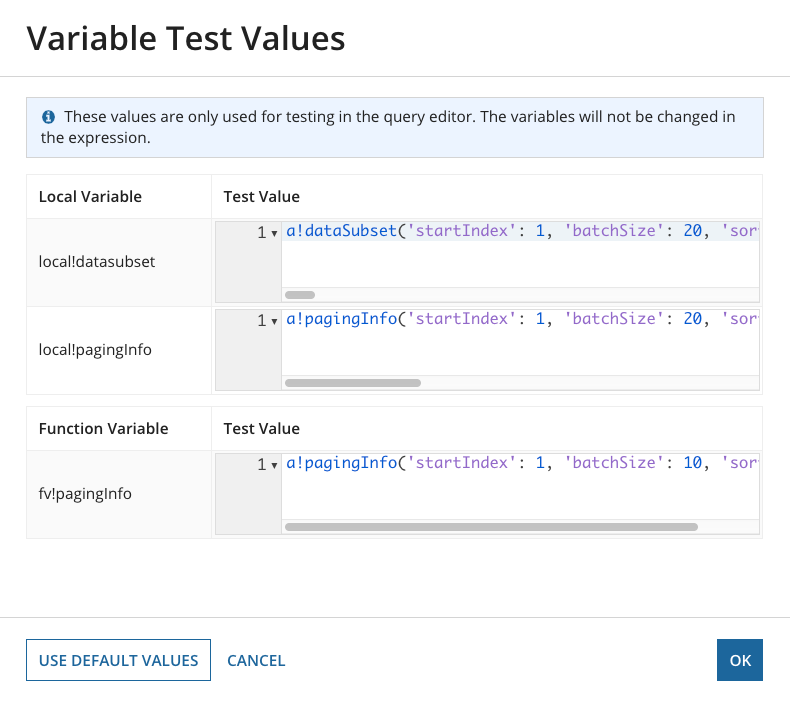
- Click USE DEFAULT TEST VALUES to reset the variables to their original values.
- Click OK.
Configure paging and sortingCopy link to clipboard
The query editor allows you to select the paging and sorting parameters in Basic mode using configurable fields. You can set limits on the amount of rows you retrieve and determine the order of the rows with paging and sorting.
To configure the page size, do one of the following:
- To change the number of rows to retrieve, enter a different number in Rows Per Page.
- To retrieve all data, select All Rows.
To configure how the data is sorted:
- For Sort By, select a field from the picker.
- Select either In Ascending Order or In Descending Order.
-
To add another field to sort by, click Add Sort.

If you need more advanced paging and sorting settings, select Expression to configure additional settings. For additional information on specifying paging and sorting as an expression, see a!pagingInfo().
Tip: The default page size of the query is 50 rows per page and the default startIndex parameter is 1. You can change the startIndex parameter in Expression mode.
Create filtersCopy link to clipboard
Filters allow you to select which results to return from your query based on conditions you specify. The query editor allows you to easily set up filters using four criteria: Field, Condition, Value, and Apply Filter.
By default, the query skips filters that have an empty value. If you don't want to skip these, clear the Ignore Filters with Empty Values check box. See a!queryLogicalExpression() for more information on ignoring filters with empty values.
To create a filter:
- Click Add Filter to add a new filter row.
- From the Field picker, select the field that you want to use to filter the data.
- From the Condition list, select the operator to apply to the filter.
- Use the context menu next to the Value field to select how you want to pass the value into the filter.
- The options in this menu change based on the data type of the field selected. In most cases, you can enter a value directly, choose a rule input or variable, or enter the value using an expression. For date and date and time data types, you can choose from a list of date presets.
- To apply conditional filters, click the condition link (shown as either Always or When) in the Apply Filter column. Enter an expression that evaluates to true or false and click OK.
Note: Use Apply Filters in situations where you want to apply the filter only if a particular condition is met. For example, if the user belongs to a specific group.
- If you have more than one filter, you can use the up and down arrows to change the order in which the filters are applied. You can also delete a filter by clicking X.
See the following image for the location of each step in the user interface.

If you need more advanced filter options, select Expression to create your filters manually. For additional information on specifying filters as an expression, see a!queryFilter().
Select fieldsCopy link to clipboard
The Fields section allows you to select which fields will be returned from your query.
By default, the query editor fetches all fields so designers can see a query preview with all available fields. For performance reasons, you should configure the query to only return the fields that you need. If you query all of the fields, it may take longer for your query to run.
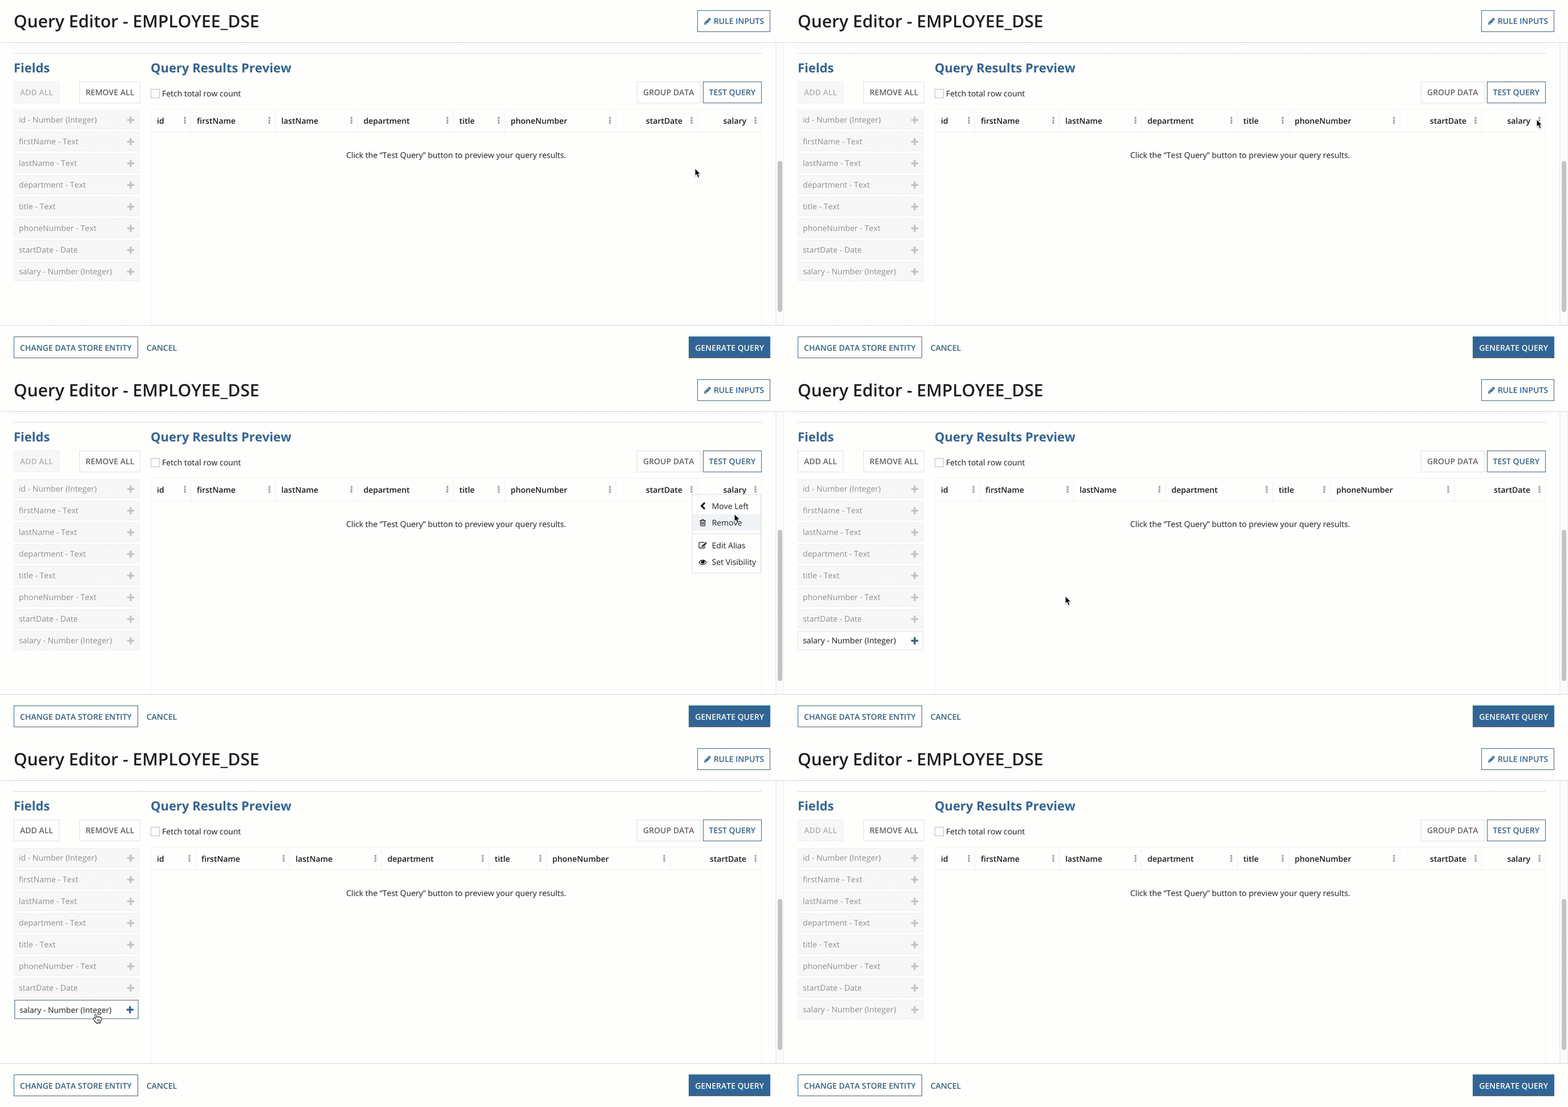
To change the fields in your query, do one or more of the following:
- To add a field to the query, click the name of the field in the Fields section.
- To remove a field from the query, click the column's context menu
 and select Remove.
 - You can also click ADD ALL or REMOVE ALL to add or remove all fields.
Organize fieldsCopy link to clipboard
The query results preview lets you arrange the order of the fields, define aliases for fields, and configure visibility.
When grouping data, aliases are automatically created for calculated columns. Edit Alias allows you to change these generated names, and you can also change the alias for any field using this feature.
Visibility defines whether or not to show a column based on if a particular condition is met (for example, if the user viewing the query result belongs to a specific group).
To organize and configure a field, click the column's context menu ![]() and then do one or more of the following:
and then do one or more of the following:
- To change the order of the fields, select Move Right or Move Left.
- To add or change the field's alias, select Edit Alias and update the Alias field.
- To configure whether or not a field appears, select Set Visibility and enter an expression that evaluates to true or false.
Note: If
false, the data for the field will not be retrieved from the database. An icon will display next to the column header and the data for the column will not display.

Group the dataCopy link to clipboard
The query editor allows you to group your data or perform calculations on it to maximize the usefulness of results. You can calculate the sum, average, minimum, maximum, or count, and you can group your data by month, year, or date.
Clicking GROUP DATA removes the currently selected fields from the query but keeps the values for the Paging & Sorting and Filters sections.
To group your data:
- Click GROUP DATA.
- Select the field that you want to group by.
- In the Fields section, select another field to perform a calculation with. Usually this is a field that contains numbers or dates.
- Click the context menu
 to select a calculation to apply to the columns.
-
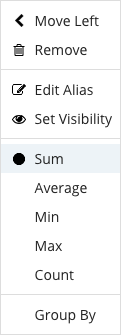
If you select a column with a Number (Integer) or Number (Decimal) data type, you can choose to calculate sum, average, min, max, or count.
-
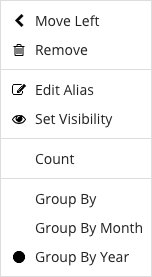
If you select a column with a Date or Date and Time data type, you can choose to show the count or group by month or year.
-
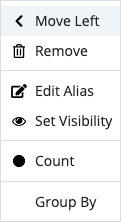
If you select a column with a Text data type, you can choose to show the count of each unique value.
-
When your data is grouped, you can select a field more than once. For example, you can add a field with a Date data type twice to group by year then month.
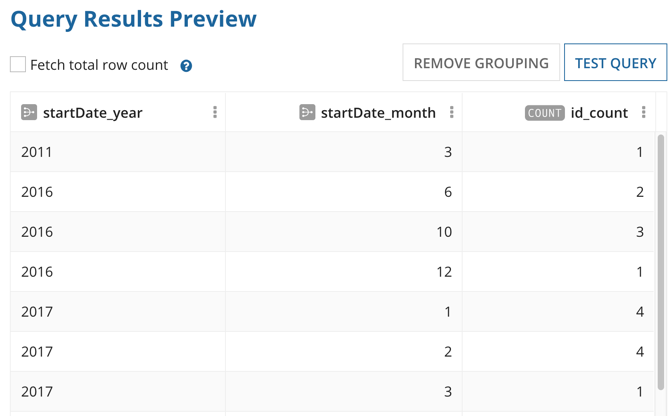
The fields display an icon that indicates which fields are used for grouping, as well as which calculations are used in numeric fields.
After the data is grouped, REMOVE GROUPING appears next to TEST QUERY. Clicking this button will remove any grouped or calculated fields. All filters will remain.
Preview the queryCopy link to clipboard
You can preview the results of your query by clicking TEST QUERY. If Fetch total row count is selected, a parameter will be applied to the query that retrieves the total number of rows that are returned by the query.
Tip: If selected, Fetch total row count is applied to the generated query, not just the preview. If you have a lot of data, it is recommended to turn off Fetch total row count to improve performance.
The query preview only shows 10 rows at a time. This may differ from the number of rows per page in the Paging & Sorting section as it is only intended to be a preview.
If the query filters out all data, Query returned no data appears in the preview grid.

